laboratory ergonomics - usda caps on lab samples contact stress resting wrists and arms off surface...
TRANSCRIPT

2012
LABORATORY ERGONOMICS PRESENTED BY: GINGER EDGECOMBE DORSEY, Ph.D. APHIS ERGONOMICS PROGRAM MANAGER

2012
Ergonomics
Definition: Fitting the job to the worker.
Goals: Work in neutral postures (i.e. the position that
requires the least amount of muscle force and allows maximal room for blood flow).
Seeks to improve the interaction between humans
and the machines & tools they use to perform their work.
Decrease risk of injury/illness.
Enhance worker productivity.
2012
Understand
There is no such thing as the average person.
It is not normal to be in pain.
Different people respond differently to their work environments, particularly after an injury, due to: Hereditary. Age. Gender. Lifestyles.

2012
Today’s Objectives
Ergonomic techniques that will reduce your risk for work-related musculoskeletal disorders within the laboratory.
How to properly set up your laboratory work area.
Exercises and stretches to relieve tension.
How to obtain reasonable accommodations.

2012
Question?
What types of lab functions do you perform?
Do these functions require your body to be in an uncomfortable position?

2012
Ergonomic Disorders and Injuries
The absence of a sound ergonomics
workplace environment can lead to a variety of physical ailments named
work-related musculoskeletal disorders (WMSDs), cumulative trauma disorders (CTDs), or
repetitive strain injuries (RSIs).

2012
WMSDs, CTDs, and RSIs
Disorders of the muscles, joints, nerves, tendons, ligaments, cartilage, or spinal discs.
Mainly occur in the neck, back, arms, and wrists.
Reflect gradual or chronic development.

2012
Causes of WMSDs
Awkward/Deviated Postures Overhead reaching Twisting the body
Highly Repetitive Work Pipetting Screwing/Unscrewing caps on lab samples
Contact Stress Resting wrists and arms off surface edge Leaning forward with elbows on work surface

2012
Awkward Postures
Overhead reaching
Bending at the back
Twisting
Outstretching arms/legs
Gripping
Crouching shoulders
Slouching
Bent wrists

2012
Most Common WMSDs
Lower Back Pain Back Injuries Cost - $125K per incident
Carpal Tunnel Syndrome (CTS)
CTS Injuries Cost - $30K per incident

WMSDs – Lower Back Injuries
Causes Lifting heavy objects. Twisting. Standing for lengthy
periods.
Symptoms Pain. Tightness. Sitting is uncomfortable.
2012

WMSDs - CTS Causes:
Poor wrist posture. Repetitive motions.
Symptoms: Pain. Numbness & tingling in
hands. Frequently dropping
items. Hand falling asleep
often.
2012
2012
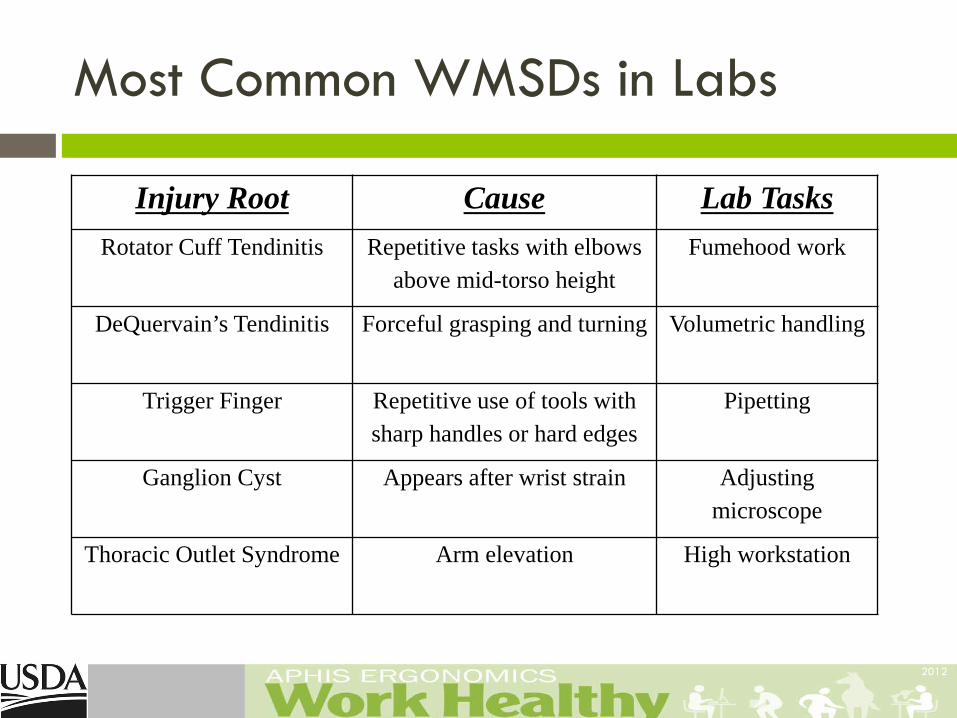
Most Common WMSDs in Labs
Injury Root Cause Lab Tasks Rotator Cuff Tendinitis Repetitive tasks with elbows
above mid-torso height Fumehood work
DeQuervain’s Tendinitis Forceful grasping and turning Volumetric handling
Trigger Finger Repetitive use of tools with sharp handles or hard edges
Pipetting
Ganglion Cyst Appears after wrist strain Adjusting microscope
Thoracic Outlet Syndrome Arm elevation High workstation

2012
Most Common WMSDs in Labs

2012
Review
Do you recognize any of the aforementioned causes of WMSDs in your work environment or job
functions?

2012
Laboratory Ergonomics
2012
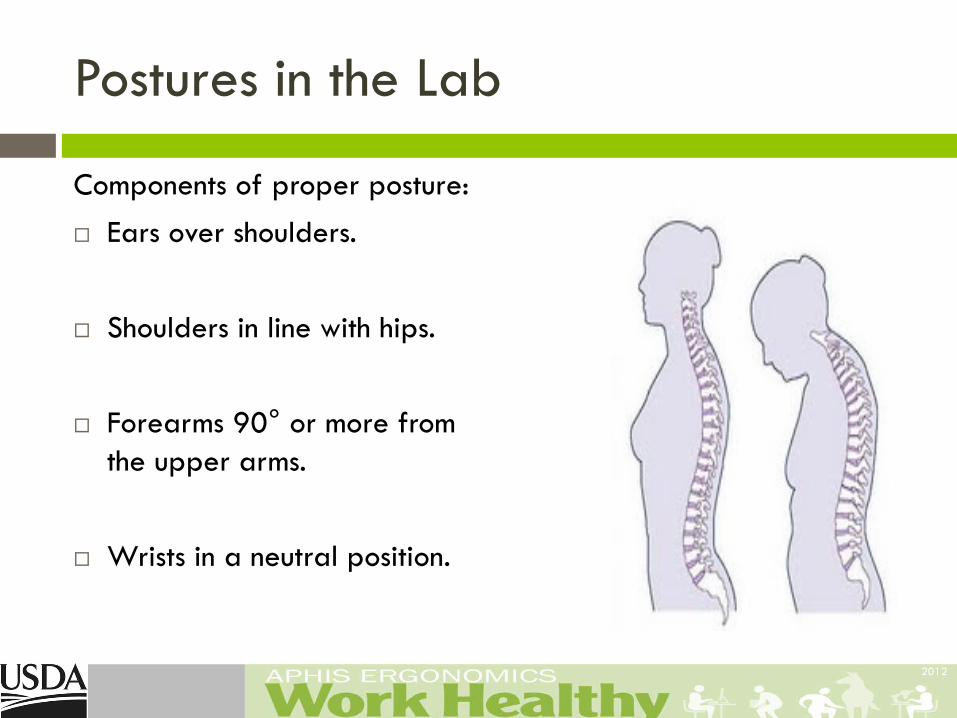
Postures in the Lab
Components of proper posture: Ears over shoulders.
Shoulders in line with hips.
Forearms 90° or more from the upper arms.
Wrists in a neutral position.

2012
Postures in the Lab
Combating the “hunched-forward” posture: Use an industrial-height footstool. Allows the employee to bend forward at the hips rather than
round the neck, back, and shoulders.
Use an adjustable lab stool with enhanced lumbar support. Provides employees working in a forward position (such as at
a BSC) with needed support during rest periods.
2012
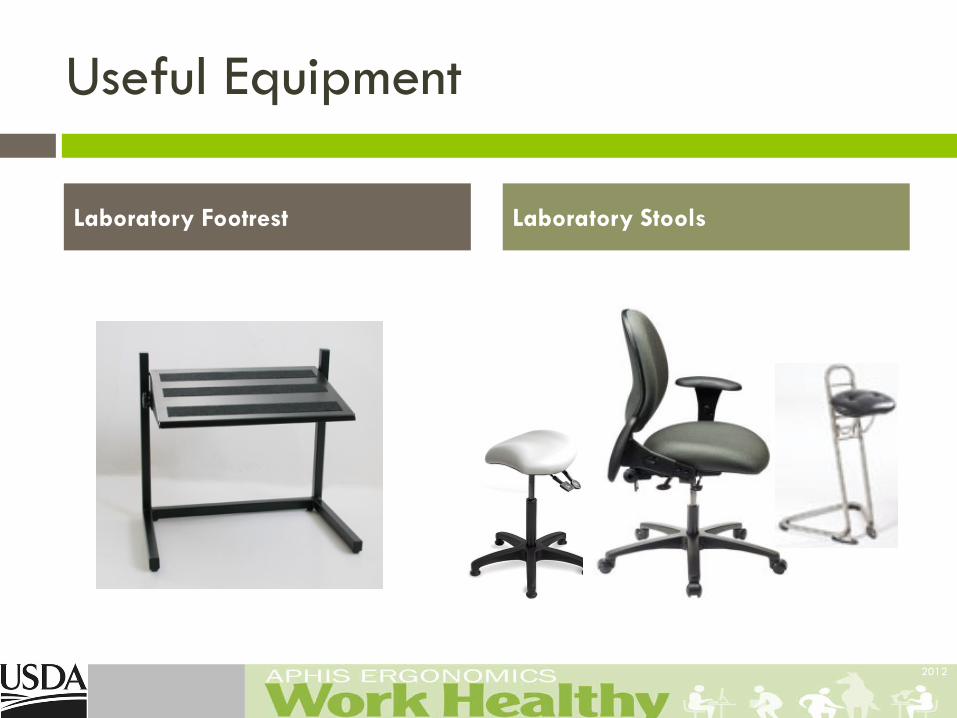
Useful Equipment
Laboratory Footrest Laboratory Stools

2012
Laboratory Ergonomics Elements
Pipetting
Microscopy Laboratory Hoods/Biological Safety Cabinets Micro-Manipulation & Fine Motor Skills Laboratory Workstations

2012
Pipetting

2012
Pipetting - General
Source of hand and shoulder problems.
Short pipettes are preferable to decrease hand and arm elevation.
Pipettes where the thumb dispenses and the index finger aspirates are best.
Pipette usage should be alternated between the right
and left hand.
2012
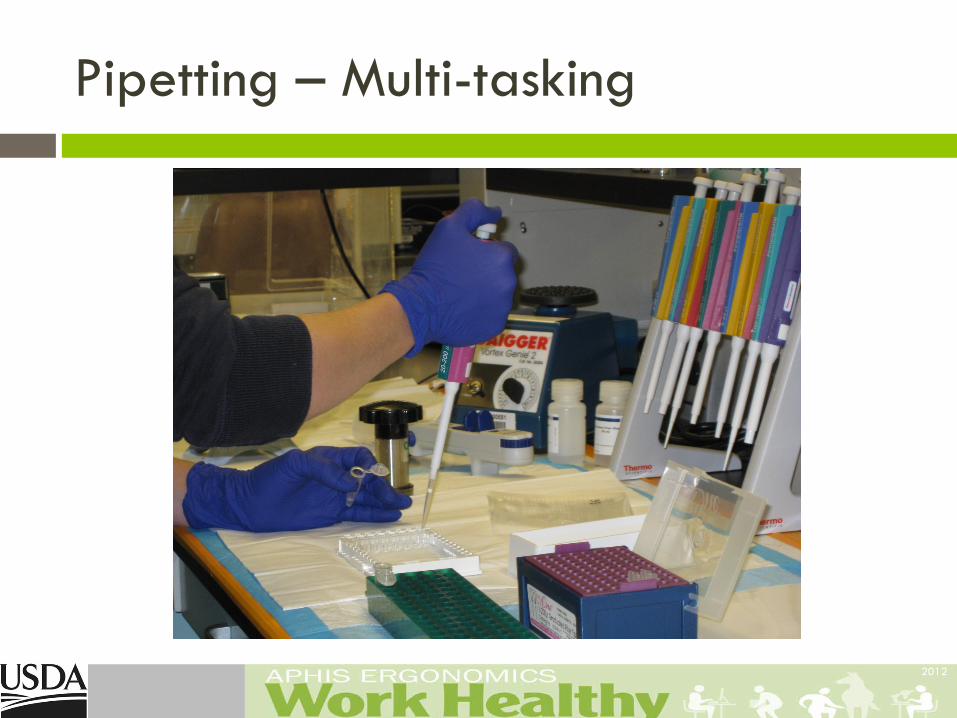
Pipetting – Multi-tasking

2012
Pipetting - Tips Use an electronic operated or a latch-mode pipettor to
replace manual plunger-operated pipettes. Use an electronic pipettor with mixing functions for tasks such
as mixing or aliquotting. Use a multichannel pipettor for large aliquotting tasks. Use thin-walled pipette tips that are easy to eject. Take micro-breaks of 2 minutes for every 20 minutes of
pipetting. Mild hand exercises and stretches are beneficial.

2012
Pipetting - Tips Clean pipettors regularly to;
reduce "sticking" and improve quality of work).
Work with arms close to the
body. Avoid arm elevation without
support for lengthy periods.
Keep samples and instruments within easy reach.
Rotate pipetting activities between laboratory tasks, hands, and people.

2012
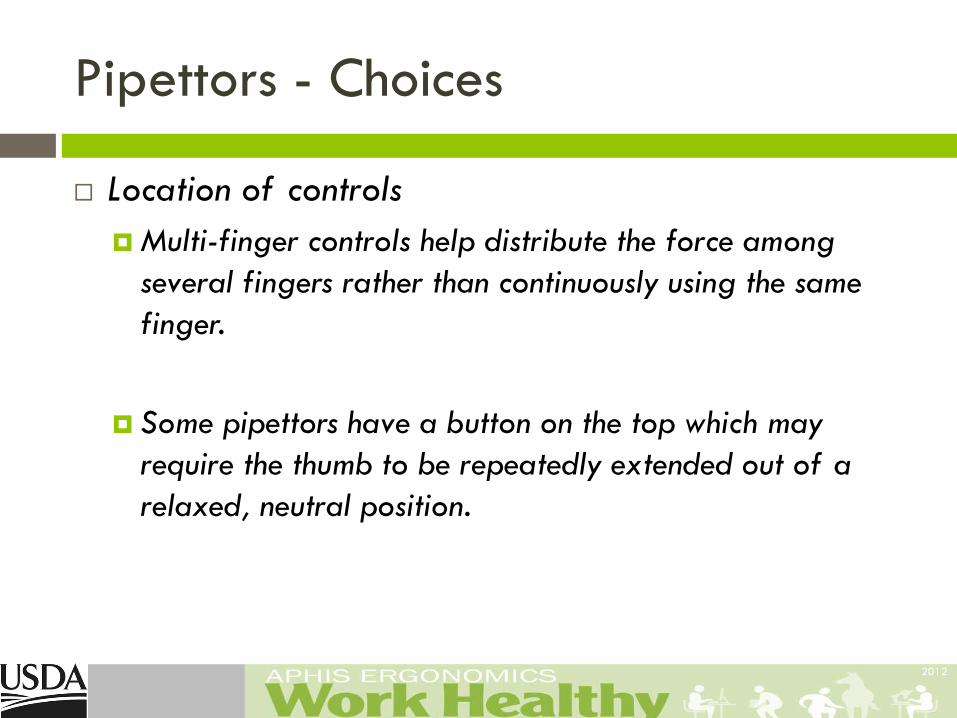
Pipettors - Choices
Considerations are highly individual: Hand size
Most important. Different sizes available.
Weight A light weight pipettor requires less force to hold.
Force Use a pipettor that requires as little force as possible to
control.
2012
Pipettors - Choices
Location of controls Multi-finger controls help distribute the force among
several fingers rather than continuously using the same finger.
Some pipettors have a button on the top which may
require the thumb to be repeatedly extended out of a relaxed, neutral position.
2012
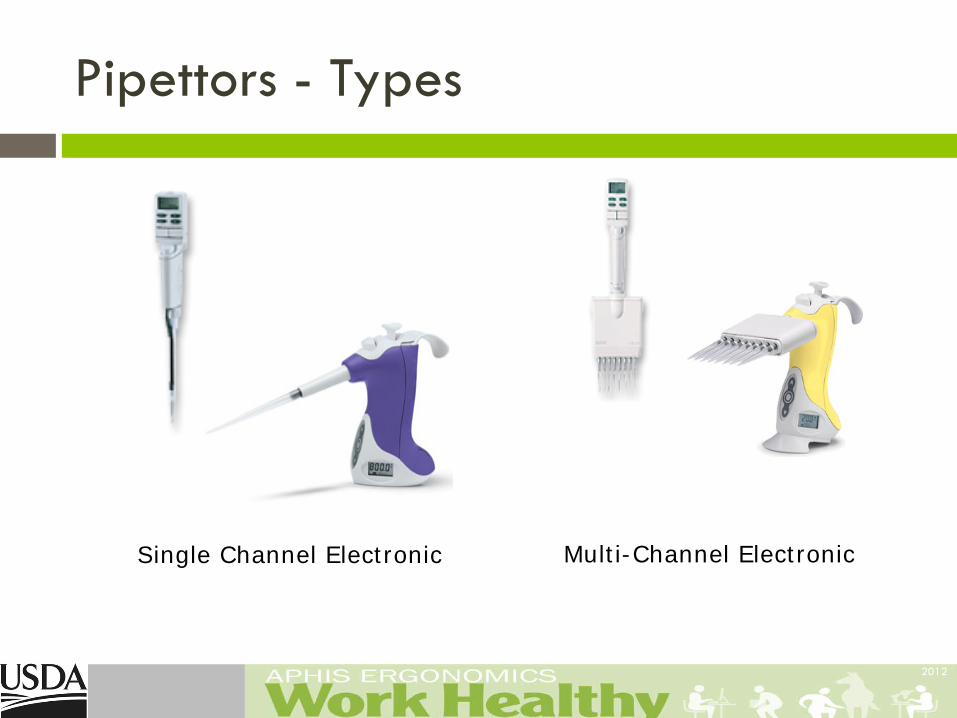
Pipettors - Types
Single Channel Electronic Multi-Channel Electronic
2012
Pipettors – Other Tips
Heights should all be approximately the same, and these items should be within easy reach in a logical work order.
Prevent twisting and bending of the wrist, neck and arms, elevation of the shoulders, and overreaching, by adjusting the height and position of: Sample holders (e.g. place on a tilt)
Solution container(s)
Waste receptacle(s) – keep at low height (e.g. no higher than top of tube being filled)

2012
Microscopy

2012
Microscopy
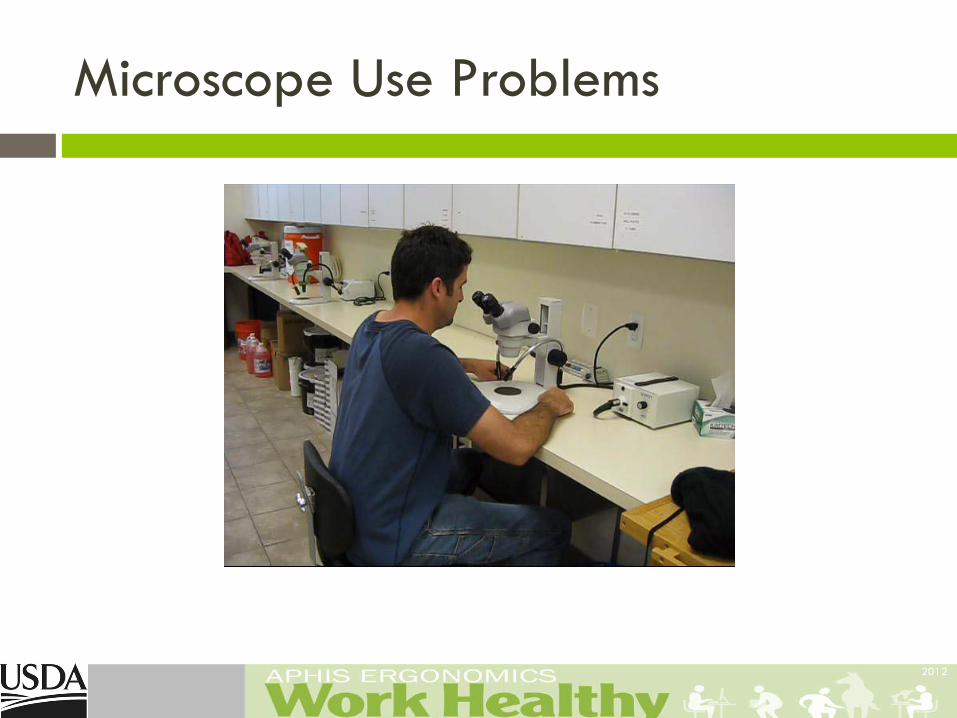
Operating a microscope for long hours will strain the neck, shoulders, eyes, lower back, arms and wrists.
Working at a microscope that is not at the correct
height and angle requires: A hunched-forward position. Contact stress on the forearms from the work surface
edge.
2012
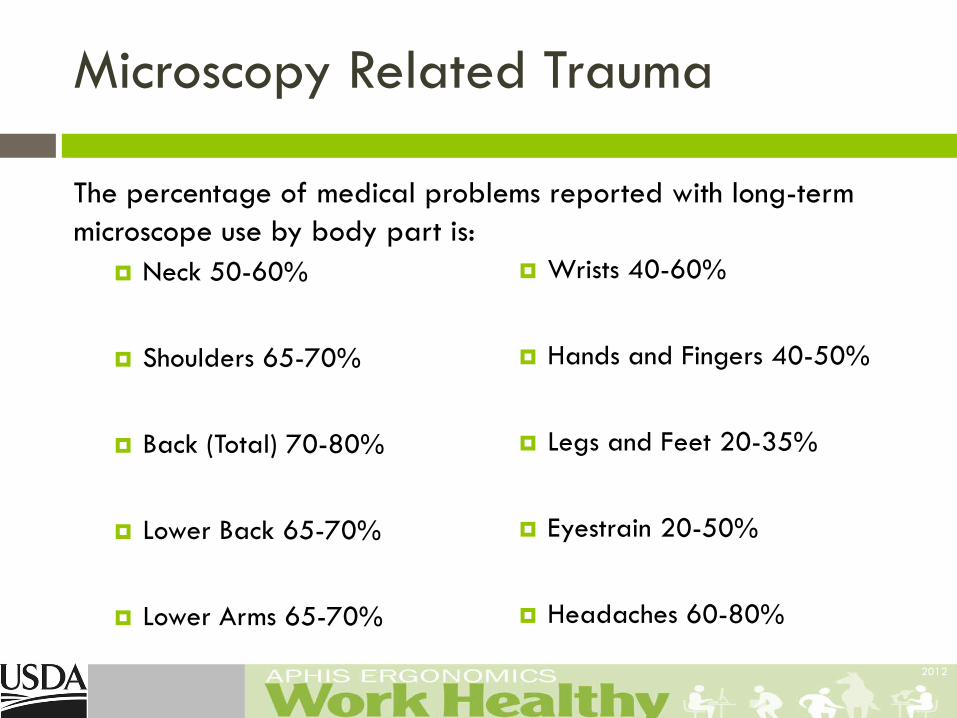
Microscopy Related Trauma
Neck 50-60%
Shoulders 65-70%
Back (Total) 70-80% Lower Back 65-70%
Lower Arms 65-70%
Wrists 40-60%
Hands and Fingers 40-50%
Legs and Feet 20-35%
Eyestrain 20-50%
Headaches 60-80%
The percentage of medical problems reported with long-term microscope use by body part is:
2012
Microscope Use Problems

2012
Microscopy - Tips
Pull the microscope towards the edge of the work surface to position the operator in a more upright posture.
Elevate the microscope. Adjust the eyepieces and angle of observation to prevent
neck strain. Use lifters and angled microscope arm supports to relieve
fatigue and strain. Maintain neutral spine.

2012
Microscopy – Other Tips
Set scope over a space with adequate room for your legs so you can sit directly under the microscope.
Position your head upright and your line of sight approx. 30-45º below straight ahead vision.
Remove armrests from chairs if they interfere with your arms.
Apply padding to the edge of the work surface in the form of foam rolls or padded edge protectors where arms are in contact with surface edges.

2012
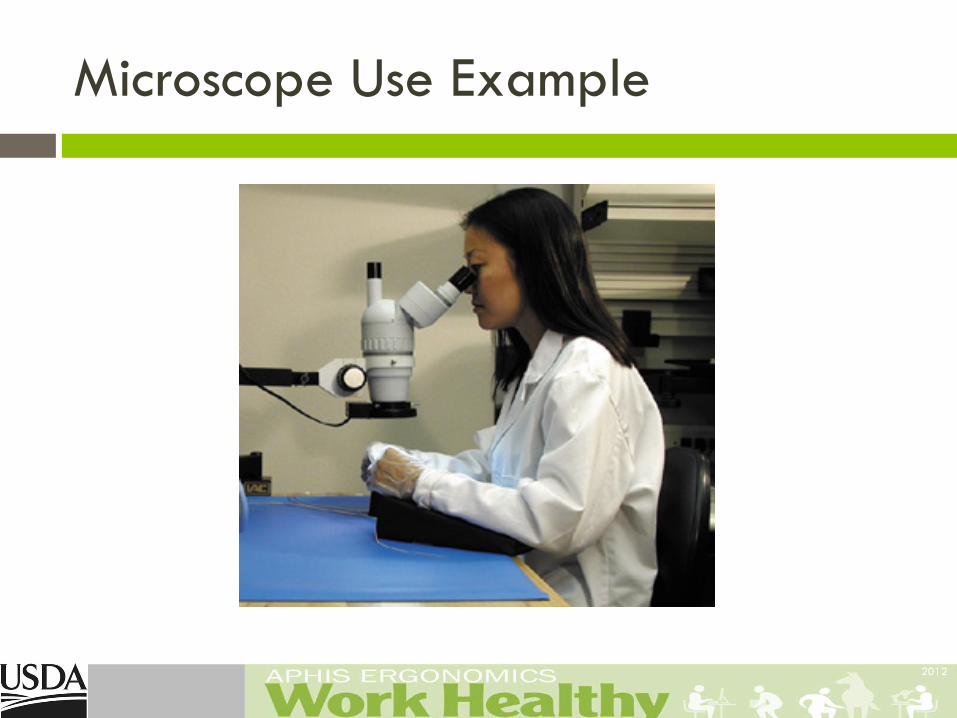
Microscope Use Example
Before After
2012
Microscope Use Example
2012
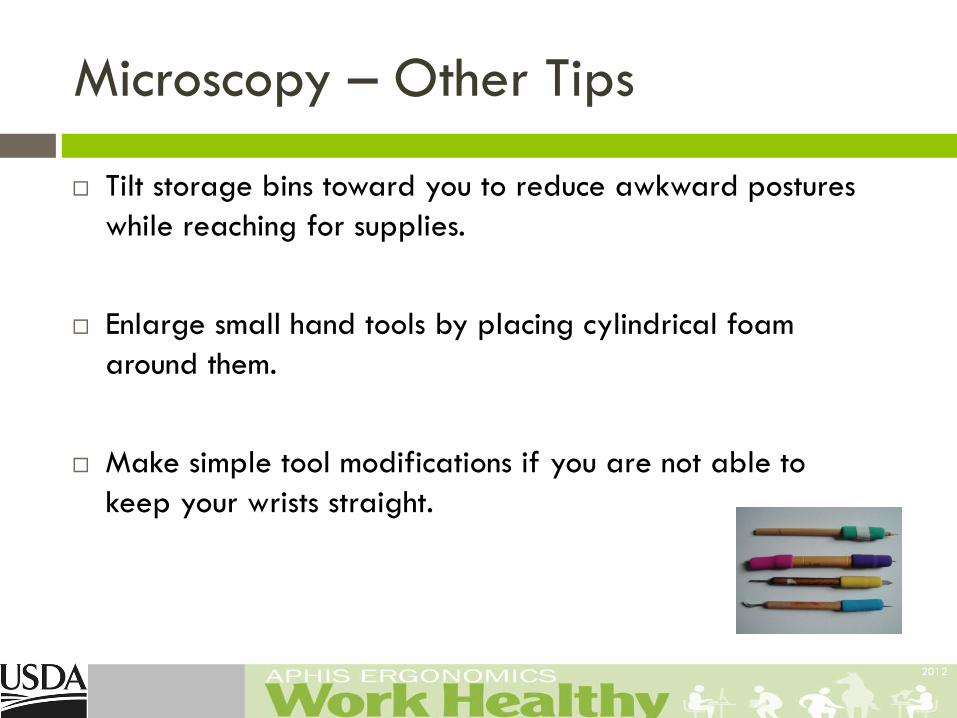
Microscopy – Other Tips
Tilt storage bins toward you to reduce awkward postures while reaching for supplies.
Enlarge small hand tools by placing cylindrical foam
around them. Make simple tool modifications if you are not able to
keep your wrists straight.

2012
Microscopy - Preventing Eye Strain
Make sure the scope is clean, lighting is adequate, and the microscope lamp and optical pathway are correctly aligned.
When possible, use a video display terminal to view the sample. Place the monitor at: Eye level. Straight ahead. An easy viewing distance.

2012
Preventing Eye Strain
Perform eye exercises/stretches.
Check lab environment for excessive glare and reflections from overhead lighting, and adjust internal microscope light to compensate.
Temperature, humidity, air currents, ventilation, excessive noise, and ambient lighting levels all affect operator comfort and fatigue. Temperature = 66-73º F.
Low humidity conditions lead to drying of the eyes.
2012
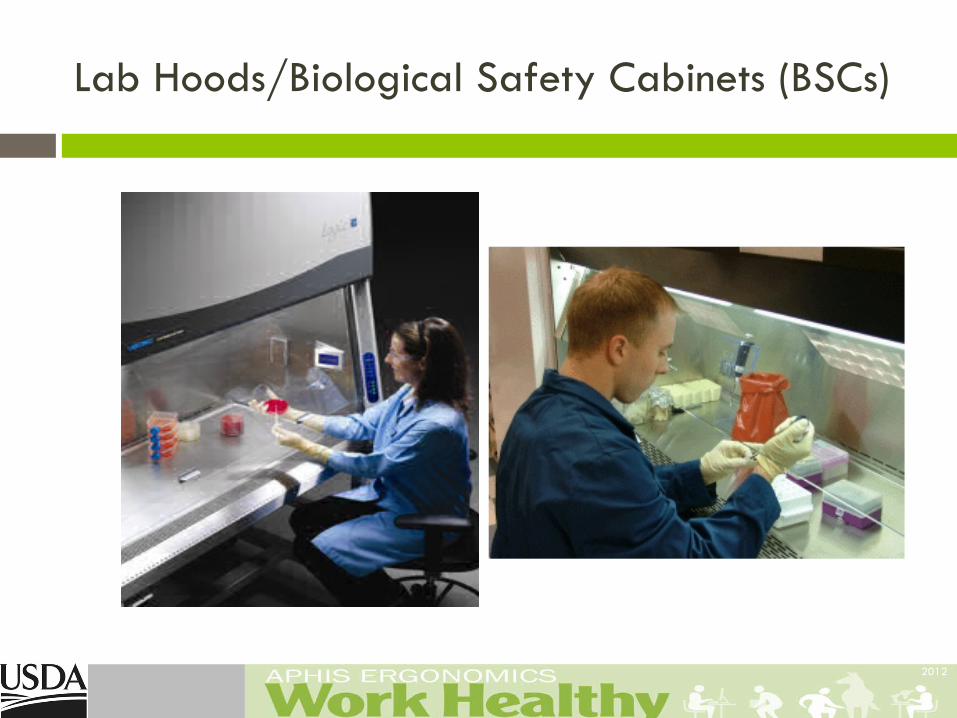
Lab Hoods/Biological Safety Cabinets (BSCs)
2012
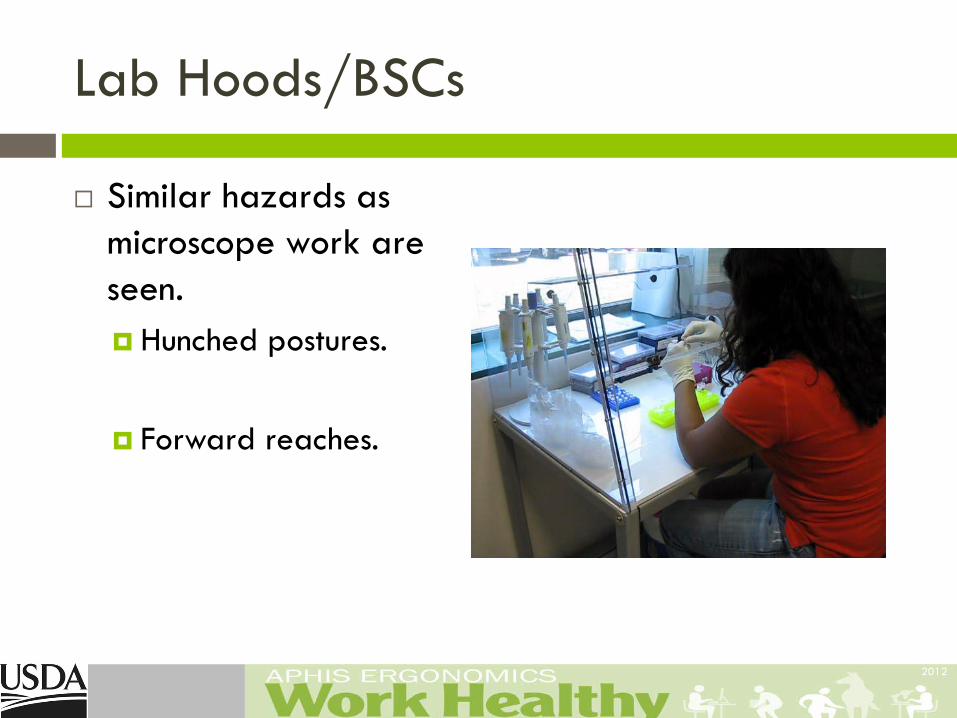
Lab Hoods/BSCs
Similar hazards as microscope work are seen. Hunched postures.
Forward reaches.

2012
Newer BSCs
Eliminate the bent, forward posture of traditional BSCs via: Height adjustable tables with downdraft or backdraft rather than
the traditional updraft exhausting.
A perforated front grill reduced by 1-2 inches which allows the work platform to be closer to the worker.
Non-glare glass on the sash window and/or adjustable plexiglass barriers.
A platform with wells for placement of tall containers to reduce reaching.
2012
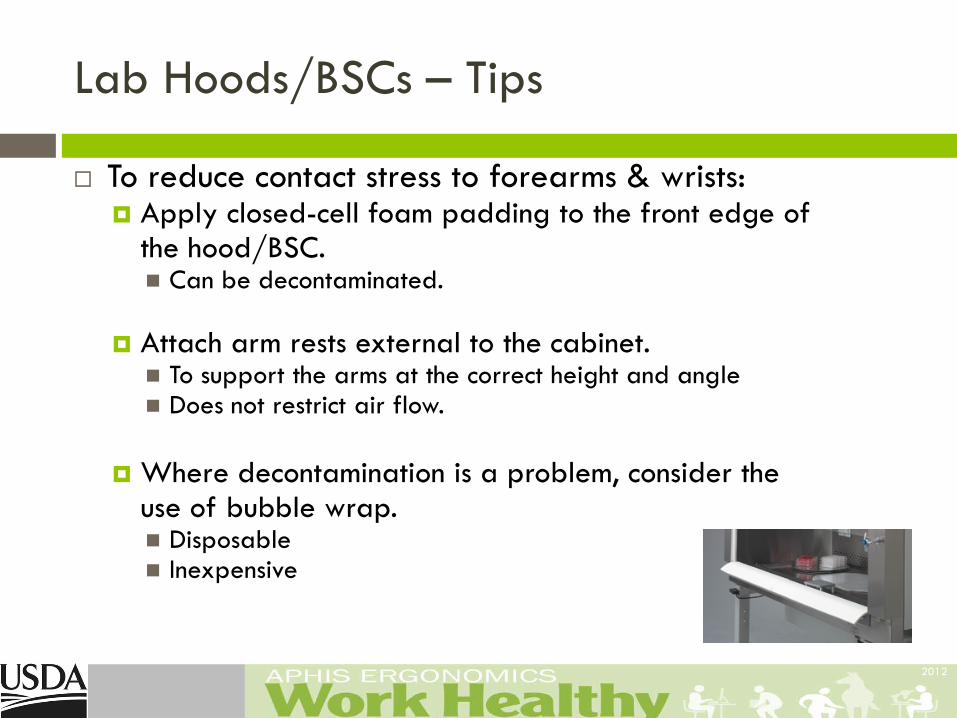
Lab Hoods/BSCs – Tips
To reduce contact stress to forearms & wrists: Apply closed-cell foam padding to the front edge of the hood/BSC. Can be decontaminated.
Attach arm rests external to the cabinet. To support the arms at the correct height and angle Does not restrict air flow.
Where decontamination is a problem, consider the use of bubble wrap. Disposable Inexpensive

2012
Lab Hoods/BSCs – Tips
Use a fully adjustable chair that provides adequate back support, adjustable seat angle, and height adjustability. Ensure adequate leg & thigh clearance under the cabinets. Raise the cabinet a couple of inches if necessary. Use a footrest, not the chair ring, to: Provide stability in leaning forward from the hips. Reduce pressure on the back of the legs.

2012
Proper Use of a Footrest
2012
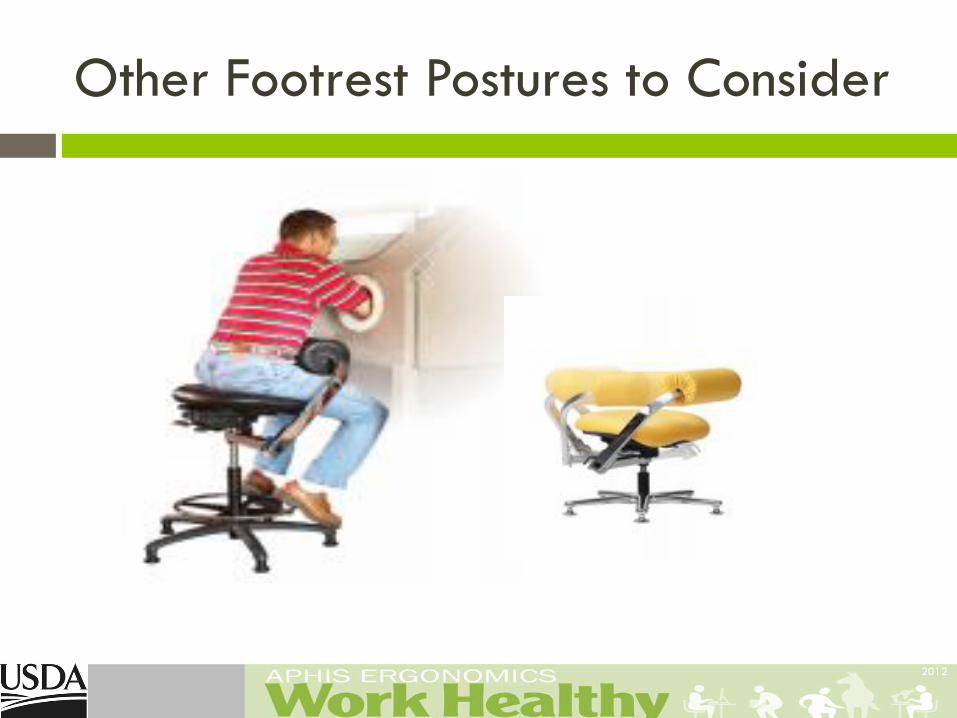
Other Footrest Postures to Consider

2012
Lab Hoods/BSCs – Work Practices
If standing at the hood/BSC, use anti-fatigue matting and wear supportive shoes.
Position materials as close as possible to avoid extended reaching.
Use a turntable to store equipment close at hand. This prevents reaching and twisting.

2012
Lab Hoods/BSCs – Eye Strain
To prevent eye strain: Make sure that lights in hoods/BSC are working
properly.
Keep the viewing window of the hood/BSC clean and the line of sight unobstructed.
Use diffused lighting to limit glare.

2012
Test Tube Handling

2012
Test Tube Handling - Tips
Whole body posture comes into play.
Adjust the chair properly before you start work so it provides adequate back support. Remove the chair arms if they interfere with the ability to get close to your
work.
Sit back in the chair for lumbar support.
Arrange tubes to minimize reaching and twisting by placing them as close as possible to you.
Use container to raise test tube racks when necessary.

2012
Test Tube Handling - Tips When possible use a vortexer
mixer rack instead of holding tubes by hand.
Use both hands to open and close test tubes to lessen the stress on one hand or the other.
Use cap removers to minimize pinch grip and stress on the fingers.

2012
Cap Removers
Gilson's Jimmy microtube opener
2012
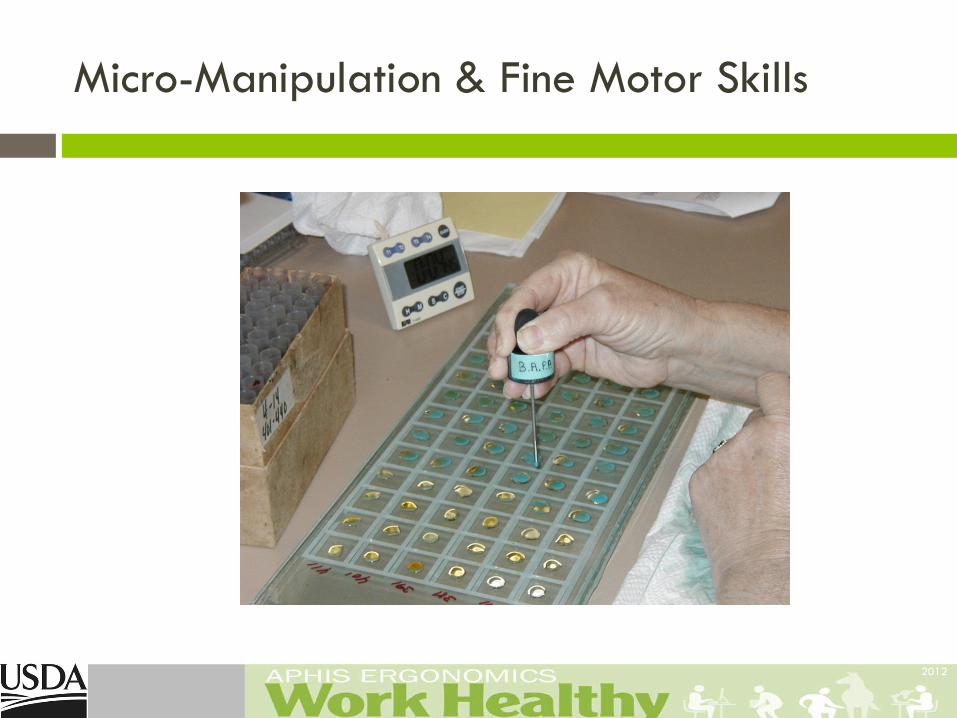
Micro-Manipulation & Fine Motor Skills

2012
Considerations
Use plastic vials with fewer threads to reduce twisting motions during capping and uncapping lids.
Tilt storage bins toward the worker to reduce wrist flexion
while reaching for supplies. Use small pieces of foam, similar to the type used on pencils
and pens to prevent soreness on the fingertips, where fingers and forceps articulate.
Practice using forceps between the 1st and 2nd digits instead
of using the thumb and the first digit.

2012
Instrument Handling
Typical method of handling forceps.
Alternative method to reduce thumb micro-trauma.

2012
Laboratory Workbenches

2012
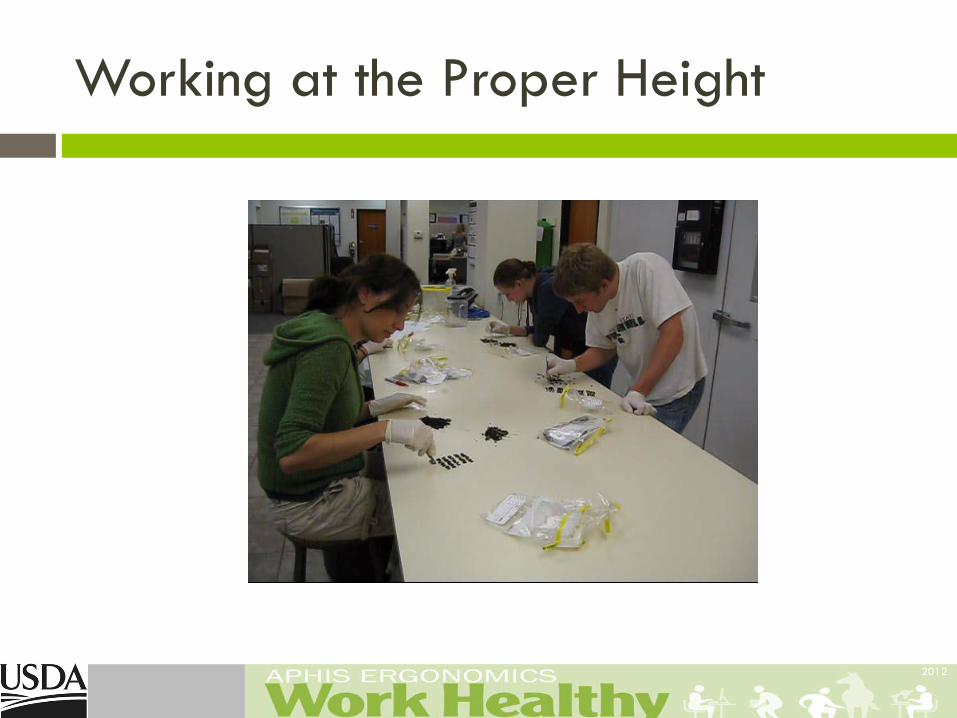
Laboratory Workbenches
Laboratory workbenches are at fixed heights and have been designed using general guidelines suggested by the National Institute of Occupational Safety and Health (NIOSH). These guidelines are as follows:
Precision Work - Workbench height should be above elbow height. Light Work - Workbench height should be just below elbow height. Heavy Work - Workbench should be 4-6 inches below elbow height. **Note: Remove drawers, supplies and other materials underneath workbenches to
provide additional leg room. Also, provide a foot rest underneath workbenches to rest feet on.
2012
Working at the Proper Height

2012
Recommendations for All Lab Activities
Use an ergonomically designed chair or stool that provides adequate back support, adjustable height, and adjustable seat angle. (Arm rests may be helpful as well.)
Use industrial footrests vs. foot rings on stools.
Use sit-stand seats in areas where there is restricted leg room.
Use anti-fatigue matting in areas of lengthy standing.

2012
Recommendations for All Lab Activities
Take frequent micro-breaks. Vary lab activities (esp. those requiring
excessive hand use). Alternate lab tasks between right and left
hands.
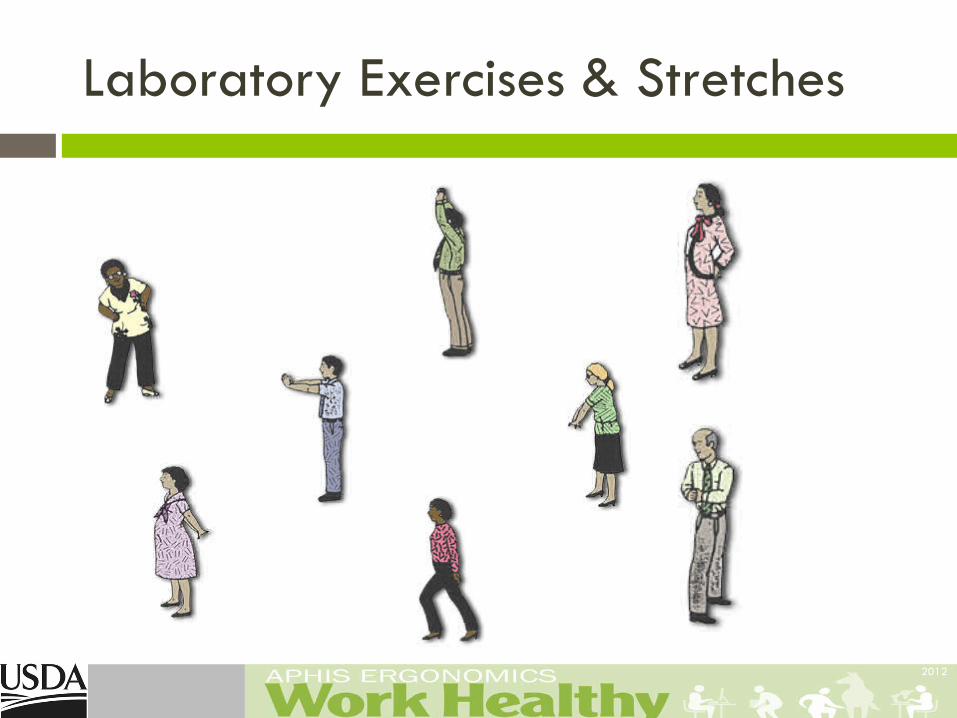
Laboratory Exercises & Stretches
2012

2012
Available Services Equipment Loans – USDA Target Center
Keyboards, mice, footrests, etc. 1-2 week loan period Ordering information provided as requested
Ergonomics Video-Lending Library (APHIS only) “Back Protection – Defending Your Safety Zone” “Office Ergonomics – It’s Your Move”
Individual Ergonomic Evaluations Phone & Email Consultations
*Contact your agency Safety and Health Program for more information.

2012
USDA Target Center
Background: Target = Technology Accessible Resources Give
Employment Today Est. in 1992 to support USDA with assistive
technology (AT) & ergonomic solutions.
Ensure all employees have safe and equal access to electronic and information technology.
Collaborate with the DoD Computer/Electronic Accommodations Program (CAP) to provide services for employees with disabilities.

2012
TARGET Center
Provides: Worksite assessments/consultations.
Presentations on AT, ergonomics, disability awareness. Group & individual demonstrations.
Equipment loans.
Alternative Formats.
2012
Contact the Target Center
[email protected] Phone
202-720-2600 (v/tty) TTY
202-690-0942 Address
Room 1006-South Building 1400 Independence Avenue, SW
Washington, DC 20250

2012
Successful Ergonomics
Understand: causes of WMSDs & ways you can prevent them.
Respect: potential hazards caused by poor posture & an unhealthy laboratory environment.
Communicate: ways to eliminate stress factors & report symptoms early.
Commitment: eliminate WMSDs in your
laboratory environment.

2012
Questions

2012
APHIS Ergonomics Program USDA APHIS
4700 River Road, Unit 124 Riverdale, MD 20737
301.436.3175
Email: [email protected]
Website: http://www.aphis.usda.gov/mrpbs/emssd/ergonomics.shtml