kohler water tile cleaning instructions
TRANSCRIPT


Cleaning your Water Tile shower heads is recommended both as a trouble-shooting
method and as general annual maintenance.
Cleaning is especially recommended when:
* Random/multi-directional spraying or water flow issues occur
* The unit is new and/or has been vacant
* The shower head (especially the ceiling tile) has been unused for weeks/months
* The purge setting has been turned "OFF“; water can settle and increase calcium build-up over
time.
* There is more than one setting in the household (i.e. one family member has the purge setting
“OFF” and another has it “ON”)
Please follow the attached steps for cleaning your shower heads.
Living 180 University - April 2014
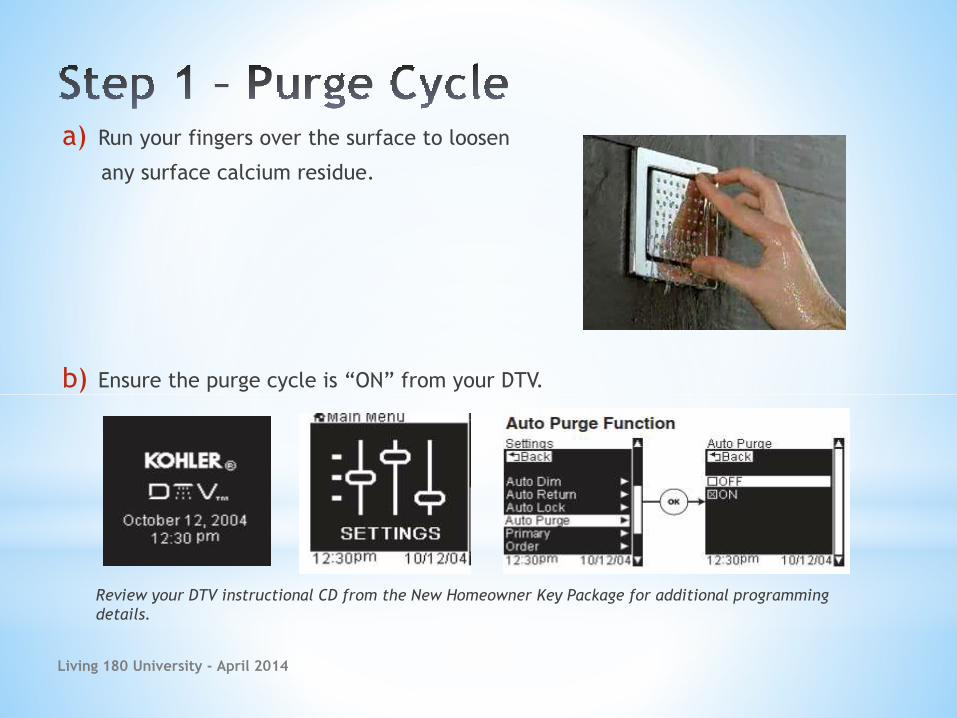
a) Run your fingers over the surface to loosen
any surface calcium residue.
b) Ensure the purge cycle is “ON” from your DTV.
Review your DTV instructional CD from the New Homeowner Key Package for additional programming
details.
Living 180 University - April 2014

a) Release screws
We suggest protecting the surface of your shower floor with a towel or mat while cleaning.
Access the screws by pivoting the tile; the opening is typically on the bottom.
Using an Allen/hexagon key in the clockwise direction (inwards) to remove the metinner
fixture.
Allen/Hexagon key
5/64
Living 180 University - April 2014

The fixture base (in the wall/ceiling) has ridges that fit into the metal casing’s slot.
Lift the bottom (screw side) out first, then the top.
(The fixture was removed from the ceiling for display purposes below. Please only remove the metal casing.)
b) Remove metal casing
Ridges (base inside the wall/ceiling)
Slot inside metal casing
Living 180 University - April 2014
RemoveBottom first, then top
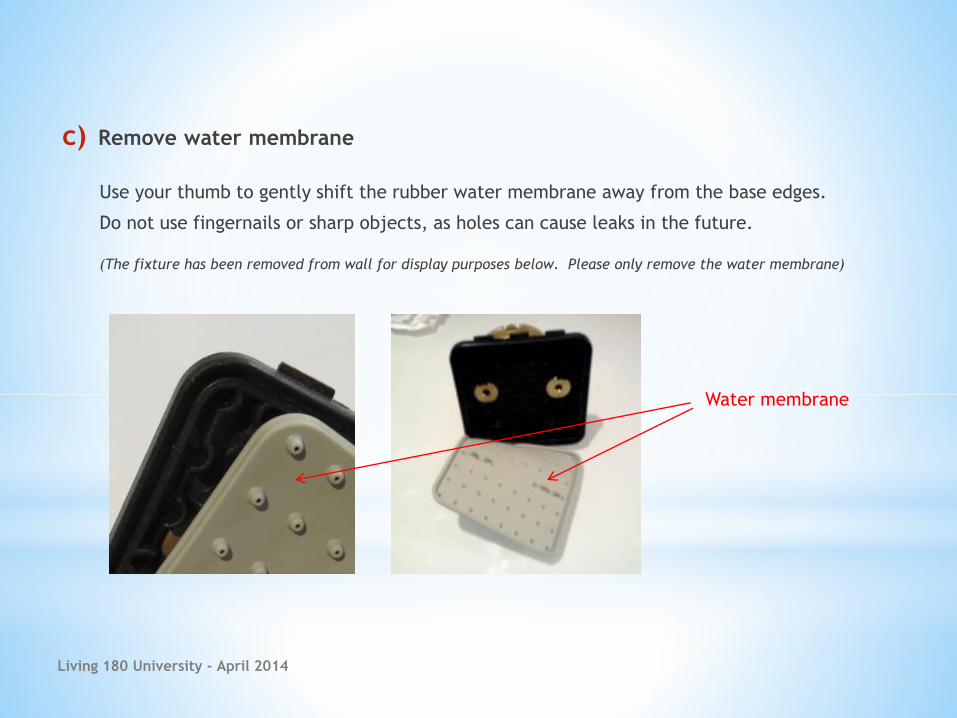
Use your thumb to gently shift the rubber water membrane away from the base edges.
Do not use fingernails or sharp objects, as holes can cause leaks in the future.
(The fixture has been removed from wall for display purposes below. Please only remove the water membrane)
c) Remove water membrane
Water membrane
Living 180 University - April 2014
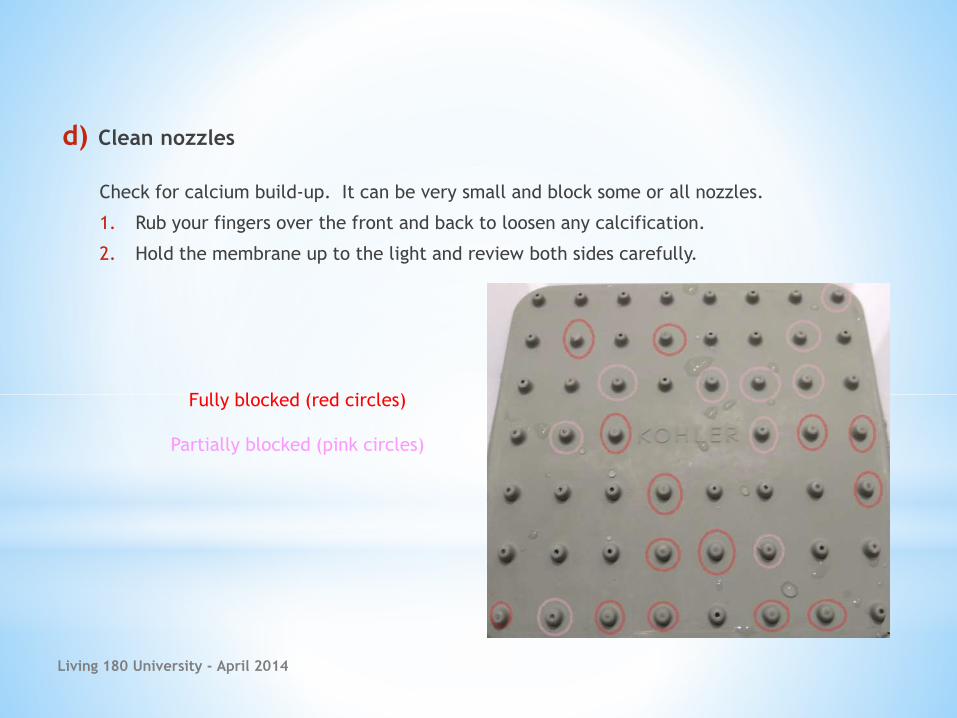
Check for calcium build-up. It can be very small and block some or all nozzles.
1. Rub your fingers over the front and back to loosen any calcification.
2. Hold the membrane up to the light and review both sides carefully.
d) Clean nozzles
Living 180 University - April 2014
Fully blocked (red circles)
Partially blocked (pink circles)

3. Squeeze each nozzle to clear the build-up.
4. Rinse membrane with water. Add a bit of vinegar for excessive build-up.
5. Hold the membrane up to a light to ensure all holes are clear. If not, rinse again.
If the membrane is torn or difficult to clean, order a replacement. Please contact Kohler or Property
Management for details.
d) Clean nozzles (continued)
Living 180 University - April 2014
Squeeze nozzles to clear Rinse Check
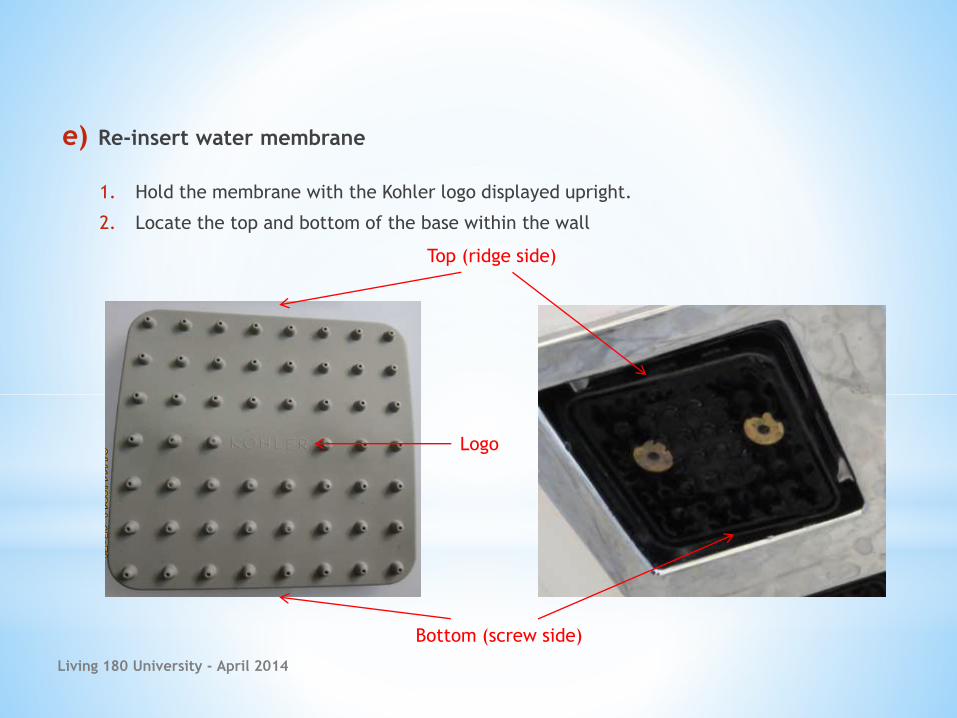
1. Hold the membrane with the Kohler logo displayed upright.
2. Locate the top and bottom of the base within the wall
e) Re-insert water membrane
Top (ridge side)
Bottom (screw side)
Living 180 University - April 2014
Logo

3. Push evenly along each edge. All edges must be completely flush to prevent leaking
in the future.
e) Re-insert water membrane (continued)
Push membrane evenly for flush edges
Living 180 University - April 2014
(Fixture was removed for display
purposes below)
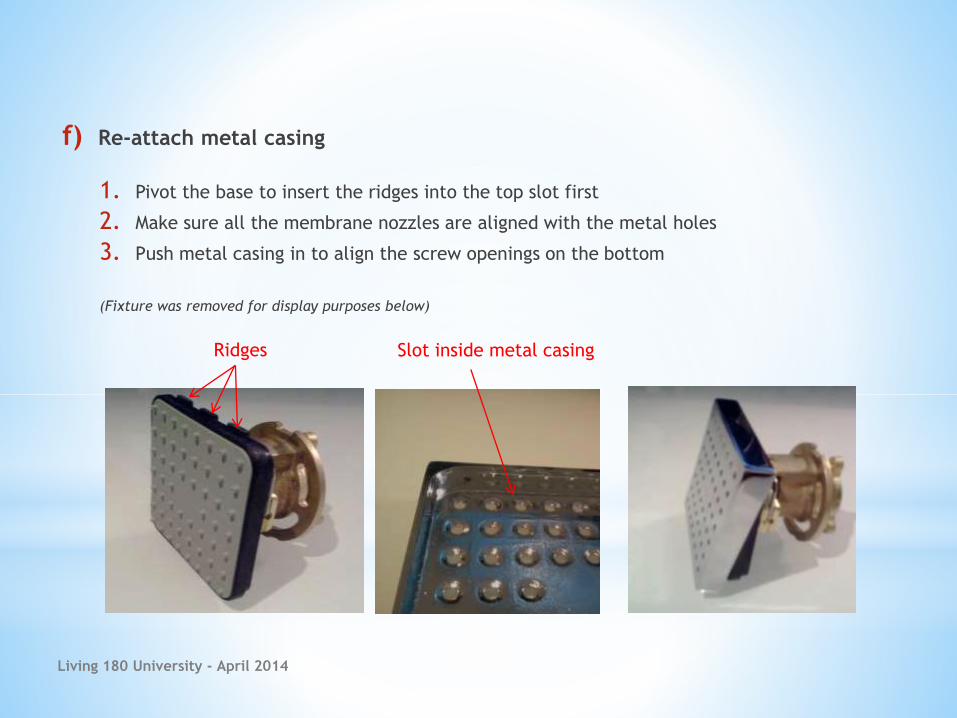
1. Pivot the base to insert the ridges into the top slot first
2. Make sure all the membrane nozzles are aligned with the metal holes
3. Push metal casing in to align the screw openings on the bottom
(Fixture was removed for display purposes below)
f) Re-attach metal casing
Ridges Slot inside metal casing
Living 180 University - April 2014
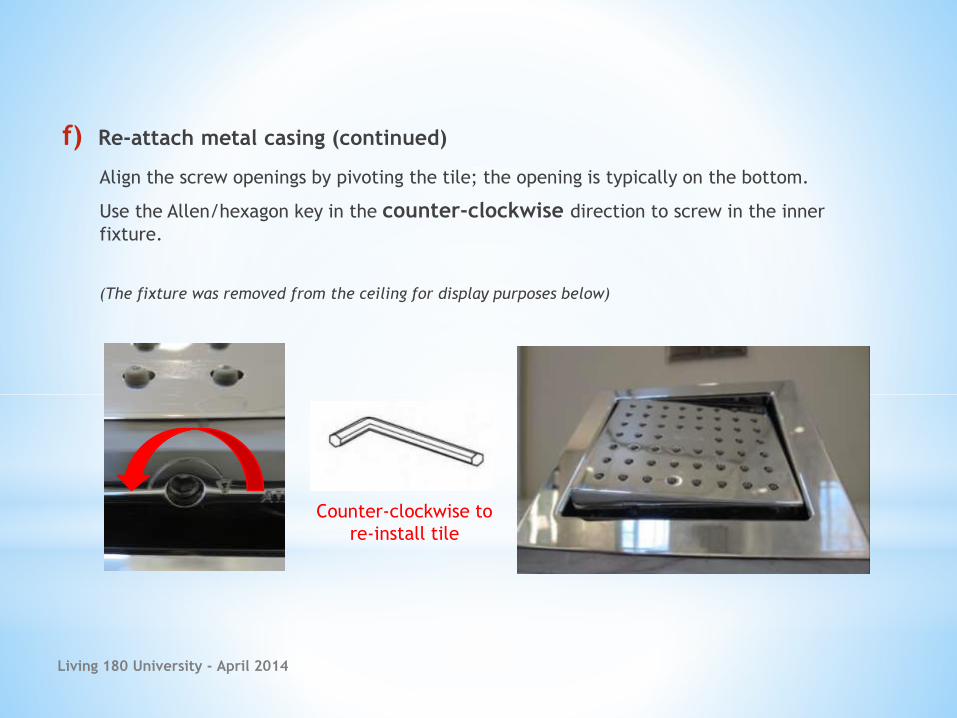
f) Re-attach metal casing (continued)
Align the screw openings by pivoting the tile; the opening is typically on the bottom.
Use the Allen/hexagon key in the counter-clockwise direction to screw in the inner
fixture.
(The fixture was removed from the ceiling for display purposes below)
Counter-clockwise to
re-install tile
Living 180 University - April 2014

a) Repeat the cleaning process to troubleshoot any other water tile flow issues.
b) After cleaning, turn on the Autopurge setting.
c) Run the shower again.
d) Enjoy!
Living 180 University - April 2014
For a quick video demonstration click on
“Kohler Water Tile Cleaning Instructions - Demo” under “videos” at:
https://www.youtube.com/Living180University
Should you continue to experience multi-directional/water flow issues, please contact a plumbing professional either independently or through your Property Manager.
All information provided is for informational purposes only, and is not intended to be definitive in its scope. No warranties of any kind are implied or granted, nor does this video replace or replicate analysis from a qualified plumbing professional. These steps are for general household maintenance. Neither the company nor its representatives shall be held in any way liable or responsible for any results caused in relation to the information provided. Contact a plumbing professional should your specific needs exceed the content of this presentation.
Living 180 University - April 2014