karen keehr photograph curator nebraska state … as a colored haze (yellow, magenta, or blue)...
TRANSCRIPT

Karen KeehrPhotograph CuratorNebraska State Historical Society

The amount of water in the air
Single most important environmental factor
Ideal RH in an Archive: 40%
High levels (50%-100%) cause oxidation, fading, and spread of fungus
Low levels (0-30%) can cause photos to become brittle and shrink unevenly
Important to avoid extreme fluctuations

Deterioration is the chemical breakdown of the photograph
Heat increases chemical reactions
Ideal temperature for Archives: 60-65°F
Anything below 65°F, no longer comfortable for people to work for long periods of time
Keep as low as possible without raising RH and causing condensation when moved to warmer environment
Consider cold storage for:
Nitrate negatives
Acetate negatives
Color negatives
Color prints

Keys to preservation
Interrelated
Temperature determines water air can hold
Warm air holds more water then cold air
In a closed system like a room or building:
A rise in temperature will lower the RH
Cooling the air will drive up the RH
Combination of high temperatures and high RH is one of the worst things to happen to your collection
Can cause emulsion to become sticky

Just plain BAD!
Causes fading and yellowing
Damage caused by light permanent
Ultraviolet (UV) light causes the most damage
Protection from UV light does NOT eliminate light damage.
ALL light is bad
Some types of images are particularly light sensitive
Albumen prints, cyanotypes, and
especially color images

Display copies whenever possible
Scanning or photocopying cause little harm
Continued light exposure & handling cause much more damage
Keep scanning and copying to a minimum
Keep original photographs in the dark
If you do display an original
Know that the damage is permanent
Take precautions
Avoid direct sunlight
Choose glass with UV protection
Select Archival quality frame and mats
Monitor fading

Often the result of poor storage conditions
Things that will eat your collection
Rodents
Mold
Insects: Silverfish, firebrats, German cockroaches, furniture beetles, termites
Things that leave behind messes
Rodents
Mold
Insects: Cockroaches, flies, spiders, wasps, etc.

Create an Integrated Pest Management Policy (IPM)
Prevention is the best protection
Improve your storage conditions
Door sweeps
Plug holes
Monitor your collection
If you think you have a problem
Handle with care and protect yourself
Use sticky traps to identify species
Contact an expert
Gerald R. Ford Conservation Center (Omaha, NE)

Store in proper photograph storage
Provide support and protection
Improve organization
Aid in disaster recovery
Use only materials that have passed the Photographic Activity Test (PAT)
Meet or exceed national standards
Will not harm your photographs
Not the same as “Archival”
Acid-free, lignin-free, unbuffered
Choose the size closest to what you are storing
Not too tight: could be damaged when removed
Not too loose: slide around & damage corners

Plastic over Paper for:
Damaged, weak, or brittle photographs
Thin prints
Often handled or looked at images
Paper over Plastic for
Nitrate or acetate negatives to allow off-gassing
Poorly processed prints

Chemically stable
Specific pH level
Unbuffered usually recommended for all photos
Smooth, non-abrasive
Pass PAT test
NO glassine or magnetic albums
Remove immediately

Chemically inert
Will not react with photographs
No surface coatings
Passes the PAT test
Main types
Polyester
Polypropylene
Polyethylene
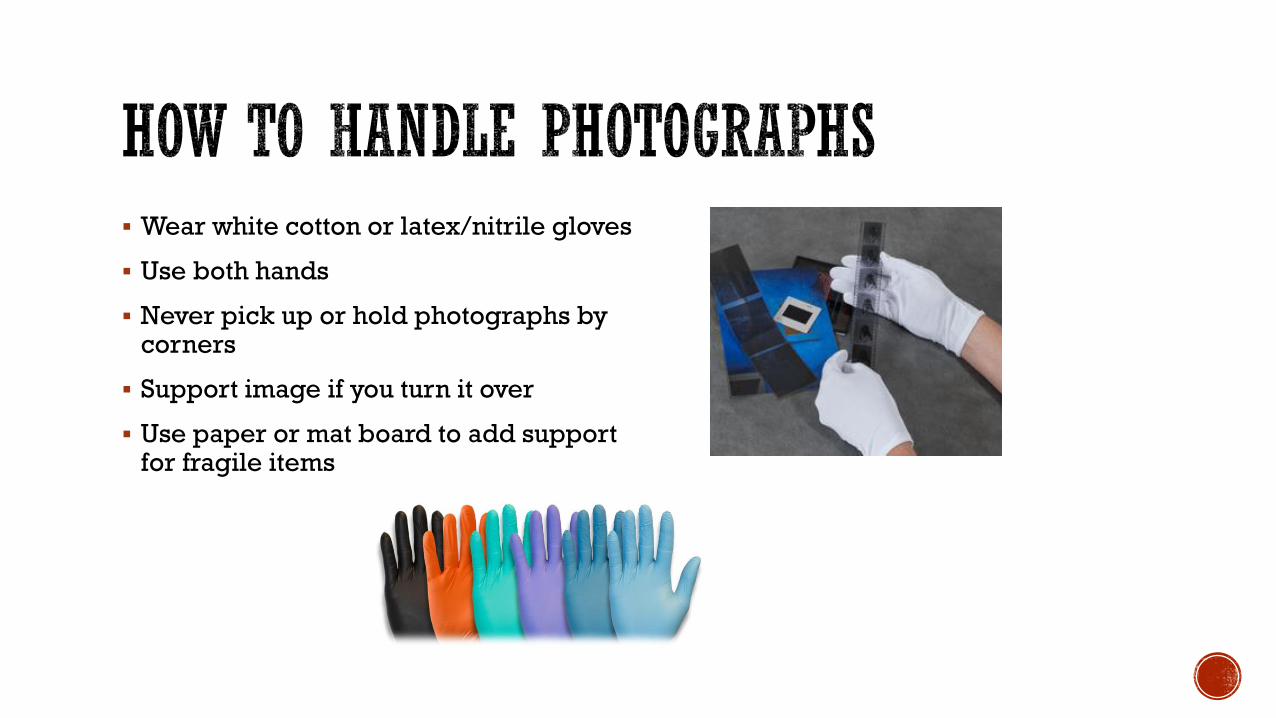
Wear white cotton or latex/nitrile gloves
Use both hands
Never pick up or hold photographs by corners
Support image if you turn it over
Use paper or mat board to add support for fragile items

Write along the edge on the back of the photo
Never write on front
Do not press too hard
Use pencil
Good old No. 2
General’s Woodless Graphite pencil
Writes even on modern, coated photographs
Pens can bleed through paper and smear
Especially during a disaster
Consider writing on enclosure or photocopy rather then original photograph

Do not attempt to clean or repair heirloom photographs yourself or allow anyone (even commercial photographers) not trained in photographic conservation to “restore” your photographs
Consult a professional conservator
Use a soft brush to gently remove dust particles
Photograph brush
Natural makeup brushes


1839-1860s, “Mirror with Memory”
Highly reflective surface
Image appears positive only under certain lighting conditions & angles of view
Surface very soft, easily damaged
Always found in a Case

Deterioration is caused by pollutants and humid storage environments
Never touch the surface
Never take apart yourself, contact a conservator
If seal is broken, silver will tarnish
Appears as a colored haze (yellow, magenta, or blue)
Contact a photograph conservator
Attempts to reseal can cause further damage

Store in cool, dry environment
Construct individual, customized boxes for storage
Protect against environmental changes & pollutants
See handout
Avoid overly intense light sources if displayed
Original glass covers also deteriorate
“Weeping glass”
Tiny whitish spots on the interior side of the glass
Contact a conservator

One-of-a-kind
Patented in U.S. by James Ambrose Cutting, 1854
Thin collodion negative on glass
Appear positive by placing a black background behind it.
Usually found in a case

Damage often due to the deterioration of the dark backing
Destroys the positive/negative effect
Unlike Daguerreotypes, can be carefully taken apart & backing replaced
Consult a conservator
Store in a cool, dry place
Like Daguerreotypes, custom storage boxes recommended

Patented by Hamilton Smith in 1856.
Also known as ferrotype (proper name since there is no tin) or melainotype
Negative is supported by dark lacquered thin iron sheet Similar to Ambrotypes, but support is different
Wouldn’t shatter as a glass image Popularity grew during Civil War
Tintypes could be mailed without shattering
While considered functionally dead after 1900, examples found dating as late as 1930.

In a case, difficult to tell from Ambrotypes
If a magnet does not hold, it is anAmbrotype
If a magnet holds, it is likely a tintype
Darkly varnished metal backings weresometimes used for Ambrotypes.
Deterioration often offers best clues
Easily bent, which can cause the varnish tocrack.
Once air & moisture penetrates iron support,it begins to rust.
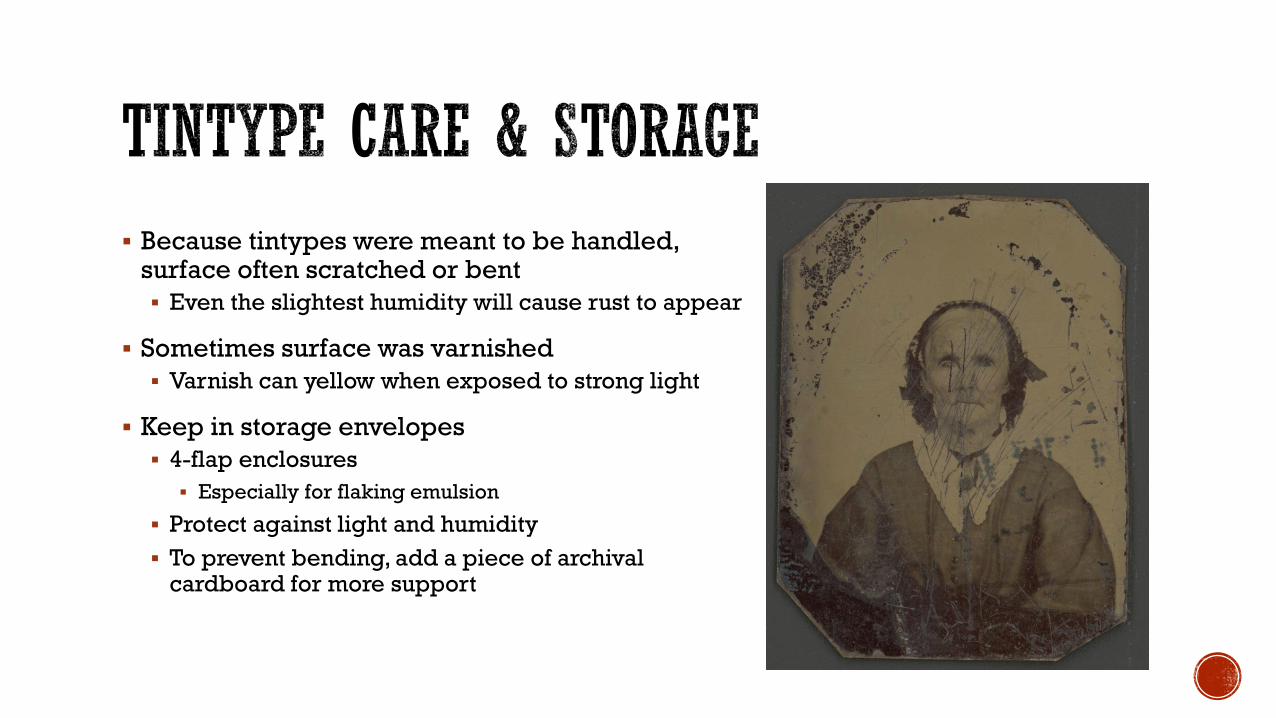
Because tintypes were meant to be handled, surface often scratched or bent
Even the slightest humidity will cause rust to appear
Sometimes surface was varnished
Varnish can yellow when exposed to strong light
Keep in storage envelopes
4-flap enclosures
Especially for flaking emulsion
Protect against light and humidity
To prevent bending, add a piece of archival cardboard for more support

Used from 1851-1885
Collodion: Cellulose nitrate dissolved in ether & alcohol
Applied to glass to provide binder for photosensitive silver compounds
Plate coated by hand & placed into camera wet
Often identified by uneven emulsion coating
Tidal waves
Corners and edges uncoated

Because emulsion was soft, usually varnished
Helped protect against humidity and pollutants
Easily scratched or abraded
Supported on glass, vulnerable to breakage
Store in envelopes in correctly sized boxes
Paper enclosures add protection against changes in humidity and pollutants
Store vertically along long edge
Horizontal or flat storage not recommended

Acid-free, lignin-free, unbuffered, PAT approved
Reduces abrasions
Acid-free, lignin-free, unbuffered, PAT approved
Rigid dividers to keep plates vertical & reduce pressure
4-flap negative enclosures Glass plate negative boxes

Popular from 1878-1940
Unlike Collodion , Gelatin negatives were “dry”
Retained their sensitivity for months before use
Could be developed long after exposure
Could be manufactured industrially, stored, distributed throughout the world, and purchased for future use
Photography no longer exclusive to professionals with darkrooms
Very common in collections

Physical damage: breaks and cracks
Delamination: emulsion lifting from glass
Poor preparation of glass
Glass deterioration
Exposure to extremely high humidity
All gelatin photographs (negatives & prints) subject to oxidation
Manifests as fading, yellowing, and silver mirroring

Supported on glass, vulnerable to breakage
Choose environment that is cool and dry
Store in envelopes in correctly sized boxes
Paper enclosures add protection against changes in humidity and pollutants
Store vertically along long edge
Store vertically along long edge
Horizontal or flat storage not recommended

Commonly used from 1910-1939
Manufactured from 1888-1951
Used for sheet film and motion picture film
Usually have “NITRATE” marked on edge
Very flammable
Can burn under water
Once ignited, nitrate fires are almost impossible to put out
Toxic gases produced by burning nitrates are lethal
Inherently unstable

Unless kept at very low temperature, cellulose nitrate self-destructs at unpredictable rates
As it deteriorates, gives off acidic by-products (nitric oxide, nitrogen dioxide)
These gases are deep lung irritants
Repeated exposure may cause eye irritation, rashes, & sores on face & neck, vertigo, nausea, headaches, swollen glands, & respiratory irritations
Also cause damage to materials around it
Embrittlement of paper & film and cumulative damage to many organic materials & metals

Store separately from other photographic material Well-ventilated
Maintain a stable environment Deterioration highly dependent on temperature & relative humidity
32-40˚F with relative humidity of 20-30%
Best method is to store in a freezer Slows decomposition (does not stop)
Special archival cold storage materials required
Use 3 layers of protection Individual sleeves
Archival, acid-free box
Place box in freezer or on shelf
Never seal nitrate film in airtight containers Gases and heat created must be allowed to escape

1925-present
Slowly replaced nitrate film
Cellulose acetate, diacetate, triacetate, etc.
“SAFETY” marked on edge
Burns with difficulty
Stability problems
Autocatalytic: once deterioration has begun, the degradation produces further damage
Plastic supports become acidic, shrink and give off a strong vinegar (acetic acid) smell

When stored in poor environment (high temperature & relative humidity) or exposed to acidic vapors Undergoes chemical reaction to form acetic acid
Causes support to become acidic, brittle, and shrink
Six progressive stages1. No deterioration.
2. The negatives begin to curl and they can turn red or blue.
3. The onset of acetic acid (vinegar smell); also shrinkage and brittleness.
4. The warping can begin.
5. The formation of bubbles and crystals in the film.
6. The formation of channeling in the film.
Cold Storage recommended
1965-present
When viewed between polarizing filters, the film is identified by interference patterns (rainbow colors)
Much more stable over time than nitrate or acetate film

Often sepia toned with a slightly glossy surface
Unfaded albumen prints have a purple-brown tone, rather than sepia
No baryta layer
Prints are always mounted
Paper fibers visible through albumen
Signs of deterioration can be helpful in identifying albumen prints
Yellowing
Localized or overall image fading

Made with the same sticky nitrocelluloseemulsion as Ambrotypes and wet plate negatives
Mixed with silver chloride and coated onto paper.
Surfaces can be matte, glossy, or semi-gloss, like an albumen print
The white areas generally lack yellowish cast of albumen prints
Usually toned with gold or platinum Show little or no fading
They do not show silver mirroring

Image developed from direct reaction to light
Warmer in tone
Usually very glossy
Often faded to yellow
First appeared in late 1880s
Visible image through use of chemical developer
Cooler in color (blue, neutral, or black) unless toned
Made either by contact printing or enlarged from negative
Printed Out Process Developed Out Process

Based on light sensitivity of iron salts
Ferric ferrocyanide (Prussian Blue)
Ferrous ferricyanide (Turnbull’s Blue)
Easily identified by uniform, bright blue color
Exposure to light chemically changes image to a colorless form
To some extent the change reverses itself in the dark & the blue color is restored
Images subject to alkaline conditions fade to very pale brown & lose almost all detail and density
Store in unbuffered or plastic enclosures

In platinotypes, or platinum prints, paper is sensitized with platinum salts
Image appears embedded in the paper fibers
Highly stable metallic platinum Resistant to fading
Toning is generally silver to black, but warm browns were also achieved
“Ghost” prints If poor quality paper is left in contact with platinum print, platinum will accelerate cellulose degradation
Brownish discoloration on paper
Not a transfer print

3 gelatin image layers, laid one on top of the other
Top to bottom, yellow, magenta, & cyan
Modern films have more complex layered structure
Chromogenic process
Dye molecules are synthesized during processing
Chromo = Color
-genic = producing
Cold Storage recommended

Image consists of at least 3 separate gelatin layers, laid one on top of the other
Top to bottom: cyan, magenta, yellow
Images aren’t “Turning Yellow”
The magenta and cyan layers fade faster then the yellow layer
Chromogenic process
Modern color prints have resin coated backing
What makes it difficult to write on backs of photos
Cold Storage recomended

Present unique challenges
Often feature mixed media
Big questions: Take apart or leave as is?
Depends on the condition
Evaluate the condition of the photographs, pages and album
“Visual Diaries”
Created to tell a story

If photos appear in good condition, leave together
Interleave pages with acid-free tissue paperTissue paper will absorb acids in album pages, so
monitor and replace regularly
Cabinet card albums often have gilded edges Can cause gold/white spots in emulation
Interleave with tissue or Mylar
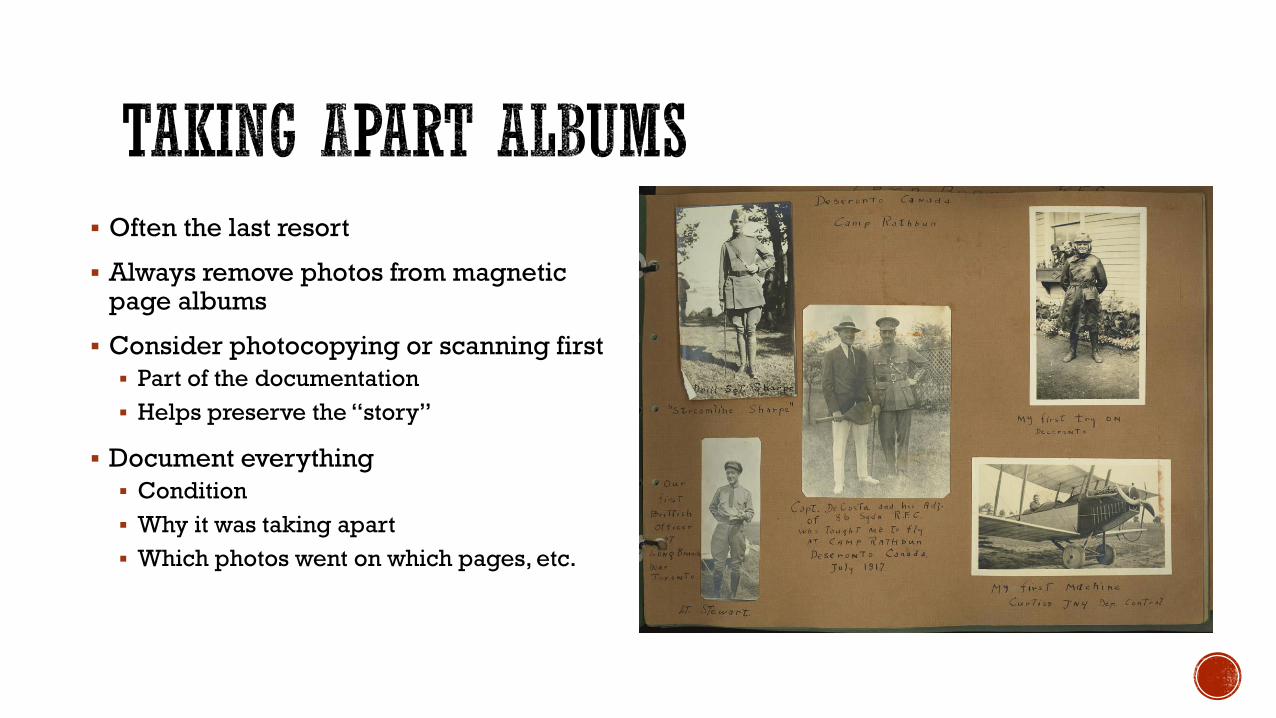
Often the last resort
Always remove photos from magnetic page albums
Consider photocopying or scanning first
Part of the documentation
Helps preserve the “story”
Document everything
Condition
Why it was taking apart
Which photos went on which pages, etc.

A Four-Step Procedure for Flattening a Rolled-Up Paper Document or Photograph
Do not use with oil paints, watercolors, charcoal, chalks or pastels
See NPS Conserve O Gram 13.2
Step 1: Clean the Paper
Step 2: Assemble a Humidification Chamber
Step 3: Humidify the Paper
Step 4: Flatten the Paper
Emulsion will be soft, do not place anything directly on top
Place weights around edges