k-9 law enforcement dog house plans · k-9 law enforcement dog house plans 1 dog/1 door, 2 dog/2...
TRANSCRIPT

K-9 Law Enforcement Dog House Plans
1 Dog/1 Door, 2 Dog/2 Door
2 Dog/1 Door, 3 Dog/1 Door
Visit our websites for various sizes in the above Models: www.doghouseplans.com www.policedoghouse.com
© All Copyrights Reserved by Ash Custom Wood Products
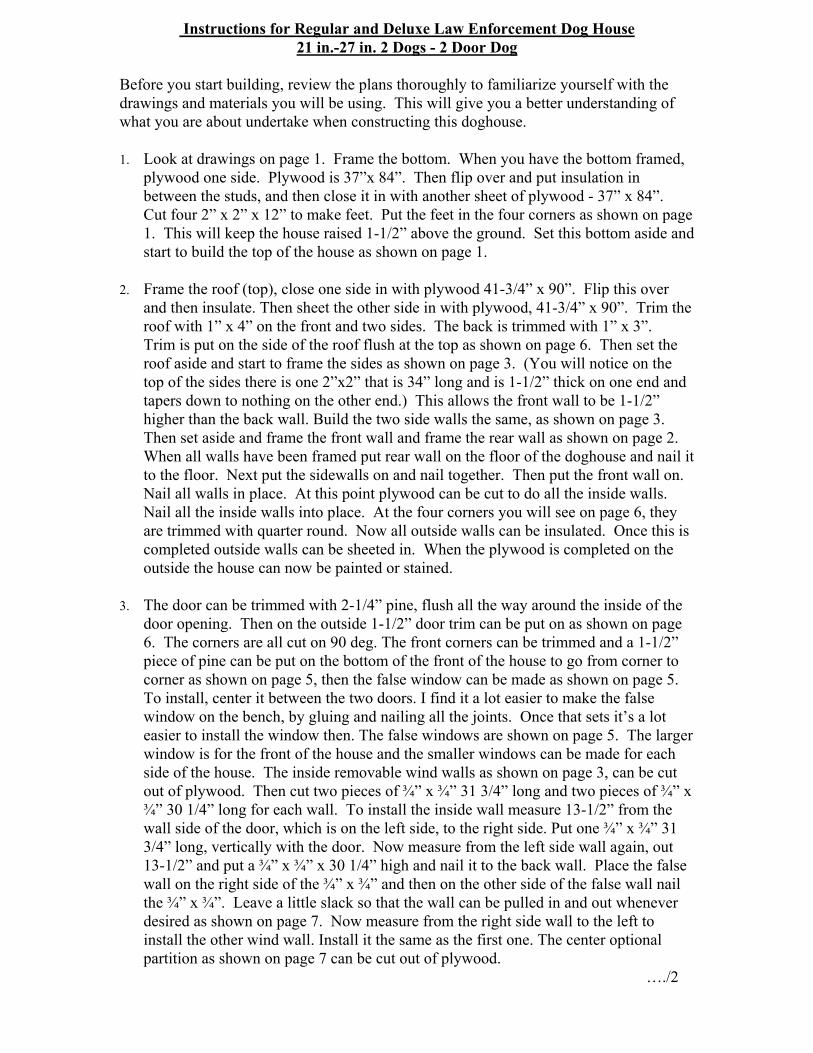
Instructions for Regular and Deluxe Law Enforcement Dog House 21 in.-27 in. 2 Dogs - 2 Door Dog
Before you start building, review the plans thoroughly to familiarize yourself with the drawings and materials you will be using. This will give you a better understanding of what you are about undertake when constructing this doghouse. 1. Look at drawings on page 1. Frame the bottom. When you have the bottom framed,
plywood one side. Plywood is 37”x 84”. Then flip over and put insulation in between the studs, and then close it in with another sheet of plywood - 37” x 84”. Cut four 2” x 2” x 12” to make feet. Put the feet in the four corners as shown on page 1. This will keep the house raised 1-1/2” above the ground. Set this bottom aside and start to build the top of the house as shown on page 1.
2. Frame the roof (top), close one side in with plywood 41-3/4” x 90”. Flip this over
and then insulate. Then sheet the other side in with plywood, 41-3/4” x 90”. Trim the roof with 1” x 4” on the front and two sides. The back is trimmed with 1” x 3”. Trim is put on the side of the roof flush at the top as shown on page 6. Then set the roof aside and start to frame the sides as shown on page 3. (You will notice on the top of the sides there is one 2”x2” that is 34” long and is 1-1/2” thick on one end and tapers down to nothing on the other end.) This allows the front wall to be 1-1/2” higher than the back wall. Build the two side walls the same, as shown on page 3. Then set aside and frame the front wall and frame the rear wall as shown on page 2. When all walls have been framed put rear wall on the floor of the doghouse and nail it to the floor. Next put the sidewalls on and nail together. Then put the front wall on. Nail all walls in place. At this point plywood can be cut to do all the inside walls. Nail all the inside walls into place. At the four corners you will see on page 6, they are trimmed with quarter round. Now all outside walls can be insulated. Once this is completed outside walls can be sheeted in. When the plywood is completed on the outside the house can now be painted or stained.
3. The door can be trimmed with 2-1/4” pine, flush all the way around the inside of the
door opening. Then on the outside 1-1/2” door trim can be put on as shown on page 6. The corners are all cut on 90 deg. The front corners can be trimmed and a 1-1/2” piece of pine can be put on the bottom of the front of the house to go from corner to corner as shown on page 5, then the false window can be made as shown on page 5. To install, center it between the two doors. I find it a lot easier to make the false window on the bench, by gluing and nailing all the joints. Once that sets it’s a lot easier to install the window then. The false windows are shown on page 5. The larger window is for the front of the house and the smaller windows can be made for each side of the house. The inside removable wind walls as shown on page 3, can be cut out of plywood. Then cut two pieces of ¾” x ¾” 31 3/4” long and two pieces of ¾” x ¾” 30 1/4” long for each wall. To install the inside wall measure 13-1/2” from the wall side of the door, which is on the left side, to the right side. Put one ¾” x ¾” 31 3/4” long, vertically with the door. Now measure from the left side wall again, out 13-1/2” and put a ¾” x ¾” x 30 1/4” high and nail it to the back wall. Place the false wall on the right side of the ¾” x ¾” and then on the other side of the false wall nail the ¾” x ¾”. Leave a little slack so that the wall can be pulled in and out whenever desired as shown on page 7. Now measure from the right side wall to the left to install the other wind wall. Install it the same as the first one. The center optional partition as shown on page 7 can be cut out of plywood.
…./2

Page 2 To install this wall that is shown on page 7, measure on the inside of the back wall from one side to the other side. This will give you the center of the house; do the same on the inside of the front wall. Cut 2 pieces of ¾” x ¾” x 31 3/4” and 2 pieces of ¾” x ¾” x 30 1/4”. The 31 3/4” go on the inside of the front wall and the 30 1/4” go on the inside of the back wall. Install the same as the wind walls in the center of the house. This will give you two equal halves.
4. The roof can now be put on the doghouse. The front and sides are trimmed with 1 x 4. 1” x 3” is on the back. Measure to make sure you have the same amount hanging over the front as hanging over the back as hanging over the sides. When this is done, at the back of the house, measure from the back corner towards the centre of the back on the roof 6”. Do this on each side, and that is where the outside of the hinge will go. Screw one side of the hinge to the back of the house and screw one side of the hinge to the bottom of the roof. Now measure to find the middle. Between the two hinges, put the third hinge there. This will give you extra support for this size roof. The roof can now be shingled and all the trim and the window can be painted.
The nails used in the project are:
• to do the 2”x2” framing: 2-1/2” spiral nails • to do the trim work: 1-1/2” trim nails • to nail the plywood: 1-1/2” spiral nails • to nail the shingles: 1-1/4” roofing nails
Just a small quantity of each of these nails is needed. Talk to your building supplier to see what small quantities are available. This law enforcement house has been in service for many years, and once you have completed this project, you will have a beautiful, durable, and comfortable house for your pet that will last for years.


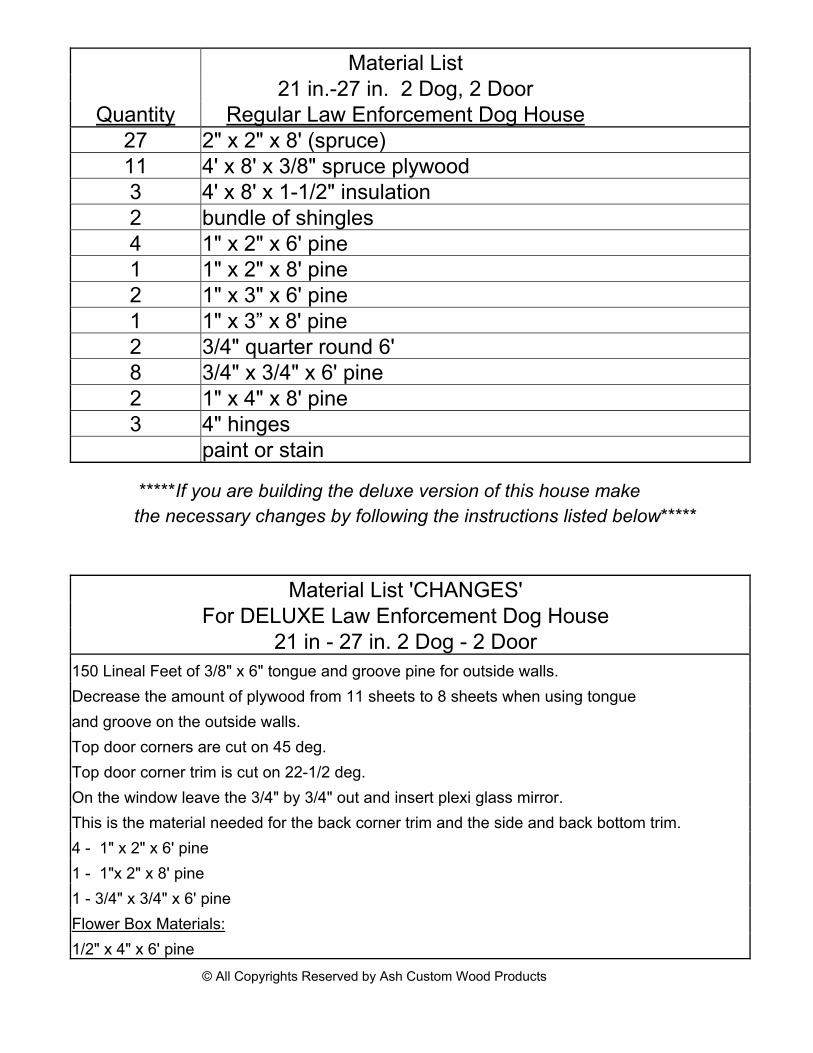
Material List 21 in.-27 in. 2 Dog, 2 Door
Quantity Regular Law Enforcement Dog House 27 2" x 2" x 8' (spruce) 11 4' x 8' x 3/8" spruce plywood 3 4' x 8' x 1-1/2" insulation 2 bundle of shingles 4 1" x 2" x 6' pine 1 1" x 2" x 8' pine 2 1" x 3" x 6' pine 1 1" x 3” x 8' pine 2 3/4" quarter round 6' 8 3/4" x 3/4" x 6' pine 2 1" x 4" x 8' pine 3 4" hinges paint or stain
*****If you are building the deluxe version of this house make the necessary changes by following the instructions listed below*****
Material List 'CHANGES'
For DELUXE Law Enforcement Dog House 21 in - 27 in. 2 Dog - 2 Door
150 Lineal Feet of 3/8" x 6" tongue and groove pine for outside walls.
Decrease the amount of plywood from 11 sheets to 8 sheets when using tongue and groove on the outside walls.
Top door corners are cut on 45 deg.
Top door corner trim is cut on 22-1/2 deg.
On the window leave the 3/4" by 3/4" out and insert plexi glass mirror.
This is the material needed for the back corner trim and the side and back bottom trim. 4 - 1" x 2" x 6' pine
1 - 1"x 2" x 8' pine
1 - 3/4" x 3/4" x 6' pine
Flower Box Materials:
1/2" x 4" x 6' pine
© All Copyrights Reserved by Ash Custom Wood Products
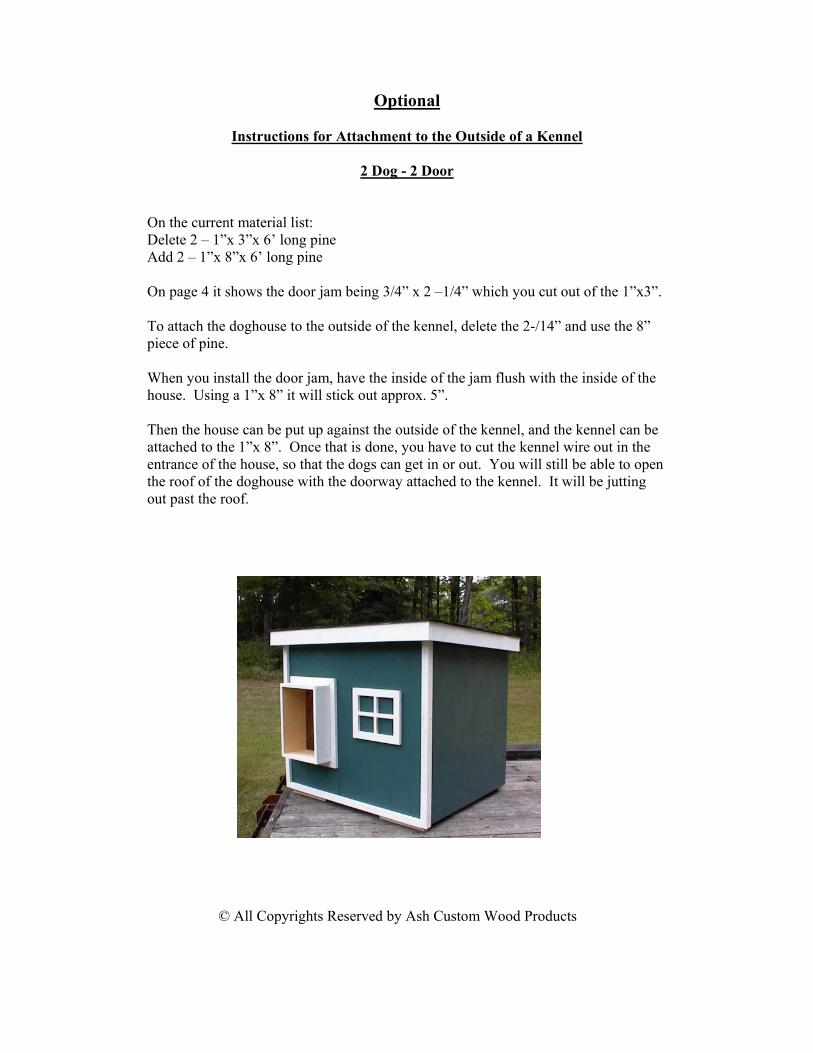
Optional
Instructions for Attachment to the Outside of a Kennel
2 Dog - 2 Door
On the current material list: Delete 2 – 1”x 3”x 6’ long pine Add 2 – 1”x 8”x 6’ long pine On page 4 it shows the door jam being 3/4” x 2 –1/4” which you cut out of the 1”x3”. To attach the doghouse to the outside of the kennel, delete the 2-/14” and use the 8” piece of pine. When you install the door jam, have the inside of the jam flush with the inside of the house. Using a 1”x 8” it will stick out approx. 5”. Then the house can be put up against the outside of the kennel, and the kennel can be attached to the 1”x 8”. Once that is done, you have to cut the kennel wire out in the entrance of the house, so that the dogs can get in or out. You will still be able to open the roof of the doghouse with the doorway attached to the kennel. It will be jutting out past the roof.
© All Copyrights Reserved by Ash Custom Wood Products