jpa quick guide - tutorialspoint.comorm.xml, jpa loader, and object grid. jpa provider : it is the...
TRANSCRIPT
http://www.tutorialspoint.com/jpa/jpa_quick_guide.htm Copyright © tutorialspoint.com
JPA - QUICK GUIDEJPA - QUICK GUIDE
JPA - INTRODUCTIONJPA - INTRODUCTIONAny enterprise application performs database operations by storing and retrieving vast amounts ofdata. Despite all the available technologies for storage management, application developersnormally struggle to perform database operations efficiently.
Generally, Java developers use lots of code, or use the proprietary framework to interact with thedatabase, whereas using JPA, the burden of interacting with the database reduces significantly. Itforms a bridge between object models Javaprogram and relational models databaseprogram.
Mismatches between relational and object modelsRelational objects are represented in a tabular format, while object models are represented in aninterconnected graph of object format. While storing and retrieving an object model from arelational database, some mismatch occurs due to the following reasons:
Granularity : Object model has more granularity than relational model.
Subtypes : Subtypes meansinheritance are not supported by all types of relational databases.
Identity : Like object model, relational model does not expose identity while writing equality.
Associations : Relational models cannot determine multiple relationships while looking intoobject domain model.
Data navigation : Data navigation between objects in an object network is different in bothmodels.
What is JPA?Java Persistence API is a collection of classes and methods to persistently store the vast amounts ofdata into a database which is provided by the Oracle Corporation.
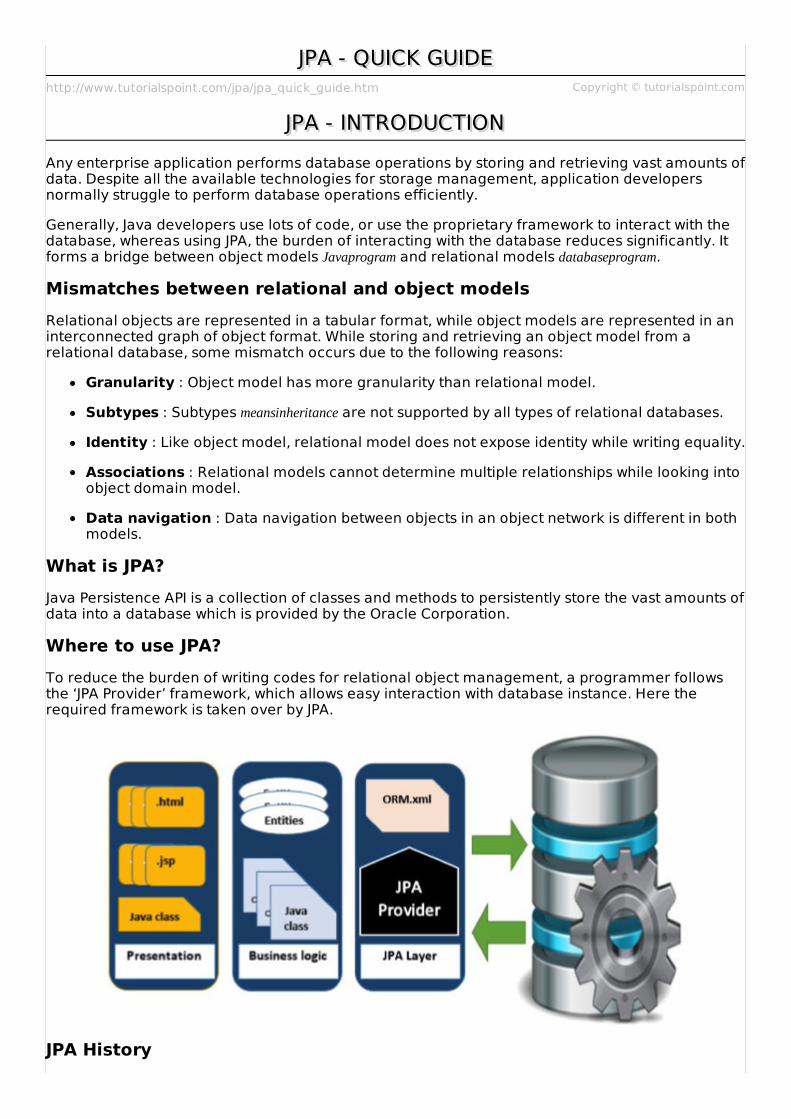
Where to use JPA?To reduce the burden of writing codes for relational object management, a programmer followsthe ‘JPA Provider’ framework, which allows easy interaction with database instance. Here therequired framework is taken over by JPA.
JPA History

Earlier versions of EJB, defined persistence layer combined with business logic layer usingjavax.ejb.EntityBean Interface.
While introducing EJB 3.0, the persistence layer was separated and specified as JPA 1.0 JavaPersistenceAPI. The specifications of this API were released along with the specifications ofJAVA EE5 on May 11, 2006 using JSR 220.
JPA 2.0 was released with the specifications of JAVA EE6 on December 10, 2009 as a part ofJava Community Process JSR 317.
JPA 2.1 was released with the specification of JAVA EE7 on April 22, 2013 using JSR 338.
JPA ProvidersJPA is an open source API, therefore various enterprise vendors such as Oracle, Redhat, Eclipse,etc. provide new products by adding the JPA persistence flavor in them. Some of these productsinclude:
Hibernate, Eclipselink, Toplink, Spring Data JPA, etc.
JPA - ARCHITECTUREJPA - ARCHITECTUREJava Persistence API is a source to store business entities as relational entities. It shows how todefine a Plain Oriented Java Object POJO as an entity and how to manage entities with relations.
Class Level ArchitectureThe following image shows the class level architecture of JPA. It shows the core classes andinterfaces of JPA.
The following table describes each of the units shown in the above architecture.
Units Description
EntityManagerFactory This is a factory class of EntityManager. It creates and managesmultiple EntityManager instances.
EntityManager It is an Interface, it manages the persistence operations on objects. Itworks like factory for Query instance.
Entity Entities are the persistence objects, stores as records in thedatabase.
EntityTransaction It has one-to-one relationship with EntityManager. For eachEntityManager, operations are maintained by EntityTransactionclass.
Persistence This class contain static methods to obtain EntityManagerFactoryinstance.
Query This interface is implemented by each JPA vendor to obtain relationalobjects that meet the criteria.
The above classes and interfaces are used for storing entities into a database as a record. Theyhelp programmers by reducing their efforts to write codes for storing data into a database so thatthey can concentrate on more important activities such as writing codes for mapping the classeswith database tables.
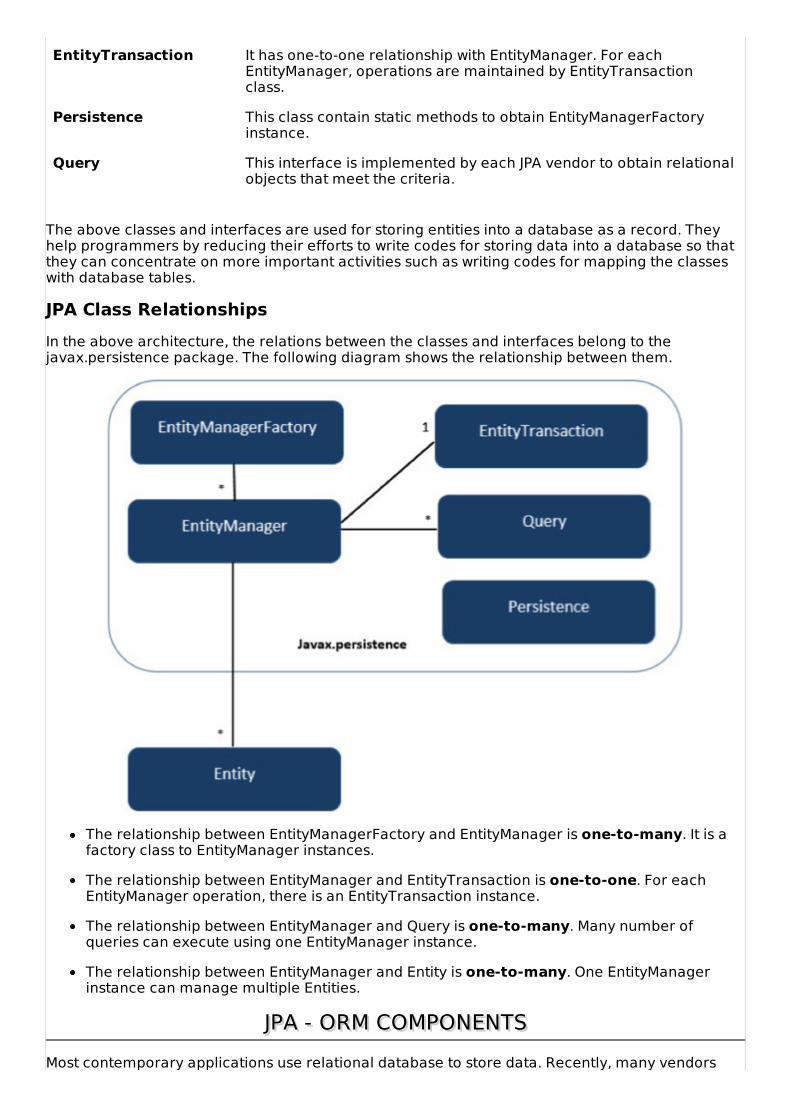
JPA Class RelationshipsIn the above architecture, the relations between the classes and interfaces belong to thejavax.persistence package. The following diagram shows the relationship between them.
The relationship between EntityManagerFactory and EntityManager is one-to-many. It is afactory class to EntityManager instances.
The relationship between EntityManager and EntityTransaction is one-to-one. For eachEntityManager operation, there is an EntityTransaction instance.
The relationship between EntityManager and Query is one-to-many. Many number ofqueries can execute using one EntityManager instance.
The relationship between EntityManager and Entity is one-to-many. One EntityManagerinstance can manage multiple Entities.
JPA - ORM COMPONENTSJPA - ORM COMPONENTSMost contemporary applications use relational database to store data. Recently, many vendors

switched to object database to reduce their burden on data maintenance. It means objectdatabase or object relational technologies are taking care of storing, retrieving, updating, andmaintaining data. The core part of this object relational technology is mapping orm.xml files. Asxml does not require compilation, we can easily make changes to multiple data sources with lessadministration.
Object Relational MappingObject Relational Mapping ORM briefly tells you about what is ORM and how it works. ORM is aprogramming ability to covert data from object type to relational type and vice versa.
The main feature of ORM is mapping or binding an object to its data in the database. Whilemapping, we have to consider the data, the type of data, and its relations with self-entity or entitiesin any other table.
Advanced FeaturesIdiomatic persistence : It enables you to write the persistence classes using object orientedclasses.
High Performance : It has many fetching techniques and hopeful locking techniques.
Reliable : It is highly stable and Used by many professional programmers.
ORM ArchitectureThe ORM architecture looks as follows.
The above architecture explains how object data is stored into relational database in three phases.
Phase1The first phase, named as the object data phase, contains POJO classes, service interfaces, andclasses. It is the main business component layer, which has business logic operations andattributes.
For example let us take an employee database as schema.
Employee POJO class contains attributes such as ID, name, salary, and designation. It alsocontains methods like setter and getter of those attributes.
Employee DAO/Service classes contain service methods such as create employee, findemployee, and delete employee.
Phase 2The second phase, named as mapping or persistence phase, contains JPA provider, mapping fileORM. xml, JPA Loader, and Object Grid.
JPA Provider : It is the vendor product that contains the JPA flavor javax. persistence. Forexample Eclipselink, Toplink, Hibernate, etc.
Mapping file : The mapping file ORM. xml contains mapping configuration between the datain a POJO class and data in a relational database.
JPA Loader : The JPA loader works like a cache memory. It can load the relational grid data.It works like a copy of database to interact with service classes for POJO data attributesofPOJOclass.
Object Grid : It is a temporary location that can store a copy of relational data, like a cachememory. All queries against the database is first effected on the data in the object grid. Onlyafter it is committed, it affects the main database.
Phase 3The third phase is the relational data phase. It contains the relational data that is logicallyconnected to the business component. As discussed above, only when the business componentcommits the data, it is stored into the database physically. Until then, the modified data is stored ina cache memory as a grid format. The process of the obtaining the data is identical to that ofstoring the data.
The mechanism of the programmatic interaction of above three phases is called as objectrelational mapping.
Mapping.xmlThe mapping.xml file is to instruct the JPA vendor to map the Entity classes with the databasetables.
Let us take an example of Employee entity which contains four attributes. The POJO class ofEmployee entity named Employee.java is as follows:
public class Employee { private int eid; private String ename; private double salary; private String deg; public Employee(int eid, String ename, double salary, String deg) { super( ); this.eid = eid; this.ename = ename; this.salary = salary; this.deg = deg; } public Employee( ) { super(); } public int getEid( ) { return eid; } public void setEid(int eid) {
this.eid = eid; } public String getEname( ) { return ename; } public void setEname(String ename) { this.ename = ename; } public double getSalary( ) { return salary; } public void setSalary(double salary) { this.salary = salary; } public String getDeg( ) { return deg; } public void setDeg(String deg) { this.deg = deg; }}
The above code is the Employee entity POJO class. It contain four attributes eid, ename, salary,and deg. Consider these attributes as the table fields in a table and eid as the primary key of thistable. Now we have to design the hibernate mapping file for it. The mapping file namedmapping.xml is as follows:
<? xml version="1.0" encoding="UTF-8" ?><entity-mappings xmlns="http://java.sun.com/xml/ns/persistence/orm" xmlns:xsi="http://www.w3.org/2001/XMLSchema-instance" xsi:schemaLocation="http://java.sun.com/xml/ns/persistence/orm http://java.sun.com/xml/ns/persistence/orm_1_0.xsd" version="1.0"> <description> XML Mapping file</description> <entity > <table name="EMPLOYEETABLE"/> <attributes> <id name="eid"> <generated-value strategy="TABLE"/> </id> <basic name="ename"> <column name="EMP_NAME" length="100"/> </basic> <basic name="salary"> </basic> <basic name="deg"> </basic> </attributes> </entity></entity-mappings>
The above script is used for mapping the entity class with the database table. In this file
<entity-mappings> : tag defines the schema definition to allow entity tags into xml file.
<description> : tag provides a description about application.
<entity> : tag defines the entity class which you want to convert into table in a database.Attribute class defines the POJO entity class name.

<table> : tag defines the table name. If you want to have identical names for both the classas well as the table, then this tag is not necessary.
<attributes> : tag defines the attributes fieldsinatable.
<id> : tag defines the primary key of the table. The <generated-value> tag defines how toassign the primary key value such as Automatic, Manual, or taken from Sequence.
<basic> : tag is used for defining remaining attributes for table.
<column-name> : tag is used to define user-defined table field names in the table.
AnnotationsGenerally xml files are used to configure specific components, or mapping two differentspecifications of components. In our case, we have to maintain xml files separately in aframework. That means while writing a mapping xml file, we need to compare the POJO classattributes with entity tags in the mapping.xml file.
Here is the solution. In the class definition, we can write the configuration part using annotations.Annotations are used for classes, properties, and methods. Annotations start with ‘@’ symbol.Annotations are declared prior to a class, property, or method. All annotations of JPA are defined inthe javax.persistence package.
Here list of annotations used in our examples are given below.
Annotation Description
@Entity Declares the class as an entity or a table.
@Table Declares table name.
@Basic Specifies non-constraint fields explicitly.
@Embedded Specifies the properties of class or an entity whose value is an instanceof an embeddable class.
@Id Specifies the property, use for identity primarykeyofatable of the class.
@GeneratedValue Specifies how the identity attribute can be initialized such as automatic,manual, or value taken from a sequence table.
@Transient Specifies the property that is not persistent, i.e., the value is neverstored in the database.
@Column Specifies the column attribute for the persistence property.
@SequenceGenerator Specifies the value for the property that is specified in the@GeneratedValue annotation. It creates a sequence.
@TableGenerator Specifies the value generator for the property specified in the@GeneratedValue annotation. It creates a table for value generation.
@AccessType This type of annotation is used to set the access type. If you set@AccessTypeFIELD, then access occurs Field wise. If you set@AccessTypePROPERTY, then access occurs Property wise.
@JoinColumn Specifies an entity association or entity collection. This is used in many-to-one and one-to-many associations.
@UniqueConstraint Specifies the fields and the unique constraints for the primary or thesecondary table.
@ColumnResult References the name of a column in the SQL query using select clause.
@ManyToMany Defines a many-to-many relationship between the join Tables.

@ManyToOne Defines a many-to-one relationship between the join Tables.
@OneToMany Defines a one-to-many relationship between the join Tables.
@OneToOne Defines a one-to-one relationship between the join Tables.
@NamedQueries specifies list of named queries.
@NamedQuery Specifies a Query using static name.
Java Bean StandardThe Java class encapsulates the instance values and their behaviors into a single unit called object.Java Bean is a temporary storage and reusable component or an object. It is a serializable classwhich has a default constructor and getter and setter methods to initialize the instance attributesindividually.
Bean ConventionsBean contains its default constructor or a file that contains serialized instance. Therefore, abean can instantiate another bean.
The properties of a bean can be segregated into Boolean properties or non-Booleanproperties.
Non-Boolean property contains getter and setter methods.
Boolean property contain setter and is method.
Getter method of any property should start with small lettered get javamethodconvention andcontinued with a field name that starts with capital letter. For example, the field name issalary therefore the getter method of this field is getSalary .
Setter method of any property should start with small lettered set javamethodconvention,continued with a field name that starts with capital letter and the argument value to set tofield. For example, the field name is salary therefore the setter method of this field issetSalary doublesal.
For Boolean property, is method to check if it is true or false. For Example the Booleanproperty empty, the is method of this field is isEmpty .
JPA - INSTALLATIONJPA - INSTALLATIONThis chapter takes you through the process of setting up JPA on Windows and Linux based systems.JPA can be easily installed and integrated with your current Java environment following a fewsimple steps without any complex setup procedures. User administration is required whileinstallation.
System Requirements
JDK Java SE 2 JDK 1.5 or above
Memory 1 GB RAM recommended
Disk Space No minimum requirement
Operating System Version Windows XP or above, Linux
Let us now proceed with the steps to install JPA.
Step1: Verify your Java Installation

First of all, you need to have Java Software Development Kit SDK installed on your system. To verifythis, execute any of the following two commands depending on the platform you are working on.
If the Java installation has been done properly, then it will display the current version andspecification of your Java installation. A sample output is given in the following table.
Platform Command Sample Output
WindowsOpen command console andtype:
\>java –version
Java version "1.7.0_60"
Java TM SE Run Time Environment build1.7.060 − b19
Java Hotspot TM 64-bit Server VM build24.60 − b09, mixedmode
LinuxOpen command terminal andtype:
$java –version
java version "1.7.0_25"
Open JDK Runtime Environment rhel − 2.3.10.4.el64 − x8664
Open JDK 64-Bit Server VM build23.7 − b01, mixedmode
We assume the readers of this tutorial have Java SDK version 1.7.0_60 installed on theirsystem.
In case you do not have Java SDK, download its current version fromhttp://www.oracle.com/technetwork/java/javase/downloads/index.html and have it installed.
Step 2: Set your Java EnvironmentSet the environment variable JAVA_HOME to point to the base directory location where Java isinstalled on your machine. For example,
Platform Description
Windows Set JAVA_HOME to C:\ProgramFiles\java\jdk1.7.0_60
Linux Export JAVA_HOME=/usr/local/java-current
Append the full path of Java compiler location to the System Path.
Platform Description
Windows Append the String "C:\Program Files\Java\jdk1.7.0_60\bin" to the end of the systemvariable PATH.
Linux Export PATH=PATH: JAVA_HOME/bin/
Execute the command java -version from the command prompt as explained above.
Step3: Installing JPAYou can go through the JPA installation by using any of the JPA Providers from this tutorial, e.g.,Eclipselink, Hibernate. Let us follow the JPA installation using Eclipselink. For JPA programming, werequire to follow the specific folder framework, therefore it is better to use IDE.
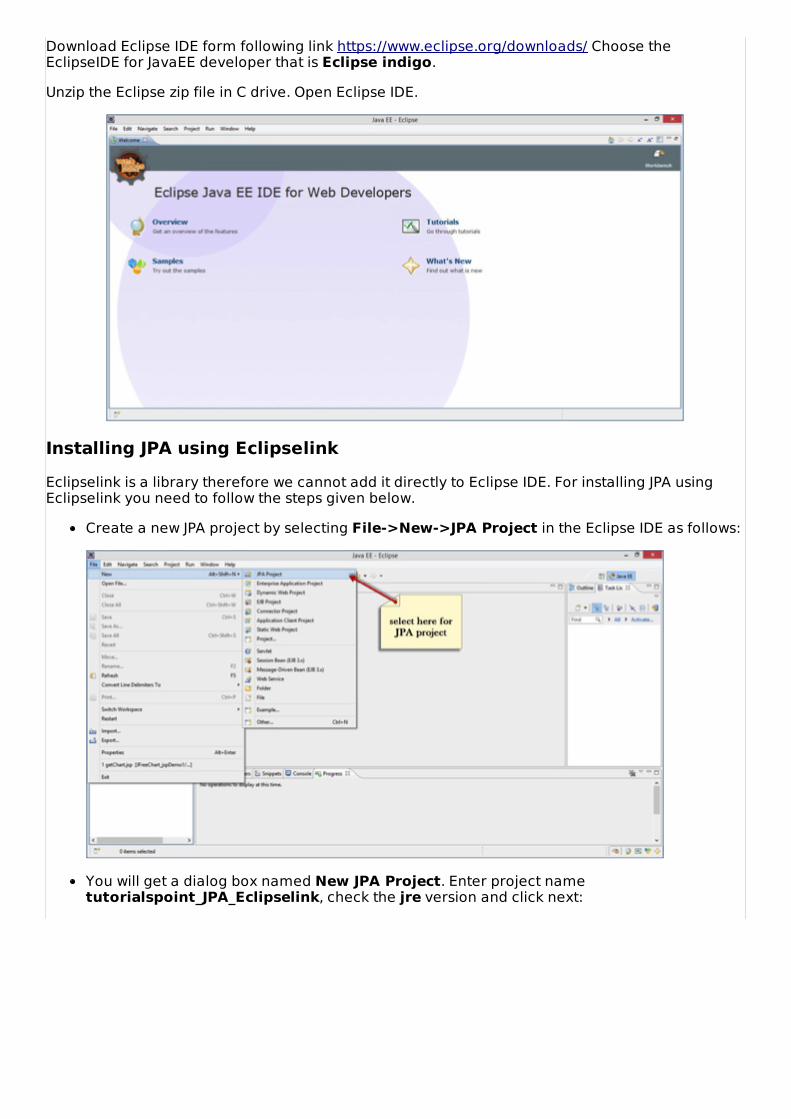
Download Eclipse IDE form following link https://www.eclipse.org/downloads/ Choose theEclipseIDE for JavaEE developer that is Eclipse indigo.
Unzip the Eclipse zip file in C drive. Open Eclipse IDE.
Installing JPA using EclipselinkEclipselink is a library therefore we cannot add it directly to Eclipse IDE. For installing JPA usingEclipselink you need to follow the steps given below.
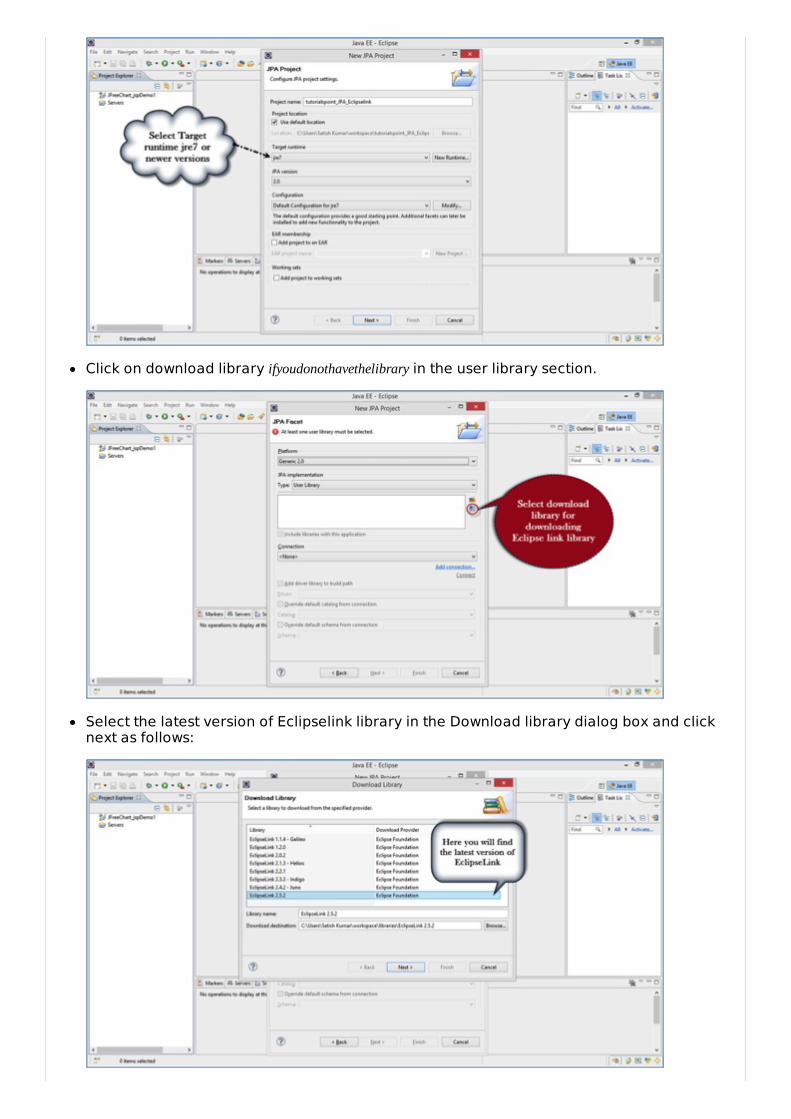
Create a new JPA project by selecting File->New->JPA Project in the Eclipse IDE as follows:
You will get a dialog box named New JPA Project. Enter project nametutorialspoint_JPA_Eclipselink, check the jre version and click next:
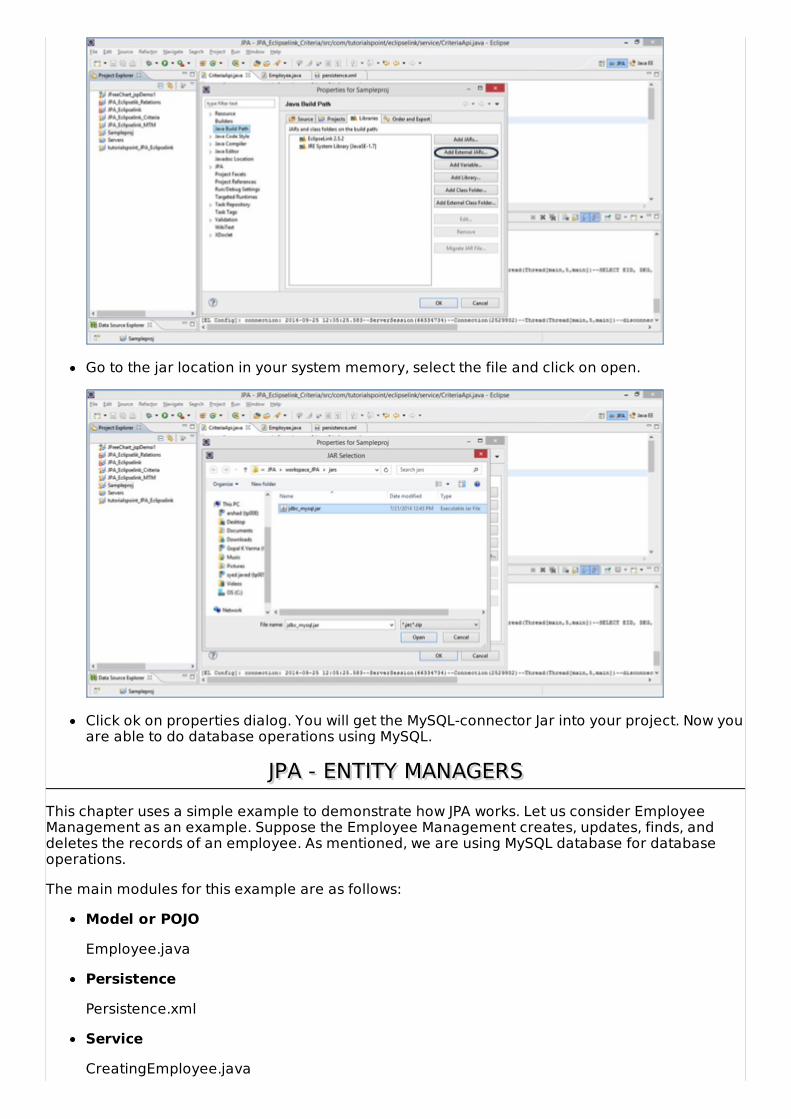
Click on download library ifyoudonothavethelibrary in the user library section.
Select the latest version of Eclipselink library in the Download library dialog box and clicknext as follows:

Accept the terms of license and click finish for download library.
6. Downloading starts as is shown in the following screenshot.
After downloading, select the downloaded library in the user library section and click finish.

Finally you get the project file in the Package Explorer in Eclipse IDE. Extract all files, youwill get the folder and file hierarchy as follows:
Adding MySQL connector to ProjectAny example that we discuss here requires database connectivity. Let us consider MySQL databasefor database operations. It requires mysql-connector jar to interact with a Java program.
Follow the steps to configure the database jar in your project.
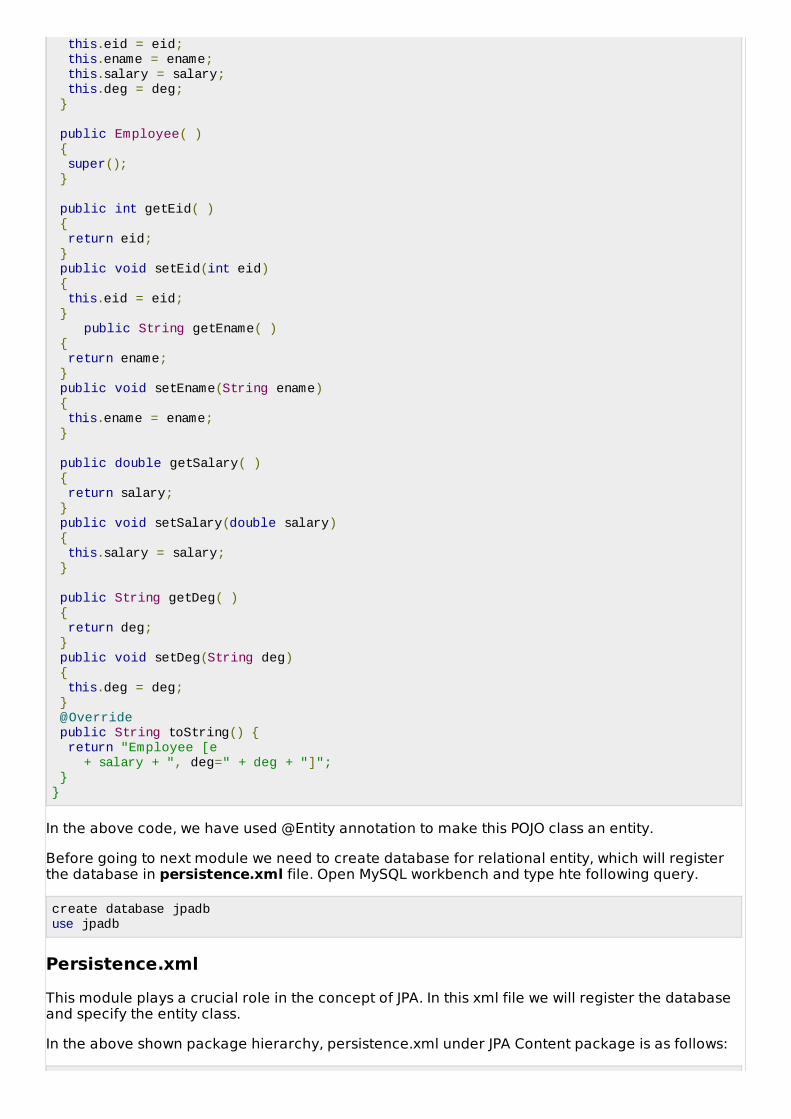
Go to Project properties -> Java Build Path by right click on it. You will get a dialog box asshown in the following screen-shot. Click on Add External Jars.
Go to the jar location in your system memory, select the file and click on open.
Click ok on properties dialog. You will get the MySQL-connector Jar into your project. Now youare able to do database operations using MySQL.
JPA - ENTITY MANAGERSJPA - ENTITY MANAGERSThis chapter uses a simple example to demonstrate how JPA works. Let us consider EmployeeManagement as an example. Suppose the Employee Management creates, updates, finds, anddeletes the records of an employee. As mentioned, we are using MySQL database for databaseoperations.
The main modules for this example are as follows:
Model or POJO
Employee.java
Persistence
Persistence.xml
Service
CreatingEmployee.java

UpdatingEmployee.java
FindingEmployee.java
DeletingEmployee.java
Let us take the package hierarchy which we have used in the JPA installation with Eclipselink.Follow the hierarchy for this example as shown below:
Creating EntitiesEntities are nothing but beans or models. In this example, we will use Employee as an entity. eid,ename, salary, and deg are the attributes of this entity. It contains a default constructor as well asthe setter and getter methods of those attributes.
In the above shown hierarchy, create a package named ‘com.tutorialspoint.eclipselink.entity’,under ‘src’ Source package. Create a class named Employee.java under given package as follows:
package com.tutorialspoint.eclipselink.entity;
import javax.persistence.Entity;import javax.persistence.GeneratedValue;import javax.persistence.GenerationType;import javax.persistence.Id;import javax.persistence.Table;
@Entity@Tablepublic class Employee { @Id @GeneratedValue(strategy= GenerationType.AUTO) private int eid; private String ename; private double salary; private String deg; public Employee(int eid, String ename, double salary, String deg) { super( );
this.eid = eid; this.ename = ename; this.salary = salary; this.deg = deg; } public Employee( ) { super(); } public int getEid( ) { return eid; } public void setEid(int eid) { this.eid = eid; } public String getEname( ) { return ename; } public void setEname(String ename) { this.ename = ename; } public double getSalary( ) { return salary; } public void setSalary(double salary) { this.salary = salary; } public String getDeg( ) { return deg; } public void setDeg(String deg) { this.deg = deg; } @Override public String toString() { return "Employee [e + salary + ", deg=" + deg + "]"; }}
In the above code, we have used @Entity annotation to make this POJO class an entity.
Before going to next module we need to create database for relational entity, which will registerthe database in persistence.xml file. Open MySQL workbench and type hte following query.
create database jpadbuse jpadb
Persistence.xmlThis module plays a crucial role in the concept of JPA. In this xml file we will register the databaseand specify the entity class.
In the above shown package hierarchy, persistence.xml under JPA Content package is as follows:

<?xml version="1.0" encoding="UTF-8"?><persistence version="2.0" xmlns="http://java.sun.com/xml/ns/persistence" xmlns:xsi="http://www.w3.org/2001/XMLSchema-instance" xsi:schemaLocation="http://java.sun.com/xml/ns/persistence http://java.sun.com/xml/ns/persistence/persistence_2_0.xsd"> <persistence-unit name="Eclipselink_JPA" transaction-type="RESOURCE_LOCAL"> <class>com.tutorialspoint.eclipselink.entity.Employee</class> <properties> <property name="javax.persistence.jdbc.url" value="jdbc:mysql://localhost:3306/jpadb"/> <property name="javax.persistence.jdbc.user" value="root"/> <property name="javax.persistence.jdbc.password" value="root"/> <property name="javax.persistence.jdbc.driver" value="com.mysql.jdbc.Driver"/> <property name="eclipselink.logging.level" value="FINE"/> <property name="eclipselink.ddl-generation" value="create-tables"/> </properties> </persistence-unit></persistence>
In the above xml, <persistence-unit> tag is defined with a specific name for JPA persistence. The<class> tag defines entity class with package name. The <properties> tag defines all theproperties, and <property> tag defines each property such as database registration, URLspecification, username, and password. These are the Eclipselink properties. This file will configurethe database.
Persistence OperationsPersistence operations are used for interacting with a database and they are load and storeoperations. In a business component, all the persistence operations fall under service classes.
In the above shown package hierarchy, create a package named‘com.tutorialspoint.eclipselink.service’, under ‘src’ source package. All the service classesnamed as CreateEmloyee.java, UpdateEmployee.java, FindEmployee.java, andDeleteEmployee.java. comes under the given package as follows:
Create EmployeeThe following code segment shows how to create an Employee class namedCreateEmployee.java.
package com.tutorialspoint.eclipselink.service;
import javax.persistence.EntityManager;import javax.persistence.EntityManagerFactory;import javax.persistence.Persistence;import com.tutorialspoint.eclipselink.entity.Employee;
public class CreateEmployee { public static void main( String[ ] args ) { EntityManagerFactory emfactory = Persistence. createEntityManagerFactory( "Eclipselink_JPA" ); EntityManager entitymanager = emfactory. createEntityManager( ); entitymanager.getTransaction( ).begin( ); Employee employee = new Employee( ); employee.setEid( 1201 ); employee.setEname( "Gopal" ); employee.setSalary( 40000 ); employee.setDeg( "Technical Manager" ); entitymanager.persist( employee ); entitymanager.getTransaction( ).commit( );
entitymanager.close( ); emfactory.close( ); }}
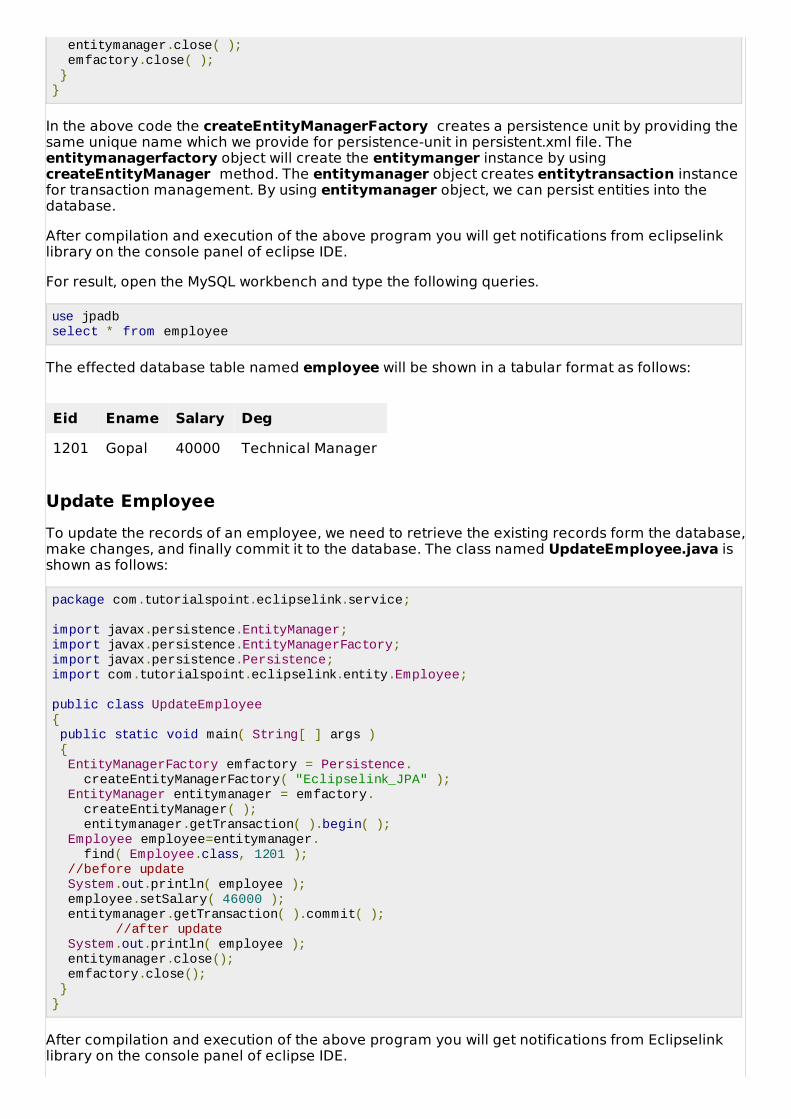
In the above code the createEntityManagerFactory creates a persistence unit by providing thesame unique name which we provide for persistence-unit in persistent.xml file. Theentitymanagerfactory object will create the entitymanger instance by usingcreateEntityManager method. The entitymanager object creates entitytransaction instancefor transaction management. By using entitymanager object, we can persist entities into thedatabase.
After compilation and execution of the above program you will get notifications from eclipselinklibrary on the console panel of eclipse IDE.
For result, open the MySQL workbench and type the following queries.
use jpadbselect * from employee
The effected database table named employee will be shown in a tabular format as follows:
Eid Ename Salary Deg
1201 Gopal 40000 Technical Manager
Update EmployeeTo update the records of an employee, we need to retrieve the existing records form the database,make changes, and finally commit it to the database. The class named UpdateEmployee.java isshown as follows:
package com.tutorialspoint.eclipselink.service;
import javax.persistence.EntityManager;import javax.persistence.EntityManagerFactory;import javax.persistence.Persistence;import com.tutorialspoint.eclipselink.entity.Employee;
public class UpdateEmployee { public static void main( String[ ] args ) { EntityManagerFactory emfactory = Persistence. createEntityManagerFactory( "Eclipselink_JPA" ); EntityManager entitymanager = emfactory. createEntityManager( ); entitymanager.getTransaction( ).begin( ); Employee employee=entitymanager. find( Employee.class, 1201 ); //before update System.out.println( employee ); employee.setSalary( 46000 ); entitymanager.getTransaction( ).commit( ); //after update System.out.println( employee ); entitymanager.close(); emfactory.close(); }}
After compilation and execution of the above program you will get notifications from Eclipselinklibrary on the console panel of eclipse IDE.
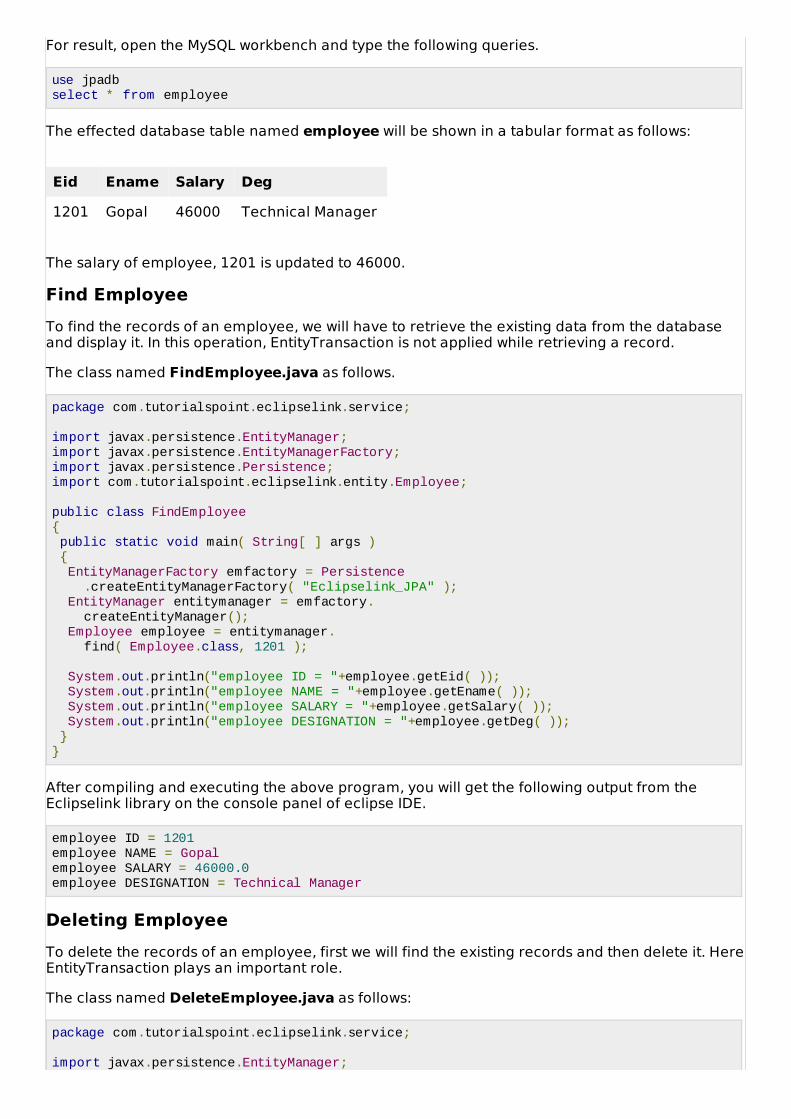
For result, open the MySQL workbench and type the following queries.
use jpadbselect * from employee
The effected database table named employee will be shown in a tabular format as follows:
Eid Ename Salary Deg
1201 Gopal 46000 Technical Manager
The salary of employee, 1201 is updated to 46000.
Find EmployeeTo find the records of an employee, we will have to retrieve the existing data from the databaseand display it. In this operation, EntityTransaction is not applied while retrieving a record.
The class named FindEmployee.java as follows.
package com.tutorialspoint.eclipselink.service;
import javax.persistence.EntityManager;import javax.persistence.EntityManagerFactory;import javax.persistence.Persistence;import com.tutorialspoint.eclipselink.entity.Employee;
public class FindEmployee { public static void main( String[ ] args ) { EntityManagerFactory emfactory = Persistence .createEntityManagerFactory( "Eclipselink_JPA" ); EntityManager entitymanager = emfactory. createEntityManager(); Employee employee = entitymanager. find( Employee.class, 1201 ); System.out.println("employee ID = "+employee.getEid( )); System.out.println("employee NAME = "+employee.getEname( )); System.out.println("employee SALARY = "+employee.getSalary( )); System.out.println("employee DESIGNATION = "+employee.getDeg( )); }}
After compiling and executing the above program, you will get the following output from theEclipselink library on the console panel of eclipse IDE.
employee ID = 1201employee NAME = Gopalemployee SALARY = 46000.0employee DESIGNATION = Technical Manager
Deleting EmployeeTo delete the records of an employee, first we will find the existing records and then delete it. HereEntityTransaction plays an important role.
The class named DeleteEmployee.java as follows:
package com.tutorialspoint.eclipselink.service;
import javax.persistence.EntityManager;

import javax.persistence.EntityManagerFactory;import javax.persistence.Persistence;import com.tutorialspoint.eclipselink.entity.Employee;
public class DeleteEmployee { public static void main( String[ ] args ) { EntityManagerFactory emfactory = Persistence. createEntityManagerFactory( "Eclipselink_JPA" ); EntityManager entitymanager = emfactory. createEntityManager( ); entitymanager.getTransaction( ).begin( ); Employee employee=entitymanager. find( Employee.class, 1201 ); entitymanager.remove( employee ); entitymanager.getTransaction( ).commit( ); entitymanager.close( ); emfactory.close( ); }}
After compilation and execution of the above program you will get notifications from Eclipselinklibrary on the console panel of eclipse IDE.
For result, open the MySQL workbench and type the following queries.
use jpadbselect * from employee
The effected database named employee will have null records.
After completion of all the modules in this example, the package and file hierarchy looks asfollows:
JPA - JPQLJPA - JPQLThis chapter describes about JPQL and how it works with persistence units. In this chapter, thegiven examples follow the same package hierarchy, which we used in the previous chapter.

Java Persistence Query languageJPQL stands for Java Persistence Query Language. It is used to create queries against entities tostore in a relational database. JPQL is developed based on SQL syntax. But it won’t affect thedatabase directly.
JPQL can retrieve data using SELECT clause, can do bulk updates using UPDATE clause and DELETEclause.
Query StructureJPQL syntax is very similar to the syntax of SQL. Having SQL like syntax is an advantage becauseSQL is simple and being widely used. SQL works directly against relational database tables,records, and fields, whereas JPQL works with Java classes and instances.
For example, a JPQL query can retrieve an entity object rather than field result set from adatabase, as with SQL. The JPQL query structure as follows.
SELECT ... FROM ...[WHERE ...][GROUP BY ... [HAVING ...]][ORDER BY ...]
The structure of JPQL DELETE and UPDATE queries are as follows.
DELETE FROM ... [WHERE ...] UPDATE ... SET ... [WHERE ...]
Scalar and Aggregate FunctionsScalar functions return resultant values based on input values. Aggregate functions return theresultant values by calculating the input values.
We will use the same example Employee Management as in the previous chapter. Here we will gothrough the service classes using scalar and aggregate functions of JPQL.
Let us assume the jpadb.employee table contains following records.
Eid Ename Salary Deg
1201 Gopal 40000 Technical Manager
1202 Manisha 40000 Proof Reader
1203 Masthanvali 40000 Technical Writer
1204 Satish 30000 Technical Writer
1205 Krishna 30000 Technical Writer

1206 Kiran 35000 Proof Reader
Create a class named ScalarandAggregateFunctions.java undercom.tutorialspoint.eclipselink.service package as follows.
package com.tutorialspoint.eclipselink.service;
import java.util.List;import javax.persistence.EntityManager;import javax.persistence.EntityManagerFactory;import javax.persistence.Persistence;import javax.persistence.Query;
public class ScalarandAggregateFunctions { public static void main( String[ ] args ) { EntityManagerFactory emfactory = Persistence. createEntityManagerFactory( "Eclipselink_JPA" ); EntityManager entitymanager = emfactory. createEntityManager(); //Scalar function Query query = entitymanager. createQuery("Select UPPER(e.ename) from Employee e"); List<String> list=query.getResultList(); for(String e:list) { System.out.println("Employee NAME :"+e); } //Aggregate function Query query1 = entitymanager. createQuery("Select MAX(e.salary) from Employee e"); Double result=(Double) query1.getSingleResult(); System.out.println("Max Employee Salary :"+result); }}
After compilation and execution of the above program you will get the following output on theconsole panel of Eclipse IDE.
Employee NAME :GOPALEmployee NAME :MANISHAEmployee NAME :MASTHANVALIEmployee NAME :SATISHEmployee NAME :KRISHNAEmployee NAME :KIRANax Employee Salary :40000.0
Between, And, Like KeywordsBetween, And, and Like are the main keywords of JPQL. These keywords are used after Whereclause in a query.
Create a class named BetweenAndLikeFunctions.java undercom.tutorialspoint.eclipselink.service package as follows:
package com.tutorialspoint.eclipselink.service;
import java.util.List;import javax.persistence.EntityManager;import javax.persistence.EntityManagerFactory;import javax.persistence.Persistence;import javax.persistence.Query;import com.tutorialspoint.eclipselink.entity.Employee;

public class BetweenAndLikeFunctions { public static void main( String[ ] args ) { EntityManagerFactory emfactory = Persistence. createEntityManagerFactory( "Eclipselink_JPA" ); EntityManager entitymanager = emfactory. createEntityManager(); //Between Query query = entitymanager. createQuery( "Select e " + "from Employee e " + "where e.salary " + "Between 30000 and 40000" ) List<Employee> list=(List<Employee>)query.getResultList( ); for( Employee e:list ) { System.out.print("Employee ID :"+e.getEid( )); System.out.println("\t Employee salary :"+e.getSalary( )); } //Like Query query1 = entitymanager. createQuery("Select e " + "from Employee e " + "where e.ename LIKE 'M%'"); List<Employee> list1=(List<Employee>)query1.getResultList( ); for( Employee e:list1 ) { System.out.print("Employee ID :"+e.getEid( )); System.out.println("\t Employee name :"+e.getEname( )); } }}
After compiling and executing the above program, you will get the following output in the consolepanel of Eclipse IDE.
Employee ID :1201 Employee salary :40000.0Employee ID :1202 Employee salary :40000.0Employee ID :1203 Employee salary :40000.0Employee ID :1204 Employee salary :30000.0Employee ID :1205 Employee salary :30000.0Employee ID :1206 Employee salary :35000.0
Employee ID :1202 Employee name :ManishaEmployee ID :1203 Employee name :Masthanvali
OrderingTo order the records in JPQL, we use the ORDER BY clause. The usage of this clause is same as inSQL, but it deals with entities. The following example shows how to use the ORDER BY clause.
Create a class Ordering.java under com.tutorialspoint.eclipselink.service package as follows:
package com.tutorialspoint.eclipselink.service;
import java.util.List;import javax.persistence.EntityManager;import javax.persistence.EntityManagerFactory;import javax.persistence.Persistence;import javax.persistence.Query;import com.tutorialspoint.eclipselink.entity.Employee;
public class Ordering { public static void main( String[ ] args )

{ EntityManagerFactory emfactory = Persistence. createEntityManagerFactory( "Eclipselink_JPA" ); EntityManager entitymanager = emfactory. createEntityManager(); //Between Query query = entitymanager. createQuery( "Select e " + "from Employee e " + "ORDER BY e.ename ASC" ); List<Employee> list=(List<Employee>)query.getResultList( ); for( Employee e:list ) { System.out.print("Employee ID :"+e.getEid( )); System.out.println("\t Employee Name :"+e.getEname( )); } }}
compiling and executing the above program you will produce the following output in the consolepanel of Eclipse IDE.
Employee ID :1201 Employee Name :GopalEmployee ID :1206 Employee Name :KiranEmployee ID :1205 Employee Name :KrishnaEmployee ID :1202 Employee Name :ManishaEmployee ID :1203 Employee Name :MasthanvaliEmployee ID :1204 Employee Name :Satish
Named QueriesA @NamedQuery annotation is defined as a query with a predefined query string that isunchangeable. In contrast to dynamic queries, named queries may improve code organization byseparating the JPQL query strings from POJO. It also passes the query parameters rather thanembedding the literals dynamically into the query string and therefore produces more efficientqueries.
First of all, add @NamedQuery annotation to the Employee entity class named Employee.javaunder com.tutorialspoint.eclipselink.entity package as follows:
package com.tutorialspoint.eclipselink.entity;
import javax.persistence.Entity;import javax.persistence.GeneratedValue;import javax.persistence.GenerationType;import javax.persistence.Id;import javax.persistence.NamedQuery;import javax.persistence.Table;
@Entity@Table@NamedQuery(query = "Select e from Employee e where e.eid = :id", name = "find employee by id")public class Employee { @Id @GeneratedValue(strategy= GenerationType.AUTO) private int eid; private String ename; private double salary; private String deg; public Employee(int eid, String ename, double salary, String deg) { super( ); this.eid = eid; this.ename = ename;

this.salary = salary; this.deg = deg; } public Employee( ) { super(); } public int getEid( ) { return eid; } public void setEid(int eid) { this.eid = eid; } public String getEname( ) { return ename; } public void setEname(String ename) { this.ename = ename; } public double getSalary( ) { return salary; } public void setSalary(double salary) { this.salary = salary; } public String getDeg( ) { return deg; } public void setDeg(String deg) { this.deg = deg; } @Override public String toString() { return "Employee [e + salary + ", deg=" + deg + "]"; }}
Create a class named NamedQueries.java under com.tutorialspoint.eclipselink.servicepackage as follows:
package com.tutorialspoint.eclipselink.service;
import java.util.List;import javax.persistence.EntityManager;import javax.persistence.EntityManagerFactory;import javax.persistence.Persistence;import javax.persistence.Query;import com.tutorialspoint.eclipselink.entity.Employee;
public class NamedQueries { public static void main( String[ ] args ) { EntityManagerFactory emfactory = Persistence. createEntityManagerFactory( "Eclipselink_JPA" ); EntityManager entitymanager = emfactory.

createEntityManager(); Query query = entitymanager.createNamedQuery( "find employee by id"); query.setParameter("id", 1204); List<Employee> list = query.getResultList( ); for( Employee e:list ) { System.out.print("Employee ID :"+e.getEid( )); System.out.println("\t Employee Name :"+e.getEname( )); } }}
After compiling and executing of the above program you will get the following output in theconsole panel of Eclipse IDE.
Employee ID :1204 Employee Name :Satish
After adding all the above classes the package hierarchy looks as follows:
Eager and Lazy FetchingThe most important concept of JPA is to make a duplicate copy of the database in the cachememory. While transacting with a database, the JPA first creates a duplicate set of data and onlywhen it is committed using an entity manager, the changes are effected into the database.
There are two ways of fetching records from the database.
Eager fetchIn eager fetching, related child objects are uploaded automatically while fetching a particularrecord.
Lazy fetchIn lazy fetching, related objects are not uploaded automatically unless you specifically request forthem. First of all, it checks the availability of related objects and notifies. Later, if you call any ofthe getter method of that entity, then it fetches all the records.
Lazy fetch is possible when you try to fetch the records for the first time. That way, a copy of thewhole record is already stored in the cache memory. Performance-wise, lazy fetch is preferable.
JPA - ADVANCED MAPPINGSJPA - ADVANCED MAPPINGS
JPA is a library which is released with Java specifications. Therefore, it supports all the object-oriented concepts for entity persistence. Till now, we are done with the basics of object relationalmapping. This chapter takes you through the advanced mappings between objects and relationalentities.
Inheritance StrategiesInheritance is the core concept of any object-oriented language, therefore we can use inheritancerelationships or strategies between entities. JPA support three types of inheritance strategies:SINGLE_TABLE, JOINED_TABLE, and TABLE_PER_CONCRETE_CLASS.
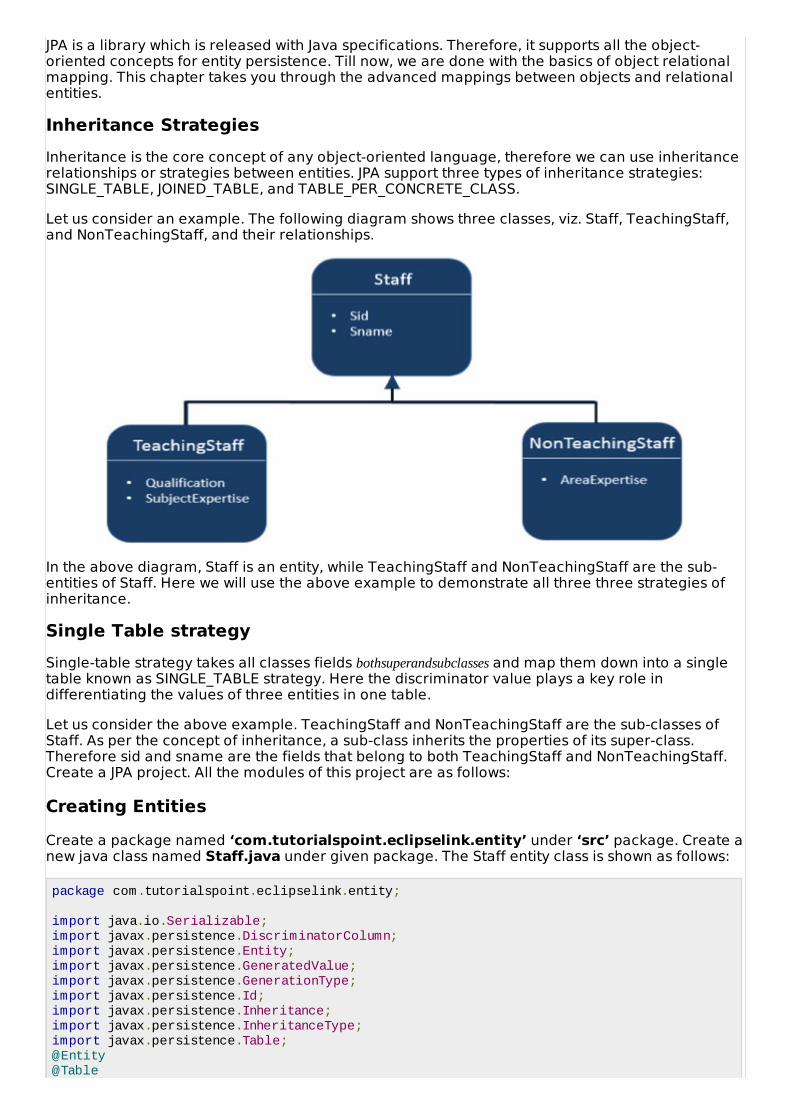
Let us consider an example. The following diagram shows three classes, viz. Staff, TeachingStaff,and NonTeachingStaff, and their relationships.
In the above diagram, Staff is an entity, while TeachingStaff and NonTeachingStaff are the sub-entities of Staff. Here we will use the above example to demonstrate all three three strategies ofinheritance.
Single Table strategySingle-table strategy takes all classes fields bothsuperandsubclasses and map them down into a singletable known as SINGLE_TABLE strategy. Here the discriminator value plays a key role indifferentiating the values of three entities in one table.
Let us consider the above example. TeachingStaff and NonTeachingStaff are the sub-classes ofStaff. As per the concept of inheritance, a sub-class inherits the properties of its super-class.Therefore sid and sname are the fields that belong to both TeachingStaff and NonTeachingStaff.Create a JPA project. All the modules of this project are as follows:
Creating EntitiesCreate a package named ‘com.tutorialspoint.eclipselink.entity’ under ‘src’ package. Create anew java class named Staff.java under given package. The Staff entity class is shown as follows:
package com.tutorialspoint.eclipselink.entity;
import java.io.Serializable;import javax.persistence.DiscriminatorColumn;import javax.persistence.Entity;import javax.persistence.GeneratedValue;import javax.persistence.GenerationType;import javax.persistence.Id;import javax.persistence.Inheritance;import javax.persistence.InheritanceType;import javax.persistence.Table;@Entity@Table
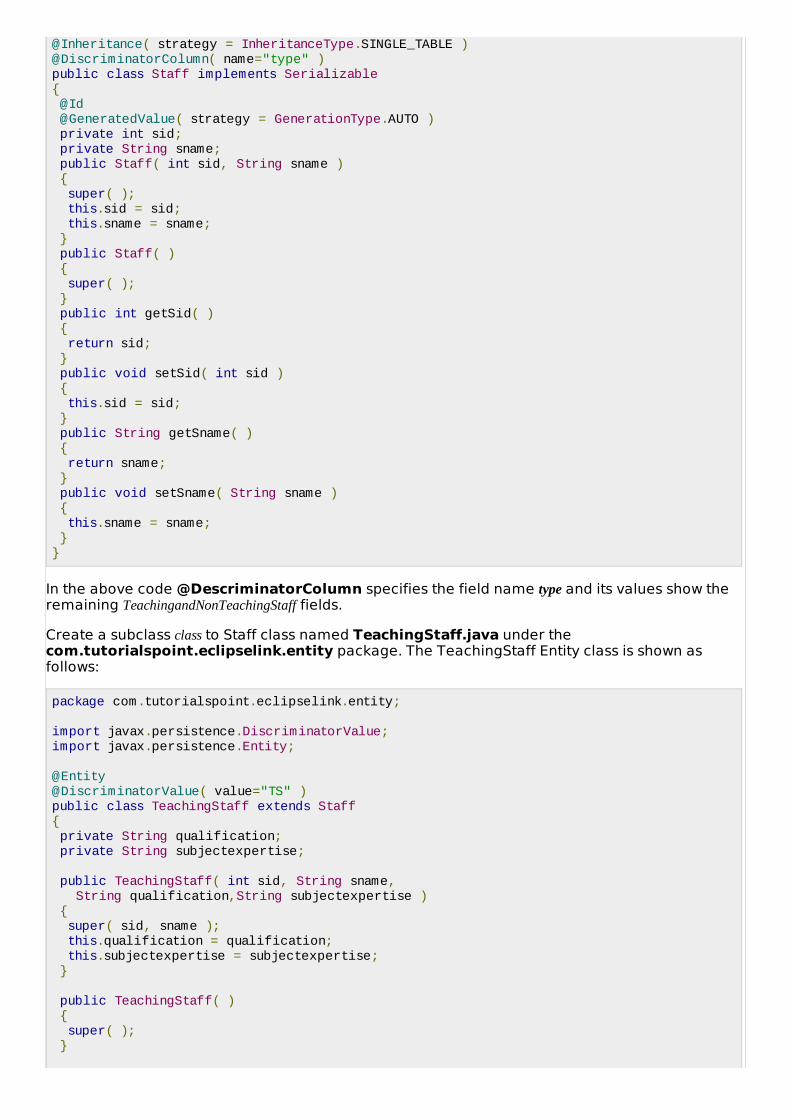
@Inheritance( strategy = InheritanceType.SINGLE_TABLE )@DiscriminatorColumn( name="type" )public class Staff implements Serializable { @Id @GeneratedValue( strategy = GenerationType.AUTO ) private int sid; private String sname; public Staff( int sid, String sname ) { super( ); this.sid = sid; this.sname = sname; } public Staff( ) { super( ); } public int getSid( ) { return sid; } public void setSid( int sid ) { this.sid = sid; } public String getSname( ) { return sname; } public void setSname( String sname ) { this.sname = sname; }}
In the above code @DescriminatorColumn specifies the field name type and its values show theremaining TeachingandNonTeachingStaff fields.
Create a subclass class to Staff class named TeachingStaff.java under thecom.tutorialspoint.eclipselink.entity package. The TeachingStaff Entity class is shown asfollows:
package com.tutorialspoint.eclipselink.entity;
import javax.persistence.DiscriminatorValue;import javax.persistence.Entity;
@Entity@DiscriminatorValue( value="TS" )public class TeachingStaff extends Staff { private String qualification; private String subjectexpertise; public TeachingStaff( int sid, String sname, String qualification,String subjectexpertise ) { super( sid, sname ); this.qualification = qualification; this.subjectexpertise = subjectexpertise; } public TeachingStaff( ) { super( ); }
public String getQualification( ) { return qualification; }
public void setQualification( String qualification ) { this.qualification = qualification; }
public String getSubjectexpertise( ) { return subjectexpertise; }
public void setSubjectexpertise( String subjectexpertise ) { this.subjectexpertise = subjectexpertise; }}
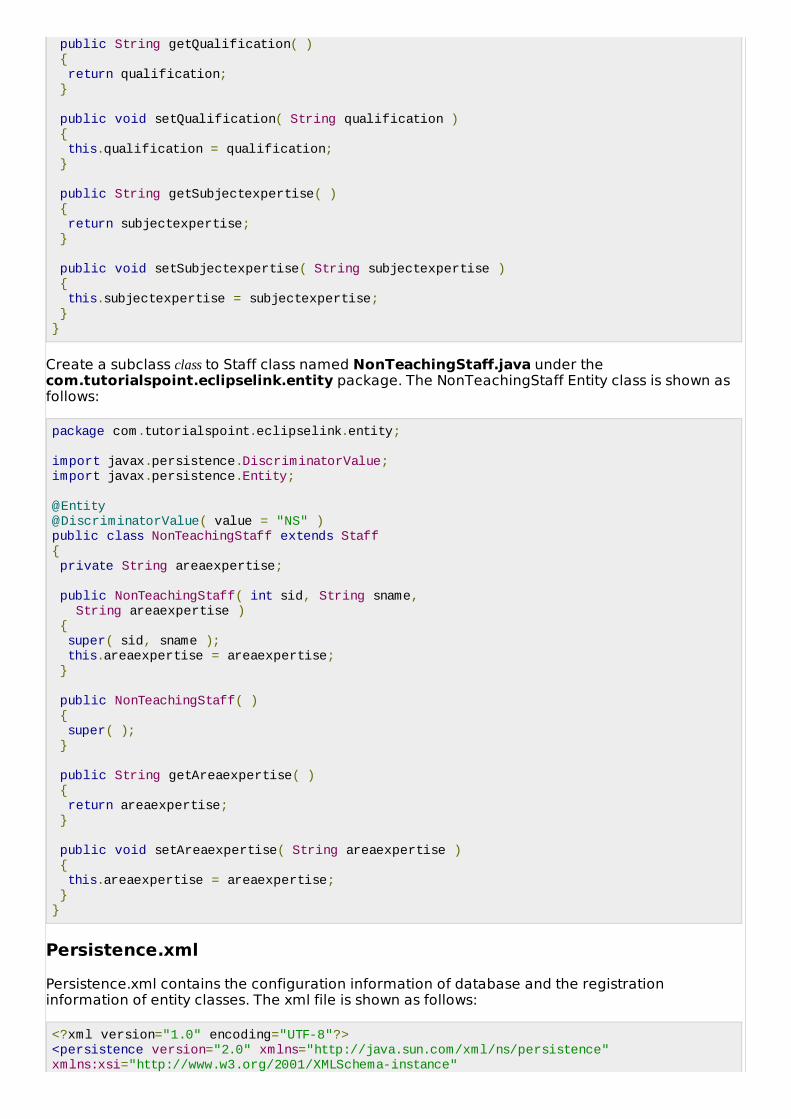
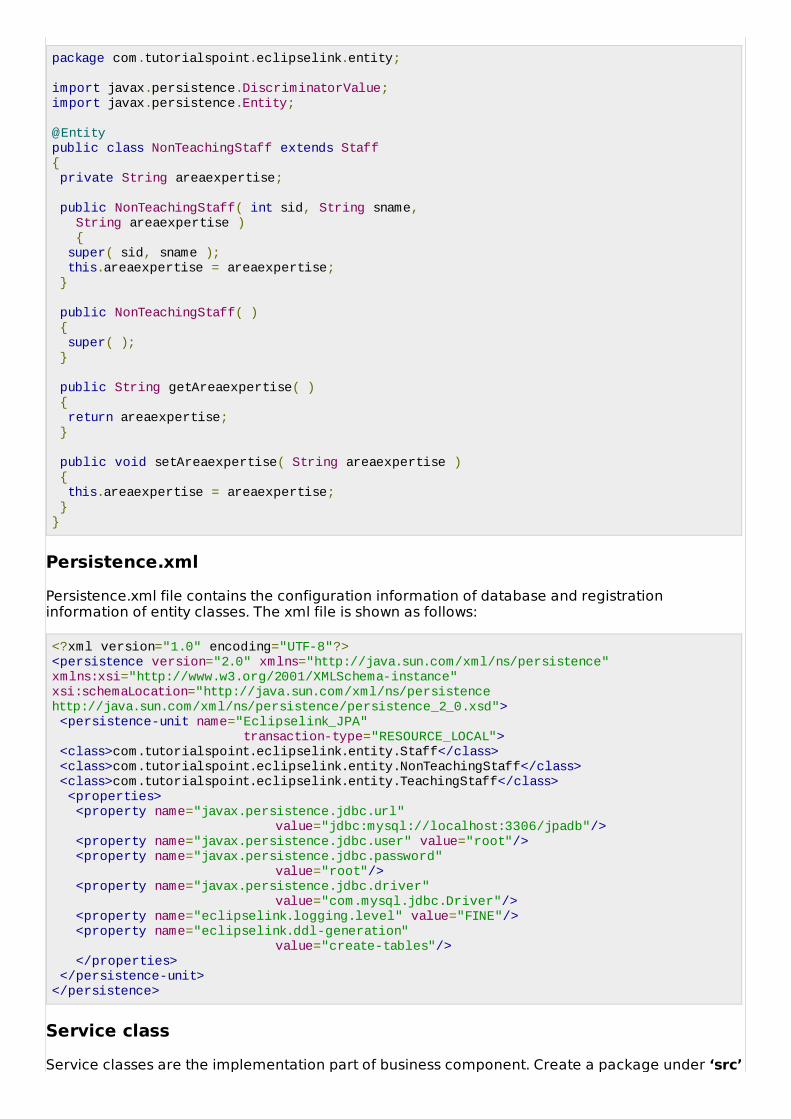
Create a subclass class to Staff class named NonTeachingStaff.java under thecom.tutorialspoint.eclipselink.entity package. The NonTeachingStaff Entity class is shown asfollows:
package com.tutorialspoint.eclipselink.entity;
import javax.persistence.DiscriminatorValue;import javax.persistence.Entity;
@Entity@DiscriminatorValue( value = "NS" )public class NonTeachingStaff extends Staff { private String areaexpertise;
public NonTeachingStaff( int sid, String sname, String areaexpertise ) { super( sid, sname ); this.areaexpertise = areaexpertise; }
public NonTeachingStaff( ) { super( ); }
public String getAreaexpertise( ) { return areaexpertise; }
public void setAreaexpertise( String areaexpertise ) { this.areaexpertise = areaexpertise; }}
Persistence.xmlPersistence.xml contains the configuration information of database and the registrationinformation of entity classes. The xml file is shown as follows:
<?xml version="1.0" encoding="UTF-8"?><persistence version="2.0" xmlns="http://java.sun.com/xml/ns/persistence" xmlns:xsi="http://www.w3.org/2001/XMLSchema-instance"

xsi:schemaLocation="http://java.sun.com/xml/ns/persistence http://java.sun.com/xml/ns/persistence/persistence_2_0.xsd"> <persistence-unit name="Eclipselink_JPA" transaction-type="RESOURCE_LOCAL"> <class>com.tutorialspoint.eclipselink.entity.Staff</class> <class>com.tutorialspoint.eclipselink.entity.NonTeachingStaff</class> <class>com.tutorialspoint.eclipselink.entity.TeachingStaff</class> <properties> <property name="javax.persistence.jdbc.url" value="jdbc:mysql://localhost:3306/jpadb"/> <property name="javax.persistence.jdbc.user" value="root"/> <property name="javax.persistence.jdbc.password" value="root"/> <property name="javax.persistence.jdbc.driver" value="com.mysql.jdbc.Driver"/> <property name="eclipselink.logging.level" value="FINE"/> <property name="eclipselink.ddl-generation" value="create-tables"/> </properties> </persistence-unit></persistence>
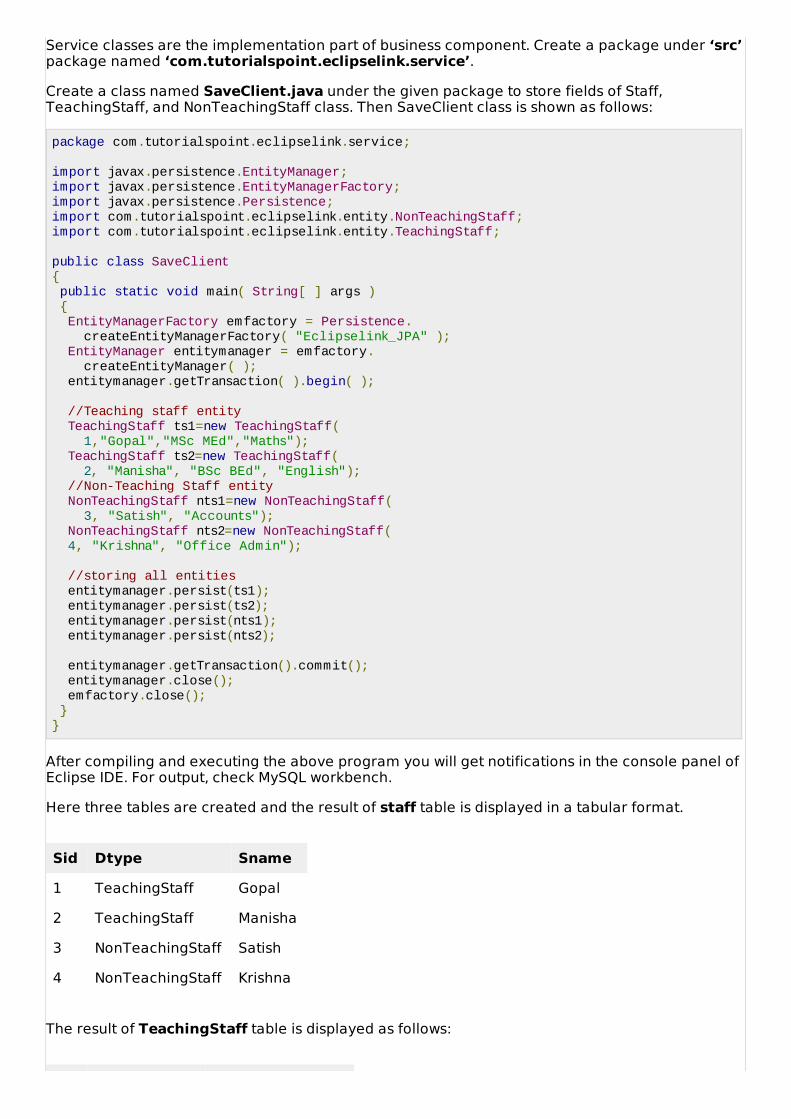
Service classService classes are the implementation part of business component. Create a package under ‘src’package named ‘com.tutorialspoint.eclipselink.service’.
Create a class named SaveClient.java under the given package to store Staff, TeachingStaff, andNonTeachingStaff class fields. The SaveClient class is shown as follows:
package com.tutorialspoint.eclipselink.service;
import javax.persistence.EntityManager;import javax.persistence.EntityManagerFactory;import javax.persistence.Persistence;import com.tutorialspoint.eclipselink.entity.NonTeachingStaff;import com.tutorialspoint.eclipselink.entity.TeachingStaff;
public class SaveClient { public static void main( String[ ] args ) { EntityManagerFactory emfactory = Persistence. createEntityManagerFactory( "Eclipselink_JPA" ); EntityManager entitymanager = emfactory. createEntityManager( ); entitymanager.getTransaction( ).begin( ); //Teaching staff entity TeachingStaff ts1=new TeachingStaff( 1,"Gopal","MSc MEd","Maths"); TeachingStaff ts2=new TeachingStaff( 2, "Manisha", "BSc BEd", "English"); //Non-Teaching Staff entity NonTeachingStaff nts1=new NonTeachingStaff( 3, "Satish", "Accounts"); NonTeachingStaff nts2=new NonTeachingStaff( 4, "Krishna", "Office Admin"); //storing all entities entitymanager.persist(ts1); entitymanager.persist(ts2); entitymanager.persist(nts1); entitymanager.persist(nts2); entitymanager.getTransaction().commit(); entitymanager.close(); emfactory.close(); }

}
After compiling and executing the above program you will get notifications on the console panel ofEclipse IDE. Check MySQL workbench for output. The output in a tabular format is shown asfollows:
Sid Type Sname Areaexpertise Qualification Subjectexpertise
1 TS Gopal MSC MED Maths
2 TS Manisha BSC BED English
3 NS Satish Accounts
4 NS Krishna Office Admin
Finally you will get a single table containing the field of all the three classes with a discriminatorcolumn named Type field.
Joined table StrategyJoined table strategy is to share the referenced column that contains unique values to join thetable and make easy transactions. Let us consider the same example as above.
Create a JPA Project. All the project modules are shown below.
Creating EntitiesCreate a package named ‘com.tutorialspoint.eclipselink.entity’ under ‘src’ package. Create anew java class named Staff.java under given package. The Staff entity class is shown as follows:
package com.tutorialspoint.eclipselink.entity;
import java.io.Serializable;import javax.persistence.Entity;import javax.persistence.GeneratedValue;import javax.persistence.GenerationType;import javax.persistence.Id;import javax.persistence.Inheritance;import javax.persistence.InheritanceType;import javax.persistence.Table;
@Entity@Table@Inheritance( strategy = InheritanceType.JOINED )public class Staff implements Serializable { @Id @GeneratedValue( strategy = GenerationType.AUTO ) private int sid; private String sname; public Staff( int sid, String sname ) { super( ); this.sid = sid; this.sname = sname; } public Staff( ) { super( ); } public int getSid( ) { return sid; }

public void setSid( int sid ) { this.sid = sid; } public String getSname( ) { return sname; } public void setSname( String sname ) { this.sname = sname; }}
Create a subclass class to Staff class named TeachingStaff.java under thecom.tutorialspoint.eclipselink.entity package. The TeachingStaff Entity class is shown asfollows:
package com.tutorialspoint.eclipselink.entity;
import javax.persistence.DiscriminatorValue;import javax.persistence.Entity;
@Entity@PrimaryKeyJoinColumn(referencedColumnName="sid")public class TeachingStaff extends Staff { private String qualification; private String subjectexpertise; public TeachingStaff( int sid, String sname, String qualification,String subjectexpertise ) { super( sid, sname ); this.qualification = qualification; this.subjectexpertise = subjectexpertise; } public TeachingStaff( ) { super( ); }
public String getQualification( ) { return qualification; }
public void setQualification( String qualification ) { this.qualification = qualification; }
public String getSubjectexpertise( ) { return subjectexpertise; }
public void setSubjectexpertise( String subjectexpertise ) { this.subjectexpertise = subjectexpertise; }}
Create a subclass class to Staff class named NonTeachingStaff.java under thecom.tutorialspoint.eclipselink.entity package. The NonTeachingStaff Entity class is shown asfollows:

package com.tutorialspoint.eclipselink.entity;
import javax.persistence.DiscriminatorValue;import javax.persistence.Entity;
@Entity@PrimaryKeyJoinColumn(referencedColumnName="sid")public class NonTeachingStaff extends Staff { private String areaexpertise;
public NonTeachingStaff( int sid, String sname, String areaexpertise ) { super( sid, sname ); this.areaexpertise = areaexpertise; }
public NonTeachingStaff( ) { super( ); }
public String getAreaexpertise( ) { return areaexpertise; }
public void setAreaexpertise( String areaexpertise ) { this.areaexpertise = areaexpertise; }}
Persistence.xmlPersistence.xml file contains the configuration information of the database and the registrationinformation of entity classes. The xml file is shown as follows:
<?xml version="1.0" encoding="UTF-8"?><persistence version="2.0" xmlns="http://java.sun.com/xml/ns/persistence" xmlns:xsi="http://www.w3.org/2001/XMLSchema-instance" xsi:schemaLocation="http://java.sun.com/xml/ns/persistence http://java.sun.com/xml/ns/persistence/persistence_2_0.xsd"> <persistence-unit name="Eclipselink_JPA" transaction-type="RESOURCE_LOCAL"> <class>com.tutorialspoint.eclipselink.entity.Staff</class> <class>com.tutorialspoint.eclipselink.entity.NonTeachingStaff</class> <class>com.tutorialspoint.eclipselink.entity.TeachingStaff</class> <properties> <property name="javax.persistence.jdbc.url" value="jdbc:mysql://localhost:3306/jpadb"/> <property name="javax.persistence.jdbc.user" value="root"/> <property name="javax.persistence.jdbc.password" value="root"/> <property name="javax.persistence.jdbc.driver" value="com.mysql.jdbc.Driver"/> <property name="eclipselink.logging.level" value="FINE"/> <property name="eclipselink.ddl-generation" value="create-tables"/> </properties> </persistence-unit></persistence>
Service class
Service classes are the implementation part of business component. Create a package under ‘src’package named ‘com.tutorialspoint.eclipselink.service’.
Create a class named SaveClient.java under the given package to store fields of Staff,TeachingStaff, and NonTeachingStaff class. Then SaveClient class is shown as follows:
package com.tutorialspoint.eclipselink.service;
import javax.persistence.EntityManager;import javax.persistence.EntityManagerFactory;import javax.persistence.Persistence;import com.tutorialspoint.eclipselink.entity.NonTeachingStaff;import com.tutorialspoint.eclipselink.entity.TeachingStaff;
public class SaveClient { public static void main( String[ ] args ) { EntityManagerFactory emfactory = Persistence. createEntityManagerFactory( "Eclipselink_JPA" ); EntityManager entitymanager = emfactory. createEntityManager( ); entitymanager.getTransaction( ).begin( ); //Teaching staff entity TeachingStaff ts1=new TeachingStaff( 1,"Gopal","MSc MEd","Maths"); TeachingStaff ts2=new TeachingStaff( 2, "Manisha", "BSc BEd", "English"); //Non-Teaching Staff entity NonTeachingStaff nts1=new NonTeachingStaff( 3, "Satish", "Accounts"); NonTeachingStaff nts2=new NonTeachingStaff( 4, "Krishna", "Office Admin"); //storing all entities entitymanager.persist(ts1); entitymanager.persist(ts2); entitymanager.persist(nts1); entitymanager.persist(nts2); entitymanager.getTransaction().commit(); entitymanager.close(); emfactory.close(); }}
After compiling and executing the above program you will get notifications in the console panel ofEclipse IDE. For output, check MySQL workbench.
Here three tables are created and the result of staff table is displayed in a tabular format.
Sid Dtype Sname
1 TeachingStaff Gopal
2 TeachingStaff Manisha
3 NonTeachingStaff Satish
4 NonTeachingStaff Krishna
The result of TeachingStaff table is displayed as follows:
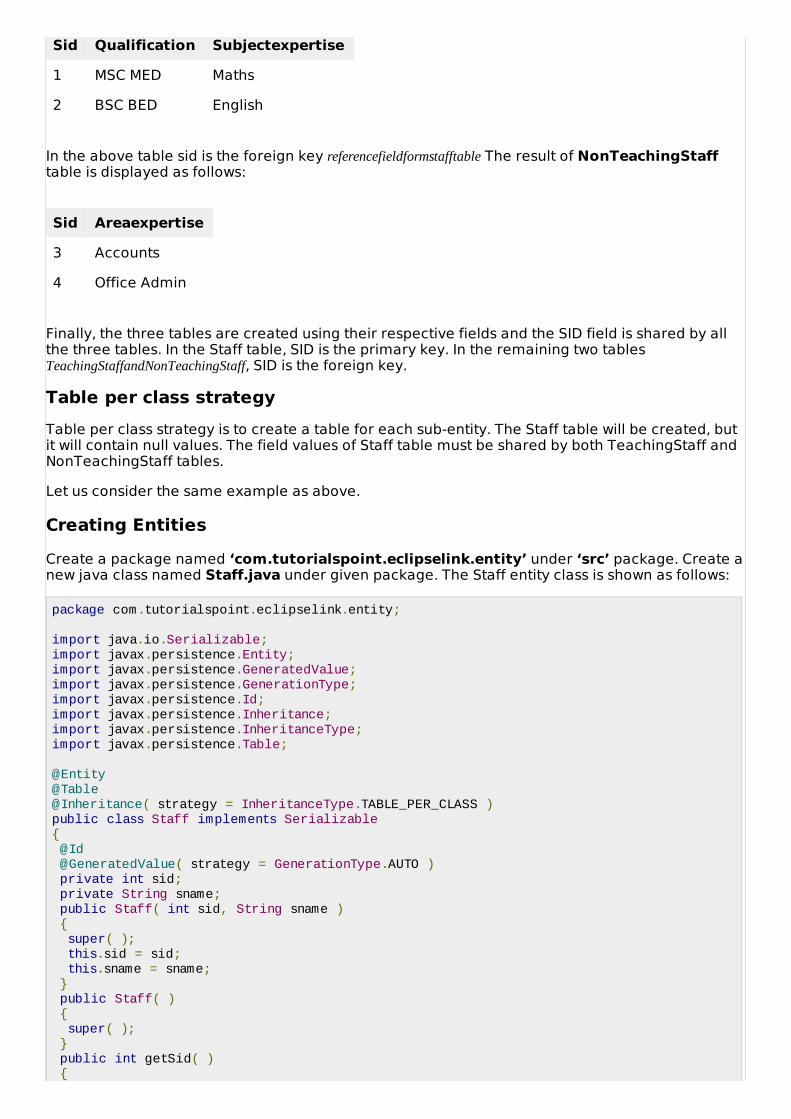
Sid Qualification Subjectexpertise
1 MSC MED Maths
2 BSC BED English
In the above table sid is the foreign key referencefieldformstafftable The result of NonTeachingStafftable is displayed as follows:
Sid Areaexpertise
3 Accounts
4 Office Admin
Finally, the three tables are created using their respective fields and the SID field is shared by allthe three tables. In the Staff table, SID is the primary key. In the remaining two tables TeachingStaffandNonTeachingStaff, SID is the foreign key.
Table per class strategyTable per class strategy is to create a table for each sub-entity. The Staff table will be created, butit will contain null values. The field values of Staff table must be shared by both TeachingStaff andNonTeachingStaff tables.
Let us consider the same example as above.
Creating EntitiesCreate a package named ‘com.tutorialspoint.eclipselink.entity’ under ‘src’ package. Create anew java class named Staff.java under given package. The Staff entity class is shown as follows:
package com.tutorialspoint.eclipselink.entity;
import java.io.Serializable;import javax.persistence.Entity;import javax.persistence.GeneratedValue;import javax.persistence.GenerationType;import javax.persistence.Id;import javax.persistence.Inheritance;import javax.persistence.InheritanceType;import javax.persistence.Table;
@Entity@Table@Inheritance( strategy = InheritanceType.TABLE_PER_CLASS )public class Staff implements Serializable { @Id @GeneratedValue( strategy = GenerationType.AUTO ) private int sid; private String sname; public Staff( int sid, String sname ) { super( ); this.sid = sid; this.sname = sname; } public Staff( ) { super( ); } public int getSid( ) {

return sid; } public void setSid( int sid ) { this.sid = sid; } public String getSname( ) { return sname; } public void setSname( String sname ) { this.sname = sname; }}
Create a subclass class to Staff class named TeachingStaff.java under thecom.tutorialspoint.eclipselink.entity package. The TeachingStaff Entity class is shown asfollows:
package com.tutorialspoint.eclipselink.entity;
import javax.persistence.DiscriminatorValue;import javax.persistence.Entity;
@Entitypublic class TeachingStaff extends Staff { private String qualification; private String subjectexpertise; public TeachingStaff( int sid, String sname, String qualification,String subjectexpertise ) { super( sid, sname ); this.qualification = qualification; this.subjectexpertise = subjectexpertise; } public TeachingStaff( ) { super( ); }
public String getQualification( ) { return qualification; } public void setQualification( String qualification ) { this.qualification = qualification; }
public String getSubjectexpertise( ) { return subjectexpertise; }
public void setSubjectexpertise( String subjectexpertise ) { this.subjectexpertise = subjectexpertise; }}
Create a subclass class to Staff class named NonTeachingStaff.java under thecom.tutorialspoint.eclipselink.entity package. The NonTeachingStaff Entity class is shown asfollows:
package com.tutorialspoint.eclipselink.entity;
import javax.persistence.DiscriminatorValue;import javax.persistence.Entity;
@Entitypublic class NonTeachingStaff extends Staff { private String areaexpertise;
public NonTeachingStaff( int sid, String sname, String areaexpertise ) { super( sid, sname ); this.areaexpertise = areaexpertise; }
public NonTeachingStaff( ) { super( ); }
public String getAreaexpertise( ) { return areaexpertise; }
public void setAreaexpertise( String areaexpertise ) { this.areaexpertise = areaexpertise; }}
Persistence.xmlPersistence.xml file contains the configuration information of database and registrationinformation of entity classes. The xml file is shown as follows:
<?xml version="1.0" encoding="UTF-8"?><persistence version="2.0" xmlns="http://java.sun.com/xml/ns/persistence" xmlns:xsi="http://www.w3.org/2001/XMLSchema-instance" xsi:schemaLocation="http://java.sun.com/xml/ns/persistence http://java.sun.com/xml/ns/persistence/persistence_2_0.xsd"> <persistence-unit name="Eclipselink_JPA" transaction-type="RESOURCE_LOCAL"> <class>com.tutorialspoint.eclipselink.entity.Staff</class> <class>com.tutorialspoint.eclipselink.entity.NonTeachingStaff</class> <class>com.tutorialspoint.eclipselink.entity.TeachingStaff</class> <properties> <property name="javax.persistence.jdbc.url" value="jdbc:mysql://localhost:3306/jpadb"/> <property name="javax.persistence.jdbc.user" value="root"/> <property name="javax.persistence.jdbc.password" value="root"/> <property name="javax.persistence.jdbc.driver" value="com.mysql.jdbc.Driver"/> <property name="eclipselink.logging.level" value="FINE"/> <property name="eclipselink.ddl-generation" value="create-tables"/> </properties> </persistence-unit></persistence>
Service classService classes are the implementation part of business component. Create a package under ‘src’

package named ‘com.tutorialspoint.eclipselink.service’.
Create a class named SaveClient.java under the given package to store Staff, TeachingStaff, andNonTeachingStaff class fields. The SaveClient class is shown as follows:
package com.tutorialspoint.eclipselink.service;
import javax.persistence.EntityManager;import javax.persistence.EntityManagerFactory;import javax.persistence.Persistence;import com.tutorialspoint.eclipselink.entity.NonTeachingStaff;import com.tutorialspoint.eclipselink.entity.TeachingStaff;public class SaveClient { public static void main( String[ ] args ) { EntityManagerFactory emfactory = Persistence. createEntityManagerFactory( "Eclipselink_JPA" ); EntityManager entitymanager = emfactory. createEntityManager( ); entitymanager.getTransaction( ).begin( ); //Teaching staff entity TeachingStaff ts1=new TeachingStaff( 1,"Gopal","MSc MEd","Maths"); TeachingStaff ts2=new TeachingStaff( 2, "Manisha", "BSc BEd", "English"); //Non-Teaching Staff entity NonTeachingStaff nts1=new NonTeachingStaff( 3, "Satish", "Accounts"); NonTeachingStaff nts2=new NonTeachingStaff( 4, "Krishna", "Office Admin"); //storing all entities entitymanager.persist(ts1); entitymanager.persist(ts2); entitymanager.persist(nts1); entitymanager.persist(nts2); entitymanager.getTransaction().commit(); entitymanager.close(); emfactory.close(); }}
After compiling and executing the above program, you will get notifications on the console panelof Eclipse IDE. For output, check MySQL workbench.
Here the three tables are created and the Staff table contains null records.
The result of TeachingStaff is displayed as follows:
Sid Qualification Sname Subjectexpertise
1 MSC MED Gopal Maths
2 BSC BED Manisha English
The above table TeachingStaff contains fields of both Staff and TeachingStaff Entities.
The result of NonTeachingStaff is displayed as follows:
Sid Areaexpertise Sname
3 Accounts Satish
4 Office Admin Krishna
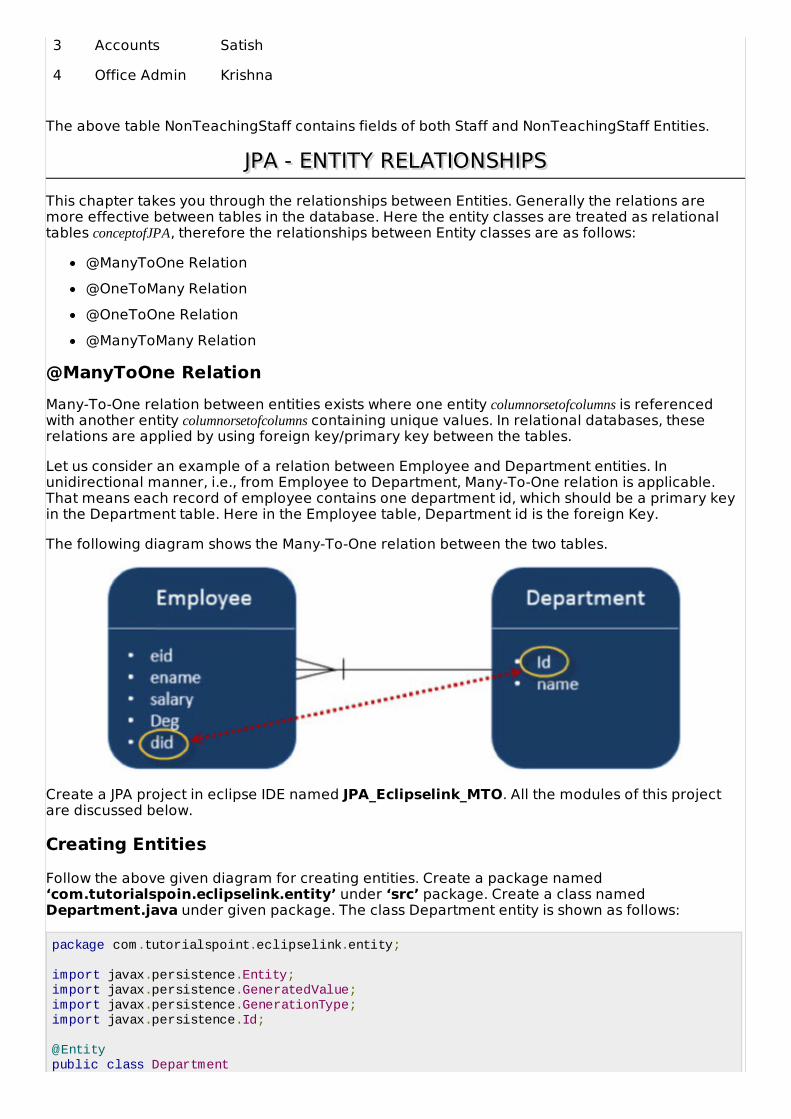
The above table NonTeachingStaff contains fields of both Staff and NonTeachingStaff Entities.
JPA - ENTITY RELATIONSHIPSJPA - ENTITY RELATIONSHIPSThis chapter takes you through the relationships between Entities. Generally the relations aremore effective between tables in the database. Here the entity classes are treated as relationaltables conceptofJPA, therefore the relationships between Entity classes are as follows:
@ManyToOne Relation@OneToMany Relation@OneToOne Relation@ManyToMany Relation
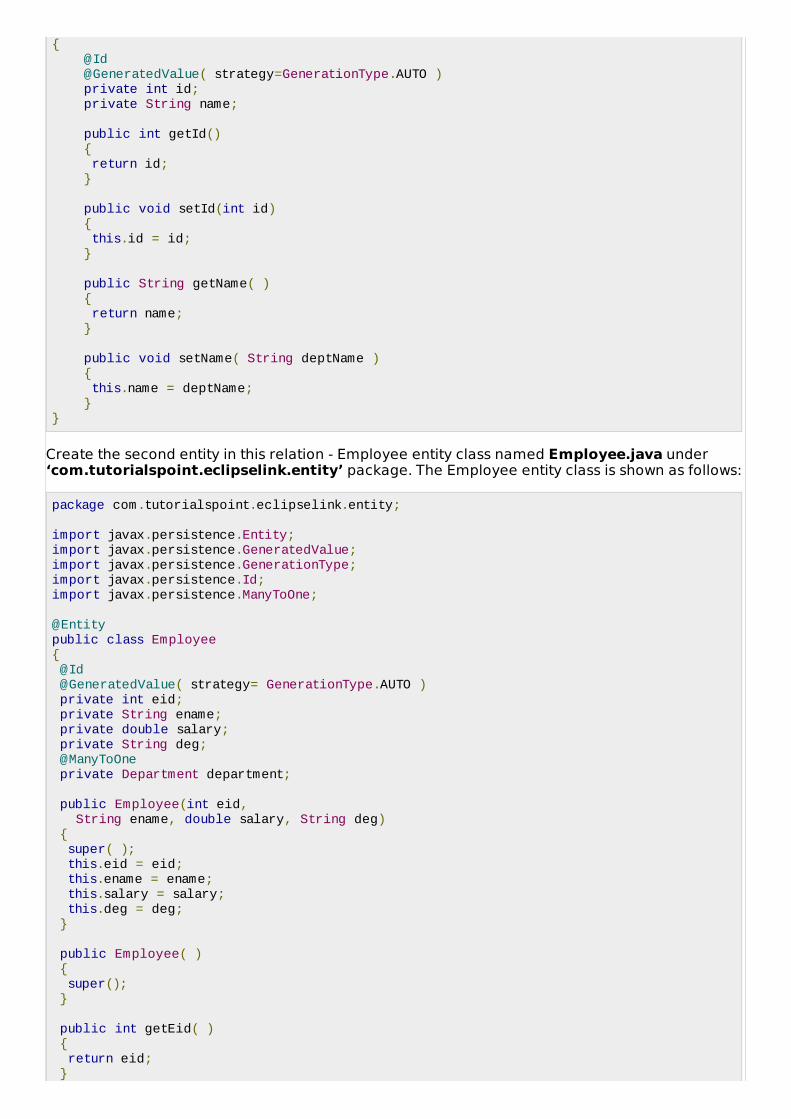
@ManyToOne RelationMany-To-One relation between entities exists where one entity columnorsetofcolumns is referencedwith another entity columnorsetofcolumns containing unique values. In relational databases, theserelations are applied by using foreign key/primary key between the tables.
Let us consider an example of a relation between Employee and Department entities. Inunidirectional manner, i.e., from Employee to Department, Many-To-One relation is applicable.That means each record of employee contains one department id, which should be a primary keyin the Department table. Here in the Employee table, Department id is the foreign Key.
The following diagram shows the Many-To-One relation between the two tables.
Create a JPA project in eclipse IDE named JPA_Eclipselink_MTO. All the modules of this projectare discussed below.
Creating EntitiesFollow the above given diagram for creating entities. Create a package named‘com.tutorialspoin.eclipselink.entity’ under ‘src’ package. Create a class namedDepartment.java under given package. The class Department entity is shown as follows:
package com.tutorialspoint.eclipselink.entity;
import javax.persistence.Entity;import javax.persistence.GeneratedValue;import javax.persistence.GenerationType;import javax.persistence.Id;
@Entitypublic class Department
{ @Id @GeneratedValue( strategy=GenerationType.AUTO ) private int id; private String name;
public int getId() { return id; } public void setId(int id) { this.id = id; } public String getName( ) { return name; } public void setName( String deptName ) { this.name = deptName; }}
Create the second entity in this relation - Employee entity class named Employee.java under‘com.tutorialspoint.eclipselink.entity’ package. The Employee entity class is shown as follows:
package com.tutorialspoint.eclipselink.entity;
import javax.persistence.Entity;import javax.persistence.GeneratedValue;import javax.persistence.GenerationType;import javax.persistence.Id;import javax.persistence.ManyToOne;
@Entitypublic class Employee { @Id @GeneratedValue( strategy= GenerationType.AUTO ) private int eid; private String ename; private double salary; private String deg; @ManyToOne private Department department; public Employee(int eid, String ename, double salary, String deg) { super( ); this.eid = eid; this.ename = ename; this.salary = salary; this.deg = deg; } public Employee( ) { super(); } public int getEid( ) { return eid; }

public void setEid(int eid) { this.eid = eid; } public String getEname( ) { return ename; } public void setEname(String ename) { this.ename = ename; } public double getSalary( ) { return salary; } public void setSalary(double salary) { this.salary = salary; } public String getDeg( ) { return deg; } public void setDeg(String deg) { this.deg = deg; } public Department getDepartment() { return department; }
public void setDepartment(Department department) { this.department = department; }}
Persistence.xmlPersistence.xml file is required to configure the database and the registration of entity classes.
Persitence.xml will be created by the eclipse IDE while creating a JPA Project. The configurationdetails are user specifications. The persistence.xml file is shown as follows:
<?xml version="1.0" encoding="UTF-8"?><persistence version="2.0" xmlns="http://java.sun.com/xml/ns/persistence" xmlns:xsi="http://www.w3.org/2001/XMLSchema-instance" xsi:schemaLocation="http://java.sun.com/xml/ns/persistence http://java.sun.com/xml/ns/persistence/persistence_2_0.xsd"> <persistence-unit name="Eclipselink_JPA" transaction-type="RESOURCE_LOCAL"> <class>com.tutorialspoint.eclipselink.entity.Employee</class> <class>com.tutorialspoint.eclipselink.entity.Department</class> <properties> <property name="javax.persistence.jdbc.url" value="jdbc:mysql://localhost:3306/jpadb"/> <property name="javax.persistence.jdbc.user" value="root"/> <property name="javax.persistence.jdbc.password" value="root"/> <property name="javax.persistence.jdbc.driver" value="com.mysql.jdbc.Driver"/> <property name="eclipselink.logging.level" value="FINE"/>

<property name="eclipselink.ddl-generation" value="create-tables"/> </properties> </persistence-unit></persistence>
Service ClassesThis module contains the service classes, which implements the relational part using the attributeinitialization. Create a package under ‘src’ package named‘com.tutorialspoint.eclipselink.service’. The DAO class named ManyToOne.java is createdunder given package. The DAO class is shown as follows:
package com.tutorialspointeclipselink.service;
import javax.persistence.EntityManager;import javax.persistence.EntityManagerFactory;import javax.persistence.Persistence;import com.tutorialspoint.eclipselink.entity.Department;import com.tutorialspoint.eclipselink.entity.Employee;
public class ManyToOne { public static void main( String[ ] args ) { EntityManagerFactory emfactory = Persistence. createEntityManagerFactory( "Eclipselink_JPA" ); EntityManager entitymanager = emfactory. createEntityManager( ); entitymanager.getTransaction( ).begin( ); //Create Department Entity Department department = new Department(); department.setName("Development"); //Store Department entitymanager.persist(department); //Create Employee1 Entity Employee employee1 = new Employee(); employee1.setEname("Satish"); employee1.setSalary(45000.0); employee1.setDeg("Technical Writer"); employee1.setDepartment(department);
//Create Employee2 Entity Employee employee2 = new Employee(); employee2.setEname("Krishna"); employee2.setSalary(45000.0); employee2.setDeg("Technical Writer"); employee2.setDepartment(department);
//Create Employee3 Entity Employee employee3 = new Employee(); employee3.setEname("Masthanvali"); employee3.setSalary(50000.0); employee3.setDeg("Technical Writer"); employee3.setDepartment(department); //Store Employees entitymanager.persist(employee1); entitymanager.persist(employee2); entitymanager.persist(employee3); entitymanager.getTransaction().commit(); entitymanager.close(); emfactory.close(); }}

After compiling and executing the above program, you will get notifications on the console panelof Eclipse IDE. For output, check MySQL workbench. In this example, two tables are created.
Pass the following query in MySQL interface and the result of Department table will be displayedas follows:
Select * from department
ID Name
101 Development
Pass the following query in MySQL interface and the result of Employee table will be displayed asfollows.
Select * from employee
Eid Deg Ename Salary Department_Id
102 Technical Writer Satish 45000 101
103 Technical Writer Krishna 45000 101
104 Technical Writer Masthanwali 50000 101
In the above table Deparment_Id is the foreign key referencefield from the Department table.
@OneToMany RelationIn this relationship, each row of one entity is referenced to many child records in other entity. Theimportant thing is that child records cannot have multiple parents. In a one-to-many relationshipbetween Table A and Table B, each row in Table A can be linked to one or multiple rows in Table B.
Let us consider the above example. Suppose Employee and Department tables in the aboveexample are connected in a reverse unidirectional manner, then the relation becomes One-To-Many relation. Create a JPA project in eclipse IDE named JPA_Eclipselink_OTM. All the modules ofthis project are discussed below.
Creating EntitiesFollow the above given diagram for creating entities. Create a package named‘com.tutorialspoin.eclipselink.entity’ under ‘src’ package. Create a class namedDepartment.java under given package. The class Department entity is shown as follows:
package com.tutorialspoint.eclipselink.entity;
import java.util.List;import javax.persistence.Entity;import javax.persistence.GeneratedValue;import javax.persistence.GenerationType;import javax.persistence.Id;import javax.persistence.OneToMany;
@Entitypublic class Department { @Id @GeneratedValue( strategy=GenerationType.AUTO ) private int id;

private String name; @OneToMany( targetEntity=Employee.class ) private List employeelist;
public int getId() { return id; } public void setId(int id) { this.id = id; } public String getName( ) { return name; } public void setName( String deptName ) { this.name = deptName; }
public List getEmployeelist() { return employeelist; }
public void setEmployeelist(List employeelist) { this.employeelist = employeelist; }}
Create the second entity in this relation -Employee entity class, named Employee.java under‘com.tutorialspoint.eclipselink.entity’ package. The Employee entity class is shown as follows:
package com.tutorialspoint.eclipselink.entity;
import javax.persistence.Entity;import javax.persistence.GeneratedValue;import javax.persistence.GenerationType;import javax.persistence.Id;
@Entitypublic class Employee { @Id @GeneratedValue( strategy= GenerationType.AUTO ) private int eid; private String ename; private double salary; private String deg; public Employee(int eid, String ename, double salary, String deg) { super( ); this.eid = eid; this.ename = ename; this.salary = salary; this.deg = deg; } public Employee( ) { super();

} public int getEid( ) { return eid; } public void setEid(int eid) { this.eid = eid; } public String getEname( ) { return ename; } public void setEname(String ename) { this.ename = ename; } public double getSalary( ) { return salary; } public void setSalary(double salary) { this.salary = salary; } public String getDeg( ) { return deg; } public void setDeg(String deg) { this.deg = deg; } }
Persistence.xmlThe persistence.xml file is as follows:
<?xml version="1.0" encoding="UTF-8"?><persistence version="2.0" xmlns="http://java.sun.com/xml/ns/persistence" xmlns:xsi="http://www.w3.org/2001/XMLSchema-instance" xsi:schemaLocation="http://java.sun.com/xml/ns/persistence http://java.sun.com/xml/ns/persistence/persistence_2_0.xsd"> <persistence-unit name="Eclipselink_JPA" transaction-type="RESOURCE_LOCAL"> <class>com.tutorialspoint.eclipselink.entity.Employee</class> <class>com.tutorialspoint.eclipselink.entity.Department</class> <properties> <property name="javax.persistence.jdbc.url" value="jdbc:mysql://localhost:3306/jpadb"/> <property name="javax.persistence.jdbc.user" value="root"/> <property name="javax.persistence.jdbc.password" value="root"/> <property name="javax.persistence.jdbc.driver" value="com.mysql.jdbc.Driver"/> <property name="eclipselink.logging.level" value="FINE"/> <property name="eclipselink.ddl-generation" value="create-tables"/> </properties> </persistence-unit></persistence>

Service ClassesThis module contains the service classes, which implements the relational part using the attributeinitialization. Create a package under ‘src’ package named‘com.tutorialspoint.eclipselink.service’. The DAO class named OneToMany.java is createdunder given package. The DAO class is shown as follows:
package com.tutorialspointeclipselink.service;
import java.util.List;import java.util.ArrayList;import javax.persistence.EntityManager;import javax.persistence.EntityManagerFactory;import javax.persistence.Persistence;import com.tutorialspoint.eclipselink.entity.Department;import com.tutorialspoint.eclipselink.entity.Employee;
public class OneToMany { public static void main(String[] args) { EntityManagerFactory emfactory = Persistence. createEntityManagerFactory( "Eclipselink_JPA" ); EntityManager entitymanager = emfactory. createEntityManager( ); entitymanager.getTransaction( ).begin( ); //Create Employee1 Entity Employee employee1 = new Employee(); employee1.setEname("Satish"); employee1.setSalary(45000.0); employee1.setDeg("Technical Writer"); //Create Employee2 Entity Employee employee2 = new Employee(); employee2.setEname("Krishna"); employee2.setSalary(45000.0); employee2.setDeg("Technical Writer"); //Create Employee3 Entity Employee employee3 = new Employee(); employee3.setEname("Masthanvali"); employee3.setSalary(50000.0); employee3.setDeg("Technical Writer"); //Store Employee entitymanager.persist(employee1); entitymanager.persist(employee2); entitymanager.persist(employee3); //Create Employeelist List<Employee> emplist = new ArrayList(); emplist.add(employee1); emplist.add(employee2); emplist.add(employee3); //Create Department Entity Department department= new Department(); department.setName("Development"); department.setEmployeelist(emplist); //Store Department entitymanager.persist(department); entitymanager.getTransaction().commit(); entitymanager.close(); emfactory.close(); }

}
After compilation and execution of the above program you will get notifications in the consolepanel of Eclipse IDE. For output check MySQL workbench as follows.
In this project three tables are created. Pass the following query in MySQL interface and the resultof department_employee table will be displayed as follows:
Select * from department_Id;
Department_ID Employee_Eid
254 251
254 252
254 253
In the above table, deparment_id and employee_id are the foreign keys referencefields fromdepartment and employee tables.
Pass the following query in MySQL interface and the result of department table will be displayed ina tabular format as follows.
Select * from department;
ID Name
254 Development
Pass the following query in MySQL interface and the result of employee table will be displayed asfollows:
Select * from employee;
Eid Deg Ename Salary
251 Technical Writer Satish 45000
252 Technical Writer Krishna 45000
253 Technical Writer Masthanwali 50000
@OneToOne RelationIn One-To-One relationship, one item can be linked to only one other item. It means each row ofone entity is referred to one and only one row of another entity.
Let us consider the above example. Employee and Department in a reverse unidirectionalmanner, the relation is One-To-One relation. It means each employee belongs to only onedepartment. Create a JPA project in eclipse IDE named JPA_Eclipselink_OTO. All the modules ofthis project are discussed below.
Creating EntitiesFollow the above given diagram for creating entities. Create a package named‘com.tutorialspoin.eclipselink.entity’ under ‘src’ package. Create a class named

Department.java under given package. The class Department entity is shown as follows:
package com.tutorialspoint.eclipselink.entity;
import javax.persistence.Entity;import javax.persistence.GeneratedValue;import javax.persistence.GenerationType;import javax.persistence.Id;
@Entitypublic class Department { @Id @GeneratedValue( strategy=GenerationType.AUTO ) private int id; private String name; public int getId() { return id; } public void setId(int id) { this.id = id; } public String getName( ) { return name; } public void setName( String deptName ) { this.name = deptName; }}
Create the second entity in this relation -Employee entity class, named Employee.java under‘com.tutorialspoint.eclipselink.entity’ package. The Employee entity class is shown as follows:
package com.tutorialspoint.eclipselink.entity;
import javax.persistence.Entity;import javax.persistence.GeneratedValue;import javax.persistence.GenerationType;import javax.persistence.Id;import javax.persistence.OneToOne;
@Entitypublic class Employee { @Id @GeneratedValue( strategy= GenerationType.AUTO ) private int eid; private String ename; private double salary; private String deg; @OneToOne private Department department; public Employee(int eid, String ename, double salary, String deg) { super( ); this.eid = eid; this.ename = ename;

this.salary = salary; this.deg = deg; } public Employee( ) { super(); } public int getEid( ) { return eid; } public void setEid(int eid) { this.eid = eid; } public String getEname( ) { return ename; } public void setEname(String ename) { this.ename = ename; } public double getSalary( ) { return salary; } public void setSalary(double salary) { this.salary = salary; } public String getDeg( ) { return deg; } public void setDeg(String deg) { this.deg = deg; }
public Department getDepartment() { return department; }
public void setDepartment(Department department) { this.department = department; } }
Persistence.xmlPersistence.xml file as follows:
<?xml version="1.0" encoding="UTF-8"?><persistence version="2.0" xmlns="http://java.sun.com/xml/ns/persistence" xmlns:xsi="http://www.w3.org/2001/XMLSchema-instance" xsi:schemaLocation="http://java.sun.com/xml/ns/persistence http://java.sun.com/xml/ns/persistence/persistence_2_0.xsd"> <persistence-unit name="Eclipselink_JPA" transaction-type="RESOURCE_LOCAL">
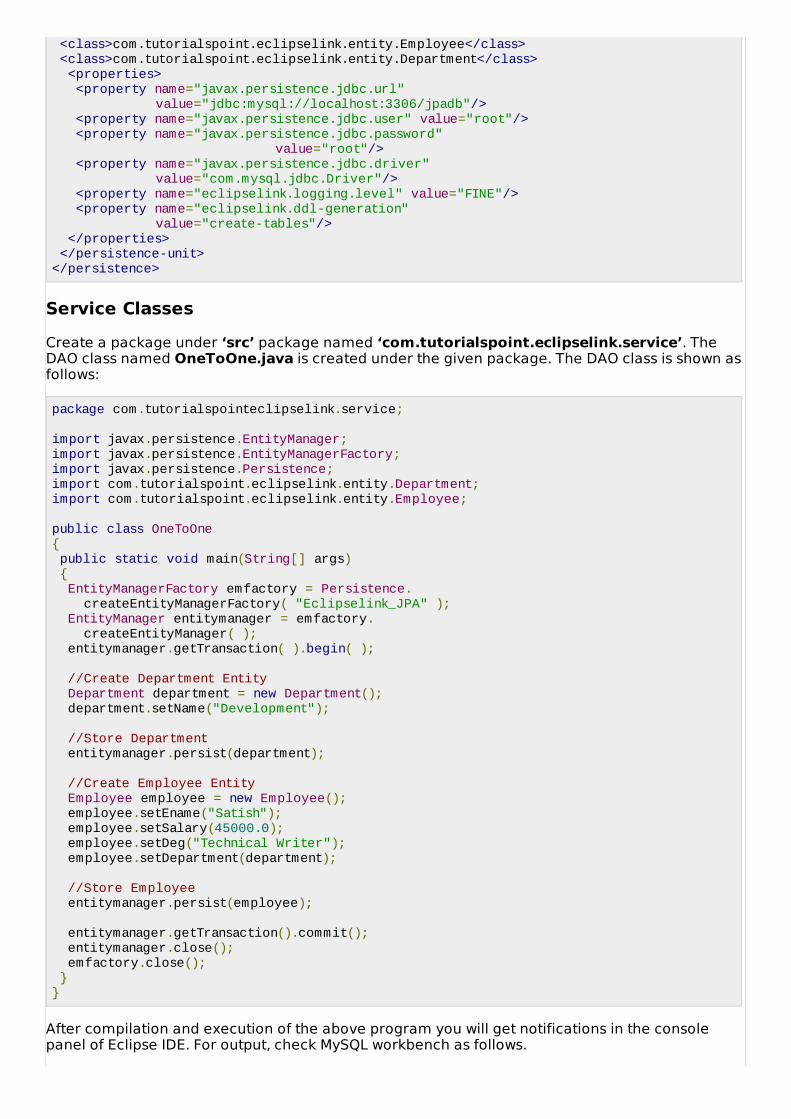
<class>com.tutorialspoint.eclipselink.entity.Employee</class> <class>com.tutorialspoint.eclipselink.entity.Department</class> <properties> <property name="javax.persistence.jdbc.url" value="jdbc:mysql://localhost:3306/jpadb"/> <property name="javax.persistence.jdbc.user" value="root"/> <property name="javax.persistence.jdbc.password" value="root"/> <property name="javax.persistence.jdbc.driver" value="com.mysql.jdbc.Driver"/> <property name="eclipselink.logging.level" value="FINE"/> <property name="eclipselink.ddl-generation" value="create-tables"/> </properties> </persistence-unit></persistence>
Service ClassesCreate a package under ‘src’ package named ‘com.tutorialspoint.eclipselink.service’. TheDAO class named OneToOne.java is created under the given package. The DAO class is shown asfollows:
package com.tutorialspointeclipselink.service;
import javax.persistence.EntityManager;import javax.persistence.EntityManagerFactory;import javax.persistence.Persistence;import com.tutorialspoint.eclipselink.entity.Department;import com.tutorialspoint.eclipselink.entity.Employee;
public class OneToOne { public static void main(String[] args) { EntityManagerFactory emfactory = Persistence. createEntityManagerFactory( "Eclipselink_JPA" ); EntityManager entitymanager = emfactory. createEntityManager( ); entitymanager.getTransaction( ).begin( ); //Create Department Entity Department department = new Department(); department.setName("Development"); //Store Department entitymanager.persist(department); //Create Employee Entity Employee employee = new Employee(); employee.setEname("Satish"); employee.setSalary(45000.0); employee.setDeg("Technical Writer"); employee.setDepartment(department); //Store Employee entitymanager.persist(employee); entitymanager.getTransaction().commit(); entitymanager.close(); emfactory.close(); }}
After compilation and execution of the above program you will get notifications in the consolepanel of Eclipse IDE. For output, check MySQL workbench as follows.
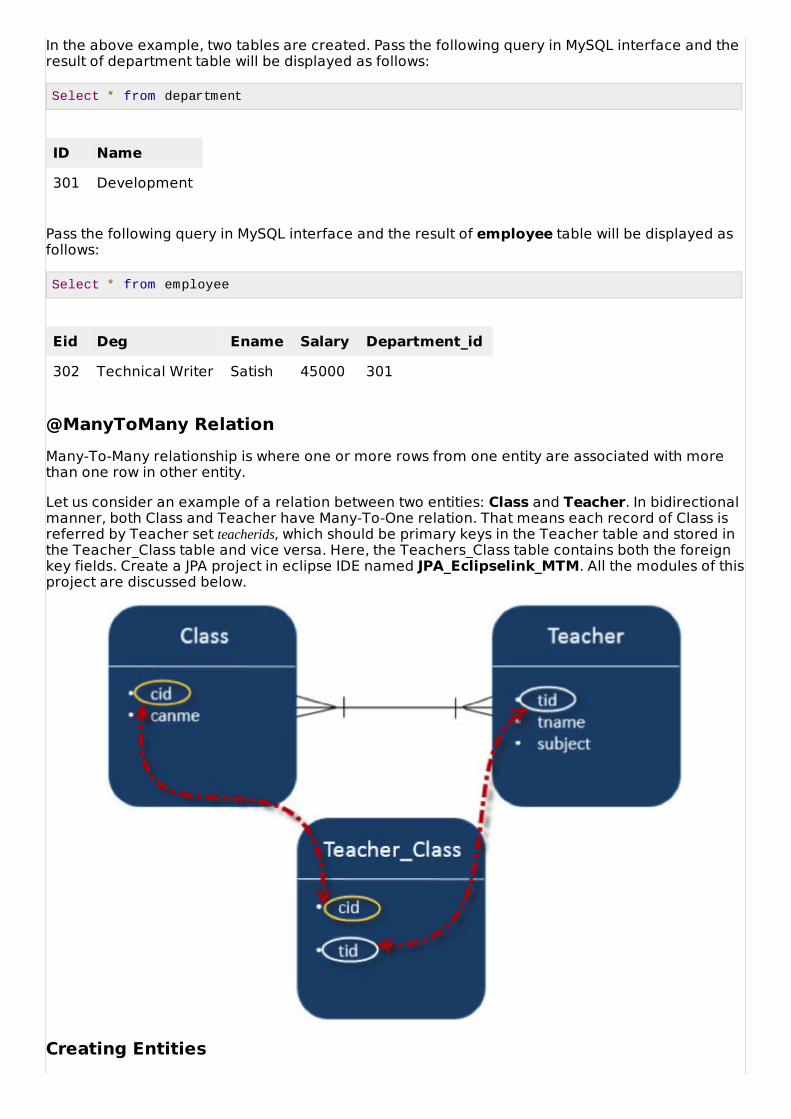
In the above example, two tables are created. Pass the following query in MySQL interface and theresult of department table will be displayed as follows:
Select * from department
ID Name
301 Development
Pass the following query in MySQL interface and the result of employee table will be displayed asfollows:
Select * from employee
Eid Deg Ename Salary Department_id
302 Technical Writer Satish 45000 301
@ManyToMany RelationMany-To-Many relationship is where one or more rows from one entity are associated with morethan one row in other entity.
Let us consider an example of a relation between two entities: Class and Teacher. In bidirectionalmanner, both Class and Teacher have Many-To-One relation. That means each record of Class isreferred by Teacher set teacherids, which should be primary keys in the Teacher table and stored inthe Teacher_Class table and vice versa. Here, the Teachers_Class table contains both the foreignkey fields. Create a JPA project in eclipse IDE named JPA_Eclipselink_MTM. All the modules of thisproject are discussed below.
Creating Entities

Create entities by following the schema shown in the diagram above. Create a package named‘com.tutorialspoin.eclipselink.entity’ under ‘src’ package. Create a class named Clas.javaunder given package. The class Department entity is shown as follows:
package com.tutorialspoint.eclipselink.entity;
import java.util.Set;import javax.persistence.Entity;import javax.persistence.GeneratedValue;import javax.persistence.GenerationType;import javax.persistence.Id;import javax.persistence.ManyToMany;
@Entitypublic class Clas { @Id @GeneratedValue( strategy = GenerationType.AUTO ) private int cid; private String cname; @ManyToMany(targetEntity=Teacher.class) private Set teacherSet; public Clas() { super(); } public Clas(int cid, String cname, Set teacherSet) { super(); this.cid = cid; this.cname = cname; this.teacherSet = teacherSet; } public int getCid() { return cid; } public void setCid(int cid) { this.cid = cid; } public String getCname() { return cname; } public void setCname(String cname) { this.cname = cname; } public Set getTeacherSet() { return teacherSet; } public void setTeacherSet(Set teacherSet) { this.teacherSet = teacherSet; } }
Create the second entity in this relation -Employee entity class, named Teacher.java under‘com.tutorialspoint.eclipselink.entity’ package. The Employee entity class is shown as follows:
package com.tutorialspoint.eclipselink.entity;
import java.util.Set;

import javax.persistence.Entity;import javax.persistence.GeneratedValue;import javax.persistence.GenerationType;import javax.persistence.Id;import javax.persistence.ManyToMany;
@Entitypublic class Teacher { @Id @GeneratedValue( strategy = GenerationType.AUTO ) private int tid; private String tname; private String subject; @ManyToMany(targetEntity=Clas.class) private Set clasSet; public Teacher() { super(); } public Teacher(int tid, String tname, String subject, Set clasSet) { super(); this.tid = tid; this.tname = tname; this.subject = subject; this.clasSet = clasSet; } public int getTid() { return tid; } public void setTid(int tid) { this.tid = tid; } public String getTname() { return tname; } public void setTname(String tname) { this.tname = tname; } public String getSubject() { return subject; } public void setSubject(String subject) { this.subject = subject; } public Set getClasSet() { return clasSet; } public void setClasSet(Set clasSet) { this.clasSet = clasSet; }}
Persistence.xmlPersistence.xml file as follows:

<?xml version="1.0" encoding="UTF-8"?><persistence version="2.0" xmlns="http://java.sun.com/xml/ns/persistence" xmlns:xsi="http://www.w3.org/2001/XMLSchema-instance" xsi:schemaLocation="http://java.sun.com/xml/ns/persistence http://java.sun.com/xml/ns/persistence/persistence_2_0.xsd"> <persistence-unit name="Eclipselink_JPA" transaction-type="RESOURCE_LOCAL"> <class>com.tutorialspoint.eclipselink.entity.Employee</class> <class>com.tutorialspoint.eclipselink.entity.Department</class> <properties> <property name="javax.persistence.jdbc.url" value="jdbc:mysql://localhost:3306/jpadb"/> <property name="javax.persistence.jdbc.user" value="root"/> <property name="javax.persistence.jdbc.password" value="root"/> <property name="javax.persistence.jdbc.driver" value="com.mysql.jdbc.Driver"/> <property name="eclipselink.logging.level" value="FINE"/> <property name="eclipselink.ddl-generation" value="create-tables"/> </properties> </persistence-unit></persistence>
Service ClassesCreate a package under ‘src’ package named ‘com.tutorialspoint.eclipselink.service’. TheDAO class named ManyToMany.java is created under given package. The DAO class is shown asfollows:
package com.tutorialspoint.eclipselink.service;
import java.util.HashSet;import java.util.Set;import javax.persistence.EntityManager;import javax.persistence.EntityManagerFactory;import javax.persistence.Persistence;import com.tutorialspoint.eclipselink.entity.Clas;import com.tutorialspoint.eclipselink.entity.Teacher;
public class ManyToMany { public static void main(String[] args) { EntityManagerFactory emfactory = Persistence. createEntityManagerFactory( "Eclipselink_JPA" ); EntityManager entitymanager = emfactory. createEntityManager( ); entitymanager.getTransaction( ).begin( ); //Create Clas Entity Clas clas1=new Clas(0,"1st",null); Clas clas2=new Clas(0,"2nd",null); Clas clas3=new Clas(0,"3rd",null); //Store Clas entitymanager.persist(clas1); entitymanager.persist(clas2); entitymanager.persist(clas3); //Create Clas Set1 Set<Clas> classSet1 = new HashSet(); classSet1.add(clas1); classSet1.add(clas2); classSet1.add(clas3); //Create Clas Set2

Set<Clas> classSet2 = new HashSet(); classSet2.add(clas3); classSet2.add(clas1); classSet2.add(clas2); //Create Clas Set3 Set<Clas> classSet3 = new HashSet(); classSet3.add(clas2); classSet3.add(clas3); classSet3.add(clas1); //Create Teacher Entity Teacher teacher1 = new Teacher(0, "Satish","Java",classSet1); Teacher teacher2 = new Teacher(0, "Krishna","Adv Java",classSet2); Teacher teacher3 = new Teacher(0, "Masthanvali","DB2",classSet3); //Store Teacher entitymanager.persist(teacher1); entitymanager.persist(teacher2); entitymanager.persist(teacher3); entitymanager.getTransaction( ).commit( ); entitymanager.close( ); emfactory.close( ); }}
In this example project, three tables are created. Pass the following query in MySQL interface andthe result of teacher_clas table will be displayed as follows:
Select * form teacher_clas
Teacher_tid Classet_cid
354 351
355 351
356 351
354 352
355 352
356 352
354 353
355 353
356 353
In the above table teacher_tid is the foreign key from teacher table, and classet_cid is theforeign key from class table. Therefore different teachers are allotted to different class.
Pass the following query in MySQL interface and the result of teacher table will be displayed asfollows:
Select * from teacher

Tid Subject Tname
354 Java Satish
355 Adv Java Krishna
356 DB2 Masthanvali
Pass the following query in MySQL interface and the result of clas table will be displayed as follows:
Select * from clas
Cid Cname
351 1st
352 2nd
353 3rd
JPA - CRITERIA APIJPA - CRITERIA APICriteria is a predefined API that is used to define queries for entities. It is an alternative way ofdefining a JPQL query. These queries are type-safe, portable, and easy to modify by changing thesyntax. Similar to JPQL, it follows an abstract schema easytoeditschema and embedded objects. Themetadata API is mingled with criteria API to model persistent entity for criteria queries.
The major advantage of Criteria API is that errors can be detected earlier during the compile time.String-based JPQL queries and JPA criteria based queries are same in performance and efficiency.
History of criteria APIThe criteria is included into all versions of JPA therefore each step of criteria is notified in thespecifications of JPA.
In JPA 2.0, the criteria query API, standardization of queries are developed.In JPA 2.1, Criteria update and delete bulkupdateanddelete are included.
Criteria Query StructureThe Criteria and the JPQL are closely related and are allowed to design using similar operators intheir queries. It follows javax.persistence.criteria package to design a query. The querystructure means the syntax criteria query.
The following simple criteria query returns all instances of the entity class in the data source.
EntityManager em = ...;CriteriaBuilder cb = em.getCriteriaBuilder();CriteriaQuery<Entity class> cq = cb.createQuery(Entity.class);Root<Entity> from = cq.from(Entity.class);cq.select(Entity);TypedQuery<Entity> q = em.createQuery(cq);List<Entity> allitems = q.getResultList();
The query demonstrates the basic steps to create a criteria.
EntityManager instance is used to create a CriteriaBuilder object.
CriteriaQuery instance is used to create a query object. This query object’s attributes will bemodified with the details of the query.

CriteriaQuery.form method is called to set the query root.
CriteriaQuery.select is called to set the result list type.
TypedQuery<T> instance is used to prepare a query for execution and specifying the typeof the query result.
getResultList method on the TypedQuery<T> object to execute a query. This query returnsa collection of entities, the result is stored in a List.
Example of criteria APILet us consider the example of employee database. Let us assume the jpadb.employee tablecontains following records:
Eid Ename Salary Deg401 Gopal 40000 Technical Manager402 Manisha 40000 Proof reader403 Masthanvali 35000 Technical Writer404 Satish 30000 Technical writer405 Krishna 30000 Technical Writer406 Kiran 35000 Proof reader
Create a JPA Project in the eclipse IDE named JPA_Eclipselink_Criteria. All the modules of thisproject are discussed below:
Creating EntitiesCreate a package named com.tutorialspoint.eclipselink.entity under ‘src’
Create a class named Employee.java under given package. The class Employee entity is shownas follows:
package com.tutorialspoint.eclipselink.entity;
import javax.persistence.Entity;import javax.persistence.GeneratedValue;import javax.persistence.GenerationType;import javax.persistence.Id;
@Entitypublic class Employee { @Id @GeneratedValue(strategy= GenerationType.AUTO) private int eid; private String ename; private double salary; private String deg; public Employee(int eid, String ename, double salary, String deg) { super( ); this.eid = eid; this.ename = ename; this.salary = salary; this.deg = deg; } public Employee( ) { super(); } public int getEid( ) { return eid; }

public void setEid(int eid) { this.eid = eid; } public String getEname( ) { return ename; } public void setEname(String ename) { this.ename = ename; } public double getSalary( ) { return salary; } public void setSalary(double salary) { this.salary = salary; } public String getDeg( ) { return deg; } public void setDeg(String deg) { this.deg = deg; } @Override public String toString() { return "Employee [e + salary + ", deg=" + deg + "]"; }}
Persistence.xmlPersistence.xml file is as follows:
<?xml version="1.0" encoding="UTF-8"?><persistence version="2.0" xmlns="http://java.sun.com/xml/ns/persistence" xmlns:xsi="http://www.w3.org/2001/XMLSchema-instance" xsi:schemaLocation="http://java.sun.com/xml/ns/persistence http://java.sun.com/xml/ns/persistence/persistence_2_0.xsd"> <persistence-unit name="Eclipselink_JPA" transaction-type="RESOURCE_LOCAL"> <class>com.tutorialspoint.eclipselink.entity.Employee</class> <properties> <property name="javax.persistence.jdbc.url" value="jdbc:mysql://localhost:3306/jpadb"/> <property name="javax.persistence.jdbc.user" value="root"/> <property name="javax.persistence.jdbc.password" value="root"/> <property name="javax.persistence.jdbc.driver" value="com.mysql.jdbc.Driver"/> <property name="eclipselink.logging.level" value="FINE"/> <property name="eclipselink.ddl-generation" value="create-tables"/> </properties> </persistence-unit></persistence>
Service classes

This module contains the service classes, which implements the Criteria query part using theMetaData API initialization. Create a package named ‘com.tutorialspoint.eclipselink.service’.The class named CriteriaAPI.java is created under given package. The DAO class is shown asfollows:
package com.tutorialspoint.eclipselink.service;
import java.util.List;import javax.persistence.EntityManager;import javax.persistence.EntityManagerFactory;import javax.persistence.Persistence;import javax.persistence.TypedQuery;import javax.persistence.criteria.CriteriaBuilder;import javax.persistence.criteria.CriteriaQuery;import javax.persistence.criteria.Root;import com.tutorialspoint.eclipselink.entity.Employee;
public class CriteriaApi { public static void main(String[] args) { EntityManagerFactory emfactory = Persistence. createEntityManagerFactory( "Eclipselink_JPA" ); EntityManager entitymanager = emfactory. createEntityManager( ); CriteriaBuilder criteriaBuilder = entitymanager .getCriteriaBuilder(); CriteriaQuery<Object> criteriaQuery = criteriaBuilder .createQuery(); Root<Employee> from = criteriaQuery.from(Employee.class); //select all records System.out.println(“Select all records”); CriteriaQuery<Object> select =criteriaQuery.select(from); TypedQuery<Object> typedQuery = entitymanager .createQuery(select); List<Object> resultlist= typedQuery.getResultList(); for(Object o:resultlist) { Employee e=(Employee)o; System.out.println("EID : "+e.getEid() +" Ename : "+e.getEname()); } //Ordering the records System.out.println(“Select all records by follow ordering”); CriteriaQuery<Object> select1 = criteriaQuery.select(from); select1.orderBy(criteriaBuilder.asc(from.get("ename"))); TypedQuery<Object> typedQuery1 = entitymanager .createQuery(select); List<Object> resultlist1= typedQuery1.getResultList(); for(Object o:resultlist1) { Employee e=(Employee)o; System.out.println("EID : "+e.getEid() +" Ename : "+e.getEname()); } entitymanager.close( ); emfactory.close( ); }}
After compiling and executing the above program you will get the following output in the consolepanel of Eclipse IDE.

Select All recordsEID : 401 Ename : GopalEID : 402 Ename : ManishaEID : 403 Ename : MasthanvaliEID : 404 Ename : SatishEID : 405 Ename : KrishnaEID : 406 Ename : KiranSelect All records by follow OrderingEID : 401 Ename : GopalEID : 406 Ename : KiranEID : 405 Ename : KrishnaEID : 402 Ename : ManishaEID : 403 Ename : MasthanvaliEID : 404 Ename : Satish