jo pedal boat om rev b - klindustries.com wheeler manual.pdf · your pedal boat is the result of...
TRANSCRIPT

OWNER’S MANUAL
ESCAPE CALYPSO
ESCAPE GLIDE & ELECTRIC GLIDE
ESCAPE JAZZ
ALL WATER WHEELER MODELS
ALL AQUATOY MODELS
KL Industries, Inc.
1790 Sun Dolphin Dr.
Muskegon, MI 49444
231-733-2725
www.klindustries.com
Rev. January 2010 1
Thank you for purchasing this pedal boat from
KL Industries, Inc.
Your pedal boat is the result of years of design,
manufacturing and material improvements. It clearly
represents the best value available and is designed to
provide you and your family with many years of fun.
This Owner’s Manual provides the key information on its
use and care. If you have additional questions, or would
like to learn about pedal boat accessories, fishing boats,
canoes, kayaks, dinghies, electric deck boats and the
other fine products we offer, please contact us:
KL Industries, Inc.
Customer Service
1790 Sun Dolphin Dr.
Muskegon, MI 49444
231-733-2725
www.klindustries.com
At KL Industries, Inc., we hope you enjoy this pedal boat
for many years to come, and use it to make a lifetime of
memories.

2
Table of Contents
Material Checklist Page 3
Illustrations of Models Pages 4-9
Basic Materials Page 10-11
- Hull Material
- Capacity and Flotation
Transporting Your Pedal Boat Pages 11
Operating Your Pedal Boat Pages 11-14
- Checklist for Operation
- Boarding
- Steering
Operating Your Electric Pedal Boat Pages 14-17
- Mounting a Motor
- Electric Motor Operation
- Battery Charging
- Motor Operation and Control
- Electric Motor Prop
Safety Procedures Pages 18-19
- Loading safety
- Weather conditions
- Personal Flotation Gear
- Launching safety
o Shore conditions
o Rudder
o Drainage
Storage Pages 19-20
Care and Maintenance Pages 21
Trouble Shooting For Electric Pedal Boats Pages 22-24
Warranty Page 25
3
MATERIAL CHECKLIST
Upon delivery of your pedal boat you should receive:
1. Warranty registration card. To properly register
your pedal boat with KL Industries for warranty
validation please fill out the warranty registration
online at www.klindustries.com. The serial
number can be found on the outside of the hull in
the back just under the gunwale.
2. Manufacturers Statement of Origin (MSO). Some
states may require a MSO for proper registration
of your boat. Please check with your local dealer
or state licensing bureau.
3. Owner’s Manual. Keep your owner’s manual for
future reference. It is a good idea to write down
the following information:
Serial Number____________________________
Date of Purchase__________________________
Purchased from___________________________
4. Rudder Blade
- The rudder is used to steer the boat
5. Registration Decals
To apply registration decals, wipe down the
surface with a damp cloth and let dry. Then peel,
and apply the decals, taking care to smooth out
any bubbles and raised edges.

4
Aq
uato
y
5
Esc
ap
e Jazz
™
Esc
ap
e G
lid
e

6
Esc
ap
e C
aly
pso
W
ate
rWh
eele
r M
KV
/Wate
rWh
eele
r 5
7
Wate
r W
hee
ler
AS
L

8
Wate
r W
hee
ler
JR
/Wate
rWh
eele
r 3/
Rogu
e R
iver
Aq
uato
y 3
9
Rogu
e R
iver
Aq
uato
y 5
R
ogu
e R
iver
Aq
uato
y A
SL
R
ogu
e R
iver
Aq
uato
y

10
BASIC MATERIALS
A. Hull and Deck WaterWheeler, Calypso, Glide, and Aquatoy
The hull and deck are thermoformed from sheets of High
Density Polyethylene plastic. Polyethylene is many times
more impact resistant than fiberglass. It will remain
colorfast and durable through many years of exposure to
the elements and throughout wide ranges of temperature
fluctuation.
Polyethylene is very abrasion resistant, but not abrasion
proof. Some care in handling and operating your boat is
necessary to ensure its long life. Clean the hull and deck
with common household detergents, hot water and a
scrub brush.
Jazz
The hull is a one-piece rotomolded Polyethylene unit. As
stated above, Polyethylene is many times more impact
resistant than fiberglass. The one piece design provides a
simpler, stronger product.
B. Flotation The weight capacity of your boat, in both passengers and
added cargo, is determined by the boat’s size and
flotation. Each boat has a capacity tag clearly displayed
on the craft. Flotation is provided by closed cell foam
blocks located between the deck and hull, with exception
to Jazz. Because polyethylene is lighter than water, the
hull material also contributes to the boat’s buoyancy.
The crankshaft is cold rolled steel that has been painted to
resist corrosion. Stainless steel cranks are available for
salt water. The newly designed crank bushings are oil
impregnated bronze for long life. The paddle wheel
spokes are molded from Super Tough nylon ™. The
11
steering linkage is extremely durable and internal to the
boat to protect it from damage.
Transporting Your Pedal Boat
Your pedal boat has a covered cooler / storage
compartment in the rear. Always face the stern (rear)
of the boat towards the direction of travel to prevent
the wind from tearing the compartment lid off. If this
happens you can contact your dealer or KL Industries,
Inc. for replacement.
Do not transport the Escape Electric Glide or
WaterWheeler Electric ASL with battery installed.
Bouncing and jarring of the battery during transport could
crack the battery compartment. Do not transport the
adjustable seat models with the adjustable seat backs
in place. They may bounce out.
OPERATING YOUR PEDAL BOAT
Checklist for Operation
A. All Models Before launching your Escape or Rogue River
AquaToy pedal boat, review the following checks
and procedures.
1. Install the rudder. Be sure to attach the cotter
ring through the end of the clevis pin to hold the
pin in place. The “flag” portion of the rudder
points away from the boat.
2. Check to ensure the bow drain plug is
properly installed. It is located on the centerline
at the bow just under the rub rail.

12
3. Check to ensure the crankshaft and paddle
wheel assembly turn freely and the axle is free of
weeds, fishing line, etc.
4. Move the steering handle to ensure the rudder
moves freely. Some resistance is designed into
the mechanism so that the rudder does not require
constant control while underway. The rudder
swing should be 90 degrees (45 degrees to each
side of center). Take note of the steering limits
and do not force the handle beyond these
limits. 5. Check any accessories that have been
installed: i.e. cushions snapped into place, canopy
supports attached to hinges, electric motor mount
properly attached to the boat and motor securely
mounted to the bracket.
B. Escape Glide Electric/WaterWheeler ASL
Electric Before launching an electric pedal boat, connect
the battery and electric motor as follows:
1. If the dealer has not already installed the
motor, locate the box containing the motor and
other accessories and carefully follow the
installation instructions. Be sure to attach the
color-coded wires to the proper terminals. Do not
install the motor with the boat in the water. 2. Install the battery. The battery should be
either an F24 or F27 RV/Marine Deep Cycle 12
VDC battery. Position the battery so the terminals
are closest to the seat back. Be sure to attach the
battery leads to the proper poles. Red is positive
(+) and black is negative (-). Secure the battery
with the battery strap. DO NOT transport the
boat on a trailer or pick up truck with the
battery installed. The walls of the battery
13
compartment may not withstand heavy bumping
of the battery while transporting.
3. Install the prop on the motor using the shear
pin and prop nut. Make sure the prop nut is snug.
4. The control panel has a forward/reverse and
speed control switch. It provides five forward
speeds and three reverse. Lower the motor to the
operating position by pressing the spring in the
middle to break the spring tension. Do not
operate the motor in the “UP” position. Stay
clear of the prop. The motor should rotate counter
clockwise. Set the direction control switch to
REVERSE and repeat the procedure. The motor
should turn clockwise. All five speeds in forward
and three in reverse should operate properly. If
they don’t review the wiring diagram carefully
and make sure all wires are connected to the
proper terminals. If the unit still fails to operate
properly, call your KL Industries, Inc. dealer for
assistance.
You should be able to operate your electric pedal boat
2-5 hours on a fully charged deep cycle marine battery.
Running the motor at less than top speed significantly
extends the time before the battery needs recharging. If
the battery should run down to the extent that progress
is unsatisfactory, you have the option of pedaling the
boat to supplement the thrust of the motor.
Boarding Use caution when climbing aboard the boat. Step into the
foot-well or front seat using your arms for additional
support and balance so the boat remains stable. Do not
step on the rub rail or gunwale (side of the boat) to board
the boat. Make sure that you and all passengers are
wearing P.F.D.’s (life jackets).

14
Steering Once seated, begin pedaling in the direction you intend to
travel and steer the craft by the steering handle.
Positioning the steering handle in the center will position
the rudder straight fore and aft and will steer the craft
generally in a straight line direction. For models with
rotary steering handles, turning the handle to the left turns
the boat to the left. Turning the handle to the right turns
the boat to the right. Models with push / pull steering
require the handle to be pushed forward to turn right and
pulled back to turn left.
OPERATING YOUR ELECTRIC PEDAL BOAT
Mounting a Motor An electric trolling motor can power some models
when the optional accessory motor mounting bracket
(see accessory order form) is installed (Exception:
Mounting bracket is standard the Jazz model).
CAUTION: The bracket is designed for electric
trolling motors with less than 36 lbs. Thrust. It is
not designed for gas-powered outboards. The
bracket comes with its own mounting hardware and is
installed on the starboard side of the transom.
Although the motor speed will have to be manually
controlled by reaching back to the control handle, the
boat can be steered by the steering handle rudder with
the electric motor locked in a straightforward position.
Electric Motor Operation Follow all safety precautions listed in the pre-launch
and launching procedures. When launching, be sure the
motor is in the “up” position. To put it in the up
position, lift the handle up until the spring is straight.
The spring is stiff enough to hold the motor in this
position. Move the boat to the water as recommended
previously.
15
CAUTION: When motor is in the “UP” position,
the motor skeg may extend up to ¼” below the
pontoons. Do not drag or push boat. This may
cause irreparable damage to the motor if jammed.
Battery Charging Make sure the battery is fully charged. Charging
should be done in an area out of the weather. A 110
VAC/12 VDC automatic battery charger with at least 6
amps 12 VDC output capacity is recommended. An
automatic model will prevent overcharging and
damaging of the battery. Follow the guidelines below
for charging the Escape Glide Electric
1.Remove the battery from the boat and connect it
to the battery charger in a sheltered area out of the
weather.
2.If the charger has a dual voltage setting be sure it
is set at 12 VDC. (Make sure the 110 VDC power
connection is protected by a Ground Fault Circuit
Interrupter (GFCI).
3.Connect the battery charger to a 110 VAC outlet.
Be sure to carefully follow all instructions in the
charger operations manual.
Charging is best accomplished by leaving the charger
connected overnight. Charging time will vary from a
couple of hours to a couple of days depending up on
the capacity of the charger and the state of discharge
of the battery. CAUTION: Do not attempt to
charge the battery in the boat while the boat is in
the water.
Remember you are handling a 110 VAC power
source. If the charger is kicked into the water or
exposed to rain, or if the power cord falls into the
water, a short or severe electrical shock could result if

16
the 110VAC circuit is not protected by a GFCI.
Follow the charging procedures in the manual
supplied with the charger.
Motor Operation and Control
Do not run the motor out of the water for more
than a few seconds. Water acts as a lubricant for
the motor shaft seal. Once the boat is in the water
(make sure the water is deep enough) lower the motor
by pressing the spring under the handle in the middle
until it folds in half and allows the motor to drop into
position. Do not operate the motor in the “UP”
position. This could damage the prop, motor or hull.
Set the direction switch to FORWARD or
REVERSE and set the speed control to the desired
speed. The motor will start immediately. Steer the
boat by turning the steering handle right or left. Do
not immediately shift from #3, 4 or 5 forward speed
to #1, 2 or 3 reverse speed. The sudden counter
rotation of the motor could damage some of its
internal components and significantly shorten motor
life.
Prior to beaching the boat, be sure to raise the
motor and lock it in the “UP” position by
extending the spring until it is straight.
Battery life between charges is dependent upon hours
of operation and also at what speed the boat is
operated. Operation at less than top speed obviously
will extend the usable period between each battery
charge.
The electric motor circuitry is protected by a 30 amp
circuit breaker located on the control panel. If the
prop becomes fouled with weeds or fishing line, or
strikes an object, the amp draw from the battery will
17
“trip” (pop out) and interrupt the flow of electricity to
the motor and circuitry. If the circuit breaker “trips”
and is telling you there is an electrical overload, turn
the motor to “off.” Pedal the boat to shore and raise
the motor. Examine the prop carefully and remove
anything that would impede the prop. Often fishing
line gets wrapped around the shaft and it’s not always
visible.
Once the prop is clear, lower the motor and push in
the circuit breaker to reset it. If it trips again, don’t
use the motor. Refer to the trouble-shooting guide in
this manual or call KL Industries, Inc.
Electric Motor Prop When operating the boat at the #5 speed setting with
only one person, some prop noise may be
experienced. This noise is created by minor
ventilation of the prop and will not have a significant
detrimental affect on performance nor will it harm the
motor.
Boat speed can be further enhanced by pedaling the
boat in conjunction with the motor.
CAUTION: Do not use the electric motor when
contact with swimmers or bystanders could occur.
Severe injury could result from contact with the
spinning prop. Children operating the boat
should be closely supervised by an adult.

18
SAFETY PROCEDURES
Loading Safety Review the passenger and weight capacity limitation.
Be sure the loading is within these limits. Distribute
weight evenly for proper balance and performance.
Weather Conditions Check the weather and water conditions before using
your pedal boat. High winds, waves, strong currents or
tides may seriously affect your ability to steer the unit
or travel the necessary distance to shore. Fatigue from
rapid and continuous pedaling to overcome these forces
may prevent you from returning to your point of
embarkation. Be sure to take these factors into
consideration before launching the boat.
Personal Flotation Gear
Make sure all passengers wear a certified Personal
Flotation Device (life jacket).
Launching Safety When launching the boat from shore, face the front of
the boat toward the water. The rudder is designed to
kick out and away from the boat if it strikes an object
when moving forward. DO NOT push the boat
backwards into the water as the rudder may jam
and bed the rudder shaft.
To prevent excessive hull abrasion over time and
protect the rudder, use two people to carry the boat to
the water. Do not drag the boat across gravel,
asphalt or concrete.
A. Shore Conditions Be especially conscious of shore conditions.
Sharp rocks, sharp edges on break-walls,
19
concrete aprons, etc. can chafe the hull if you
drag or slide the boat over these surfaces.
B. Rudder Make sure the rudder is installed properly and
secured with the clevis pin and cotter ring. If
the ring is missing the pin may fall out,
resulting in the loss of your rudder and
ability to steer.
C. Drainage
You may need to drain the area between the
deck and the hull of any accumulated
condensation or water seepage. Remove the
bow drain plug located at the bow under the
rub-rail and stand the boat up on its bow to
thoroughly drain the interior cavity. Reinstall
the drain plug. CAUTION: Make sure you
remove the battery on the electric model
before you try to drain the boat.
STORAGE
Short Term Storage Pull the boat from the water to prevent a build up of
algae and marine growth on the hull surface. Cover the
boat with the storage cover (available from your dealer
or KL Industries, Inc. via the order form in the back of
this manual), or turn it on its side to prevent water from
accumulating in the boat. With the Escape Glide
Electric, remove the battery and store it in an area
protected from freezing. Make sure the battery is fully
charged and remains so during prolonged storage.
NOTE: If accumulated water in the boat’s foot-
wells reaches the level of the crank bushings,
substantial leaking will occur between the hull and

20
the deck. Some leakage will occur during heavy or
continuous rain. THIS IS NOT A DEFECT!
Remove the bow drain plug located at the bow
under the rub-rail and stand the boat on its bow end
to drain the water.
No damage will result from water accumulation, but the
boat should be periodically drained (once a month).
If excess water is left in the boat, the hull shape could
alter. If excess water freezes, hull/deck shape could
alter as well. Remember, you don’t leave your car
windows down during a rain. Don’t leave your pedal
boat right side up for prolonged periods without a
cover. If you do, you will have to drain the interior
prior to use.
Running a cable or chain over the paddle wheel and
looping it around a stationary object can secure the boat
and locking the two cables ends together. Make sure
the electric motor is in the “UP” position to prevent
water from seeping down the motor mounting shaft
and into the motor.
Long Term Storage Storage of your Escape or AquaToy in the off-season or
long periods of time requires a little extra care. If it is
to be stored outside, stand the boat on its bow or side
and lean it against a building, hull side out to prevent
water, snow, leaves etc. from accumulating in the unit.
Do not stand the boat on its stern as this could
damage the rudderpost and rudder. Secure the boat
so it cannot fall. Install the storage cover if you have
one. If you have room to store it inside, the boat can be
set flat on the floor or stood on its bow and leaned
against the wall.
21
Do not stack heavy articles on top of the boat or set it
on narrow supports, i.e. saw horses. Additional weight
and/or narrow supports may cause the hull or deck to
compress and dent over time. If this should happen,
most dents will gradually come out by removing the
weight that caused the dent and placing the boat on a
flat surface in the sun to be warmed. It may take
several days of warm weather, but the polyethylene
material will gradually return to its original shape.
CARE AND MAINTENANCE
Your pedal boat is designed to provide you with many
years of enjoyable service with a minimum of care. Here
are some suggestions for proper maintenance.
Cleaning General cleaning can be done with soap, water and a
scrub brush. Standard household cleaners, dish soap or
car wash soap are adequate. Be sensitive to the
environment and don’t clean your boat in the lake.
Clean it away from the water.
In salt water, barnacles and other marine life will form
on the hull surface if the boat is left in the water over
long periods of time. Carefully scrape them off
periodically with a putty knife. They’ll be easier to
remove if you keep them wet. Painting the hull with an
antifouling bottom preservative can help minimize
barnacle build up.
Contact KL Industries, Inc. directly for repair
procedures, parts or accessories call 231-733-2725.

22
Escape Electric Glide/WaterWheeler ASL
Trouble Shooting
Problem: Motor Won’t Run
Probably Cause Corrective Action Dead battery or missing battery Recharge or replace
battery
Battery leads disconnected Remove battery leads,
or badly corroded. clean corrosion from
battery terminals and
connectors. Reconnect
battery leads and tighten
wing nuts.
Circuit breaker on control panel Check prop. Remove
tripped. weeds, fishing line, rope
that may be wound
around prop shaft. Reset
breaker.
Circuit breaker continues to trip. Remove control panel.
Clean all corrosion from
terminals. Make sure
connections are tight. If
motor still doesn’t run,
call dealer for service.
Prop jammed against obstruction. Check prop for
obstruction due to
weeds, fishing line, rope,
etc. Reset and try again.
If no obstruction is
found, see dealer for
service.
Defective control switch. See dealer for service.
23
Problem: Motor runs but will not move boat.
Probable Cause Corrective Action Missing prop, broken shear pin. Replace prop and/or shear pin.
Tighten prop nut.
Problem: Motor Runs Slow
Probable Cause Corrective Action Low battery charge. Check battery water level
Charge battery
Prop partially obstructed by Raise motor. Remove boat
fishing line, weeds, etc. from water, carefully inspect
and clean prop. Remove prop
and any line, rope, weeds, etc.
that may be wound around it.
Water in motor due to Check for water in motor.
defective seals. Replace motor if water is
inside.
Problem: Prop strikes hull.
Probable Cause Corrective Action Motor is in “up” position. Lower motor to “run” position.
Problem: Motor runs backwards.
Probable Cause Corrective Action Battery leads reversed. Reverse battery
24
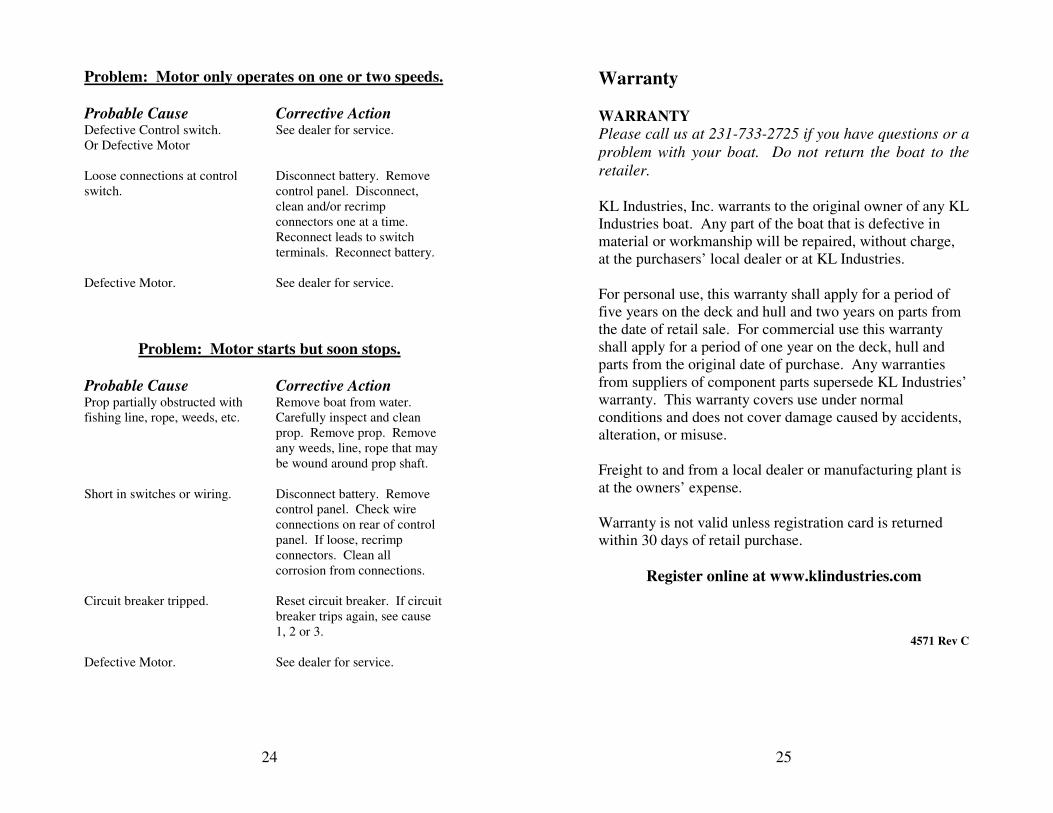
Problem: Motor only operates on one or two speeds.
Probable Cause Corrective Action Defective Control switch. See dealer for service.
Or Defective Motor
Loose connections at control Disconnect battery. Remove
switch. control panel. Disconnect,
clean and/or recrimp
connectors one at a time.
Reconnect leads to switch
terminals. Reconnect battery.
Defective Motor. See dealer for service.
Problem: Motor starts but soon stops.
Probable Cause Corrective Action Prop partially obstructed with Remove boat from water.
fishing line, rope, weeds, etc. Carefully inspect and clean
prop. Remove prop. Remove
any weeds, line, rope that may
be wound around prop shaft.
Short in switches or wiring. Disconnect battery. Remove
control panel. Check wire
connections on rear of control
panel. If loose, recrimp
connectors. Clean all
corrosion from connections.
Circuit breaker tripped. Reset circuit breaker. If circuit
breaker trips again, see cause
1, 2 or 3.
Defective Motor. See dealer for service.
25
Warranty
WARRANTY
Please call us at 231-733-2725 if you have questions or a
problem with your boat. Do not return the boat to the
retailer.
KL Industries, Inc. warrants to the original owner of any KL
Industries boat. Any part of the boat that is defective in
material or workmanship will be repaired, without charge,
at the purchasers’ local dealer or at KL Industries.
For personal use, this warranty shall apply for a period of
five years on the deck and hull and two years on parts from
the date of retail sale. For commercial use this warranty
shall apply for a period of one year on the deck, hull and
parts from the original date of purchase. Any warranties
from suppliers of component parts supersede KL Industries’
warranty. This warranty covers use under normal
conditions and does not cover damage caused by accidents,
alteration, or misuse.
Freight to and from a local dealer or manufacturing plant is
at the owners’ expense.
Warranty is not valid unless registration card is returned
within 30 days of retail purchase.
Register online at www.klindustries.com
4571 Rev C