jimmy lamb - sawgrass technologies -...
TRANSCRIPT

Profitable
Sublimation
Workshop
Jimmy Lamb
Profitable Sublimation WorkshopProfitable Sublimation WorkshopProfitable Sublimation WorkshopProfitable Sublimation Workshop
A Note From The Speaker
Thanks for registering for my class, I think you will find it very worth your while and
look forward to the opportunity to share my experiences with you.
I have created this handout as a supplement to the class, rather than as an exact
outline of the presentation. I have a tendency to “fine-tune” the direction of the
seminar based on the profiles of attendees, which means I may spend more time in
some subject matters while skipping other topics (when warranted). Thus, I may not
follow the hand-out as it’s written. Think of the handout as a resource, rather than a
script.
Another point I wish to make, is that I prefer you to focus on the live content, rather
than trying to follow along in the handout. I use lots of projected images and actual
samples (when possible) so if you aren’t paying attention to the front of the classroom,
you might miss something important. Plus, it would be impossible to document every
bit of information that gets shared in the class, so if you are reading the handout trying
to figure out where I am going next, you might get behind and miss out on something
useful.
With that said, I do encourage you to print the handout and bring it to the class so that
you have something to write your notes on, but don’t let it distract you from listening
and asking questions.
Jimmy Lamb

Profitable Sublimation WorkshopProfitable Sublimation WorkshopProfitable Sublimation WorkshopProfitable Sublimation Workshop
Session 1 – Sublimation 101
Overview
Sublimation is a simple, but unique digital dye process used for printing graphic images onto polymer
surfaces. The physical steps are pretty much identical to the digital transfer process, but it’s the
chemistry that makes sublimation uniquely different from any other form of digital printing.
Just like with digital transfers, you start the process by creating an image and printing it onto transfer
paper using (in this case) sublimation inks. The transfer paper is placed on the substrate that is being
decorated and heat is applied using a heat press.
The combination of heat and pressure cause the sublimation ink to convert into a gas which then
permeates and attaches to any polymer based fibers it comes in contact with. The result is a high
resolution, permanent coloration that won’t fade or crack, even after multiple washings.
Obviously the limitation of sublimation is that it only works on polymer-based surfaces, which in the
case of apparel means some form of polyester. But with the surging demand for poly-performance
apparel, sublimation is the ideal process to have in-house. Some DTG inks and screen-print inks also
work on polyester fabrics, but rarely do they have the vivid detail and color that comes from
sublimation. And most of those inks are surface applications, whereas sublimation actually dyes the
fabrics.
Another advantage of sublimation is that it is a simple process for decorating non-apparel as well,
including items like plaques, awards, coasters, signage, clipboards, mugs, mouse pads, photo panels,
etc. In fact, the clarity and detail provided by the sublimation process make it possible to produce
true photo-realistic images. Many professional photographers use it to create portraits and other
photo products.
The startup and imaging costs are very low for sublimation, putting it in reach of any shop looking to
expand its capabilities.
Create-Print-Press – The Sublimation Production Process
Dye sublimation printing makes it possible to create highly profitable customized products in a quick
and easy three-step process:
Create! Create an image or import your artwork into a graphics program, such as CorelDRAW® or
Adobe® Photoshop®.
Print! Print your image using sublimation inks, a standard Epson® or Ricoh printer and high quality
sublimation paper.
Press! Transfer your image onto your desired substrate (T-shirt, mug, mouse pad, or other) by using a
standard flatbed or mug heat press.
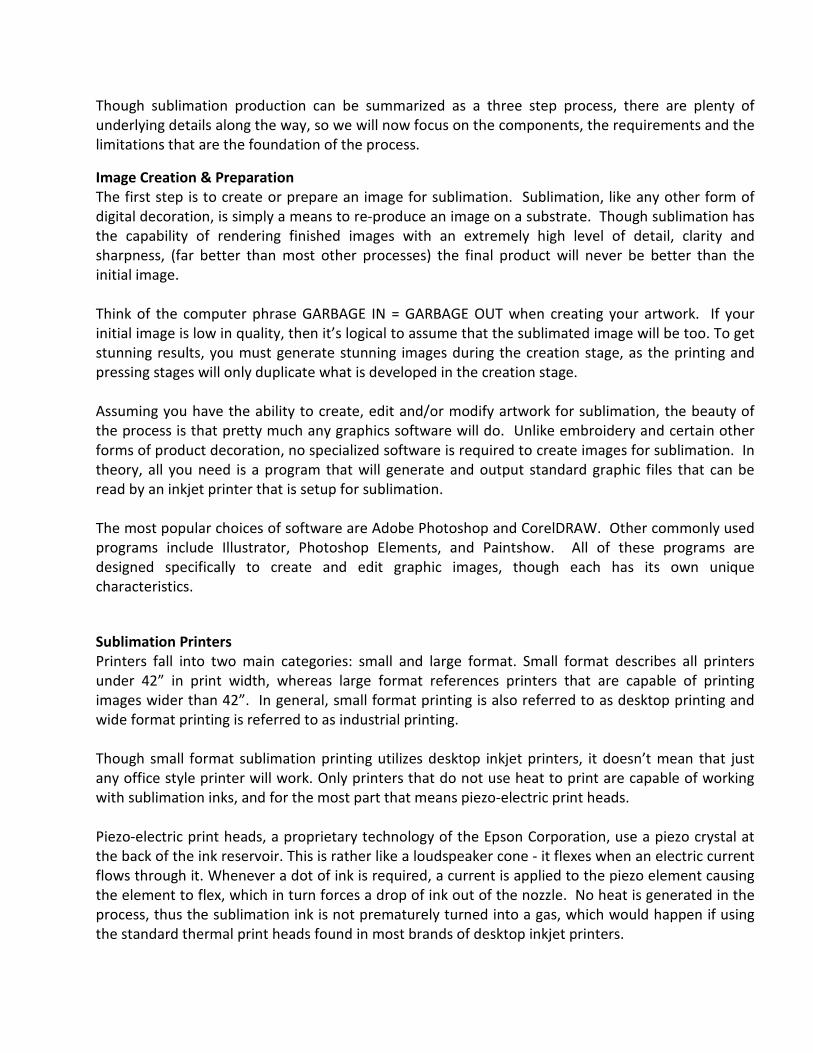
Though sublimation production can be summarized as a three step process, there are plenty of
underlying details along the way, so we will now focus on the components, the requirements and the
limitations that are the foundation of the process.
Image Creation & Preparation
The first step is to create or prepare an image for sublimation. Sublimation, like any other form of
digital decoration, is simply a means to re-produce an image on a substrate. Though sublimation has
the capability of rendering finished images with an extremely high level of detail, clarity and
sharpness, (far better than most other processes) the final product will never be better than the
initial image.
Think of the computer phrase GARBAGE IN = GARBAGE OUT when creating your artwork. If your
initial image is low in quality, then it’s logical to assume that the sublimated image will be too. To get
stunning results, you must generate stunning images during the creation stage, as the printing and
pressing stages will only duplicate what is developed in the creation stage.
Assuming you have the ability to create, edit and/or modify artwork for sublimation, the beauty of
the process is that pretty much any graphics software will do. Unlike embroidery and certain other
forms of product decoration, no specialized software is required to create images for sublimation. In
theory, all you need is a program that will generate and output standard graphic files that can be
read by an inkjet printer that is setup for sublimation.
The most popular choices of software are Adobe Photoshop and CorelDRAW. Other commonly used
programs include Illustrator, Photoshop Elements, and Paintshow. All of these programs are
designed specifically to create and edit graphic images, though each has its own unique
characteristics.
Sublimation Printers
Printers fall into two main categories: small and large format. Small format describes all printers
under 42” in print width, whereas large format references printers that are capable of printing
images wider than 42”. In general, small format printing is also referred to as desktop printing and
wide format printing is referred to as industrial printing.
Though small format sublimation printing utilizes desktop inkjet printers, it doesn’t mean that just
any office style printer will work. Only printers that do not use heat to print are capable of working
with sublimation inks, and for the most part that means piezo-electric print heads.
Piezo-electric print heads, a proprietary technology of the Epson Corporation, use a piezo crystal at
the back of the ink reservoir. This is rather like a loudspeaker cone - it flexes when an electric current
flows through it. Whenever a dot of ink is required, a current is applied to the piezo element causing
the element to flex, which in turn forces a drop of ink out of the nozzle. No heat is generated in the
process, thus the sublimation ink is not prematurely turned into a gas, which would happen if using
the standard thermal print heads found in most brands of desktop inkjet printers.

There are several advantages to the piezo method. First, the process allows more control over the
shape and size of ink droplet release. The tiny fluctuations in the crystal allow for smaller droplet
sizes and hence higher nozzle density. Also, unlike with thermal technology, the ink does not have to
be heated and cooled between each cycle. This saves time and the ink itself is tailored more for its
absorption properties than its ability to withstand high temperatures. This allows more freedom for
developing new chemical properties in inks.
You must use a high quality transfer paper designed to support commercial sublimation. Because
the paper is the media that receives the sublimated image and transfers it to the item being
decorated, it’s a critical part of the process and can have a detrimental effect when an inferior
product is used. Suitable papers include: Accuplot, Media Street (31 lb), QC Pro and TruPix Classic.
Heat Presses
There are many types and sizes of heat presses to choose from depending upon your products and
needs. Sublimation depends upon precise temperature and pressure settings, thus it’s imperative
that you invest in a good quality unit. Presses come in three basic configurations: flat, mug or cap.
The flat (flat platen) press is available as a clam-shell style or a swing-sway style. The clam-shell
version opens and closes like a clam, where the bottom platen is stationery and the top platen moves
up and down. The swing-away press opens by lifting up the top platen, but then will move sideways
completely out of the way for ease of placement and removal of transferred products.
Non-flat products require special heat presses such as the mug press and the cap press. Since both
the mug and the cap have curved surfaces, the mug and cap presses are designed to fit the curvature
of those products. There are also combination presses which offer both flat and curve pressing
capabilities via the use of specialized attachments.
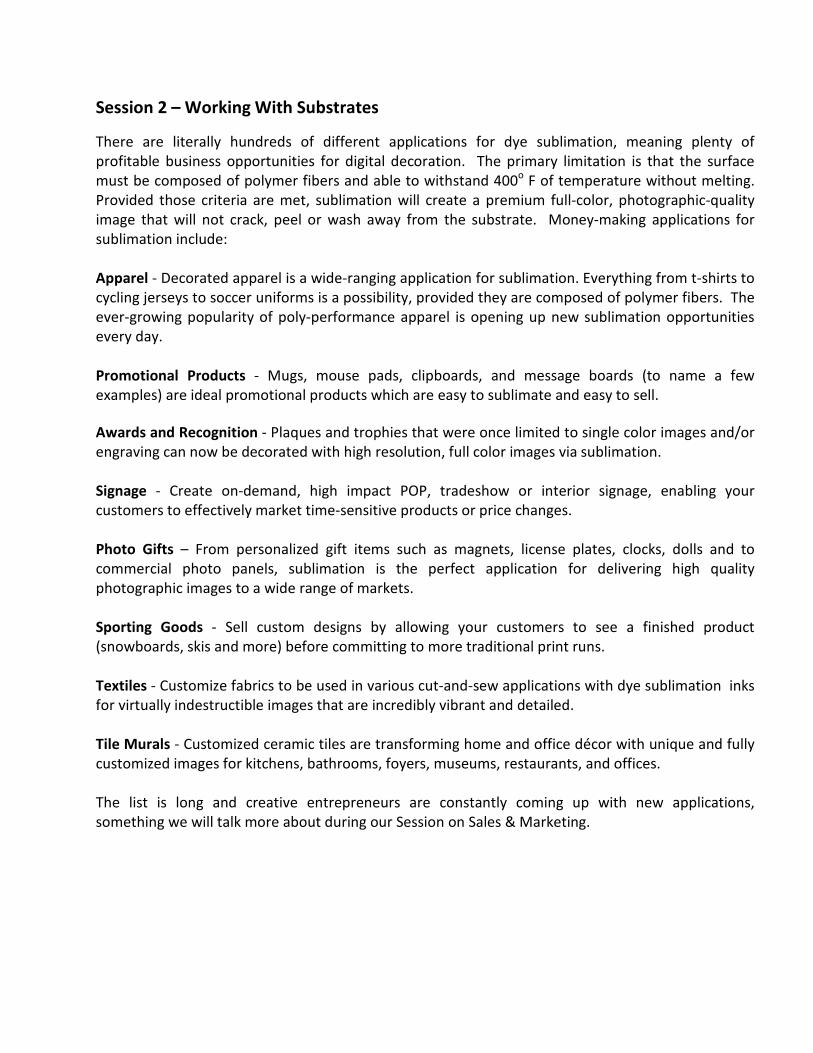
Session 2 – Working With Substrates
There are literally hundreds of different applications for dye sublimation, meaning plenty of
profitable business opportunities for digital decoration. The primary limitation is that the surface
must be composed of polymer fibers and able to withstand 400o F of temperature without melting.
Provided those criteria are met, sublimation will create a premium full-color, photographic-quality
image that will not crack, peel or wash away from the substrate. Money-making applications for
sublimation include:
Apparel - Decorated apparel is a wide-ranging application for sublimation. Everything from t-shirts to
cycling jerseys to soccer uniforms is a possibility, provided they are composed of polymer fibers. The
ever-growing popularity of poly-performance apparel is opening up new sublimation opportunities
every day.
Promotional Products - Mugs, mouse pads, clipboards, and message boards (to name a few
examples) are ideal promotional products which are easy to sublimate and easy to sell.
Awards and Recognition - Plaques and trophies that were once limited to single color images and/or
engraving can now be decorated with high resolution, full color images via sublimation.
Signage - Create on-demand, high impact POP, tradeshow or interior signage, enabling your
customers to effectively market time-sensitive products or price changes.
Photo Gifts – From personalized gift items such as magnets, license plates, clocks, dolls and to
commercial photo panels, sublimation is the perfect application for delivering high quality
photographic images to a wide range of markets.
Sporting Goods - Sell custom designs by allowing your customers to see a finished product
(snowboards, skis and more) before committing to more traditional print runs.
Textiles - Customize fabrics to be used in various cut-and-sew applications with dye sublimation inks
for virtually indestructible images that are incredibly vibrant and detailed.
Tile Murals - Customized ceramic tiles are transforming home and office décor with unique and fully
customized images for kitchens, bathrooms, foyers, museums, restaurants, and offices.
The list is long and creative entrepreneurs are constantly coming up with new applications,
something we will talk more about during our Session on Sales & Marketing.

Regardless of what the application is, the substrate that is chosen as the base material for the
product you are creating must of course be suitable for the sublimation process. Substrates for
sublimation generally fall into the following physical categories:
1. Hard Poly Fiber Products or fiber re-enforced plastic (FRP)
2. Coated Metal Products
3. Coated Ceramic Products
4. Soft Poly Fiber Products
5. Poly-performance or polyester based fabric.
Hard Poly Fiber Products
More or less, this can best be described as hard plastic stuff. Technically the term is fiber re-enforced
plastic (FRP) and in actuality it’s a lot more sophisticated than common everyday plastic. In reality,
most plastic items would never withstand the 400 degree temperature of the heat press, among
other things, so hard poly fiber products suitable for sublimation must be engineered to specific
requirements. On the outside it may look like ordinary plastic, but on the inside it’s so much more.
There are literally hundreds of creative and innovative hard poly fiber products available to
sublimators, with Unisub being the largest manufacturer (www.unisub.com). Examples include:
coasters, clocks, awards, plaques, photo panels, luggage tags, signs, puzzles, license plates, license
plate holders, picture frames, ornaments, etc.
Note: There are also coated wood products which for the most part are items that have had a hard
poly fiber surface added to them, as the preferred surface color for sublimation is white.
Coated Metal Products
On the outside, coated metal products look like any other metal products, but since sublimation
doesn’t work with metal, they are obviously quite different. Suitable products have to first be
treated with a coating that will accept sublimation. Obviously a coating is applied, something that
sounds like a do-it-yourself (DIY) kind of thing. But that is not the case, as the coating process
involves multiple layers of specially engineered coatings that are applied in a systematic method that
involves precise coverage, sanding and polishing. Uneven and/or unbalanced coatings would yield
low quality sublimation. In addition, the coatings must be chemically compatible with both
sublimation dyes and metal surfaces.
Most coated metal products have a white surface, as this is the ideal color for sublimation. However
there are specialty metal products that have silver surfaces, which can be used to create some really
cool “looks” but at the same time, the color white cannot be reproduced in a design on a non-white
surface, as white sublimation ink/dye does not exist. (More on the white ink issue coming up later.)
Examples of readily available coated metal products include: clocks, dog tags, license plates, photo
panels, name plates, aluminum water bottles, etc.

Coated Ceramic Products
Just like with coated metal products, ceramic items that are suitable for sublimation have been
coated using a special process to provide a base for sublimation dyes to adhere to. To the naked eye,
a coated ceramic product looks just like an uncoated one. But don’t expect that coffee mug from
target to work with sublimation – it won’t. One thing that separates ceramics from other types of
sublimatable products is that they pressing or curing time is longer. Typically 3-4 minutes when using
a press and 12-15 minutes when using a convection oven and wraps. Also consult the
manufacturer’s recommendations for each product.
Examples of coated ceramics include: coffee mugs, water bottles, plates, tiles, etc.
Soft Poly Fiber Products
Soft poly fiber products are not to be confused with apparel products, as they are not fabric based.
Typically, these are items made of neoprene or a similar material. The key characteristics are that
they withstand 400 degrees of heat and have suitable polymer fiber content to support sublimation.
Examples include: mouse pads, drink wraps (huggers), lapstop sleeves, stadium seats, flip flops, etc.
Poly Performance and Polyester Apparel
Poly-performance products are composed of a unique 100% polyester fabric that has been designed
with cutting-edge moisture-wicking capabilities, designed to draw sweat away from the skin. The
end result is an all-season garment that is warm in the winter and cool in the summer. In fact, some
variations have the feel of 100% cotton.
For most people, the mere mention of polyester conjures up images of a fabric that is hot, clingy,
stretchy, and silky. For those of you who remember the 70’s, leisure suits probably come to mind,
along with visions of John Travolta dancing in Saturday Night Fever… there was a lot of polyester in
that movie! Though polyester was billed as a durable, maintenance-free fabric, it lost favor over the
years as new apparel styles were developed and cotton became king.
If you or your customer is ever in doubt as to what poly-performance apparel is, just think Under
Armour! This is the company (brand) that put poly-performance apparel on the map. They certainly
aren’t the only source, but they got the ball rolling be introducing the product to the masses. And
because of their success in the marketplace, the demand has been steadily increasing, which means
you can cash in on their hard work.
There are plenty of sources and options when it comes to poly-performance blanks. Apparel
products include: basic tees, polos, sweats, safety tees, long sleeve tees, baby doll tees, tank tops,
ringers, athletic uniforms, dancewear, cycling apparel and more.
In addition to a wide range of products, you will find various fabric styles within the poly-
performance family. Some styles have the look and fill of traditional polyester, whereas others

actually feel like cotton. They both have the moisture-wicking characteristics, in spite of the
significant difference in finish.
Apparel composed of poly-performance fabric typically falls into one of two distinct categories of
“fit”: compression or loose.
Compression fit garments are meant to fit tight against the skin and are typically worn by athletes to
help prevent muscle pulls and strains. Thus, the fabric goes through repetitive cycles of stretch and
recovery which is a key focus point when you choose how to embellish compression garments.
Loose fit garments are just like they sound – apparel products meant to fit loosely on the body.
Though they may look like standard garments, they have the advantage of moisture-wicking and thus
are growing in popularity due to their extreme level of comfort.
Never Call It A T-shirt - Poly Performance products cost more than comparable products composed of
100% cotton or 50/50. For example, a poly-performance t-shirt runs about $5.00 blank, compared to
a 100% cotton t-shirt blank that could be as low as $1.00. The poly version is a PREMIUM product, so
never refer to it as a t-shirt, as that lowers the perception of what it is worth. Always reference these
products using the poly-performance phrase.
Sublimation On Dark Surfaces
Without a doubt, the best color to print on is white. And not just for apparel. Using your desktop
office printer, print out something like a flyer that has color images and text onto a white sheet of
paper. Looks pretty good doesn’t it? Ok, now print that same thing out on a sheet of yellow paper.
Notice the decrease in image quality. Now use a sheet of red paper – ick! As a final test, go with the
darkest color of paper you can find – dark green? dark blue? The results speak for themselves; white
is by far the best background color you can print on in every situation in order to get the most
vibrant, detailed image possible.
But image quality isn’t the only issue when it comes to surface color. Most printing equipment does
not offer the color white as an ink choice, which means it’s impossible to recreate this color when
printing. The normal method is to leave the white areas of an image “open” so that the color of the
background shows through. Envision a soccer ball – it’s a combination of white and black and black
pentagons. If you print it on a white background, everything looks great. If you print it on a yellow
background, the white areas of the ball are now yellow, because the background color is showing
through the open areas that should be white. This problem is not restricted to paper. In the apparel
printing world, it’s a very serious challenge.
The standard method is to use a specially formulated type of white ink which is applied as a base for
the image being printed. This initial layer has to be graphically correct, meaning that all layers of ink
applied on top of it completely cover it so that no embarrassing traces of the white ink show up
outside the contours of the design.
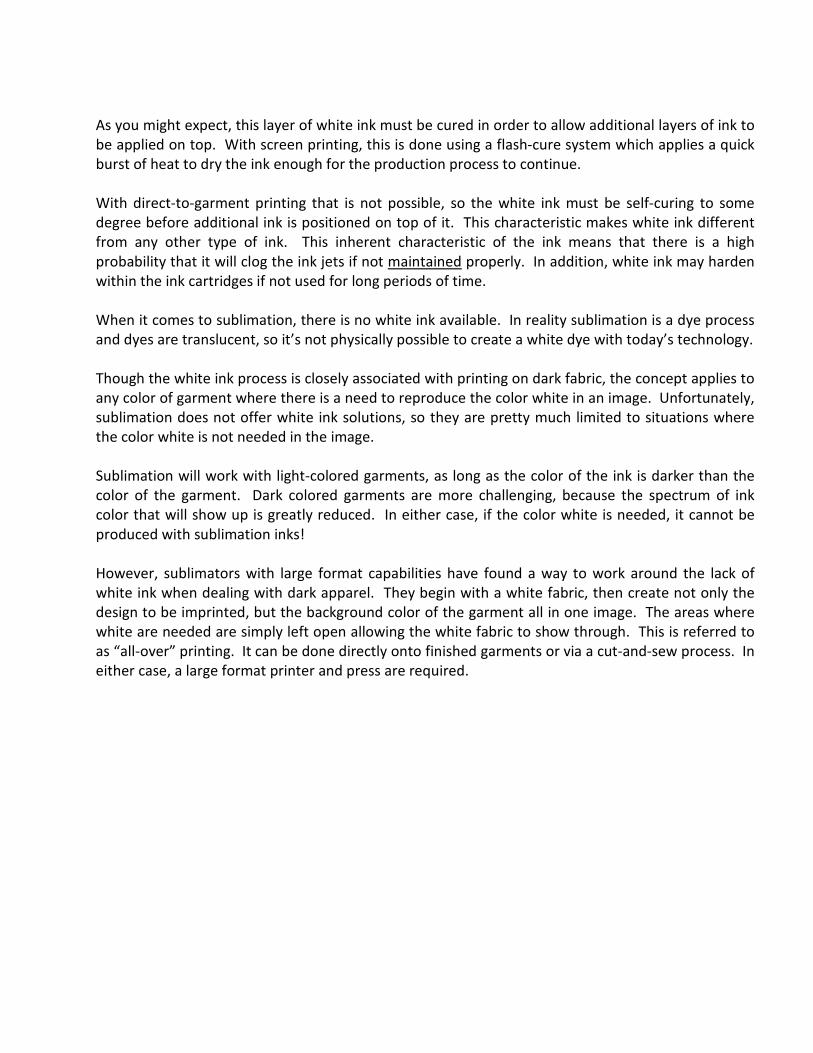
As you might expect, this layer of white ink must be cured in order to allow additional layers of ink to
be applied on top. With screen printing, this is done using a flash-cure system which applies a quick
burst of heat to dry the ink enough for the production process to continue.
With direct-to-garment printing that is not possible, so the white ink must be self-curing to some
degree before additional ink is positioned on top of it. This characteristic makes white ink different
from any other type of ink. This inherent characteristic of the ink means that there is a high
probability that it will clog the ink jets if not maintained properly. In addition, white ink may harden
within the ink cartridges if not used for long periods of time.
When it comes to sublimation, there is no white ink available. In reality sublimation is a dye process
and dyes are translucent, so it’s not physically possible to create a white dye with today’s technology.
Though the white ink process is closely associated with printing on dark fabric, the concept applies to
any color of garment where there is a need to reproduce the color white in an image. Unfortunately,
sublimation does not offer white ink solutions, so they are pretty much limited to situations where
the color white is not needed in the image.
Sublimation will work with light-colored garments, as long as the color of the ink is darker than the
color of the garment. Dark colored garments are more challenging, because the spectrum of ink
color that will show up is greatly reduced. In either case, if the color white is needed, it cannot be
produced with sublimation inks!
However, sublimators with large format capabilities have found a way to work around the lack of
white ink when dealing with dark apparel. They begin with a white fabric, then create not only the
design to be imprinted, but the background color of the garment all in one image. The areas where
white are needed are simply left open allowing the white fabric to show through. This is referred to
as “all-over” printing. It can be done directly onto finished garments or via a cut-and-sew process. In
either case, a large format printer and press are required.
Session 3 - Common Mistakes That New Sublimators Make
It’s a known fact that you learn more from getting it wrong than from getting it right, but why waste
time learning from YOUR mistakes when you can learn just as much from EVERYONE ELSE’S
mistakes?
On the surface, sublimation is a relatively simple process that is quick and easy to learn. Couple that
with the super low start-up costs combined with a wide range of profitable products that can be
created, and you have the makings of the perfect add-on to any decorated apparel business. But
sublimation has a learning curve just like any other process and more than a handful of
entrepreneurs have spent an inordinate amount of time scratching their heads trying to get it all
figured out.
Here is a look at ten of the most common mistakes that new Sublimators make.
Printing On The Wrong Side Of The Paper
Most sublimation transfer papers have a right side and a wrong side, which are easily identified by
the words “This Side Up”…right??? … WRONG! On the contrary, the majority of transfer papers do
not have an easy identifying mark to designate which side should be printed on. This is a situation
where you really need to pay attention to the instructions provided by the paper supplier to avoid
printing on the wrong surface. Usually, there are markings on the package as to which side is up, but
then you go and do something really smart like remove the transfer paper from the package. (That’s
me!) But have no fear, in most cases one side is slightly brighter than the other and that is the
correct side for printing.
However, identifying the correct side is only half the battle – you still need to get it into the printer
the right way. Be sure to read the printer instructions on this one. With some units, you place the
paper so the print side is up, whereas, with others the print side goes down.
Not Using Blowout Sheets
What the heck is a blowout sheet? It’s that Teflon sheet that came with your heat press and it has
two purposes. The first is to protect the surface of the substrate from any dirt, grease, stray ink, or
whatever on the heat press during pressing. The second is to prevent any stray ink from the transfer
paper or substrate from migrating onto the pressing surfaces of the heat press.
While most people use the Teflon sheet supplied with the press, eventually it can become soiled in
which case it loses its effectiveness. A great alternative is to use blank newsprint. It’s cheap and
quite absorbent. However, it’s also a one-time use product, so discard after every pressing. By the
way, if you are pressing both sides of a product like a bag or shirt, you will want to add a second
blowout sheet underneath when you flip it over to do the second side. You may also want to add a
third one inside the item to prevent any unwanted transfer of ink from the previously pressed side
over to the side bring pressed.

Using Poor Quality Images
It should go without saying that high quality sublimation starts with high quality images, but
somewhere along the way, that message seems to get lost. But it’s really simple: garbage in =
garbage out. As great as the sublimation process is at printing high resolution, finely detailed, full
color images, it can’t convert bad images into good ones. So what is the ideal resolution? That’s a
tricky question, as resolution is tied to image size.
In general, most Digital Decorators prefer artwork in the 350 dpi range for the size of the given
application. Keep in mind that increasing the size will reduce the dpi. For example, If you were
printing a 4” x 4” tile, then the image needs to be 350 dpi at 4” x 4”. If the image was 350 dpi at 2” x
2”, your resolution would decrease by about half when you increased the image size to 4” x 4”.
Bottom-line: size does matter! It should also be noted, that dpi only applies to raster or bitmap
images. Vector art on the other hand is resolution independent, meaning that resizing does not
affect image quality. The only limiting factors become the abilities of an output device such as a
printer.
Not Mirroring The Design
With sublimation you must mirror the design when printing. There is a setting on your printer driver
for this, but it’s easy to forget when you are just starting out, especially since sublimation is pretty
much the only application that requires mirroring. But the first time you print something that is
spelled backwards you will understand why you need to mirror the image.
Not Using Appropriate Substrates
Repeat after me: “Sublimation only works with polyester fabrics and polymer coated hard surfaces!”
There are all kinds of cool things that you can sublimate like flip flops, ceramic tiles, mugs, water
bottles, puzzles, plaques, etc, but in order for the process to work those items must have a polymer
coating on the surface.
Same concept applies to apparel. Forget 100% cotton products. 50/50 shirts will work, but the
image will only be absorbed into the polyester fibers (not the cotton fibers) and not look the same as
one applied to a 100% poly-performance garment, which is the ideal apparel product for sublimation.
Leaping Before Looking
Sublimation is like anything else, it has a learning curve. You need to experiment and practice
BEFORE taking your first order. There are all kinds of little things to deal with like heat press settings.
Though the standard recommendation for sublimation is 400oF for 60 seconds at 40pis of pressure,
every heat press is a little bit different and various substrates will ultimately respond differently to
those settings. You need to run plenty of test samples and make the necessary adjustments to fine
tune your system so that you consistently generate high quality products. Learning how to sublimate
on a customer’s order is a bad thing!
Knowledge is power and lack of education is a poor excuse. With all of the online resources available
at your fingertips, plus seminars at Trade Shows and special events, you are surrounded with

hundreds of educational opportunities. Take advantage of them, as it can save you a lot of time and
aggravation in the long run.
Graphically Challenged
There are three components to the sublimation process – Create / Print / Press. Printing and
pressing are pretty straight forward as long as the creation part is done properly. Thus, you need to
be somewhat proficient with some form of graphics software in order to create high quality images
that print correctly. CorelDRAW is probably the most popular program used by Sublimators followed
by PhotoShop, Illustrator and PhotoShop Elements. Though they are all great programs, it takes
some time to learn to use each of them effectively. With all of the seminars, webinars, videos and
books available, there is ample opportunity to successfully learn a program on your own. It really
should be a prerequisite for doing sublimation, as this is the heart of the process.
Failure To Read The Instructions
Ok guys, this one’s for you. It’s acceptable to read the instructions as long as no one sees you doing
it! Yes, sublimation is billed as a “plug-n-play” technology, but you still need to review the manuals
and videos that tell you how to set your system up. For example, you do NOT want to load the OEM
inks (the ones supplied with the printer) before installing the sublimation inks. If you do, then you
are going to have to flush out all of the OEM ink before proceeding with the setup. With most
sublimation products, you will also need to download and install a software driver to ensure the
printer can process the sublimation inks properly.
Beyond that, there are instructions on how to sublimate different products, how to setup your heat
press, how to troubleshoot color matching, etc, etc. Take the time to read and understand what it
takes to effectively manage your new system BEFORE you plug anything in.
What You See Is Not What You Get
It’s a known fact that the colors you see on a computer screen are not the colors that come out of
the printer. Sure, they are close (in most cases) which may be fine for the casual consumer but not
when to comes to reproducing corporate logos and fine photography. This problem of color mis-
match is not the result of a defective system, rather it comes from the fact that there are multiple
pieces of image rendering equipment involved in the process, each having different methods and
ranges of color management. First and foremost, the computer monitor is displaying in RGB mode
while the printer is printing in CMYK mode. And with sublimation, what comes out of the printer is
not the final color as it will shift again during the pressing. It’s kind of like translating French to
English to Spanish, you can get the general message across, but rarely is there a direct word-to-word
match-up.
The ink manufacturer typically provides an ICC profile or basic color management software to enable
you to optimize colors for specific substrates, but it helps to have good clear cut visual references to
assist with color matching. The key for this with sublimation is to create reference charts that
correlate the final colors to what you see on the screen.
To do this, simply print the color palette that is used by your sublimation printer driver (it includes
the RGB codes). Then press it onto a reference substrate such as a photo panel. This becomes a
visual representation of what the colors will look like in their final form. Select the colors for your
design based on this chart, rather than relying on the screen colors. It may not look correct on the
screen, but you will know what it will look like when it comes off the press.
For more advanced users, you can create your own color palettes or profiles that show the same
color on screen as the final sublimation result. Essentially, you will create RGB color values for the
screen that link to the correct CMYK color values for the output.
Improper Printer Maintenance
Without a doubt, this is by far the most common mistake encountered by new Sublimators. Like it or
not, ink – all forms of ink – dries out over time. If this happens inside the print heads, then obviously,
the flow of ink will be inhibited, which means poor quality or in worst case, no printing at all.
As long as you are printing on a regular basis – at least several times per week – the ink will not have
an opportunity to dry out. But for long stretches of time with no printer activity, you could have
issues.
The simplest way to deal with this is to run a small quantity of ink through the heads on a routine
basis. In the case of Ricoh printers, this is done for you automatically, as long as you leave the printer
powered up. However, for Epson printers you will need to perform a manual print head cleaning
every few days, which means pushing a button. Other than remembering to do it, this is sooooo
simple, but it’s amazing how many people don’t keep up with it.
For those of you who have a short term memory, there is another solution: Harvey Head Cleaner
www.harveyheadcleaner.com . This is a utility program designed to prevent head clogging in inkjet
printers by performing head cleaning automatically. You set it up and it does the work as long as you
leave everything powered up!
Key thing to remember: No Power – No Clean!
So there you have it – ten common mistakes that new (and some old) Sublimators make. It’s not
difficult to bring sublimation online in your business, but just like any other new process you need to
take your time and learn the ins and outs so you don’t find yourself making all these classic goofs,
which will ultimately cost you money, lower your self-confidence, and delay your ability to generate
profitable products for your customers.
Session 4 – Pricing & Cost Analysis
The first element of a profitable price strategy is the most important: cost. If you don’t know what it
costs to operate your business, then it’s highly unlikely that you can create a pricing system that
works. Too many people focus on the cost of the ink, but in the grand scheme of things ink costs are
a very small part of the equation. There are many costs to running a business, and these expenses
must be factored into your pricing system in order to recoup them and make a profit on top of that.
Thus, you must start the process of pricing with a focused cost analysis strategy.
Step 1 - Determine Operational Costs
Your first step is to identify and add up all of the projected costs for operating your business for one
year. Keep in mind that some costs are fixed, while others may be changing as your business grows.
Thus, you should put everything in a spreadsheet so that you can constantly update as your business
changes. Also, costs such as merchandise for resale will be recovered in the sales process, so don’t
include it here, unless you are entering into a payment plan for purchasing such merchandise. In
addition, be sure to include your desired paycheck! The final result will be the total estimated dollars
that you need to pay all of your yearly bills plus your paycheck. But always keep in mind that there
will be unexpected costs and fluctuations in some of your costs, so don’t assume this number is
carved in stone. But it is a reasonable starting point for your cost analysis. (We will cover this in
detail during class.)
Step 2 - Break Down The Costs Into Usable Increments
Taking the information gathered in the initial assessment phase, you should now have an
approximate figure for the annual cost of operation. Suppose that number was $60,000.00. What
does that tell you? Pretty much nothing at all, so you need to break this number down into
something that is easier to deal with.
Decide how many weeks you plan to operate your business per year. Most people go with 48
initially, as this equals two weeks of vacation and ten business holidays. Divide $60,000.00 by 48 and
you come up with $1250.00, which is your weekly cost of operation. Said another way, you need to
bring in at least this amount of money in net dollars each week, 48 weeks per year, in order to reach
your yearly number. Divide this number by 5 to see what the daily figure is ($250.00) and by 40 to
determine the hourly figure ($31.25).
You can now see quite realistically what it costs to run your business on a daily basis. This
information will make it easier to track the performance as well, because you essentially have a
series of production goals that must be met in order to generate the required amount of annual
revenue needed to pay the bills and yourself.
Step 3 - Compare Production Against Costs
Once you have usable operating cost figures, then it’s time to compare them against your “logical”
production capabilities in order to see what it really costs to generate sublimated images.
Unlike many other decoration processes, sublimation is pretty constant in terms of production time.
Regardless of the size of an image, the pressing time remains the same – about one minute for most
applications. Printing time can vary with the size of the image and with the printer being used, but in
the case of some systems like the Ricoh, printing time rarely exceeds 30 seconds for anything.
For simplicity, assume that it take 30 seconds to print, 30 seconds to prepare substrate for press and
60 seconds to press per item. That works out to 2 minutes. Thus, within reason you have a
maximum output POTENTIAL of 30 pieces per hour.
If your hourly cost of operation is $31.25 (calculated earlier) and your potential maximum production
is 30 pieces per hour, then a quick bit of math reveals your cost per item to produce is $1.04. That
includes ink, paper, labor, insurance, utilities, etc, etc, etc. In fact, the only thing it doesn’t include is
the cost of the substrate and of course a sizable markup.
If you play with the figures, you will also see, that if you increase your production output per hour
against the same overhead, you will reduce the cost per item. And if you go the other way, you will
of course see the numbers increase. It’s important to understand this concept, as different variable
in different jobs will affect the cost of the item being produced.
For example, if you are sublimating coasters, you can usually print out 5 images on one sheet of 8 ½”
x 11” paper and press 5 coasters at once as a result. Thus you are producing 5 items per cycle
instead of one. In theory, that would yield 30 cycles/hour X 5 items/cycle or 150 pieces per hour.
Now the production cost is $0.21 per coaster (not including substrate).
But of course that is just numbers on paper. If you think it through, there will be more prep time for
setting up five coasters to press than for setting up one, because you need to tape each one into
place on the transfer then flip it upside down and place on the press without shifting - more like a
minute (or more) than 30 seconds for prep time. But if you take the time to play with numbers and
variables, you can start to generate some pretty decent base figures for pricing.
So far your numbers assume you are running your equipment non-stop, all day long, but that will not
be the case. Every job requires setup and finishing, which means pre and post production downtime.
In fact, these production downtimes can be higher than the actual production time when dealing
with small orders. For example, let’s say you have to produce 12 plaques, each taking about 2
minutes to print and press for a total production time of 24 minutes. However, you need to do some
logo work which will take another 15 minutes. And at the end of the production cycle you will need
to wrap and box the plaques, something that will take about 15 minutes. Now your total job time is
54 minutes, which can be rounded off to 60 minutes. So the reality is that you produced, beginning
to end, 12 items in 1 hour. At an hourly cost of $31.25, each plaque cost $2.60 to produce when you
add in the pre and post production times.

The end result here is that you must be sure you are covering the true job costs in any pricing scheme
you use. In addition, you will have to add in the cost of the substrate, shipping charges for getting
the substrate in your hands, credit card percentages and of course a decent mark-up.
Once you are in class, we will go over all of this information in detail and also look at how to calculate
pricing for various quantities of products. It will all be done using an electronic spreadsheet which
will be made available to you so that you can develop your own pricing system at home.

Session 5 – Sales & Marketing
What are you selling? Sublimation? If that’s your answer, then you are on the wrong track with your
business (unless you are a contract production shop). There is way too much emphasis in this
industry on the decoration itself. We are all Decorators, we do embellishment, we sell imprinted
garments, we produce printed logos, etc. But at the end of the day, how do we really differentiate
ourselves from the competition? After all, any sublimation shop can put a logo on a substrate, what
makes you unique?
To better define this concept, we will go through a visual test to see if you really understand what it
is that you are selling.
Quick Test Item #1
What do you see in this picture? Sublimated mouse pads? Wrong! This is
a billboard for promoting someone’s business, summed up in one simple
word: advertising.
Too many times we don’t place the appropriate emphasis on what it is that
we are selling. A mouse pad is boring – sublimation means nothing to the
customer. Advertising on the other hand is an essential part of growing a
business. In marketing terms, this is referred to as “putting a spin on it”, in other words elevating an
everyday item to superstar status. A customer really needs a good reason to spend money with you,
so you have to come up with a compelling reason as to why they should. Simply stating that you
produce good quality products at a great price is not usually an exciting sales approach.
For example, you could walk into a tackle shop and say to the owner, “Hi I’m Jimmy and I own
imprinting business. We would love to do business with you and can easily put your business name
on a variety of products including apparel, license plates, huggers, etc. We have great quality and
competitive pricing…blah, blah, blah.” How exciting is that? You just said the same thing that every
other Decorator is probably saying, but you didn’t give the customer any real incentive to learn more.
Everything you say and do must be focused on one thing – filling a need for that customer!
Quick Test Item #2
What does this look like? By now I’m sure you are on the right track. Definitely
not a digitally printed shirt, but rather a souvenir.
If you are offering a line of products with tourist designs and location names, you
are in the business of selling souvenirs and even memories for that matter.
People take great pride in being able to say “been there, done that” and that is
the purpose of a souvenir product. Look at Hard Rock Café and Planet
Hollywood. They both have built a business around selling souvenir products – you probably made
the mistake of thinking they were restaurants. They did too – in the beginning.
Quick Test Item #3
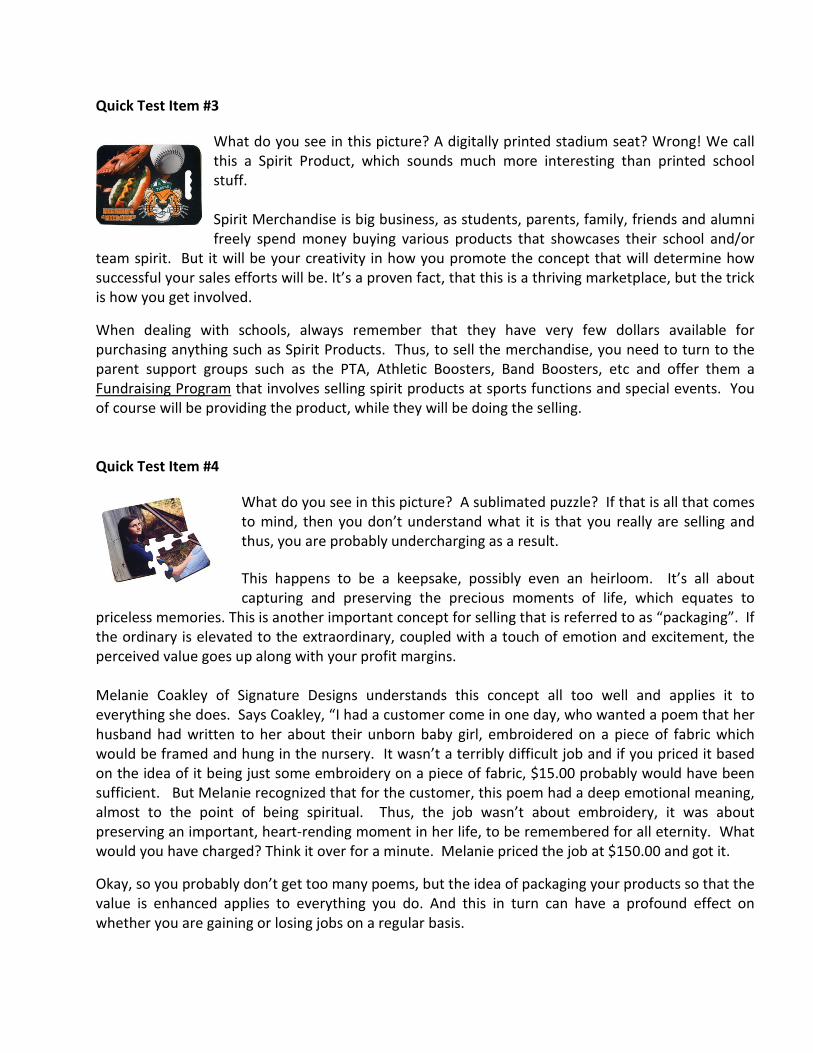
What do you see in this picture? A digitally printed stadium seat? Wrong! We call
this a Spirit Product, which sounds much more interesting than printed school
stuff.
Spirit Merchandise is big business, as students, parents, family, friends and alumni
freely spend money buying various products that showcases their school and/or
team spirit. But it will be your creativity in how you promote the concept that will determine how
successful your sales efforts will be. It’s a proven fact, that this is a thriving marketplace, but the trick
is how you get involved.
When dealing with schools, always remember that they have very few dollars available for
purchasing anything such as Spirit Products. Thus, to sell the merchandise, you need to turn to the
parent support groups such as the PTA, Athletic Boosters, Band Boosters, etc and offer them a
Fundraising Program that involves selling spirit products at sports functions and special events. You
of course will be providing the product, while they will be doing the selling.
Quick Test Item #4
What do you see in this picture? A sublimated puzzle? If that is all that comes
to mind, then you don’t understand what it is that you really are selling and
thus, you are probably undercharging as a result.
This happens to be a keepsake, possibly even an heirloom. It’s all about
capturing and preserving the precious moments of life, which equates to
priceless memories. This is another important concept for selling that is referred to as “packaging”. If
the ordinary is elevated to the extraordinary, coupled with a touch of emotion and excitement, the
perceived value goes up along with your profit margins.
Melanie Coakley of Signature Designs understands this concept all too well and applies it to
everything she does. Says Coakley, “I had a customer come in one day, who wanted a poem that her
husband had written to her about their unborn baby girl, embroidered on a piece of fabric which
would be framed and hung in the nursery. It wasn’t a terribly difficult job and if you priced it based
on the idea of it being just some embroidery on a piece of fabric, $15.00 probably would have been
sufficient. But Melanie recognized that for the customer, this poem had a deep emotional meaning,
almost to the point of being spiritual. Thus, the job wasn’t about embroidery, it was about
preserving an important, heart-rending moment in her life, to be remembered for all eternity. What
would you have charged? Think it over for a minute. Melanie priced the job at $150.00 and got it.
Okay, so you probably don’t get too many poems, but the idea of packaging your products so that the
value is enhanced applies to everything you do. And this in turn can have a profound effect on
whether you are gaining or losing jobs on a regular basis.

Quick Test Item #5
What is this? Proof that people will buy just about anything if it’s packaged
creatively…
Some might refer to it as a scam, but there was nothing hidden about the fact
that the product was just as it appeared – a basic rock.
So, what is it that you are selling?
You are selling products that use embellishment to deliver a message and/or enhance the value of the
item being offered for sale.
Perception Is Reality
Bottom-line, it’s only worth what someone will pay for it. Therefore you must focus on raising the
perceived value of what it is you are selling, in order to get the highest possible margin, while
increasing your chances of closing the deal. This is accomplished through a combination of
creativity, uniqueness, positioning and packaging. Rather than spending time trying to figure out
how to do something cheaper, you should focus on how to raise the customer’s perceptions to a
higher level of price-point.
Someone else will always do it cheaper. If you give it away for free, someone else will pay the
customer to take it…
Selling on price is like building a sand castle on the beach at low tide. There is plenty of satisfaction
right up until the reality of the high tide wipes it all out and leaves you with nothing.
A Picture Is Worth A Thousand Words And A Fistful of Dollars
The beauty of digital decoration is that you can easily create so many cool products with a high level
of perceived value. The key of course is to take advantage of the tools. Too many Decorators simply
act like robots and process the order exactly as dictated by the customer. Though this sounds like
good customer service, you might be losing money due to the lack of knowledge and imagination on
the part of the customer.
Using high energy graphics, inspiring layouts and really cool products, you have the opportunity to
turn ordinary into extraordinary which accomplishes three important objectives:
1. Higher margins.
2. Larger volume orders.
3. Increased sales from repeat orders.

Summing It All Up
So take a look at what you have to offer, then think about what purpose it serves the end-user and
use this information to repackage what you sell so that it excites the customer rather than incites
them. Be sure to place plenty of emphasis on the worth of the product rather than the cost of the
components and stay away from simple formulas like 100% markup, as the actual selling price is a
function of the customer’s perception of value of the product. And in many cases that is much higher
than what some simple formula yields.
But also keep in mind, that it’s not just about WHAT you are selling, but also WHO you are selling it
to. It’s critical that you make your products unique and creative, while appealing to the wants and
demands of your targeted customer. Everyone is concerned about price, but if you can’t satisfy the
needs of the customer, then price has very little bearing on whether you get the order or not.
The rest of our session will focus on developing and delivering profitable products which will make
use of images and samples. We will then do a little bit of real sublimation production where you can
burn your hands just like me!
So that about does it for the handout. I know it’s a lot of information, but it’s really
only a small part of what we will cover in the actual Workshop. So come prepared to
learn with plenty of questions. I look forward to working with you.
See you in class!
Jimmy Lamb
Want To Learn More?
Webinars, Seminars, Videos & More
www.sawgrassink.com/education
Want To Learn More?
Webinars, Seminars, Videos & More
www.sawgrassink.com/education-events
Contact Me
Want To Learn More?
Webinars, Seminars, Videos & More
events