introduction to graphql - evan huus · challenge: learn about the third type of graphql query - a...
TRANSCRIPT

Introduction to GraphQLJuly 13, 2018MidDevCon
Baltimore, MD
@ShopifyDevs http://developers.shopify.com

Welcome! My name is Evan

Shout out: MLH Localhost
● Special thanks to Major League Hacking, who created these workshop materials
● Major League Hacking (MLH) powers over 200 weekend-long invention competitions that inspire innovation, cultivate communities and teach computer science skills to more than 65,000 students around the world.
● Localhost is their “between hackathon” workshop offering
https://mlh.io/@MLHacks

What will you learn today?

Why does this matter?

Table of contents1. Introduction to APIs and GraphQL

Why are APIs important?Example: Google APIs
●
●
●
●
●

What is REST?● Representational State
Transfer.
●
●
●

What is GraphQL?Graph Query Language.

The graph in GraphQLA partial data graph GraphQL schema

GraphQL executionA partial data graph Resolver

Benefits of GraphQL●
●
●
●
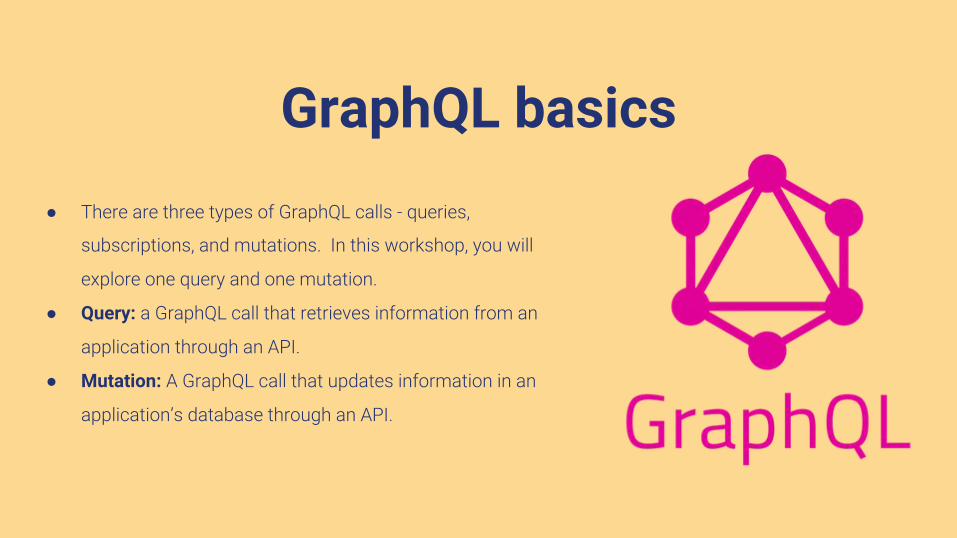
GraphQL basics●
● Query:
● Mutation:

GraphQL query structure●
●
●
●
01 query { 02 user(id: "abc123") {03 name 04 email06 birthday 07 }08 }

GraphQL response structure
●
●
01 { 02 "user": {03 "name": "MidDevCon",04 "email": "[email protected]" ,06 "birthday": "July 13, 2018"07 }08 }

GraphQL users

GraphQL at Shopify●
●
●
●

Table of contents
2. Preview the app

Try the demo application: https://nl-localhost-shopify.herokuapp.com/
Goal:Purchase power- in a game using the Shopify Storefront API
Technologies:Node.jsJavaScriptHTML / CSS GraphQL

Step1: install Node
Follow the installation instructions for the type of computer you have at the following URL:
https://nodejs.org/en/download/
Let me know if you have any trouble!

Step 2: download the sample code
To get the sample code, enter this URL in your browser:
https://bit.ly/GraphQLIntro
Let me know if you have any trouble!

Step 3: unzip files
$ cd ~/Downloads
$ Expand-Archive mlh-localhost-shopify-graphql-master.zip . Windows
Mac
Do not forget the "." in this command
$ cd ~/Downloads
$ unzip mlh-localhost-shopify-graphql-master.zip

Step 4: run the Node server
$ cd mlh-localhost-shopify-graphql-master
$ ls
README.md node_modules/ package.json public/ server.js
$ node server.js
Listening on http://localhost:5000/
Mac and Windows

Step 5: navigate to the URL below
localhost:5000
Notice something missing?

Set up Shopify for developmenthttps://developers.shopify.com
1. Creating a developer account.2. Creating a development store on your account.3. Creating an app on your store.4. Setting up free payments on your store.

Register for a Shopify developer account
https://developers.shopify.com
1. Navigate to the address above. 2. Click "Create account."

Register for a Shopify developer account
3. Enter your name and email address4. Choose a password5. Click “Create account”

Register for a Shopify developer account
6. Fill in the rest of the form and click “See Partner dashboard” at the bottom.

Register for a Shopify developer account
7. Click “Development stores.”

Register for a Shopify developer account
8. Click “Create store”

Register for a Shopify developer account
9. Give your store a unique name, don’t use “snake game” or anything similar because the name needs to be unique to your store.
10. Fill in the rest of the form and then click “Save.”

Get credentials11. On the left side of the home screen, click "Apps".
12. Click "Manage private apps" on the bottom of the next screen.

Get credentials13. Click “Create a new private app.”
‘

Get credentials14. Name your private app.
15. Enter an email. 16. Click "Allow this app to access your storefront data using the Storefront API."
17. Click "Save."

Connect your store to application19. In your preferred text editor, open the project folder you downloaded. In
public/js/queries.js, paste your storefront access token on Line 2.
01 var storeFrontAPI = "https://name-of-your-store.myshopify.com/api/graphql";02 var storeFrontAccessToken = "12345acbde";
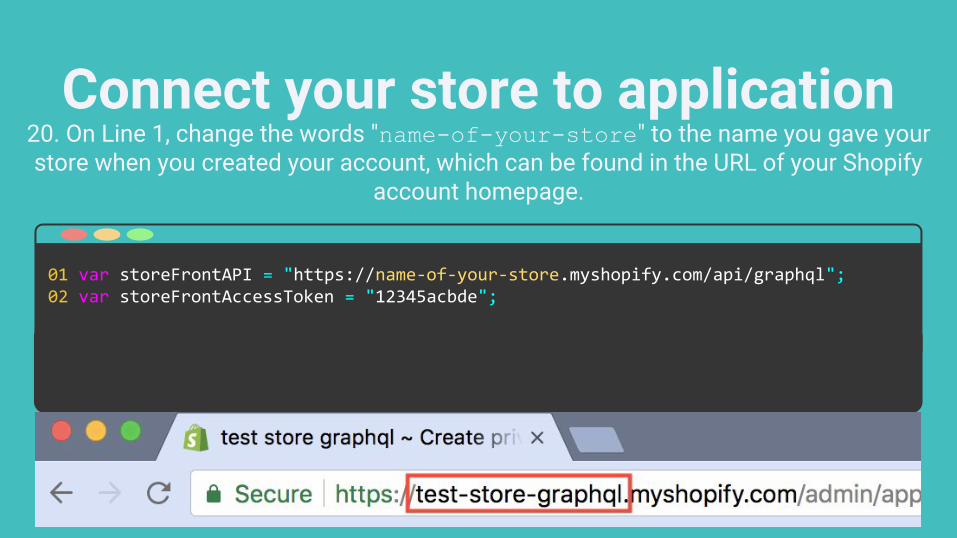
Connect your store to application20. On Line 1, change the words "name-of-your-store" to the name you gave your store when you created your account, which can be found in the URL of your Shopify
account homepage.
01 var storeFrontAPI = "https://name-of-your-store.myshopify.com/api/graphql";02 var storeFrontAccessToken = "12345acbde";

Set up paymentsNow that you have connected your store to your application, return to your Storefront
home page in your browser so that you can set up payments. 1. Click "Settings" at the bottom of your screen.

Set up payments2. Click “Payment providers”

Set up payments3. Scroll to "Manual payments" and select "Create custom payment method."

Set up payments4. Give your payment method a name and click "Activate."

Add power-ups to the storefront
Now that you have created your Storefront, we're going to add the power-ups to the store!
Let us know if you’re still setting up! ✋

Add power-ups to store1. Return to your account home page on Shopify. 2. On the upper left-hand side of the screen, click "Products." 3. Then, click "Add Product."

Add power-ups to store4. Name the product "Extra Life." 5. Give the product a simple description, like "Extra Life Power-Up."

Add power-ups to store6. Upload public/images/storefront-images/extra-life.png image from the project folder you downloaded. 7. Verify that "Charge taxes on this product" is NOT checked. 8. Verify that "This is a physical product" is NOT checked.

Add power-ups to store9. At the bottom of the page, click "Edit website SEO." 10. In the URL and handle field, change the name from "extra-life" to "power-up-1." It must be spelled and formatted exactly like this for the game to work.

Add power-ups to storeThe game we previewed at the beginning of this workshop had four power-ups. Repeat the process you just completed to add the Speed Boost Power-Up.
Be sure to: ● Upload the "speed-boost.png" image● Uncheck "Charge taxes on this product" and "This product requires
shipping" ● Change the website seo to be "power-up-2"

Table of contents
4. Write your own GraphQL calls

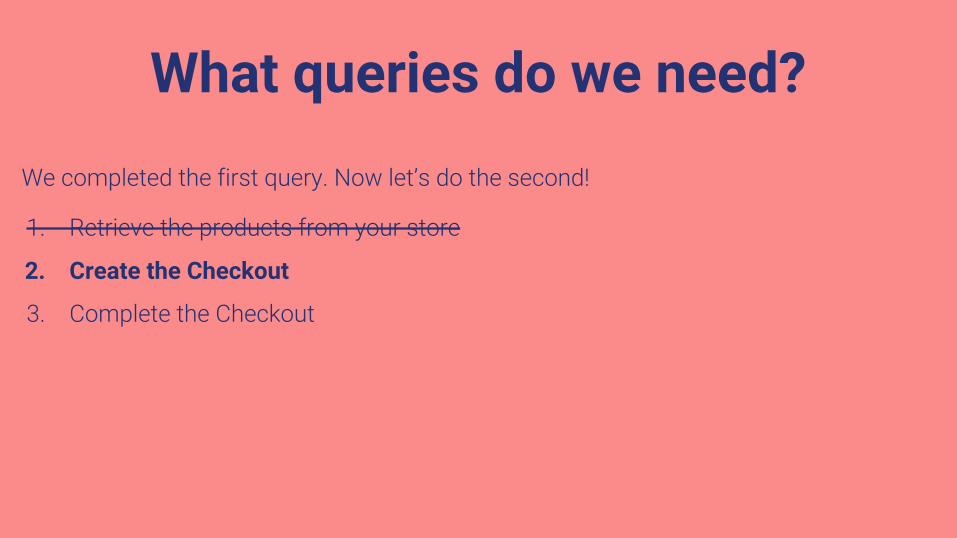
What queries do we need?
1. Retrieve the products from your store
2. Create the Checkout
3. Complete the Checkout

Code review: queries.jsqueries.js makeRequest
05 function makeRequest(query) {06 var headers = { 07 "X-Shopify-Storefront-Access-Token": storeFrontAccessToken,08 "Content-Type": "application/json"09 };10 11 return $.ajax({ 12 url: storeFrontAPI 13 type: "POST", 14 data: JSON.stringify({ query: query }), 15 headers: headers 16 }); 17 }

Write your first GraphQL callhttps://help.shopify.com/en/api/custom-storefronts
/storefront-api/graphql-explorer
GraphiQL
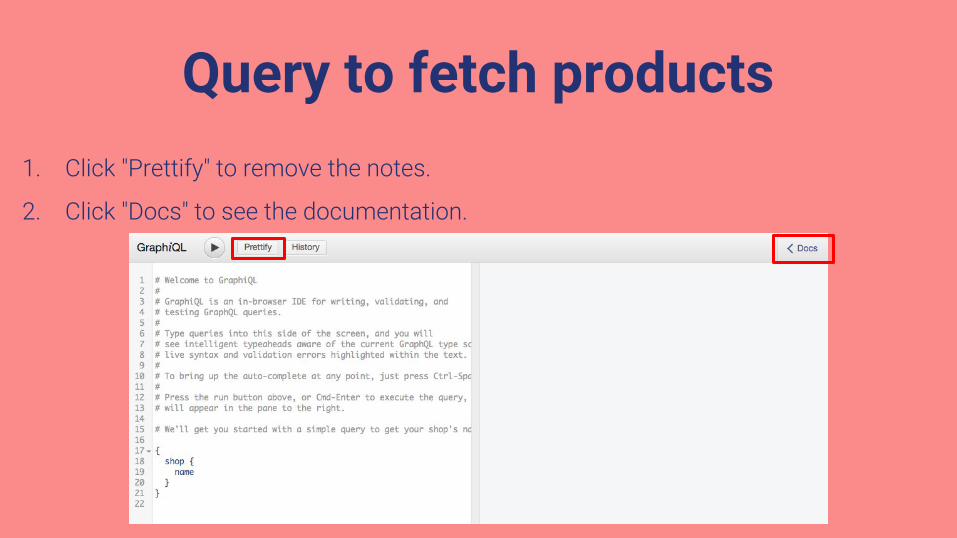
Query to fetch products

Query to fetch products
Key term: QueryRoot:

Query to fetch products

Query to fetch products

Query to fetch products

Query to fetch products
you must provide one of first or
last.

Query to fetch productsfirst last products
first: 2) products
Key term: Argument: Information
passed to a function that is used
by the function to produce the
desired result.

Query to fetch products
Product Connection!

Query to fetch products
ProductEdge! edges

Query to fetch productsedges node
Product! node

Query to fetch productsQuestion:

Query to fetch productsAnswer: images title

Query to fetch productsid
title
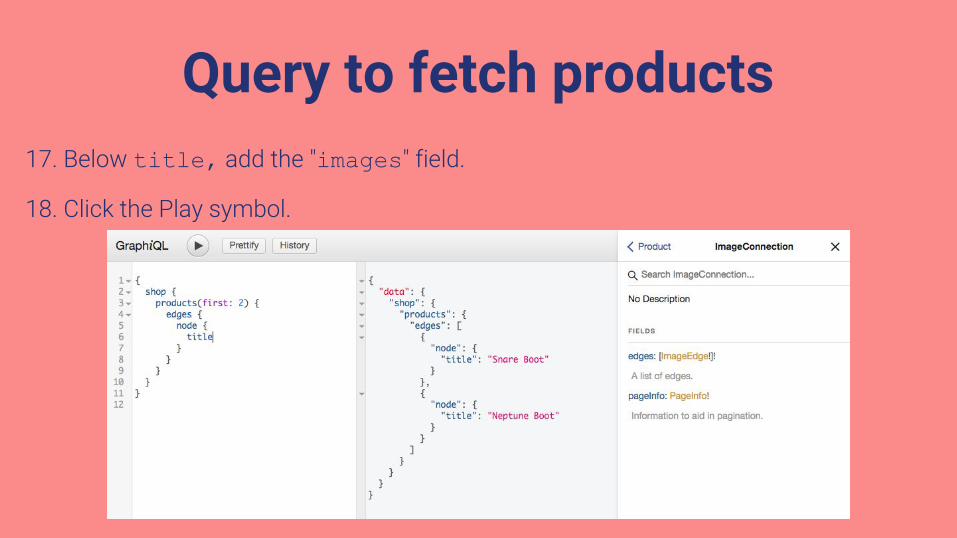
Query to fetch productstitle, images

Query to fetch productsyou must provide one of first or last
images
first: 1 images

Query to fetch productsid
ImageConnection! ImageEdge! Image.

Query to fetch productsid originalSrc URL
id originalSrc

Query to fetch productsvariant
src variants(first: 1)

Query to fetch productsqueries.js

Write your first GraphQL call: queries.js
19 // Queries for product information20 function fetchProducts() {21 var query = `22 query {23 shop {24 products(first: 4) {25 edges {26 node {27 title28 images(first: 1) {29 edges {30 node {31 src32 }33 }34 }35 variants(first: 1) {36 // Code Continues Below

Let’s test the game
node server.js
$ [CTRL C]
$ node server.js
Listening on Port 5000

Let’s test the game
localhost:5000
What queries do we need?
2. Create the Checkout

Write a mutation: Delete the double slashes / / on lines 53 to 64 in queries.js
55 // function buyPowerUp(variantId) {56 // var query = `57 // mutation {58 // checkoutCreate(input: {59 // lineItems: [{60 // 61 // }]62 // }) {63 // checkout {64 //65 // }66 // }67 // }68 // `;69 //70 // return makeRequest(query);71 // }

Code review● buyPowerUp()
variantId
● variantId
● query
55 function buyPowerUp(variantId) {56 var query = `57.. 6768 `;69 70 return makeRequest(query);71 }

Code review
55 function buyPowerUp(variantId) {56 var query = `57 mutation {58 checkoutCreate(input: {59 lineItems: [{60 61 }]62 }) {63 checkout {64 65 }66 }67 }68 `;69 70 return makeRequest(query);71 }

Code review●
● checkoutCreate()
● checkoutCreate() input
checkout
57 mutation {58 checkoutCreate(input: {59 lineItems: [{60 61 }]62 }) {63 checkout {64 65 }66 }67 }

Code reviewhttps://help.shopify.com/api/storefront-api/reference/mutation/checkoutcreate
input
● lineItems
● lineItems
57 mutation {58 checkoutCreate(input: {59 lineItems: [{60 61 }]62 }) {63 checkout {64 65 }66 }67 }

Challenge
57 mutation {58 checkoutCreate(input: {59 lineItems: [{60 61 }]62 }) {63 checkout {64 65 }66 }67 }
https://help.shopify.com/api/storefront-api/reference/mutation/checkoutcreate
lineItems

Solution
57 mutation {58 checkoutCreate(input: {59 lineItems: [{60 61 }]62 }) {63 checkout {64 65 }66 }67 }
lineItems
● quantity
● variantId

Update your code
57 mutation {58 checkoutCreate(input: {59 lineItems: [{60 quantity: 1,61 variantId: "${variantId}"62 }]63 }) {64 checkout {65 66 }67 }68 }
● On line 60, we added the quantity argument with a value of 1 which means the default
number of power-ups to buy is 1.
● On line 61, we added the variantId argument with a value of "${variantId}" which takes
the value we passed to the function on line 55 and puts into in the query variable.

Challenge
57 mutation {58 checkoutCreate(input: {59 lineItems: [{60 quantity: 1,61 variantId: "${variantId}"62 }]63 }) {64 checkout {65 66 }67 }68 }
● The checkout return field (line 62) has no input fields.
● We're going to add three. The first is webUrl.
● Look at the checkCompletedPurchases() function at the bottom of queries.js and
compare it to the documentation for checkout to see if you can determine the other two input
fields!

Solution
63 }) {64 checkout {65 webUrl66 completedAt67 id68 }69 }
The three fields are webUrl, completedAt, and id.

Let’s test the game
$ [CTRL C]
$ node server.js
Listening on Port 5000
● Type [CTRL] [C] in the command line to kill the server.
● Type node server.js to restart the server.

Test your game!

Table of contents
5. Review

Let’s recap quickly...

Table of contents
6. Next steps

Keep learningPractice problems for later
1. CategoriesChallenge: Reorganize your products into categories, which will require you to update the requests you make.
2. Subscriptions Challenge: Learn about the third type of GraphQL query - a subscription - and try to recreate the 3rd GraphQL call in queries.js from scratch, with help from the documentation

Continue your learning
● Read the GraphQL documentation: http://graphql.org/learn/
● Read the Shopify Storefront documentation:https://help.shopify.com/api/storefront-api
● Read the Shopify Admin documentation:https://help.shopify.com/en/api/graphql-admin-api
● Discover other APIs using GraphQLhttp://graphql.org/users/

Shopify developer program
● Solve interesting problems for over 600,000 business owners worldwide
● Keep 80% of any app revenue you generate● Refer stores and generate ongoing income● Help build the future of commerce!
http://developers.shopify.com@ShopifyDevs

Have a couple minutes?Please take this super short survey! Your feedback is a
gift.
https://bit.ly/madevcon
http://developers.shopify.com@ShopifyDevs

Thank you! Don’t be a stranger!
And don’t forget your socks
http://developers.shopify.com@ShopifyDevs