introduction to forensic microscopy - forensic science · part 2 introduction to forensic...
TRANSCRIPT

Module 4BIntroduction to Forensic
Microscopy
Forensic Science Teacher Professional Development

Part 2 Introduction to Forensic Microscopy
There are several steps in the process of
recovery and examination of trace evidence:
1. Detection
2. Isolation
3. Identification
4. Comparison
5. Evaluation

Part 2 Introduction to Forensic Microscopy
1) Detection of trace evidence is usually achieved by observations
of crime scene investigators at a scene of crime or by a trace
analyst in the crime laboratory.
Magnifiers, stereomicroscopes with an alternate light source, are
always used to facilitate the discovery and detection of trace
evidence from a crime scene or from an object.
Figure 3 A regular view of
the keyboard of a laptop
Figure 4 A shaft of hair can be
better discovered under this macro
view of the keyboard.

Part 2 Introduction to Forensic Microscopy
In Figure 3 and Figure 4, a hair can be better
observed under a macro view of the
keyboard.
Since trace evidence is often invisible to the
naked eye, it can be better detected under a
macro view.
The crime scene investigator or trace
analyst should bring his or her eyes closer to
the object with bright lights (or alternate light
sources) at the stage of trace evidence
detection (or evidence search).

Part 2 Introduction to Forensic Microscopy
Similar examples can be seen in Figure 5 and Figure 6. With
a macro view, the observer can recognize more details of the
object.
Figure 5 A regular view of the
objects on a table
Figure 6 A macro view of the
objects on a table

Part 2 Introduction to Forensic Microscopy
2) Isolation (physical removal) of trace from a
substrate can be carefully performed with tools
like tweezers, scalpels, or needles under a
stereomicroscope, once the trace is detected.
3) Identification occurs through physical and
chemical methods, after targeted trace
evidence is isolated from a substrate.
Generally, least destructive analytical methods
should be performed first before destructive
methods.

Part 2 Introduction to Forensic Microscopy
4) Comparisons between known samples and
questioned samples can then be performed
based on the results from the physical
examination and the chemical analysis of the
samples.
5) Evaluation occurs to determine the location
of the trace evidence, the origin of the
manufacturer, and its end-use. Unique
information can be generated as an
investigative lead.

Part 2 Introduction to Forensic Microscopy
Microscopic examination of trace evidence is
the fast and affordable way to identify and
compare trace evidence.
A microscope is the most fundamental tool
in a trace laboratory.
Microscopic examination of trace evidence is
usually performed with a stereomicroscope
followed by a compound light microscope.
Optical properties, such as refractive index
and birefringence, can be readily determined
by the use of a polarized light microscope
(PLM).

Part 2 Introduction to Forensic Microscopy
To learn the fundamentals of microscopy, a visit to the
following website is recommended.
http://micro.magnet.fsu.edu/primer/index.html

Part 2 Introduction to Forensic Microscopy
• Electromagnetic property of
light
• Particle property of light
• Wave property of light
• Sources of visible light
• Fluorescence
• Speed of light
• Reflection of light
• Refraction of light
• Diffraction of light
• Polarization of light
• Interference of light
• Optical birefringence
• Color temperature
• Light filters
• Human vision and color
perception
• Light and energy
• Lenses and geometrical
optics
• Basic properties of mirrors
• Prisms and beam splitters
• Laser light sources
Fundamental properties of light and color include the following:
Part 2 Introduction to Forensic Microscopy
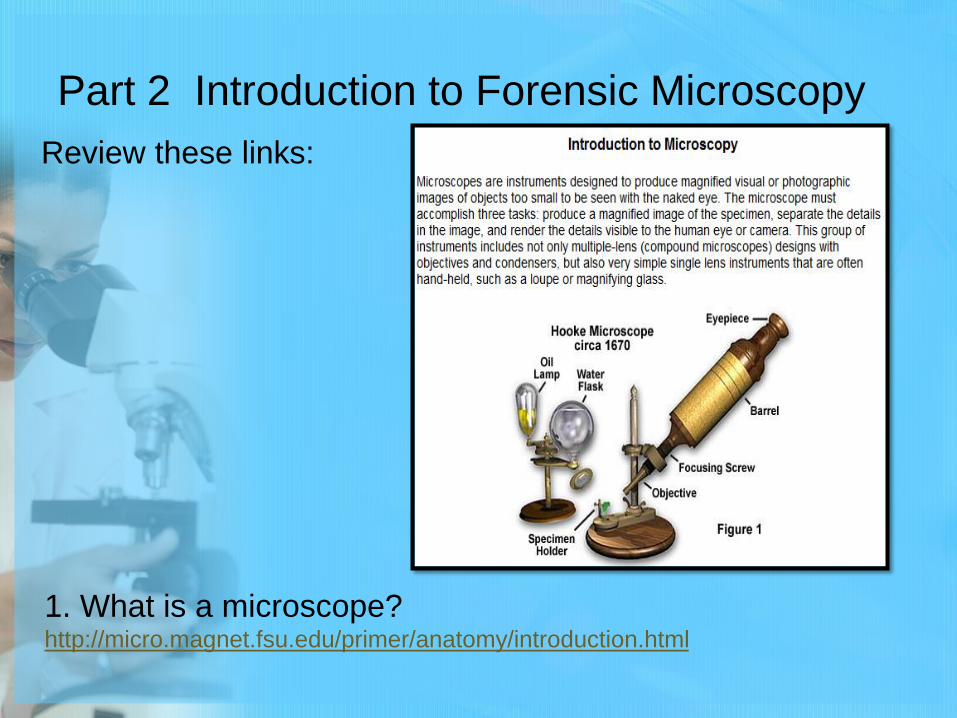
Review these links:
1. What is a microscope?http://micro.magnet.fsu.edu/primer/anatomy/introduction.html

Part 2 Introduction to Forensic Microscopy
Review these links:
2. What is Köhler Illumination?http://micro.magnet.fsu.edu/primer/anatomy/kohler.html

Part 2 Introduction to Forensic Microscopy
Review these links:
3. What is a stereomicroscope?http://www.microscopyu.com/articles/stereomicroscopy/stereointro.html

Part 2 Introduction to Forensic Microscopy
Review these links:
4. Microscope: Basics and Beyond (50 pages in PDF format;
20.7 MB)http://micro.magnet.fsu.edu/primer/pdfs/basicsandbeyond.pdf
Part 2 Introduction to Forensic Microscopy
Review these links:
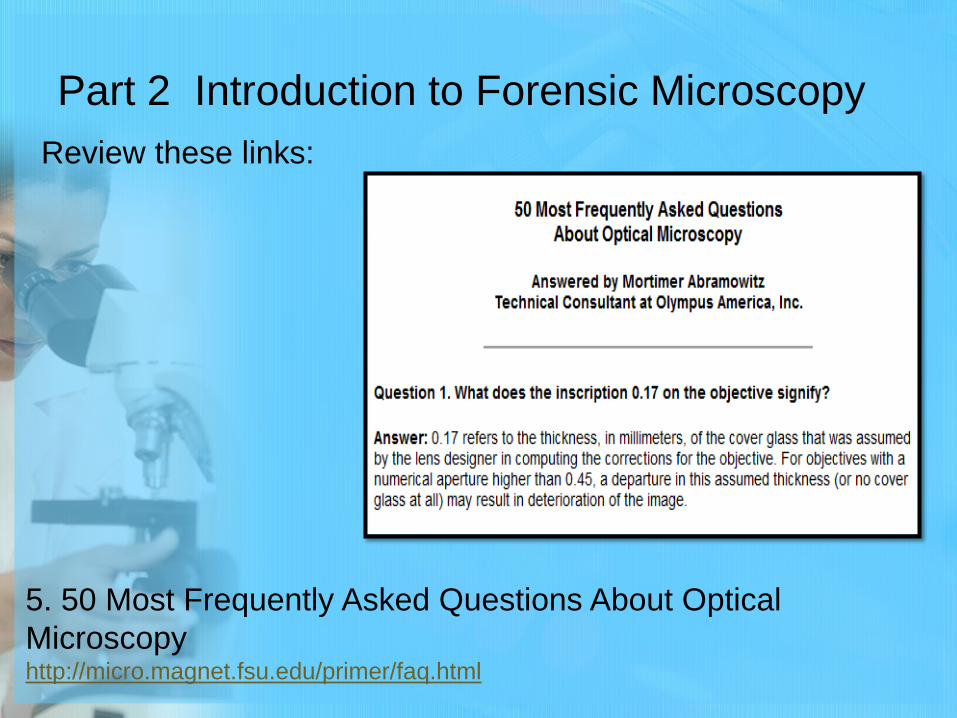
5. 50 Most Frequently Asked Questions About Optical
Microscopyhttp://micro.magnet.fsu.edu/primer/faq.html
Part 2 Introduction to Forensic Microscopy
Techniques of microscopy, such as
• Bright field
• Dark field
• Differential Interference Contrast (DIC)
• Fluorescence
• Phase contrast
• Polarized light
These can also be found on the listed websites
and reading assignment.
Part 2 Introduction to Forensic Microscopy
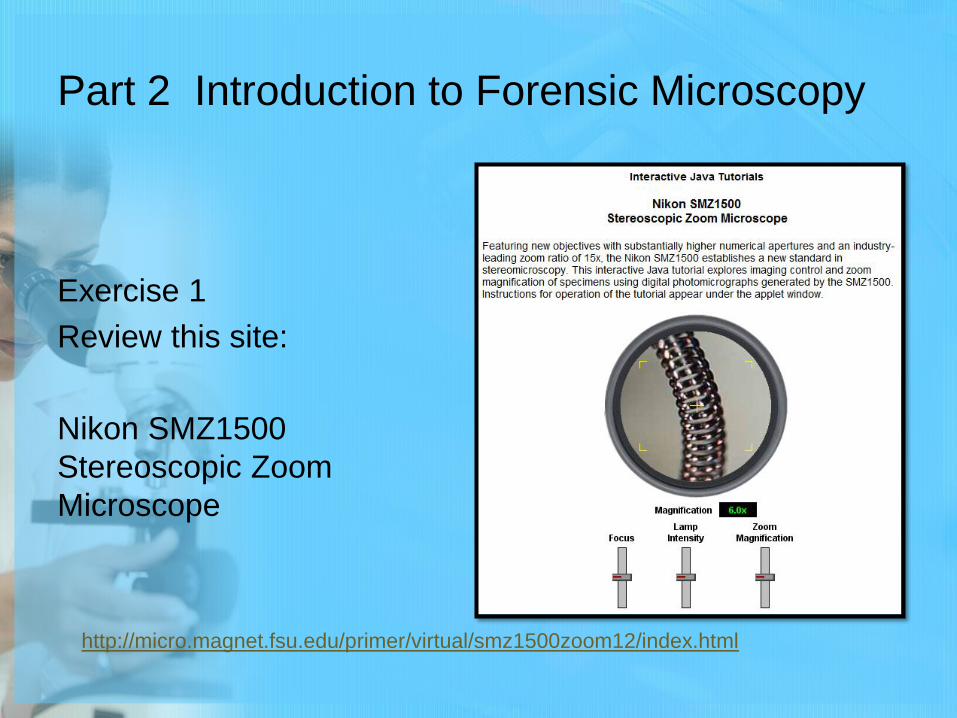
Exercise 1
Review this site:
Nikon SMZ1500
Stereoscopic Zoom
Microscope
http://micro.magnet.fsu.edu/primer/virtual/smz1500zoom12/index.html

Part 2 Introduction to Forensic Microscopy
Exercise 2
Review this site:
Polarized light microscope
http://micro.magnet.fsu.edu/primer/virtual/polarizing/index.html

Part 2 Introduction to Forensic Microscopy
Exercise 3
Review this site:
Virtual Microscope
http://virtual.itg.uiuc.edu/

Part 2 Introduction to Forensic Microscopy
Important optical properties of material
Mounting Media (Mountant)
Using a mounting medium not only preserves the sample against
oxidation, but also provides a better contrast for the observation of
sample morphologies.
The magnitude of contrast to which a colorless transparent specimen
can be seen when immersed in different mounting media is known as
relief.
The higher the difference of refractive index (RI) between the mounting
medium and samples, the better the contrast (the higher the relief).
The contrast oil, a mounting medium with a known refractive index, can
be used to temporarily prepare samples for microscopic examinations.

Part 2 Introduction to Forensic Microscopy
Important optical properties of material
Mounting Media (Mountant), continued
For example, refractive index (matching) liquids from Cargille can be
good mounting media for a temporary mount.
Many trace evidences can be permanently mounted using Canadian
balsam, which is a natural resin with excellent optical properties and a
refractive index near that of glass.
A semi-permanent mount such as Cargille MeltmountTM can be used for
a variety of samples.
It is a waxy solid at room temperature, but it liquefies under modest heat
from a water bath or a hotplate for easy mounting and removal.
PermountTM Resin dissolved in toluene can also be used for a semi-
permanent mount for trace evidence.

Part 2 Introduction to Forensic Microscopy
Becke line
The refractive index (RI) of a microscopic
material can be determined by the
immersion method, in which a sample is
immersed in different mounting media with
known RIs.
The difference between the RIs of the
mounting medium and the sample can be
determined by observing the movement of
the Becke line when the working distance is
increased.
The Becke Line is a bright halo observed
along the edges of a sample when the
focus is raised after the sample is in sharp
focus.

Part 2 Introduction to Forensic Microscopy
Becke line
The Becke line always moves toward the substance with the
higher RI when the focus of a sharply focused sample is
raised (resulting in increasing working distance).
Figure 7 When glass has a higher
refractive index, the Becke line is
observed inside the glass sample as
the working distance increases.
Figure 8 When glass has lower
refractive index, the Becke line is
observed outside the glass sample as
the working distance increases.

Part 2 Introduction to Forensic Microscopy
In a crime laboratory, the refractive
index of trace glass evidence is
usually measured by a GRIM ®
(Glass Refractive Index
Measurement) system, shown in
Figure 8. The GRIM can measure
the RI of a trace glass particle using
an immersion method with a
temperature-controllable hot stage.
The GRIM determines the matching
point temperature of the immersion
oil at which the contrast of the glass
image is at a minimum. The
matching point temperature is then
converted to a refractive index from
a calibration data of the immersion
oil.
Figure 9 A GRIM ® (Glass Refractive
Index Measurement) system can
measure the refractive index of a
microscopic glass sample with high
precision.
http://www.fosterfreeman.com/tech-5/412-glass-ri.html

Part 2 Introduction to Forensic Microscopy
Isotropic
A material is classified as isotropic when
there is only one refractive index observed
from the material.
The refractive index is uniform regardless of
the light ray’s angle of incidence.
Examples are gases, liquids (excluding
“liquid crystals”), and amorphous solids
(glass, cubic crystals).

Part 2 Introduction to Forensic Microscopy
Anisotropic
A material is classified as anisotropic
when there are two or more refractive
indices observed from the material.
In other words, when a light source
attempts to pass through an
anisotropic material, the light will
experience two or more refractive
indices in different directions within
the materials. Birefringence is the
difference of the maximum and
minimum indices of refraction in an
anisotropic material represented by
the formula,
birefringence = (RI max – RI
min). *RI refers to Refractive Index
Figure 10 An example of
birefringence of calcite

End of Module 4B
Forensic Science Teacher Professional Development