intro to powerpoint 2007 handout - university of north...
TRANSCRIPT

INTRO TO POWERPOINT 2007
Department of Technology Enhanced Learning Information Technology Systems Division
What’s New in PowerPoint 2007 ............................ 2
Using the Ribbon .................................................... 3
Creating a Presentation .......................................... 5
Creating New and Consistent Slides ...................... 7
Entering Text .......................................................... 8
Formatting Text .................................................... 10
Inserting a Picture ................................................. 11
Inserting Movies and Sounds ............................... 12
Inserting a Chart ................................................... 13
Starting a Slide Show ........................................... 15
Navigating a Slide Show....................................... 16
Creating an End Slide ........................................... 17
Printing a Presentation ......................................... 18
TOPICS COVERED
For assistance contact the Technology Assistance Center:
962-4357 E-mail: [email protected]
Updated 9/07
INTRO TO POWERPOINT 2007
Intro to PowerPoint 2007 Department of Technology Enhanced Learning Last Modified: 9/07 Information Technology Systems Division, UNCW
2
What’s New in PowerPoint 2007
Whether you need to put together a quick presentation of sales figures for your department or create a polished slide show for your manager, PowerPoint 2007 can help you present your information efficiently and professionally.
PowerPoint is a presentation graphics program that helps you create a slide show presentation and supplements, such as handouts and speaker's notes. A slide show presentation is made up of a series of slides that can contain charts, diagrams, pictures, bulleted lists, eye-catching text, multimedia video and sound clips, and more. PowerPoint 2007 is set up with a tab-based Ribbon (New!) and dialog boxes that provide you with the tools you need when you need them to get tasks done.
PowerPoint provides a variety of professionally designed templates and style galleries to help you create great-looking presentations. When you complete your presentation, you can save it in a more efficient PowerPoint XML format or as a PDF document, send it through e-mail for review, or package it on a CD for clients.
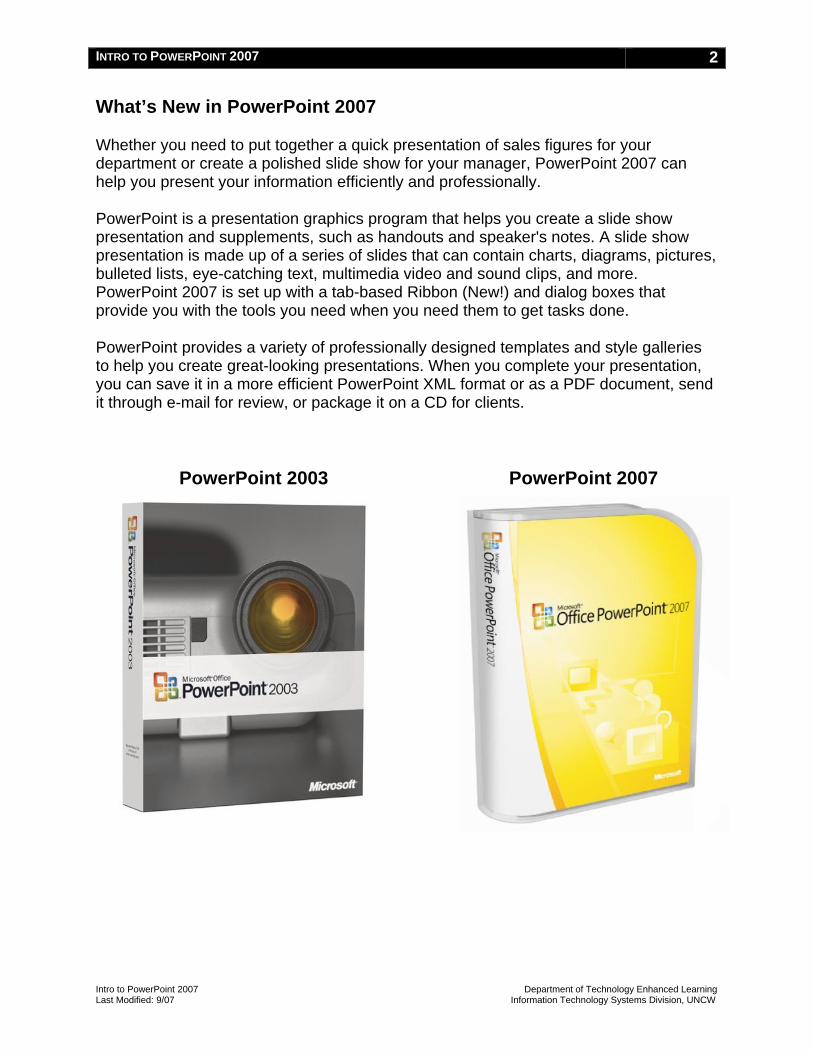
PowerPoint 2003 PowerPoint 2007

INTRO TO POWERPOINT 2007
Intro to PowerPoint 2007 Department of Technology Enhanced Learning Last Modified: 9/07 Information Technology Systems Division, UNCW
3
Using the Ribbon
The Ribbon is a new look for PowerPoint 2007. It replaces menus, toolbars, and most of the task panes found in PowerPoint 2003. The Ribbon is located at the top of the presentation window and is comprised of tabs that are organized by task or objects. The controls on each tab are organized into groups, or subtasks. The controls, or command buttons, in each group execute a command, or display a menu of commands or a drop-down gallery. Controls in each group provide a visual way to quickly make presentation changes.
HINT: To minimize the Ribbon, double-click the name of the tab that is displayed. Double-click a tab to maximize it.
Tabs
PowerPoint provides three types of tabs on the Ribbon. The first type is called a standard tab - such as Home, Insert, Design, Animations, Slide Show, Review, View, and Add-Ins..
The second type is called a contextual tab - such as Picture Tools, Drawing, or Table - that appear only when they are needed based on the type of task you are doing. PowerPoint recognizes what you're doing and provides the right set of tabs and tools for you to use when you need them.
The third type is called a program tab - such as Print Preview, Slide Master, Handout Master, or Notes Master - that replace the standard set of tabs when you switch to certain views or modes.
NOTE: When you point to a gallery option, such as WordArt, on the Ribbon, PowerPoint displays a live preview of the option change so that you can see exactly what your change will look like before committing to it.

INTRO TO POWERPOINT 2007
Intro to PowerPoint 2007 Department of Technology Enhanced Learning Last Modified: 9/07 Information Technology Systems Division, UNCW
4

INTRO TO POWERPOINT 2007
Intro to PowerPoint 2007 Department of Technology Enhanced Learning Last Modified: 9/07 Information Technology Systems Division, UNCW
5
Creating a Presentation
If you are not sure how you want your presentation to look, you can start a new presentation from scratch. You can create a blank presentation when you first start PowerPoint or after you have already started PowerPoint. Either way, a blank presentation appears, ready for you to use. When you create a new presentation, PowerPoint names them Presentation1, Presentation2, etc. until you save and name them. The presentation name appears on the title bar and taskbar buttons.
Start a Blank Presentation
1. Start PowerPoint.
2. A blank presentation appears when you first open PowerPoint.
Start a Blank Presentation within PowerPoint
1. Click the Office button, and then click New.
2. The New Presentation dialog box appears, display the Blank and recent category.
3. Click Blank Presentation.
4. Click Create.
5. A new blank presentation appears in the PowerPoint window.

INTRO TO POWERPOINT 2007
Intro to PowerPoint 2007 Department of Technology Enhanced Learning Last Modified: 9/07 Information Technology Systems Division, UNCW
6
Start a Presentation from a Template
PowerPoint provides a collection of professionally designed templates that you can use to help you create presentations. Start with a template when you have a good idea of your content but want to take advantage of a template's professional look. A template is a PowerPoint presentation file (.potx) that provides you with a unified presentation design, which includes layouts, themes and slide masters, so you only need to add text and graphics. In the New Presentation dialog box, you can choose a template from those already installed with PowerPoint or from Microsoft Office Online, an online content library. You can choose a Microsoft Office Online template from one of the listed categories or from the Spotlight (New!) section, which highlights new PowerPoint content.
1. Click the Office button, and then click New.
2. Choose one of the following:
• Click the Blank and recent category to open recently used templates. • Click the Installed Templates category, and then click a template. • Click the My Templates category to open a dialog box. • Click the Featured category, and then a template from the Spotlight section. • Click a Microsoft Office Online template category, and then click a template.
3. Click Create or Download.

INTRO TO POWERPOINT 2007
Intro to PowerPoint 2007 Department of Technology Enhanced Learning Last Modified: 9/07 Information Technology Systems Division, UNCW
7
Creating New and Consistent Slides
Creating consistent looking slides makes it easier for your audience to follow and understand your presentation. PowerPoint provides a gallery of slide layouts to help you position and format slides in a consistent manner. A slide layout contains placeholders, such as text, charts, tables, or SmartArt graphics, where you can enter text or insert elements. When you create a new slide, you can apply a standard layout or a custom layout of your own design. You can also apply a layout to an existing slide at any time. When you change a slide's layout, PowerPoint keeps the existing information and applies the new look.
Insert a New Slide
1. Click the Home tab.
2. Click the New Slide button arrow.
3. In the Slide Layout gallery, click the slide layout you want to use.

INTRO TO POWERPOINT 2007
Intro to PowerPoint 2007 Department of Technology Enhanced Learning Last Modified: 9/07 Information Technology Systems Division, UNCW
8
Entering Text
In Normal view, you can type text directly into the text placeholders. A text placeholder is an empty text box. If you type more text than fits in the placeholder, the text is automatically resized to fit on the slide. You can also manually increase or decrease the line spacing or font size of the text. The insertion point (the blinking vertical line) indicates where text will appear when you type. To place the insertion point into your text, move the pointer over the text. The pointer changes to an I-beam to indicate that you can click and then type. When a selection box of dashed lines appears, your changes affect only the selected text. When a solid-lined selection box appears, changes apply to the entire text object.
Enter Text into a Placeholder
1. In Normal view, click the text placeholder if it isn't already selected.
2. Type the text you want to enter.

INTRO TO POWERPOINT 2007
Intro to PowerPoint 2007 Department of Technology Enhanced Learning Last Modified: 9/07 Information Technology Systems Division, UNCW
9
Enter Text in a Bulleted or Numbered List
1. In Normal view, click the text placeholder.
2. To switch to a numbered or bulleted list, click the Home tab, if necessary, and then click the Numbering or Bullet button.
3. Type the first item.
4. Press Enter.
• To increase the list level, press Tab or click the Increase List Level button on the Home tab.
• To decrease the list level, press Shift+Tab, or click the Decrease List Level button on the Home tab.
5. Type the next item.
6. Repeat steps 4 and 5 until you complete the list.

INTRO TO POWERPOINT 2007
Intro to PowerPoint 2007 Department of Technology Enhanced Learning Last Modified: 9/07 Information Technology Systems Division, UNCW
10
Formatting Text
Although PowerPoint's layouts and themes provide preformatted styles for text, you can change the formatting or add extra emphasis to a word or text object. You can format a single letter, a word, a phrase, or all the text in a text object. The basic formats you apply to text are available on the Home tab in the Font group. Some of the formats include strikethrough or double strikethrough, all caps or small caps, and double or color underline. If you no longer like your text formatting, you can quickly remove it.
Change the Font Using the Ribbon
1. Select the text or text object whose font you want to change.
2. Click the Home tab, click the Font list arrow, and then point for a live preview, or click the font you want, either a theme font or any available fonts.
Format or Unformat Text Using the Ribbon
1. Select the text you want to format, or click the selection box of a text object to format all the text in the box.
2. Click one or more of the formatting buttons on the Home tab in the Font group: Bold, Italic, Underline, Shadow, Strikethrough (New!), or Font Color.
3. To clear all formatting and return to default text style, click the Clear All Formatting button (New!) on the Home tab.

INTRO TO POWERPOINT 2007
Intro to PowerPoint 2007 Department of Technology Enhanced Learning Last Modified: 9/07 Information Technology Systems Division, UNCW
11
Inserting a Picture
PowerPoint makes it possible for you to insert pictures, graphics, scanned photographs, art, photos, or artwork from a CD-ROM or other program into a slide. When you use the Picture button on the Insert tab, you specify the source of the picture. When you insert pictures from files on your hard disk drive, scanner, digital camera, or Web camera, PowerPoint allows you to select multiple pictures, view thumbnails of them, and insert them all at once, which speeds up the process.
Insert a Picture from a File
1. Click the Insert tab.
2. Click the Picture button.
3. Click the Look in list arrow, and then select the drive and folder that contain the file you want to insert.
4. Click the file you want to insert.
5. Click Insert.
• To link a picture file, click the Insert button arrow, and then click Link to File.
• To insert and link a picture file, click the Insert button arrow, and then click Insert and Link.

INTRO TO POWERPOINT 2007
Intro to PowerPoint 2007 Department of Technology Enhanced Learning Last Modified: 9/07 Information Technology Systems Division, UNCW
12
Inserting Movies and Sounds
You can insert movies or sounds into a presentation by inserting them from the Clip Art task pane or a file. Movies can be either animated pictures or they can be digital videos prepared with digitized video equipment. Movies and sounds are inserted as PowerPoint objects. When you insert a sound, a small icon appears representing the sound file. When you insert a movie or sound, PowerPoint asks you how you want it to start in a slide show. You can choose to have the movie or sound play automatically or when clicked.
Insert a Movie or Sound from a File
1. Click the Insert tab.
2. Click the Movie or Sound button arrow, and then click Movie from File or Sound from File.
3. Locate and select a movie or sound file.
4. Click OK.
Insert a Movie on a New Slide
1. Click the Home tab.
2. Click the New Slide button arrow, and then click a slide layout with media content placeholder.
3. Click the Insert Movie icon in the media content placeholder.
4. Click the media clip you want to insert, and then click OK.
5. When the message is displayed, click Automatically or When Clicked.

INTRO TO POWERPOINT 2007
Intro to PowerPoint 2007 Department of Technology Enhanced Learning Last Modified: 9/07 Information Technology Systems Division, UNCW
13
Inserting a Chart
Instead of adding a table of dry numbers, insert a chart. Charts add visual interest and useful information represented by lines, bars, pie slices, or other markers. PowerPoint uses Microsoft Excel to embed and display the information in a chart: the worksheet, a spreadsheet-like grid of rows and columns that contains your data; and the chart, the graphical representation of the data. A worksheet contains cells to hold your data. A cell is the intersection of a row and column. A group of data values from a row or column of data makes up a data series. Each data series has a unique color or pattern on the chart.
Insert and Create a Chart
1. Click the Insert tab.
2. Click the Chart button.
3. In the left pane, click a category, such as Column, Line, Pie, Bar, Area, X Y (Scatter), Stock, Surface, Doughnut, Bubble, and Radar.
4. In the right pane, click a chart style type.
5. Click OK.

INTRO TO POWERPOINT 2007
Intro to PowerPoint 2007 Department of Technology Enhanced Learning Last Modified: 9/07 Information Technology Systems Division, UNCW
14
A Microsoft Excel worksheet opens and tiles next to your PowerPoint presentation. The worksheet contains sample data, and the presentation contains a chart.
6. Replace the sample data in the datasheet with your own data.
7. Edit and format the data in the datasheet as appropriate.
8. Click the Close button on the Excel worksheet to close it and view the chart in PowerPoint.
9. If necessary, change the chart type, and format the chart.
10. When you're done, click outside of the chart.
Open and View Chart Data
1. Click the chart you want to modify.
2. A chart consists of the following elements.
• Data markers. A graphical representation of a data point in a single cell in the datasheet. Typical data markers include bars, dots, or pie slices. Related data markers constitute a data series.
• Legend. A pattern or color that identifies each data series.
• X-axis. A reference line for the horizontal data values.
• Y-axis. A reference line for the vertical data values.
• Tick marks. Marks that identify data increments.
3. Click the Design tab under Chart Tools.
4. Click the Edit Data button.
5. A Microsoft Excel worksheet opens and tiles next to your PowerPoint presentation.
6. To close the worksheet and view the chart, click the Close button on the Excel worksheet and return to PowerPoint.

INTRO TO POWERPOINT 2007
Intro to PowerPoint 2007 Department of Technology Enhanced Learning Last Modified: 9/07 Information Technology Systems Division, UNCW
15
Starting a Slide Show
Once you have set up your slide show, you can start the show at any time. As you run your slide show, you can use the Slide Show toolbar, or Pop-up toolbar, to access certain PowerPoint commands without leaving Slide Show view.
Start a Slide Show and Display the Slide Show Toolbar
1. Click the Slide Show tab.
2. Click the From Beginning or From Current Slide button.
3. Move the mouse pointer to display the Slide Show toolbar.
4. Click a button on the Slide Show toolbar to move to the next or previous slide, or navigate the slide show, or end the show.
Set Slide Show Options
1. Click the Office button, and then click PowerPoint Options.
2. In the left pane, click Advanced.
3. Select the slide show and pop-up toolbar check box options you want.
• Show menu on right mouse click. Select to show a shortcut menu when you right-click a slide during a slide show.
• Show popup toolbar. Select to show the popup toolbar at the bottom of a full screen presentation.
• Prompt to keep ink annotations when exiting. Select to be prompted to save your changes when you write on slides during a slide show.
• End with black slide. Select to insert a black slide at the end of the presentation.
4. Click OK.

INTRO TO POWERPOINT 2007
Intro to PowerPoint 2007 Department of Technology Enhanced Learning Last Modified: 9/07 Information Technology Systems Division, UNCW
16
Navigating a Slide Show
In Slide Show view, you advance to the next slide by clicking the mouse button, pressing the Spacebar, or pressing Enter. In addition to those basic navigational techniques, PowerPoint provides keyboard shortcuts that can take you to the beginning, the end, or any particular slide in your presentation. You can also use the navigation commands on the shortcut menu to access slides in custom slide shows. After a period of inactivity during a normal full-screen slide show, PowerPoint hides the pointer and Slide Show toolbar.
Go to a Specific Slide
1. In Slide Show view, move the mouse to display the Slide Show toolbar, and then click the Slide button.
2. Point to Go to Slide, and then click the title of the slide to which you want to go.

INTRO TO POWERPOINT 2007
Intro to PowerPoint 2007 Department of Technology Enhanced Learning Last Modified: 9/07 Information Technology Systems Division, UNCW
17
Use Slide Show View Navigation Shortcuts
Slide Show View Shortcuts Action Result
Mouse click Moves to the next slide
Right-mouse click Moves to the previous slide (only if the Shortcut Menu On Right-Click option is disabled)
Press Enter Moves to the next slide
Press Home Moves to the first slide in the show
Press End Moves to the last slide in the show
Press Page Up Moves to the previous slide
Press Page Down Moves to the next slide
Enter a slide number and press Enter
Moves to the slide number you specified when you press Enter
Press B Displays a black screen; press again to return
Press W Displays a white screen; press again to return
Press Esc Exits Slide Show view Creating an End Slide Creating an End Slide is a good idea for several reasons:
• It lets everyone know you’re at the end of the presentation
• It will allow people to ask questions
• It can be used to give contact information such as your phone number, mailing address, e-mail address, web page or any other relevant information

INTRO TO POWERPOINT 2007
Intro to PowerPoint 2007 Department of Technology Enhanced Learning Last Modified: 9/07 Information Technology Systems Division, UNCW
18
Printing a Presentation
You can print all the elements of your presentation - the slides, outline, notes, and handouts - in either color or black and white. PowerPoint makes it easy to print your presentation; it detects the type of printer and then prints the appropriate version of the presentation. For example, if you select a black and white printer, your presentation will be set to print in shades of gray (grayscale). The Print dialog box also offers standard Windows features, giving you the option to print multiple copies, specify ranges, access printer properties, and print to a file.
Print a Presentation
1. Click the Office button, and then click Print.
2. Click the Name list arrow, and then select a printer.
3. Click the Print what list arrow, and then click what you want to print.
4. Change settings in the Print dialog box as necessary.
5. Click OK.

INTRO TO POWERPOINT 2007
Intro to PowerPoint 2007 Department of Technology Enhanced Learning Last Modified: 9/07 Information Technology Systems Division, UNCW
19
Questions or Problems?
Contact the Technology Assistance Center (TAC) Location: Hoggard Hall, room 126 Phone: 962-HELP (4357) E-mail: [email protected]. Normal hours of operation: Monday – Thursday, 7:30am-11pm; Friday, 7:30am-5:30pm; Sunday, 12pm-11pm