installing oracle soa suite and business process management … · 2019-09-24 · oracle® fusion...
TRANSCRIPT

Oracle® Fusion MiddlewareInstalling Oracle SOA Suite and BusinessProcess Management Suite Quick Start forDevelopers
12c (12.2.1.4.0)E95086-01September 2019

Oracle Fusion Middleware Installing Oracle SOA Suite and Business Process Management Suite Quick Startfor Developers, 12c (12.2.1.4.0)
E95086-01
Copyright © 2014, 2019, Oracle and/or its affiliates. All rights reserved.
Primary Author: Oracle Corporation
This software and related documentation are provided under a license agreement containing restrictions onuse and disclosure and are protected by intellectual property laws. Except as expressly permitted in yourlicense agreement or allowed by law, you may not use, copy, reproduce, translate, broadcast, modify,license, transmit, distribute, exhibit, perform, publish, or display any part, in any form, or by any means.Reverse engineering, disassembly, or decompilation of this software, unless required by law forinteroperability, is prohibited.
The information contained herein is subject to change without notice and is not warranted to be error-free. Ifyou find any errors, please report them to us in writing.
If this is software or related documentation that is delivered to the U.S. Government or anyone licensing it onbehalf of the U.S. Government, then the following notice is applicable:
U.S. GOVERNMENT END USERS: Oracle programs, including any operating system, integrated software,any programs installed on the hardware, and/or documentation, delivered to U.S. Government end users are"commercial computer software" pursuant to the applicable Federal Acquisition Regulation and agency-specific supplemental regulations. As such, use, duplication, disclosure, modification, and adaptation of theprograms, including any operating system, integrated software, any programs installed on the hardware,and/or documentation, shall be subject to license terms and license restrictions applicable to the programs.No other rights are granted to the U.S. Government.
This software or hardware is developed for general use in a variety of information management applications.It is not developed or intended for use in any inherently dangerous applications, including applications thatmay create a risk of personal injury. If you use this software or hardware in dangerous applications, then youshall be responsible to take all appropriate fail-safe, backup, redundancy, and other measures to ensure itssafe use. Oracle Corporation and its affiliates disclaim any liability for any damages caused by use of thissoftware or hardware in dangerous applications.
Oracle and Java are registered trademarks of Oracle and/or its affiliates. Other names may be trademarks oftheir respective owners.
Intel and Intel Xeon are trademarks or registered trademarks of Intel Corporation. All SPARC trademarks areused under license and are trademarks or registered trademarks of SPARC International, Inc. AMD, Opteron,the AMD logo, and the AMD Opteron logo are trademarks or registered trademarks of Advanced MicroDevices. UNIX is a registered trademark of The Open Group.
This software or hardware and documentation may provide access to or information about content, products,and services from third parties. Oracle Corporation and its affiliates are not responsible for and expresslydisclaim all warranties of any kind with respect to third-party content, products, and services unless otherwiseset forth in an applicable agreement between you and Oracle. Oracle Corporation and its affiliates will not beresponsible for any loss, costs, or damages incurred due to your access to or use of third-party content,products, or services, except as set forth in an applicable agreement between you and Oracle.

Contents
Preface
Audience ix
Documentation Accessibility ix
Related Documents ix
Conventions x
Part I Preparing to Install Quick Start
1 Introducing the Quick Start Distributions
Orientation 1-1
Planning Your Installation 1-1
About Quick Start 1-2
About the Oracle SOA Suite Quick Start Distribution 1-2
About the Oracle Business Process Management Suite Quick Start Distribution 1-3
About Quick Start Components 1-4
About Oracle B2B 1-4
About Oracle Managed File Transfer 1-5
About Oracle SOA Suite for Healthcare Integration 1-5
About Domain Configurations 1-5
2 Preparing to Install Quick Start
Verifying Certification, System, and Interoperability Requirements 2-1
About the Software Required for an Oracle Fusion Middleware Product Installation 2-2
Understanding Database Requirements for an Oracle Fusion MiddlewareInstallation 2-2
About the Custom Variables Required for the SOA Suite Schemas 2-3
Understanding JDK Requirements for an Oracle Fusion Middleware Installation 2-4
Selecting an Installation User 2-4
About User Permissions 2-5
Understanding Non-Default User Permissions on UNIX Operating Systems 2-7
iii

Verifying that the Installation User has Administrator Privileges on WindowsOperating Systems 2-7
Setting JAVA_HOME 2-8
Next Steps 2-8
Part II Quick Start for Oracle SOA Suite
3 Installing Oracle SOA Suite Quick Start for Developers
Orientation 3-1
Downloading the Oracle SOA Suite Quick Start Installer 3-1
Launching the Oracle SOA Suite Quick Start Installer 3-2
Navigating the Installation Screens 3-2
Next Steps 3-3
4 Configuring an Integrated WebLogic Server Domain
Orientation 4-1
Understanding Quick Start Domains 4-1
Preparing to Launch the Integrated WebLogic Server 4-2
Setting the JDEV_USER_DIR Environment Variable 4-2
Setting the ORACLE_HOME Environment Variable 4-3
Checking Entropy for Oracle Linux 4-4
Configuring JDeveloper's Default Domain 4-4
Starting the Integrated WebLogic Server 4-4
Verifying Your Domain 4-5
Disabling Secure Sockets Layer (SSL) 4-6
Configuring a Standalone Domain 4-6
Starting the Configuration Wizard 4-7
Navigating the Configuration Wizard Screens 4-7
Starting the Administration Sever 4-8
Starting the Application Server Connection Wizard 4-8
Navigating the Create Application Server Connection Wizard Screens 4-9
Verifying Your Connection 4-9
Understanding Basic JDeveloper Functions 4-9
Stopping the Integrated WebLogic Server 4-10
Restarting JDeveloper 4-10
Managing Multiple Installations on the Same Machine 4-10
Switching Between Quick Start Distributions 4-11
Next Steps 4-11
iv

5 Configuring a Compact Domain
Orientation 5-1
Preparing to Configure a Compact Domain for a Quick Start Installation 5-1
Closing Oracle JDeveloper, Extra Server Connections, or Java DB 5-2
Downloading and Installing a Supported Database 5-2
Configuring a 12c Database for Quick Start 5-2
Installing Required Schemas 5-3
Running Installers for Additional Components 5-3
Creating Schemas for Quick Start with the Repository Creation Utility 5-3
Using the Configuration Wizard to Configure a Compact Domain 5-5
Starting the Configuration Wizard 5-6
Selecting the Domain Type and Domain Home Location 5-6
Selecting Configuration Templates for Oracle SOA Suite Quick Start 5-7
Selecting the Application Home Location 5-8
Configuring the Administrator Account 5-8
Specifying the Domain Mode and JDK 5-8
Specifying the Datasource Configuration Type 5-8
Specifying JDBC Component Schema Information 5-9
Testing the JDBC Connections 5-9
Specifying the Path to the Keystore Certificate or Key 5-10
Selecting Advanced Configuration 5-10
Completing the Configuration 5-10
Starting the Administration Server 5-10
Connecting JDeveloper to the Compact Domain 5-11
Starting the Application Server Connection Wizard 5-11
Starting the Administration Server 5-11
Verifying Your Connection 5-12
Next Steps 5-12
Part III Quick Start for Oracle Business Process Management Suite
6 Installing Oracle Business Process Management Suite Quick Startfor Developers
Orientation 6-1
Downloading the Oracle Business Process Management Suite Quick Start Installer 6-1
Launching the Oracle Business Process Management Suite Quick Start Installer 6-2
Navigating the Installation Screens 6-2
Next Steps 6-3
v
7 Configuring an Integrated WebLogic Server Domain
Orientation 7-1
Understanding Quick Start Domains 7-1
Preparing to Launch the Integrated WebLogic Server 7-2
Setting the JDEV_USER_DIR Environment Variable 7-2
Setting the ORACLE_HOME Environment Variable 7-3
Checking Entropy for Oracle Linux 7-4
Configuring JDeveloper's Default Domain 7-4
Starting the Integrated WebLogic Server 7-4
Verifying Your Domain 7-5
Disabling Secure Sockets Layer (SSL) 7-6
Configuring a Standalone Domain 7-6
Starting the Configuration Wizard 7-7
Navigating the Configuration Wizard Screens 7-7
Starting the Administration Sever 7-8
Starting the Application Server Connection Wizard 7-8
Navigating the Create Application Server Connection Wizard Screens 7-9
Verifying Your Connection 7-9
Understanding Basic JDeveloper Functions 7-9
Stopping the Integrated WebLogic Server 7-10
Restarting JDeveloper 7-10
Managing Multiple Installations on the Same Machine 7-10
Switching Between Quick Start Distributions 7-11
Next Steps 7-11
8 Configuring a Compact Domain
Orientation 8-1
Preparing to Configure a Compact Domain for a Quick Start Installation 8-1
Closing Oracle JDeveloper, Extra Server Connections, or Java DB 8-2
Downloading and Installing a Supported Database 8-2
Configuring a 12c Database for Quick Start 8-2
Installing Required Schemas 8-3
Running Installers for Additional Components 8-3
Creating Schemas for Quick Start with the Repository Creation Utility 8-3
Using the Configuration Wizard to Configure a Compact Domain 8-5
Starting the Configuration Wizard 8-6
Selecting the Domain Type and Domain Home Location 8-6
Selecting Configuration Templates for Oracle Business Process ManagementSuite Quick Start 8-7
Selecting the Application Home Location 8-8
vi

Configuring the Administrator Account 8-8
Specifying the Domain Mode and JDK 8-8
Specifying the Datasource Configuration Type 8-9
Specifying JDBC Component Schema Information 8-9
Testing the JDBC Connections 8-10
Specifying the Path to the Keystore Certificate or Key 8-10
Selecting Advanced Configuration 8-10
Completing the Configuration 8-10
Starting the Administration Server 8-10
Connecting JDeveloper to the Compact Domain 8-11
Starting the Application Server Connection Wizard 8-11
Starting the Administration Server 8-11
Verifying Your Connection 8-12
Next Steps 8-12
Part IV Post-configuration Tasks for Oracle Quick Start
9 Adding Components to a Quick Start Installation
Orientation 9-1
About Adding Components to a Quick Start Installation 9-1
Installing Oracle B2B, Oracle SOA Suite for Healthcare Integration, or OracleManaged File Transfer for Quick Start 9-2
Installing Oracle B2B for Quick Start 9-2
Activating a Limited Oracle B2B Interface without a Full Installation 9-2
Installing Oracle B2B for Quick Start 9-2
Installing Oracle SOA Suite for Healthcare Integration for Quick Start 9-3
Installing Oracle SOA Suite for Healthcare Integration for Quick Start 9-4
Activating the Oracle SOA Suite for Healthcare Integration User Interface 9-5
Installing Oracle Managed File Transfer for Quick Start 9-5
Creating Schemas for Quick Start Components 9-6
Updating a Compact Domain 9-6
Launching the Domain Configuration Wizard 9-7
Selecting the Domain Type and Domain Home Location 9-7
Selecting the Configuration Templates 9-7
Specifying the Datasource Configuration Type 9-8
Verifying the Component Datasources 9-8
Testing the JDBC Connections 9-9
Selecting Advanced Configuration 9-9
Configuring the Domain 9-9
Reviewing Your Domain Location 9-9
vii

Next Steps 9-9
10
Running a Sample Application
Creating an Oracle Business Process Management Suite Sample Application 10-1
Next Steps 10-1
11
Uninstalling Oracle Quick Start
Performing Pre-Uninstallation Tasks 11-1
Uninstalling a Quick Start Distribution 11-1
Starting the Uninstaller 11-1
Manually Removing the Oracle Home 11-2
Cleaning Up JDeveloper Artifacts 11-2
A Updating the JDK After Installing and Configuring an Oracle FusionMiddleware Product
About Updating the JDK Location After Installing an Oracle Fusion MiddlewareProduct A-1
Updating the JDK Location in an Existing Oracle Home A-2
Updating the JDK Location in an Existing Domain Home A-3
viii

Preface
This document describes how to install a development or evaluation environment andto build or test applications using one of the following Oracle Fusion Middlewaredistributions:
• Oracle SOA Suite Quick Start for Developers
• Oracle Business Process Management Suite Quick Start for Developers
This Preface describes:
• Audience
• Documentation Accessibility
• Related Documents
• Conventions
AudienceInstalling SOA Suite and Business Process Management Suite Quick Start forDevelopers is intended for Oracle SOA Suite application developers. It can also beused by those who want to evaluate the Oracle SOA Suite and Oracle BusinessProcess Management features and capabilities available within Oracle JDeveloper.
Documentation AccessibilityFor information about Oracle's commitment to accessibility, visit the OracleAccessibility Program website at http://www.oracle.com/pls/topic/lookup?ctx=acc&id=docacc.
Access to Oracle Support
Oracle customers that have purchased support have access to electronic supportthrough My Oracle Support. For information, visit http://www.oracle.com/pls/topic/lookup?ctx=acc&id=info or visit http://www.oracle.com/pls/topic/lookup?ctx=acc&id=trsif you are hearing impaired.
Related DocumentsRefer to the Oracle Fusion Middleware Library for additional information.
• For Oracle SOA Suite information, see Oracle SOA Suite Documentation.
• For Oracle Business Process Management information, see Oracle BusinessProcess Management Documentation.
• For installation information, see Fusion Middleware Installation Documentation.
ix

• For upgrade information, see Fusion Middleware Upgrade Documentation.
• For administration-related information, see Fusion Middleware AdministrationDocumentation.
• For release-related information, see Fusion Middleware Release Notes.
ConventionsThe following text conventions are used in this document:
Convention Meaning
boldface Boldface type indicates graphical user interface elements associatedwith an action, or terms defined in text or the glossary.
italic Italic type indicates book titles, emphasis, or placeholder variables forwhich you supply particular values.
monospace Monospace type indicates commands within a paragraph, URLs, codein examples, text that appears on the screen, or text that you enter.
Preface
x

Part IPreparing to Install Quick Start
Before you install Oracle Quick Start, use this part to understand the Quick Startdistributions and verify that your system is certified and capable of running Quick Start.
• Introducing the Quick Start DistributionsThe Oracle SOA Suite and Oracle Business Process Management Suite QuickStart distributions allow you to quickly install a development or evaluationenvironment on a single host computer. The result is a compact domain, which isa developer domain consisting of a single administration server and no managedservers.
• Preparing to Install Quick StartBefore installing Quick Start, you must verify that it can run on your system.
1Introducing the Quick Start Distributions
The Oracle SOA Suite and Oracle Business Process Management Suite Quick Startdistributions allow you to quickly install a development or evaluation environment on asingle host computer. The result is a compact domain, which is a developer domainconsisting of a single administration server and no managed servers.
This chapter will help you plan your installation by explaining each Quick Startdistribution and giving you an overview of the entire process.
Note that you cannot expand or scale a Quick Start installation into a productionenvironment. Quick Starts are installations for development or evaluation only. If youwant a production environment, start with About the Oracle SOA Suite and OracleBusiness Process Management Installation in Installing and Configuring Oracle SOASuite and Business Process Management to install a full-scale developmentenvironment that can be scaled into a production environment.
• Orientation
• Planning Your Installation
• About Quick Start
• About the Oracle SOA Suite Quick Start Distribution
• About the Oracle Business Process Management Suite Quick Start Distribution
• About Quick Start Components
• About Domain Configurations
OrientationThis is the Quick Start installation and configuration roadmap. You are planning yourinstallation.
Step Description
Plan your installation. Use this chapter to decide which distribution andconfiguration path suits your goals.
Download and install a QuickStart distribution
You will download and install Quick Start for Oracle SOA Suiteor Oracle Business Process Management Suite.
Configure a default orstandalone domain.
You will configure a default domain, a standalone domain, orcompact domain for your developed applications.
Develope or test anapplication.
You will develop or test an application.
Planning Your InstallationYou should use this chapter to make the following key decisions:
1-1

1. Make sure that a Quick Start installation suits your needs. Its limitations aredescribed in About Quick Start.
2. Choose between the SOA Suite Quick Start or Business Process ManagementSuite Quick Start distribution. These are described in About the Oracle SOA SuiteQuick Start Distribution and About the Oracle Business Process ManagementSuite Quick Start Distribution.
3. Decide if you want to add any SOA Suite components that were not included in thedefault Quick Start distribution. Supported components for Quick Start aredescribed in About Quick Start Components.
4. Decide what type of domain you want to use during development. The threedomain types available for Quick Start are described in Table 1-1 in About DomainConfigurations.
Making these decisions by the end of this chapter will simplify your installationexperience.
About Quick StartQuick Start is available for Oracle SOA Suite and Oracle Business ProcessManagement Suite. A Quick Start installation differs from a full installation in setupspeed and limited uses.
When you use a Quick Start installer, you create a new Oracle home that contains allthe software required for a development or evaluation environment on a single host.After running the installation wizard, you can quickly start developing and testing yourSOA applications by running Oracle JDeveloper from the Oracle home.
However, Quick Start installations are limited to one Administration server with nooption to add Managed servers. You also cannot upgrade your Quick Start distributionto a production environment.
If you know you want a production environment with additional managed servers orclusters, you should not use Quick Start. Instead, see About the Oracle SOA Suite andOracle Business Process Management Installation in Installing and Configuring OracleSOA Suite and Business Process Management to install a full-scale developmentenvironment that can be scaled into a production environment.
There are two different Quick Start distributions. You can choose the best distributionfor your use case by reading the following descriptions:
• About the Oracle SOA Suite Quick Start Distribution
• About the Oracle Business Process Management Suite Quick Start Distribution
About the Oracle SOA Suite Quick Start DistributionOracle SOA Suite is an integration platform centered around BPEL Process Managerfor integration and orchestration. Oracle SOA Suite is a comprehensive software suiteto build, deploy and manage Service-Oriented Architectures (SOA). The componentsof the suite benefit from common capabilities including consistent tooling, a singledeployment and management model, end-to-end security and unified metadatamanagement.
Chapter 1About Quick Start
1-2

By default, the Oracle SOA Suite Quick Start installation contains Oracle JDeveloperand an Integrated WebLogic Server, but can also be used to set up a domain outsideof Oracle JDeveloper.
The JDeveloper in this distribution is pre-configured with some JDeveloper IDEextensions so that you can create various kinds of applications immediately. Thesepre-installed IDE extensions include the following:
• Oracle BPEL Process Manager
• Oracle Human Workflow
• Oracle Business Rules
• Oracle Mediator
• Oracle Service Bus
• Oracle Enterprise Scheduler
• SOA Spring Component Design Time
The Integrated WebLogic Server is pre-configured with Java DB and the runtimesoftware for the all of the components listed above except for Oracle EnterpriseScheduler. This means you can run any JDeveloper application that does not useOracle Enterprise Scheduler on the Integrated WebLogic Server immediately after youfinish installing a Quick Start distribution.
If you want to configure your installation to use Oracle Enterprise Scheduler or otherSOA components, see About Quick Start Components.
About the Oracle Business Process Management SuiteQuick Start Distribution
Oracle Business Process Management Suite is layered on top of Oracle SOA Suite.As a result, it includes all of the Oracle SOA Suite components and additionalcomponents that emphasize human-focused business processes. If you plan ondesigning applications with end-user responses and other human task flows in mind,you should install Oracle Business Process Management Suite.
By default, the Oracle Business Process Management Suite Quick Start installationcontains Oracle JDeveloper and an Integrated WebLogic Server, but can also be usedto set up a domain outside of Oracle JDeveloper.
The JDeveloper in this distribution is pre-configured with some JDeveloper IDEextensions so that you can create various kinds of applications immediately. Thesepre-installed IDE extensions include the following:
• All Oracle SOA Suite components listed in About the Oracle SOA Suite QuickStart Distribution
• Oracle Business Process Management Composer
• Oracle Business Process Management Workspace
• Oracle Case Management
• Oracle BPMN Process Manager
Chapter 1About the Oracle Business Process Management Suite Quick Start Distribution
1-3

The Integrated WebLogic Server is pre-configured with Java DB and the runtimesoftware for the listed components so that you can immediately test and runapplications using these components within the development environment.
If you want to configure your installation to use Oracle Enterprise Scheduler or otherSOA components, see About Quick Start Components.
About Quick Start ComponentsSome Oracle SOA Suite components are not are not supported to run with theincluded Java DB database. These components include:
• Oracle Business Activity Monitoring
• Oracle B2B
• Oracle Enterprise Scheduler
• Oracle Managed File Transfer
• Oracle SOA Suite for Healthcare Integration
Tip:
If you are not sure what components you want to include in your installation,see Key Components in Understanding Oracle SOA Suite for descriptions ofeach component.
To add any of these components, you must install and use an Oracle database. Youcan then use the domain configuration software included in the Quick Start installationto configure a compact domain, which is a limited developer domain consisting of anAdministration server and no managed servers.
Decide which runtime components you want before beginning the domainconfiguration process. The process is the same for a majority of the listedcomponents, but you should be aware of additional procedures for the followingcomponents:
• About Oracle B2B
• About Oracle Managed File Transfer
• About Oracle SOA Suite for Healthcare Integration
About Oracle B2BOracle B2B is an e-commerce gateway that enables the secure and reliable exchangeof business documents between an enterprise and its trading partners. See ProtocolsSupported in B2B in User's Guide for B2B for a list of the industry-standard e-commerce protocols supported in Oracle B2B.
The capability to exchange Custom Documents is already included in a standardQuick Start installation. You can activate this limited version of Oracle B2B byfollowing the activation steps detailed in Activating a Limited Oracle B2B Interfacewithout a Full Installation.
Chapter 1About Quick Start Components
1-4

To obtain the full B2B user interface for more document management capabilities, youmust use the regular Oracle B2B installer on your Quick Start Oracle home andconfigure a standalone32ewr compact domain. The complete installation will give youthe Oracle B2B user interface and Oracle B2B JDeveloper adapter. A walkthrough ofthis process is covered in Installing Oracle B2B for Quick Start.
About Oracle Managed File TransferOracle Managed File Transfer is a product that can be configured without Oracle SOASuite or Oracle Business Process Management Suite. If you want to configure acompact domain solely for Oracle Managed File Transfer, launch the domainconfiguration wizard as described in this guide and only select the Oracle ManagedFile Transfer template when prompted.
About Oracle SOA Suite for Healthcare IntegrationOracle SOA Suite for Healthcare Integration uses several features of Oracle SOASuite to help you design, create, and manage applications that process healthcaredata. There are two configurations possible for two use cases:
• X12 HIPAA users should install the full Oracle B2B installation configured withHealthcare Integration.
• Healthcare providers using HL7 documents should install the full Oracle SOASuite for Healthcare Integration software.
TheOracle B2B user interface is the default when you finish installing Oracle SOASuite for healthcare integration into your Oracle home. If you want to use the OracleSOA Suite for healthcare integration user interface, you must complete both of thefollowing post-installation configurations:
1. Use the Repository Creation Utility (RCU) to set a custom variable before runningthe domain configuration wizard.
2. Select an Oracle SOA Suite for healthcare integration-specific template duringdomain configuration.
The Oracle SOA Suite for Healthcare Integration user interface will not functionproperly if you do not do both tasks. These configurations are detailed further in Activating the Oracle SOA Suite for Healthcare Integration User Interface.
About Domain ConfigurationsOnce you have installed a Quick Start distribution, you need to configure a domain totest applications during development. To simplify your installation and configurationexperience, you should decide on a domain type now.
The three possible domain types are described and compared in Table 1-1. Note thatif you plan to install any of the Oracle SOA Suite components listed in About QuickStart Components, your only choice is the compact domain.
For all of these domain options, SOA and B2B use the MDS file system. This meansthat the edit function in SOA Composer is not supported in Quick Start.
Chapter 1About Domain Configurations
1-5
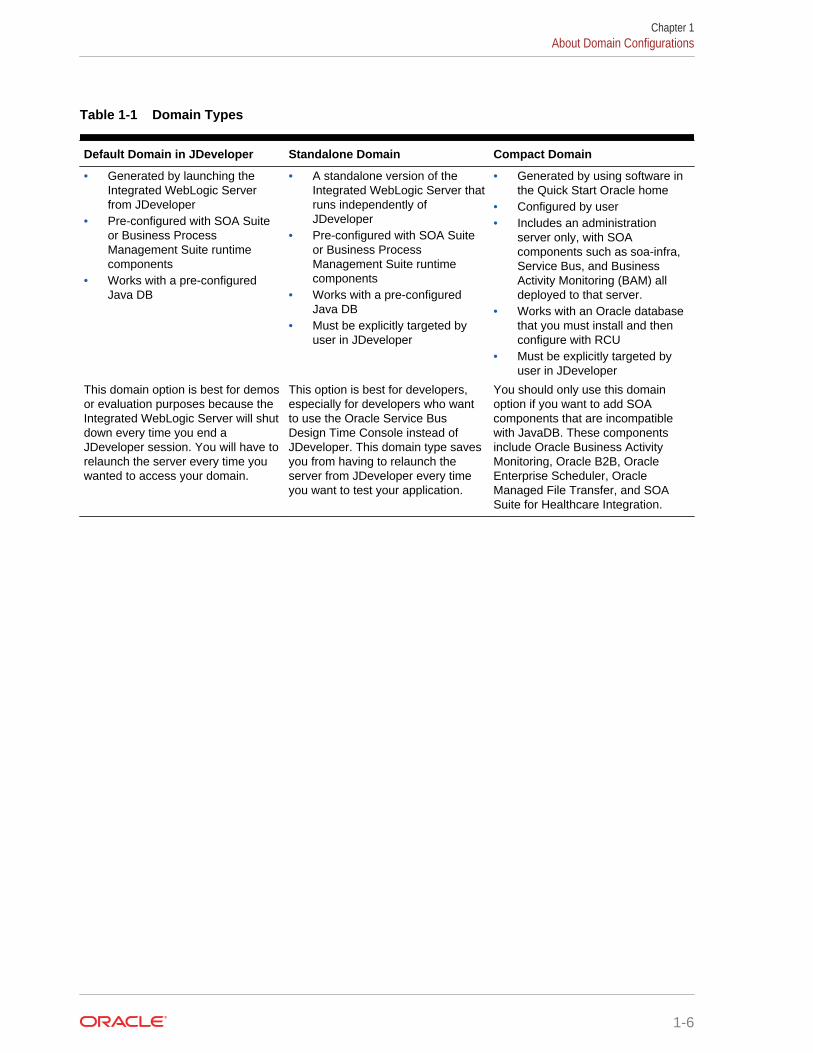
Table 1-1 Domain Types
Default Domain in JDeveloper Standalone Domain Compact Domain
• Generated by launching theIntegrated WebLogic Serverfrom JDeveloper
• Pre-configured with SOA Suiteor Business ProcessManagement Suite runtimecomponents
• Works with a pre-configuredJava DB
• A standalone version of theIntegrated WebLogic Server thatruns independently ofJDeveloper
• Pre-configured with SOA Suiteor Business ProcessManagement Suite runtimecomponents
• Works with a pre-configuredJava DB
• Must be explicitly targeted byuser in JDeveloper
• Generated by using software inthe Quick Start Oracle home
• Configured by user• Includes an administration
server only, with SOAcomponents such as soa-infra,Service Bus, and BusinessActivity Monitoring (BAM) alldeployed to that server.
• Works with an Oracle databasethat you must install and thenconfigure with RCU
• Must be explicitly targeted byuser in JDeveloper
This domain option is best for demosor evaluation purposes because theIntegrated WebLogic Server will shutdown every time you end aJDeveloper session. You will have torelaunch the server every time youwanted to access your domain.
This option is best for developers,especially for developers who wantto use the Oracle Service BusDesign Time Console instead ofJDeveloper. This domain type savesyou from having to relaunch theserver from JDeveloper every timeyou want to test your application.
You should only use this domainoption if you want to add SOAcomponents that are incompatiblewith JavaDB. These componentsinclude Oracle Business ActivityMonitoring, Oracle B2B, OracleEnterprise Scheduler, OracleManaged File Transfer, and SOASuite for Healthcare Integration.
Chapter 1About Domain Configurations
1-6

2Preparing to Install Quick Start
Before installing Quick Start, you must verify that it can run on your system.
• Verifying Certification, System, and Interoperability RequirementsOracle recommends that you use the certification matrix and system requirementsdocuments with each other to verify that your environment meets the requirementsfor installation.
• About the Software Required for an Oracle Fusion Middleware Product InstallationBefore you install Oracle Fusion Middleware, you should understand and verify thedatabase and JDK requirements.
• Selecting an Installation UserThe user who installs and configures your system must have the requiredpermissions and privileges.
• Setting JAVA_HOMESet the environment variable JAVA_HOME to point to the location of your JDK.
• Next StepsAfter completing the installation preparation steps, you are ready to install a QuickStart distribution.
Verifying Certification, System, and InteroperabilityRequirements
Oracle recommends that you use the certification matrix and system requirementsdocuments with each other to verify that your environment meets the requirements forinstallation.
1. Verifying that your environment meets certification requirements:
Make sure that you install your product on a supported hardware and softwareconfiguration. See the certification document for your release on the Oracle FusionMiddleware Supported System Configurations page.
Oracle has tested and verified the performance of your product on all certifiedsystems and environments. Whenever new certifications are released, they areadded to the certification document right away. New certifications can be releasedat any time. Therefore, the certification documents are kept outside thedocumentation libraries and are available on Oracle Technology Network.
2. Using the system requirements document to verify certification:
Oracle recommends that you use the Oracle Fusion Middleware SystemRequirements and Specifications document to verify that the certificationrequirements are met. For example, if the certification document indicates thatyour product is certified for installation on 64-Bit Oracle Linux 6.5, use thisdocument to verify that your system meets the required minimum specifications.These include disk space, available memory, specific platform packages andpatches, and other operating system-specific requirements. System requirements
2-1
can change in the future. Therefore, the system requirement documents are keptoutside of the documentation libraries and are available on Oracle TechnologyNetwork.
3. Verifying interoperability among multiple products:
To learn how to install and run multiple Fusion Middleware products from the samerelease or mixed releases with each other, see Oracle Fusion Middleware 12cInteroperability and Compatibility in Understanding Interoperability andCompatibility.
About the Software Required for an Oracle FusionMiddleware Product Installation
Before you install Oracle Fusion Middleware, you should understand and verify thedatabase and JDK requirements.
• Understanding Database Requirements for an Oracle Fusion MiddlewareInstallationMany Fusion Middleware products require database schemas prior toconfiguration. If you do not already have a database where you can install theseschemas, you must install and configure a certified database.
• Understanding JDK Requirements for an Oracle Fusion Middleware InstallationMost Fusion Middleware products are in .jar file format. These distributions donot include a JDK. To run a .jar distribution installer, you must have a certifiedJDK already installed on your system.
Understanding Database Requirements for an Oracle FusionMiddleware Installation
Many Fusion Middleware products require database schemas prior to configuration. Ifyou do not already have a database where you can install these schemas, you mustinstall and configure a certified database.
To find a certified database for your operating system, see the certification documentfor your release on the Oracle Fusion Middleware Supported System Configurationspage.
To make sure your database is properly configured for schema creation, seeRepository Creation Utility Requirements in the Oracle Fusion Middleware SystemRequirements and Specifications document.
After your database is properly configured, you use the Repository Creation Utility(RCU) to create product schemas in your database. This tool is available in the Oraclehome for your Oracle Fusion Middleware product. See Understanding RepositoryCreation Utility in Creating Schemas with the Repository Creation Utility.
• About the Custom Variables Required for the SOA Suite SchemasWhen you install the Oracle SOA Suite schemas, you are prompted to set twocustom variables, which affect the way in which these schemas are created in thedatabase.
Chapter 2About the Software Required for an Oracle Fusion Middleware Product Installation
2-2

About the Custom Variables Required for the SOA Suite SchemasWhen you install the Oracle SOA Suite schemas, you are prompted to set two customvariables, which affect the way in which these schemas are created in the database.
These variables are explained further in the following sections:
• About the Database Profile Custom VariableThe Database Profile custom variable on the Repository Creation Utility (RCU)Custom Variables screen allows you to identify the predicted size or profile of thedatabase on which you are installing the SOA Infrastructure schema.
• About the Healthcare Integration Custom VariableThe Healthcare Integration custom variable helps to activate the Oracle SOA Suitefor healthcare integration user interface. The interface is not supported for OracleSOA Suite for healthcare integration.
About the Database Profile Custom VariableThe Database Profile custom variable on the Repository Creation Utility (RCU)Custom Variables screen allows you to identify the predicted size or profile of thedatabase on which you are installing the SOA Infrastructure schema.
To estimate the size of the database required for your Oracle SOA Suite configuration,consider the information in Developing a Database Growth Management Strategy inAdministering Oracle SOA Suite and Oracle Business Process Management Suite.
If you enter SMALL or MEDIUM as the database profile, the RCU performs no specialactions when the schema is created. The SMALL and MEDIUM options should beentered for informational purposes only.
If you enter LARGE as the database profile, the RCU creates the SOA Infrastructureschema using an Oracle database feature called Interval Partitioning. Intervalpartitioning improves the efficiency of the database when large numbers of compositeapplications must be processed. When you select the LARGE database profile, theRCU creates the interval partitioned tables in a manner supported by the Oracle SOASuite purging scripts and guidelines.
For more information about database partitioning, see the following sections of theOracle Database VLDB and Partitioning Guide:
• Partitioning Overview
• Interval Partitioning
About the Healthcare Integration Custom VariableThe Healthcare Integration custom variable helps to activate the Oracle SOA Suite forhealthcare integration user interface. The interface is not supported for Oracle SOASuite for healthcare integration.
If you are not planning to use the Oracle SOA Suite for healthcare integration userinterface, then set the value of the Healthcare Integration custom variable to NO. If youare planning to use the Oracle SOA Suite for healthcare integration user interface, setit to YES. Otherwise, the Oracle SOA Suite for healthcare integration user interfacewill not function properly after it is installed and configured.
Chapter 2About the Software Required for an Oracle Fusion Middleware Product Installation
2-3
When set to YES, the RCU creates additional materialized views in the database,which are required by the Oracle SOA Suite for healthcare integration user interface.When set to NO, you can perform these additional schema configuration tasks later byrunning the following SQL script on the database. This script is installed in the OracleFusion Middleware Oracle home when you select the Healthcare with B2B installationtype:
ORACLE_HOME/common/sql/soainfra/sql/oracle/b2b_mv.sql
See Using the Oracle SOA Suite for Healthcare Integration User Interface in UsingOracle SOA Suite for Healthcare Integration.
Understanding JDK Requirements for an Oracle Fusion MiddlewareInstallation
Most Fusion Middleware products are in .jar file format. These distributions do notinclude a JDK. To run a .jar distribution installer, you must have a certified JDKalready installed on your system.
Make sure that the JDK is installed outside of the Oracle home. If you install the JDKunder the Oracle home, you will encounter problems when you try to perform tasks inthe future. Oracle Universal Installer validates that the Oracle home directory is empty;the install will not progress until you specify an empty directory. Oracle recommendsthat you locate your JDK installation in the /home/oracle/products/jdk directory.
Some products (such as Oracle HTTP Server and Oracle JDeveloper) are availableas platform-specific distributions. Platform-specific distributions have a .bin (forUNIX operating systems) or .exe (for Windows operating systems) installer; in thesecases, a platform-specific JDK is in the distribution and you do not need to install aJDK separately. However, you may need to upgrade this JDK to a more recentversion, depending on the JDK versions that are certified.
Always verify the required JDK version by reviewing the certification information on the Oracle Fusion Middleware Supported System Configurations page. For 12c(12.2.1.4.0), the certified JDK is 1.8.0_211 and later.
To download the required JDK, navigate to the following URL and download the JavaSE JDK:
http://www.oracle.com/technetwork/java/javase/downloads/index.html
Selecting an Installation UserThe user who installs and configures your system must have the required permissionsand privileges.
• About User PermissionsThe user who installs a Fusion Middleware product owns the files and has certainpermissions on the files.
• Understanding Non-Default User Permissions on UNIX Operating SystemsChanging the default permissions setting reduces the security of the installationand possibly your system. Oracle does not recommend changing defaultpermission settings.
Chapter 2Selecting an Installation User
2-4

• Verifying that the Installation User has Administrator Privileges on WindowsOperating SystemsTo update the Windows Registry, you must have administrator privileges.
About User PermissionsThe user who installs a Fusion Middleware product owns the files and has certainpermissions on the files.
• Read and write permissions on all non-executable files (forexample, .jar, .properties, or .xml). All other users in the same group as the fileowner have read permissions only.
• Read, write, and execute permissions on all executable files (forexample, .exe, .sh, or .cmd). All other users in the same group as the file ownerhave read and execute permissions only.
This means that someone other than the person who installs the software can use theinstalled binaries in the Oracle home directory to configure a domain or set of FusionMiddleware products.
During configuration, the files generated by the configuration process are owned bythe user who ran the Configuration Wizard. This user has the same permissions asdescribed above for the installation user. However, security-sensitive files are notcreated with group permissions. Only the user that created the domain has read andwrite permissions and can administer the domain.
Consider the following examples:
• Example 1: A Single User Installs the Software and Configures the Domain
This example explains the file permissions where the same user installs thesoftware and configures the domain.
To ensure proper permissions and privileges for all files, Oracle recommends thatthe same owner perform both tasks: install the Oracle Fusion Middleware productand configure the WebLogic Server domain by using the Configuration Wizard.
Chapter 2Selecting an Installation User
2-5

Figure 2-1 Directory Structure when a Single User Installs the Software andConfigures the Domain
The Oracle home is created by User1 during product
installation. User1 has read/write/execute permissions
on all executable files, and read/write permissions on all
other files. All other users in User1’s group have
read/execute permissions on all executable files, and
read permissions on all other files.
product
Oracle Home
(Oracle_Home)
Application Home (applications)
oracle
home
Domain Home(domains)
configThe Domain home and Application home are created by
User1 during product installation. User1 has
read/write/execute permissions on all executable files,
and read/write permissions on all other files. All other
users in User1’s group have read/execute permissions
on all executable files, and read permissions on all
other files.
If the user who creates the domain is different than the user who installed thesoftware, then both users must have the same privileges, as shown in the nextexample.
• Example 2: The Oracle Home Directory and Domain are Created by DifferentUsers
This example explains the file permissions where one user creates the Oraclehome and another user configures the domain.
Figure 2-2 Directory Structure when Different Users Install the Softwareand Configure the Domain
The Oracle home is created by User1 during product
installation. User1 has read/write/execute permissions on
all executable files, and read/write permissions on all
other files. All other users in User1’s group have
read/execute permissions on all executable files, and read
permissions on all other files.
product
Oracle Home
(Oracle_Home)
Application Home (applications)
oracle
home
Domain Home(domains)
configThe Domain home and Application home are created by
User2 during product installation. User2 has
read/write/execute permissions on all executable files,
and read/write permissions on all other files. All other
users in User2’s group (including User1) have
read/execute permissions on all executable files, and read
permissions on all other files.
Chapter 2Selecting an Installation User
2-6
Note:
Certain domain files do not have group permissions. For example,cwallet.sso.
Consider the following points before you run the installer:
• On UNIX operating systems, Oracle recommends that you set umask to 027 onyour system before you install the software. This ensures that the file permissionsare set properly during installation. Use the following command:
umask 027
You must enter this command in the same terminal window from which you plan torun the product installer.
• On UNIX operating systems, do not run the installation program as a root user. Ifyou run the installer as a root user, the startup validation may fail and you cannotcontinue the installation.
• When you manage a product installation (for example, applying patches or startingmanaged Servers), use the same user ID that you used to install the product.
• On Windows operating systems, you must have administrative privileges to installthe product. See Verifying the Installation User has Administrator Privileges onWindows Operating Systems.
Understanding Non-Default User Permissions on UNIX OperatingSystems
Changing the default permissions setting reduces the security of the installation andpossibly your system. Oracle does not recommend changing default permissionsettings.
If other users require access to particular files or executable, consider using the UNIXsudo command (or other similar command) in lieu of changing file permissions.
Refer to your UNIX operating system Administrator's Guide or contact your operatingsystem vendor if you need further assistance.
Verifying that the Installation User has Administrator Privileges onWindows Operating Systems
To update the Windows Registry, you must have administrator privileges.
By default, users with the administrator privilege sign in to the system with regularprivileges, but can request elevated permissions to perform administrative tasks.
To perform a task with elevated privileges:
1. Find the Command Prompt icon, either from the Start menu or the Windows iconin the lower-left corner.
2. Right-click Command Prompt and select Run as administrator.
Chapter 2Selecting an Installation User
2-7

This opens a new command prompt window, and all actions performed in thiswindow are done with administrator privileges.
Note:
If you have User Access Control enabled on your system, you may seean additional window asking you to confirm this action. Confirm andcontinue with this procedure.
3. Perform the desired task.
For example, to start the product installer:
For a jar file, enter:
java —jar distribution_name.jar
For an executable (.exe, .bin, or .sh file), enter:
distribution_name.exe
Setting JAVA_HOMESet the environment variable JAVA_HOME to point to the location of your JDK.
Your path definition should look something like the following:
Environment Run Command
UNIXJAVA_HOME=$HOME/Java/jdk1.8.0_211export JAVA_HOME
Windows Search for cmd.exe in the Start menu. Right-click thecmd.exe and select Run as Administrator.
SET JAVA_HOME="C:\Program Files\Java\jdk1.8.0_211"
• Note that JAVA_HOME must be in all caps.
• Your JDK folder may not be named the same or located at the destination in theabove example. Make sure you point to the actual destination.
Next StepsAfter completing the installation preparation steps, you are ready to install a QuickStart distribution.
The rest of this guide describes how to configure your distribution to use an externalOracle Database and compact domain, how to test your distribution with a sampleapplication, and how to uninstall your Quick Start distribution. Each chapter will endwith a list of actions you can take to navigate through this guide.
Note that the overall installation and configuration processes for both Oracle SOASuite and Oracle Business Process Management Suite are identical. This book offersseparate parts for them to simplify the presentation of detailed instructions.
Chapter 2Setting JAVA_HOME
2-8

Choose a distribution to begin using Quick Start:
Action Resource
Begin installing Oracle SOA Suite with QuickStart.
See Installing Oracle SOA Suite Quick Startfor Developers .
Begin installing Oracle Business ProcessManagement Suite with Quick Start.
See Installing Oracle Business ProcessManagement Suite Quick Start forDevelopers .
Chapter 2Next Steps
2-9
Part IIQuick Start for Oracle SOA Suite
This part covers the steps to install Oracle SOA Suite using Quick Start.
• Installing Oracle SOA Suite Quick Start for Developers
• Configuring an Integrated WebLogic Server Domain
• Configuring a Compact Domain

3Installing Oracle SOA Suite Quick Start forDevelopers
During the Oracle SOA Suite Quick Start installation, you will use the IntegratedWebLogic Server's default domain or create a standalone domain.Before beginning this installation, you should review Introducing the Quick StartDistributions.
• Orientation
• Downloading the Oracle SOA Suite Quick Start Installer
• Launching the Oracle SOA Suite Quick Start Installer
• Navigating the Installation Screens
• Next Steps
OrientationThis is where you are in the Quick Start installation and configuration roadmap.
Step Description
Plan your installation You used Chapter 1 to decide whichdistribution and configuration path suits yourgoals.
Download and install a Quick Startdistribution
You are downloading and installing QuickStart for Oracle SOA Suite or OracleBusiness Process Management Suite.
Configure a default or standalone domain You will configure a default domain orstandalone domain for your developedapplications.
Develop or test an application You will develop or test an application.
Downloading the Oracle SOA Suite Quick Start InstallerTo download the Oracle SOA Suite Quick Start installer:
1. Sign in to the host computer where you want to install your Quick Start installation.
2. Find and download the Oracle SOA Suite Quick Start installer zip file. This islocated on the Oracle Technology Network under Oracle SOA Suite Downloads.
If you cannot find the installers at the specified location, verify the downloadlocation in the Oracle Fusion Middleware Download, Installation, and ConfigurationReadme File.
3-1
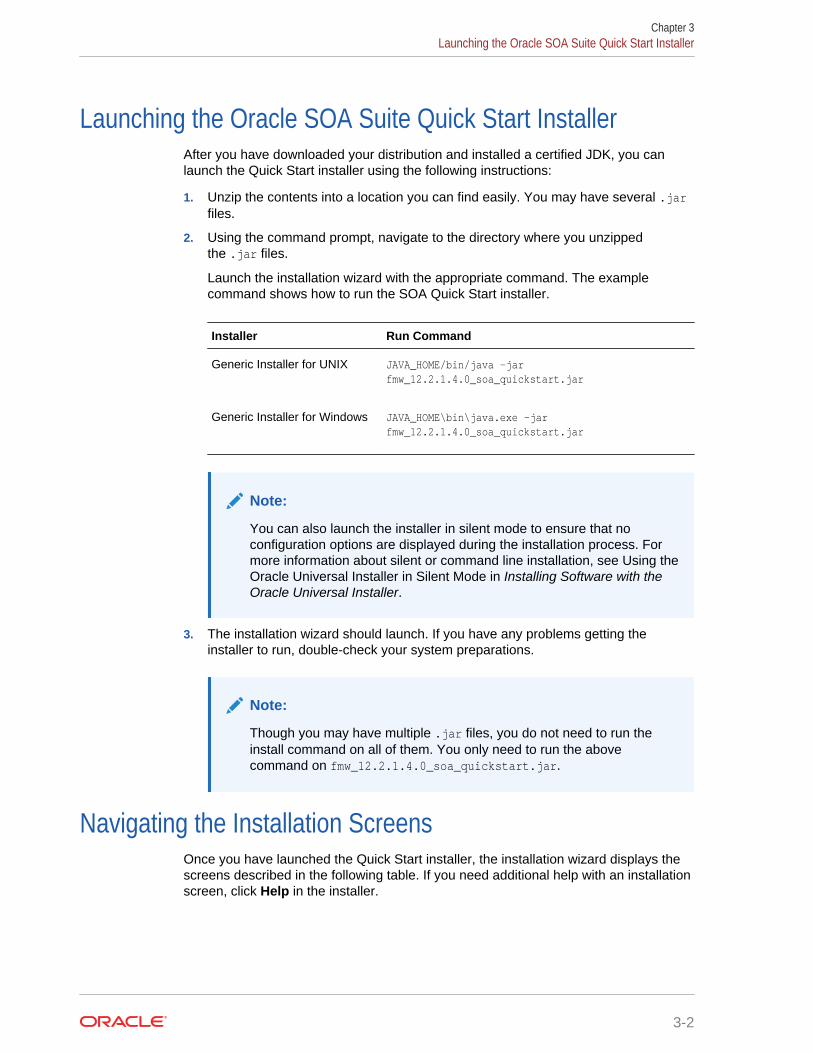
Launching the Oracle SOA Suite Quick Start InstallerAfter you have downloaded your distribution and installed a certified JDK, you canlaunch the Quick Start installer using the following instructions:
1. Unzip the contents into a location you can find easily. You may have several .jarfiles.
2. Using the command prompt, navigate to the directory where you unzippedthe .jar files.
Launch the installation wizard with the appropriate command. The examplecommand shows how to run the SOA Quick Start installer.
Installer Run Command
Generic Installer for UNIX JAVA_HOME/bin/java -jar fmw_12.2.1.4.0_soa_quickstart.jar
Generic Installer for Windows JAVA_HOME\bin\java.exe -jar fmw_12.2.1.4.0_soa_quickstart.jar
Note:
You can also launch the installer in silent mode to ensure that noconfiguration options are displayed during the installation process. Formore information about silent or command line installation, see Using theOracle Universal Installer in Silent Mode in Installing Software with theOracle Universal Installer.
3. The installation wizard should launch. If you have any problems getting theinstaller to run, double-check your system preparations.
Note:
Though you may have multiple .jar files, you do not need to run theinstall command on all of them. You only need to run the abovecommand on fmw_12.2.1.4.0_soa_quickstart.jar.
Navigating the Installation ScreensOnce you have launched the Quick Start installer, the installation wizard displays thescreens described in the following table. If you need additional help with an installationscreen, click Help in the installer.
Chapter 3Launching the Oracle SOA Suite Quick Start Installer
3-2

Table 3-1 Quick Start Install Screens
Screen Description
Welcome This screen introduces you to the product installer.
Installation Location Use this screen to specify the location of your Oracle homedirectory. Ensure that the name of the directory that you choosedoes not contain spaces.
For more about Oracle Fusion Middleware directory structure,see About the Directories for Installation and Configuration inPlanning an Installation of Oracle Fusion Middleware.
Prerequisite Checks This screen verifies that your system meets the minimumnecessary requirements.
Installation Summary Use this screen to verify the installation options you selected. Ifyou want to save these options to a response file, click SaveResponse File and provide the location and name of theresponse file. Response files can be used later in a silentinstallation situation.
Installation Progress This screen shows the installation progress.
When the progress bar reaches 100% complete, click Finish todismiss the installer, or click Next to see a summary.
Installation Complete This screen appears when the installation is complete. Reviewthe information on this screen.
At the bottom of this screen, there is a checkbox to launchOracle JDeveloper upon closing the installation wizard.
Oracle recommends that you deselect this box.
Click Finish.
Next StepsOnce you have verified your installation, you should configure a domain. See AboutDomain Configurations for detailed descriptions of your domain options.
Otherwise, use the following table to help you decide quickly.
Action Resource
Immediately launch theIntegrated WebLogic Serverto initiate a domain withJava DB.
This option does not requireany additional installations.
See Configuring an Integrated WebLogic Server Domain.
Chapter 3Next Steps
3-3

Action Resource
Install and configure anOracle database to workwith your Quick Startinstallation.
This option requires you toinstall an Oracle databasebut allows you to use moreOracle SOA Suitecomponents, such asOracle Managed FileTransfer, or Oracle B2B/Healthcare.
See Configuring a Compact Domain.
Chapter 3Next Steps
3-4
4Configuring an Integrated WebLogic ServerDomain
You can configure the Integrated WebLogic Server's default domain or standalonedomain for a Quick Start distribution.After following the steps in this section, you will be able to test applications using theIntegrated WebLogic Server and Java DB.
• Orientation
• Understanding Quick Start Domains
• Preparing to Launch the Integrated WebLogic Server
• Configuring JDeveloper's Default Domain
• Configuring a Standalone Domain
• Understanding Basic JDeveloper Functions
• Managing Multiple Installations on the Same Machine
• Switching Between Quick Start Distributions
• Next Steps
OrientationThis is where you are in the Quick Start installation and configuration roadmap.
Step Description
Plan your installation. You used Chapter 1 to decide whichdistribution and configuration path suits yourgoals.
Download and install a Quick Start distribution You downloaded and installed Quick Start forOracle SOA Suite or Oracle Business ProcessManagement Suite.
Configure a default or standalone domain. You are configuring a default domain or astandalone domain for your developedapplications.
Develop or test an application. You will develop or test an application.
Understanding Quick Start DomainsThere are three supported ways to configure a domain with Quick Start. All domainswill be pre-configured with IDE plugins for the Oracle SOA Suite components of yourchoice.
Use the following table to decide which domain would best suit your needs.
4-1
SuggestedUse Case
Method Description
Evaluation Configure theIntegratedWebLogicServer's defaultdomain inJDeveloper.
Launch the Integrated WebLogic Server from insideJDeveloper to create the default domain.
In this case, the server is tethered to your current JDevelopersession. When you quit JDeveloper, the Integrated WebLogicServer shuts down as well. Every time you start a newJDeveloper session, you need to relaunch the IntegratedWebLogic Server.
See Configuring JDeveloper's Default Domain.
Development with JavaDB
Configure astandalonedomain.
Create a standalone version of the Integrated WebLogicServer. The server and domain run independently ofJDeveloper.
This will save you startup time if you plan on developing anapplication in JDeveloper over a series of separate sessions,or if you plan to develop applications in the Oracle Service Busbrowser-based console.
See Configuring a Standalone Domain.
Development with anOracleDatabase
Configure acompactdomain.
You can configure your Quick Start installation to use anOracle database with an external compact domain.
You should only choose this option if you know you want yourdomain to be compatible with Enterprise Scheduler, ManagedFile Transfer, B2B, Heathcare, or BAM components.
See Configuring a Compact Domain.
Any other method of creating a domain is not recommended.
Preparing to Launch the Integrated WebLogic ServerFollow steps to prepare your environment before launching the Integrated WebLogicServer.
• Setting the JDEV_USER_DIR Environment Variable
• Setting the ORACLE_HOME Environment Variable
• Checking Entropy for Oracle Linux
Setting the JDEV_USER_DIR Environment VariableYou can set the JDEV_USER_DIR environment variable to define the location of youruser home directory. This should be a unique location for your distribution. The userhome directory will contain subdirectories for your domain files and your user-generated application files.
Note:
This step is crucial if you are planning to install and run multiple distributionsof JDeveloper on the same machine. Assign a unique user home directoryfor each distribution you install.
Chapter 4Preparing to Launch the Integrated WebLogic Server
4-2

Oracle recommends a directory structure similar to the one shown below, whereconfig shows the location of the user home directory.
Figure 4-1 Recommended Oracle Fusion Middleware Directory Structure
If you do not define JDEV_USER_DIR, your domain home and application home will becreated at two different locations.
On an UNIX host, the default domain home will be created at $HOME/.jdeveloper/system12.2.1.4.0.x.x.xxxx/DefaultDomain. The default application home will becreated at $HOME/jdeveloper/mywork.
On a Windows host, the default domain home will be created at %USERPROFILE%\AppData\Roaming\JDeveloper\system12.2.1.4.0.x.x.xxxx\DefaultDomain. Yourdefault application home will be created at C:\JDeveloper\mywork.
Once you have set JDEV_USER_DIR, the domain home and application home will becollocated as subdirectories under the defined location. For example, on a UNIXsystem, the domain home will be located in JDEV_USER_DIR\system12.2.1.4.0.x.x.xxx. The application home will be located in JDEV_USER_DIR\mywork.
Setting the ORACLE_HOME Environment VariableYou can set the ORACLE_HOME environment variable to simplify navigating to the variousdirectories when you are running installation and configuration commands.
The path definition should look something like this:
Chapter 4Preparing to Launch the Integrated WebLogic Server
4-3

Environment Run Command
UNIXsetenv ORACLE_HOME $HOME/Oracle/Middleware/Oracle_Homeexport ORACLE_HOME
WindowsSET ORACLE_HOME=C:\Oracle\Middleware\Oracle_Home
Checking Entropy for Oracle LinuxIf you are installing on an Oracle Linux (formally Oracle Enterprise Linux) machine,you should ensure that you have sufficient entropy. You need at least 500 for theIntegrated WebLogic Server to start up in a timely manner.
To check for entropy, run the following command:
cat /proc/sys/kernel/random/entropy_avail
If you have less than 500, use the following command to replenish bytes to /dev/random using /dev/urandom as the source:
rngd -r /dev/urandom -o /dev/random -b
You can configure this command by editing /etc/sysconfig/rngd and add thefollowing line:
EXTRAOPTIONS="-i -r /dev/urandom -o /dev/random -b -t 60 -W 2048"
Configuring JDeveloper's Default DomainYou can configure JDeveloper's default domain by launching the Integrated WebLogicServer.
• Starting the Integrated WebLogic Server
• Verifying Your Domain
• Disabling Secure Sockets Layer (SSL)
Starting the Integrated WebLogic ServerTo start the integrated WebLogic server:
1. Start JDeveloper.
If you have set the ORACLE_HOME environment variable to your Oracle home, youcan enter commands similar to the following examples:
Environment Run Command
UNIX cd ORACLE_HOME/jdeveloper/jdev/bin ./jdev
Windows cd ORACLE_HOME\jdeveloper jdev.exe
Chapter 4Configuring JDeveloper's Default Domain
4-4

As Oracle JDeveloper starts, you will get three prompts.
When prompted, select Studio Developer as your role and click OK.
When prompted, click No to import preferences from a previous JDeveloperinstallation.
When prompted about Oracle Usage Tracking, check whether or not you wantOracle JDeveloper to send automated usage reports to Oracle and click OK.
JDeveloper has fully started at this point.
2. Start the Integrated WebLogic Server by selecting Run from top menu bar, thenStart Server Instance.
3. The first time you start the server instance, you will be prompted to enter apassword for your default domain.
The Administrator ID, Listen Address, Listen Port, and SSL Listen Port shouldalready have values. Review them and make any appropriate changes.
4. Starting the integrated server will take several minutes.
You can track the server's launch in the Messages window pane. This windowshould automatically open at the bottom of the JDeveloper screen. If it is not there,you can open it by selecting Window from the top bar menu and Log from thedrop-down menu. You can also activate it with the keyboard shortcut Ctrl+Shift+L.
Note:
If the creation of the Integrated WebLogic Server domain fails with thefollowing error:
Failed to query contents of table SERVICETABLE. - Schema'DEMODB' does not exist
Make sure to shut down all running servers, even if they are not usingJava DB, and try the domain creation again.
Note:
If your machine is connected through a VPN, Coherence may beconfusing the local and VPN IP addresses. Change the Coherencecluster to multicast.
5. When you see the following messages appear in the log, the Integrated WebLogicServer has started successfully.
[SOA Platform is running and accepting requests[IntegratedWebLogicServer started.]
Verifying Your DomainYour default domain is already configured with Oracle SOA Suite and Oracle ServiceBus runtime components. To verify your domain installation:
Chapter 4Configuring JDeveloper's Default Domain
4-5

1. Access the Enterprise Manager Fusion Middleware Control, which is located at aURL following this format:
http://hostname.domain:7101/em
Note:
The default port for the Integrated WebLogic Server should always be7101 unless you changed it during configuration.
Sign in using the username and password that you specified when starting theIntegrated Weblogic Server.
For more information on using Fusion Middleware Control, see Getting StartedUsing Oracle Enterprise Manager Fusion Middleware Control in AdministeringOracle Fusion Middleware.
2. Alternatively, if you plan to develop projects using the Oracle Service Bus console,you can check to see if Oracle Service Bus is running.
The Oracle Service Bus console is located at an URL with the following format:
http://hostname.domain:7101/servicebus
Log in using the username and password that you specified when creating yourstandalone domain.
For more information on using the Oracle Service Bus console, see GettingStarted with the Oracle Service Bus Console in Developing Services with OracleService Bus.
Disabling Secure Sockets Layer (SSL)This is an optional task. SSL is enabled by default in the Integrated WebLogic Server.If you do not have stringent design time requirements, you can disable SSL as follows:
1. Go to the Administrator Console at http://localhost:7101/console
2. Log in with your credentials.
3. Select Environments, then Servers, then Admin Server.
4. Uncheck SSL Listen Port Enabled.
5. Restart the Integrated WebLogic Server.
Configuring a Standalone DomainYou can launch a standalone version of the Integrated WebLogic Server and domain.
• Starting the Configuration Wizard
• Navigating the Configuration Wizard Screens
• Starting the Administration Sever
• Starting the Application Server Connection Wizard
• Navigating the Create Application Server Connection Wizard Screens
Chapter 4Configuring a Standalone Domain
4-6

• Verifying Your Connection
Starting the Configuration WizardBefore starting the configuration wizard, make sure no other servers are running onyour system.
To start the configuration wizard to create a standalone domain:
1. Go to the bin directory.
2. Set the environment variable QS_TEMPLATES to either the SOA domain template orto both SOA and OSB domain template.
3. Start the standalone domain configuration wizard.
If you have set the ORACLE_HOME environment variable to your Oracle home, you canenter commands similar to the following examples:
Environment Run Command
UNIXcd $ORACLE_HOME/oracle_common/common/binsetenv QS_TEMPLATES "$ORACLE_HOME/soa/common/templates/wls/oracle.soa_template.jar, $ORACLE_HOME/osb/common/templates/wls/oracle.osb_template.jar"export QS_TEMPLATES./qs_config.sh
Windowscd %ORACLE_HOME%\oracle_common\common\binset QS_TEMPLATES=%ORACLE_HOME%\soa\common\templates\wls\oracle.soa_template.jar, %ORACLE_HOME%\osb\common\templates\wls\oracle.osb_template.jarqs_config.cmd
Navigating the Configuration Wizard ScreensNavigate through the following screens in the Configuration Wizard:
Table 4-1 Quick Start WebLogic Server Configuration Wizard Screens
Screen Description
Configuration Specify a password for your default domain.
Edit the Domain Location. By default, the domain will becreated at ORACLE_HOME/user_projects/domains/base_domain. To prevent confusion in the future, replacebase_domain in the Domain Location path withstandalone_domain.
Replace base_domain with standalone_domain in theApplication Location path as well.
Review the port numbers.
Click Create.
Configuration Progress This screen allows you to see the progress of the configuration.
Chapter 4Configuring a Standalone Domain
4-7

Table 4-1 (Cont.) Quick Start WebLogic Server Configuration Wizard Screens
Screen Description
End of Configuration This screen appears when the installation is complete. Take noteof the information on this screen.
You can leave the option to start your new domain unchecked ifyou want to start it manually from the domain location listed onthis screen.
Click Finish to exit the wizard.
Starting the Administration SeverIf you chose not to start the domain automatically after creation, you can start yourstandalone manually.
If you have set the DOMAIN_HOME environment variable to your domain home location,you can enter the following commands to start the domain’s Administration Server:
OperatingSystem
Command
UNIXcd $DOMAIN_HOME/bin./startWebLogic.sh
Windowscd %DOMAIN_HOME%\binstartWebLogic.cmd
Domain configuration will take several minutes. When you see the following messageappear in the terminal, the WebLogic Server has started and your standalone domainhas been created successfully.
SOA Platform is running and accepting requests
Your standalone domain is already configured with Oracle SOA Suite runtimecomponents.
Starting the Application Server Connection WizardStart Oracle JDeveloper with the appropriate command.
If you have set the ORACLE_HOME environment variable to your Oracle home, you canenter the following commands:
Environment Run Command
UNIXcd $ORACLE_HOME/jdeveloper/jdev/bin./jdev
Windowscd %ORACLE_HOME%\jdeveloperjdeveloper.exe
Chapter 4Configuring a Standalone Domain
4-8

Select Window from the top menu, and then choose Application Server from thedrop-down menu. Alternatively, use the keyboard shortcut Ctrl-Shift-G. This willopen the Application Server Navigator in the left-hand pane.
Right-click on Application Server in the Application Server Navigator. Select NewApplication Server from the drop-down menu to start the Create Application ServerConnection wizard.
Navigating the Create Application Server Connection Wizard ScreensThe Create Application Server Connection wizard includes the following screens:
Table 4-2 Application Server Connection Creation Screens
Screen Description
Usage Select Standalone Server.Click Next.
Name and Type Specify an intuitive Connection Name for your server.
Leave WebLogic 12.x selected as the Connection Type.
Click Next.
Authentication Input the Username and Password you created during domainconfiguration.
Click Next.
Connections Input the standalone domain's name. Then click Next withoutchanging anything else on the screen.
Test Click the Test Connection button at the top. If any of the testsfail, you should press Back to the Connections orAuthentication screens to make sure you entered everythingcorrectly.
If everything passes, click Next.
Finish The Finish screen tells you how to launch your new connection,covered in the following task. Click Finish.
Verifying Your ConnectionExpand the connection node beside Application Servers in the Application ServerNavigator. You should see your standalone domain listed by the Connection Nameyou specified on the Name and Type screen.
Right-click on your standalone domain's name and choose Launch AdministrativeConsole.
Log into your administrative console. If you log in successfully, then you can begincreating applications.
Understanding Basic JDeveloper FunctionsYou should be familiar with basic Oracle JDeveloper functions to manage JDevelopereffectively.
You can learn more about using Oracle JDeveloper in Working with Oracle JDeveloperin Developing Applications with Oracle JDeveloper.
Chapter 4Understanding Basic JDeveloper Functions
4-9

• Stopping the Integrated WebLogic Server
• Restarting JDeveloper
Stopping the Integrated WebLogic ServerIf you started the Integrated WebLogic Server from inside Oracle JDeveloper, you cansimply close out of Oracle JDeveloper to end a running server.
If you do not want to close out of JDeveloper for any reason, you can also click the redstop button in the ribbon menu.
If you have set the DOMAIN_HOME environment variable to your Oracle home, you canenter the following commands to stop an independent WebLogic Server:
Environment Run Command
UNIXcd $DOMAIN_HOME/bin./stopWebLogic.sh
Windowscd %DOMAIN_HOME%\binstopWebLogic.cmd
Restarting JDeveloperIf you have closed Oracle JDeveloper and need to reopen it, you can use the followingcommands:
Environment Run Command
UNIXcd $ORACLE_HOME/jdeveloper/jdev/bin./jdev
Windowscd %ORACLE_HOME%\jdeveloperjdev.exe
Managing Multiple Installations on the Same MachineWhen you install multiple Quick Start distributions on the same machine, eachdistribution has its own JDeveloper that runs its own unique instance of Java DB. AllJava DB instances on the same machine initialize on the same port. For thesereasons, you cannot perform the following actions:
• You cannot simultaneously start two Integrated WebLogic Servers from differentdistributions.
• You cannot access your Oracle SOA Suite runtime environment by starting theWebLogic Server from your Oracle Business Process Management Suite QuickStart Oracle home.
• You cannot access your Oracle Business Process Management Suite runtimeenvironment by starting the WebLogic Server from your Oracle SOA Suite QuickStart Oracle home.
Chapter 4Managing Multiple Installations on the Same Machine
4-10

Switching Between Quick Start DistributionsIf you want to switch between different servers using Java DB on the same machine,you need to take the following steps to ensure you are starting the desireddevelopment environment:
1. If you have not done so already, decide on separate user directory home locationsfor each of your JDeveloper distributions. The user home directory will containsubdirectories for your domain files and your user-generated application files.
For example, you may want to install and use both an Oracle Business ProcessManagement Suite JDeveloper and an Oracle SOA Suite JDeveloper on the samemachine. You could designate the user home directory for your Oracle SOA SuiteJDeveloper to be located at C:/jdev12cworkarea/soa, while your Oracle BusinessProcess Management Suite user home directory could be located at C:/jdev12cworkarea/bpm.
2. Set the environment variable JDEV_USER_DIR to the location of the user directoryhome for the JDeveloper distribution that you want to use.
For the example in the previous step, set JDEV_USER_DIR=C:/jdev12cworkarea/soa if you want to use the Oracle SOA Suite environment.
Note:
Redefining JDEV_USER_DIR changes the default save location for yourapplication projects. If you already started and used JDeveloper withoutdefining JDEV_USER_DIR, you may have saved applications in the defaultapplication home. The default application home is located at the user'sroot directory under JDeveloper/mywork.
3. Go to the JDeveloper home of the distribution you want to use.
For example, if you want to use your Oracle SOA Suite environment, go to yourOracle SOA Suite Oracle home and navigate to /jdeveloper/jdev/bin.
4. Start the JDeveloper executable from there.
You must reset the JDEV_USER_DIR variable every time you switch betweendistributions using Java DB.
Next StepsOnce you have verified your installation, you can perform any of the following tasks:
Action Resource
Configure your Quick Startinstallation to use an externalOracle database and standalonecompact domain.
See Configuring a Compact Domain.
Deploy a sample application. See Running a Sample Application.
Chapter 4Switching Between Quick Start Distributions
4-11
Action Resource
Make or test an application of yourown.
See Working with Oracle JDeveloper in DevelopingApplications with Oracle JDeveloper.
Delete your installation. If you have tested your installation out and are done, see Uninstalling Oracle Quick Start .
Chapter 4Next Steps
4-12

5Configuring a Compact Domain
After configuring a compact domain for a Quick Start installation, you will have createdan external Oracle Database.Follow the steps in this section only if you want create applications with componentsthat are incompatible with the Integrated WebLogic Server's Java DB. Thesecomponents include Oracle Business Activity Monitoring, Oracle B2B, OracleEnterprise Scheduler, Oracle Managed File Transfer, and Oracle SOA Suite forHealthcare Integration.
• Orientation
• Preparing to Configure a Compact Domain for a Quick Start Installation
• Installing Required Schemas
• Using the Configuration Wizard to Configure a Compact Domain
• Starting the Administration Server
• Connecting JDeveloper to the Compact Domain
• Next Steps
OrientationThis is where you are in the Quick Start installation and configuration roadmap.
Step Description
Plan your installation. You used Chapter 1 to decide whichdistribution and configuration path suits yourgoals.
Download and install a Quick Start distribution You downloaded and installed Quick Start forOracle SOA Suite or Oracle Business ProcessManagement Suite.
Configure a compact domain. You are configuring a compact domain foryour developed applications.
Develop or test an application. You will develop or test an application.
Preparing to Configure a Compact Domain for a Quick StartInstallation
You will need to prepare your system for configuring a compact domain.
A compact domain is a developer domain consisting of a single Administration serverand no managed servers. Configuring a compact domain will allow you to use anOracle Database so that you can install additional components incompatible with theJava DB included by default in the Quick Start installation.
5-1
Make sure that you have verified that your Quick Start installation works before movingon to the following tasks:
• Closing Oracle JDeveloper, Extra Server Connections, or Java DB
• Downloading and Installing a Supported Database
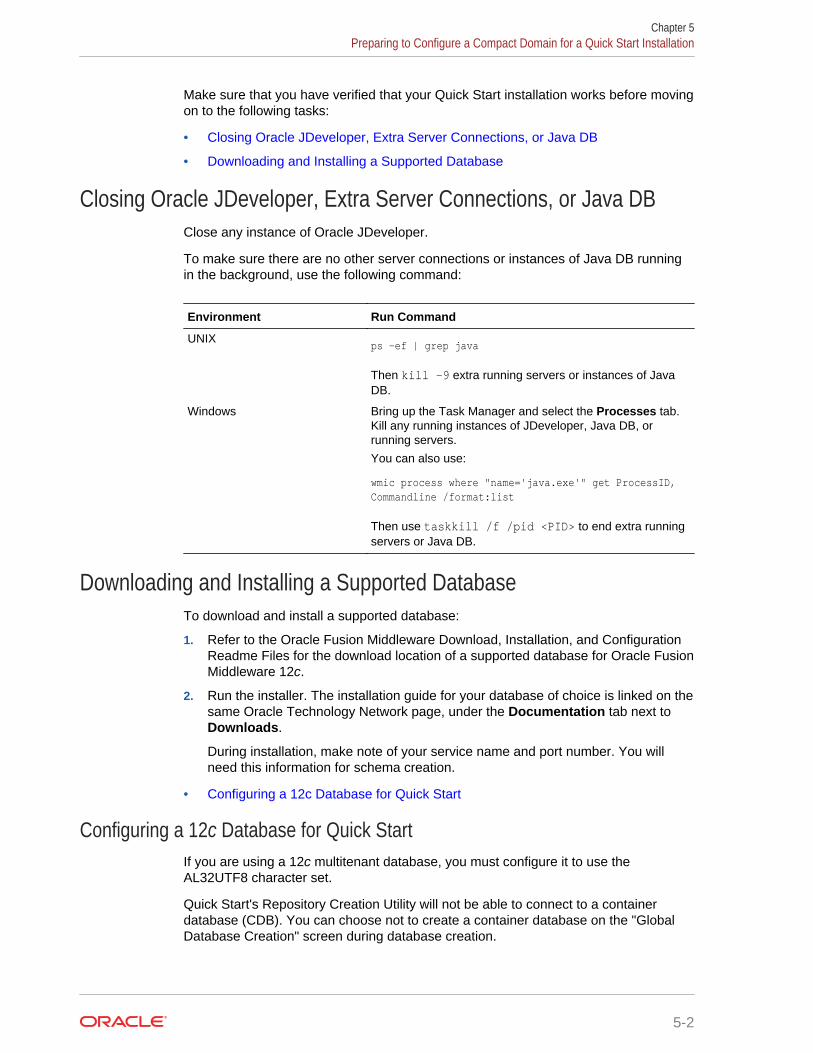
Closing Oracle JDeveloper, Extra Server Connections, or Java DBClose any instance of Oracle JDeveloper.
To make sure there are no other server connections or instances of Java DB runningin the background, use the following command:
Environment Run Command
UNIXps -ef | grep java
Then kill -9 extra running servers or instances of JavaDB.
Windows Bring up the Task Manager and select the Processes tab.Kill any running instances of JDeveloper, Java DB, orrunning servers.
You can also use:
wmic process where "name='java.exe'" get ProcessID, Commandline /format:list
Then use taskkill /f /pid <PID> to end extra runningservers or Java DB.
Downloading and Installing a Supported DatabaseTo download and install a supported database:
1. Refer to the Oracle Fusion Middleware Download, Installation, and ConfigurationReadme Files for the download location of a supported database for Oracle FusionMiddleware 12c.
2. Run the installer. The installation guide for your database of choice is linked on thesame Oracle Technology Network page, under the Documentation tab next toDownloads.
During installation, make note of your service name and port number. You willneed this information for schema creation.
• Configuring a 12c Database for Quick Start
Configuring a 12c Database for Quick StartIf you are using a 12c multitenant database, you must configure it to use theAL32UTF8 character set.
Quick Start's Repository Creation Utility will not be able to connect to a containerdatabase (CDB). You can choose not to create a container database on the "GlobalDatabase Creation" screen during database creation.
Chapter 5Preparing to Configure a Compact Domain for a Quick Start Installation
5-2

If you do create container database, you can create a pluggable database (PDB)within the CDB. Then point the RCU to the PDB. See the 12c DatabaseAdministrator's Guide for how to configure a compatible PDB.
Installing Required SchemasYou will need to create the schemas required for a Quick Start compact domain.
• Running Installers for Additional Components
• Creating Schemas for Quick Start with the Repository Creation Utility
Running Installers for Additional ComponentsIf you know you want to add Oracle Managed File Transfer, Oracle B2B, or OracleSOA Suite for healthcare integration, you should download and run their installersbefore running the RCU for the first time. Refer to Installing Oracle B2B, Oracle SOASuite for Healthcare Integration, or Oracle Managed File Transfer for Quick Start forbrief walkthroughs of these installations.
You do not need to run separate installers to add Oracle Enterprise Scheduler orOracle Business Activity Monitoring.
If you are not sure which additional products you want yet, you can add anycomponent after creating your compact domain. However, deciding now will minimizethe number of times you have to restart your server and run the domain ConfigurationWizard or the RCU.
Note:
In 12c, the Repository Creation Utility (RCU) is included in the Oracle SOASuite install. Do not download or use a separate version.
If you have finished configuring a compact domain but want to add new schemas, see Updating a Compact Domain for how to update a compact domain.
Creating Schemas for Quick Start with the Repository Creation UtilityTo create schemas with the Repository Creation Utility (RCU):
1. Launch the RCU packaged with your Quick Start installation to create schemas inyour new database. Do not download or use any other version of RCU to configurea database with Quick Start.
If you have set the ORACLE_HOME environment variable to your Oracle home, youcan enter the following commands:
Environment Run Command
UNIX cd $ORACLE_HOME/oracle_common/bin./rcu
Chapter 5Installing Required Schemas
5-3

Environment Run Command
Windows cd %ORACLE_HOME%\oracle_common\binrcu.bat
2. Navigate through the following screens. For more information about the options ona specific screen, click Help or see Understanding Repository Creation UtilityScreens in Creating Schemas with the Repository Creation Utility.
Table 5-1 RCU Schema Creation Screens
Screen Description
Welcome This screen provides an introduction to what RCU is and itspurpose. Click Next.
Create Repository Choose Create Repository and System Load and ProductLoad Concurrently.
If the second option doesn't appear for you, you do not havethe necessary permissions or privileges to perform DBAactivities.
Database ConnectionDetails
Fill the Host Name, Username, and Password blanks withthe credentials for your Oracle database. Your Service Nameand Port number were created when you installed yourdatabase.
If you using a 12c multitenant database and are havingconnection issues, make sure you have configured yourdatabase properly.
Click Next.
Checking Prerequisites This screen will pop up with a progress indicator bar. Whenthe prerequisites are checked off, click OK to continue.
Select Components Specify an intuitive prefix for your new schemas, such asSOAQS or BPMQS, so you can target them easily when youare configuring a domain.
Select AS Common Schemes and SOA Suite to select all oftheir dependencies.
If you are installing Oracle Managed File Transfer, selectManaged File Transfer from the list. You will not see thisoption listed if you have not run the corresponding installeryet.
Click Next.
Schema Passwords Select Use same passwords for all schemas. Then createa password you will remember.
Custom Variables This screen will show up because you are installing SOAInfrastructure. See About the Custom Variables Required forthe SOA Suite Schemas in Installing and Configuring OracleSOA Suite and Business Process Management fordescriptions of these variables.
If you are a healthcare provider and want the HealthcareIntegration user interface, change the Value field forHealthcare Integration to Yes. If you do not set this valuenow, the Healthcare Integration user interface will not functionproperly. See Activating the Oracle SOA Suite for HealthcareIntegration User Interface for more information.
Otherwise, accept the defaults and press Next.
Chapter 5Installing Required Schemas
5-4

Table 5-1 (Cont.) RCU Schema Creation Screens
Screen Description
Map Tablespaces This screen displays default and temporary tablespaces forthe components you want to create schemas for. You canreview this information and click NextClick OK through the next two confirmation dialogues. Thenclick Next again to progress to the next screen.
Summary This screen summarizes the component schemas that will becreated. Take note of the Database details at the top of thisscreen.
Click Create to begin schema creation.
A progress dialog shows the progress of schema creation.Green checks will appear next to the names of successfullycreated schemas.
Completion Summary This screen displays the log files created with the databaseschemas. You can open any of the log files to reviewinformation or to troubleshoot a creation issue.
If any operation failed, you can check the Cleanup for failedcomponents box. Upon clicking Close, this option will dropfailed schemas from your database.
When you click Close, schema creation is complete.
If you encountered any problems during schema creation, verify the following:
• You are using the RCU included in your Quick Start installation.
• Your database server and listeners are running.
• If you are using a 12c database, you have configured your database properly.
You can also troubleshoot the issue using the log files generated on theCompletion Summary screen. For more information, see TroubleshootingRepository Creation Utility in Creating Schemas with the Repository CreationUtility.
Using the Configuration Wizard to Configure a CompactDomain
In a developer environment, you can create a compact domain using the ConfigurationWizard.
• Starting the Configuration Wizard
• Selecting the Domain Type and Domain Home Location
• Selecting Configuration Templates for Oracle SOA Suite Quick Start
• Selecting the Application Home Location
• Configuring the Administrator Account
• Specifying the Domain Mode and JDK
• Specifying the Datasource Configuration Type
• Specifying JDBC Component Schema Information
Chapter 5Using the Configuration Wizard to Configure a Compact Domain
5-5

• Testing the JDBC Connections
• Specifying the Path to the Keystore Certificate or Key
• Selecting Advanced Configuration
• Completing the Configuration
Starting the Configuration WizardTo start the Configuration Wizard to create a compact domain:
1. Go to the bin directory.
2. Set the environment variable CONFIG_JVM_ARGS to -Dcom.oracle.cie.config.showProfile=true. This enables the Create a newcompact domain option in the Configuration Wizard.
3. Launch the Configuration Wizard.
If you have set the ORACLE_HOME environment variable to your Oracle home, you canenter the following commands:
OperatingSystem
Command
UNIXcd $ORACLE_HOME/oracle_common/common/binsetenv CONFIG_JVM_ARGS -Dcom.oracle.cie.config.showProfile=trueexport CONFIG_JVM_ARGS./config.sh
Windowscd %ORACLE_HOME%\oracle_common\common\binSET CONFIG_JVM_ARGS=-Dcom.oracle.cie.config.showProfile=trueconfig.cmd
Selecting the Domain Type and Domain Home LocationOn the Configuration Type screen, select Create a new compact domain. If you donot see this option, you did not set the CONFIG_JVM_ARGS environment variablesuccessfully.
In the Domain Location field, specify your Domain home directory. If you alreadylaunched the Integrated WebLogic Server and generated the default domain, youshould create a new domain outside of base_domain.
You should create your Domain home outside the Oracle home directory. See thelocation of Application Home relative to Oracle Home in the following figure.
Chapter 5Using the Configuration Wizard to Configure a Compact Domain
5-6

Figure 5-1 Recommended Oracle Fusion Middleware Directory Structure
This directory structure will help you avoid issues when you need to upgrade orreinstall your software. See What Are the Key Oracle Fusion Middleware Directories?in Understanding Oracle Fusion Middleware.
Selecting Configuration Templates for Oracle SOA Suite Quick StartOn the Templates screen, make sure Create Domain Using Product Templates isselected, then select the following templates:
Note:
Use the SOA classic domain to extend the SOA domain to BPM. Extending areference-configured SOA domain to BPM is not supported.
• Oracle SOA Suite - 12.2.1.4.0 [soa]
Selecting this template automatically selects the following as dependencies:
– Oracle Enterprise Manager
– Oracle WSM Policy Manager
– Oracle JRF
– WebLogic Coherence Cluster Extension
• Oracle Service Bus - 12.2.1.4.0 [osb]
Selecting this template automatically selects the following as a dependency:
– WebLogic Advanced Web Services for JAX-RPC Extension
Chapter 5Using the Configuration Wizard to Configure a Compact Domain
5-7

• Oracle Enterprise Scheduler Service Basic - 12.2.1.4.0 [oracle_common]
• Oracle Enterprise Manager Plugin for ESS - 12.2.1.4.0 [em]
Optionally, select the following to install additional components:
• Oracle Business Activity Monitoring - 12.2.1.4.0 [soa]
• Oracle B2B - 12.2.1.4.0 [soa]
• Oracle Managed File Transfer -12.2.1.4.0 [mft]
If you have not run the installers for Oracle B2B or Oracle Managed File Transfer, youwill not see the options to select those templates. See About Adding Components to aQuick Start Installation for installation instructions for these components.
Note:
Oracle SOA Suite for healthcare integration - 12.2.1.4.0 [soa] template canbe configured directly from template locations.
Selecting the Application Home LocationOn the Application Location screen, select the location where you want to store yourapplications associated with your domain. This location is also known as theApplication home directory.
Your Application home should be created at the same location you specified for yourDomain home above.
Configuring the Administrator AccountOn the Administrator Account screen, specify the user name and password for thedefault WebLogic Administrator account for the domain. You will use these credentialsto connect to the domain's Administrator Server.
Specifying the Domain Mode and JDKOn the Domain Mode and JDK screen:
• In the Domain Mode field, select Development.
• In the JDK field, select Oracle HotSpot JDK.
Specifying the Datasource Configuration TypeOn the Database Configuration Type screen, select RCU Data to activate the fields.The RCU Data option instructs the Configuration Wizard to connect to the databaseand Service Table (STB) schema to automatically retrieve schema information for theschemas needed to configure the domain.
Chapter 5Using the Configuration Wizard to Configure a Compact Domain
5-8

Note:
If you choose to select Manual Configuration on this screen, you will haveto manually fill in the parameters for your schema on the following screen.
After selecting RCU Data, fill in the following fields:
Field Description
DBMS/Service Enter the database DBMS name, or service name if you selected aservice type driver. If you are using a 12c multitenant database, makesure you use the service name for a configured pluggable database(PDB) and not the container.
Host Name Enter the name of the server hosting the database.
Port Enter the port number on which the database listens.
Schema Owner
Schema Password
Enter the username and password for connecting to the database'sService Table schema. This is the schema username and password thatwas specified for the Service Table component on the "SchemaPasswords" screen in the RCU.
The default username is prefix_STB, where prefix is the customprefix that you defined in RCU.
Click Get RCU Configuration when you are finished specifying the databaseconnection information. The following output in the Connection Result Log indicatesthat the operation succeeded:
Connecting to the database server...OKRetrieving schema data from database server...OKBinding local schema components with retrieved data...OK
Successfully Done.
For more information about the RCU Data option, see Understanding the ServiceTable Schema in Creating Schemas with the Repository Creation Utility.
Specifying JDBC Component Schema InformationVerify that the values on the JDBC Component Schema screen are correct for allschemas. If you selected RCU Data on the previous screen, the schema table shouldalready be populated appropriately.
Testing the JDBC ConnectionsUse the JDBC Component Schema Test screen to test the datasource connectionsyou have just configured.
A green check mark in the Status column indicates a successful test. If you encounterany issues, see the error message in the Connection Result Log section of the screen,fix the problem, then try to test the connection again.
Chapter 5Using the Configuration Wizard to Configure a Compact Domain
5-9

Specifying the Path to the Keystore Certificate or Key
Use the Keystore screen to specify either the path to the trusted certificate for eachkeystore, or the path to each keystore’s private key and other private key information.
When you click in the Trusted Certificate, Private Key, or Identity Certificate fields, abrowse icon appears to the right of the field. Click this icon to browse to theappropriate file.
For more information about this screen, see Keystore in Creating WebLogic DomainsUsing the Configuration Wizard .
Selecting Advanced ConfigurationYou do not need any advanced configuration for a compact domain. You can skipthrough the Advanced Configuration screen without selecting anything.
Completing the ConfigurationThe Configuration Summary screen shows the final directory structure and thecomponents and extensions with which your compact domain will be configured.Review this information and click Create.
The Configuration Progress screen shows the configuration progress bar.
Upon successful configuration, the Configuration Success screen shows the directorylocation of your domain and the URL for your administration console access. Takenote of both and click Close.
Starting the Administration ServerIf you have set the DOMAIN_HOME environment variable to your domain home location,you can enter the following commands to start the domain’s Administration Server:
OperatingSystem
Command
UNIXcd $DOMAIN_HOME/bin./startWebLogic.sh
Windowscd %DOMAIN_HOME%\binstartWebLogic.cmd
If you want to use JDeveloper's Integrated WebLogic Server, on the same system inconjunction with your compact domain, add the flag noderby to the end of thecommand. For example, the UNIX launch command will look like the following:
./startWebLogic.sh noderby
The noderby option will prevent the Derby Java Database from starting in the JavaVirtual Machine. This will prevent any conflicts with the Integrated WebLogic Server,which needs to initialize the Derby Java Database to start up successfully.
Chapter 5Starting the Administration Server
5-10

You know that the administrator server is running when you see the following output:
Server state changed to RUNNING.
Connecting JDeveloper to the Compact DomainAfter configuring a compact domain, you need to prepare JDeveloper to target the newcompact domain for launching applications.
• Starting the Application Server Connection Wizard
• Starting the Administration Server
• Verifying Your Connection
Starting the Application Server Connection WizardStart Oracle JDeveloper with the appropriate command.
If you have set the ORACLE_HOME environment variable to your Oracle home, you canenter the following commands:
Environment Run Command
UNIXcd $ORACLE_HOME/jdeveloper/jdev/bin./jdev
Windowscd %ORACLE_HOME%\jdeveloperjdeveloper.exe
Select Window from the top menu, and then choose Application Server from thedrop-down menu. Alternatively, use the keyboard shortcut Ctrl-Shift-G. This willopen the Application Server Navigator in the left-hand pane.
Right-click on Application Server in the Application Server Navigator. Select NewApplication Server from the drop-down menu to start the Create Application ServerConnection wizard.
Starting the Administration ServerIf you have set the DOMAIN_HOME environment variable to your domain home location,you can enter the following commands to start the domain’s Administration Server:
OperatingSystem
Command
UNIXcd $DOMAIN_HOME/bin./startWebLogic.sh
Windowscd %DOMAIN_HOME%\binstartWebLogic.cmd
Chapter 5Connecting JDeveloper to the Compact Domain
5-11

If you want to use JDeveloper's Integrated WebLogic Server, on the same system inconjunction with your compact domain, add the flag noderby to the end of thecommand. For example, the UNIX launch command will look like the following:
./startWebLogic.sh noderby
The noderby option will prevent the Derby Java Database from starting in the JavaVirtual Machine. This will prevent any conflicts with the Integrated WebLogic Server,which needs to initialize the Derby Java Database to start up successfully.
You know that the administrator server is running when you see the following output:
Server state changed to RUNNING.
Verifying Your ConnectionExpand the connection node beside Application Servers in the Application ServerNavigator. You should see your standalone domain listed by the Connection Nameyou specified on the Name and Type screen.
Right-click on your standalone domain's name and choose Launch AdministrativeConsole.
Log into your administrative console. If you log in successfully, then you can begincreating applications.
Next StepsOnce you have verified your Quick start installation and compact domain connection,you can take any of the following actions:
Action Resource
Deploy a sample application for Oracle SOASuite Quick Start.
See Running a Sample Application.
Make or test an application of your own. See Getting Started with DevelopingApplications with Oracle JDeveloper inDeveloping Applications with OracleJDeveloper.
Add Oracle Managed File Transfer or OracleB2B/Healthcare.
See Adding Components to a Quick StartInstallation for instructions on addingcomponents to a fully configured compactdomain.
Delete your installation. If you have tested your installation out and aredone, see Deinstalling Oracle Quick Start.
Chapter 5Next Steps
5-12

Part IIIQuick Start for Oracle Business ProcessManagement Suite
This part covers the steps to install Oracle Business Process Management Suite usingQuick Start.
• Installing Oracle Business Process Management Suite Quick Start for Developers
• Configuring an Integrated WebLogic Server Domain
• Configuring a Compact Domain

6Installing Oracle Business ProcessManagement Suite Quick Start forDevelopers
During the Oracle Business Process Management Suite Quick Start installation, youwill use the Integrated WebLogic Server's default domain or create a standalonedomain.Before beginning this installation, you should review Introducing the Quick StartDistributions.
• Orientation
• Downloading the Oracle Business Process Management Suite Quick Start Installer
• Launching the Oracle Business Process Management Suite Quick Start Installer
• Navigating the Installation Screens
• Next Steps
OrientationThis is where you are in the Quick Start installation and configuration roadmap.
Step Description
Plan your installation You used Chapter 1 to decide whichdistribution and configuration path suits yourgoals.
Download and install a Quick Startdistribution
You are downloading and installing QuickStart for Oracle SOA Suite or OracleBusiness Process Management Suite.
Configure a default or standalone domain You will configure a default domain orstandalone domain for your developedapplications.
Develop or test an application You will develop or test an application.
Downloading the Oracle Business Process ManagementSuite Quick Start Installer
To download the Oracle Business Process Management Suite installer:
1. Log into the host computer where you want to install Oracle Business ProcessManagement Suite.
2. Download the Oracle Business Process Management Suite Quick Start installerzip file. This is located on the Oracle Software Delivery Cloud as part of the OracleFusion Middleware 12c Media Pack.
6-1

If you cannot find the installer at the specified location, verify the downloadlocation in the Oracle Fusion Middleware Download, Installation, and ConfigurationReadme File.
Launching the Oracle Business Process Management SuiteQuick Start Installer
After you have installed a certified JDK and downloaded the Quick Start installer zipfile, you can launch the Quick Start installer
1. Unzip the zip file contents into a location you can find easily. You may haveseveral .jar files.
2. Using the command prompt, navigate to the directory where you unzipped the jarfiles. Launch the installation wizard with the appropriate command.
Installer Run Command
Generic Installer for Linux JAVA_HOME/bin/java -jar fmw_12.2.1.4.0_bpm_quickstart.jar
Generic Installer for Windows JAVA_HOME\bin\java.exe -jar fmw_12.2.1.4.0_bpm_quickstart.jar
Note:
You can also launch the installer in silent mode to ensure that noconfiguration options are displayed during the installation process. Formore information about silent or command line installation, see Using theOracle Universal Installer in Silent Mode in Installing Software with theOracle Universal Installer.
3. The installation wizard should launch. If you have any problems getting theinstaller to run, double-check your system preparations.
Note:
Though you may have multiple jar files, you do not need to run the installcommand on all of them. You only need to run the above command onfmw_12.2.1.4.0_bpm_quickstart.jar.
Navigating the Installation ScreensOnce you have launched the Quick Start installer, the installation wizard displays thescreens described in the following table. If you need additional help with an installationscreen, click Help in the installer.
Chapter 6Launching the Oracle Business Process Management Suite Quick Start Installer
6-2

Table 6-1 Quick Start Install Screens
Screen Description
Welcome This screen introduces you to the product installer.
Installation Location Use this screen to specify the location of your Oracle homedirectory. Ensure that the name of the directory that you choosedoes not contain spaces.
For more about Oracle Fusion Middleware directory structure,see About the Directories for Installation and Configuration inPlanning an Installation of Oracle Fusion Middleware.
Prerequisite Checks This screen verifies that your system meets the minimumnecessary requirements.
Installation Summary Use this screen to verify the installation options you selected. Ifyou want to save these options to a response file, click SaveResponse File and provide the location and name of theresponse file. Response files can be used later in a silentinstallation situation.
Installation Progress This screen shows the installation progress.
When the progress bar reaches 100% complete, click Finish todismiss the installer, or click Next to see a summary.
Installation Complete This screen appears when the installation is complete. Reviewthe information on this screen.
At the bottom of this screen, there is a checkbox to launchOracle JDeveloper upon closing the installation wizard.
Oracle recommends that you deselect this box.
Click Finish.
Next StepsOnce you have verified your installation, you should configure a domain. See AboutDomain Configurations for detailed descriptions of your domain options.
Or, use the following table to help you decide quickly.
Action Resource
Immediately launch the Integrated WebLogicServer to initiate a domain with Java DB.
This option does not require any additionalinstallations.
See Configuring an Integrated WebLogicServer Domain.
Install and configure an Oracle database towork with your Quick Start installation.
This option requires you to install an Oracledatabase but allows you to use more OracleSOA Suite components, such as OracleManaged File Transfer or Oracle B2B/Healthcare.
See Configuring a Compact Domain.
Chapter 6Next Steps
6-3

7Configuring an Integrated WebLogic ServerDomain
You can configure the Integrated WebLogic Server's default domain or standalonedomain for a Quick Start distribution.After following the steps in this section, you will be able to test applications using theIntegrated WebLogic Server and Java DB.
• Orientation
• Understanding Quick Start Domains
• Preparing to Launch the Integrated WebLogic Server
• Configuring JDeveloper's Default Domain
• Configuring a Standalone Domain
• Understanding Basic JDeveloper Functions
• Managing Multiple Installations on the Same Machine
• Switching Between Quick Start Distributions
• Next Steps
OrientationThis is where you are in the Quick Start installation and configuration roadmap.
Step Description
Plan your installation. You used Chapter 1 to decide whichdistribution and configuration path suits yourgoals.
Download and install a Quick Start distribution You downloaded and installed Quick Start forOracle SOA Suite or Oracle Business ProcessManagement Suite.
Configure a default or standalone domain. You are configuring a default domain or astandalone domain for your developedapplications.
Develop or test an application. You will develop or test an application.
Understanding Quick Start DomainsThere are three supported ways to configure a domain with Quick Start. All domainswill be pre-configured with IDE plugins for the Oracle Business Process ManagementSuite components of your choice.
Use the following table to decide which domain best suits your needs.
7-1

Suggested UseCase
Method Description
Evaluation Configure theIntegratedWebLogicServer'sdefaultdomain inJDeveloper.
Launch the Integrated WebLogic Server from inside JDeveloper tocreate the default domain.
In this case, the server is tethered to your current JDevelopersession. When you quit JDeveloper, the Integrated WebLogicServer shuts down as well. Every time you start a new JDevelopersession, you need to relaunch the Integrated WebLogic Server.
See Configuring JDeveloper's Default Domain.
Development withJava DB
Configure astandalonedomain.
Create a standalone version of the Integrated WebLogic Server.The server and domain run independently of JDeveloper.
This will save you startup time if you plan on developing anapplication in JDeveloper over a series of separate sessions, or ifyou plan to develop applications in the Oracle Service Busbrowser-based console.
See Configuring a Standalone Domain for more information.
Development with anOracleDatabase
Configure acompactdomain.
You can configure your Quick Start installation to use an Oracledatabase with an external compact domain.
You should only choose this option if you know you want yourdomain to be compatible with Enterprise Scheduler, Managed FileTransfer, B2B, Heathcare, or BAM components.
See Configuring a Compact Domain.
Any other method of creating a domain is not recommended.
Preparing to Launch the Integrated WebLogic ServerFollow steps to prepare your environment before launching the Integrated WebLogicServer.
• Setting the JDEV_USER_DIR Environment Variable
• Setting the ORACLE_HOME Environment Variable
• Checking Entropy for Oracle Linux
Setting the JDEV_USER_DIR Environment VariableYou can set the JDEV_USER_DIR environment variable to define the location of youruser home directory. This should be a unique location for your distribution. The userhome directory will contain subdirectories for your domain files and your user-generated application files.
Note:
This step is crucial if you are planning to install and run multiple distributionsof JDeveloper on the same machine. Assign a unique user home directoryfor each distribution you install.
Chapter 7Preparing to Launch the Integrated WebLogic Server
7-2

Oracle recommends a directory structure similar to the one shown below, whereconfig shows the location of the user home directory.
Figure 7-1 Recommended Oracle Fusion Middleware Directory Structure
If you do not define JDEV_USER_DIR, your domain home and application home will becreated at two different locations.
On an UNIX host, the default domain home will be created at $HOME/.jdeveloper/system12.2.1.4.0.x.x.xxxx/DefaultDomain. The default application home will becreated at $HOME/jdeveloper/mywork.
On a Windows host, the default domain home will be created at %USERPROFILE%\AppData\Roaming\JDeveloper\system12.2.1.4.0.x.x.xxxx\DefaultDomain. Yourdefault application home will be created at C:\JDeveloper\mywork.
Once you have set JDEV_USER_DIR, the domain home and application home will becollocated as subdirectories under the defined location. For example, on a UNIXsystem, the domain home will be located in JDEV_USER_DIR\system12.2.1.4.0.x.x.xxx. The application home will be located in JDEV_USER_DIR\mywork.
Setting the ORACLE_HOME Environment VariableYou can set the ORACLE_HOME environment variable to simplify navigating to the variousdirectories when you are running installation and configuration commands.
The path definition should look something like this:
Chapter 7Preparing to Launch the Integrated WebLogic Server
7-3
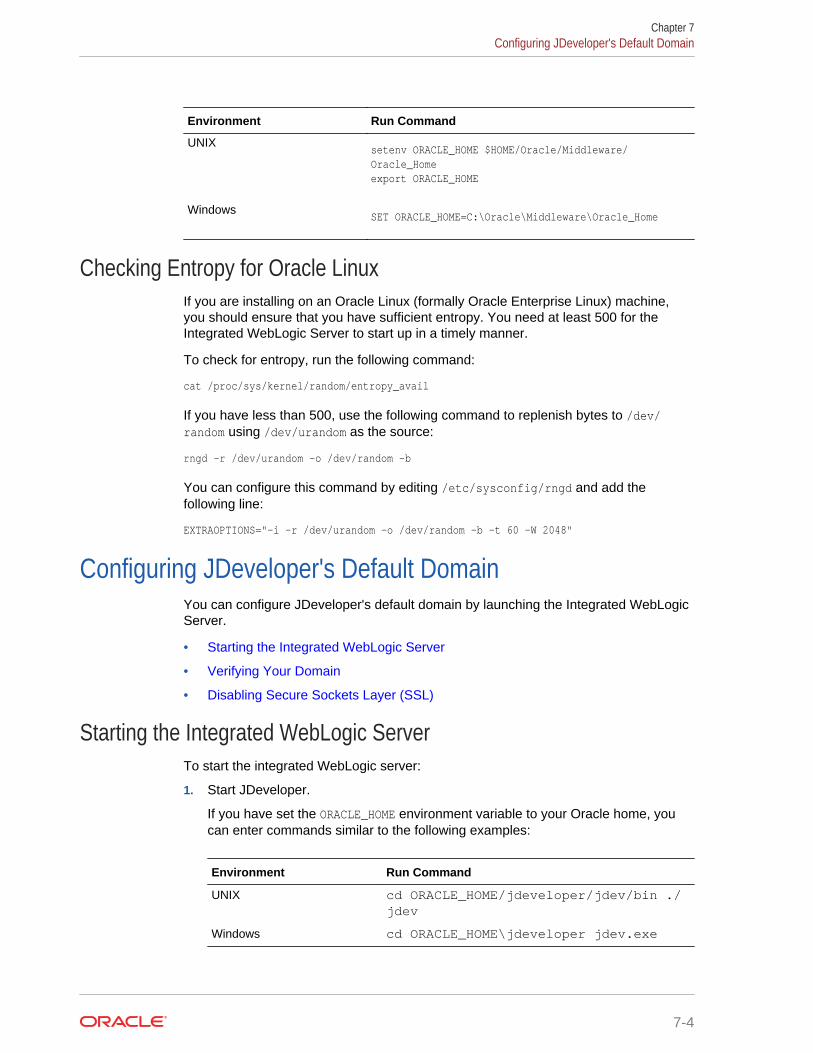
Environment Run Command
UNIXsetenv ORACLE_HOME $HOME/Oracle/Middleware/Oracle_Homeexport ORACLE_HOME
WindowsSET ORACLE_HOME=C:\Oracle\Middleware\Oracle_Home
Checking Entropy for Oracle LinuxIf you are installing on an Oracle Linux (formally Oracle Enterprise Linux) machine,you should ensure that you have sufficient entropy. You need at least 500 for theIntegrated WebLogic Server to start up in a timely manner.
To check for entropy, run the following command:
cat /proc/sys/kernel/random/entropy_avail
If you have less than 500, use the following command to replenish bytes to /dev/random using /dev/urandom as the source:
rngd -r /dev/urandom -o /dev/random -b
You can configure this command by editing /etc/sysconfig/rngd and add thefollowing line:
EXTRAOPTIONS="-i -r /dev/urandom -o /dev/random -b -t 60 -W 2048"
Configuring JDeveloper's Default DomainYou can configure JDeveloper's default domain by launching the Integrated WebLogicServer.
• Starting the Integrated WebLogic Server
• Verifying Your Domain
• Disabling Secure Sockets Layer (SSL)
Starting the Integrated WebLogic ServerTo start the integrated WebLogic server:
1. Start JDeveloper.
If you have set the ORACLE_HOME environment variable to your Oracle home, youcan enter commands similar to the following examples:
Environment Run Command
UNIX cd ORACLE_HOME/jdeveloper/jdev/bin ./jdev
Windows cd ORACLE_HOME\jdeveloper jdev.exe
Chapter 7Configuring JDeveloper's Default Domain
7-4
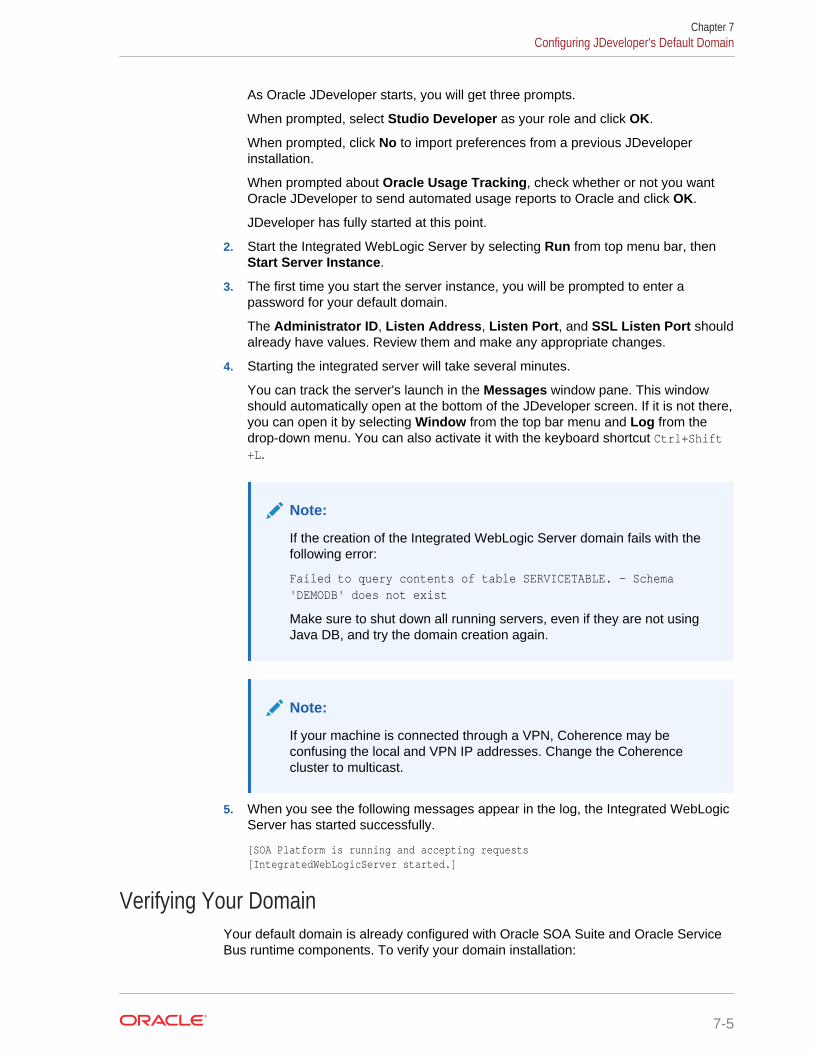
As Oracle JDeveloper starts, you will get three prompts.
When prompted, select Studio Developer as your role and click OK.
When prompted, click No to import preferences from a previous JDeveloperinstallation.
When prompted about Oracle Usage Tracking, check whether or not you wantOracle JDeveloper to send automated usage reports to Oracle and click OK.
JDeveloper has fully started at this point.
2. Start the Integrated WebLogic Server by selecting Run from top menu bar, thenStart Server Instance.
3. The first time you start the server instance, you will be prompted to enter apassword for your default domain.
The Administrator ID, Listen Address, Listen Port, and SSL Listen Port shouldalready have values. Review them and make any appropriate changes.
4. Starting the integrated server will take several minutes.
You can track the server's launch in the Messages window pane. This windowshould automatically open at the bottom of the JDeveloper screen. If it is not there,you can open it by selecting Window from the top bar menu and Log from thedrop-down menu. You can also activate it with the keyboard shortcut Ctrl+Shift+L.
Note:
If the creation of the Integrated WebLogic Server domain fails with thefollowing error:
Failed to query contents of table SERVICETABLE. - Schema'DEMODB' does not exist
Make sure to shut down all running servers, even if they are not usingJava DB, and try the domain creation again.
Note:
If your machine is connected through a VPN, Coherence may beconfusing the local and VPN IP addresses. Change the Coherencecluster to multicast.
5. When you see the following messages appear in the log, the Integrated WebLogicServer has started successfully.
[SOA Platform is running and accepting requests[IntegratedWebLogicServer started.]
Verifying Your DomainYour default domain is already configured with Oracle SOA Suite and Oracle ServiceBus runtime components. To verify your domain installation:
Chapter 7Configuring JDeveloper's Default Domain
7-5

1. Access the Enterprise Manager Fusion Middleware Control, which is located at aURL following this format:
http://hostname.domain:7101/em
Note:
The default port for the Integrated WebLogic Server should always be7101 unless you changed it during configuration.
Sign in using the username and password that you specified when starting theIntegrated Weblogic Server.
For more information on using Fusion Middleware Control, see Getting StartedUsing Oracle Enterprise Manager Fusion Middleware Control in AdministeringOracle Fusion Middleware.
2. Alternatively, if you plan to develop projects using the Oracle Service Bus console,you can check to see if Oracle Service Bus is running.
The Oracle Service Bus console is located at an URL with the following format:
http://hostname.domain:7101/servicebus
Log in using the username and password that you specified when creating yourstandalone domain.
For more information on using the Oracle Service Bus console, see GettingStarted with the Oracle Service Bus Console in Developing Services with OracleService Bus.
Disabling Secure Sockets Layer (SSL)This is an optional task. SSL is enabled by default in the Integrated WebLogic Server.If you do not have stringent design time requirements, you can disable SSL as follows:
1. Go to the Administrator Console at http://localhost:7101/console
2. Log in with your credentials.
3. Select Environments, then Servers, then Admin Server.
4. Uncheck SSL Listen Port Enabled.
5. Restart the Integrated WebLogic Server.
Configuring a Standalone DomainYou can launch a standalone version of the Integrated WebLogic Server and domain.
• Starting the Configuration Wizard
• Navigating the Configuration Wizard Screens
• Starting the Administration Sever
• Starting the Application Server Connection Wizard
• Navigating the Create Application Server Connection Wizard Screens
Chapter 7Configuring a Standalone Domain
7-6
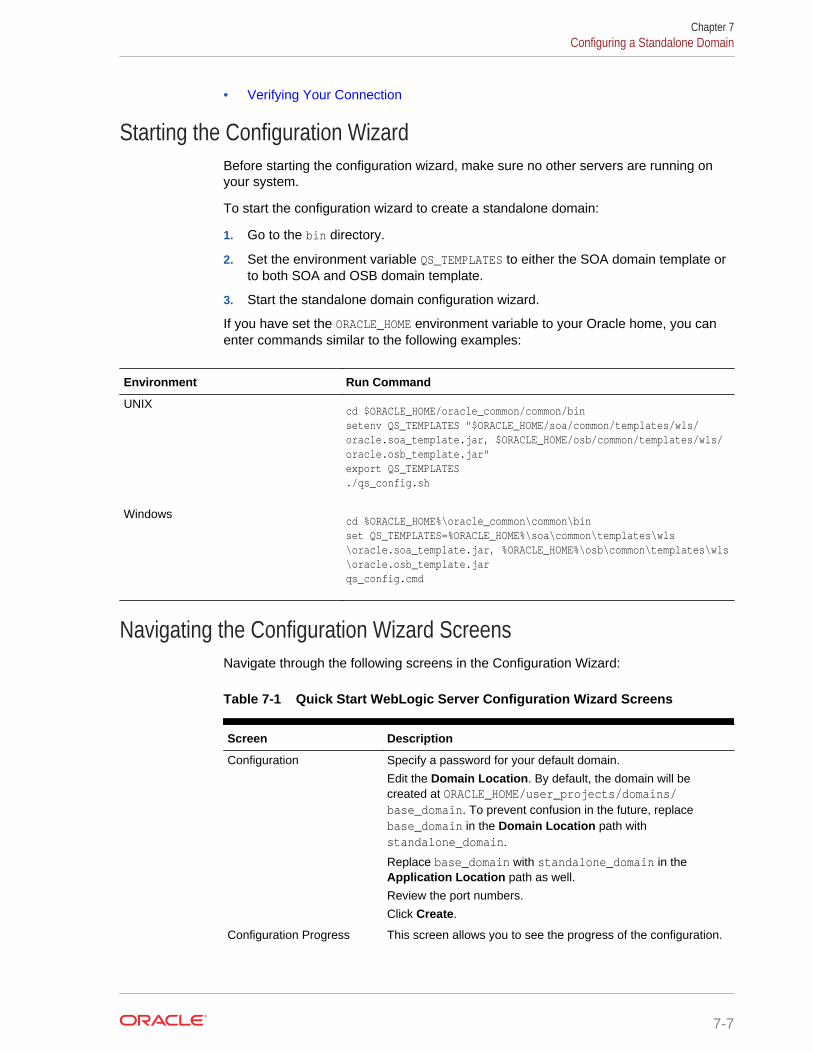
• Verifying Your Connection
Starting the Configuration WizardBefore starting the configuration wizard, make sure no other servers are running onyour system.
To start the configuration wizard to create a standalone domain:
1. Go to the bin directory.
2. Set the environment variable QS_TEMPLATES to either the SOA domain template orto both SOA and OSB domain template.
3. Start the standalone domain configuration wizard.
If you have set the ORACLE_HOME environment variable to your Oracle home, you canenter commands similar to the following examples:
Environment Run Command
UNIXcd $ORACLE_HOME/oracle_common/common/binsetenv QS_TEMPLATES "$ORACLE_HOME/soa/common/templates/wls/oracle.soa_template.jar, $ORACLE_HOME/osb/common/templates/wls/oracle.osb_template.jar"export QS_TEMPLATES./qs_config.sh
Windowscd %ORACLE_HOME%\oracle_common\common\binset QS_TEMPLATES=%ORACLE_HOME%\soa\common\templates\wls\oracle.soa_template.jar, %ORACLE_HOME%\osb\common\templates\wls\oracle.osb_template.jarqs_config.cmd
Navigating the Configuration Wizard ScreensNavigate through the following screens in the Configuration Wizard:
Table 7-1 Quick Start WebLogic Server Configuration Wizard Screens
Screen Description
Configuration Specify a password for your default domain.
Edit the Domain Location. By default, the domain will becreated at ORACLE_HOME/user_projects/domains/base_domain. To prevent confusion in the future, replacebase_domain in the Domain Location path withstandalone_domain.
Replace base_domain with standalone_domain in theApplication Location path as well.
Review the port numbers.
Click Create.
Configuration Progress This screen allows you to see the progress of the configuration.
Chapter 7Configuring a Standalone Domain
7-7

Table 7-1 (Cont.) Quick Start WebLogic Server Configuration Wizard Screens
Screen Description
End of Configuration This screen appears when the installation is complete. Take noteof the information on this screen.
You can leave the option to start your new domain unchecked ifyou want to start it manually from the domain location listed onthis screen.
Click Finish to exit the wizard.
Starting the Administration SeverIf you chose not to start the domain automatically after creation, you can start yourstandalone manually.
If you have set the DOMAIN_HOME environment variable to your domain home location,you can enter the following commands to start the domain’s Administration Server:
OperatingSystem
Command
UNIXcd $DOMAIN_HOME/bin./startWebLogic.sh
Windowscd %DOMAIN_HOME%\binstartWebLogic.cmd
Domain configuration will take several minutes. When you see the following messageappear in the terminal, the WebLogic Server has started and your standalone domainhas been created successfully.
SOA Platform is running and accepting requests
Your standalone domain is already configured with Oracle SOA Suite runtimecomponents.
Starting the Application Server Connection WizardStart Oracle JDeveloper with the appropriate command.
If you have set the ORACLE_HOME environment variable to your Oracle home, you canenter the following commands:
Environment Run Command
UNIXcd $ORACLE_HOME/jdeveloper/jdev/bin./jdev
Windowscd %ORACLE_HOME%\jdeveloperjdeveloper.exe
Chapter 7Configuring a Standalone Domain
7-8
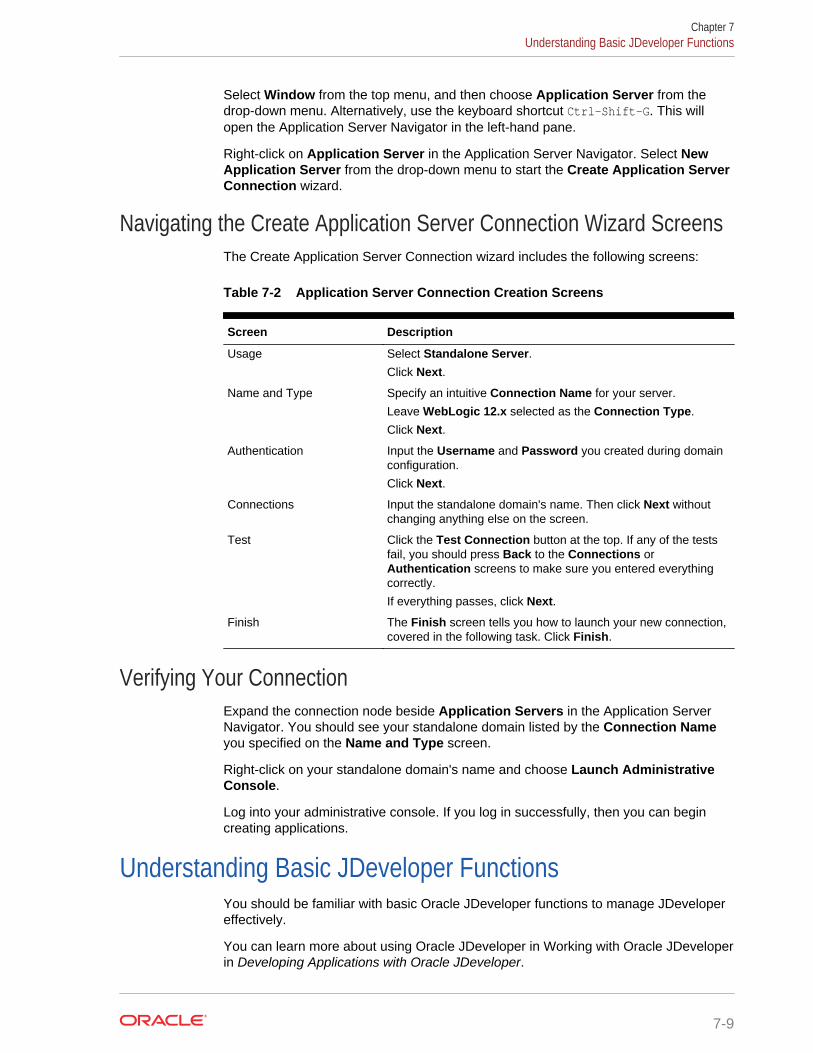
Select Window from the top menu, and then choose Application Server from thedrop-down menu. Alternatively, use the keyboard shortcut Ctrl-Shift-G. This willopen the Application Server Navigator in the left-hand pane.
Right-click on Application Server in the Application Server Navigator. Select NewApplication Server from the drop-down menu to start the Create Application ServerConnection wizard.
Navigating the Create Application Server Connection Wizard ScreensThe Create Application Server Connection wizard includes the following screens:
Table 7-2 Application Server Connection Creation Screens
Screen Description
Usage Select Standalone Server.Click Next.
Name and Type Specify an intuitive Connection Name for your server.
Leave WebLogic 12.x selected as the Connection Type.
Click Next.
Authentication Input the Username and Password you created during domainconfiguration.
Click Next.
Connections Input the standalone domain's name. Then click Next withoutchanging anything else on the screen.
Test Click the Test Connection button at the top. If any of the testsfail, you should press Back to the Connections orAuthentication screens to make sure you entered everythingcorrectly.
If everything passes, click Next.
Finish The Finish screen tells you how to launch your new connection,covered in the following task. Click Finish.
Verifying Your ConnectionExpand the connection node beside Application Servers in the Application ServerNavigator. You should see your standalone domain listed by the Connection Nameyou specified on the Name and Type screen.
Right-click on your standalone domain's name and choose Launch AdministrativeConsole.
Log into your administrative console. If you log in successfully, then you can begincreating applications.
Understanding Basic JDeveloper FunctionsYou should be familiar with basic Oracle JDeveloper functions to manage JDevelopereffectively.
You can learn more about using Oracle JDeveloper in Working with Oracle JDeveloperin Developing Applications with Oracle JDeveloper.
Chapter 7Understanding Basic JDeveloper Functions
7-9

• Stopping the Integrated WebLogic Server
• Restarting JDeveloper
Stopping the Integrated WebLogic ServerIf you started the Integrated WebLogic Server from inside Oracle JDeveloper, you cansimply close out of Oracle JDeveloper to end a running server.
If you do not want to close out of JDeveloper for any reason, you can also click the redstop button in the ribbon menu.
If you have set the DOMAIN_HOME environment variable to your Oracle home, you canenter the following commands to stop an independent WebLogic Server:
Environment Run Command
UNIXcd $DOMAIN_HOME/bin./stopWebLogic.sh
Windowscd %DOMAIN_HOME%\binstopWebLogic.cmd
Restarting JDeveloperIf you have closed Oracle JDeveloper and need to reopen it, you can use the followingcommands:
Environment Run Command
UNIXcd $ORACLE_HOME/jdeveloper/jdev/bin./jdev
Windowscd %ORACLE_HOME%\jdeveloperjdev.exe
Managing Multiple Installations on the Same MachineWhen you install multiple Quick Start distributions on the same machine, eachdistribution has its own JDeveloper that runs its own unique instance of Java DB. AllJava DB instances on the same machine initialize on the same port. For thesereasons, you cannot perform the following actions:
• You cannot simultaneously start two Integrated WebLogic Servers from differentdistributions.
• You cannot access your Oracle SOA Suite runtime environment by starting theWebLogic Server from your Oracle Business Process Management Suite QuickStart Oracle home.
• You cannot access your Oracle Business Process Management Suite runtimeenvironment by starting the WebLogic Server from your Oracle SOA Suite QuickStart Oracle home.
Chapter 7Managing Multiple Installations on the Same Machine
7-10

Switching Between Quick Start DistributionsIf you want to switch between different servers using Java DB on the same machine,you need to take the following steps to ensure you are starting the desireddevelopment environment:
1. If you have not done so already, decide on separate user directory home locationsfor each of your JDeveloper distributions. The user home directory will containsubdirectories for your domain files and your user-generated application files.
For example, you may want to install and use both an Oracle Business ProcessManagement Suite JDeveloper and an Oracle SOA Suite JDeveloper on the samemachine. You could designate the user home directory for your Oracle SOA SuiteJDeveloper to be located at C:/jdev12cworkarea/soa, while your Oracle BusinessProcess Management Suite user home directory could be located at C:/jdev12cworkarea/bpm.
2. Set the environment variable JDEV_USER_DIR to the location of the user directoryhome for the JDeveloper distribution that you want to use.
For the example in the previous step, set JDEV_USER_DIR=C:/jdev12cworkarea/soa if you want to use the Oracle SOA Suite environment.
Note:
Redefining JDEV_USER_DIR changes the default save location for yourapplication projects. If you already started and used JDeveloper withoutdefining JDEV_USER_DIR, you may have saved applications in the defaultapplication home. The default application home is located at the user'sroot directory under JDeveloper/mywork.
3. Go to the JDeveloper home of the distribution you want to use.
For example, if you want to use your Oracle SOA Suite environment, go to yourOracle SOA Suite Oracle home and navigate to /jdeveloper/jdev/bin.
4. Start the JDeveloper executable from there.
You must reset the JDEV_USER_DIR variable every time you switch betweendistributions using Java DB.
Next StepsOnce you have verified your installation, you can perform any of the following tasks:
Action Resource
Configure your Quick Start installationto use an external Oracle database andstandalone compact domain.
See Configuring a Compact Domain.
Deploy a sample application. See Running a Sample Application.
Make or test an application of yourown.
See Working with Oracle JDeveloper in DevelopingApplications with Oracle JDeveloper.
Chapter 7Switching Between Quick Start Distributions
7-11

Action Resource
Delete your installation. If you have tested your installation out and are done,see Uninstalling Oracle Quick Start .
Chapter 7Next Steps
7-12
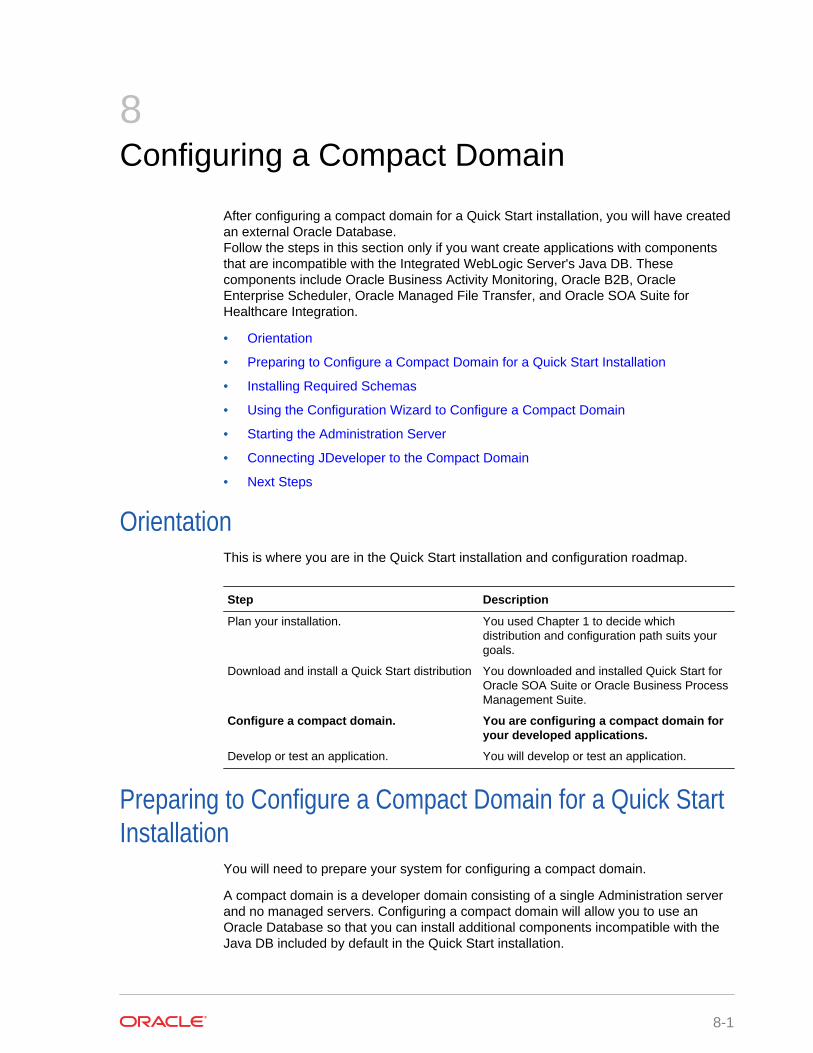
8Configuring a Compact Domain
After configuring a compact domain for a Quick Start installation, you will have createdan external Oracle Database.Follow the steps in this section only if you want create applications with componentsthat are incompatible with the Integrated WebLogic Server's Java DB. Thesecomponents include Oracle Business Activity Monitoring, Oracle B2B, OracleEnterprise Scheduler, Oracle Managed File Transfer, and Oracle SOA Suite forHealthcare Integration.
• Orientation
• Preparing to Configure a Compact Domain for a Quick Start Installation
• Installing Required Schemas
• Using the Configuration Wizard to Configure a Compact Domain
• Starting the Administration Server
• Connecting JDeveloper to the Compact Domain
• Next Steps
OrientationThis is where you are in the Quick Start installation and configuration roadmap.
Step Description
Plan your installation. You used Chapter 1 to decide whichdistribution and configuration path suits yourgoals.
Download and install a Quick Start distribution You downloaded and installed Quick Start forOracle SOA Suite or Oracle Business ProcessManagement Suite.
Configure a compact domain. You are configuring a compact domain foryour developed applications.
Develop or test an application. You will develop or test an application.
Preparing to Configure a Compact Domain for a Quick StartInstallation
You will need to prepare your system for configuring a compact domain.
A compact domain is a developer domain consisting of a single Administration serverand no managed servers. Configuring a compact domain will allow you to use anOracle Database so that you can install additional components incompatible with theJava DB included by default in the Quick Start installation.
8-1

Make sure that you have verified that your Quick Start installation works before movingon to the following tasks:
• Closing Oracle JDeveloper, Extra Server Connections, or Java DB
• Downloading and Installing a Supported Database
• Configuring a 12c Database for Quick Start
Closing Oracle JDeveloper, Extra Server Connections, or Java DBClose any instance of Oracle JDeveloper.
To make sure there are no other server connections or instances of Java DB runningin the background, use the following command:
Environment Run Command
UNIXps -ef | grep java
Then kill -9 extra running servers or instances of JavaDB.
Windows Bring up the Task Manager and select the Processes tab.Kill any running instances of JDeveloper, Java DB, orrunning servers.
You can also use:
wmic process where "name='java.exe'" get ProcessID, Commandline /format:list
Then use taskkill /f /pid <PID> to end extra runningservers or Java DB.
Downloading and Installing a Supported DatabaseTo download and install a supported database:
1. Refer to the Oracle Fusion Middleware Download, Installation, and ConfigurationReadme Files for the download location of a supported database for Oracle FusionMiddleware 12c.
2. Run the installer. The installation guide for your database of choice is linked on thesame Oracle Technology Network page, under the Documentation tab next toDownloads.
During installation, make note of your service name and port number. You willneed this information for schema creation.
Configuring a 12c Database for Quick StartIf you are using a 12c multitenant database, you must configure it to use theAL32UTF8 character set.
Quick Start's Repository Creation Utility will not be able to connect to a containerdatabase (CDB). You can choose not to create a container database on the "GlobalDatabase Creation" screen during database creation.
Chapter 8Preparing to Configure a Compact Domain for a Quick Start Installation
8-2

If you do create container database, you can create a pluggable database (PDB)within the CDB. Then point the RCU to the PDB. See the 12c DatabaseAdministrator's Guide for how to configure a compatible PDB.
Installing Required SchemasYou will need to create the schemas required for a Quick Start compact domain.
• Running Installers for Additional Components
• Creating Schemas for Quick Start with the Repository Creation Utility
Running Installers for Additional ComponentsIf you know you want to add Oracle Managed File Transfer, Oracle B2B, or OracleSOA Suite for healthcare integration, you should download and run their installersbefore running the RCU for the first time. Refer to Installing Oracle B2B, Oracle SOASuite for Healthcare Integration, or Oracle Managed File Transfer for Quick Start forbrief walkthroughs of these installations.
You do not need to run separate installers to add Oracle Enterprise Scheduler orOracle Business Activity Monitoring.
If you are not sure which additional products you want yet, you can add anycomponent after creating your compact domain. However, deciding now will minimizethe number of times you have to restart your server and run the domain ConfigurationWizard or the RCU.
Note:
In 12c, the Repository Creation Utility (RCU) is included in the Oracle SOASuite install. Do not download or use a separate version.
If you have finished configuring a compact domain but want to add new schemas, see Updating a Compact Domain for how to update a compact domain.
Creating Schemas for Quick Start with the Repository Creation UtilityTo create schemas with the Repository Creation Utility (RCU):
1. Launch the RCU packaged with your Quick Start installation to create schemas inyour new database. Do not download or use any other version of RCU to configurea database with Quick Start.
If you have set the ORACLE_HOME environment variable to your Oracle home, youcan enter the following commands:
Environment Run Command
UNIX cd $ORACLE_HOME/oracle_common/bin./rcu
Chapter 8Installing Required Schemas
8-3

Environment Run Command
Windows cd %ORACLE_HOME%\oracle_common\binrcu.bat
2. Navigate through the following screens. For more information about the options ona specific screen, click Help or see Understanding Repository Creation UtilityScreens in Creating Schemas with the Repository Creation Utility.
Table 8-1 RCU Schema Creation Screens
Screen Description
Welcome This screen provides an introduction to what RCU is and itspurpose. Click Next.
Create Repository Choose Create Repository and System Load and ProductLoad Concurrently.
If the second option doesn't appear for you, you do not havethe necessary permissions or privileges to perform DBAactivities.
Database ConnectionDetails
Fill the Host Name, Username, and Password blanks withthe credentials for your Oracle database. Your Service Nameand Port number were created when you installed yourdatabase.
If you using a 12c multitenant database and are havingconnection issues, make sure you have configured yourdatabase properly.
Click Next.
Checking Prerequisites This screen will pop up with a progress indicator bar. Whenthe prerequisites are checked off, click OK to continue.
Select Components Specify an intuitive prefix for your new schemas, such asSOAQS or BPMQS, so you can target them easily when youare configuring a domain.
Select AS Common Schemes and SOA Suite to select all oftheir dependencies.
If you are installing Oracle Managed File Transfer, selectManaged File Transfer from the list. You will not see thisoption listed if you have not run the corresponding installeryet.
Click Next.
Schema Passwords Select Use same passwords for all schemas. Then createa password you will remember.
Custom Variables This screen will show up because you are installing SOAInfrastructure. See About the Custom Variables Required forthe SOA Suite Schemas in Installing and Configuring OracleSOA Suite and Business Process Management fordescriptions of these variables.
If you are a healthcare provider and want the HealthcareIntegration user interface, change the Value field forHealthcare Integration to Yes. If you do not set this valuenow, the Healthcare Integration user interface will not functionproperly. See Activating the Oracle SOA Suite for HealthcareIntegration User Interface for more information.
Otherwise, accept the defaults and press Next.
Chapter 8Installing Required Schemas
8-4

Table 8-1 (Cont.) RCU Schema Creation Screens
Screen Description
Map Tablespaces This screen displays default and temporary tablespaces forthe components you want to create schemas for. You canreview this information and click NextClick OK through the next two confirmation dialogues. Thenclick Next again to progress to the next screen.
Summary This screen summarizes the component schemas that will becreated. Take note of the Database details at the top of thisscreen.
Click Create to begin schema creation.
A progress dialog shows the progress of schema creation.Green checks will appear next to the names of successfullycreated schemas.
Completion Summary This screen displays the log files created with the databaseschemas. You can open any of the log files to reviewinformation or to troubleshoot a creation issue.
If any operation failed, you can check the Cleanup for failedcomponents box. Upon clicking Close, this option will dropfailed schemas from your database.
When you click Close, schema creation is complete.
If you encountered any problems during schema creation, verify the following:
• You are using the RCU included in your Quick Start installation.
• Your database server and listeners are running.
• If you are using a 12c database, you have configured your database properly.
You can also troubleshoot the issue using the log files generated on theCompletion Summary screen. For more information, see TroubleshootingRepository Creation Utility in Creating Schemas with the Repository CreationUtility.
Using the Configuration Wizard to Configure a CompactDomain
In a developer environment, you can create a compact domain using the ConfigurationWizard.
• Starting the Configuration Wizard
• Selecting the Domain Type and Domain Home Location
• Selecting Configuration Templates for Oracle Business Process ManagementSuite Quick Start
• Selecting the Application Home Location
• Configuring the Administrator Account
• Specifying the Domain Mode and JDK
• Specifying the Datasource Configuration Type
• Specifying JDBC Component Schema Information
Chapter 8Using the Configuration Wizard to Configure a Compact Domain
8-5

• Testing the JDBC Connections
• Specifying the Path to the Keystore Certificate or Key
• Selecting Advanced Configuration
• Completing the Configuration
Starting the Configuration WizardTo start the Configuration Wizard to create a compact domain:
1. Go to the bin directory.
2. Set the environment variable CONFIG_JVM_ARGS to -Dcom.oracle.cie.config.showProfile=true. This enables the Create a newcompact domain option in the Configuration Wizard.
3. Launch the Configuration Wizard.
If you have set the ORACLE_HOME environment variable to your Oracle home, you canenter the following commands:
OperatingSystem
Command
UNIXcd $ORACLE_HOME/oracle_common/common/binsetenv CONFIG_JVM_ARGS -Dcom.oracle.cie.config.showProfile=trueexport CONFIG_JVM_ARGS./config.sh
Windowscd %ORACLE_HOME%\oracle_common\common\binSET CONFIG_JVM_ARGS=-Dcom.oracle.cie.config.showProfile=trueconfig.cmd
Selecting the Domain Type and Domain Home LocationOn the Configuration Type screen, select Create a new compact domain. If you donot see this option, you did not set the CONFIG_JVM_ARGS environment variablesuccessfully.
In the Domain Location field, specify your Domain home directory. If you alreadylaunched the Integrated WebLogic Server and generated the default domain, youshould create a new domain outside of base_domain.
You should create your Domain home outside the Oracle home directory. See thelocation of Application Home relative to Oracle Home in the following figure.
Chapter 8Using the Configuration Wizard to Configure a Compact Domain
8-6

Figure 8-1 Recommended Oracle Fusion Middleware Directory Structure
This directory structure will help you avoid issues when you need to upgrade orreinstall your software. See What Are the Key Oracle Fusion Middleware Directories?in Understanding Oracle Fusion Middleware.
Selecting Configuration Templates for Oracle Business ProcessManagement Suite Quick Start
On the Templates screen, make sure Create Domain Using Product Templates isselected, then select the following template:
Note:
Use the SOA classic domain to extend the SOA domain to BPM. Extending areference-configured SOA domain to BPM is not supported.
• Oracle BPM Suite - 12.2.1.4.0 [soa]
Selecting this template automatically selects the following as dependencies:
– Oracle SOA Suite
– Oracle Enterprise Manager
– Oracle WSM Policy Manager
– Oracle JRF
– WebLogic Coherence Cluster Extension
To install Oracle Real-Time Integration Business Insight, select:
Chapter 8Using the Configuration Wizard to Configure a Compact Domain
8-7
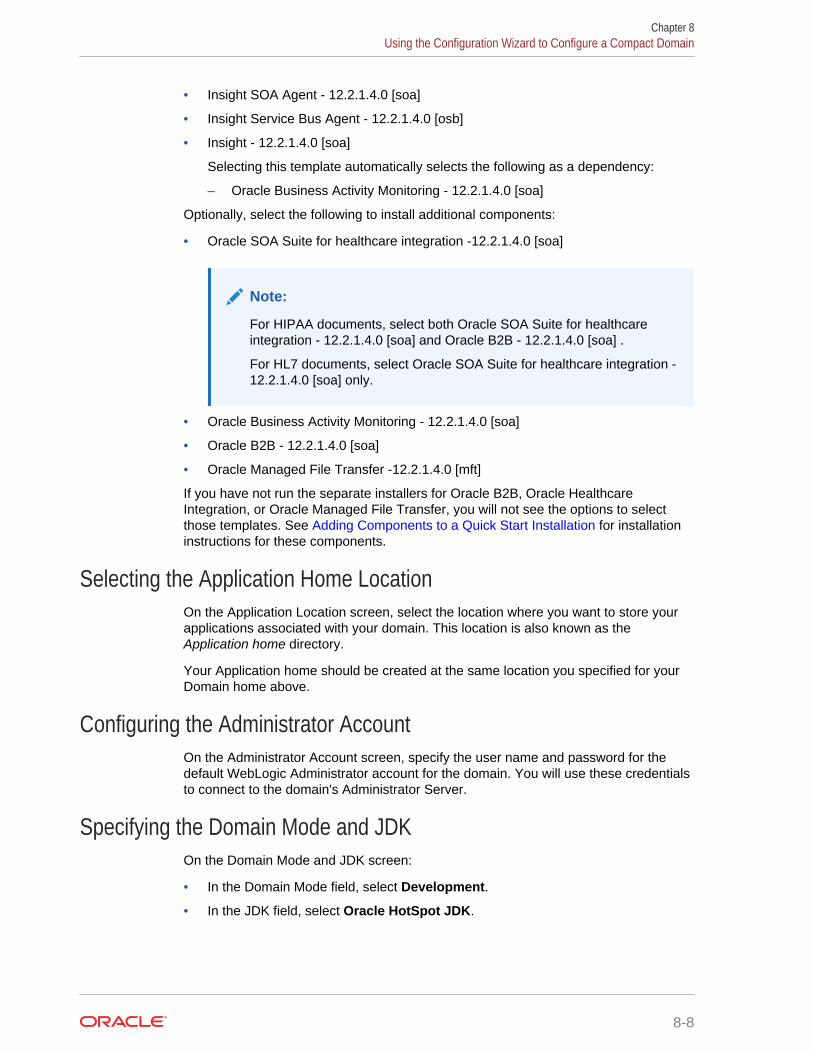
• Insight SOA Agent - 12.2.1.4.0 [soa]
• Insight Service Bus Agent - 12.2.1.4.0 [osb]
• Insight - 12.2.1.4.0 [soa]
Selecting this template automatically selects the following as a dependency:
– Oracle Business Activity Monitoring - 12.2.1.4.0 [soa]
Optionally, select the following to install additional components:
• Oracle SOA Suite for healthcare integration -12.2.1.4.0 [soa]
Note:
For HIPAA documents, select both Oracle SOA Suite for healthcareintegration - 12.2.1.4.0 [soa] and Oracle B2B - 12.2.1.4.0 [soa] .
For HL7 documents, select Oracle SOA Suite for healthcare integration -12.2.1.4.0 [soa] only.
• Oracle Business Activity Monitoring - 12.2.1.4.0 [soa]
• Oracle B2B - 12.2.1.4.0 [soa]
• Oracle Managed File Transfer -12.2.1.4.0 [mft]
If you have not run the separate installers for Oracle B2B, Oracle HealthcareIntegration, or Oracle Managed File Transfer, you will not see the options to selectthose templates. See Adding Components to a Quick Start Installation for installationinstructions for these components.
Selecting the Application Home LocationOn the Application Location screen, select the location where you want to store yourapplications associated with your domain. This location is also known as theApplication home directory.
Your Application home should be created at the same location you specified for yourDomain home above.
Configuring the Administrator AccountOn the Administrator Account screen, specify the user name and password for thedefault WebLogic Administrator account for the domain. You will use these credentialsto connect to the domain's Administrator Server.
Specifying the Domain Mode and JDKOn the Domain Mode and JDK screen:
• In the Domain Mode field, select Development.
• In the JDK field, select Oracle HotSpot JDK.
Chapter 8Using the Configuration Wizard to Configure a Compact Domain
8-8

Specifying the Datasource Configuration TypeOn the Database Configuration Type screen, select RCU Data to activate the fields.The RCU Data option instructs the Configuration Wizard to connect to the databaseand Service Table (STB) schema to automatically retrieve schema information for theschemas needed to configure the domain.
Note:
If you choose to select Manual Configuration on this screen, you will haveto manually fill in the parameters for your schema on the following screen.
After selecting RCU Data, fill in the following fields:
Field Description
DBMS/Service Enter the database DBMS name, or service name if you selected aservice type driver. If you are using a 12c multitenant database, makesure you use the service name for a configured pluggable database(PDB) and not the container.
Host Name Enter the name of the server hosting the database.
Port Enter the port number on which the database listens.
Schema Owner
Schema Password
Enter the username and password for connecting to the database'sService Table schema. This is the schema username and password thatwas specified for the Service Table component on the "SchemaPasswords" screen in the RCU.
The default username is prefix_STB, where prefix is the customprefix that you defined in RCU.
Click Get RCU Configuration when you are finished specifying the databaseconnection information. The following output in the Connection Result Log indicatesthat the operation succeeded:
Connecting to the database server...OKRetrieving schema data from database server...OKBinding local schema components with retrieved data...OK
Successfully Done.
For more information about the RCU Data option, see Understanding the ServiceTable Schema in Creating Schemas with the Repository Creation Utility.
Specifying JDBC Component Schema InformationVerify that the values on the JDBC Component Schema screen are correct for allschemas. If you selected RCU Data on the previous screen, the schema table shouldalready be populated appropriately.
Chapter 8Using the Configuration Wizard to Configure a Compact Domain
8-9

Testing the JDBC ConnectionsUse the JDBC Component Schema Test screen to test the datasource connectionsyou have just configured.
A green check mark in the Status column indicates a successful test. If you encounterany issues, see the error message in the Connection Result Log section of the screen,fix the problem, then try to test the connection again.
Specifying the Path to the Keystore Certificate or Key
Use the Keystore screen to specify either the path to the trusted certificate for eachkeystore, or the path to each keystore’s private key and other private key information.
When you click in the Trusted Certificate, Private Key, or Identity Certificate fields, abrowse icon appears to the right of the field. Click this icon to browse to theappropriate file.
For more information about this screen, see Keystore in Creating WebLogic DomainsUsing the Configuration Wizard .
Selecting Advanced ConfigurationYou do not need any advanced configuration for a compact domain. You can skipthrough the Advanced Configuration screen without selecting anything.
Completing the ConfigurationThe Configuration Summary screen shows the final directory structure and thecomponents and extensions with which your compact domain will be configured.Review this information and click Create.
The Configuration Progress screen shows the configuration progress bar.
Upon successful configuration, the Configuration Success screen shows the directorylocation of your domain and the URL for your administration console access. Takenote of both and click Close.
Starting the Administration ServerIf you have set the DOMAIN_HOME environment variable to your domain home location,you can enter the following commands to start the domain’s Administration Server:
OperatingSystem
Command
UNIXcd $DOMAIN_HOME/bin./startWebLogic.sh
Windowscd %DOMAIN_HOME%\binstartWebLogic.cmd
Chapter 8Starting the Administration Server
8-10

If you want to use JDeveloper's Integrated WebLogic Server, on the same system inconjunction with your compact domain, add the flag noderby to the end of thecommand. For example, the UNIX launch command will look like the following:
./startWebLogic.sh noderby
The noderby option will prevent the Derby Java Database from starting in the JavaVirtual Machine. This will prevent any conflicts with the Integrated WebLogic Server,which needs to initialize the Derby Java Database to start up successfully.
You know that the administrator server is running when you see the following output:
Server state changed to RUNNING.
Connecting JDeveloper to the Compact DomainAfter configuring a compact domain, you need to prepare JDeveloper to target the newcompact domain for launching applications.
• Starting the Application Server Connection Wizard
• Starting the Administration Server
• Verifying Your Connection
Starting the Application Server Connection WizardStart Oracle JDeveloper with the appropriate command.
If you have set the ORACLE_HOME environment variable to your Oracle home, you canenter the following commands:
Environment Run Command
UNIXcd $ORACLE_HOME/jdeveloper/jdev/bin./jdev
Windowscd %ORACLE_HOME%\jdeveloperjdeveloper.exe
Select Window from the top menu, and then choose Application Server from thedrop-down menu. Alternatively, use the keyboard shortcut Ctrl-Shift-G. This willopen the Application Server Navigator in the left-hand pane.
Right-click on Application Server in the Application Server Navigator. Select NewApplication Server from the drop-down menu to start the Create Application ServerConnection wizard.
Starting the Administration ServerIf you have set the DOMAIN_HOME environment variable to your domain home location,you can enter the following commands to start the domain’s Administration Server:
Chapter 8Connecting JDeveloper to the Compact Domain
8-11
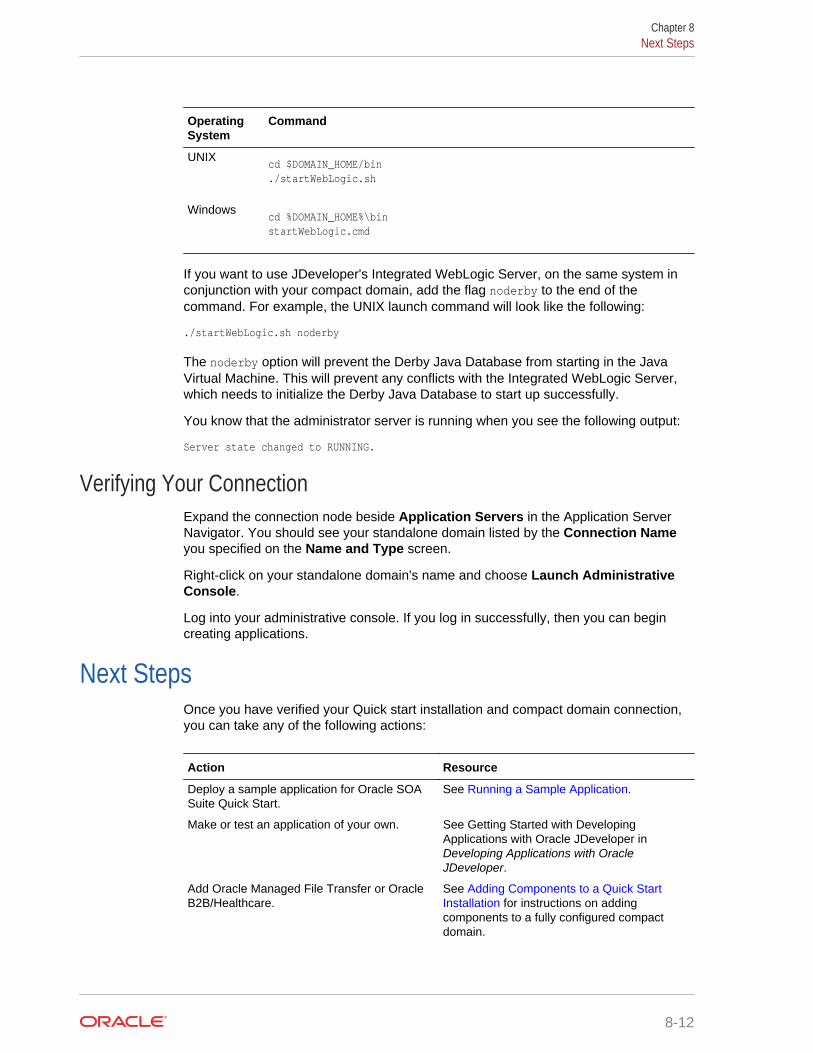
OperatingSystem
Command
UNIXcd $DOMAIN_HOME/bin./startWebLogic.sh
Windowscd %DOMAIN_HOME%\binstartWebLogic.cmd
If you want to use JDeveloper's Integrated WebLogic Server, on the same system inconjunction with your compact domain, add the flag noderby to the end of thecommand. For example, the UNIX launch command will look like the following:
./startWebLogic.sh noderby
The noderby option will prevent the Derby Java Database from starting in the JavaVirtual Machine. This will prevent any conflicts with the Integrated WebLogic Server,which needs to initialize the Derby Java Database to start up successfully.
You know that the administrator server is running when you see the following output:
Server state changed to RUNNING.
Verifying Your ConnectionExpand the connection node beside Application Servers in the Application ServerNavigator. You should see your standalone domain listed by the Connection Nameyou specified on the Name and Type screen.
Right-click on your standalone domain's name and choose Launch AdministrativeConsole.
Log into your administrative console. If you log in successfully, then you can begincreating applications.
Next StepsOnce you have verified your Quick start installation and compact domain connection,you can take any of the following actions:
Action Resource
Deploy a sample application for Oracle SOASuite Quick Start.
See Running a Sample Application.
Make or test an application of your own. See Getting Started with DevelopingApplications with Oracle JDeveloper inDeveloping Applications with OracleJDeveloper.
Add Oracle Managed File Transfer or OracleB2B/Healthcare.
See Adding Components to a Quick StartInstallation for instructions on addingcomponents to a fully configured compactdomain.
Chapter 8Next Steps
8-12

Action Resource
Delete your installation. If you have tested your installation out and aredone, see Deinstalling Oracle Quick Start.
Chapter 8Next Steps
8-13

Part IVPost-configuration Tasks for Oracle QuickStart
This part covers some steps you can take after installing a Quick Start distribution.
• Adding Components to a Quick Start Installation
• Running a Sample Application
• Uninstalling Oracle Quick Start

9Adding Components to a Quick StartInstallation
You can add Oracle Enterprise Scheduler, Oracle B2B, Oracle SOA Suite forhealthcare integration, Oracle Business Activity Monitoring, and Oracle Managed FileTransfer to your Quick Start installation.Use this section to walk through the installation process for each component that youcan add to a Quick Start installation, or to add components to a completely configuredcompact domain.
• Orientation
• About Adding Components to a Quick Start Installation
• Installing Oracle B2B, Oracle SOA Suite for Healthcare Integration, or OracleManaged File Transfer for Quick Start
• Creating Schemas for Quick Start Components
• Updating a Compact Domain
• Next Steps
OrientationThis is where you are in the Quick Start installation and configuration roadmap.
Step Description
Plan your installation. You used Chapter 1 to decide whichdistribution and configuration path suits yourgoals.
Download and install a Quick Start distribution You downloaded and installed Quick Start forOracle SOA Suite or Oracle Business ProcessManagement Suite.
Configure a compact domain. You are configuring or reconfiguring acompact domain.
Develop or test an application. You will develop or test an application.
About Adding Components to a Quick Start InstallationTo add Oracle B2B, Oracle Healthcare, and Oracle Managed File Transfer to yourQuick Start installation, you need to download their independent installers Theseinstallers are discussed in Installing Oracle B2B, Oracle SOA Suite for HealthcareIntegration, or Oracle Managed File Transfer for Quick Start.
Oracle Business Activity Monitoring and Oracle Enterprise Scheduler do not haveseparate installers. The compact domain can be configured for these components
9-1

directly in the domain configuration wizard. Using the domain configuration wizard toupdate a compact domain is covered in Updating a Compact Domain.
Tip:
To minimize the number of times you have to invoke the Repository CreationUtility and the Fusion Middleware Configuration Wizard, run all installers forall of the components that you want to add before launching the RCU or theConfiguration Wizard. Each installer will activate a set of product-specificschemas and provide a set of product-specific configuration templates.
Installing Oracle B2B, Oracle SOA Suite for HealthcareIntegration, or Oracle Managed File Transfer for Quick Start
This section describes how to add Oracle B2B, Oracle SOA Suite for HealthcareIntegration, or Oracle Managed File Transfer to your Quick Start distribution.
• Installing Oracle B2B for Quick Start
• Installing Oracle SOA Suite for Healthcare Integration for Quick Start
• Installing Oracle Managed File Transfer for Quick Start
Installing Oracle B2B for Quick StartThis section covers how to install Oracle B2B for Quick Start. Make sure youunderstand the installation options for Oracle B2B, as described in About Oracle B2B.
• Activating a Limited Oracle B2B Interface without a Full Installation
• Installing Oracle B2B for Quick Start
Activating a Limited Oracle B2B Interface without a Full InstallationTo activate a limited Oracle B2B user interface without running the full B2B installer,set the following property in Oracle Enterprise Manager Fusion Middleware Control:
b2b.docPluginList=Custom
If you do not set this property, inbound documents will fail with an XEngine lookuperror. You will be able to use Custom Documents with this interface.
For more information about using the MBean browser, see Getting Started Using theFusion Middleware Control MBean Browsers in Administering Oracle FusionMiddleware.
Installing Oracle B2B for Quick StartOracle B2B and Oracle SOA Suite for Healthcare Integration share the same installer.Obtain the installer zip file labeled fmw_12.2.1.4.0_b2b_Disk1_1of1.zip.
Chapter 9Installing Oracle B2B, Oracle SOA Suite for Healthcare Integration, or Oracle Managed File Transfer for Quick Start
9-2
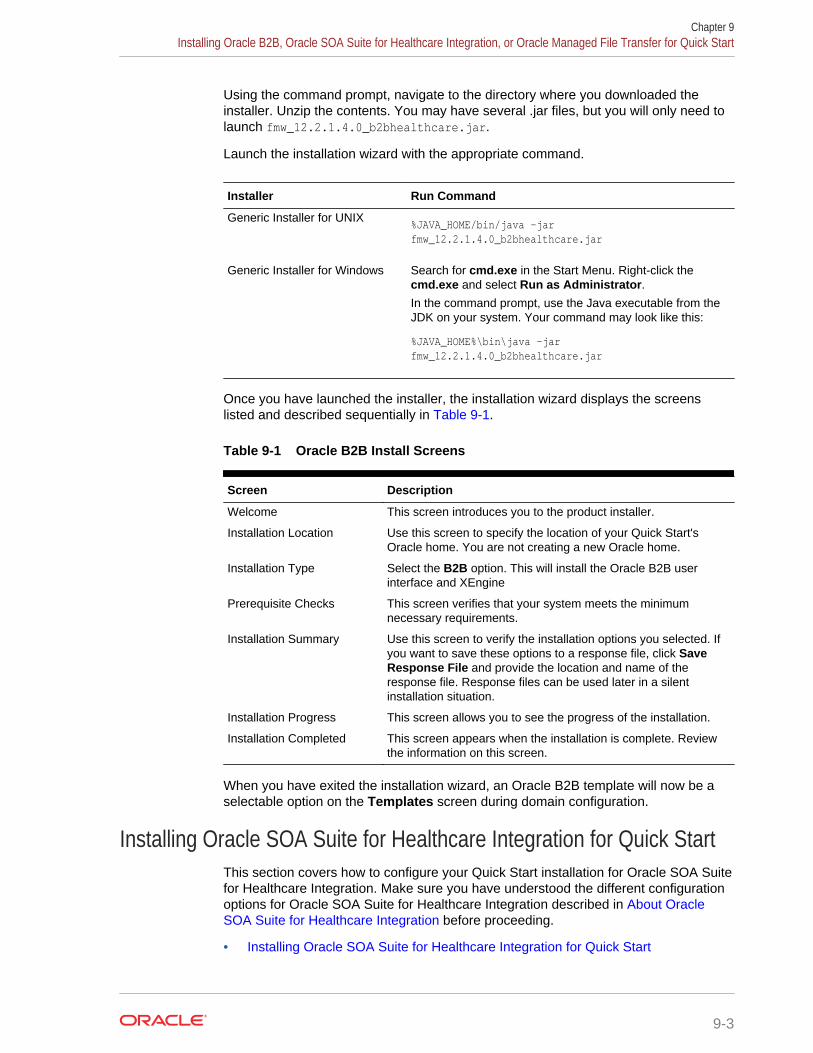
Using the command prompt, navigate to the directory where you downloaded theinstaller. Unzip the contents. You may have several .jar files, but you will only need tolaunch fmw_12.2.1.4.0_b2bhealthcare.jar.
Launch the installation wizard with the appropriate command.
Installer Run Command
Generic Installer for UNIX%JAVA_HOME/bin/java -jar fmw_12.2.1.4.0_b2bhealthcare.jar
Generic Installer for Windows Search for cmd.exe in the Start Menu. Right-click thecmd.exe and select Run as Administrator.In the command prompt, use the Java executable from theJDK on your system. Your command may look like this:
%JAVA_HOME%\bin\java -jar fmw_12.2.1.4.0_b2bhealthcare.jar
Once you have launched the installer, the installation wizard displays the screenslisted and described sequentially in Table 9-1.
Table 9-1 Oracle B2B Install Screens
Screen Description
Welcome This screen introduces you to the product installer.
Installation Location Use this screen to specify the location of your Quick Start'sOracle home. You are not creating a new Oracle home.
Installation Type Select the B2B option. This will install the Oracle B2B userinterface and XEngine
Prerequisite Checks This screen verifies that your system meets the minimumnecessary requirements.
Installation Summary Use this screen to verify the installation options you selected. Ifyou want to save these options to a response file, click SaveResponse File and provide the location and name of theresponse file. Response files can be used later in a silentinstallation situation.
Installation Progress This screen allows you to see the progress of the installation.
Installation Completed This screen appears when the installation is complete. Reviewthe information on this screen.
When you have exited the installation wizard, an Oracle B2B template will now be aselectable option on the Templates screen during domain configuration.
Installing Oracle SOA Suite for Healthcare Integration for Quick StartThis section covers how to configure your Quick Start installation for Oracle SOA Suitefor Healthcare Integration. Make sure you have understood the different configurationoptions for Oracle SOA Suite for Healthcare Integration described in About OracleSOA Suite for Healthcare Integration before proceeding.
• Installing Oracle SOA Suite for Healthcare Integration for Quick Start
Chapter 9Installing Oracle B2B, Oracle SOA Suite for Healthcare Integration, or Oracle Managed File Transfer for Quick Start
9-3

• Activating the Oracle SOA Suite for Healthcare Integration User Interface
Installing Oracle SOA Suite for Healthcare Integration for Quick StartOracle B2B and Oracle SOA Suite for Healthcare Integration share the same installer.Obtain the installer zip file labeled fmw_12.2.1.4.0_b2b_Disk1_1of1.zip.
Using the command prompt, navigate to the directory where you downloaded theinstaller. Unzip the contents. You may have several .jar files, but you will only need tolaunch fmw_12.2.1.4.0_b2bhealthcare.jar.
Launch the installation wizard with the appropriate command.
Installer Run Command
Generic Installer for UNIX%JAVA_HOME/bin/java -jar fmw_12.2.1.4.0_b2bhealthcare.jar
Generic Installer for Windows Search for cmd.exe in the Start Menu. Right-click thecmd.exe and select Run as Administrator.In the command prompt, use the Java executable from theJDK on your system. Your command may look like this:
%JAVA_HOME%\bin\java -jar fmw_12.2.1.4.0_b2bhealthcare.jar
Once you have launched the installer, the installation wizard displays the screenslisted and described sequentially in Table 9-2.
Table 9-2 Oracle SOA Suite for Healthcare Install Screens
Screen Description
Welcome This screen introduces you to the product installer.
Installation Location Use this screen to specify the location of your Quick Start'sOracle home. You are not creating a new Oracle home.
Installation Type Select B2B with Healthcare to install the B2B user interface,the Healthcare user interface, XEngine, and Healthcare libraries.
Prerequisite Checks This screen verifies that your system meets the minimumnecessary requirements.
Installation Summary Use this screen to verify the installation options you selected. Ifyou want to save these options to a response file, click SaveResponse File and provide the location and name of theresponse file. Response files can be used later in a silentinstallation situation.
Installation Progress This screen allows you to see the progress of the installation.
Installation Completed This screen appears when the installation is complete. Reviewthe information on this screen.
When you exit the installation wizard, an Oracle SOA Suite for Healthcare Integrationtemplate will now be available on the Templates screen during domain configuration.
If you want to use the Oracle SOA Suite for Healthcare Integration user interface toexchange healthcare documents, you should review all of the post-installation steps
Chapter 9Installing Oracle B2B, Oracle SOA Suite for Healthcare Integration, or Oracle Managed File Transfer for Quick Start
9-4

required to activate the Healthcare user interface in Activating the Oracle SOA Suitefor Healthcare Integration User Interface.
Activating the Oracle SOA Suite for Healthcare Integration User InterfaceThis section describes how to activate the Oracle SOA Suite for Healthcare Integrationuser interface to replace the default Oracle B2B interface. Make sure you understandthe user interface options described in About Oracle SOA Suite for HealthcareIntegration before proceeding.
You should have already run the Oracle SOA Suite for Healthcare Integration installerand chosen the B2B with Healthcare installation option. Now complete the followingsteps:
1. Run the RCU. On the Custom Variables screen, input Yes for the HealthcareIntegration variable. This creates additional materialized views required by theHealthcare integration software.
If you do not set this custom variable when creating the SOA schemas for yourdomain, the Healthcare Integration User Interface will not function properly.
Note:
If you already ran the RCU for a previous component and did not inputYES for the Healthcare Integration custom variable, you can still set thisvariable by running the following SQL script on the database:
ORACLE_HOME/common/sql/soainfra/sql/oracle/b2b_mv.sql
For more information about the Healthcare Integration variable you set in RCU,see About the Custom Variables Required for the SOA Suite Schemas in Installingand Configuring Oracle SOA Suite and Business Process Management
2. Run the domain configuration wizard. On the Templates screen, select the OracleSOA Suite for healthcare integration - 12.2.1.4.0 [soa] template. This changesthe default message delivery mode from AQ to JMS, as Healthcare is notsupported in AQ mode.
For more information on the Oracle SOA Suite for Healthcare Integration userinterface, see Using the Oracle SOA Suite for Healthcare Integration User Interface inUsing Oracle SOA Suite for Healthcare Integration.
Installing Oracle Managed File Transfer for Quick StartThis section reviews the installation process for Oracle Managed File Transfer. Youneed to run this installer before you can configure a Quick Start compact domain withOracle Managed File Transfer runtime components.
Obtain the installer zip file labeled fmw_12.2.1.4.0_mft_Disk1_1of1.zip.
Using the command prompt, navigate to the directory where you downloaded theinstaller. Unzip the contents. You may have several .jar files, but you will only need tolaunch fmw_12.2.1.4.0_mft.jar.
Launch the installation wizard with the appropriate command.
Chapter 9Installing Oracle B2B, Oracle SOA Suite for Healthcare Integration, or Oracle Managed File Transfer for Quick Start
9-5

Installer Run Command
Generic Installer for UNIX%JAVA_HOME/bin/java -jar fmw_12.2.1.4.0_mft.jar
Generic Installer for Windows Search for cmd.exe in the Start Menu. Right-click thecmd.exe and select Run as Administrator.In the command prompt, use the Java executable from theJDK on your system. Your command may look like this:
%JAVA_HOME%\bin\java -jar fmw_12.2.1.4.0_mft.jar
Once you have launched the installer, the installation wizard displays the screenslisted and described sequentially in Table 9-3.
Table 9-3 Oracle Managed File Transfer Install Screens
Screen Description
Welcome This screen introduces you to the product installer.
Installation Location Use this screen to specify the location of your Quick Start'sOracle home. You are not creating a new Oracle home.
Prerequisite Checks This screen verifies that your system meets the minimumnecessary requirements.
Installation Summary Use this screen to verify the installation options you selected. Ifyou want to save these options to a response file, click SaveResponse File and provide the location and name of theresponse file. Response files can be used later in a silentinstallation situation.
Installation Progress This screen allows you to see the progress of the installation.
Installation Completed This screen appears when the installation is complete. Reviewthe information on this screen.
When you have exited the installation wizard, an Oracle Managed File Transfertemplate will now be a selectable option on the Templates screen during domainconfiguration.
Creating Schemas for Quick Start ComponentsOnce you have finished running the installers for the components that you want, runthe RCU.
If you have not finished configuring a compact domain for the first time, you shouldreturn to Configuring a Compact Domain.
If you are adding components to an existing compact domain, see Updating aCompact Domain.
Updating a Compact DomainThis section describes the actions you can take to reconfigure your compact domain toadd new components.
Chapter 9Creating Schemas for Quick Start Components
9-6

To add Oracle B2B, Healthcare, or Managed File Transfer, you must have run theirseparate installers as described in Installing Oracle B2B, Oracle SOA Suite forHealthcare Integration, or Oracle Managed File Transfer for Quick Start beforeproceeding to the following steps:
• Launching the Domain Configuration Wizard
• Selecting the Domain Type and Domain Home Location
• Selecting the Configuration Templates
• Specifying the Datasource Configuration Type
• Verifying the Component Datasources
• Testing the JDBC Connections
• Selecting Advanced Configuration
• Configuring the Domain
• Reviewing Your Domain Location
Launching the Domain Configuration WizardGo to ORACLE_HOME/oracle_common/common/bin for your Quick Start distribution andlaunch the configuration wizard.
If you have set the ORACLE_HOME environment variable to your Oracle home, you canenter commands similar to the following examples:
OperatingSystem
Command
UNIXcd $ORACLE_HOME/oracle_common/common/bin./config.sh
Windowscd %ORACLE_HOME\oracle_common\common\binconfig.cmd
Then navigate through the following configuration screens.
Selecting the Domain Type and Domain Home LocationOn the Configuration Type screen, select Update an existing domain.
In the Domain Location field, select the location of the compact domain that you wantto update.
Selecting the Configuration TemplatesOn the Templates screen, make sure Update Domain Using Product Templates isselected. The templates that you have installed already will be greyed out.
Select the templates for the components you want to add to your installation:
• Oracle SOA Suite for healthcare integration - 12.2.1.4.0 [soa]
Chapter 9Updating a Compact Domain
9-7
Note:
For HIPAA documents, you need to select both the Oracle SOA Suitefor healthcare integration - 12.2.1.4.0 [soa] template and Oracle B2B- 12.2.1.4.0 [soa] template.
For HL7 documents, you only need to select both the Oracle SOA Suitefor healthcare integration - 12.2.1.4.0 [soa] template.
• Oracle B2B - 12.2.1.4.0 [soa]
• Oracle Managed File Transfer - 12.2.1.4.0 [mft]
• Oracle Business Activity Manager - 12.2.1.4.0 [soa]
• Oracle Enterprise Scheduler Service Basic - 12.2.1.4.0 [oracle_common]
• Oracle Enterprise Manager Plugin for ESS - 12.2.1.4.0 [em]
Specifying the Datasource Configuration TypeSelect RCU Data to activate the fields on this screen. All of the fields should auto-populate with the values you specified when you first configured your domain.
Click Get RCU Configuration. The following output in the Connection Result Logindicates that the operation succeeded:
Connecting to the database server...OKRetrieving schema data from database server...OKBinding local schema components with retrieved data...OK
Successfully Done.
Note:
More information about the RCU Data option can be found in About theService Table Schema in Creating Schemas with the Repository CreationUtility.
More information about the other options on this screen can be found under Database Configuration Type in Creating WebLogic Domains Using theConfiguration Wizard
Verifying the Component DatasourcesVerify that the values on the Component Datasource screen are correct for allschemas. If you selected RCU Data on the previous screen, the schema table shouldalready be populated appropriately.
Chapter 9Updating a Compact Domain
9-8

Testing the JDBC ConnectionsUse the JDBC Component Schema Test screen to test the datasource connectionsyou have just configured. A green check mark in the Status column indicates asuccessful test.
If you encounter any issues, see the error message in the Connection Result Logsection of the screen, fix the problem, then try to test the connection again.
More information about the other options on this screen can be found under JDBCComponent Schema Test in Creating WebLogic Domains Using the ConfigurationWizard
Selecting Advanced ConfigurationYou do not need any advanced configuration for a compact domain. You can skipthrough this screen without selecting anything.
Configuring the DomainThis screen shows you the final directory structure and the components andextensions with which your compact domain will be configured.
Review this information and click Update. The configuration progress bar will appearon the next screen.
Reviewing Your Domain LocationUpon successful configuration, the wizard will give you the directory location of yourdomain and the URL for your administration console access. Take note of both andclick Close.
Next StepsOnce you have verified your Quick Start installation and compact domain connection,you can take any of the following actions:
Action Resource
Deploy a sample application. See Running a Sample Application.
Make or test an application of your own. See Getting Started with DevelopingApplications with Oracle JDeveloper inDeveloping Applications with OracleJDeveloper.
Delete your installation. If you have tested your installation out and aredone, see Uninstalling Oracle Quick Start .
Chapter 9Next Steps
9-9
10Running a Sample Application
You can load and run a sample application for the Oracle SOA Suite Quick Startdistribution using the Integrated WebLogic Server's default domain. You can also findsample applications for Oracle Business Process Management Suite.
• Creating an Oracle Business Process Management Suite Sample Application
• Next Steps
Creating an Oracle Business Process Management SuiteSample Application
You can find an Oracle Business Process Management Suite tutorial for building anend-to-end loan application at the following URL:
https://java.net/projects/oraclebpmsuite12c/downloads/directory/Samples/Loan%20Application%20End%20to%20End.
Next StepsAfter you have successfully run a sample application, you can do any of the followingactions:
Action Resource
Make or test an application of your own. See Getting Started with DevelopingApplications with Oracle JDeveloper inDeveloping Applications with OracleJDeveloper.
Uninstall your current Quick Start distribution. See Uninstalling Oracle Quick Start .
Install a different Quick Start distribution. See Introducing the Quick Start Distributions.
10-1

11Uninstalling Oracle Quick Start
Follow the instructions in this section to remove Oracle Quick Start products from yoursystem.
• Performing Pre-Uninstallation Tasks
• Uninstalling a Quick Start Distribution
Performing Pre-Uninstallation TasksBefore uninstalling Oracle Fusion Middleware software components, you should stopall Oracle Fusion Middleware processes.
For more information about starting and stopping Oracle Fusion Middleware, refer to Starting and Stopping Oracle Fusion Middleware in Administering Oracle FusionMiddleware.
Uninstalling a Quick Start DistributionWhen you run the uninstaller, it removes everything under the Oracle home (referredto in this guide as ORACLE_HOME) from which the uninstaller is started. Be sure that nosystem components are using the Oracle home you want to remove.
• Starting the Uninstaller
• Manually Removing the Oracle Home
• Cleaning Up JDeveloper Artifacts
Starting the UninstallerTo uninstall a Quick Start distribution, do the following:
1. Go to the following location in your ORACLE_HOME:
• On a Windows system:
ORACLE_HOME\oui\bin\
• On Linux, UNIX, and Mac OS X systems:
ORACLE_HOME/oui/bin/
2. Start the uninstaller by running the following command:
• On a Windows system:
deinstall.cmd
• On Linux, UNIX, Mac OS X systems:
./deinstall.sh
11-1

Manually Removing the Oracle HomeIf you selected No on the warning screen during uninstallation, you must manuallyremove your ORACLE_HOME directory and all sub-directories. For example, if yourORACLE_HOME directory is /home/Oracle/, then on a Linux or UNIX operating system,enter the following commands:
cd /home/Oracle/rm -rf
On a Windows operating system, if your ORACLE_HOME directory is C:\Oracle\, use afile manager window and navigate to the C:\Oracle\ directory and delete the contentsof the directory..
Cleaning Up JDeveloper ArtifactsMake sure you delete any remaining jdeveloper and .jdeveloper directories fromyour home directory.
Chapter 11Uninstalling a Quick Start Distribution
11-2

AUpdating the JDK After Installing andConfiguring an Oracle Fusion MiddlewareProduct
Consider that you have a JDK version jdk1.8.0_191 installed on your machine. Whenyou install and configure an Oracle Fusion Middleware product, the utilities, such asConfiguration Wizard (config.sh|exe), OPatch, or RCU point to a default JDK, forexample, jdk1.8.0_191. After some time, Oracle releases a new version of the JDK,say jdk1.8.0_211 that carries security enhancements and bug fixes. From 12c(12.2.1.4.0) onwards, you can upgrade the existing JDK to a newer version, and canhave the complete product stack point to the newer version of the JDK.
You can maintain multiple versions of JDK and switch to the required version on needbasis.
• About Updating the JDK Location After Installing an Oracle Fusion MiddlewareProductThe binaries and other metadata and utility scripts in the Oracle home and Domainhome, such as RCU or Configuration Wizard, use a JDK version that was usedwhile installing the software and continue to refer to the same version of the JDK.The JDK path is stored in a variable called JAVA_HOME which is centrally locatedin .globalEnv.properties file inside the ORACLE_HOME/oui directory.
About Updating the JDK Location After Installing an OracleFusion Middleware Product
The binaries and other metadata and utility scripts in the Oracle home and Domainhome, such as RCU or Configuration Wizard, use a JDK version that was used whileinstalling the software and continue to refer to the same version of the JDK. The JDKpath is stored in a variable called JAVA_HOME which is centrally locatedin .globalEnv.properties file inside the ORACLE_HOME/oui directory.
The utility scripts such as config.sh|cmd, launch.sh, or opatch reside in theORACLE_HOME, and when you invoke them, they refer to the JAVA_HOME variablelocated in .globalEnv.properties file. To point these scripts and utilities to the newerversion of JDK, you must update the value of the JAVA_HOME variable inthe .globalEnv.properties file by following the directions listed in Updating the JDKLocation in an Existing Oracle Home .
To make the scripts and files in your Domain home directory point to the newer versionof the JDK, you can follow one of the following approaches:
• Specify the path to the newer JDK on the Domain Mode and JDK screen whilerunning the Configuration Wizard.
For example, consider that you installed Oracle Fusion Middleware Infrastructurewith the JDK version 8u191. So while configuring the WebLogic domain with theConfiguration Assistant, you can select the path to the newer JDK on the Domain
A-1

Mode and JDK screen of the Configuration Wizard. Example: /scratch/jdk/jdk1.8.0_211.
• Manually locate the files that have references to the JDK using grep (UNIX) orfindstr (Windows) commands and update each reference. See Updating theJDK Location in an Existing Oracle Home .
Note:
If you install the newer version of the JDK in the same location as theexisting JDK by overwriting the files, then you don’t need to take any action.
• Updating the JDK Location in an Existing Oracle HomeThe getProperty.sh|cmd script displays the value of a variable, such asJAVA_HOME, from the .globalEnv.properties file. The setProperty.sh|cmd scriptis used to set the value of variables, such as OLD_JAVA_HOME or JAVA_HOMEthat contain the locations of old and new JDKs in the .globalEnv.properties file.
• Updating the JDK Location in an Existing Domain HomeYou must search the references to the current JDK, for example 1.8.0_191manually, and replace those instances with the location of the new JDK.
Updating the JDK Location in an Existing Oracle HomeThe getProperty.sh|cmd script displays the value of a variable, such asJAVA_HOME, from the .globalEnv.properties file. The setProperty.sh|cmd script isused to set the value of variables, such as OLD_JAVA_HOME or JAVA_HOME thatcontain the locations of old and new JDKs in the .globalEnv.properties file.
The getProperty.sh|cmd and setProperty.sh|cmd scripts are located in the followinglocation:
(UNIX) ORACLE_HOME/oui/bin(Windows) ORACLE_HOME\oui\binWhere, ORACLE_HOME is the directory that contains the products using the currentversion of the JDK, such as 1.8.0_191.
To update the JDK location in the .globalEnv.properties file:
1. Use the getProperty.sh|cmd script to display the path of the current JDK from theJAVA_HOME variable. For example:
(UNIX) ORACLE_HOME/oui/bin/getProperty.sh JAVA_HOME(Windows) ORACLE_HOME\oui\bin\getProperty.cmd JAVA_HOMEecho JAVA_HOMEWhere JAVA_HOME is the variable in the .globalEnv.properties file that containsthe location of the JDK.
2. Back up the path of the current JDK to another variable such asOLD_JAVA_HOME in the .globalEnv.properties file by entering the followingcommands:
(UNIX) ORACLE_HOME/oui/bin/setProperty.sh -name OLD_JAVA_HOME-value specify_the_path_of_current_JDK(Windows) ORACLE_HOME\oui\bin\setProperty.cmd -nameOLD_JAVA_HOME -value specify_the_path_of_current_JDK
Appendix AAbout Updating the JDK Location After Installing an Oracle Fusion Middleware Product
A-2
This command creates a new variable called OLD_JAVA_HOME inthe .globalEnv.properties file, with a value that you have specified.
3. Set the new location of the JDK in the JAVA_HOME variable ofthe .globalEnv.properties file, by entering the following commands:
(UNIX) ORACLE_HOME/oui/bin/setProperty.sh -name JAVA_HOME -value specify_the_location_of_new_JDK(Windows) ORACLE_HOME\oui\bin\setProperty.cmd -name JAVA_HOME-value specify_the_location_of_new_JDK
After you run this command, the JAVA_HOME variable inthe .globalEnv.properties file now contains the path to the new JDK, such asjdk1.8.0_211.
Updating the JDK Location in an Existing Domain HomeYou must search the references to the current JDK, for example 1.8.0_191 manually,and replace those instances with the location of the new JDK.
You can use the grep (UNIX) or findstr (Windows) commands to search for thejdk-related references.
You’ll likely be required to update the location of JDK in the following three files:
(UNIX) DOMAIN_HOME/bin/setNMJavaHome.sh(Windows) DOMAIN_HOME\bin\setNMJavaHome.cmd
(UNIX) DOMAIN_HOME/nodemanager/nodemanager.properties(Windows) DOMAIN_HOME\nodemanager\nodemanager.properties
(UNIX) DOMAIN_HOME/bin/setDomainEnv.sh(Windows) DOMAIN_HOME\bin\setDomainEnv.cmd
Appendix AAbout Updating the JDK Location After Installing an Oracle Fusion Middleware Product
A-3