installation - pci telephony boards
TRANSCRIPT

7/24/2019 Installation - PCI Telephony Boards
http://slidepdf.com/reader/full/installation-pci-telephony-boards 1/25
SwissQual®... DiversityPCI Telephony BoardsInstallation Manual
I n s t a l l a t i o n M a n u a l
3483777248 ─ 01(RáÛÖ`)
T e s t & M e a s u r e m e n t

7/24/2019 Installation - PCI Telephony Boards
http://slidepdf.com/reader/full/installation-pci-telephony-boards 2/25
The firmware of the instrument makes use of several valuable open source software packages. For information, see the "Open
Source Acknowledgement" on the user documentation CD-ROM (included in delivery).
Rohde & Schwarz would like to thank the open source community for their valuable contribution to embedded computing.
© SwissQual AG
Allmendweg 8, 4528 Zuchwil, Switzerland
Phone: +41 32 686 65 65
Fax:+41 32 686 65 66
E-mail: [email protected]
Internet: http://www.swissqual.com/
Printed in Germany – Subject to change – Data without tolerance limits is not binding.
R&S® is a registered trademark of Rohde & Schwarz GmbH & Co. KG.
Trade names are trademarks of the owners.
SwissQual has made every effort to ensure that eventual instructions contained in the document are adequate and free of errors and
omissions. SwissQual will, if necessary, explain issues which may not be covered by the documents. SwissQual’s liability for any
errors in the documents is limited to the correction of errors and the aforementioned advisory services.
Copyright 2000 - 2015 SwissQual AG. All rights reserved.
No part of this publication may be copied, distributed, transmitted, transcribed, stored in a retrieval system, or translated into any
human or computer language without the prior written permission of SwissQual AG.
Confidential materials.
All information in this document is regarded as commercial valuable, protected and privileged intellectual property, and is provided
under the terms of existing Non-Disclosure Agreements or as commercial-in-confidence material.
When you refer to a SwissQual technology or product, you must acknowledge the respective text or logo trademark somewhere in
your text.
SwissQual®, Seven.Five®, SQuad®, QualiPoc®, NetQual®, VQuad®, Diversity® as well as the following logos are registered trade-
marks of SwissQual AG.
Diversity Explorer TM
, Diversity Ranger TM
, Diversity UnattendedTM
, NiNA+TM
, NiNATM
, NQAgentTM
, NQCommTM
, NQDITM
, NQTMTM
,NQViewTM, NQWebTM, QPControlTM, QPViewTM, QualiPoc Freerider TM, QualiPoc iQTM, QualiPoc MobileTM, QualiPoc StaticTM, Quali-
Watch-MTM, QualiWatch-STM, SystemInspector TM, TestManager TM, VMonTM, VQuad-HDTM are trademarks of SwissQual AG.
7/24/2019 Installation - PCI Telephony Boards
http://slidepdf.com/reader/full/installation-pci-telephony-boards 3/25
ContentsSwissQual ... Diversity
3Installation Manual 3483777248 ─ 01
Contents
1 Introduction............................................................................................ 51.1 Before You Install..........................................................................................................5
1.1.1 NMS Drivers....................................................................................................................5
2 Installing the NMS PSTN Board............................................................6
2.1 Configuring the NMS Software.................................................................................. 11
3 Installing the Diva ISDN Board........................................................... 17
3.1 Configuring the Diva Driver....................................................................................... 19
4 Installing the Dialogic Diva PSTN Board........................................... 214.1 Successful installation page......................................................................................23
7/24/2019 Installation - PCI Telephony Boards
http://slidepdf.com/reader/full/installation-pci-telephony-boards 4/25
ContentsSwissQual ... Diversity
4Installation Manual 3483777248 ─ 01

7/24/2019 Installation - PCI Telephony Boards
http://slidepdf.com/reader/full/installation-pci-telephony-boards 5/25
IntroductionSwissQual ... Diversity
5Installation Manual 3483777248 ─ 01
1 Introduction
The following sections describe how to install and to configure the NMS AG 2000PSTN and the Diva 4BRI V2 ISDN PCI telephony boards for use with Diversity soft-
ware.
1.1 Before You Install
Before you install the drivers for the NMS or Diva board, you need to extract the con-
tents of the respective zip files.
1.1.1 NMS Drivers
To install the NMS drivers, you need the following files from the NMS PSTN Board
installation folder:
● 7100-77275.exe
● agpi2000.cfg
● cta.cfg
● oamsys.cfg
If you do not have these files, contact our support center.
Please consult the Customer Support Center.pdf document for the best methodto contact us.
Before You Install

7/24/2019 Installation - PCI Telephony Boards
http://slidepdf.com/reader/full/installation-pci-telephony-boards 6/25
Installing the NMS PSTN BoardSwissQual ... Diversity
6Installation Manual 3483777248 ─ 01
2 Installing the NMS PSTN Board
The following sections describe how to install the NMS AG 2000 board as well asinstall and configure the Windows drivers for the board.
You require administrator access to Windows to install the driver for the AG 2000
board.
To install the NMS AG 2000 PCI board
1. Install the AG 2000 hardware.
a) Turn off and disconnect the computer or PCM from the power source.
b) Insert the AG 2000 board into a PCI slot.
If the board is in a Diversity PIM, attach the PIM to a PCM. You need to haveaccess to Windows on the PCM to install the software.
c) Reconnect the power source and restart the computer.
d) In Windows, stop the "Add Hardware Wizard".
2. Double-click the 7100-77275.exe file, type a path in the "Unzip To Folder" box,
and then click "Unzip".
Fig. 2-1: Choose folder location
3. In the folder where you extracted the driver software, double-click the
Install.bat file, and start the installation.
a) On the "Welcome" page, click "Next".
b) On the "Software License Agreement" page, click "Next".
4. Specify the PCI board information.

7/24/2019 Installation - PCI Telephony Boards
http://slidepdf.com/reader/full/installation-pci-telephony-boards 7/25
Installing the NMS PSTN BoardSwissQual ... Diversity
7Installation Manual 3483777248 ─ 01
a) On the "Select Board Family" page, select the "AG and CG" check box, and
then click "Next".
Fig. 2-2: Select Board Family page for NMS setup
b) On the "Select Countries" page, select "Switzerland".
Fig. 2-3: Select Countries for NMS setup
Note: You must select Switzerland, even if you intend to use the board outside of
Switzerland.
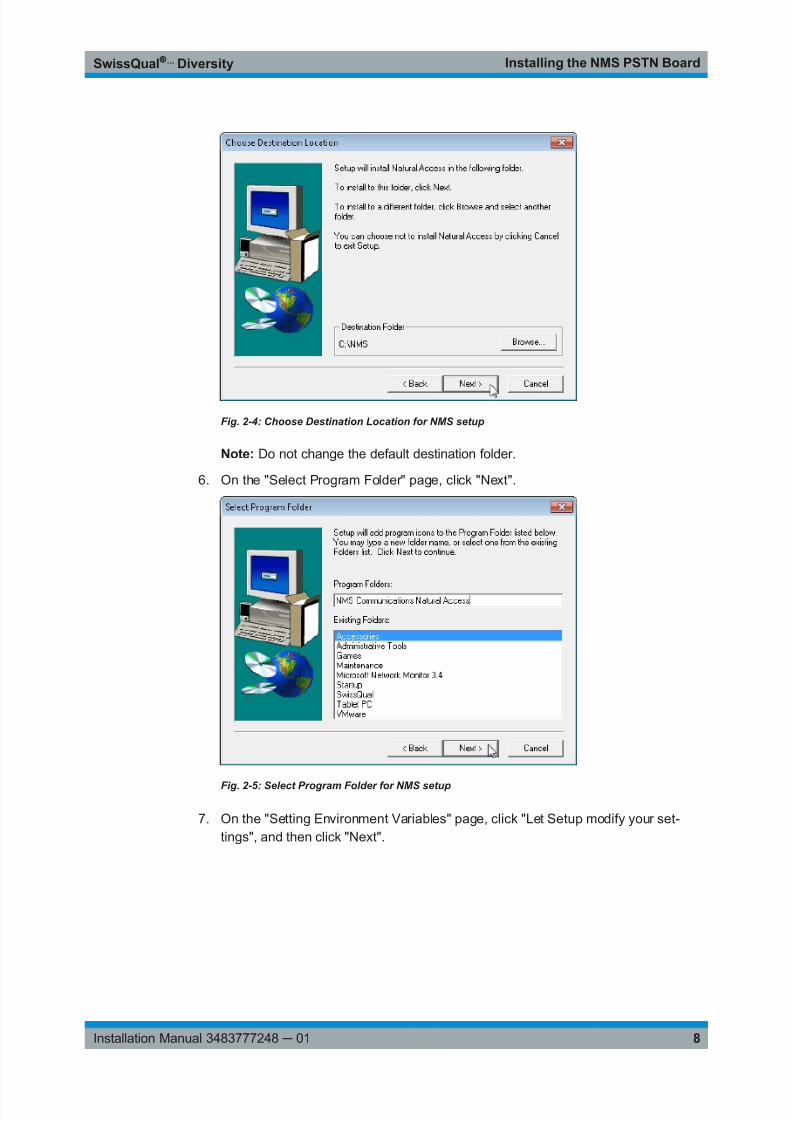
5. On the "Choose Destination Location" page, accept the default installation location,
and then click "Next".
7/24/2019 Installation - PCI Telephony Boards
http://slidepdf.com/reader/full/installation-pci-telephony-boards 8/25
Installing the NMS PSTN BoardSwissQual ... Diversity
8Installation Manual 3483777248 ─ 01
Fig. 2-4: Choose Destination Location for NMS setup
Note: Do not change the default destination folder.
6. On the "Select Program Folder" page, click "Next".
Fig. 2-5: Select Program Folder for NMS setup
7. On the "Setting Environment Variables" page, click "Let Setup modify your set-
tings", and then click "Next".

7/24/2019 Installation - PCI Telephony Boards
http://slidepdf.com/reader/full/installation-pci-telephony-boards 9/25
Installing the NMS PSTN BoardSwissQual ... Diversity
9Installation Manual 3483777248 ─ 01
Fig. 2-6: Setting Environment Variables for NMS setup
8. On the "Start Copying Files" page, click "Next".
Fig. 2-7: Start Copying Files for NMS setup
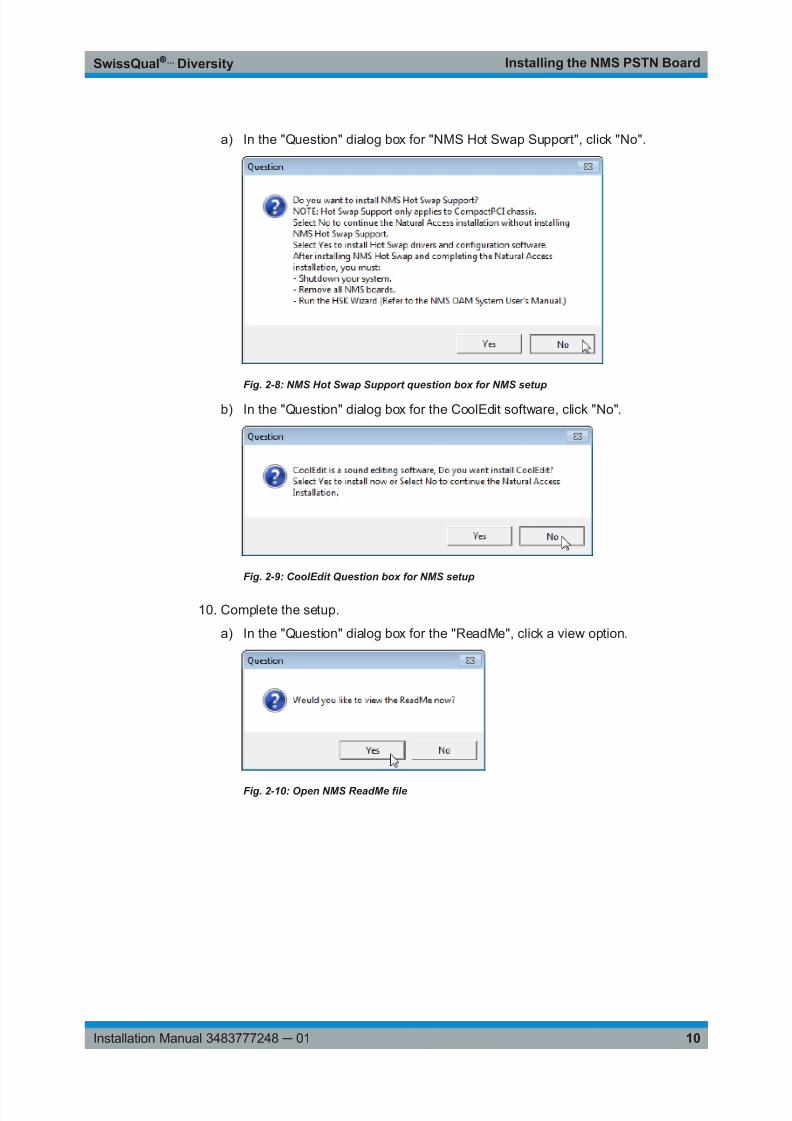
9. Specify the additional software options.
7/24/2019 Installation - PCI Telephony Boards
http://slidepdf.com/reader/full/installation-pci-telephony-boards 10/25
Installing the NMS PSTN BoardSwissQual ... Diversity
10Installation Manual 3483777248 ─ 01
a) In the "Question" dialog box for "NMS Hot Swap Support", click "No".
Fig. 2-8: NMS Hot Swap Support question box for NMS setup
b) In the "Question" dialog box for the CoolEdit software, click "No".
Fig. 2-9: CoolEdit Question box for NMS setup
10. Complete the setup.
a) In the "Question" dialog box for the "ReadMe", click a view option.
Fig. 2-10: Open NMS ReadMe file
7/24/2019 Installation - PCI Telephony Boards
http://slidepdf.com/reader/full/installation-pci-telephony-boards 11/25
Installing the NMS PSTN BoardSwissQual ... Diversity
11Installation Manual 3483777248 ─ 01
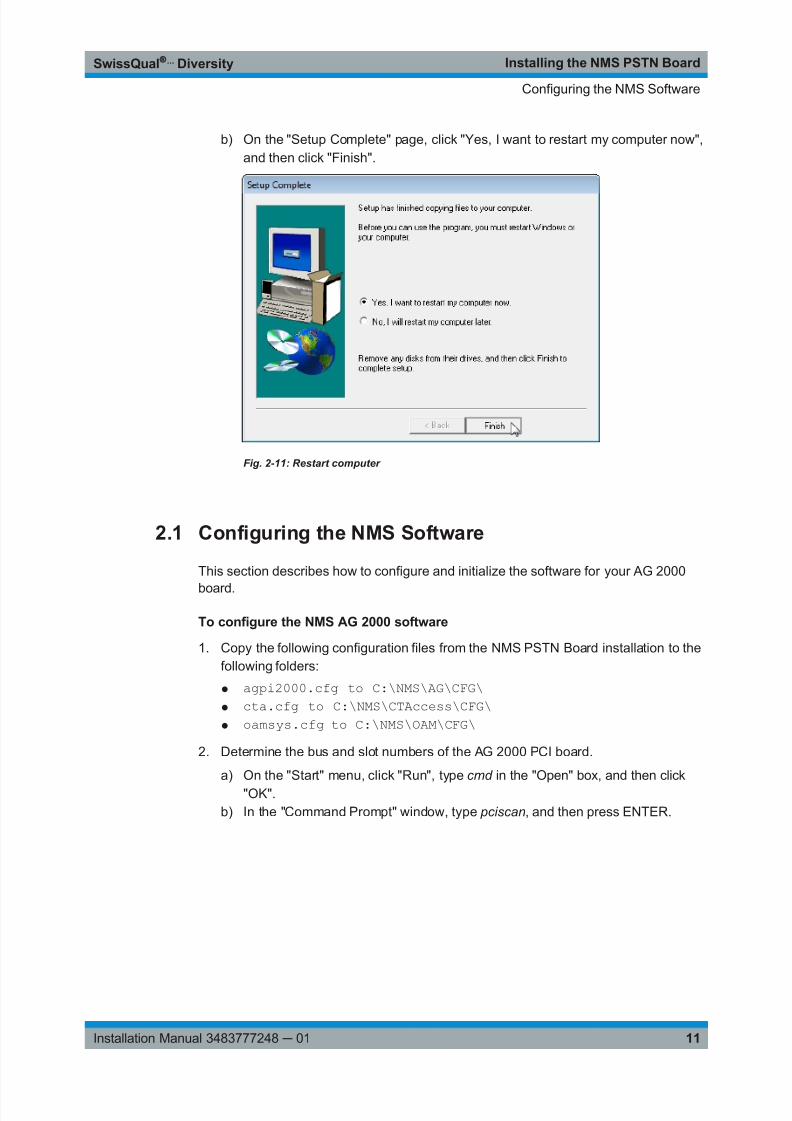
b) On the "Setup Complete" page, click "Yes, I want to restart my computer now",
and then click "Finish".
Fig. 2-11: Restart computer
2.1 Configuring the NMS Software
This section describes how to configure and initialize the software for your AG 2000
board.
To configure the NMS AG 2000 software
1. Copy the following configuration files from the NMS PSTN Board installation to the
following folders:
● agpi2000.cfg to C:\NMS\AG\CFG\
● cta.cfg to C:\NMS\CTAccess\CFG\
● oamsys.cfg to C:\NMS\OAM\CFG\
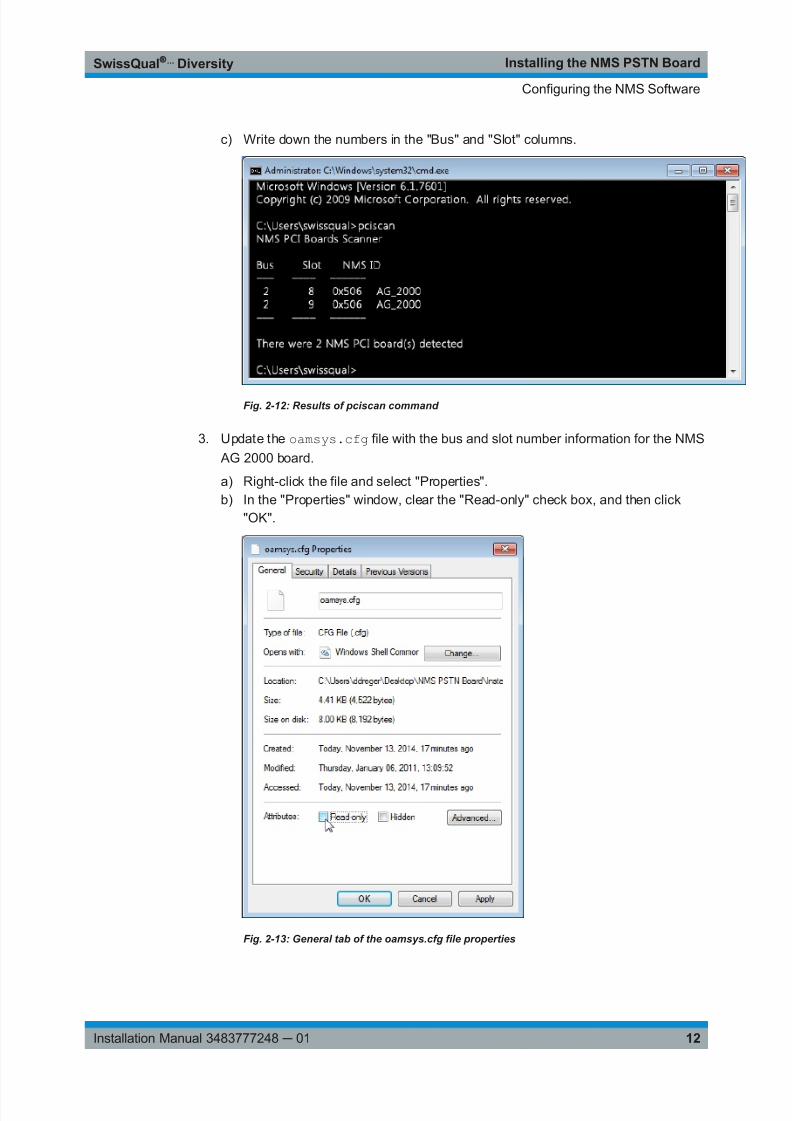
2. Determine the bus and slot numbers of the AG 2000 PCI board.
a) On the "Start" menu, click "Run", type cmd in the "Open" box, and then click
"OK".
b) In the "Command Prompt" window, type pciscan, and then press ENTER.
Configuring the NMS Software
7/24/2019 Installation - PCI Telephony Boards
http://slidepdf.com/reader/full/installation-pci-telephony-boards 12/25
Installing the NMS PSTN BoardSwissQual ... Diversity
12Installation Manual 3483777248 ─ 01
c) Write down the numbers in the "Bus" and "Slot" columns.
Fig. 2-12: Results of pciscan command
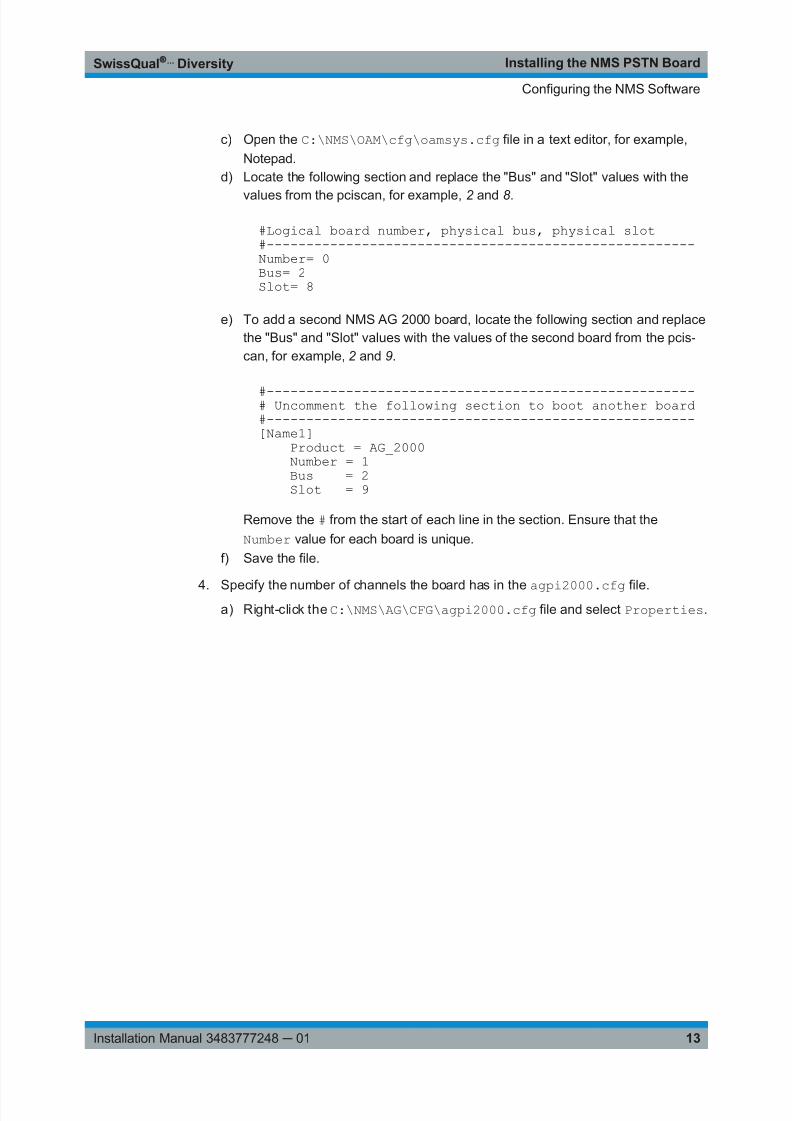
3. Update the oamsys.cfg file with the bus and slot number information for the NMS
AG 2000 board.
a) Right-click the file and select "Properties".
b) In the "Properties" window, clear the "Read-only" check box, and then click
"OK".
Fig. 2-13: General tab of the oamsys.cfg file properties
Configuring the NMS Software
7/24/2019 Installation - PCI Telephony Boards
http://slidepdf.com/reader/full/installation-pci-telephony-boards 13/25
Installing the NMS PSTN BoardSwissQual ... Diversity
13Installation Manual 3483777248 ─ 01
c) Open the C:\NMS\OAM\cfg\oamsys.cfg file in a text editor, for example,
Notepad.
d) Locate the following section and replace the "Bus" and "Slot" values with the
values from the pciscan, for example, 2 and 8 .
#Logical board number, physical bus, physical slot#------------------------------------------------------Number= 0Bus= 2Slot= 8
e) To add a second NMS AG 2000 board, locate the following section and replace
the "Bus" and "Slot" values with the values of the second board from the pcis-
can, for example, 2 and 9.
#------------------------------------------------------# Uncomment the following section to boot another board#------------------------------------------------------[Name1] Product = AG_2000 Number = 1 Bus = 2 Slot = 9
Remove the # from the start of each line in the section. Ensure that the
Number value for each board is unique.
f) Save the file.
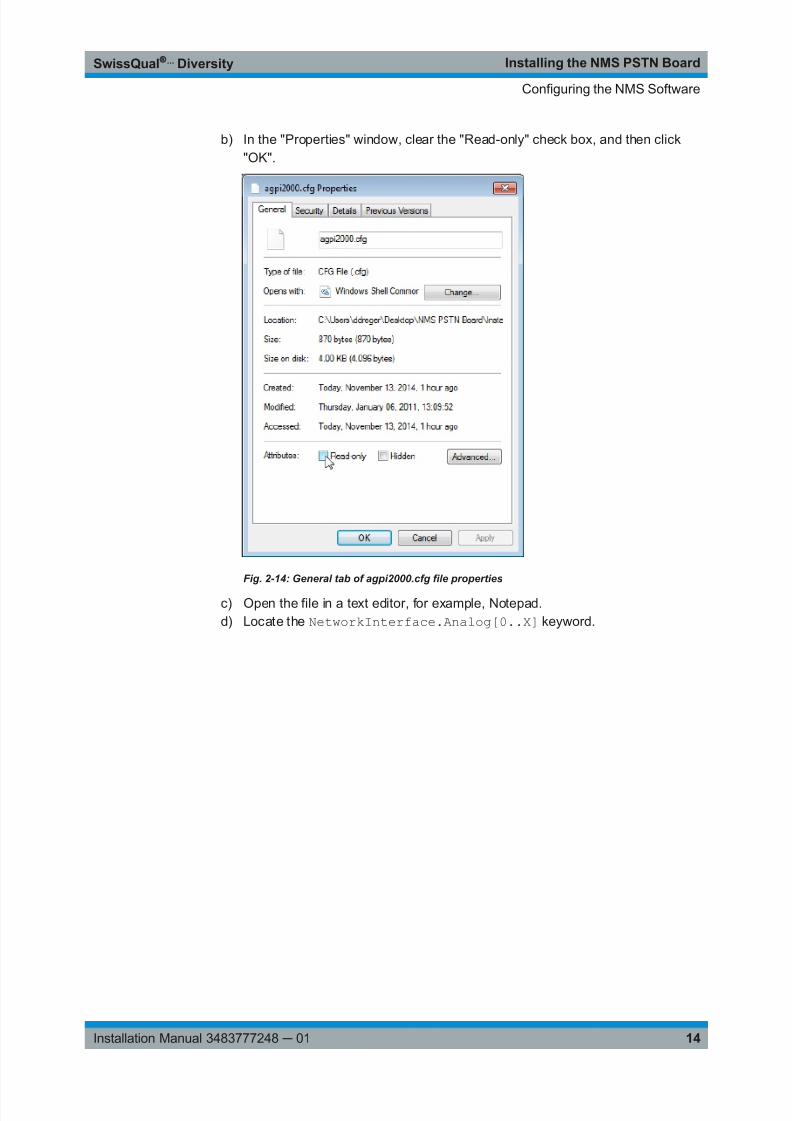
4. Specify the number of channels the board has in the agpi2000.cfg file.a) Right-click the C:\NMS\AG\CFG\agpi2000.cfg file and select Properties.
Configuring the NMS Software
7/24/2019 Installation - PCI Telephony Boards
http://slidepdf.com/reader/full/installation-pci-telephony-boards 14/25
Installing the NMS PSTN BoardSwissQual ... Diversity
14Installation Manual 3483777248 ─ 01
b) In the "Properties" window, clear the "Read-only" check box, and then click
"OK".
Fig. 2-14: General tab of agpi2000.cfg file properties
c) Open the file in a text editor, for example, Notepad.
d) Locate the NetworkInterface.Analog[0..X] keyword.
Configuring the NMS Software

7/24/2019 Installation - PCI Telephony Boards
http://slidepdf.com/reader/full/installation-pci-telephony-boards 15/25
Installing the NMS PSTN BoardSwissQual ... Diversity
15Installation Manual 3483777248 ─ 01
e) For a board with four channels, replace the X with 3, that is, [0..3] .
Fig. 2-15: Editing the agpi2000.cfg file
f) For a board with eight channels, replace the X with 7 , that is, [0..7] .
g) Save the file.
5. Activate and verify the changes to the oamsys.cfg and agpi2000.cfg configu-
ration files.
a) On the "Start" menu, click "Run", type cmd in the "Open" box, and then click
"OK".
b) In the "Command Prompt" window, type oamsys, and then press ENTER.
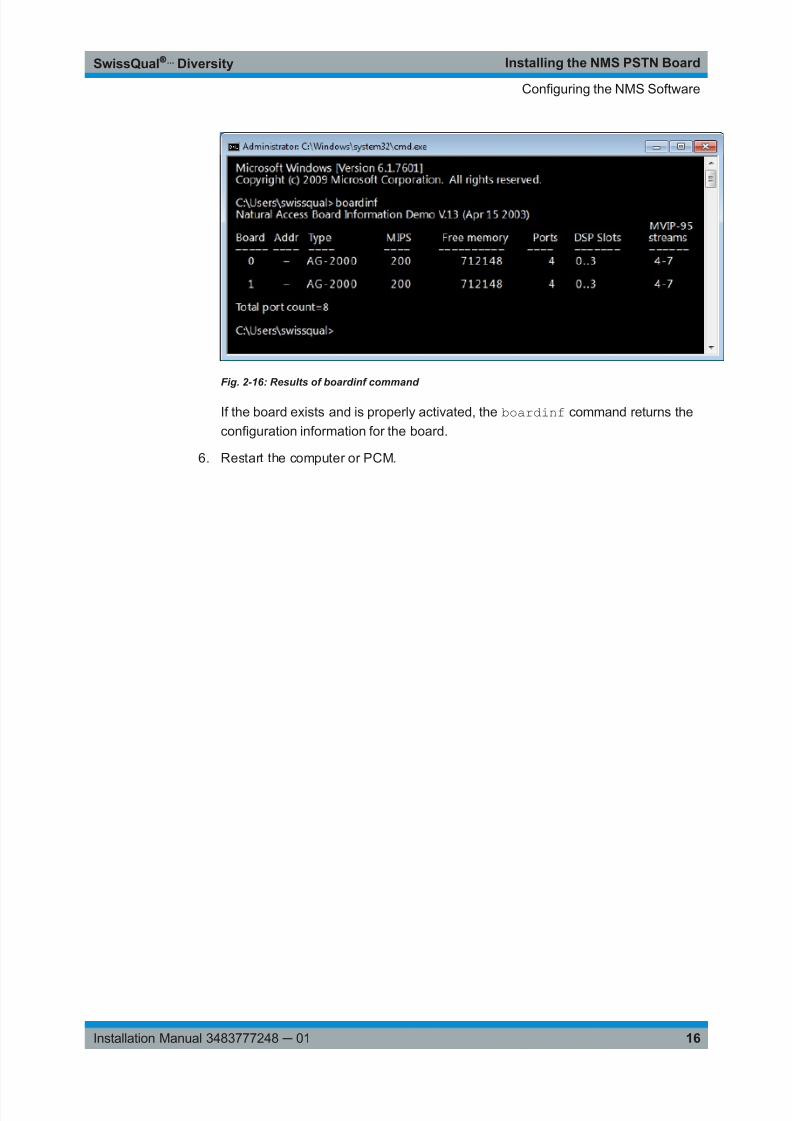
c) Type boardinf, and then press ENTER.
Configuring the NMS Software
7/24/2019 Installation - PCI Telephony Boards
http://slidepdf.com/reader/full/installation-pci-telephony-boards 16/25
Installing the NMS PSTN BoardSwissQual ... Diversity
16Installation Manual 3483777248 ─ 01
Fig. 2-16: Results of boardinf command
If the board exists and is properly activated, the boardinf command returns the
configuration information for the board.
6. Restart the computer or PCM.
Configuring the NMS Software
7/24/2019 Installation - PCI Telephony Boards
http://slidepdf.com/reader/full/installation-pci-telephony-boards 17/25
Installing the Diva ISDN BoardSwissQual ... Diversity
17Installation Manual 3483777248 ─ 01
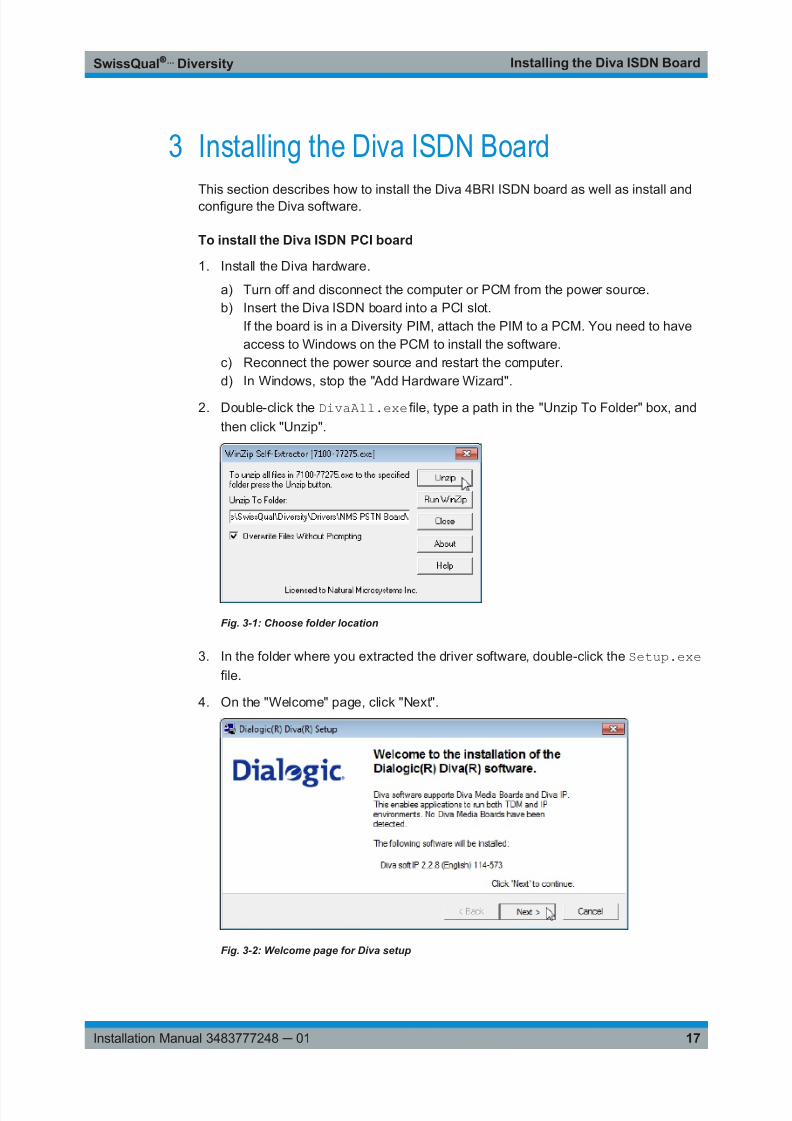
3 Installing the Diva ISDN Board
This section describes how to install the Diva 4BRI ISDN board as well as install andconfigure the Diva software.
To install the Diva ISDN PCI board
1. Install the Diva hardware.
a) Turn off and disconnect the computer or PCM from the power source.
b) Insert the Diva ISDN board into a PCI slot.
If the board is in a Diversity PIM, attach the PIM to a PCM. You need to have
access to Windows on the PCM to install the software.
c) Reconnect the power source and restart the computer.
d) In Windows, stop the "Add Hardware Wizard".
2. Double-click the DivaAll.exe file, type a path in the "Unzip To Folder" box, and
then click "Unzip".
Fig. 3-1: Choose folder location
3. In the folder where you extracted the driver software, double-click the Setup.exe
file.
4. On the "Welcome" page, click "Next".
Fig. 3-2: Welcome page for Diva setup
7/24/2019 Installation - PCI Telephony Boards
http://slidepdf.com/reader/full/installation-pci-telephony-boards 18/25
Installing the Diva ISDN BoardSwissQual ... Diversity
18Installation Manual 3483777248 ─ 01
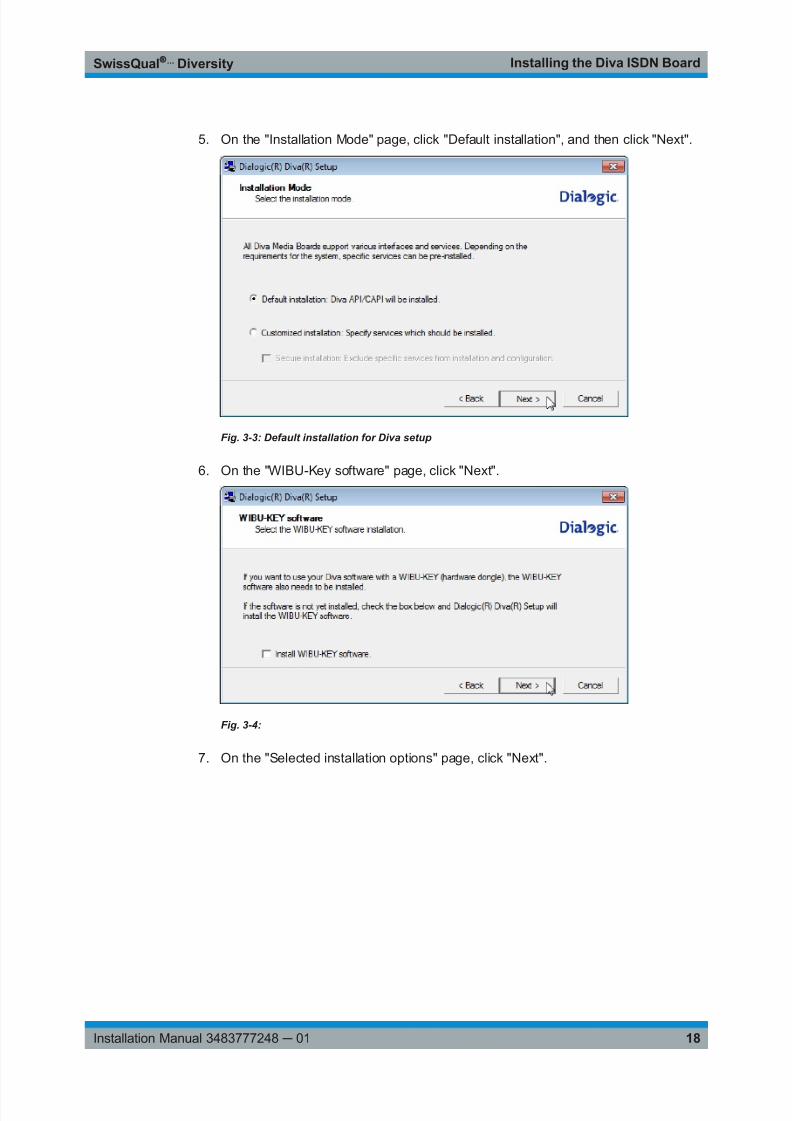
5. On the "Installation Mode" page, click "Default installation", and then click "Next".
Fig. 3-3: Default installation for Diva setup
6. On the "WIBU-Key software" page, click "Next".
Fig. 3-4:
7. On the "Selected installation options" page, click "Next".

7/24/2019 Installation - PCI Telephony Boards
http://slidepdf.com/reader/full/installation-pci-telephony-boards 19/25
Installing the Diva ISDN BoardSwissQual ... Diversity
19Installation Manual 3483777248 ─ 01
Fig. 3-5: Selected installation options for Diva setup
8. At the end of the process, select the "Restart your computer" check box, and then
click "Next".
Fig. 3-6: Successful installation page
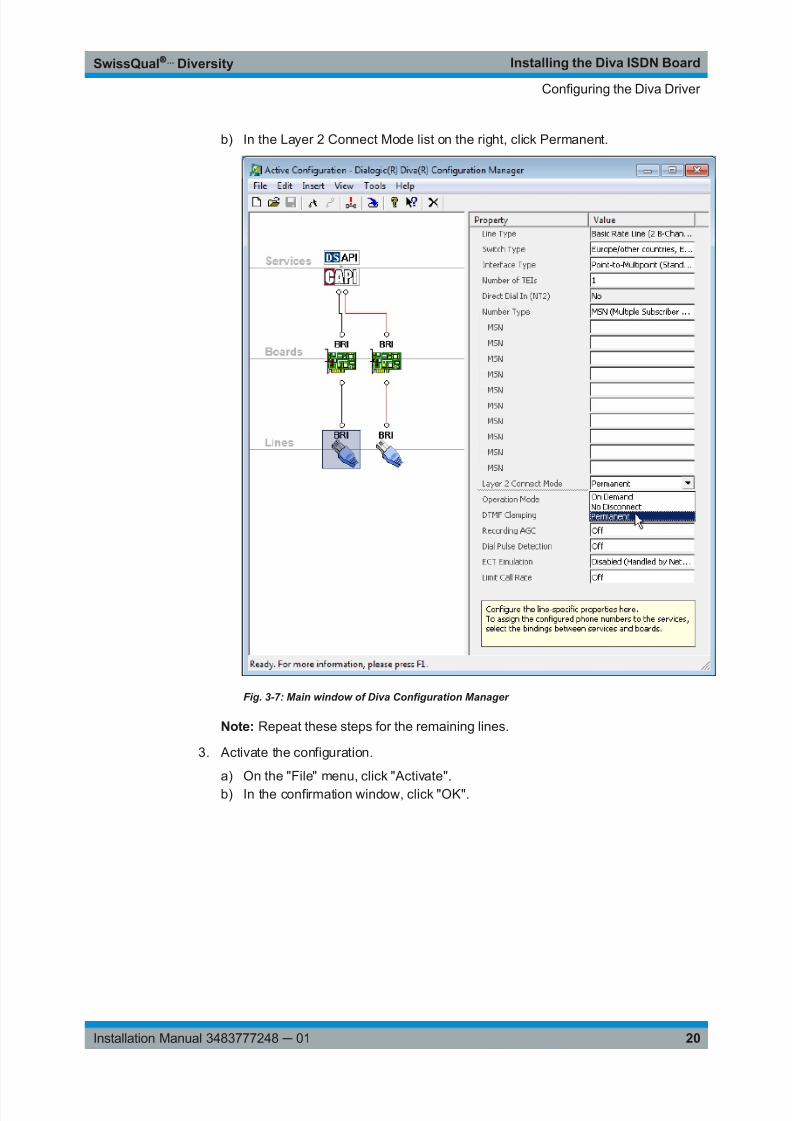
3.1 Configuring the Diva Driver
After you install the Diva software, you need to configure the Layer 2 connect mode for
the ISDN lines.
To configure the Diva driver
1. On the "Start" menu, point to "All Programs", point to "Dialogic Diva", and then click
"Configuration Manager".
2. Change the Layer 2 Connect Mode for each line that connects to the board.
a) In the schematic diagram, click the symbol for a line.
Configuring the Diva Driver
7/24/2019 Installation - PCI Telephony Boards
http://slidepdf.com/reader/full/installation-pci-telephony-boards 20/25
Installing the Diva ISDN BoardSwissQual ... Diversity
20Installation Manual 3483777248 ─ 01
b) In the Layer 2 Connect Mode list on the right, click Permanent.
Fig. 3-7: Main window of Diva Configuration Manager
Note: Repeat these steps for the remaining lines.
3. Activate the configuration.
a) On the "File" menu, click "Activate".
b) In the confirmation window, click "OK".
Configuring the Diva Driver
7/24/2019 Installation - PCI Telephony Boards
http://slidepdf.com/reader/full/installation-pci-telephony-boards 21/25
Installing the Dialogic Diva PSTN BoardSwissQual ... Diversity
21Installation Manual 3483777248 ─ 01
4 Installing the Dialogic Diva PSTN Board
This section describes how to install the Dialogic Diva UM-Analog-8 PCIe board aswell as install and configure the Dialogic Diva software.
The Dialogic Diva PSTN board replaces the older NMS AG-2000 PSTN board.
To install the Dialogic Diva PSTN PCIe board
1. Install the Diva hardware.
a) Turn off and disconnect the computer from the power source.
b) Insert the Dialogic Diva PSTN board into a free PCIe slot.
c) Reconnect the power source and restart the computer.d) In Windows, stop the "Found New Hardware" Wizard.
2. In the folder where you extracted the driver software, double-click the setup.exe
file.
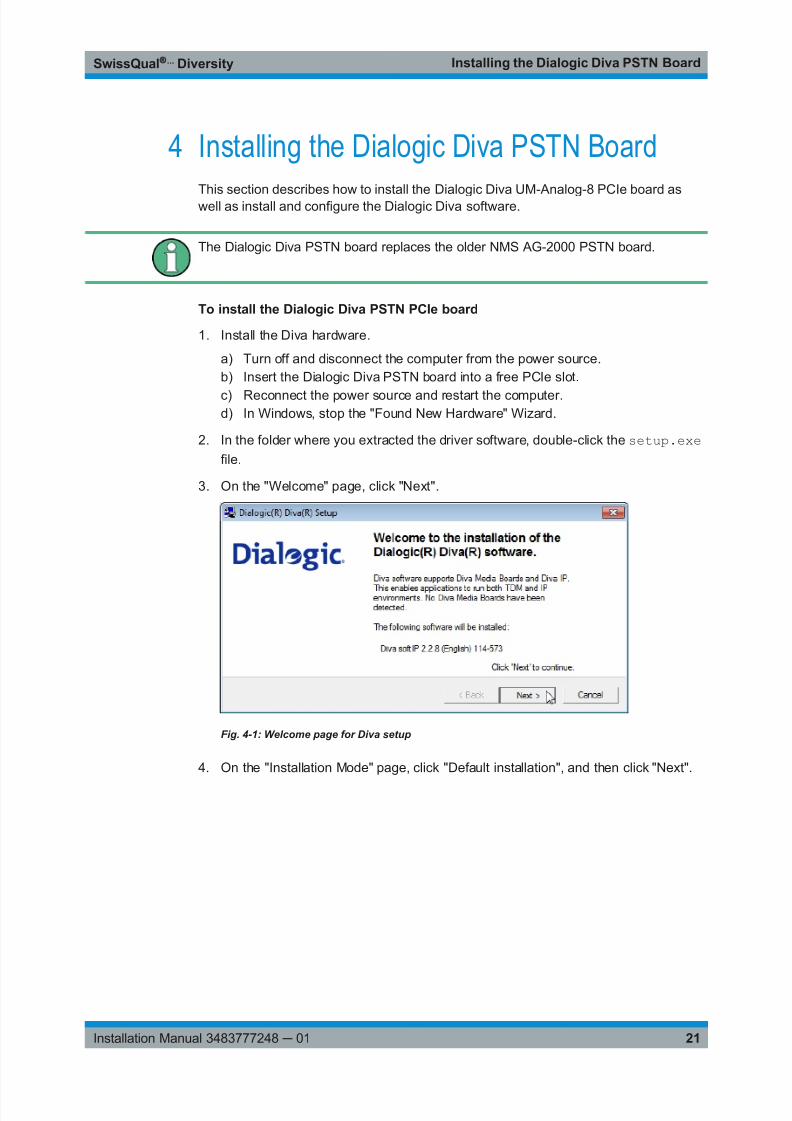
3. On the "Welcome" page, click "Next".
Fig. 4-1: Welcome page for Diva setup
4. On the "Installation Mode" page, click "Default installation", and then click "Next".

7/24/2019 Installation - PCI Telephony Boards
http://slidepdf.com/reader/full/installation-pci-telephony-boards 22/25
Installing the Dialogic Diva PSTN BoardSwissQual ... Diversity
22Installation Manual 3483777248 ─ 01
Fig. 4-2: Default installation for Diva setup
5. On the "WIBU-Key software" page, click "Next".
Fig. 4-3:
6. On the "Selected installation options" page, click "Next".

7/24/2019 Installation - PCI Telephony Boards
http://slidepdf.com/reader/full/installation-pci-telephony-boards 23/25
Installing the Dialogic Diva PSTN BoardSwissQual ... Diversity
23Installation Manual 3483777248 ─ 01
Fig. 4-4: Selected installation options for Diva setup
7. At the end of the process, select the "Restart your computer" check box, and then
click "Next".
Fig. 4-5: Successful installation page
4.1 Successful installation page
After you install the Diva software, you need to configure the analog line behaviour of
the PSTN board.
To configure the Diva driver
1. On the "Start" menu, point to "Programs", point to "Dialogic Diva", and then click
"Configuration Manager".
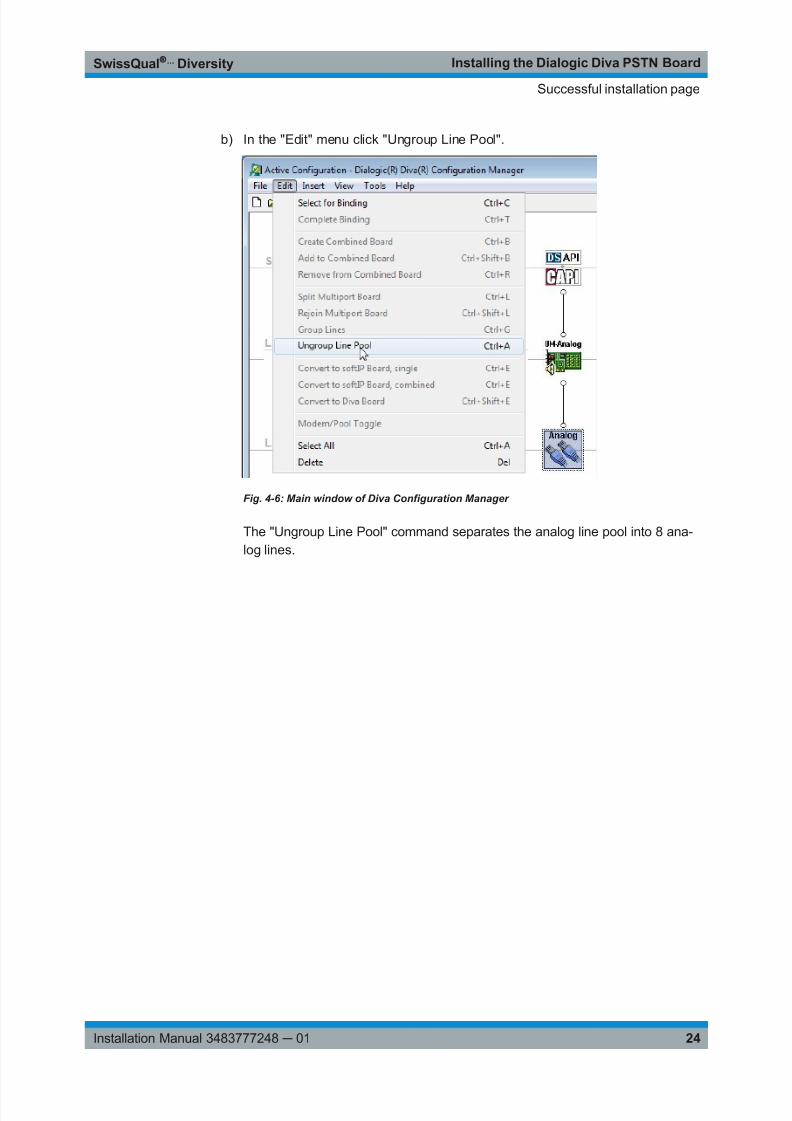
2. Change the Line mode for the analog board.
a) In the schematic diagram, click the symbol for the Analog line.
Successful installation page
7/24/2019 Installation - PCI Telephony Boards
http://slidepdf.com/reader/full/installation-pci-telephony-boards 24/25
Installing the Dialogic Diva PSTN BoardSwissQual ... Diversity
24Installation Manual 3483777248 ─ 01
b) In the "Edit" menu click "Ungroup Line Pool".
Fig. 4-6: Main window of Diva Configuration Manager
The "Ungroup Line Pool" command separates the analog line pool into 8 ana-
log lines.
Successful installation page

7/24/2019 Installation - PCI Telephony Boards
http://slidepdf.com/reader/full/installation-pci-telephony-boards 25/25
Installing the Dialogic Diva PSTN BoardSwissQual ... Diversity
Fig. 4-7: Main window of Dialogic Diva Configuration Manager after Ungrouping
3. Change the disconnect detection behavior.
a) In the properties pane, click "Off" in the "Timeout on silence" list.
Fig. 4-8: Properties pane
b) In the "Off-Hook Speed" list, click "Normal".
Fig. 4-9: Properties pane Off-Hook Speed
4. On the "File" menu, click "Activate".
Successful installation page