installation manual ami-g3 system - inogate · installation manual ami-g3 system for windows...
TRANSCRIPT

Installation Manual
AMI-G3 System
For Windows Stand-alone Version
Hexing Electrical Co Ltd wwwhxgroupcn
[20133]
System Installation Manual-AMI-G3 2 35
Introduction
Range of validity
The present installation manual applies to the system software specified on the title page
Purpose
The installation manual contains all the information required for installation and maintenance
of the system software
Target group
The contents of this installation manual are intended for qualified personnel of energy supply
companies responsible for installation and maintenance of the system software
Hexing Electrical reserves the right of final interpretation
System Installation Manual-AMI-G3 3 35
Table of Contents
INTRODUCTION 2
1 SYSTEM LOGICAL STRUCTURE 5
2 SYSTEM DEPLOYMENT DIAGRAM 6
3 SYSTEM INSTALLATION REQUIREMENT 6
31 SERVER CONFIGURATION 6
32 SOFTWARE INSTALLATION ENVIRONMENT 7
4 OPERATING SYSTEM INSTALLATION CONFIGURATION 7
5 DATABASE INSTALLATION CONFIGURATION 7
51 CHECK JRE 7
52 INSTALLATION PROCESS 8
53 INSTALL SQL TOOL 20
6 DATA INITIALIZATION 20
61 LOGIN DATABASE AS ldquoSYSrdquo USER 20
62 DELETE USER 20
63 EXECUTE ldquoCREATE TABLE SPACErdquo SCRIPT 20
64 CREATE USER 21
65 LOGIN AS NEW USER 21
66 EXECUTE ldquoCREATE TABLErdquo SCRIPT(258) 21
67 EXECUTE CREATE PARTITION TABLE SCRIPT(16) 21
68 EXECUTE CREATE SEQUENCE SCRIPT(51) 21
69 EXECUTE CREATE VIEW SCRIPT (4 IN TOTAL) 22
610 EXECUTE CREATE TYPE SCRIPT (1) 22
611 EXECUTE CREAT PACKAGE SCRIPT (12 IN TOTAL) 22
612 CHECK IF THERE IS INVALID OBJECT 22
613 EXECUTE BELOW SCRIPT TO DISABLE FOREIGN KEY LIMITATION 23
614 IMPORT DATA 23
615 EXECUTE BELOW SCRIPT TO ENABLE FOREIGN KEY LIMITATION 24
616 ANALYZE IMPORTED DATA TABLES 24
617 DELETE JOB 24
618 EXECUTE CREATE JOB SCRIPT(7) 25
7 JDK INSTALLATION 26
71 INSTALLATION PACKAGE 26
72 COMPRESSED PACKAGE INSTALLATION 29
8 COMMUNICATION SERVICE DEPLOYMENT 29
81 FE CONFIGURATION 29
82 BP CONFIGURATION 29
83 GATE CONFIGURATION 30
System Installation Manual-AMI-G3 4 35
84 PORT CONFIGURATION 30
85 DP CONFIGURATION (SCHEDULED CALL) 31
86 DR CONFIGURATION (RECALL ) 31
9 WEB SERVICE INSTALLATION AND DEPLOYMENT (TOMCAT) 31
91 WEB SERVICE INSTALLATION 31
92 WEB APPLICATION DEPLOYMENT 31
93 WEB APPLICATION START-UP 33
System Installation Manual-AMI-G3 5 35
1 System Logical Structure
Figure 1 System Logical Structure
System Installation Manual-AMI-G3 6 35
2 System Deployment Diagram
Data Collection Communications Platform
AMI Web
DataBase
UserUser
BPBP
GateGate
GPRS Meter
WEBWEB
DBDB
GPRS Lan
LAN
Browser
LAN
FEFE
Lan
GPRS
Concenterator
Figure 2 System Deployment Diagram
3 System Installation Requirement
31 Server Configuration
No Item Configuration requirement QTY
1 Database server
PC Server or Minicomputer Server cluster
Memory 2G
CPU Dual-core
Hard disk ge300G
1
2 Communication
front-end processor
PC Server
Memory 2G
CPU Dual-core
Hard disk ge 200G
1
3 Communication
gateway
PC server
Memory 2G
CPU Dual-core
Hard disk ge 200G
1
4 Application Server
PC server
Memory 2G
CPU Dual-core
1
System Installation Manual-AMI-G3 7 35
Hard disk ge 200G
5 Hand Held Unit From Hexing 2
6 Meter PC software From Hexing 2
Figure 3 Server configuration
Note for the current pilot project communication gateway and communication front-end
processor can be arranged on the same server but memory of this server shall be no less than
4G However if database is also installed on this server its memory shall be no less than 8G
Meanwhile the server used for communication gateway must be able to connect to Internet or
VPN network to realize GPRS communication between meter and data concentrator
32 Software Installation Environment
No Item Requirement
1 Operating system Windows sever 2003 version or above
2 JDK Version 16 or above
3 Tomcat Version 60 or above
4 Oracle Version 10g or above Oracle11g is recommended
Figure 4 Software Installation Environment
4 Operating System Installation Configuration
Installation process will not be introduced here
Configuration Shall support remote control function so that engineers can make remote
debugging and maintenance
5 Database Installation Configuration
Below is an example for installation of Oracle11g database For other versionrsquos database the
interface might be a bit different with here but the installation process is similar
51 Check JRE
Oracle11g requires version JRE13 or above If the JRE version is too low error information as
System Installation Manual-AMI-G3 8 35
below will prompt during installation process
Please enter httpwwwjavasoftcom to download new version JRE and then install Oracle
database
52 Installation Process
Firstly do NOT tick in above red circuled part and then clickldquoNextrdquo
If below error information prompt ignore it and click ldquoYesrdquo to continue
System Installation Manual-AMI-G3 9 35
Select ldquoCreate and configure a databaserdquo
Select ldquoServer Classrdquo
System Installation Manual-AMI-G3 10 35
Select ldquoSingle instance database installaitonrdquo
System Installation Manual-AMI-G3 11 35
Select ldquoAdvanced installrdquo
Choose among available languages and add needed languages
System Installation Manual-AMI-G3 12 35
Select database edition make sure there is enough disk space
Choose installation directory of Oracle database
System Installation Manual-AMI-G3 13 35
Select ldquoGeneral PurposeTransaction Processingrdquo
Input ldquoGlobal Database Namerdquo and ldquoSIDrdquo the default value is ldquoamirdquo
System Installation Manual-AMI-G3 14 35
Select ldquoEnable Automatic Memory Managementldquo
Switch to ldquoCharacter setsrdquo TAB page and select ldquoUse Unicold (AL32UTF8)rdquo Click ldquoNextrdquo
System Installation Manual-AMI-G3 15 35
Click ldquoNextrdquo
Fill in ldquoSpecify database file locationrdquo
System Installation Manual-AMI-G3 16 35
Keep default setting and clickldquoNextrdquo
If choose ldquoUse dufferent passwords for these accountsrdquo input passwords one by one You can
also select ldquoUse the same password for all accountsrdquo
System Installation Manual-AMI-G3 17 35
Perform prerequisite check If there is error information it will prompt in the relevant page
Remove error accordingly as per the instruction After check enter next interface
Click ldquoFinishrdquo to complete installation
System Installation Manual-AMI-G3 18 35
This installation section might take a while please wait in patience
Wait until reaching 100 which means database installation is completed
System Installation Manual-AMI-G3 19 35
Installation completed
Record EM URL ass shown in below red circle which will be used for Oracle management
System Installation Manual-AMI-G3 20 35
53 Install SQL Tool
Install PLSQL Developer database SQL tool which is used for subsequent database
initialization installation process Download address is as below
httpwwworaclecomtechnetworkdeveloper-toolssql-developerdownloadsindexhtml
6 Data Initialization
Initialization process of system database script involves creation of table space So if table space
exists then skip step 3 execute the ldquocreate table space scriptrdquo operation Create database
account information username AMI password AMI (capitalized) If database is oracle11g
version the passwords are case sensitive
61 Login Database as ldquosysrdquo User
Execute under cmd command
Sqlplus syspasswrodconn as sysdba
Note Connection character ldquoconn rdquo needs to be configured by the user
62 Delete User
SQLgtdrop user AMI cascade
63 Execute ldquoCreate Table Spacerdquo Script
SQLgtCdatabasetablespacecreate_tablespacesql
Note When creating table space change the paths in ldquocreate_tablespacesqlrdquo to real path
Words in red as shown below shall be changed to time path
CREATE TABLESPACE HX_RW_2011 DATAFILE oracleoradataHX_RW_2011_01DBF SIZE
System Installation Manual-AMI-G3 21 35
4097M EXTENT MANAGEMENT LOCAL SEGMENT SPACE MANAGEMENT AUTO
64 Create User
SQLgt Cdatabaseusercreate_usersql
65 Login as New User
SQLgt conn AMIAMIconn
Note Connection character ldquoconn rdquo needs to be configured by the user
66 Execute ldquoCreate Tablerdquo Script(258)
SQL gtCdatabasetabletrisql
After create table script is executed execute below
SQL gt SELECT COUNT() FROM user_objects t
WHERE tOBJECT_TYPE = TABLE
AND tobject_name NOT IN(SELECT table_name FROM user_tab_partitions)
Check if it is 258
67 Execute Create Partition Table Script(16)
SQL gtC databasepart_tabletrisql
After create table script is executed execute below
SQL gt SELECT COUNT(DISTINCT table_name) cnt FROM user_tab_partitions
Check if it is 16
68 Execute Create Sequence Script(51)
SQLgtCdatabasesequencetrisql
After execution execute below
SQLgtSELECT COUNT() FROM user_objects t
System Installation Manual-AMI-G3 22 35
WHERE tOBJECT_TYPE = SEQUENCE
Check if the result is 51
69 Execute Create View Script (4 in total)
SQLgtCdatabaseviewtrisql
After execution execute below
SQLgtSELECT COUNT() FROM user_objects t
WHERE tOBJECT_TYPE = VIEW
Check if the result is 4
610 Execute Create Type Script (1)
SQLgtCdatabasetypetrisql
After execution execute below
SQLgt SELECT COUNT() FROM user_objects t
WHERE tOBJECT_TYPE = TYPE
AND tOBJECT_NAME = ARRAY_VARCHAR2
Check if the result is 1
611 Execute Creat Package Script (12 in total)
SQLgtCdatabasepackagetrisql
After execution execute below
SQLgt SELECT COUNT() FROM user_objects t
WHERE tOBJECT_TYPE IN (PACKAGEPACKAGE BODY)
AND object_name NOT IN (PKG_IMITATE_DATA)
Check if the result is 12
612 Check if There Is Invalid Object
Use plsql developer tool to login AMI user
System Installation Manual-AMI-G3 23 35
Open Tools---gtCompiled Invalid objects
Check if there is invalid object If there is invalid object recompile it
As shown in below picture
613 Execute Below Script to Disable Foreign Key Limitation
SQLgtCdatabaseimpdisable_fksql
614 Import Data
Under file Ddatabaseimp
Open ami_imptxt file
Change the data in first and second line as below
userid=AMIAMIconn
file=Cdatabaseimpamidmp
ldquoconnrdquo shall be changed to the actual configured connection string at site
Change the path of ldquoFilerdquointo actual path at site for amidmp
Under doc execute
Input imp parfile = Ddatabaseimpami_imptxt
Note path for ami_imptxt needs to be changed according to actual path
System Installation Manual-AMI-G3 24 35
615 Execute Below Script to Enable Foreign Key Limitation
SQLgtCdatabaseimpenable_fksql
616 Analyze Imported Data Tables
Under sqlplus execute
SQLgtCdatabaseanalyze_tabtrisql
617 Delete Job
Use plsql developer tool to delete it
As shown in above figure find DBMS_Jobs on the left window of plsql developer Select job
you want to delete and right click ldquodroprdquo to delete them one by one
Note If it is the first time operation skip this step otherwise this step should be executed
System Installation Manual-AMI-G3 25 35
618 Execute Create Job Script(7)
Under sqlplus execute
SQLgtCdatabasejobcreate_jobsql
After execution execute below
SQLgtselect COUNT() FROM user_jobs
Check if the result is 7
Till this step database operation is completed
System Installation Manual-AMI-G3 26 35
7 JDK Installation
Two kinds of installation methods are available for JDK installation One is to download exe
installation package to install the other is to use the compressed package for installation
71 Installation Package
Download the package of JDK16 from this link httpjdk6javanetdownloadhtml
Click to install it
License Agreement selectldquoAcceptrdquo
System Installation Manual-AMI-G3 27 35
Select the installation path
Installation process
System Installation Manual-AMI-G3 28 35
Installation finished
System Installation Manual-AMI-G3 29 35
72 Compressed Package Installation
Decompress the installation package directly to the corresponding directory in which there should
only be English words or numbers
8 Communication Service Deployment
81 FE Configuration
The configuration in application properties
1) fegprsclients=1270018087name=gprs1
This is the connection with gate(it matches with feserver in gate)
2) bpserver=10011name=bpSocketServer
this is the port of BP connection which should match bpfeclienturl in BP
3) uplogtable
For saving uplink report
4) downlogtable
For saving downlink report
5) wzuplogtable
For saving unknown report
82 BP Configuration
The configuration in application properties
1) bpfeclienturl =12700110011
This is IP and port of FE to connect BP And it matches bpserver=10011 in FE
2) bpwebserverport =7778
It is the port which connect with BP
3) bpbatchSize
This is the maximum quantity of batch saved data
4) bpdelaySecond
System Installation Manual-AMI-G3 30 35
This is the delay time for saving data in batch
5) sysshowprofilecronExpression
This is the log print script strategy
6) bprefreshRtucronExpression
this is for timely taking synchronization record in terminal synchronization table and refresh
memory archives job
Note6789 items are not suggested to be modified
83 Gate Configuration
The configuration in application properties
1) gatetcpservers=3084name=gprs-t-1
This is the port connected with meters
2) feserver=8087name=fe-server
this is the port connected with FE which is corresponding to the above (1)
Note Server of the Gate should have a fixed internet IP or VPN net It ensures that meters can be
successfully connected with Gate application via GPRS
84 Port Configuration
WEBBPFEGATEMETER
1) WEB communicates with BP via the port bpwebserverport=7778 of BP
2) BP communicates with FE in BP the configuration is bpfeclienturl=12700110011 in FE the
configuration is bpserver=10011name=bpSocketServer
3) FE communicates with GATE in FE the configuration is
fegprsclients=172162512398087name=gprs1 In GATE the configuration is
feserver=8087name=fe-server
4) GATE communicates with meters in GATE the configuration is
gatetcpservers=3089name=gprs-t-1 and 3089 is written in the meters
System Installation Manual-AMI-G3 31 35
85 DP Configuration (scheduled call)
Enter root directory of scheduled call and modify configurations in the file applicationproperties
1) modify bpclientsurl according to the configurations in bp and it should match that in bp
bpclientsurl=1270017778
2) modify scheduled call strategies in dlms protocol(whatrsquos the regular period for performing the
task)
dlmstaskinitcronExpression=0 1 0
86 DR Configuration (Recall )
Configuration in application properties
1) modify bpclientsurl according to configuration in bp and it should match that in bp
bpclientsurl=1270017778
9 Web Service Installation and Deployment (Tomcat)
91 Web Service Installation
Download Tomcat6 or senior version( zip format) decompress it into the corresponding directorty
Download link httparchiveapacheorgdisttomcattomcat-7v708bin
92 Web Application Deployment
Enter tomcat root directory
System Installation Manual-AMI-G3 32 35
Set JAVA_HOME
Edit bincatalinabat file set the JAVA_HOME variables in the beginning of the file
set JAVA_HOME=cjdk160_17
jdk path shall be defined according to the actual directory
Set JVM memory parameters
set JAVA_OPTS=JAVA_OPTS -Xms512m ndashXmx1800m -XXPermSize=64m
-XXMaxPermSize=512m
amoung the part in red Xms is the minimum space that JVM takes Xmx is the maximum space
that JVM takes It is distributed according to the capacity of physical memory of system if the
memory capacity allows it is better to make the value of Xmx larger In the 32 bits operating
system the upper limit of Xms is 2048 for JVM
Set application patch
AmiWebxml
Copy the file AmiWebxml to the directory of confCatalinalocalhost
Edit the content as below
ltContext docBase=cAmiWeb gt
Modify the part in red parts to the complete path where the application package is
Link for this application is httpipportAmiWeb
Set Web application database connection
Enter Web root directory
System Installation Manual-AMI-G3 33 35
Edit configuration documentsWEB-INFclassesresdatabaseproperties
databaseconnectionurl=jdbcoraclethin172162512391521ami
databaseconnectiondriver_class=oraclejdbcdriverOracleDriver
databaseconnectionusername=AMI4
databaseconnectionpassword=AMI4
databaseconnectioninitialPoolSize=5
databaseconnectionminPoolSize=5
databaseconnectionmaxPoolSize=20
Set the correct database connection information
Set Web and communication service information
Edit configuration file WEB-INFclassesresfaal-clientproperties
bpclientsurl=17216241487778name=bp1ampusage=0117216241487778name=bp2ampusage=0217216
241487778name=bp3ampusage=03
Modify the parameters in red IP and port of BP server
Task Service
zzrwhost=1721624148
zzrwport=7778
Modify the parameters in red IP and port of BP server
FE Service
feip=1721624148
feport=20002
Modify the parameters in red IP and port of FE server
93 Web Application Start-up
Enter Tomcat root directory
System Installation Manual-AMI-G3 34 35
Enter bin directory click ldquostartupbatrdquo If it fails please check if the configuration information
of database connection is correct or not
NOTE Information in this document is subject to change without notice The information is
accurate at the time of printing (March 2013) copy Hexing Electrical
System Installation Manual-AMI-G3 35 35
Hexing Electrical
Add Shangcheng Industrial Zone 1418 Moganshan Road Hangzhou China
TEL +86-571-28020767769
FAX +86-571-28029263
wwwhxgroupcn
markethxgroupco
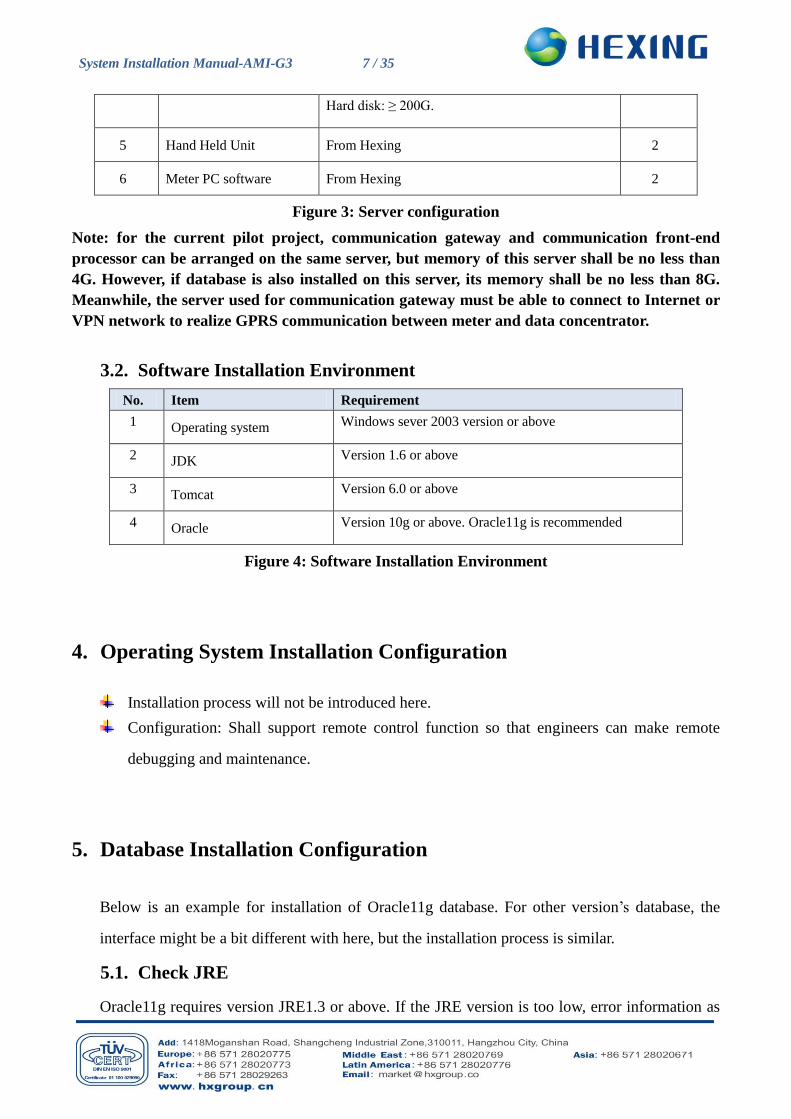
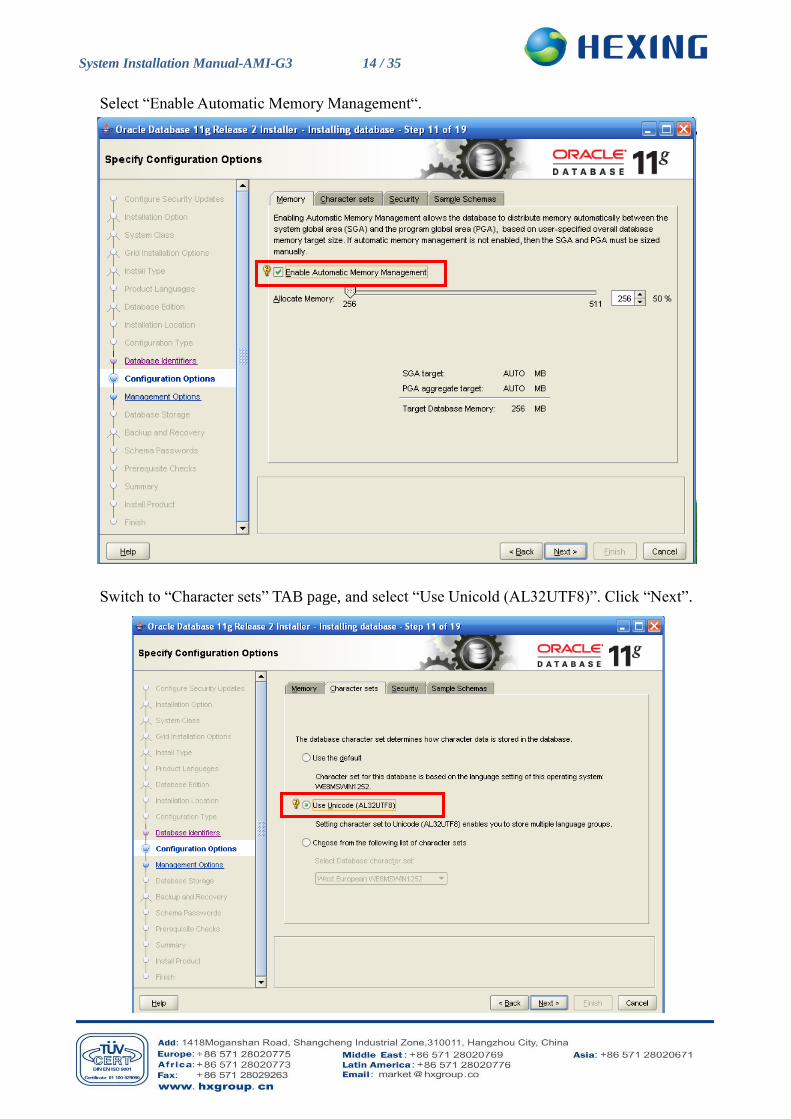
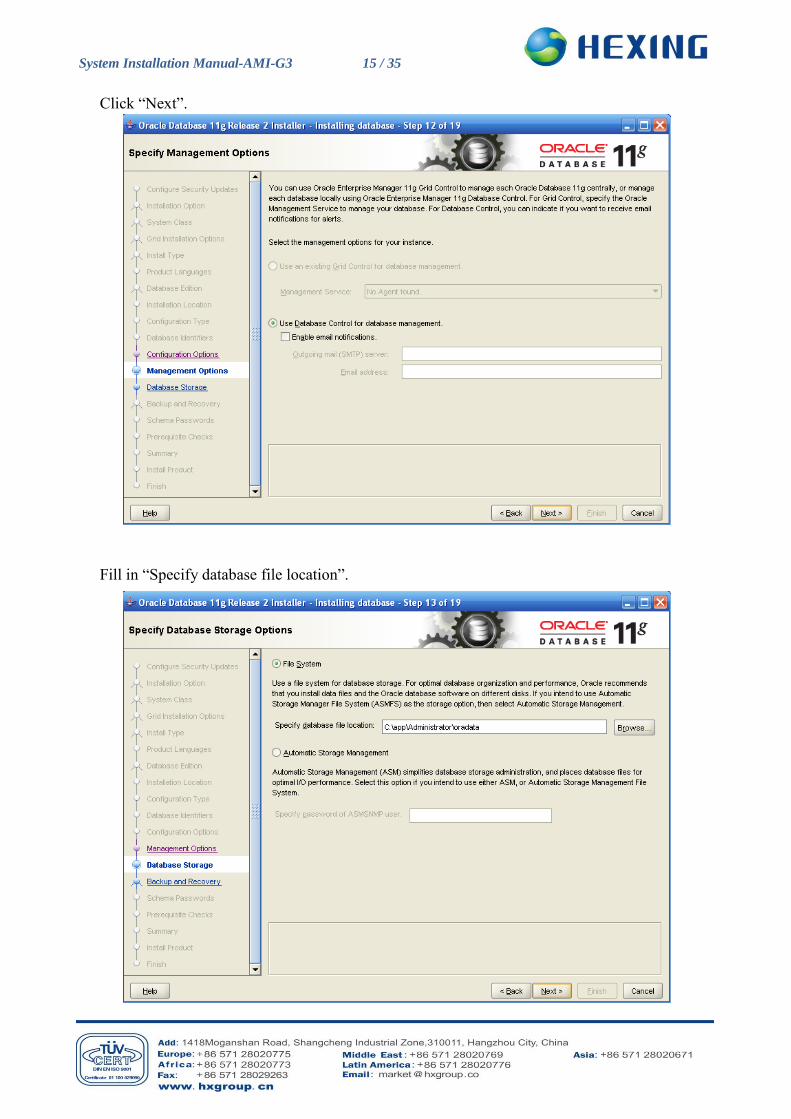
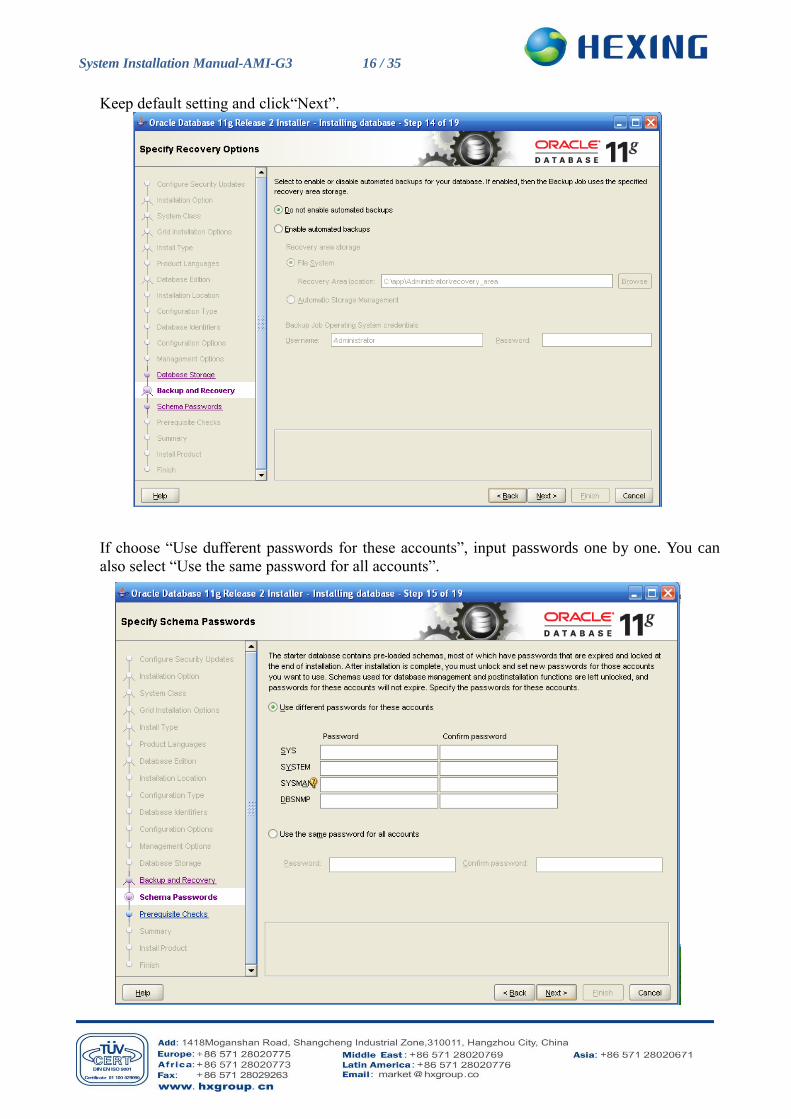
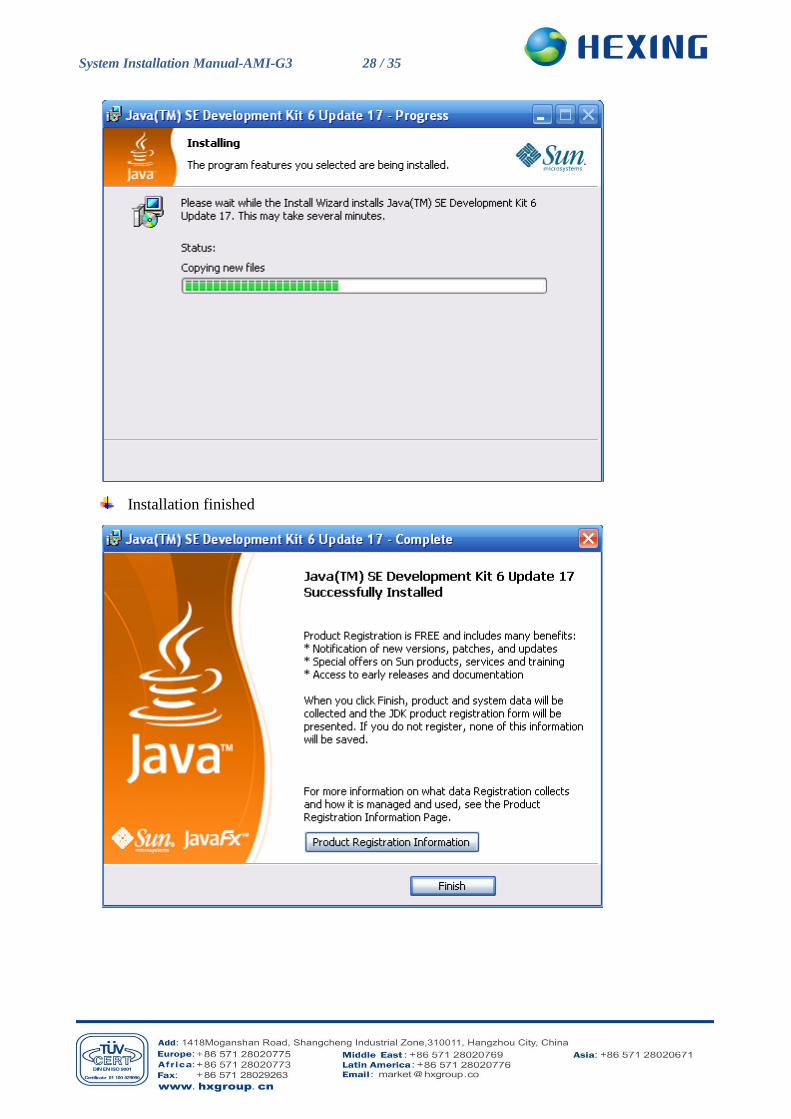
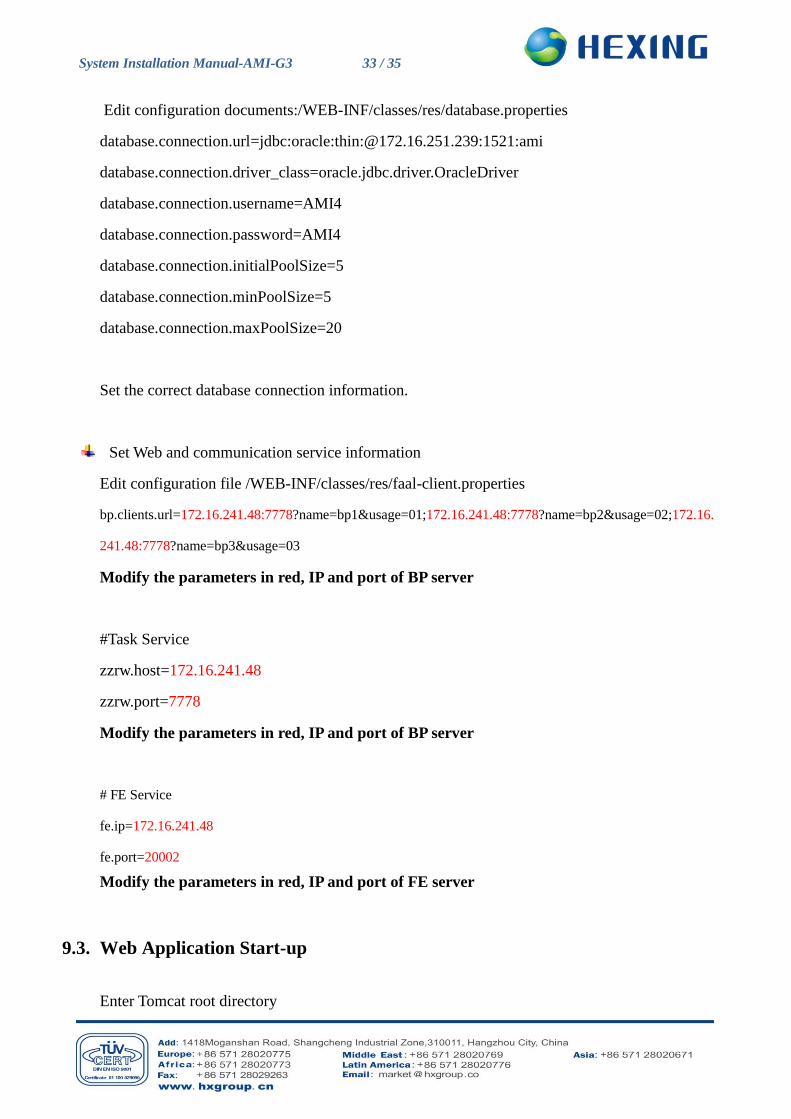

System Installation Manual-AMI-G3 35 35
Hexing Electrical
Add Shangcheng Industrial Zone 1418 Moganshan Road Hangzhou China
TEL +86-571-28020767769
FAX +86-571-28029263
wwwhxgroupcn
markethxgroupco