installation instructions - barn door · optional floor guide) ... cut a slot in the door where the...
TRANSCRIPT
INSTALLATION INSTRUCTIONS!
IDENTIFY COMPONENTS!
Make sure everything matches the packing slip and parts identification page.
Review the exploded view diagram and
drawing of the hardware on the following page before starting, to better visualize the install.
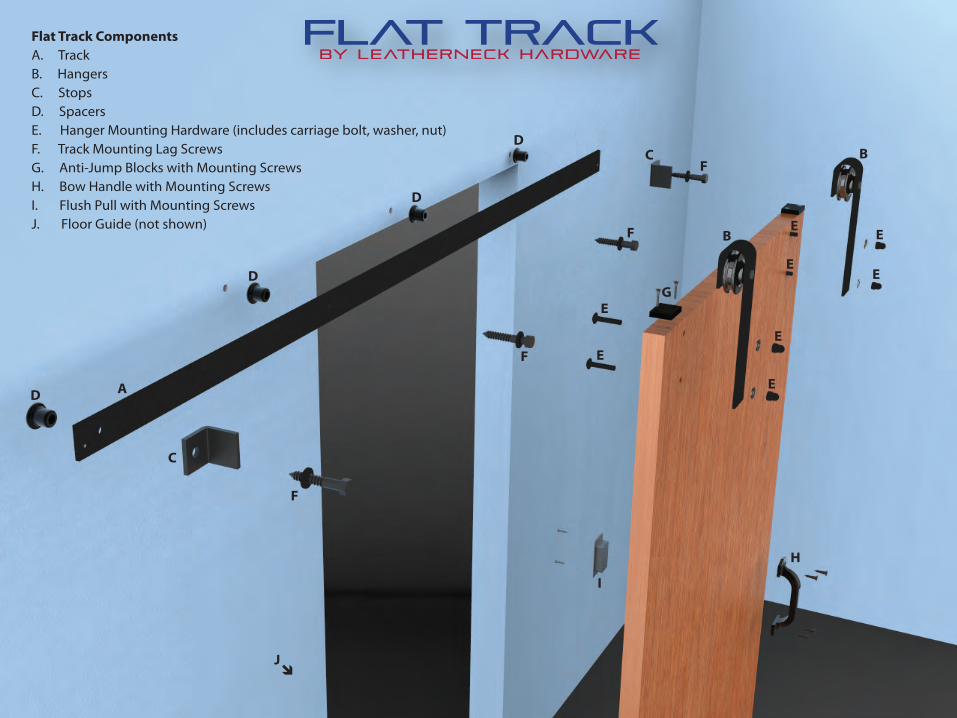
Flat Track ComponentsA. TrackB. HangersC. StopsD. SpacersE. Hanger Mounting Hardware (includes carriage bolt, washer, nut)F. Track Mounting Lag ScrewsG. Anti-Jump Blocks with Mounting ScrewsH. Bow Handle with Mounting ScrewsI. Flush Pull with Mounting ScrewsJ. Floor Guide (not shown)
D
C
A
D
D
D
F
F
F
FC
E
E
G
I
B
E
E
E
E
E
E
H
JÔ
B
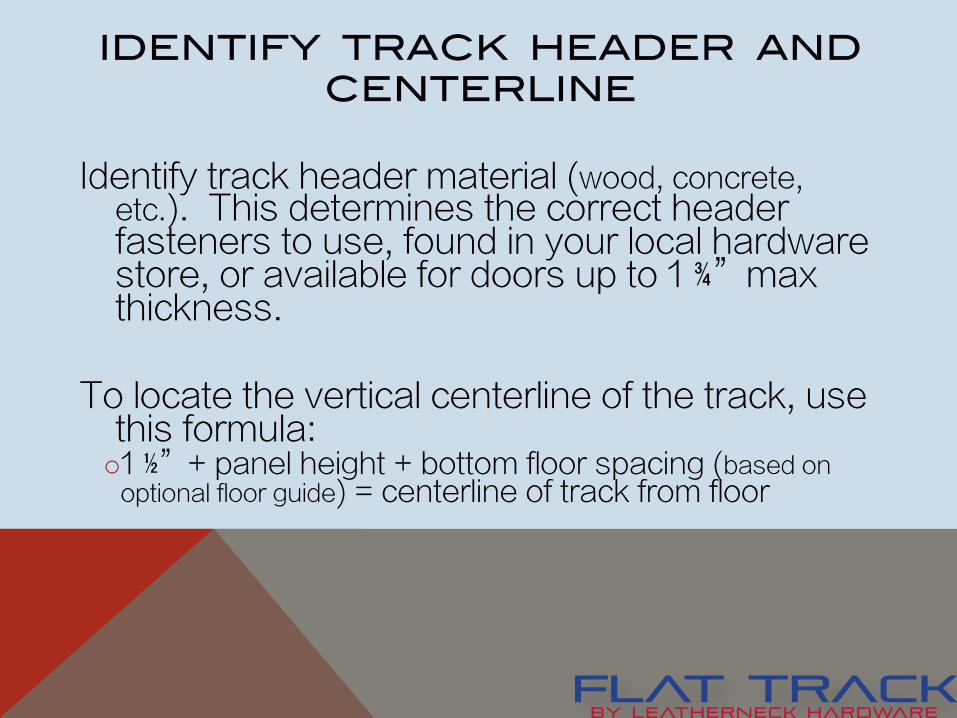
IDENTIFY TRACK HEADER AND CENTERLINE!
Identify track header material (wood, concrete, etc.). This determines the correct header fasteners to use, found in your local hardware store, or available for doors up to 1 ¾”max thickness.
To locate the vertical centerline of the track, use
this formula: o 1 ½”+ panel height + bottom floor spacing (based on
optional floor guide) = centerline of track from floor
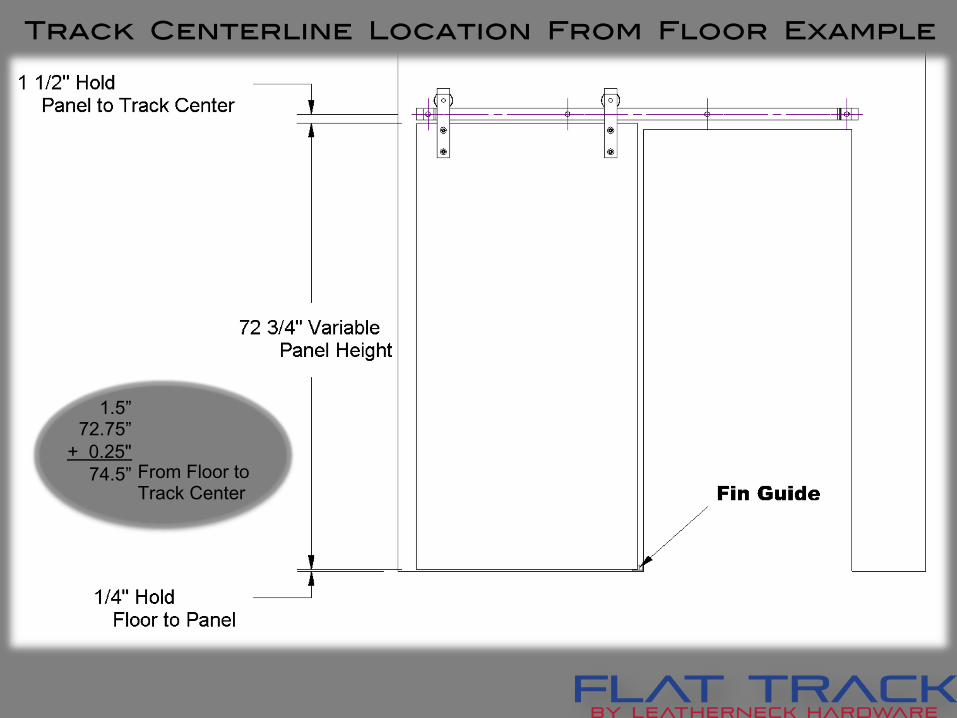
Track Centerline Location From Floor Example!
1.5” 72.75”
+ 0.25" 74.5” From Floor to
Track Center
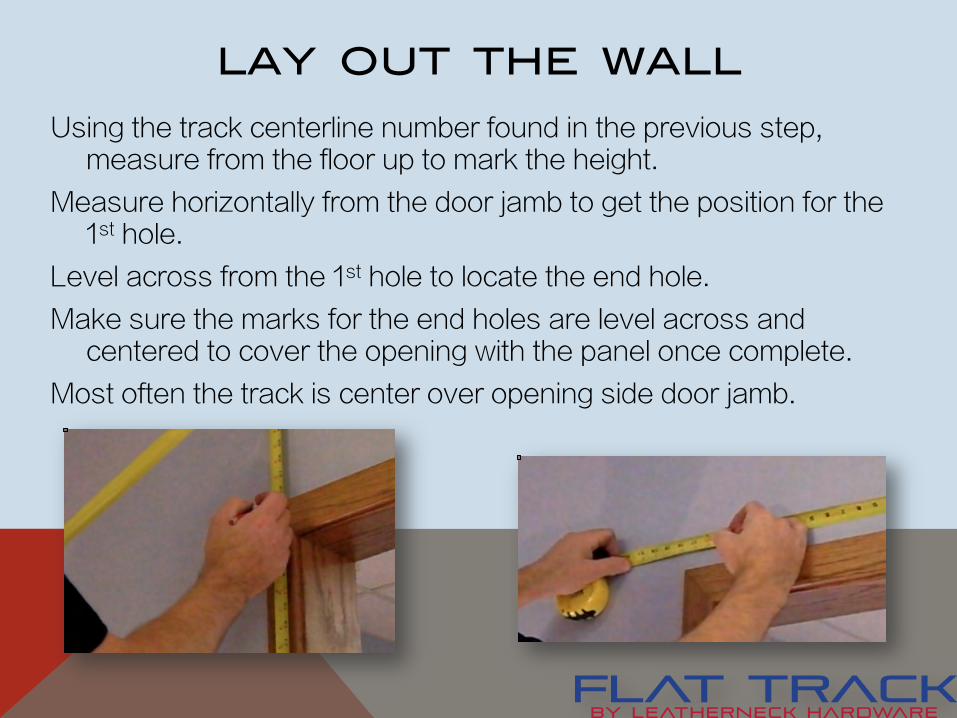
LAY OUT THE WALL!Using the track centerline number found in the previous step,
measure from the floor up to mark the height.
Measure horizontally from the door jamb to get the position for the 1st hole.
Level across from the 1st hole to locate the end hole.
Make sure the marks for the end holes are level across and centered to cover the opening with the panel once complete.
Most often the track is center over opening side door jamb.
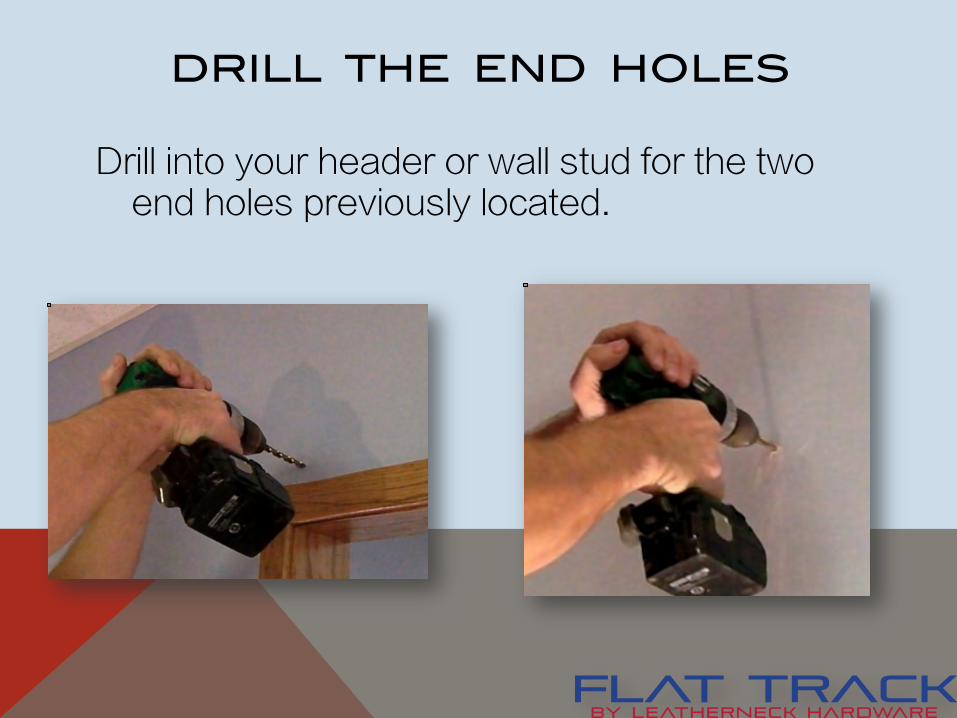
DRILL THE END HOLES!
Drill into your header or wall stud for the two end holes previously located.
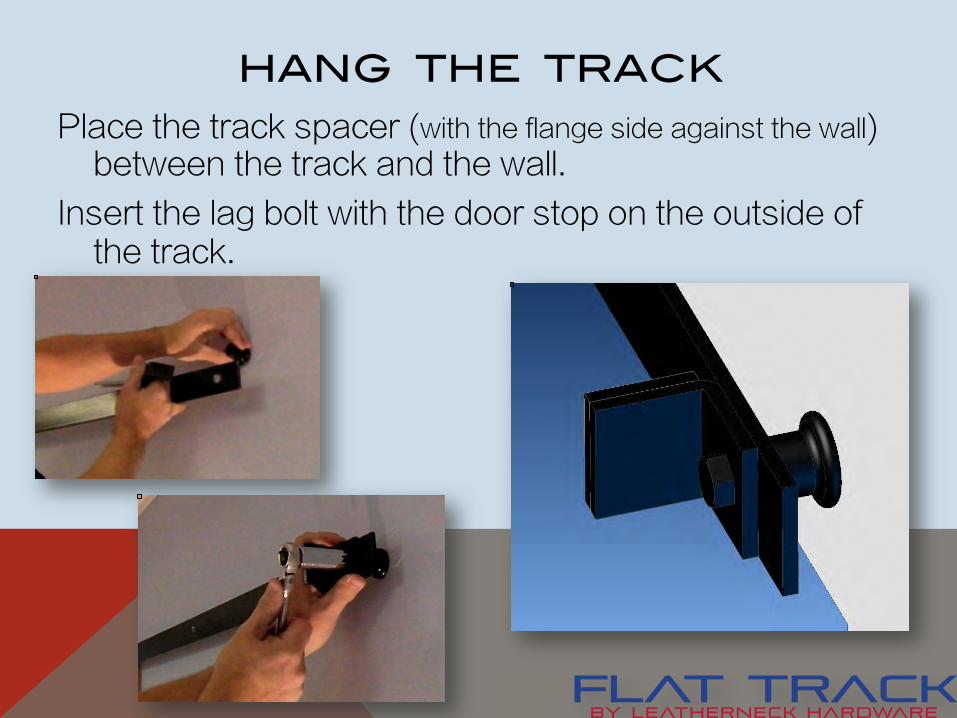
HANG THE TRACK!Place the track spacer (with the flange side against the wall)
between the track and the wall.
Insert the lag bolt with the door stop on the outside of the track.

DRILL THE REMAINING TRACK HOLES!
With the two ends of the track fastened down with door stops installed, drill the remaining holes using the spacer as a guide.
Insert and fasten down the lag bolts.
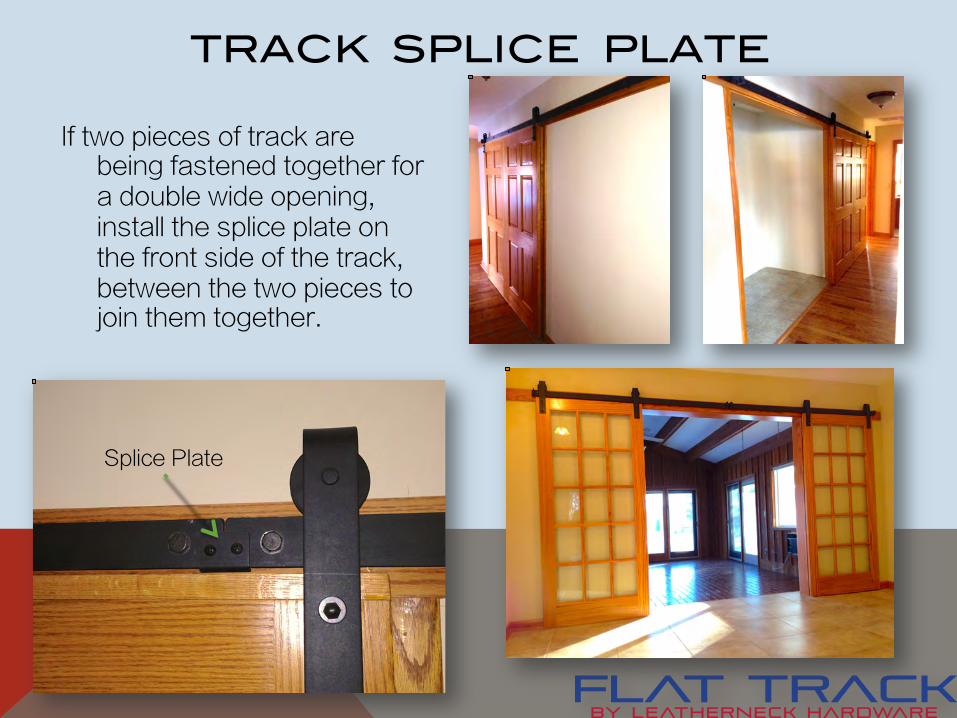
TRACK SPLICE PLATE!
If two pieces of track are being fastened together for a double wide opening, install the splice plate on the front side of the track, between the two pieces to join them together.
Splice Plate

FLOOR GUIDE!
There are several different types of floor guides Leatherneck may provide. Depending on what is provided, set the guide on the open side of the jamb to run through the middle of the door, or around the door edges, depending on the guide style.
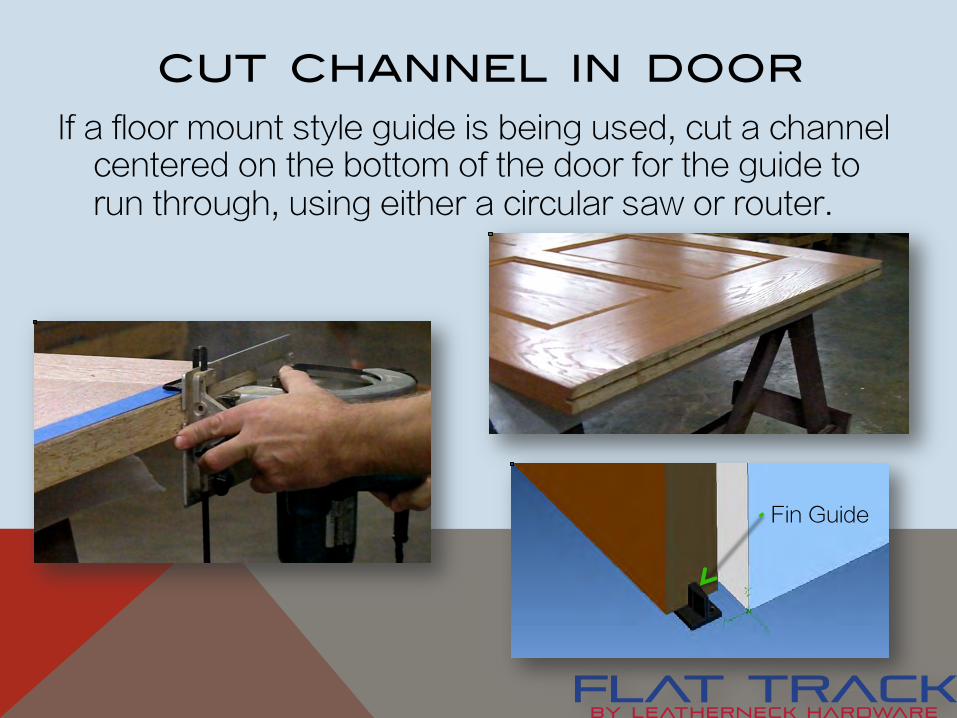
CUT CHANNEL IN DOOR "!If a floor mount style guide is being used, cut a channel
centered on the bottom of the door for the guide to run through, using either a circular saw or router.
Fin Guide
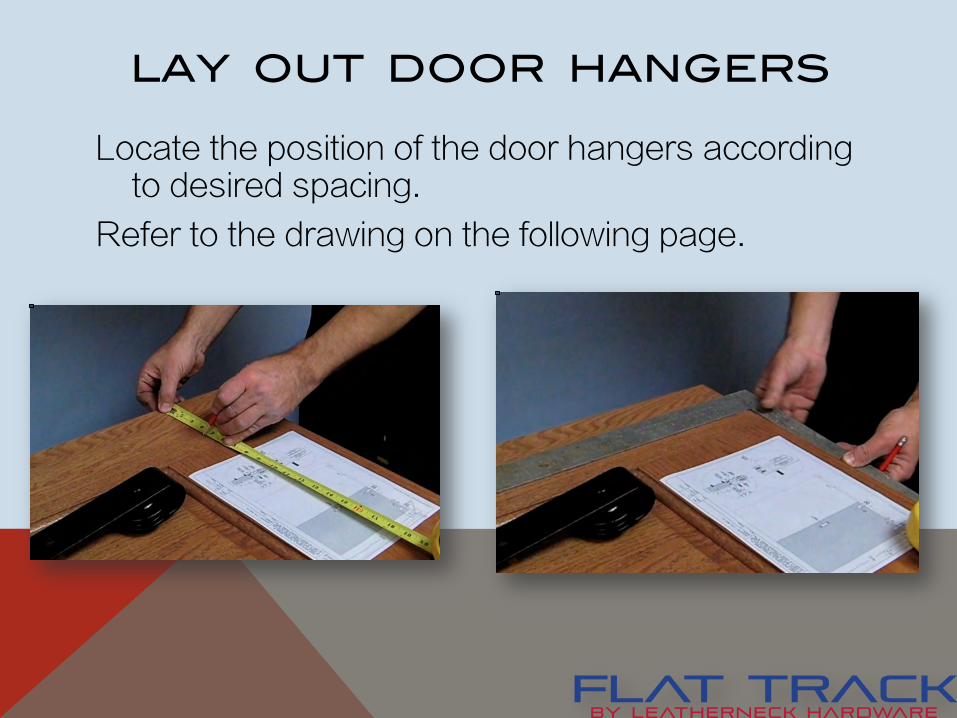
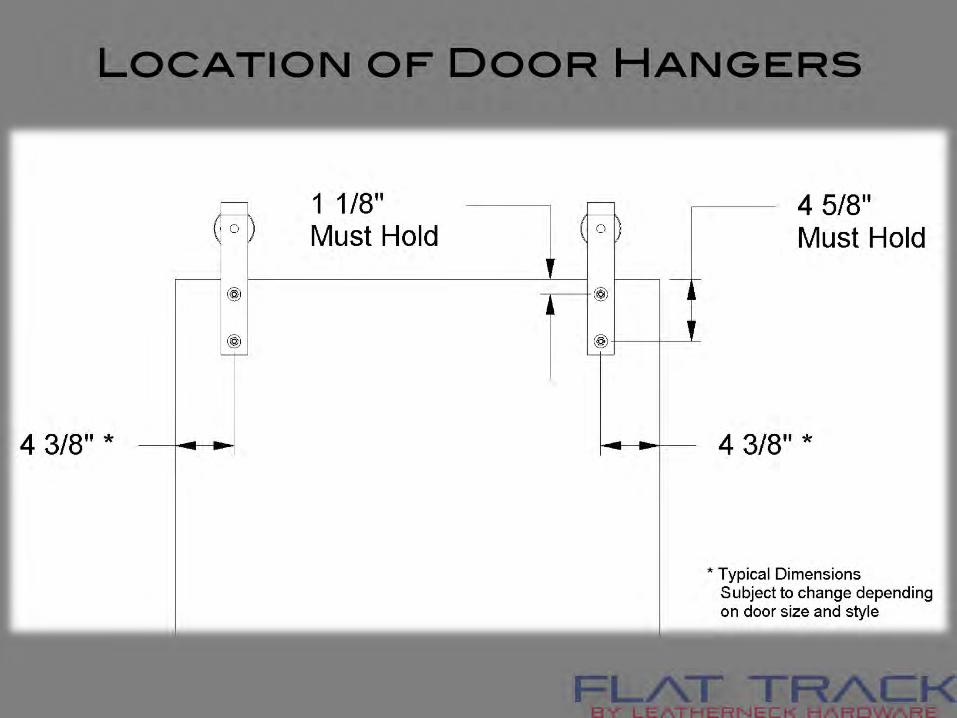
LAY OUT DOOR HANGERS!
Locate the position of the door hangers according to desired spacing.
Refer to the drawing on the following page.
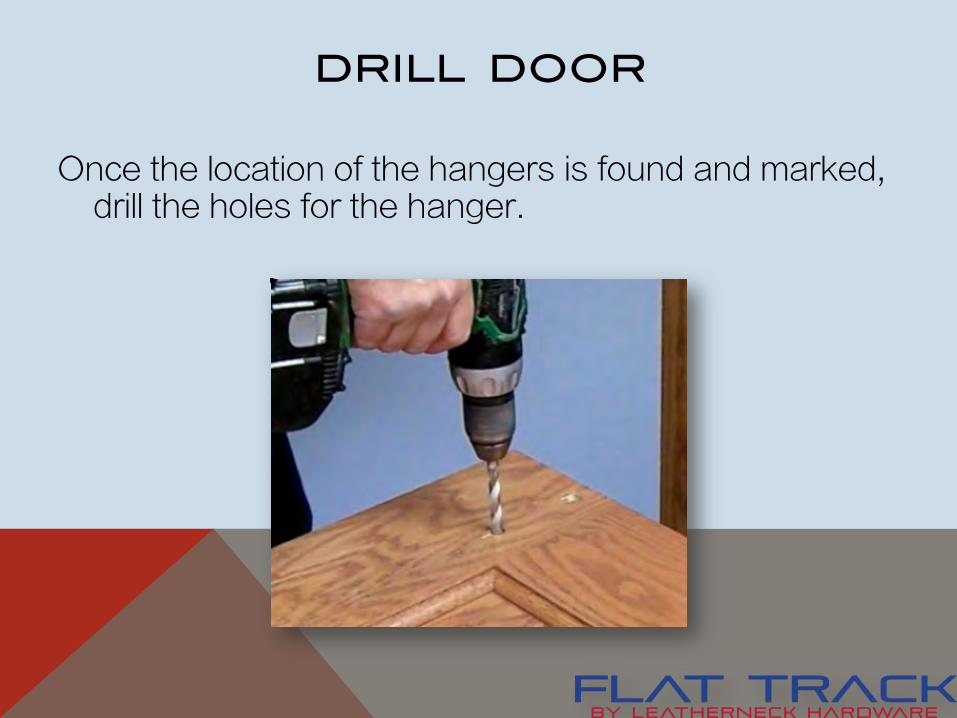
DRILL DOOR!
Once the location of the hangers is found and marked, drill the holes for the hanger.
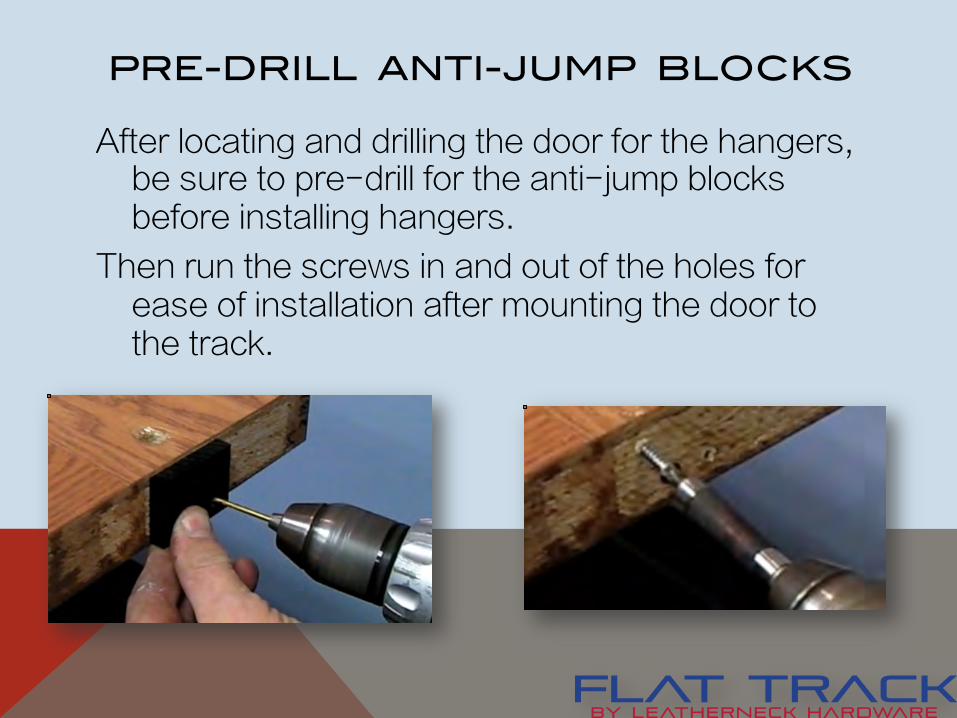
PRE-DRILL ANTI-JUMP BLOCKS!
After locating and drilling the door for the hangers, be sure to pre-drill for the anti-jump blocks before installing hangers.
Then run the screws in and out of the holes for ease of installation after mounting the door to the track.

ATTACH HANGERS TO DOOR!
Place hanger on the door, insert the carriage bolt from the back side, and fasten down with the flat washers and acorn nuts.

HANG THE DOOR!Once the hardware is fastened down, place the door
on the track.
Make sure the door is in position for the floor guide to run through the channel, or around the door, depending on style of guide.
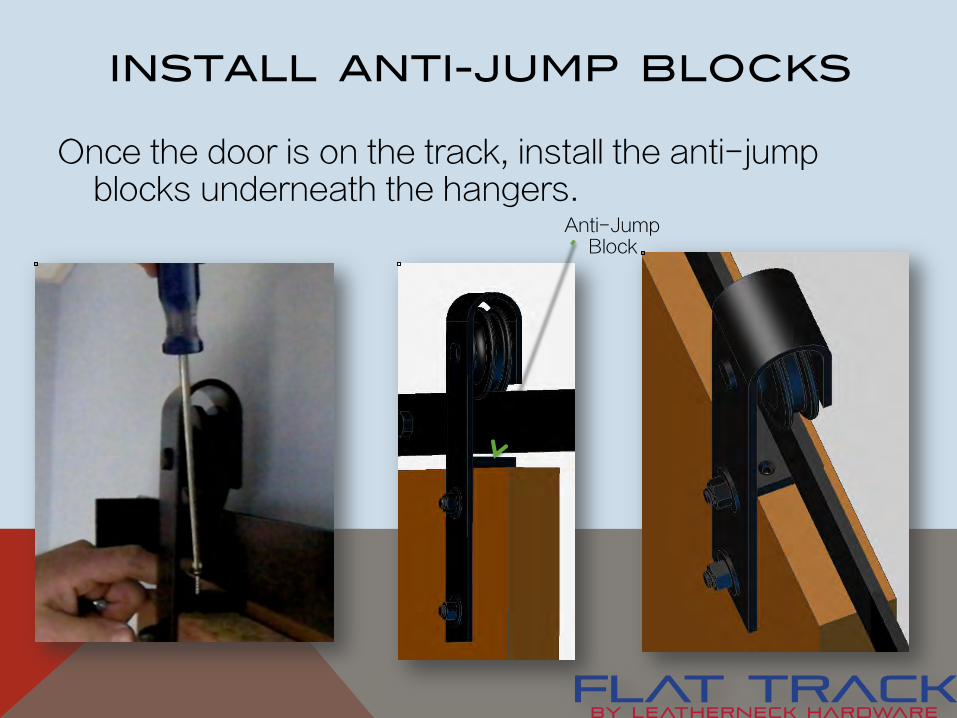
INSTALL ANTI-JUMP BLOCKS!
Once the door is on the track, install the anti-jump blocks underneath the hangers.
Anti-Jump Block
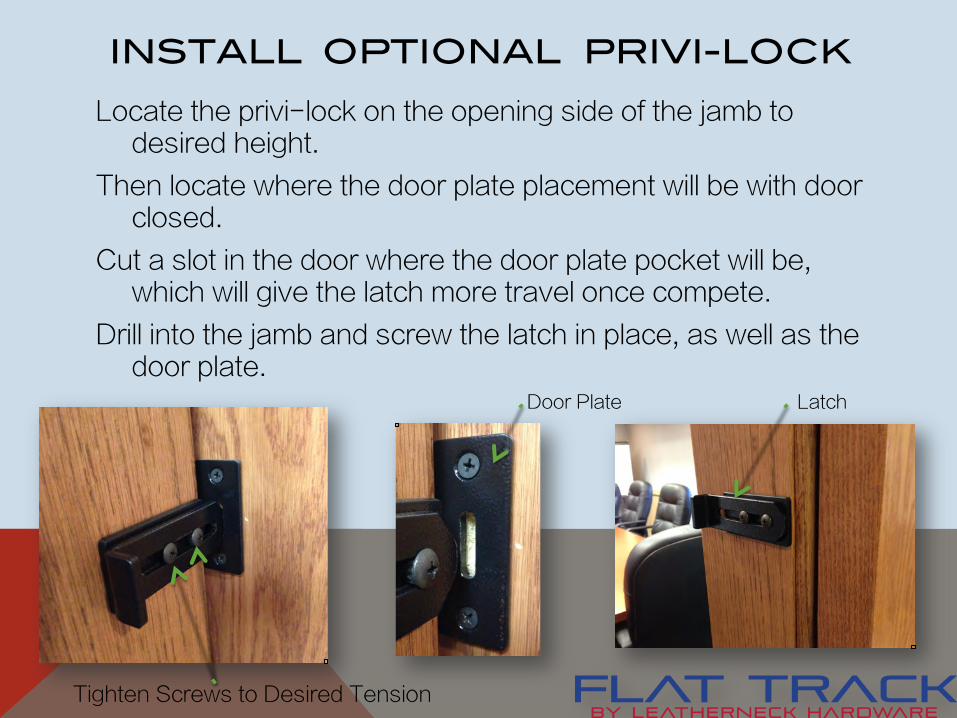
INSTALL OPTIONAL PRIVI-LOCK!Locate the privi-lock on the opening side of the jamb to
desired height.
Then locate where the door plate placement will be with door closed.
Cut a slot in the door where the door plate pocket will be, which will give the latch more travel once compete.
Drill into the jamb and screw the latch in place, as well as the door plate.
Tighten Screws to Desired Tension
Latch Door Plate

leatherneck
h
ard w are, inc.
★ ★
Thank you for choosing Leatherneck Hardware for your specialty sliding door needs.
For additional information, contact us at [email protected], or call toll free at
888-442-4572.