infinity connect guide for administrators administrators and conference organizers can also provide...
TRANSCRIPT

Infinity ConnectGuide for Administrators
Introduction
About Pexip Infinity and Infinity ConnectPexip Infinity is a distributed conferencing platform. It provides any number of users with their own personal Virtual Meeting Rooms, as well as Virtual Auditoriums, which they can use to hold conferences, share presentations, and chat. Participants can join over audio or video from virtually any type of communications tool (such as Microsoft Lync, a traditional conferencing endpoint, a mobile telephone, or a Pexip Infinity Connect client) for a seamless meeting experience.
Pexip Infinity also includes a gateway service, allowing end users to place point-to-point calls to other endpoints that use different protocols and media formats.
Infinity Connect clientsThe Infinity Connect suite of clients allows conference participants to access any Virtual Meeting Room or Virtual Auditorium within the Pexip Infinity deployment. Infinity Connect users can also control the conference, view presentations, share content, and chat. Infinity Connect can also be used to make outbound point-to-point calls when used in conjunction with the Pexip Distributed Gateway.
All Infinity Connect clients can make outbound calls; the Infinity Connect desktop client and Infinity Connect Mobile client for Android can also register to Pexip Infinity in order to receive incoming calls.
Infinity Connect clients are available for almost any device:
l The Infinity Connect Web App is included as part of all Pexip Infinity deployments. It is used to access Pexip Infinity services from all of the major web browsers and provides voice, video, content sharing and viewing, chat, and conference control.
l The Infinity Connect desktop client is an installable client, supported on Windows, OS X, and Linux. It provides voice, video, content sharing and viewing, chat, and conference control.
l The Infinity Connect Mobile client for Android due for release in August 2015 provides voice, video, content sharing and viewing, chat, and conference control.
l The Infinity Connect Mobile client for iOS due for release in August 2015 provides voice, video, content viewing, image sharing and conference control. Chat will be added in a future release.
© 2015 Pexip AS Version 10.a July 2015 Page 1 of 22

Infinity Connect Guide for Administrators Introduction
© 2015 Pexip AS Version 10.a July 2015 Page 2 of 22
Infinity Connect guides for end usersWe publish a series of quick guides aimed at users of the Infinity Connect desktop client, the Infinity Connect Web App when used in different browsers, and the Infinity Connect Mobile client for iOS and for Android. These guides are available in PDF format from http://docs.pexip.com/admin/download_pdf.htm.
About this guideThis guide covers topics not included in the quick guides, including those that are only relevant to an administrator.

Infinity Connect Guide for Administrators Comparison of Infinity Connect clients
© 2015 Pexip AS Version 10.a July 2015 Page 3 of 22
Comparison of Infinity Connect clientsPexip Infinity Connect is available in three main formats:
l directly from a web browser (the Infinity Connect Web App)
l as an installable desktop application (the Infinity Connect desktop client)
l as an installable application for iOS or Android devices (the Infinity Connect Mobile client).
There are some differences in features available between the different clients and browsers, as shown in the table below:
Presentation and control-only mode
Audio-only mode
Full audio and video mode
PDF sharing
Image sharing
Screen sharing
View presentations in full motion
Send DTMF to individual participants
Chat Register to receive calls
Desktop client
✓ ✓ ✓ ✓ ✓ ✓ ✓ ✓ ✓ ✓
Web App via Chrome
✓ ✓ ✓ ✓ ✓ ✓ * ✓ ✓ ✓
Web App via Internet Explorer
✓ ✓ ✓ ✓ ✓ ✓
Web App via Firefox
✓ ✓ ✓ ✓ ✓ ✓ ✓ ✓
Web App via Safari
✓ ✓ ✓ ✓ ✓ ✓
Web App via Opera
✓ ✓ ✓ ✓ ✓ ✓ ✓ ✓
Mobile client for Android
✓ ✓ ✓ ✓ ✓ ✓ ✓ ✓ ✓
Mobile client for iOS
✓ ✓ ✓ ✓
* Requires installation of a Chrome extension

Infinity Connect Guide for Administrators Installing and using Infinity Connect
© 2015 Pexip AS Version 10.a July 2015 Page 4 of 22
Installing and using Infinity Connect
About the Infinity Connect Web AppThe Infinity Connect Web App is available as part of all Pexip Infinity deployments. It provides access to Pexip Infinity services from any of the following browsers:
l Google Chrome version 27 and later
l Mozilla Firefox version 20 and later
l Opera version 23 and later
l Microsoft Internet Explorer version 10 and later (requires Flash Player 11 and later ActiveX® plug-in, and must not be in Compatibility View)
l Apple Safari version 6 and later (Mac OS X only) (requires Flash Player 11 and later plug-in)
Infinity Connect users can share images and PDFs from any browser. Additionally, Chrome users can share their screen if they first install a chrome extension. The screen-sharing feature is not available from other browsers but is available from the Infinity Connect desktop client.
To access a conference using the Infinity Connect Web App, users enter into the address bar the IP address or domain name of their nearest Conferencing Node or reverse proxy, followed by /webapp/ (for example, rp.example.com/webapp/). Users are then presented with a screen from where they can then enter the alias of the conference or person they want to call.
System administrators and conference organizers can also provide a preconfigured link to a conference alias.
Note that:
l Chrome, Firefox and Opera browsers can connect to privately-addressed "on-premises" nodes via a reverse proxy and route their media through a TURN server (as they use the WebRTC protocol).
l Internet Explorer and Safari browsers need a direct TCP connection to a Conferencing Node (as they use the RTMP protocol and thus cannot use ICE/TURN). The Web App will attempt an encrypted RTMPS connection first. For a secure RTMP connection to be established, the SIP TLS FQDN must be configured on the Conferencing Node (via Platform configuration > Conferencing Nodes) and it must match the Common Name of its TLS server certificate. If RTMPS fails, it will use an unencrypted connection for media.

Infinity Connect Guide for Administrators Installing and using Infinity Connect
© 2015 Pexip AS Version 10.a July 2015 Page 5 of 22
Installing and managing Chrome extensions
Enabling screen sharing in Chrome
Before you can use Infinity Connect via Google Chrome to share your computer screen with other conference participants, you must install the Pexip Screensharing Extension (screensharing is not currently available from any other browser).
To download the extension:
1. Go to http://www.pexip.com/extension and click on the link provided there.This will take you to the Pexip Screensharing Extension on the Chrome web store.
2. Download the extension by clicking on the button at the top right of the page.The following confirmation will appear:
3. Select Add.
You are now ready to share your screen.
Managing the Pexip Screensharing Extension
The Pexip Screensharing Extension maintains a list of all of the domains (or websites) that you have allowed to use the extension.
To remove domains from this list:
1. Go to chrome://extensions (type this in to your Chrome browser's address bar).
2. Select Options under the Pexip Screensharing Extension.
3. Select X by any domain you want to remove.
If you subsequently attempt to share your computer screen while participating in a conference hosted at a domain that you have removed, you will once again be asked to allow the Pexip Screensharing Extension to share your screen.
About the Infinity Connect desktop clientThe Infinity Connect desktop client is released separately to Pexip Infinity, and may have been updated since this Administrator Guide was released. For the most up-to-date Infinity Connect desktop client user documentation, see Introduction to Pexip Infinity.
The Pexip Infinity Connect desktop client is a stand-alone video client that provides access to Pexip Infinity services. It is currently supported on:
l Microsoft Windows 7 and later
l Mac OS X 10.7 and later
l Ubuntu Linux
The initial release of the Infinity Connect desktop client does not verify TLS certifications and therefore should not be used on untrusted networks.

Infinity Connect Guide for Administrators Installing and using Infinity Connect
© 2015 Pexip AS Version 10.a July 2015 Page 6 of 22
Installing the Infinity Connect desktop clientTo install the Infinity Connect desktop client, go to www.pexip.com/software-download and download and install the appropriate file for your OS:
l Windows: pexip-infinity-connect_windows-ia32_<release>.msi. Click on this file to install the Infinity Connect desktop client automatically. During the installation process the Infinity Connect icon will be added to the desktop, and an entry will be added to the Windows registry to allow links prefixed with pexip: to open automatically in the Infinity Connect desktop client.
l OS X: pexip-infinity-connect_osx-ia32_<release>.zip. Unzip this file and move it to the desired folder.
l Linux 32-bit: pexip-infinity-connect_linux-ia32_<release>.tar.gz. Unzip this file and move it to the desired folder.
l Linux 64-bit: pexip-infinity-connect_linux-x64_<release>.tar.gz. Unzip this file and move it to the desired folder.
When users open the desktop client, they are asked to enter the alias of the conference or person they want to call (for example [email protected]).
System administrators and conference organizers can also provide a preconfigured link to a conference alias.
About the Infinity Connect Mobile client for AndroidThe Infinity Connect Mobile clients are released separately to Pexip Infinity, and may have been updated since this Guide was released. For the most up-to-date Infinity Connect Mobile client user documentation, see Introduction to Infinity Connect.
The Infinity Connect Mobile client for Android can be used by conference participants to control the conference and view presentations from their own personal device, even when they are using a separate video endpoint to participant in the conference.
In addition, the latest release of the Infinity Connect Mobile client for Android also includes the ability to join a conference over audio-only, or as a full audio and video participant, allowing users to participate in a conference from anywhere they have an internet connection.
Most standard Infinity Connect features are available to Infinity Connect Mobile client users, along with these additional features:
l View the presentation on their personal device.
o Video participants can elect to use their video endpoint just for viewing other participants, while viewing the presentation on their device - essentially providing them with a dual-screen video system.
o Audio-only participants will be able to view the presentation on their personal device, enhancing their conference experience.
l Decide where they want to view the presentation: on their mobile device, on the video endpoint, or both.
l Zoom in on the presentation on their device, allowing them to see details that would otherwise not be visible from a distance on the screen.
Installing the Infinity Connect Mobile client for AndroidThe Infinity Connect Mobile client for Android requires Android 4.0 or later.
It is available for free from the Google Play store at https://play.google.com/store/apps/details?id=com.pexip.android. Follow the instructions to download and install the Infinity Connect Mobile client on your device.

Infinity Connect Guide for Administrators Installing and using Infinity Connect
© 2015 Pexip AS Version 10.a July 2015 Page 7 of 22
When installing the Infinity Connect Mobile client for Android, it will request permission to access the contacts/calendar on your device:
You must accept this request to continue with the installation.
Pexip for SECTOR NetworkSpecial versions of the Infinity Connect Mobile client, called Pexip for SECTOR Network, are also available for iOS and Android. These versions are for use in enterprises that require all mobile apps to work with management solutions based on OpenPeak's ADAM platform, and include additional security features, functionality, and IT management capabilities. For more information, see www.pexip.com/article/news/pexip-app-for-sector-network.
Pexip for SECTOR Network for Android is available for free from the Google Play store at https://play.google.com/store/apps/details?id=com.pexip.android.SEC_APP.
About the Infinity Connect Mobile client for iOSThe Infinity Connect Mobile clients are released separately to Pexip Infinity, and may have been updated since this Guide was released. For the most up-to-date Infinity Connect Mobile client user documentation, see Introduction to Infinity Connect.
The Infinity Connect Mobile client for iOS can be used by conference participants to control the conference and view presentations from their own personal device, even when they are using a separate video endpoint to participant in the conference.
In addition, the latest release of the Infinity Connect Mobile client for iOS also includes the ability to join a conference over audio-only, or as a full audio and video participant, allowing users to participate in a conference from anywhere they have an internet connection.
Most standard Infinity Connect features are available to Infinity Connect Mobile client users, along with these additional features:
l View the presentation on their personal device.
o Video participants can elect to use their video endpoint just for viewing other participants, while viewing the presentation on their device - essentially providing them with a dual-screen video system.
o Audio-only participants will be able to view the presentation on their personal device, enhancing their conference experience.
l Decide where they want to view the presentation: on their mobile device, on the video endpoint, or both.
l Zoom in on the presentation on their device, allowing them to see details that would otherwise not be visible from a distance on the screen.
Installing the Infinity Connect Mobile client for iOSThe Infinity Connect Mobile client for iOS is available for free from the Apple Store at https://itunes.apple.com/us/app/pexip/id667867771. Follow the instructions to download and install the client on your device.
Infinity Connect Guide for Administrators Installing and using Infinity Connect
© 2015 Pexip AS Version 10.a July 2015 Page 8 of 22
l Version 4.0 is compatible with any iOS device running 8.x or later, and Pexip Infinity version 7 or later.
l Version 3.0 is compatible with any iOS device running 8.x or later, and Pexip Infinity version 9.x and earlier. This version introduced support for joining a call using video and audio.
l Version 1.1 is compatible with any iOS device running iOS 7.x or 8.x, and is optimized for iPhone 5.
l Version 1.0.3 is available for devices running earlier iOS versions (iOS 5.1 to iOS 6.x).
Pexip for SECTOR NetworkSpecial versions of the Infinity Connect Mobile client, called Pexip for SECTOR Network, are also available for iOS and Android. These versions are for use in enterprises that require all mobile apps to work with management solutions based on OpenPeak's ADAM platform, and include additional security features, functionality, and IT management capabilities. For more information, see www.pexip.com/article/news/pexip-app-for-sector-network.
Pexip for SECTOR Network for iOS will be available for free from the Apple store soon.
Registering your device to receive callsIf you want to be able to receive calls on your Infinity Connect desktop client, Infinity Connect Mobile client on Android, or your SIP endpoint, you must first register it with Pexip Infinity using an alias, username, and password provided by your system administrator. These credentials must match a registration entry on Pexip Infinity in order for the registration to be accepted.
Infinity Connect clientsTo register your Infinity Connect desktop client or Infinity Connect Mobile client for Android to receive calls (if this is supported in your deployment):
1. Select Settings at the top left of the Infinity Connect window.
2. In the Registration section of the Settings page, enter the Server address, Alias, User name and Password provided to you by your administrator.
3. Select Remember password.
4. Select Register.
When you have successfully registered, the button will change to Unregister, and when you return to the home page there will be a green icon next to your name and your registered alias will be shown underneath:
.
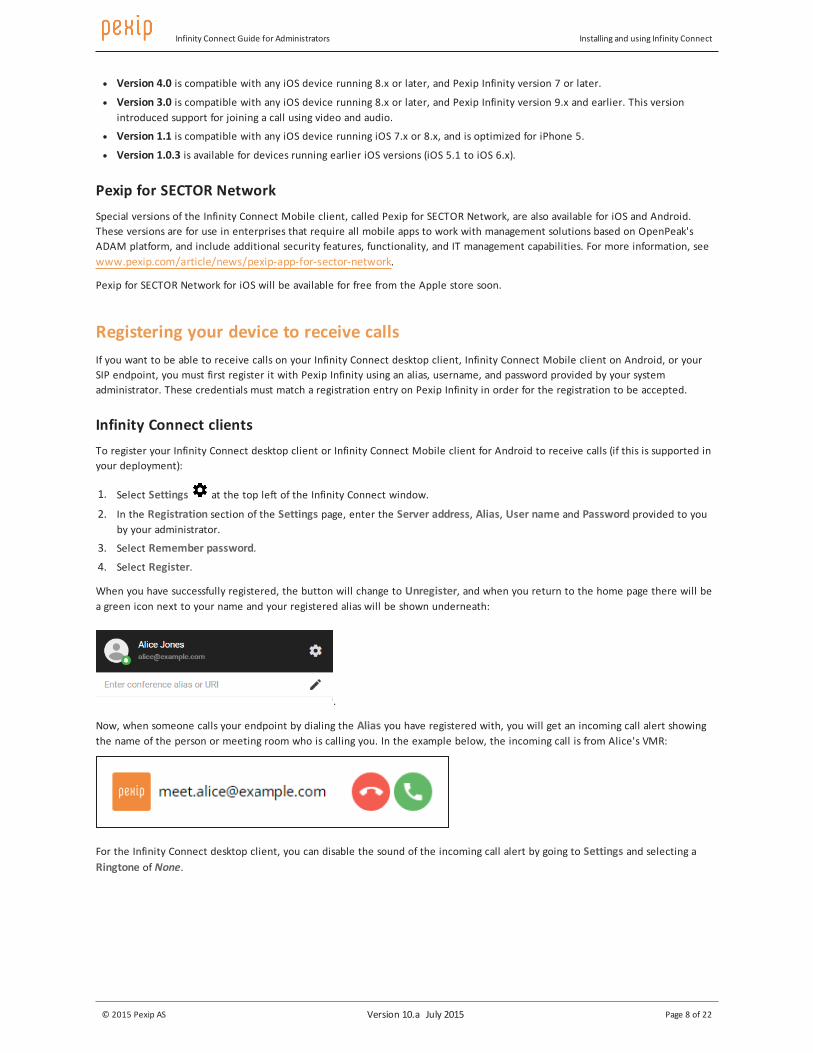
Now, when someone calls your endpoint by dialing the Alias you have registered with, you will get an incoming call alert showing the name of the person or meeting room who is calling you. In the example below, the incoming call is from Alice's VMR:
For the Infinity Connect desktop client, you can disable the sound of the incoming call alert by going to Settings and selecting a Ringtone of None.

Infinity Connect Guide for Administrators Installing and using Infinity Connect
© 2015 Pexip AS Version 10.a July 2015 Page 9 of 22
Configuring a default domainIf you frequently use Virtual Meeting Rooms and Virtual Auditoriums that have aliases with the same domain, you can configure the Infinity Connect desktop client and Infinity Connect Mobile client so that you only need to enter the initial part of the alias. For example, if you often access Virtual Meeting Rooms with the aliases [email protected], [email protected] and [email protected], you could configure the Infinity Connect Mobile client with a Domain of example.com, so that you only need to enter meet.alice, meet.bob or meet.sales in the URI field in order to join the Virtual Meeting Room.
If you have set up a preconfigured domain, you can still enter Virtual Meeting Room and Virtual Auditorium aliases that use a different domain. Just enter the full URI in the URI field - the preconfigured domain will be ignored.
Infinity Connect desktop client and Infinity Connect Mobile client for AndroidTo preconfigure the Infinity Connect Mobile client for Android with a domain:
1. Select Settings at the top left of the Infinity Connect window.
2. In the Connections section, enter the Default domain.
Infinity Connect Mobile client for iOSTo preconfigure the Infinity Connect Mobile client for iOS with a domain:
1. Select Connection settings.
2. In the Domain field, enter the domain.
3. Select Done.

Infinity Connect Guide for Administrators Installing and using Infinity Connect
© 2015 Pexip AS Version 10.a July 2015 Page 10 of 22
Using Infinity Connect to share contentYou can use Infinity Connect to share content such as images and PDFs, or what's on your screen, with other participants. What you can share depends on which of the Infinity Connect clients you are using.
If you are already in the call using another video endpoint, you can open and use Infinity Connect just to share content - for example, if you have joined the conference from a meeting room with a dedicated endpoint, and you want to show a presentation from your laptop without worrying about finding and connecting the correct cables.
Sharing your screenScreen sharing is available from:
l the Infinity Connect desktop client
l the Infinity Connect Web App via Chrome (requires the installation of a Chrome extension).
To share your screen:
1. For Chrome users, ensure you have enabled screen sharing.
2. From the toolbar at the bottom of the screen, select Start presenting .
3. The first time that you use Infinity Connect via Chrome to share your screen from a conference hosted at a particular domain, a confirmation window will appear:
Select OK to confirm that you want to share your screen.
4. Select either the entire screen or the individual window you want to share, and then select Share.

Infinity Connect Guide for Administrators Installing and using Infinity Connect
© 2015 Pexip AS Version 10.a July 2015 Page 11 of 22
Sharing images and PDFsYou can share images from any Infinity Connect client; you can share PDFs from:
l the Infinity Connect desktop client
l the Infinity Connect Web App
l Infinity Connect Mobile client for Android
To share images or PDFs:
1. From the toolbar at the bottom of the screen, select Share image or PDF .
The Share slides screen will appear:
2. Select add files, or drag and drop the file(s) you want to share into the Infinity Connect window. You can add multiple files, and they can be a combination of images and PDFs (if supported by your device). Each image will be converted into an individual slide, as will each page of each PDF.
3. Select Start presenting and use the left < and right > controls at the top of the screen to scroll through the slides.
4. To stop sharing the slides, from the toolbar select Stop presenting .
Using Infinity Connect just to share contentIf you are in a conference using an endpoint other than Infinity Connect and you want to share content from your computer or mobile device:
1. Open the Infinity Connect client and enter the details of the Virtual Meeting Room or Virtual Auditorium you are in.
2. From the toolbar, select Start presenting (Infinity Connect desktop client and Infinity Connect Web App via Chrome only),
or Share image or PDF .
Using Infinity Connect for presentation, chat and conference control onlyIf you are already in a conference using an endpoint other than Infinity Connect, you can still access the additional features available to Infinity Connect users (such as conference control, chat, content sharing, and viewing the participant list) by using Infinity Connect to join the conference without audio or video.
To do this, simply open an Infinity Connect client and connect to the conference, but do not take the final step of joining over audio or video.
You can now view and share content, send and receive chat messages, view the participant list, and (if you are a Host) control aspects of the conference such as adding participants, muting participants, disconnecting participants, and locking the conference.

Infinity Connect Guide for Administrators Installing and using Infinity Connect
© 2015 Pexip AS Version 10.a July 2015 Page 12 of 22
Using Infinity Connect in-call controlsThe table below shows the actions that can be performed while a call is in progress. Note that this table includes all features available to the Infinity Connect desktop client, the Mobile client for Android, and the Web App, although not all features are available to all clients. For the features that are available to the Infinity Connect Mobile client for iOS, see the Infinity Connect Mobile client for iOS Quick Guide.
Select the microphone and camera to use prior to joining over video/audio
Desktop client, Mobile client for Android, Web App for Chrome and Opera
1. At the right of the video preview thumbnail select .
2. Select the desired microphone and camera from the drop-down menus.
3. Select START.
Web App for Internet Explorer and Safari
1. At the right of the video preview window select .
2. Select the desired microphone and camera from the drop-down menus.
3. Click on the Microphone and Camera tabs and select from the drop-down menus:
Web App for Firefox
1. When requested by Firefox, from the dropdown menus select the microphone and camera to use, and then select Always share:
2. At the right of the video preview window select .
3. Select the desired microphone and camera from the drop-down menus.
4. Select START.
Share your screen with all other participants
(Available to Infinity Connect desktop client and Infinity Connect Web App via Chrome users only)
1. For Chrome users, ensure that you have enabled screen sharing.
2. From the toolbar at the bottom of the window, select Start presenting.
3. Select the window or screen you want to share.

Infinity Connect Guide for Administrators Installing and using Infinity Connect
© 2015 Pexip AS Version 10.a July 2015 Page 13 of 22
Share images or PDFs with all other participants
1. From the toolbar at the bottom of the window, select Share image or PDF.
2. Drag and drop the file(s) you want to share into the Infinity Connect window. You can add multiple files, and they can be a combination of images and PDFs. Each image will be converted into an individual slide, as will each page of each PDF.
3. Select Start presenting. The first slide will appear in a presentation thumnail at the top left of the screen. Use the left < and right > controls to scroll through the slides. You can make the slides appear in your main video window by clicking on the presentation thumbnail.
4. To stop sharing the slides, from the toolbar select Stop presenting.
View a presentation being shown by another participant
When a participant starts a presentation, you will automatically see the content they are sharing as your main image, and the image of the participants will reduce to a small thumbnail at the top left corner.
You can toggle between viewing the presentation and viewing the participants by clicking on the thumbnail.
View a presentation at a higher (or lower) refresh rate
When a participant is showing a presentation, by default you receive it as a series of still images. This is suitable for documents and screens being shared, but if the presentation contains a lot of movement it may appear jerky. If this is the case, you can elect to receive the presentation in full motion.
To do this, from the bottom right of the screen select click View full motion presentation. To return to the default view, select View still image presentation.
Stop/start sending your video to other participants
From the toolbar at the bottom of the window, select Disable my camera or Enable my camera.
Stop/start sending your audio to other participants
From the toolbar at the bottom of the window, select Mute my microphone or Unmute my microphone.
View the video image full screen/exit fullscreen
From the toolbar at the bottom of the window, select Go full screen or Exit full screen.
Stop/start viewing the video of yourself
The video of yourself that is being sent to other participants is shown in a thumbnail at the top right of the screen. To hide this, select the Hide self
view icon at the top right of the image. It will be replaced by a small Show self view icon; select this to view your image again.
Send DTMF tones (Requires Host privileges; you must be joined over audio or video and audio)
From the participant list, select the participant to whom you want to send DTMF tones, and then select Keypad.
This feature is generally used to communicate with external systems (such as audio bridges, automated switchboards, and recording devices) after they have been added to the conference.
Send and receive chat messages
(Available when chat has been enabled by the administrator)
At the bottom of the screen there is a Chat room area, which shows the messages sent by participants in the conference. To send a message, type it in the bottom window. Messages are visible to everyone else in the conference with a chat-capable client (such as Lync or Infinity Connect).

Infinity Connect Guide for Administrators Installing and using Infinity Connect
© 2015 Pexip AS Version 10.a July 2015 Page 14 of 22
View a list of other conference participants
When using Infinity Connect, a list of all other conference participants will be shown to the left of or at the bottom of the screen. You can scroll through this list, or use the search box at the top of the list, to view other participants.
You can show and hide this participant list by clicking on the Hide side bar < and Show side bar > icons at the bottom right of the list.
Prevent/allow others from joining the conference
(Requires Host privileges)
From the top left of the screen, select the menu icon and then select Lock conference or Unlock conference.
The impact of locking depends on whether or not the Virtual Meeting Room or Virtual Auditorium being used has a Host PIN. For more information, see Locking a conference and allowing participants to join a locked conference.
Add a participant to the conference
(Requires Host privileges)
1. At the top left of the screen, select the menu icon and then select Add a new participant.
2. At the prompt, enter the address of the person you want to dial.
3. If you want to use a protocol other than SIP (the default) select either H.323 or Lync. RTMP is typically used when connecting to a streaming or recording service.
4. Select whether you want the participant to have Host or Guest privileges.
5. Select OK.
Mute/unmute another participant
(Requires Host privileges)
From the participant list, to the right of the participant's name select Mute participant or Unmute participant.
Muting all Guests (Requires Host privileges)
From the top left of the screen, select the menu icon and then select Mute all guests.
.
Disconnect another participant
(Requires Host privileges)
Select the participant's name and then select Disconnect.
Disconnect all participants (including yourself)
(Requires Host privileges)
From the top left of the screen, select the menu icon and then select Disconnect all participants.
Disconnect yourself from the conference
From the toolbar at the bottom of the screen, select Disconnect.
View diagnostic information about your call
From the bottom right of the screen, select Call statistics.

Infinity Connect Guide for Administrators Installing and using Infinity Connect
© 2015 Pexip AS Version 10.a July 2015 Page 15 of 22
Locking a conference and allowing participants to join a locked conferenceIf you want to prevent any further participants from joining a conference after it has started, you can lock it by either using the Administrator interface or using Infinity Connect. After a conference has been locked, participants who are attempting to join the conference can be allowed in individually by participants already in the conference.
The impact of locking depends on whether or not the Virtual Meeting Room or Virtual Auditorium being used has a Host PIN.
If the service does not have a Host PIN:
l Participants will be able to join the conference until it is locked.
l After the conference has been locked, any further participants who attempt to join the conference (including any Automatically Dialed Participants and manually-invited participants) will be held at the Waiting for conference host screen.
l All participants who are already in the conference will be notified of any participants who are attempting to join the locked conference, and will be able to allow the waiting participants to join.
l When the conference is unlocked, any participants who are still waiting will automatically join the conference.
If the service has a Host PIN:
l Host and Guest participants will be able to join the conference until it is locked.
l After the conference has been locked, participants who enter the Host PIN will be able to join the conference immediately - locking does not apply to them.
l After the conference has been locked, Guest participants (including any Automatically Dialed Participants and manually-invited participants who have been given a role of Guest) will be held at the Waiting for conference host screen.
l All Host participants who are already in the conference will be notified of any Guest participants who are attempting to join the locked conference, and will be able to allow the waiting Guest participants to join.
l When the conference is unlocked, any Guest participants who are still waiting will automatically join the conference.
Locking using the Administrator interfaceTo lock or unlock a conference from the Administrator interface:
1. Log into the Pexip Infinity Administrator interface.
2. Go to Status > Conferences.
3. From the Service name column, select the conference you want to lock or unlock.
4. At the bottom left of the page, select Lock conference or Unlock conference as appropriate.
Locking using Infinity ConnectHost participants using Infinity Connect can lock and unlock the conference they are in by clicking on the conference control menu
and selecting Lock conference or Unlock conference as appropriate:
A "locked" icon will appear next to the conference avatar to indicate that the conference is currently locked.
Allowing waiting participants to join a locked conferenceWhen a new participant attempts to join a locked conference, Host participants in the conference will be notified that the
participant is waiting to join, and will see a red "waiting" icon next to the participant's avatar. To allow the participant to join
the locked conference they can click on the green telephone icon next to the participant's name:

Infinity Connect Guide for Administrators Installing and using Infinity Connect
© 2015 Pexip AS Version 10.a July 2015 Page 16 of 22
In the above example, Bob is waiting to join Alice's locked VMR. Alice is a Host, so can let him join at any time by clicking on the green telephone icon next to Bob's name.
Rejecting a request to join a locked conferenceIf a Host does not want a waiting participant to join the conference immediately, they have two options:
l To reject the request completely, the Host participant must click on the red telephone icon next to the waiting participant's name. The waiting participant's call will be disconnected.
l To leave the participant at the waiting for Host screen, the Host participant should do nothing. The waiting participant will remain at the waiting screen until:
o a Host participant chooses to let the waiting participant join the conference, or
o the conference is unlocked (after which the waiting participant will automatically join the conference), or
o the conference finishes (after which the waiting participant's call will be disconnected).

Infinity Connect Guide for Administrators Administering Infinity Connect
© 2015 Pexip AS Version 10.a July 2015 Page 17 of 22
Administering Infinity Connect
About Infinity Connect client settingsThere are various settings available within the Infinity Connect clients. The tables below provides information about each of these.
Desktop client, Android client and Web App
Setting Description Desktop client
Android client
Web App
Your name The name for this user, which will appear to other conference participants. ✓ ✓ ✓
Registration server address
The address of the server to which the registration request will be sent. This must be the IP address or FQDN of a local Conferencing Node, or the IP address or FQDN of the reverse proxy.
✓ ✓
Registration alias The alias that this client will register with. This is the alias that other users will dial when they want to call this client.
This alias must match one of the entries on the Management Node under Service configuration > Device aliases.
✓ ✓
Registration user name and password
The username and password to be used by this device when it is registering to Pexip Infinity.
The username and password must match those configured for this alias on the Management Node under Service configuration > Device aliases.
✓ ✓
Connection default domain
The domain that will be appended to any URIs that are dialed from this client that do not already include a domain.
✓ ✓
Connection server address
The address of the server to which calls will be sent. This must be the IP address or FQDN of a local Conferencing Node, or the IP address or FQDN of the reverse proxy.
✓ ✓
Connection bandwidth
The maximum bandwidth for the call, and the bandwidth at which the initial call attempt will be made. Note that calls may be temporarily downspeeded due to network condtions.
✓ ✓
Ringtone If users do not want to hear the default ringtone when they are receiving an incoming call, they can turn it off by selecting None.
✓
Always start media immediately when connecting
When this option is selected, users will automatically join a call in full audio and video mode. The options to check and change their microphone and camera, or to join in presentation/chat/control-only mode will not be available prior to joining a call.
✓ ✓ ✓
Show confirmation dialog when disconnecting
When this option is selected, users must confirm each time they wish to disconnect from a conference. This prevents users from accidentally disconnecting themselves.
✓ ✓ ✓

Infinity Connect Guide for Administrators Administering Infinity Connect
© 2015 Pexip AS Version 10.a July 2015 Page 18 of 22
Setting Description Desktop client
Android client
Web App
View full motion presentation by default
This setting determines how presentations from other participants are initially received by this user.
Presentations can be received as a lower-bandwidth series of still images (suitable for documents and screens being shared) or a higher-bandwidth full motion stream (suitable for presentations with a lot of movement).
By default, presentations are initially shown as still images, and users can elect to view them in full motion. However, when this option is selected, presentations received by this user will always be shown in full motion by default, and the user can then elect to view it as still images.
✓ ✓ ✓ *
Send anonymous usage statistics to Pexip
When this option is selected, anonymous information about how the client is being used is sent to Pexip.
✓ ✓ ✓
* Not Internet Explorer or Safari
Mobile client for iOS
Setting Description Path
Name The name for this user, which will appear to other conference participants. From your device's home screen, go to Settings > General > About > Name.
Domain The domain that will be appended to any URIs that are dialed from this client that do not already include a domain.
From the Infinity Connect home screen, select Connection Settings > Domain.
UsernamePassword
The username and password that will be sent by the iOS client in response to an HTTP authentication request. Some connections, such as those to a reverse proxy, may require HTTP authentication.
From the Infinity Connect home screen, select Connection Settings > Username.
Obtaining diagnostic information from Infinity ConnectUsers of Infinity Connect clients can obtain information about their client's incoming and outgoing audio and video streams, which may be helpful in diagnosing issues with call quality.
To obtain this information, from the bottom right of the Infinity Connect screen, select Call statistics .
Creating preconfigured links to conferences via Infinity Connect
Links to Infinity Connect Web AppYou can provide conference participants with a URL that, when clicked, will open an instance of Infinity Connect in their default browser. You can format the URL so that it pre-fills some or all of the required fields and allows the participant to review these before joining, or you can format the URL so the participant is taken straight into the conference.
The URL is in the format:
https://<address>/webapp/?conference=<alias>&name=<name>&bw=<bandwidth>&pin=<PIN>&join=<join>&role=<role>&media=<media>&audioonly=<audioonly>

Infinity Connect Guide for Administrators Administering Infinity Connect
© 2015 Pexip AS Version 10.a July 2015 Page 19 of 22
where:
l <address> is the IP address or domain name of the Conferencing Node or reverse proxy
l <alias> is one of the aliases for the Virtual Meeting Room or Virtual Auditorium the user will join
l <name> is the name of the user who is joining the conference
l <bandwidth> is the bandwidth in kbps, and can be any number between 256 and 1864
l <PIN> is either the Host or Guest PIN, if required
l <join> is 1 if you want the participant to automatically join the conference, otherwise it is not present
l <role> is either host or guest and is used when the URL does not contain a PIN (for example, to allow Guests to automatically join a conference that has no Guest PIN). However, if the URL already specifies a <PIN>, the PIN will determine the participant's role and the <role> will be ignored.
l <media> is 1 if you want to start your camera and microphone immediately after joining.
l <audioonly> is 1 if you want to start an audio-only call (must be used in conjunction with media=1).
The URL must always include https://<address>/webapp/?; the remainder of the fields are optional, as follows:
l If a field is not specified in the URL but is required when logging in (i.e. alias, name, or PIN if the conference uses PINs), the participant will be required to provide the information themselves before they can join the conference.
l If the bandwidth is not specified in the URL and the participant has not previously selected a different value, the default of 576 will be used.
Examples
l If the domain name of your reverse proxy is conference.example.com, and there is a Virtual Meeting Room with the alias meet.alice, which has no PIN, the URL for Bob to join it directly would be:
https://conference.example.com/webapp/?conference=meet.alice&name=Bob&join=1 l If we then gave the same Virtual Meeting Room a Host PIN of 1234 but no Guest PIN, the URL for Bob to join it directly as a
Host would be:
https://conference.example.com/webapp/?conference=meet.alice&name=Bob&pin=1234&join=1and the URL for Bob to join it directly as a guest would be:
https://conference.example.com/webapp/?conference=meet.alice&name=Bob&join=1&role=guestand the URL for Bob to join it directly as an audio-only guest would be:https://conference.example.com/webapp/?conference=meet.alice&name=Bob&join=1&role=guest&media=1&audioonly=1

Infinity Connect Guide for Administrators Administering Infinity Connect
© 2015 Pexip AS Version 10.a July 2015 Page 20 of 22
Links to Infinity Connect desktop clientYou can create a URL that, when clicked, will open an instance of the Infinity Connect desktop client with the conference name pre-filled. This URL can be included in web pages or emails (but note that some email clients such as Gmail will strip them out for security reasons).
This URL is in the format:
pexip:<alias>
where:
l <alias> is one of the aliases for the Virtual Meeting Room or Virtual Auditorium the user will join.
Example
For example, Alice's personal meeting room has the alias [email protected] so she includes the following text in her email footer:
l Video: <a href="pexip:[email protected]">[email protected]</a>
which displays as:
l Video: [email protected]
Now, when someone who has the Infinity Connect desktop client installed clicks on the link in her email, the client will open automatically with [email protected] already entered, and all they need to do is select Connect.
Using Infinity Connect from outside your networkIn most cases, your Pexip Infinity deployment will be located inside a private network. If this is the case and you wish to allow Infinity Connect users who are located outside your network (for example on another organization's network, from their home network, or the public internet) to connect to your deployment, note that:
l Chrome, Firefox and Opera browsers can connect to privately-addressed "on-premises" nodes via a reverse proxy and route their media through a TURN server (as they use the WebRTC protocol).
l Internet Explorer and Safari browsers need a direct TCP connection to a Conferencing Node (as they use the RTMP protocol and thus cannot use ICE/TURN). The Web App will attempt an encrypted RTMPS connection first. For a secure RTMP connection to be established, the SIP TLS FQDN must be configured on the Conferencing Node (via Platform configuration > Conferencing Nodes) and it must match the Common Name of its TLS server certificate. If RTMPS fails, it will use an unencrypted connection for media.
This means that Internet Explorer and Safari users connecting from outside your network will not be able to send or receive media. These users should connect over a VPN, or use another browser.
For more information, see Pexip Reverse Proxy and TURN Server Deployment Guide.
Enabling and disabling Infinity Connect clientsIf you do not wish to allow participants to use Infinity Connect clients (Infinity Connect desktop client, Infinity Connect Mobile client, and Infinity Connect Web App) to access conferences within your deployment, you can disable this feature.
This feature is enabled by default. To disable or re-enable this feature:
1. Go to Platform configuration > Global settings.
2. From within the Connectivity section, deselect or select Enable support for Pexip Infinity Connect and Mobile App.
When access has been disabled, users attempting to use Infinity Connect clients to access a conference or make a call will be presented with the message Call Failed: Disabled. This message is customizable; for more information see Customizing the Infinity Connect Web App.

Infinity Connect Guide for Administrators Administering Infinity Connect
© 2015 Pexip AS Version 10.a July 2015 Page 21 of 22
Setting up DNS records for Infinity Connect Mobile client and Infinity Connect desktop client useTo enable participants to connect to conferences within your deployment using the Infinity Connect desktop client or Infinity Connect Mobile client, you must provide a DNS lookup so that these clients know which host to contact. The host will typically be a reverse proxy (for deployments where Conferencing Nodes are located within a private network), but it can also be a public-facing Conferencing Node.
To enable access from these desktop and mobile clients, each domain used in aliases in your deployment must either have an SRV record for _pexapp._tcp.<domain>, or resolve directly to the IP address of a reverse proxy or a public-facing Conferencing Node.
The SRV record for _pexapp._tcp.<domain> should always reference port 443 on the host.
The Infinity Connect desktop client and Infinity Connect Mobile client currently support a single SRV record per domain. If multiple SRV records are returned by the SRV lookup on _pexapp._tcp.<domain>, the client will attempt to contact the first host in the list, which may or may not be the preferred host. If this attempt fails, no further attempts will be made to contact other hosts on the list.
If the Infinity Connect desktop client or Infinity Connect Mobile client cannot locate the host (i.e. reverse proxy or Conferencing Node) through DNS SRV discovery because either:
l the SRV lookup on _pexapp._tcp.<domain> does not return any records, or
l the client cannot contact the first host on the list that is returned in the SRV lookup,
it will fall back to performing a DNS A-record lookup for the domain in question. If successful, it will attempt to connect to port 443 on the IP address returned from this A-record lookup.
(The DNS SRV lookup does not apply to participants using Infinity Connect Web App, because they connect to Conferencing Nodes or the reverse proxy directly, so no lookup is required.)
ExampleAssume that the following _pexapp._tcp.example.com DNS SRV record has been created:
_pexapp._tcp.example.com. 86400 IN SRV 1 100 443 proxy.example.com.
This points to the DNS A-record proxy.example.com, port 443 (HTTPS), with a priority of 1 and a weight of 100. In other words, it tells the Infinity Connect desktop client and Infinity Connect Mobile client to send their HTTP requests to host proxy.example.com (our reverse proxy server) on TCP port 443.
In this example, when a user attempts to access [email protected] from the Infinity Connect Mobile client:
l The Infinity Connect Mobile client will attempt an SRV lookup on _pexapp._tcp.example.com.
o If the SRV lookup succeeds, it will return the record shown above, and the Infinity Connect Mobile client will attempt to contact proxy.example.com (our reverse proxy server) on TCP port 443.
o If the SRV lookup fails, the Infinity Connect Mobile client will attempt to connect to http://example.com:443.
For more information on setting up reverse proxies, see Pexip Reverse Proxy and TURN Server Deployment Guide.
Ultimately it is the responsibility of your network administrator to set up SRV records correctly so that the Infinity Connect desktop client and Infinity Connect Mobile client know which system to connect to.
Using a reverse proxy and TURN server with Infinity Connect In Pexip Infinity deployments, all Pexip Infinity Connect clients use HTTPS for the call signaling connections towards Conferencing Nodes.
However, with some Pexip deployments, these clients are not able to communicate directly with Pexip Conferencing Nodes, for example in on-prem deployments where the Pexip platform is located on an internal, enterprise LAN network while the clients are located in public networks on the Internet. In these cases it is common to deploy a reverse proxy application in the environment.

Infinity Connect Guide for Administrators Administering Infinity Connect
© 2015 Pexip AS Version 10.a July 2015 Page 22 of 22
This is an application which can proxy HTTP and HTTPS traffic from an externally-located client to a web service application located on the internal network — in our case a Pexip Conferencing Node. A reverse proxy can also be referred to as a load balancer.
In addition to providing HTTP/HTTPS connectivity between external Pexip clients and internal Conferencing Nodes, a reverse proxy can also be used for hosting customized Infinity Connect Web App content.
In deployments such as the ones described above, the reverse proxy provides for HTTPS call signaling connectivity between Infinity Connect WebRTC clients (Chrome, Firefox and Opera browsers and the desktop client) and Conferencing Nodes. However, to ensure audio/video/presentation connectivity between the two, a TURN server is also required.
A TURN server is a media relay/proxy which allows peers to exchange UDP or TCP media traffic whenever one or both parties are behind NAT. When Conferencing Nodes are deployed behind NAT, these nodes will instruct the WebRTC client to send its media packets to the TURN server, which will forward (relay) the packets to the Conferencing Nodes. Since this TURN server is normally located outside of the enterprise firewall, the Conferencing Node will constantly send media packets to this TURN server to "punch holes" in the firewall, allowing this TURN server to relay media packets back to the Conferencing Node, as the firewall will classify this as return traffic.
Pexip's Infinity Connect WebRTC clients (the desktop client; Web App for Chrome, Firefox and Opera; and mobile clients for iOS and Android) use ICE (Interactive Connectivity Establishment) to negotiate optimal media paths with Conferencing Nodes. Microsoft Lync clients use a similar ICE mechanism, which means that Pexip can use TURN for all of these client types.
Note that Infinity Connect on Internet Explorer and Safari browsers uses the RTMP protocol, rather than WebRTC. RTMP clients cannot currently connect via the reverse proxy or TURN server and thus need a direct TCP connection to a Conferencing Node.
Depending on the network topology, the reverse proxy can be deployed with one or two network interfaces in various configurations:
l Single NIC, public address
l Dual NIC, private and public addresses
In deployments with more than one Conferencing Node, the reverse proxy can load-balance HTTPS traffic between all Conferencing Nodes using a round-robin algorithm. A reverse proxy can also provide an authentication layer between Infinity Connect clients and Conferencing Nodes, for instance through an Active Directory or similar LDAP backend.
For more information about using a reverse proxy, see Pexip Reverse Proxy and TURN Server Deployment Guide.