ibm tivoli monitoring for databases: db2: user s...
TRANSCRIPT

IBM Tivoli Monitoring for Databases: DB2
User’s GuideVersion 5.1.0
SC23-4726-00
���


IBM Tivoli Monitoring for Databases: DB2
User’s GuideVersion 5.1.0
SC23-4726-00
���
NoteBefore using this information and the product it supports, read the information in Appendix G, “Notices” on page 175.
First Edition (September 2002)
This edition applies to version 5.1.0 of IBM Tivoli Monitoring for Databases: DB2 and to all subsequent releases andmodifications until otherwise indicated in new editions.
© Copyright International Business Machines Corporation 2002. All rights reserved. US Government UsersRestricted Rights – Use, duplication or disclosure restricted by GSA ADP Schedule Contract with IBM Corp.

Contents
Figures . . . . . . . . . . . . . . . v
Tables . . . . . . . . . . . . . . . vii
About this guide . . . . . . . . . . . ixWho should read this guide . . . . . . . . . ixWhat this guide contains . . . . . . . . . . ixPublications . . . . . . . . . . . . . . x
IBM Tivoli Monitoring for Databases: DB2 library xPrerequisite publications . . . . . . . . . xiRelated publications . . . . . . . . . . xiAccessing softcopy publications . . . . . . xiiUsing the guide online . . . . . . . . . xiiViewing online help . . . . . . . . . . xiiOrdering publications . . . . . . . . . . xiiProviding feedback about publications . . . . xiii
Accessibility . . . . . . . . . . . . . . xiiiContacting Customer Support . . . . . . . . xiiiConventions used in this guide . . . . . . . xiii
Typeface conventions . . . . . . . . . . xiiiTivoli command syntax . . . . . . . . . xivOperating system-dependent variables and paths xv
Chapter 1. Overview . . . . . . . . . 1Understanding IBM Tivoli Monitoring . . . . . . 1IBM Tivoli Monitoring for Databases: DB2administrators . . . . . . . . . . . . . . 8Authorization roles . . . . . . . . . . . . 8DB2 managed resources and endpoints . . . . . 8User interface options . . . . . . . . . . . 9
Chapter 2. Getting startedquick-reference guide . . . . . . . . 11
Chapter 3. Setting up IBM TivoliMonitoring for Databases: DB2 . . . . 15Starting the Tivoli environment . . . . . . . . 16Setting authorization roles . . . . . . . . . 17Creating an IBM Tivoli Monitoring for Databases:DB2 policy region . . . . . . . . . . . . 20Moving the Monitoring for DB2 objects . . . . . 21Adding or removing managed resource types . . . 23Creating a db2ecc user ID and assigning anadministrator group . . . . . . . . . . . 25Creating DB2 instance objects . . . . . . . . 26Creating DB2 database objects . . . . . . . . 28Creating DB2 gateway objects . . . . . . . . 31Creating partition objects . . . . . . . . . . 33Creating partition group objects . . . . . . . 35Creating DB2 Discovery objects. . . . . . . . 37Discovering DB2 instances . . . . . . . . . 39Discovering DB2 databases . . . . . . . . . 41Adding or removing partition group members . . 42Subscribing to notice groups. . . . . . . . . 43
Chapter 4. Setting up IBM TivoliMonitoring . . . . . . . . . . . . . 45Suggested guidelines for setting up your resourcemodels . . . . . . . . . . . . . . . . 45Creating profile managers and profiles . . . . . 46Subscribing resources to profile managers . . . . 48Adding default resource models to profiles . . . . 49Distributing profiles from the desktop . . . . . 50Distributing profiles using MDist2 . . . . . . . 52Rerunning failed profile distributions . . . . . . 54
Chapter 5. Working with IBM TivoliMonitoring for Databases: DB2 . . . . 57Opening a DB2 Instance endpoint . . . . . . . 57Viewing DB2 object properties . . . . . . . . 58Updating the state of a server . . . . . . . . 61Starting and stopping a database instance, partitionserver, or partition group node . . . . . . . . 62Opening a database endpoint . . . . . . . . 63Showing client connection information . . . . . 64Running DB2 commands from the command lineprocessor . . . . . . . . . . . . . . . 66Launching the DB2 Java Control Center . . . . . 67
Chapter 6. Working with tasks and jobs 69Running a task . . . . . . . . . . . . . 69Customizing a task . . . . . . . . . . . . 74Creating a job . . . . . . . . . . . . . 78Running a job . . . . . . . . . . . . . 81Scheduling a job . . . . . . . . . . . . . 82
Chapter 7. Viewing resource modelresults with the IBM Tivoli MonitoringWeb Health Console . . . . . . . . . 89Overview . . . . . . . . . . . . . . . 89
Understanding Resource Health . . . . . . 89Connecting the IBM Tivoli Monitoring WebHealth Console . . . . . . . . . . . . 90
Chapter 8. Customizing resourcemodels. . . . . . . . . . . . . . . 91Overview of IBM Tivoli Monitoring . . . . . . 91Adding custom resource models to profiles. . . . 92Customizing indications . . . . . . . . . . 93Adding or removing built-in actions . . . . . . 95Editing a built-in action . . . . . . . . . . 97Specifying tasks for an indication . . . . . . . 99Sending a notice to administrators when an eventoccurs . . . . . . . . . . . . . . . . 101Customizing parameters. . . . . . . . . . 102Creating scheduling rules . . . . . . . . . 104Customizing the scheduling monitoring period . . 106Customizing data logging information . . . . . 108
iii

Managing profiles and resource models atendpoints. . . . . . . . . . . . . . . 110Managing IBM Tivoli Monitoring gateways . . . 111Determining which resource models have beendistributed to endpoints . . . . . . . . . . 112Determining which resource models are runningon endpoints . . . . . . . . . . . . . 112
Chapter 9. Enabling IBM TivoliMonitoring for Databases: DB2 forTivoli Enterprise Data Warehouse. . . 115Overview. . . . . . . . . . . . . . . 115
Control server . . . . . . . . . . . . 115Central data warehouse . . . . . . . . . 116Data marts . . . . . . . . . . . . . 116Report interface . . . . . . . . . . . 116
Tivoli Enterprise Data Warehouse reports . . . . 117Accessing the IBM Console . . . . . . . . . 118Creating an IBM Console user . . . . . . . . 118Assigning roles to a user . . . . . . . . . 119Creating a user group . . . . . . . . . . 120Assigning users to a user group . . . . . . . 120Assigning user groups to a data mart . . . . . 121Running reports . . . . . . . . . . . . 121Scheduling reports to run automatically . . . . 122Modifying default settings for reports . . . . . 122Creating reports . . . . . . . . . . . . 123IBM Tivoli Monitoring for Databases: DB2 datamarts and reports . . . . . . . . . . . . 124
Appendix A. Authorization roles quickreference . . . . . . . . . . . . . 125
Appendix B. Setting Up the TivoliEnterprise Console . . . . . . . . . 129Overview of the Tivoli Enterprise Console. . . . 129
Configuring Event Console using a task . . . . 130Configuring Event Console using Tivoli EnterpriseConsole commands . . . . . . . . . . . 133Viewing events in the Tivoli Enterprise Console 135
Appendix C. Integrating with TivoliBusiness Systems Manager . . . . . 137Understanding Tivoli Business Systems Manager 137Prerequisites. . . . . . . . . . . . . . 138Integrating IBM Tivoli Monitoring for Databases:DB2 with Tivoli Business Systems Manager . . . 138Configuring the Tivoli Enterprise Console eventserver . . . . . . . . . . . . . . . . 139Discovering resources for Tivoli Business SystemsManager . . . . . . . . . . . . . . . 140Working with Tivoli Business Systems Manager 141Uninstalling IBM Tivoli Monitoring for Databases:DB2 integration from Tivoli Business SystemsManager . . . . . . . . . . . . . . . 141
Appendix D. Problem determination 143
Appendix E. Messages . . . . . . . 147
Appendix F. Accessibility . . . . . . 173Using assistive technologies . . . . . . . . 173Magnifying what is displayed on the screen . . . 173Documentation in accessible formats . . . . . 173Using alternative text. . . . . . . . . . . 173
Appendix G. Notices . . . . . . . . 175Trademarks . . . . . . . . . . . . . . 177
Index . . . . . . . . . . . . . . . 179
iv IBM Tivoli Monitoring for Databases: DB2: User’s Guide

Figures
1. Administrators dialog box . . . . . . . 182. Set Resource Roles dialog box . . . . . . 193. Navigator dialog box . . . . . . . . . 224. Set Managed Resources dialog box . . . . 245. Create DB2InstanceManager dialog box 286. Create DB2DatabaseManager dialog box 307. Discover databases dialog box . . . . . . 308. Create DB2 Gateway dialog box . . . . . 329. Discover DCS Database dialog box . . . . 33
10. Create DB2PartitionManager dialog box 3511. Create DB2PartitionGroupManager dialog
box . . . . . . . . . . . . . . . 3712. Create a new DB2Discovery Object dialog
box . . . . . . . . . . . . . . . 3913. Edit Discovery Endpoints dialog box . . . . 4014. DB2 Instance Discovery dialog box . . . . 4115. Discover Databases dialog box . . . . . . 4216. Set Notice Groups dialog box . . . . . . 4417. Policy Region dialog box . . . . . . . . 4818. DB2 Instance endpoint dialog box. . . . . 58
19. DB2 Instance Properties dialog box . . . . 6120. Startup DB2 Instance dialog box . . . . . 6321. Database endpoint dialog box . . . . . . 6322. Endpoint - Instance Client Connectivity Test
dialog box . . . . . . . . . . . . . 6423. Client connectivity test endpoints dialog box 6524. DB2 Command Line Processor dialog box 6725. Task Library dialog box . . . . . . . . 7126. Execute Task dialog box . . . . . . . . 7227. Destination for Task Output dialog box 7328. Configuring task arguments dialog box 7429. Task Library dialog box . . . . . . . . 7530. Execute Task dialog box . . . . . . . . 7631. Configure task arguments dialog box . . . . 7632. Saving arguments dialog box . . . . . . 7733. Create Job dialog box . . . . . . . . . 7934. Destination for Task Output dialog box 8135. Add Scheduled Job dialog box . . . . . . 8436. Set Retry/Cancel Restrictions Options dialog
box . . . . . . . . . . . . . . . 86
v

vi IBM Tivoli Monitoring for Databases: DB2: User’s Guide

Tables
1. High CPU Usage percentages over 12 cycles:health . . . . . . . . . . . . . . . 5
2. Quick reference to installation and setupprocedures . . . . . . . . . . . . . 11
3. DB2 setup guidelines . . . . . . . . . 154. Adding or removing managed resource types
from a policy region . . . . . . . . . 235. DB2InstanceManager icon. . . . . . . . 266. DB2DatabaseManager icon . . . . . . . 297. DB2Gateway icon . . . . . . . . . . 318. DB2PartitionManager icon . . . . . . . 339. DB2PartitionGroupManager icon . . . . . 36
10. DB2Discovery icon . . . . . . . . . . 3811. Monitoring resources and applications
guidelines . . . . . . . . . . . . . 45
12. Working with IBM Tivoli Monitoring forDatabases: DB2 guidelines . . . . . . . 57
13. DB2 Instance properties . . . . . . . . 5914. DB2 Database properties . . . . . . . . 5915. Down-state icons. . . . . . . . . . . 6116. Working with tasks and jobs . . . . . . . 6917. Health Determination Example . . . . . . 8918. Goals and where to find procedures for
enabling IBM Tivoli Monitoring forDatabases: DB2 for Tivoli Enterprise DataWarehouse . . . . . . . . . . . . 117
19. Default time filter names and values 12320. Setting up the Tivoli Enterprise Console
guidelines. . . . . . . . . . . . . 129
vii

viii IBM Tivoli Monitoring for Databases: DB2: User’s Guide

About this guide
The IBM Tivoli Monitoring for Databases, Version 5.1.0: DB2 User’s Guide describeshow to install and use the IBM Tivoli Monitoring for Databases: DB2 software tomanage DB2 resources with Tivoli Enterprise software.
Who should read this guideThis guide is for system administrators and database administrators. It explains theconcepts you should know to use the IBM Tivoli Monitoring for Databases: DB2software. It contains information about database management using this productand how IBM Tivoli Monitoring for Databases: DB2 software is integrated into theTivoli environment.
Readers should be familiar with the following:v Windows NT® or UNIX® operating systemsv Tivoli® environmentv DB2® database administration
What this guide containsThis guide contains the following chapters:v Chapter 1, “Overview” on page 1
Provides an overview of the capabilities of the IBM Tivoli Monitoring forDatabases: DB2 software.
v Chapter 2, “Getting started quick-reference guide” on page 11
Provides a quick-reference table of the installation and setup procedures youmust perform before you can use IBM Tivoli Monitoring for Databases: DB2.
v Chapter 3, “Setting up IBM Tivoli Monitoring for Databases: DB2” on page 15
Provides information on how to set up IBM Tivoli Monitoring for Databases:DB2.
v Chapter 4, “Setting up IBM Tivoli Monitoring” on page 45
Provides information on how to set up IBM Tivoli Monitoring.v Chapter 5, “Working with IBM Tivoli Monitoring for Databases: DB2” on
page 57
Provides information on how to use IBM Tivoli Monitoring for Databases: DB2.v Chapter 6, “Working with tasks and jobs” on page 69
Provides information on how to manage tasks and jobs.v Chapter 7, “Viewing resource model results with the IBM Tivoli Monitoring
Web Health Console” on page 89
Provides an overview of the IBM Tivoli Monitoring Web Health Console.v Chapter 8, “Customizing resource models” on page 91
Provides information on how to use IBM Tivoli Monitoring to customizeresource models.
v Chapter 9, “Enabling IBM Tivoli Monitoring for Databases: DB2 for TivoliEnterprise Data Warehouse” on page 115
ix

Provides information on how to enable IBM Tivoli Monitoring for Databases:DB2 with Tivoli Enterprise Data Warehouse.
This guide contains the following appendixes:v Appendix A, “Authorization roles quick reference” on page 125
Provides a summary of the authorization roles needed for different procedures.v Appendix B, “Setting Up the Tivoli Enterprise Console” on page 129
Provides information on how to set up Tivoli Enterprise Console® for use withthe IBM Tivoli Monitoring for Databases: DB2 software.
v Appendix C, “Integrating with Tivoli Business Systems Manager” on page 137
Provides information on how to use Tivoli Business Systems Manager to manageDB2 resources and events.
v Appendix D, “Problem determination” on page 143
Provides a list of solutions to problems that you might encounter when using orinstalling the IBM Tivoli Monitoring for Databases: DB2 software.
v Appendix E, “Messages” on page 147
Provides a list of IBM Tivoli Monitoring for Databases: DB2 messages and anexplanation of the message.
v Appendix F, “Accessibility” on page 173
Provides accessibility features in IBM Tivoli Monitoring for Databases: DB2.v Appendix G, “Notices” on page 175
Provides notices, copyright, and trademark information available to the user.
PublicationsThis section lists publications in the IBM Tivoli Monitoring for Databases: DB2library and any other related documents. It also describes how to access Tivolipublications online, how to order Tivoli publications, and how to make commentson Tivoli publications.
IBM Tivoli Monitoring for Databases: DB2 libraryThe following documents are available in the IBM Tivoli Monitoring for Databases:DB2 library:v IBM Tivoli Monitoring for Databases, Version 5.1.0: DB2 User’s Guide, SC23-4726
Provides information about how to install and use the IBM Tivoli Monitoring forDatabases: DB2 software to manage DB2 database resources with TivoliEnterprise software.
v IBM Tivoli Monitoring for Databases, Version 5.1.0: DB2 Reference Guide, SC23-4727Provides task and resource model information about procedures described in theIBM Tivoli Monitoring for Databases, Version 5.1.0: DB2 User’s Guide
v IBM Tivoli Monitoring for Databases: Installation and Setup Guide, GC23-4730Provides information on how to install the IBM Tivoli Monitoring for Databases:DB2 software.
v IBM Tivoli Monitoring for Databases, Version 5.1.0 Release Notes, GI11-0933Describes product features and provides information about the latest changes tothe installation requirements and procedures. The release notes also describeknown limitations related to installation and explain how to work around eachlimitation.
v IBM Tivoli Monitoring for Databases: DB2 Limitations and Workarounds Supplement,SC23-4786
x IBM Tivoli Monitoring for Databases: DB2: User’s Guide

Provides the latest information about known product limitations andworkarounds. To ensure that the information is the latest available, thisdocument is provided only on the Web, where it is updated on a regular basis.You can access the Limitations and Workarounds document through the IBMTivoli Monitoring for Databases: DB2 link on the Tivoli Information Center Website:http://www.tivoli.com/support/public/Prodman/public_manuals/td/TD_PROD_LIST.html
Prerequisite publicationsTo to use the information in this book effectively, you must have some prerequisiteknowledge, which you can get from the following books:v Tivoli Management Framework User’s Guide
Provides information about profiles and profile management.v Tivoli Management Framework Planning and Installation Guide
Provides information about server and hardware requirements.v Tivoli Management Framework Reference Guide
Provides information about command line commands, such as the winstallcommand.
v IBM Tivoli Monitoring User’s Guide
Provides information about distributed monitoring.v Tivoli Enterprise Console User’s Guide
Provides information about using the Tivoli Enterprise Console®.v Tivoli Software Installation Service User’s Guide, Version 4.0
Provides information about using Tivoli Software Installation Service to installthe IBM Tivoli Monitoring for Databases: DB2 software.
Related publicationsThe following documents also provide useful information:v DB2 System Monitor Guide and Reference
Provides information about how to collect different kinds of information aboutdatabases and the database manager. This book explains how to use theinformation to understand database activity, improve performance, anddetermine the causes of problems.
v DB2 Administration Guide: Planning
Provides an overview of DB2 database concepts, information about design issues(such as logical and physical database design), and a discussion of highavailability.
v DB2 Administration Guide: Implementation
Provides information about DB2 implementation issues such as implementingyour design, accessing databases, auditing, backup, and recovery.
The Tivoli Glossary includes definitions for many of the technical terms related toTivoli software. The Tivoli Glossary is available, in English only, at the followingWeb site:
http://www.tivoli.com/support/documents/glossary/termsm03.htm
About this guide xi

Accessing softcopy publicationsThe publications for this product are available in PDF and HTML formats throughthe following media:v IBM Tivoli Monitoring for Database, Version 5.1.0: Documentation CD, LK3T-8517-00
The Documentation CD contains all of the English language publications for thisproduct, except for the Web-only limitations and workarounds supplements. Toaccess the publications, use a Web browser to open the start.html file, which islocated in the root directory of the CD.
v IBM Tivoli Monitoring for Database, Version 5.1.0: NLS Documentation CD,LK3T-8611-00The NLS (national language support) Documentation CD contains both Englishand non-English language publications for this product, except for the Web-onlylimitations and workarounds supplements. To access the publications, use a Webbrowser to open the start.html file, which is located in the root directory of theCD.
v Tivoli Information CenterIBM posts all publications for this and all other Tivoli products, as they becomeavailable and whenever they are updated, to the Tivoli Information Center Website. The Tivoli Information Center is located at the following Web address:http://www.tivoli.com/support/public/Prodman/public_manuals/td/TD_PROD_LIST.html
Click the IBM Tivoli Monitoring for Databases: DB2 link to access the productlibrary.
Using the guide onlineThis document is available on the IBM Tivoli Monitoring for Databases, Version 5.1.0:Documentation CD, LK3T-8516–00 in PDF and HTML formats. Refer to thereadme.txt file on the CD for instructions on downloading the Acrobat Reader,Version 3.0 or later, to view, save, and print the manual.
Use your HTML browser to open the start.html file on the CD to access the .htmldocumentation files. Every navigation page also includes a link at the bottom todownload the Acrobat reader for viewing, saving, and printing the files.
Viewing online helpOnline help is available in several forms:v Desktop — Access online help by clicking the Help buttons in dialog boxes.v Commands — You can display command syntax and parameter information for
command line interface (CLI) commands by typing the name of the command ata command prompt and pressing the Enter key.
v Management Console — Access help by pressing the F1 key in the ManagementConsole.
Ordering publicationsYou can order hardcopy publications online from the IBM Publications Center Website:
http://www.elink.ibmlink.ibm.com/public/applications/publications/cgibin/pbi.cgi
xii IBM Tivoli Monitoring for Databases: DB2: User’s Guide

You can also order by telephone by calling one of these numbers:v In the United States: 800-879-2755v In Canada: 800-426-4968v In other countries, for a list of telephone numbers, see the following Web site:
http://www.tivoli.com/inside/store/lit_order.html
Providing feedback about publicationsIf you have comments or suggestions about Tivoli products and documentation,complete the customer feedback survey at the following Web site:
http://www.tivoli.com/support/survey/
AccessibilityAccessibility features help a user who has a physical disability, such as restrictedmobility or limited vision, to use software products successfully. With this product,you can use assistive technologies to hear and navigate the interface. You can alsouse the keyboard instead of the mouse to operate all features of the graphical userinterface.
For additional information, see the Accessibility Appendix in IBM Tivoli Monitoringfor Databases, Version 5.1.0: DB2 User’s Guide.
Contacting Customer SupportIf you have a problem with any Tivoli product, you can contact IBM CustomerSupport for Tivoli products. See the Tivoli Customer Support Handbook at thefollowing Web site:
http://www.tivoli.com/support/handbook/
The handbook provides information about how to contact Customer Support,depending on the severity of your problem, and the following information:v Registration and eligibilityv Telephone numbers and e-mail addresses, depending on the country in which
you are locatedv What information you should gather before contacting Customer Support
Conventions used in this guideThis book uses several conventions for special terms and actions, operatingsystem-dependent commands and paths, and margin graphics.
Typeface conventionsThe following typeface conventions are used in this book:
Bold Lowercase and mixed-case commands, command options, file andpath names, and flags that appear within text appear like this, inbold type.
Graphical user interface elements and names of keys also appearlike this, in bold type.
About this guide xiii

Italic Variables, values you must provide, new terms, and words andphrases that are emphasized appear like this, in italic type.
Monospace Commands, command options, and flags that appear on a separateline, code examples, output, and message text appear like this, inmonospace type.
Names of text strings you must type, when they appear withintext, names of Java™ methods and classes, and HTML and XMLtags also appear like this, in monospace type.
Tivoli command syntaxThe commands in this book use the following special characters to define Tivolicommand syntax:
< > Indicates that the text enclosed in the angle brackets is a variable that yousupply.
[ ] Identifies optional elements. Elements that do not have brackets aroundthem are required.
... Indicates you can specify multiple values for the previous element.Separate multiple values by a space, unless the command informationspecifies differently.
If the ellipsis for an element follows a closing bracket ( ] ), use the syntaxwithin the brackets to specify multiple values. For example, to specify twoadministrators for the option [–a admin]..., use –a admin1 –a admin2.
If the ellipsis for an element is within brackets, use the syntax of the lastelement to specify multiple values. For example, to specify two hosts forthe option [–h host...], use –h host1 host2.
| Indicates mutually exclusive information, meaning you can use the elementon either the left or right of the vertical bar, but not both.
{ } Delimits a set of mutually exclusive elements when a command requiresone of them, but not multiple elements. Brackets ([ ]) are around elementsthat are optional.
\ A backslash indicates that a command continues on the next line.
In addition to the special characters, Tivoli command syntax uses the typefaceconventions described in the Preface of this guide.
The following examples illustrate the typeface conventions used in Tivolicommand syntax:v wcrtpr [–a admin]... [–s region] [–m resource]... name
The name argument is the only required element for the wcrtpr command. Thebrackets around the options indicate that they are optional. The ellipsis after the–a admin option means that you can specify multiple administrators multipletimes. The ellipsis after the –m resource option means that you can specifymultiple resources multiple times.
v wchkdb [–o outfile] [–u] [–x] {–f infile | –i | object...}The –f, –i, and object elements are mutually exclusive. The braces that surroundthe –f, –i, and object elements indicate that you are including required elements.If you specify the object argument, you can specify more than one object.
xiv IBM Tivoli Monitoring for Databases: DB2: User’s Guide

When you reference an object in a command issued from the command line, thereference is not an absolute object reference like those used in programming.Instead, the reference is a user-friendly name. This user-friendly name derives froma name given to the object by the user of the application, such as when creating apolicy region.
Operating system-dependent variables and pathsThis book uses the UNIX convention for specifying environment variables and fordirectory notation.
When using the Windows command line, replace $variable with %variable% forenvironment variables and replace each forward slash (/) with a backslash (\) indirectory paths.
Note: If you are using the bash shell on a Windows system, you can use the UNIXconventions.
About this guide xv

xvi IBM Tivoli Monitoring for Databases: DB2: User’s Guide

Chapter 1. Overview
The IBM® Tivoli® Monitoring for Databases: DB2® software complements existingtools for DB2 and adds features so you can manage a large number of DB2databases in a distributed environment. This software concentrates on those tasksthat you can define and deploy by generic methods. It reduces the complexity ofmanaging large distributed database environments and allows administrators toconcentrate on the specific issues associated with each of the individual databases.
The IBM Tivoli Monitoring for Databases: DB2 software supports theEnterprise-Extended Edition (EEE), Extended Edition (EE), DB2 Connect ExtendedEdition (EE), and Workgroup Edition products of the IBM DB2 Universal Database(UDB). It provides the ability to manage and monitor DB2 databases by providingextensions to Tivoli Management Framework, IBM Tivoli Monitoring, TivoliEnterprise Console, and the Tivoli Business Systems Manager®. It also includes thetask libraries and resource models, which enable you to manage distributed DB2computing resources effectively.
IBM Tivoli Monitoring for Databases: DB2 software enables you to perform thefollowing:v Automate repetitive database administrator (DBA) operations across all database
servers and databases to define simple tasks and perform them on multipledatabases and servers in a single action.– Ensure optimal performance through monitoring.– Ensure query plans are based on the correct statistics.– Ensure space availability on log and data devices.– Run standard maintenance commands and check for corruption.– Check database and configuration settings.– Start and stop the IBM Replication Capture and Apply programs.– Provide general statistics about database objects.– Keep up-to-date recovery information.– Back up databases and log files.
v Use the resource models for global DB2 database availability and performancemonitoring facilities.
v Alert administrators to DB2 performance problems or serious errors and failures.v Integrate with IBM Tivoli Monitoring.v Integrate with the Tivoli Enterprise Console to provide event correlation. You
can define rules for automated responses, such as running a corrective task.v Integrate with Tivoli Business Systems Manager.
Understanding IBM Tivoli MonitoringThis section describes the main concepts required for understanding how to set upand use resource models. IBM Tivoli Monitoring uses resource models to productmonitor and manage resources at distributed systems. A managed resource is adatabase object that represents a hardware, software, or data entity that youmanage according to policies set up in a Tivoli environment. Managed resourcescan include physical and logical disks, CPUs, memory, printers, processes, and
1

services. A distributed system is the service that monitors resources, compares datafrom monitored resources against configured thresholds, and runs automatedresponses in a Tivoli environment.
Note: The resource models and indications used as examples within the followingdescriptions are automatically installed with IBM Tivoli Monitoring.
ActionsYou can associate one or more recovery actions with a specific event. Theseactions are automatically triggered when the event occurs and, typically,are used for restoring satisfactory system service level. Each time an eventoccurs, the system provides a notification of the event, triggers a recoveryaction to restore satisfactory conditions and, if the action is successful,provides a notification that the action was performed. Actions areassociated with the execution of a CIM method or the execution of aprogram. Associate actions with indications when modifying an existingresource model using this software, or when creating a new resourcemodel with the IBM Tivoli Monitoring Workbench.
AttributesAttributes can be string or numeric values. A resource model receivesattributes when it is created. In IBM Tivoli Monitoring for Databases: DB2,you do not add, delete, or modify attributes that are in the default resourcemodels. When creating a new resource model with the IBM TivoliMonitoring Workbench, you can qualify an event by specifying relevantattributes according to the information you want the resource model tomonitor. For example, an event might indicate insufficient disk space.When you specify attributes, such as disk name, or available disk space,the resource model can generate a more precise indication of the problem.For each resource model, some of the attributes are designated as keys.
Cycles When a resource model runs at an endpoint, it gathers data at regularintervals, called cycles; the duration of a cycle is the cycle time, which isdisplayed in seconds. A resource model with a cycle time of 60 secondsgathers data every 60 seconds. Each of the supplied resource models has adefault cycle time that you can modify when you define the resourcemodel. At each cycle, the resource model collects data, analyzes it,generates the events, and triggers specified actions. The data collected are asnapshot of the status of the resources specified in the resource model.
Gathering Historical Data componentThe Gathering Historical Data component uses data collected by specificIBM Tivoli Monitoring resource models to populate a database on theTivoli server where it is installed. The collected data is aggregated every 24hours and added to the IBM Tivoli Monitoring database, from which it canbe used in analyses that help plan network growth using key systemmetrics.
For more information about Tivoli Enterprise Data Warehouse, see thefollowing publications:v Tivoli Distributed Monitoring Warehouse Enablement Pack: Implementation
Guide
v Enabling an Application for Tivoli Enterprise Data Warehouse
Heartbeat functionIn addition to the monitoring processes described above, IBM TivoliMonitoring operates a heartbeat function, which monitors the basic systemstatus at endpoints attached to the gateway at which it is enabled. Events
2 IBM Tivoli Monitoring for Databases: DB2: User’s Guide

can be sent to the Tivoli Business Systems Manager (provided that theTivoli Business Systems Manager Adapter component is installed at thegateway), the Tivoli Enterprise Console®, and the IBM Tivoli MonitoringNotice Group.
Indications and eventsAn indication is generated when the state of a given resource meetsdefined criteria. By itself, an indication does not trigger any specific action.When indications are aggregated, the resource model generates an event.When you define an event, you must specify under what conditions acertain number of indications are aggregated into an event. You alsospecify whether these indications must be consecutive, or whether thesequence may be interrupted by one or more monitoring cycles that do notregister any indication. The cycles during which no indication is generatedare called holes. An event can notify that there is a problem in the resourcestate, trigger an action and, if enabled, send a notification to the TivoliEnterprise Console server or to the Tivoli Business Systems Manager.
IndicationsEach resource model generates an indication in a given cycle basedon the settings defined for it. A single occurrence of an indicationdoes not always represent a problem, however the persistence ofindications might. The resource model measures the persistence ofthe indications and aggregates them according to yourspecifications, or how you define settings for occurrences andholes. If the persistence of an indication meets the specifiednumber of occurrences, the resource model generates an event.Indications can be generated in any one of the followingcircumstances:v When a single threshold is exceeded. For example, in the
Windows® Process resource model, the Process High CPUindication is generated when the High CPU Usage threshold isexceeded (for any process that has a non-zero process ID).
v When a combination of two or more thresholds are exceeded.For example, in the Windows Logical Disk resource model aHigh Read Bytes per Second indication is generated when boththe following thresholds are exceeded:– The amount of bytes transferred per second (being written or
read) exceeds the High Bytes per Second threshold– The percentage of time that the selected disk drive spends
making read or write requests exceeds the High PercentUsage threshold.
v When a combination of other factors change. For example, in theWindows Process resource model the Process Handle Leakindication is generated when a process is losing memory. Thereis no threshold for this indication. The resource model comparesthe number of handles of the five processes with the mosthandles in consecutive cycles. If the number of handles hasincreased, the indication is generated.
Occurrences and holesOccurrences and holes record whether or not an indication occursduring the cycle for a specific resource model. An occurrence is acycle during which required conditions are met to generate anindication for a given resource model. A hole is a cycle duringwhich an indication does not occur for a given resource model. A
Chapter 1. Overview 3

hole means none of the conditions that generate an indication weremet, but it does not necessarily mean that no thresholds wereexceeded.
For example, in the Windows Logical Disk resource model a HighRead Bytes per Second indication is not created when thepercentage disk time is higher than the High Percent Usagethreshold, provided that the Low Disk Space threshold isexceeded.
Events
An event is used to verify the persistence of a given indication byeliminating unrepresentative peaks and troughs for the indication.The number of occurrences, with allowance for holes, of anindication defines an event. For example, a process that generatesthe Process High CPU indication in one cycle is behaving perfectlynormally, and is of no threat to other processes if the high usagedoes not repeat. However, an indication that persists over severalcycles is a problem.
When you define an event, you can specify how many consecutiveholes in the sequence of consecutive occurrences are permitted.Specifying how many consecutive holes are permitted during theaccumulation of the consecutive occurrences enables you tocontinue the counting of consecutive occurrences if a given numberof cycles fall below the threshold.
While defining an event, you can also indicate if you want thesystem to notify the Tivoli Enterprise Console server, or the TivoliBusiness Systems Manager, that an event was generated. The TivoliMonitoring operator can change these selections later, when theresource model is included in a Tivoli Monitoring profile. You canalso define the degree of severity of the event.
Clearing eventsA clearing event is a resource model function that, if enabled, allowsIBM Tivoli Monitoring to close an event when the circumstancesthat caused the event are no longer present. Clearing events can beprocessed by the Tivoli Enterprise Console server and by TivoliBusiness Systems Manager. Clearing events have a severity ofharmless, regardless of the severity of the original event, but havethe same event ID as the original event.
For example, a service stops and the Tivoli Enterprise Consoleserver receives an event notifying it of this problem. Until theservice restarts, the problem is still present on the endpoint, butIBM Tivoli Monitoring does not send any further eventnotifications to the Tivoli Enterprise Console server. If the ClearingEvent function is enabled, as soon as the service restarts, a clearingevent is sent to the Tivoli Enterprise Console server, therebyclosing the original event. The Clearing Event itself does notnormally appear on the server, because its only function is to clearthe original error event.
Note: Correlated events cannot be cleared.
Monitoring of events and indicationsEvents can be sent to the Tivoli Enterprise Console server, the WebHealth Console, and Tivoli Business Systems Manager.
4 IBM Tivoli Monitoring for Databases: DB2: User’s Guide

Tivoli Enterprise Console ServerEvents can be viewed by a Tivoli Enterprise Console serverprovided that you have compiled and loaded the relevantBasic Recorder of Objects in C (BAROC) files on the server.The event contains a set of properties that can help toidentify the problem. For example, the information in theProcessHandleLeak event includes values for the following:v Current Process IDv Number of handles allocated to the processv Name of the process
Clearing events can also be processed by the TivoliEnterprise Console server. If the default procedure is usedto enable the monitoring of events, the Tivoli EnterpriseConsole server uses the clearing event to close theassociated error event. However, if you choose not toinstall the clearing events rule incorporated in theabove-mentioned default procedure, the clearing event isdisplayed as a separate entity with the same id as theoriginal error event.
Web Health ConsoleThe Web Health Console, which is an optional part of IBMTivoli Monitoring, obtains events and indications fromendpoints. The Web Health Console displays the health ofeach potential problem as a numeric value between 100(perfect health) and zero (with zero meaning that theconditions for the corresponding event have been met).
Table 1. High CPU Usage percentages over 12 cycles: health
Cycle 1 2 3 4 5 6 7 8 9 10 11 12
CPU% 55 73 54 63 68 42 50 70 90 55 70 80
Occurrenceor Hole
H O H O O H H O O H O O
OccurrenceCount
0 1 1 2 3 3 0 1 2 2 3 4
Health (%) 100 75 75 50 25 25 100 75 50 50 25 0
In this example, the health percentage changes in steps of25% because 4 occurrences were required to trigger anevent; if the indication had required 5 occurrences, thehealth percentage would have changed by steps of 20%.
Tivoli Business Systems Manager
Events can also be sent to the Tivoli Business SystemsManager, provided that the Tivoli Business SystemsManager Adapter component has been installed on thegateways of the endpoints that are to be monitored. A fulldescription of Tivoli Business Systems Manager can befound in the Tivoli Business Systems Managerdocumentation.
Clearing events can also be processed by the TivoliBusiness Systems Manager, which uses the clearing eventto close the associated error event.
Chapter 1. Overview 5

LoggingFor any endpoint, you can log the data collected by a resource model andwrite it in a local database. Then you can view it through the History Viewof the Web Health Console. You can choose to store raw or aggregateddata.
ParametersWhile thresholds can be only numeric values, parameters can be lists ofnumbers or strings. Using parameters enables you to customize yourresource model. You can define different parameters, as required. For eachparameter you can specify a value, which can be a list of numbers orstrings. This list can represent the instances you want to monitor, or a limityou do not want your resource to exceed, depending on how you use thissetting in your script. The lists will then be displayed in the IBM TivoliMonitoring dialogs, and depending on the type of list you select in theWorkbench, the lists will appear in different forms on IBM TivoliMonitoring. Within the Workbench you can define default values and thenlet the operator customize the settings in IBM Tivoli Monitoring. You canchoose one among the following kinds of lists when you specify theparameters:v Boolean Listv Choice Listv String Listv Numeric List
Some resource models have one or more parameters. For example, theWindows Parametric TCP/IP Ports resource model uses parameters thatcontain lists of ports and port states that you want to monitor.
ProfilesIBM Tivoli Monitoring is a profile-based application that runs in a Tivolienvironment. Different profiles can be defined containing differentselections of resource models. All aspects of existing profiles can bemodified, including the addition, deletion and customization of resourcemodels. You can distribute multiple profiles to each endpoint.
Recovery actionsFor any event, recovery actions can be run automatically, such as built-inactions (for Windows) or tasks. The actions can take positive steps toremedy the situation, or can ensure that information about the event isdistributed to the appropriate authorities or entities.
Built-in actions
Note: The indications in IBM Tivoli Monitoring for Databases: DB2resource models do not have built-in actions.
Certain events can have one or more built-in actions predefined forthem. An action can be either the execution of a CIM class methodor the execution of a program. Both type of actions can beimplemented only through the IBM Tivoli Monitoring Workbench.For example, an event that detects the failure of a service couldhave the restart of that service as its built-in action. Thus, withoutany human intervention, IBM Tivoli Monitoring detects the failureof a service and automatically restarts it. Built-in actions aredefined by default as part of an event, but can be removed. Theyhave the same event ID as the event that they are designed tocorrect.
6 IBM Tivoli Monitoring for Databases: DB2: User’s Guide

Tasks For each event you can select one or more tasks to be performedwhen the event is triggered. The tasks that are triggered by an IBMTivoli Monitoring event can access the event name and eventthresholds of the triggering event by accessing the environmentvariables.
Resource modelsIBM Tivoli Monitoring products provide predefined resource models thataccess specific performance data from the system at runtime. (For example,the Process resource model gathers data about processes running on thesystem.) The resource models process the data they collect using analgorithm that determines whether or not the system is performing toexpectations. You can either use a resource model’s default values to collectperformance data or customize the resource models to match specificrequirements in your environment. Distributing resource models usingdefault values enables you to begin monitoring immediately to obtainuseful data concerning your enterprise. When you become more familiarwith the monitoring process and feedback, you may choose to customizethe resource model information.
SchedulingIBM Tivoli Monitoring contains a scheduling feature that enables you todetermine a period within which monitoring takes place and specificscheduling rules. The monitoring period is determined by defining a fromand a to date.
The scheduling rules enable you to define time periods on specificweekdays during which monitoring takes place. Any number of rules canbe defined, allowing you to set up a complex pattern of resourcemonitoring for a profile, covering the time periods important to you.
The scheduled times are always interpreted as local times, enabling you toset up a single rule that monitors the same local time period in differenttime zones. For example, if your region covers several time zones, but youwant to monitor morning activities in each time zone, a single ruledefining the monitoring period of between 08:00 and 13:00 is interpretedlocally in each of the time zones, so that you monitor the same relativeperiod.
You should note also that all times of events or activities reported fromendpoints or gateways are also logged in the local time of the system fromwhere they originated.
ThresholdsEach resource model defines one or more thresholds. Each threshold has adefault numeric value that you can change when you define the profile.The monitoring algorithm written in the Java script determines how theresource model uses a threshold. The following are examples of how aresource model can use thresholds:v A threshold value might represent a limit that, if not met, indicates an
unsatisfactory resource state. For example, if you want the system tonotify you when disk space drops under 70%, set the threshold value to70 to generate an indication each time your disk space is less than 70%.
v Some threshold values control the scope of what the resource modelmonitors. For example, the Windows Process resource model uses theMaximum Processes threshold to limit the number processes monitored
Chapter 1. Overview 7

for the highest usage of CPU. Thus, if you set the Maximum Processesthreshold to 5, the resource model only reports on the the five highestCPU-using processes.
You can add a description for each threshold in the Threshold dialogexplaining what each value measures and how it is used within themonitoring algorithm.
IBM Tivoli Monitoring for Databases: DB2 administratorsThe Tivoli Management Framework administrator or root administrator canperform tasks and manage policy regions in one or more management regions.
In IBM Tivoli Monitoring for Databases: DB2 the initial administrator who canperform DB2 database management tasks is the Tivoli Management Frameworkadministrator or root administrator. After you install IBM Tivoli Monitoring forDatabases: DB2, you can define and give authorization roles to a non-rootadministrator (it is recommended that you select your DB2 product administrator).Based on these roles, the IBM Tivoli Monitoring for Databases: DB2 administratorcan perform assigned database and system management tasks.
Authorization rolesTivoli authorization roles determine the range of actions an administrator canperform in the Tivoli Management Framework policy region. You assign roles toadministrators so they can perform system or database management procedures. Arole can be over the entire Tivoli management region or over a specific set ofresources, such as those contained in a policy region. Super, senior, admin, policyand user are examples of standard Tivoli Management Framework authorizationroles. See the Tivoli Management Framework User’s Guide for information on TivoliManagement Framework provided roles.
The IBM Tivoli Monitoring for Databases: DB2 software includes the followingauthorization roles:
db2_userThis role provides the ability to view managed resources and query adatabase.
db2_dbaThis role provides the ability to perform all IBM Tivoli Monitoring forDatabases: DB2 operations and functions on a DB2 instance and database.
DB2 managed resources and endpointsA managed resource is a system or network resource that you manage with TivoliManagement Framework. A managed resource is a specific resource that has adefault policy defined in the policy region. An endpoint is a managed resource thatis the target for distribution of a profile or the resource on which a task or jobruns.
The following list provides important features of a Tivoli endpoint:v Software installation for an endpoint requires less than one MB of disk space.v An endpoint does not have an object database, which further reduces its disk
space requirement.v An endpoint uses method cache.
8 IBM Tivoli Monitoring for Databases: DB2: User’s Guide
v An endpoint is the final destination for a profile distribution. Endpoint gatewaysreside on managed nodes, and they control all communication and operations ofendpoints with the managed nodes. A gateway can support thousands ofendpoints.
IBM Tivoli Monitoring for Databases: DB2 provides six types of managedresources:v DB2InstanceManagerv DB2DatabaseManagerv DB2Gatewayv DB2PartitionManagerv DB2PartitionGroupManagerv DB2Discovery
You can subscribe database and instance endpoints to profiles within profilemanagers in the same way you subscribe any other managed resource.
User interface optionsThe IBM Tivoli Monitoring for Databases: DB2 software offers a choice of thefollowing user interfaces:v Tivoli desktop graphical user interface. The desktop includes the Navigator, a
search tool that enables you to quickly access Tivoli objects in the managementregion without regard to object hierarchy.
v Tivoli command line interface (CLI) for entering Tivoli commands and scripts.Tivoli commands are run in a shell on an endpoint, a managed node, a gateway,or a Tivoli management region server. A shell is a command interpreter thatenables the operating system to process commands. You can run commandsfrom a shell’s command line or include them in shell scripts on either UNIX orWindows operating systems. Before running Tivoli commands, you must set theTivoli environment variables for the shell. This procedure is described inChapter 1, “Overview” of the IBM Tivoli Monitoring for Databases, Version 5.1.0:DB2 Reference Guide.
This document provides procedures for commands from either the desktop or thecommand line interface.
Chapter 1. Overview 9

10 IBM Tivoli Monitoring for Databases: DB2: User’s Guide

Chapter 2. Getting started quick-reference guide
This chapter provides a quick-reference table of the installation and setupprocedures you must perform before you can use IBM Tivoli Monitoring forDatabases: DB2.
Table 2. Quick reference to installation and setup procedures
Procedure Refer to
1. Make sure you have the required amount of diskspace and memory for the IBM Tivoli Monitoringfor Databases: DB2software.
IBM Tivoli Monitoring forDatabases, Version 5.1.0: DB2Release Notes
2. Install the software. IBM Tivoli Monitoring forDatabases: Component InstallationGuide
3. Assign a DB2 administrator to the Administratorrole for the IBM Tivoli Monitoring for Databases:DB2 software.
The Tivoli Management FrameworkUser’s Guide provides informationon how to assign authorizationroles to Tivoli administrators.
4. Assign the db2_dba and policy roles to the IBMTivoli Monitoring for Databases: DB2 administrator.
The Tivoli Management FrameworkUser’s Guide provides informationon how to assign authorizationroles to Tivoli administrators.
5. Create an IBM Tivoli Monitoring for Databases:DB2 policy region.
“Creating an IBM TivoliMonitoring for Databases: DB2policy region” on page 20
6. Set the following managed resource types for theIBM Tivoli Monitoring for Databases: DB2 policyregion:v DB2InstanceManagerv DB2DatabaseManagerv DB2Gatewayv DB2PartitionManagerv DB2PartitionGroupManagerv DB2Discovery
“Adding or removing managedresource types” on page 23
7. Set the Tmw2kProfile managed resource type forthe IBM Tivoli Monitoring for Databases: DB2policy region to create DB2 distributed monitoringprofiles.
“Adding or removing managedresource types” on page 23
8. Create a db2ecc user ID and assign it to the DB2SYSADM group on the machine where DB2 islocated.
“Creating a db2ecc user ID andassigning an administrator group”on page 25
11

Table 2. Quick reference to installation and setup procedures (continued)
Procedure Refer to
9. Create the DB2 objects that you will manage on theTivoli desktop.
“Creating DB2 instance objects”on page 26
“Creating DB2 database objects”on page 28
“Creating DB2 gateway objects”on page 31
“Creating partition objects” onpage 33
“Creating partition group objects”on page 35
“Creating DB2 Discovery objects”on page 37
10.Set up monitoring profiles and tasks for theresources and applications that you want tomonitor. This procedure contains the followingsub-procedures:v Create a profile manager and a profile for the
monitors.v Subscribe resources to profile managersv Add default and custom resource models to
profiles
“Creating profile managers andprofiles” on page 46
“Subscribing resources to profilemanagers” on page 48
“Adding default resource modelsto profiles” on page 49
“Distributing profiles from thedesktop” on page 50
Chapter 8, “Customizing resourcemodels” on page 91
11.For each resource model in your profile, do thefollowing:v Determine how the resource model generates an
event by specifying thresholds for each indicationfor that resource model.
v Specify if you want a recovery action when aspecific event occurs.
v Specify if you want corrective or reporting tasksfor an event.
v Specify if you want to receive information on aspecific event through a notice.
v Specify if you want to customize the resourcemodel parameters to optimize the monitoringprocess.
v Specify when the monitoring occurs.v Specify if you want the monitoring to occur at
specific time periods on selected days.v Specify if you want the collected log data written
to a local database.
“Customizing indications” onpage 93
“Editing a built-in action” onpage 97
“Specifying tasks for anindication” on page 99
“Sending a notice toadministrators when an eventoccurs” on page 101
“Customizing parameters” onpage 102
“Creating scheduling rules” onpage 104
“Customizing the schedulingmonitoring period” on page 106
“Customizing data logginginformation” on page 108
12.Subscribe endpoints to the profile manager.
“Subscribing resources to profilemanagers” on page 48
12 IBM Tivoli Monitoring for Databases: DB2: User’s Guide

Table 2. Quick reference to installation and setup procedures (continued)
Procedure Refer to
13.Save and distribute profiles.
“Distributing profiles from thedesktop” on page 50
“Distributing profiles usingMDist2” on page 52
14.Set up customized tasks.
“Customizing a task” on page 74
15.Run a job from the task library.
“Running a job” on page 81
16.Set up a job task in a schedule.
“Scheduling a job” on page 82
17.Optional: Connect IBM Tivoli Monitoring forDatabases: DB2 to the Tivoli Enterprise Consoleproduct.
Appendix B, “Setting Up theTivoli Enterprise Console” onpage 129
18.Optional: Install the Tivoli Business SystemsManager product to control DB2 resources.
Appendix C, “Integrating withTivoli Business Systems Manager”on page 137
19.Optional: Install the Tivoli Enterprise DataWarehouse product to control DB2 resources.
Chapter 9, “Enabling IBM TivoliMonitoring for Databases: DB2for Tivoli Enterprise DataWarehouse” on page 115
Chapter 2. Getting started quick-reference guide 13

14 IBM Tivoli Monitoring for Databases: DB2: User’s Guide

Chapter 3. Setting up IBM Tivoli Monitoring for Databases:DB2
This chapter describes the general setup procedures for IBM Tivoli Monitoring forDatabases: DB2.
Table 3 provides an overview of the topics covered in this chapter.
Table 3. DB2 setup guidelines
Goal Refer to
1. Create a DB2 administrator forIBM Tivoli Monitoring forDatabases: DB2.
Tivoli Management Framework User’s Guide
2. Create an IBM TivoliMonitoring for Databases: DB2policy region to maintain andmanage your DB2 resources.
“Creating an IBM Tivoli Monitoring forDatabases: DB2 policy region” on page 20
3. Move the DB2Manager-DefaultPolicyRegion objects tothe IBM Tivoli Monitoring forDatabases: DB2 policy regionfor easy access.
“Moving the Monitoring for DB2 objects” onpage 21
4. Set the DB2 managed resourcetypes for the IBM TivoliMonitoring for Databases: DB2policy region. This enables youto create DB2 resource objectsthat you want to manage.
“Adding or removing managed resource types”on page 23
5. Create a db2ecc operatingsystem user ID and assign it toan administrator group. Theuser login name is the rootadministrator of the Tivolimanagement region where youplan to use Tivoli Manager forDB2.
“Creating a db2ecc user ID and assigning anadministrator group” on page 25
6. Create DB2 resource objects thatyou want to manage.
“Creating DB2 instance objects” on page 26
“Creating DB2 database objects” on page 28
“Creating DB2 gateway objects” on page 31
“Creating partition objects” on page 33
“Creating partition group objects” on page 35
“Creating DB2 Discovery objects” on page 37
7. Automatically create multipleDB2 instance objects in a policyregion.
“Discovering DB2 instances” on page 39
15

Table 3. DB2 setup guidelines (continued)
Goal Refer to
8. Automatically create multipledatabase objects in a policyregion.
“Discovering DB2 databases” on page 41
9. Change the members of thepartition group.
“Adding or removing partition group members”on page 42
10. Assign administrators to receivemessages from a notice group.
“Subscribing to notice groups” on page 43
Starting the Tivoli environment
ObjectiveTo access the Tivoli environment so that you can use the operations and functionsof IBM Tivoli Monitoring for Databases: DB2.
Background informationYou can access the Tivoli desktop or the Tivoli command line interface in order touse the operations and functions of IBM Tivoli Monitoring for Databases: DB2.
The Tivoli desktop is a user interface that provides point-and-click access to IBMTivoli Monitoring for Databases: DB2 features and functions. The Tivoli desktopprovides a central control point for you to organize, manage, and delegate systemmanagement operations.
IBM Tivoli Monitoring for Databases: DB2 also provides a command line interface(CLI) that enables you to enter commands from the keyboard. You can use thesecommands in shell scripts and with system utilities such as the UNIX cron utility.For more information about using commands, refer to the Tivoli ManagementFramework Reference Manual.
Required authorization roleadmin
Before you beginNone.
When you finishNone.
ProcedureYou can perform this procedure from the Tivoli command line or from the desktop.
Command line: Use one of the following two methods to access the commandline interface, depending on whether you use a Windows NT or UNIX operatingsystem:v Windows NT
1. Log on to a Windows NT managed node or Tivoli management regionserver.
2. Click Start and select Command Prompt in the Windows taskbar to open thecommand prompt window.
16 IBM Tivoli Monitoring for Databases: DB2: User’s Guide

3. Enter the following command to run the environment initialization and setupscript:%SystemRoot%\system32\drivers\etc\Tivoli\setup_env.cmd
This command enables you to perform all of the IBM Tivoli Monitoring forDatabases operations.
v UNIX
1. Log on to a UNIX managed node or Tivoli management region server.2. Run the environment initialization and setup script.
– If you are using the Bourne, Korn, or bash shell, run the followingcommand:. /etc/Tivoli/setup_env.sh
– If you are using the C shell, run the following command:source /etc/Tivoli/setup_env.csh
Windows NT desktop:
1. Do one of the following to access the login screen of the Tivoli desktop:v Click Start in the Windows taskbar and select Programs.
v Select Tivoli and selectTivoli a second time.—OR—
v Enter the tivoli command at a DOS prompt. See the Tivoli ManagementFramework Reference Manual for more information on this command.
2. Type the following values in the fields of the login screen:v Host Machine specifies the Tivoli managed node, including the Tivoli server
where the Tivoli desktop should connect.v Log In As specifies the login name to the managed node.v Password specifies the password for the specified login name.
3. Click OK to display the Tivoli desktop.
Setting authorization roles
ObjectiveTo authorize persons to have the roles they need for managing resources in IBMTivoli Monitoring for Databases: DB2.
Background informationWhen you authorize roles for the persons who use the product, they can performoperations and access the resources that their jobs require. For example, anadministrator needs the following roles, depending on his or her responsibilities:v db2_user provides the ability to view managed resources and query a database.v db2_dba provides the ability to perform all IBM Tivoli Monitoring for
Databases: DB2 operations and functions on a DB2 instance and database.
Required authorization rolesenior
Before you beginNone.
Chapter 3. Setting up IBM Tivoli Monitoring for Databases: DB2 17

When you finishYou can add managed resources (objects) to a policy region. See “Adding orremoving managed resource types” on page 23 for more information on workingwith various types of managed resources.
ProcedureYou can perform this procedure from the Tivoli command line or from the desktop.
Command line: Use the wsetadmin command to set or change resourceauthorization roles. See the Tivoli Management Framework Reference Manual for moreinformation.
Desktop: Follow these steps to perform this procedure from the Tivoli desktop:1. Double-click the Administrators icon to display the Administrators dialog box.
2. Right-click the existing administrator whose role you want to modify to displaythe pop-up menu.
3. Select Edit Resource Roles to display the Set Resource Roles dialog box.
Figure 1. Administrators dialog box
18 IBM Tivoli Monitoring for Databases: DB2: User’s Guide

4. Select a resource for which you want to set the administrator’s role from theResources list.Additional information: The roles listed in the Available Roles and CurrentRoles lists depend on the particular applications installed.
5. Add or remove one or more roles for one or more selected resources as follows:v Add Roles
a. Do one of the following to add roles for resources:– Select one or more roles from those shown in the Available Roles
scrolling list, and click the left-arrow button.The selected roles move from the Available Roles scrolling list to theCurrent Roles scrolling list.—OR—
– Double-click an entry in the Available Roles scrolling list to move itautomatically to the Current Roles scrolling list.
Note: Moving a role from one list to another only moves the selectedroles temporarily to the Current Roles or Available Rolesscrolling lists.
b. Click Change after moving each role or multiple roles.Additional information: The Set Resource Roles dialog box remainsdisplayed until you click Close or Change & Close.
c. Click Change & Close to add all of the selected roles for theadministrator and return to the Administrators dialog box.
Figure 2. Set Resource Roles dialog box
Chapter 3. Setting up IBM Tivoli Monitoring for Databases: DB2 19

v Remove Rolesa. Do one of the following to remove roles for resources:
– Select one or more roles from those shown in the Current Rolesscrolling list, and click the right-arrow button.The selected roles move from the Current Roles scrolling list to theAvailable Roles scrolling list.—OR—
– Double-click an entry in the Current Roles scrolling list to move itautomatically to the Available Roles scrolling list.
Note: Moving a role from one list to another only moves the selectedroles temporarily to the Current Roles or Available Rolesscrolling lists.
b. Click Change after moving each role or multiple roles.Additional information: The Set Resource Roles dialog box remainsdisplayed until you click Close or Change & Close.
c. Click Change & Close to remove all of the selected roles for theadministrator and return to the Administrators dialog box.
6. Shut down and restart the Administrator’s desktop to activate these changes.
Creating an IBM Tivoli Monitoring for Databases: DB2 policy region
ObjectiveTo create an IBM Tivoli Monitoring for Databases: DB2 policy region where similarmanaged resources are stored to share one or more common policies.
Background informationA policy region is a collection of DB2 resources, such as databases or servers, thatshare one or more common policies. By grouping similar resources into policyhierarchies that reflect your organization, you can customize IBM Tivoli Monitoringfor Databases: DB2 to maintain and manage your DB2 resources. For example, youcan create a policy region, North_America, that distinguishes the location,department, or group of resources.
Required authorization rolesenior and policy
Before you beginInstall the IBM Tivoli Monitoring for Databases: DB2 product. Refer to IBM TivoliMonitoring for Databases: Component Installation Guide for information.
When you finishMove the DB2Manager-DefaultPolicyRegion objects that were created duringinstallation to the IBM Tivoli Monitoring for Databases: DB2 policy region. Refer to“Moving the Monitoring for DB2 objects” on page 21 for information.
ProcedureYou can perform this procedure from the Tivoli command line or from the desktop.
Command line: Use the wcrtpr command to create a policy region. The syntax forthe command will vary depending on the version of the Tivoli ManagementFramework you are using. For more information, refer to the Tivoli ManagementFramework User’s Guide.
20 IBM Tivoli Monitoring for Databases: DB2: User’s Guide

For example, to create a policy region named TMfDB2 on administrator Chris’sdesktop, enter the following command:wcrtpr -a chris TMfDB2
Desktop:
1. Click Create and select Region to display the Create Policy Region dialog box.2. In the Name text box, type a name for the new policy region.
Additional Information: The policy region name can include letters, underscores,dashes, periods, and spaces; however, they must be unique within the localTivoli management region.
3. Click Create & Close to create the new policy region and return to the desktop.
Moving the Monitoring for DB2 objects
ObjectiveTo move the Monitoring for DB2 objects to the IBM Tivoli Monitoring forDatabases: DB2 region.
By moving these objects and tools to an IBM Tivoli Monitoring for Databases: DB2policy region, you make them readily available for use and reuse from the policyregion. If you do not move the objects and tools, you must access them throughthe Tivoli Navigator.
Background informationThe default policy region contains instance objects and tools that were optionallycreated during the IBM Tivoli Monitoring for Databases: DB2 installationprocedure. The tools include task libraries, default distributed monitoring profiles,and the DB2Discovery object for automatically creating multiple instance objects.
All DB2 objects are accessible as endpoints in a policy region regardless of whetherthose objects reside in the same policy region or not. The objects belong to theTivoli management region and not to a specific policy region.
Note: If you move the task libraries from the Monitoring for DB2 objects, allavailable Tivoli endpoints become associated with the task libraries. Only afew of the task libraries are valid for IBM Tivoli Monitoring for Databases:DB2.
Required authorization rolesenior and policy
Before you beginCreate an IBM Tivoli Monitoring for Databases: DB2 region where you can movethe Monitoring for DB2 objects and tools. Refer to “Creating an IBM TivoliMonitoring for Databases: DB2 policy region” on page 20 for information.
When you finishNone
ProcedureYou can perform this procedure from the Tivoli command line or from the desktop.
Command line: Use the wmv command to move DB2 instance objects and toolsbetween policy regions. The syntax for the command will vary depending on theversion of the Tivoli Management Framework you are using. For information, referto the Tivoli Management Framework User’s Guide.
Chapter 3. Setting up IBM Tivoli Monitoring for Databases: DB2 21

For example, to move the DB2ManagerDatabaseTasks task library tool to a policyregion called TMfDB2, enter the following command:wmv /Library/TaskLibrary/DB2ManagerDatabaseTasks/Regions/TMfDB2
Desktop:
1. Click Desktop and select Navigator from the desktop to display the Navigatordialog box.
2. Select the PolicyRegion check box to display the available policy regions in theResources scrolling list.
3. Select Monitoring for DB2 and click Go To to display the Policy Region dialogbox.
4. Select the icon for the DB2 instance object or tool.5. Drag and drop the icon on the IBM Tivoli Monitoring for Databases: DB2
policy region icon to complete the move.Additional information: When using a remote access application, it may benecessary to hold down the shift key when performing this step.
Note: For Solaris Operating Environments only: You cannot use the desktop todrag the DB2 instance object or tool icons to move them out of theMonitoring for DB2. You must use the command line.
Figure 3. Navigator dialog box
22 IBM Tivoli Monitoring for Databases: DB2: User’s Guide

Adding or removing managed resource types
ObjectiveTo set the managed resource types for the IBM Tivoli Monitoring for Databases:DB2 policy region and to define the DB2 resource objects that can be created.
Background informationThe managed resource types must be defined before any resource objects can becreated on the Tivoli desktop. For example, to add a DB2 instance object, add theDB2InstanceManager resource type.
The following types of managed resources are available in the IBM TivoliMonitoring for Databases: DB2 product:v DB2InstanceManager manages instances of DB2 servers.v DB2DatabaseManager manages DB2 database objects.v DB2Gateway manages DB2 gateway objects.v DB2PartitionManager manages instances of DB2 partitioned servers.v DB2PartitionGroupManager manages partitioned group objects as defined in
the IBM Tivoli Monitoring for Databases: DB2 product.v DB2Discovery manages DB2 Discovery objects.
Required authorizationsenior and policy
Before you beginv Create an IBM Tivoli Monitoring for Databases: DB2 policy region. Refer to
“Creating an IBM Tivoli Monitoring for Databases: DB2 policy region” onpage 20 for information.
When you finishNone
ProcedureYou can perform this procedure from the Tivoli command line or from the desktop.
Command line: Use the following commands to set the managed resource typesin the policy region.
Table 4. Adding or removing managed resource types from a policy region
Command Task
wgetpr <region>where: region Specifies the target policy region.
To list the installedmanaged resources ina policy region
Chapter 3. Setting up IBM Tivoli Monitoring for Databases: DB2 23

Table 4. Adding or removing managed resource types from a policy region (continued)
Command Task
wsetpr [–d <default_pol>] [–v <validation_pol>] [–E | –e]<managed_resource> <policy_region>
where:
–d default_polSpecifies the label of the default policy.
–v validation_polSpecifies the label of the validation policy to be used forthe managed resource.
–E Displays policy validation.
–e Enables policy validation.
managed_resourceSpecifies to managed resource to add.
policy_regionSpecifies the policy region to which the managed resourcewill be added.
To set up themanaged resources ina policy region
wsetpr –r <managed_resource> <policy_region>where: –r manged_resource policy_region specifies themanaged resource to remove from the policy region.
To remove a managedresource from a policyregion
The following example adds the managed resource DB2DatabaseManager to theTMfDB2 policy region.wsetpr DB2DatabaseManager TMfDB2
Desktop:
1. Double-click the policy region to display the Policy Region dialog box.2. Click Properties and select Managed Resources to display the Set Managed
Resources dialog box.
Additional Information: The Current Resources list displays the policy region’scurrent managed resources and the Available Resources list displays themanaged resources that can be added.
Figure 4. Set Managed Resources dialog box
24 IBM Tivoli Monitoring for Databases: DB2: User’s Guide

3. Select the resources to be added from the Available Resources list.4. Click the left-arrow button to move the selection to the Current Resources list.
Additional Information: Double-clicking a selection also moves the resource fromone list to another.
5. Optional: Select one or more managed resources in the Current Resources listand click the right-arrow button to remove the managed resource.
6. Click Set & Close to save the changes and close the Set Managed Resourcesdialog box.
Creating a db2ecc user ID and assigning an administrator group
ObjectiveTo define the db2ecc operating system user ID and assign it to the DB2 SYSADMgroup so that the DB2 instance can be managed by IBM Tivoli Monitoring forDatabases: DB2.
Background informationYou must define a db2ecc operating system user ID on each DB2 endpoint andmake the primary group set to the SYSADM group defined to DB2.
Required authorization roleNo role required.
Before you beginFor Solaris Operating Environments and AIX only: If you have more than one DB2instance on an endpoint, verify that the SYSADM group parameter setting is thesame for each instance. See step 2 for information on verifying and changing theSYSADM group parameter.
When you finishCreate a DB2 instance object. Refer to Table 5 on page 26 for more information.
ProcedureYou must complete this procedure on AIX, Solaris Operating Environments, andWindows operating systems.
For AIX and Solaris Operating Environment Installations:
1. Define a db2ecc operating system user ID on each endpoint in the Tivolimanagement region where DB2 managed resources will be managed andmonitored.
2. The current setting of the SYSADM DB2InstanceManager configuration file canbe checked from the command line by entering the command:db2 get dbm config
Additional Information: The db2ecc user ID needs to be in the primary operatingsystem group, which is defined for the DB2InstanceManager as the SYSADMgroup for each instance to be managed. After you select an operating systemgroup to function as the DB2 system administrator group, you must define it asthe value of the SYSADM parameter in the DB2InstanceManager configurationfile.
The value of the SYSADM parameter can be changed by entering thecommand:db2 update dbm config using sysadm_group <global_group_name>
Chapter 3. Setting up IBM Tivoli Monitoring for Databases: DB2 25

3. If you share executable files between nodes in your Tivoli management regionusing NFS remote mount, ensure that the integer values used to represent thedb2ecc OS user ID and its primary group are identical among all gateways thatshare executable files in your Tivoli management region.
For Windows installations:
1. Define a local or domain db2ecc user identification (in the operating systemsoftware) on each endpoint in the Tivoli management region where DB2managed resources will be managed and monitored.
2. Define the db2ecc user as a member of the local or domain Administrators andTivoli_Admin_Privileges groups.
3. Grant the Log on as service policy to the db2ecc user from the User RightsPolicy dialog box.
4. For DB2 Extended-Enterprise Edition only. Set Tivoli Remote Access Account(TRAA) services to db2ecc, or any valid ID, by using the Tivoli wlcftapcommand. When you enter wlcftap -r db2ecc you will be prompted for apassword. To activate the user, enter wlcftap -a.
Creating DB2 instance objects
ObjectiveTo create an instance of a DB2 database server on the Tivoli desktop so thatadministrators can monitor server activity and simplify redundant tasks.
Background informationAn instance object is an occurrence or session of a partitioned or nonpartitioneddatabase server. For a partitioned database server, all partitions belonging to theinstance must reside in the same Tivoli management region. Only one instanceobject is needed to represent a partitioned database server even if the instanceresides on multiple managed nodes.
Note: If you delete and then recreate a DB2 instance, you must delete and recreatethe corresponding DB2InstanceManager from the IBM Tivoli Monitoring forDatabases: DB2 product. If you delete a DB2InstanceManager object, youmust also unsubscribe the object from all profile managers to which it issubscribed. In addition, when you delete a DB2InstanceManager object, youalso delete any child objects associated with the object.
After the instance is created, the DB2InstanceManager icon is displayed on thedesktop as shown in Table 5. The server’s state must be checked before the statuscan be changed to Normal. Refer to “Updating the state of a server” on page 61 forinformation.
Table 5. DB2InstanceManager icon
Icon Managed resource object
DB2InstanceManager
DB2InstanceManager object for parallelinstances
26 IBM Tivoli Monitoring for Databases: DB2: User’s Guide

Required authorization roledb2_dba
Before you beginv Set up the DB2InstanceManager managed resource type for the policy region.
Refer to “Adding or removing managed resource types” on page 23 forinformation.
v Create and assign a db2ecc User ID. Refer to “Creating a db2ecc user ID andassigning an administrator group” on page 25
When you finishCreate a DB2DatabaseManager object manually or by using the Discover Databasefunction. Refer to either “Discovering DB2 databases” on page 41 or “Creating DB2database objects” on page 28 for information.
ProcedureYou can perform this procedure from the Tivoli command line or from the desktop.
Command line: Use the wcdb2inst command to create an instance object.
wcdb2inst -l <instance_label> -e <endpoint> -i <instance > -p <policy_region >[-u<password>] [-m <proxy node>]
where:
-l instance_labelSpecifies a unique label for the DB2 server.
-e endpointSpecifies the endpoint label of the computer containing the DB2 server.
-i instanceSpecifies the name of the DB2 server on the specified managed node forwhich the endpoint is created.
-p policy_regionSpecifies the name of the policy region to which the DB2 instance willbelong.
- u passwordFor Windows only. Specifies the db2ecc password used to log in to theoperating system. Passwords are case-sensitive.
-m proxy nodeThis optional argument defines where the DB2 instance object is stored. Ifa proxy node is not specified, the instance is stored on the gateway wherethe endpoint is connected as specified in the -e argument.
Note: In order to store the instance on a node, you must have IBM TivoliMonitoring Component Services, Version 5.1.0 and IBM TivoliMonitoring for Databases: DB2, Version 5.1.0, installed on the node.
For example, to create a DB2 instance for the db2inst1 server labeleddb2inst1@catalina on the endpoint catalina in the policy region TMfDB2, use thefollowing command:wcdb2inst -l "db2inst1@catalina" -e catalina -i db2inst1 -p TMfDB2
Desktop:
1. Double-click the policy region to display the Policy Region dialog box.
Chapter 3. Setting up IBM Tivoli Monitoring for Databases: DB2 27

2. Click Create and select DB2InstanceManager to display the CreateDB2InstanceManager dialog box.
3. Select the host name of the computer on which the DB2 server exists from theEndpoint scrolling list.
4. Type the name of the DB2 server on the host in the Instance Name text box.5. Type a unique label for the desktop icon representation of the instance name in
the Label text box.6. For Windows only. Type the db2ecc password used to log in to the operating
system where the endpoint and DB2 server are located.7. Click Create & Close to create the instance object and close the dialog box.
Additional Information: Right-click the new instance object and select CheckStatus to change the object to a normal state.
Creating DB2 database objects
ObjectiveTo create a DB2DatabaseManager object so that administrators can manage and runtasks on the DB2 database from the Tivoli desktop.
Background informationTo access and manage a DB2 database from the Tivoli desktop, you must create aDB2DatabaseManager object. DB2DatabaseManager objects reference DB2 ExtendedEdition (EE) databases.
The database object must be installed on the host that is an endpoint in the Tivolimanagement region. When you create the database object, it becomes a databaseendpoint in the policy region. Subscribe the endpoint to profiles in profilemanagers in the same way as any other managed resource.
Note: To delete a DB2 database object, you must unsubscribe it from all profilemanagers.
Multiple DB2DatabaseManager objects can be created using Discover Databases.Refer to “Discovering DB2 databases” on page 41 for information.
Figure 5. Create DB2InstanceManager dialog box
28 IBM Tivoli Monitoring for Databases: DB2: User’s Guide

After the database object is created, the DB2DatabaseManager icon is displayed onthe desktop.
Note: Child objects are created on the same node as the parent objects.
Table 6. DB2DatabaseManager icon
Icon Managed resource object
DB2DatabaseManager
Required authorization roledb2_dba
Before you beginv Set up the DB2DatabaseManager managed resource type for the policy region.
Refer to “Adding or removing managed resource types” on page 23 forinformation.
v Create a DB2InstanceManager object. Refer to “Creating DB2 instance objects” onpage 26 for information.
When you finishSet up the monitoring profiles to monitor DB2 databases. Refer to Chapter 8,“Customizing resource models” on page 91 for information.
ProcedureYou can perform this procedure from the Tivoli command line or from the desktop.
Command line: Use the wcdb2dbs command to create a database object.
wcdb2dbs -l <database_label > -i <instance_label> -d <database> -p <policy_region>
where:
-l database_labelSpecifies a unique label for the DB2 database object icon representation.
-i instance_labelSpecifies the label of the server containing the DB2 partition.
-d databaseSpecifies the name of the existing database on the specified server forwhich a database endpoint will be created.
-p policy_regionSpecifies the name of the policy region to which the DB2 database objectwill belong.
For example, to create a DB2 database object for a sample database labeledsample@db2inst1, on the server db2inst1@catalina in the policy region westcoast,enter the following command:wcdb2dbs -l "sample@db2inst1" -i "db2inst1@catalina" -d sample -p westcoast
Desktop:
1. Double-click the policy region to display the Policy Region dialog box.
Chapter 3. Setting up IBM Tivoli Monitoring for Databases: DB2 29

2. Click Create and select DB2DatabaseManager to display the CreateDB2DatabaseManager dialog box.
3. Select the DB2 instance where the DB2 database exists from the DB2 Instancescrolling list.
4. Type the name of the DB2 database to manage in the Database Name text box,or click Discover to create multiple databases.Additional Information: If you choose to Discover databases, select the databasesfrom the Discover databases dialog box, and click OK. Refer to “DiscoveringDB2 databases” on page 41 for more information.
5. Type a unique label for the icon representation of the DB2 database in theLabel text box.
6. Click Create & Close to create the DB2 database object and close the dialogbox.
Figure 6. Create DB2DatabaseManager dialog box
Figure 7. Discover databases dialog box
30 IBM Tivoli Monitoring for Databases: DB2: User’s Guide

Creating DB2 gateway objects
ObjectiveTo create a DB2Gateway object so that administrators can manage and run tasks onthe DB2 gateway from the Tivoli desktop.
Background informationA DB2 gateway object represents a DCS database connection to a host DB2 systemthrough DB2 Connect Enterprise Edition (EE).
To access and manage a DB2 gateway from the Tivoli desktop, you must create aDB2Gateway object.
You must install the gateway object on the host that is an endpoint in the Tivolimanagement region. When you create the gateway object, it becomes a gatewayendpoint in the policy region. Subscribe the endpoint to profiles in profilemanagers in the same way as any other managed resource.
Note: To delete a DB2 gateway object, you must unsubscribe it from all profilemanagers.
You can create multiple DB2Gateway objects by using Discover Databases. Refer to“Discovering DB2 databases” on page 41 for information.
After you create the gateway object, the DB2Gateway icon is displayed on thedesktop.
Note: Child objects are created on the same node as the parent objects.
Table 7. DB2Gateway icon
Icon Managed resource object
DB2Gateway
Required authorization roledb2_dba
Before you beginv Set up the DB2Gateway managed resource type for the policy region. Refer to
“Adding or removing managed resource types” on page 23 for information.v Create a DB2InstanceManager object. Refer to “Creating DB2 instance objects” on
page 26 for information.
When you finishSet up the monitoring profiles to monitor DB2 gateways. Refer to Chapter 8,“Customizing resource models” on page 91 for information.
ProcedureYou can perform this procedure from the Tivoli command line or from the desktop.
Command line: Use the wcdb2gateway command to create a gateway object.
wcdb2gateway -l <gateway_label > -i <instance_label> -d <DCSdatabase> -p<policy_region>
Chapter 3. Setting up IBM Tivoli Monitoring for Databases: DB2 31

where:
-l gateway_labelSpecifies a unique label for the DB2 gateway object icon representation.
-i instance_labelSpecifies the label of the server containing the DB2 partition.
-d DCSdatabaseSpecifies the name of the existing database on the specified server forwhich a gateway endpoint is created.
-p policy_regionSpecifies the name of the policy region to which the DB2 gateway objectwill belong.
For example, to create a DB2 gateway object for the database sample, on the serverdb2inst1@catalina in the policy region westcoast, enter the following command:wcdb2gateway -l "sample@db2inst1" -i "db2inst1@catalina" -d sample -p westcoast
Desktop:
1. Double-click the policy region to display the Policy Region dialog box.2. Click Create and select DB2Gateway to display the Create DB2 Gateway
dialog box.
3. Select the DB2 instance where the DB2 gateway exists from the DB2 Instancescrolling list.
4. Type the name of the DB2 database to manage in the DCS Database Name textbox, or click Discover to create multiple databases.Additional Information: If you choose to Discover databases, select the databasesfrom the Discover DCS Databases dialog box, and click OK. Refer to“Discovering DB2 databases” on page 41 for more information.
Figure 8. Create DB2 Gateway dialog box
32 IBM Tivoli Monitoring for Databases: DB2: User’s Guide

5. Type a unique label for the icon representation of the DB2 gateway in the Labeltext box.
6. Click Create & Close to create the DB2 gateway object and close the dialogbox.
Creating partition objects
ObjectiveTo create a DB2PartitionManager object so that administrators can manage and runtasks on partitioned DB2 databases from the Tivoli desktop.
Background informationA DB2PartitionManager object represents the logical division of a DB2Extended-Enterprise Edition (EEE) database on a given node. Each node can havemultiple partitions if multiple databases are defined on the database instance.
Note: To delete a DB2 partition object, you must unsubscribe it from all profilemanagers.
Table 8. DB2PartitionManager icon
Icon Managed resource object
DB2PartitionManager
Required authorization roledb2_dba
Before you beginv Set up the DB2InstanceManager managed resource type for the policy region.
Refer to “Adding or removing managed resource types” on page 23 forinformation.
v Create a DB2InstanceManager object. Refer to “Creating DB2 instance objects” onpage 26 for information.
v Ensure that all partitions belonging to a partitioned database server reside in thesame Tivoli management region.
When you finishSet up monitoring profiles. Refer to Chapter 8, “Customizing resource models” onpage 91 for information.
Figure 9. Discover DCS Database dialog box
Chapter 3. Setting up IBM Tivoli Monitoring for Databases: DB2 33

ProcedureYou can perform this procedure from the Tivoli command line or from the desktop.
Command line: Use the wcdb2pt command to create a DB2PartitionManagerobject.
wcdb2pt -l <partition_label> -i <instance_label> -d <database> -n <node_number> -p<policy_region> [-u <password>]
where:
-l partition_labelSpecifies a unique label for the DB2 partition object’s icon representation.
-i instance_labelSpecifies the label of the server containing the DB2 partition.
-d databaseSpecifies the name of the existing partitioned database in the specifiedserver where the object is created.
-n node_numberSpecifies the node number of the existing partitioned database in thespecified instance where the object is created.
-p policy_regionSpecifies the name of the policy region to which the DB2 partition objectwill belong.
- u passwordFor Windows only. Specifies the db2ecc password used to log in to theoperating system where the endpoint and DB2 server is located.
For example, to create a DB2 partition object for the partitioned database sample,with a node number of 0, in the instance labeled db2pel@catalina in the policyregion westcoast, enter the following command:wcdb2pt -l "sample_0@db2pel" -i "db2pel@catalina" -d sample -n 0 -p westcoast
Desktop:
1. Double-click the policy region to display the Policy Region dialog box.2. Click Create and select DB2PartitionManager to display the Create
DB2PartitionManager dialog box.
34 IBM Tivoli Monitoring for Databases: DB2: User’s Guide

3. Select the DB2 instance that contains the database from the DB2 Instance list.4. Select the node number that contains the database from the Node number list.5. Type the name of the DB2 database in the Database Name text box.
Additional Information: You can optionally click Discover to automatically createmultiple database objects. Refer to “Discovering DB2 databases” on page 41 forinformation.
6. For Windows only: Type the db2ecc password used to log in to the operatingsystem where the endpoint and DB2 server are located.
7. Type a unique label for the icon representation of the object in the Label textbox.
8. Click Create & Close to create the DB2 partition object and close the dialogbox.
Creating partition group objects
ObjectiveTo create a DB2PartitionGroupManager object so that administrators can manageand run tasks on DB2 partitioned groups from the Tivoli desktop.
Background informationA DB2PartitionGroupManager object is an IBM Tivoli Monitoring for Databases: DB2object that represents a collection of DB2 partitions. It does not represent a DB2object and has no relationship to a DB2 node group. The partition group objectenables you to run monitors and tasks from multiple partitions, regardless ofwhere those partitions reside.
Note: To delete a DB2 partition group object, you must unsubscribe it from allprofile managers.
After the partition group object is created, the DB2PartitionGroupManager icon isdisplayed on the desktop.
Figure 10. Create DB2PartitionManager dialog box
Chapter 3. Setting up IBM Tivoli Monitoring for Databases: DB2 35

Table 9. DB2PartitionGroupManager icon
Icon Managed resource object
DB2PartitionGroupManager
Required authorization roledb2_dba
Before you beginv Create a parallel DB2InstanceManager object in your management region. Refer
to “Creating DB2 instance objects” on page 26 for information.v Create DB2 partition objects before creating a DB2 partition group object so that
the DB2 partition group object will not be empty. Refer to “Creating partitionobjects” on page 33 for information.
When you finishSet up monitoring profiles to begin monitoring DB2 database group partitions.Refer to Chapter 8, “Customizing resource models” on page 91 for information.
ProcedureYou can perform this procedure from the Tivoli command line or from the desktop.
Command line: Use the wcdb2pg command to create a DB2 partition groupobject.
wcdb2pg -l <partition_label> -i <instance_label> -d <database> -n <node_number> -p<policy_region>
where:
-l partition_labelSpecifies a unique label for the DB2 partition group object iconrepresentation.
-i instance_labelSpecifies the label of the server containing the DB2 group partition.
-d databaseSpecifies the name of the existing partitioned database in the specifiedserver where the object is created.
-n node_numberSpecifies the node numbers of the existing partitioned database in thespecified instance where the object is created.
-p policy_regionSpecifies the name of the policy region to which the DB2 partition groupobject will belong.
For example, to create a DB2 partition group object for a partition group labeledsample_grp@db2pel, with the node numbers 0, 1, and 2, in the instance labeleddb2pel@catalina, in the partitioned database sample in the policy regionwestcoast, enter the following command:wcdb2pg -l "sample_grp@db2pel" -i "db2pel@catalina" -d sample-n "0 1 2" -p westcoast
36 IBM Tivoli Monitoring for Databases: DB2: User’s Guide

Desktop:
1. Double-click the policy region icon to display the Policy Region dialog box.2. Click Create and select DB2PartitionGroup to display the Create
DB2PartitionGroupManager dialog box.
3. Select the name of the partitioned database server from the DB2 Instance list.4. Select the partitions for the group from the Partition member list.5. Type a unique name for the icon representation of the partition group object in
the Label text box.6. Click Create & Close to create the DB2 partition group object and close the
dialog box.
Creating DB2 Discovery objects
ObjectiveTo create a DB2Discovery object so that multiple DB2InstanceManager objects canbe created automatically. This enables administrators to create instances for all DB2servers simultaneously.
Background informationDiscovery searches specified endpoints for DB2 instances that are not already beingmanaged. When an instance is encountered, Discovery automatically creates aDB2InstanceManager object. Discovery runs from within the policy region wherethe instance objects are added.
A default DB2Discovery object is automatically stored in the DB2Manager-DefaultPolicyRegion upon installation of the IBM Tivoli Monitoring for Databases:DB2 product. Therefore, the DB2Discovery object must be created in the specificpolicy region where servers are to be discovered.
Note: To delete a DB2Discovery object, you must unsubscribe it from all profilemanagers.
After the Discovery object is created, the DB2Discovery icon is displayed on thedesktop.
Figure 11. Create DB2PartitionGroupManager dialog box
Chapter 3. Setting up IBM Tivoli Monitoring for Databases: DB2 37

Table 10. DB2Discovery icon
Icon Managed resource object
DB2Discovery
Required authorization roledb2_dba
Before you beginSet up the DB2Discovery managed resource type for the policy region. Refer to“Adding or removing managed resource types” on page 23 for information.
When you finishDiscover DB2 instances. Refer to “Discovering DB2 instances” on page 39 forinformation.
ProcedureYou can perform this procedure from the Tivoli command line or from the desktop.
Command line: Use the wcdb2dsc command to create a DB2Discovery object.
wcdb2dsc -l <Label> -p <policy_region> [-u <db2ecc Password> -m <proxy node>]
where:
-l LabelSpecifies a unique label for the DB2Discovery object icon representation.
-p policy_regionSpecifies the name of the policy region where the DB2Discovery object willbelong.
- u db2ecc PasswordFor Windows only. Specifies the db2ecc password used to log in to theoperating system where the endpoint and DB2 server are located.
-m proxy nodeThis optional argument defines the managed node where you want to storethe instance objects created by DB2Discovery. If you do not specify thisoption, DB2Discovery stores the instance objects on the gateway. In orderto store the instance on a node, you must have IBM Tivoli MonitoringComponent Services, Version 5.1.0 and IBM Tivoli Monitoring forDatabases: DB2, Version 5.1.0, installed on the node.
Note: Because proxy nodes require the use of the oserv, they must remainon managed nodes at the same level as the Tivoli managementregion server. Do not migrate existing proxy nodes to endpointclients.
Desktop:
1. Double-click the policy region to display the Policy Region dialog box.2. Click Create and select DB2Discovery to display the Create a new
DB2Discovery Object dialog box.
38 IBM Tivoli Monitoring for Databases: DB2: User’s Guide

3. Type a unique label for the icon representation of the DB2Discovery object inthe new DB2Discovery name text box.
4. For Windows only. Type the default db2ecc password defined for the operatingsystem in the Default db2ecc password text box.
5. Click Execute and Close to create the DB2Discovery object and close the dialogbox.
Discovering DB2 instances
ObjectiveTo automatically create multiple DB2 instance objects on the Tivoli desktop.
Background informationDiscovery searches for DB2 instances that reside on endpoints. If a DB2 instance isfound that is not already being managed, a DB2InstanceManager object isautomatically created on the Tivoli desktop.
Required authorization roledb2_user (to edit Discovery) or db2_dba (to run Discovery)
Before you beginCreate a DB2Discovery object in the policy region. Refer to “Creating DB2Discovery objects” on page 37 for information.
When you finishNone
ProcedureYou can perform this procedure from the Tivoli desktop only.
Desktop:
1. Double-click the policy region to display the Policy Region dialog box.2. Right-click the discovery object icon.3. Select Edit Discovery Endpoints to display the Edit Discovery Endpoints
dialog box.
Figure 12. Create a new DB2Discovery Object dialog box
Chapter 3. Setting up IBM Tivoli Monitoring for Databases: DB2 39

4. Select the gateway on which you want to discover DB2 instances from theAvailable Discovery Gateways scrolling list. If only one gateway is displayedin the list, that gateway is the default gateway.
5. Select the endpoints on which you want to discover DB2 instances from theAvailable Discovery Endpoints scrolling list.
6. Click the left-arrow button to move the endpoints to the Current DiscoveryEndpoints scrolling list.
7. Select the object storage point based on the following descriptions:
Note: Because proxy nodes require the use of the oserv, they must remain onmanaged nodes at the same level as the Tivoli management regionserver. Do not migrate proxy nodes to endpoints.
v Create on gateway to store the instance objects on the gateway.v Create on specific managed node to store the instance objects on the
managed node selected from the Storage Node scrolling list.
Note: In order to store the instance on a node, you must have TivoliApplication Services and IBM Tivoli Monitoring for Databases: DB2,Version 5.1.0, installed on the node.
8. For Windows only: Type the db2ecc password used to log in to the operatingsystem.
Figure 13. Edit Discovery Endpoints dialog box
40 IBM Tivoli Monitoring for Databases: DB2: User’s Guide

9. Click Change & Close to save your changes and return to the policy region.10. Right-click the discovery object icon.11. Select Run Discovery to begin the discovery process. While the discovery
function is running, the DB2 Instance Discovery dialog box displays theprogress of the discovery.
12. Right-click the newly created instance object, and select Check Status tochange the object to a normal state.
Discovering DB2 databases
ObjectiveTo automatically select the databases IBM Tivoli Monitoring for Databases: DB2manages. Discover Databases enables you to create multiple DB2DatabaseManagerobjects in a policy region on the Tivoli desktop from a single operation.
Background informationDiscover Databases searches for DB2 databases in your local Tivoli managementregion. If Discover Databases finds a DB2 database that is not already beingmanaged, a DB2DatabaseManager object is automatically created on the Tivolidesktop.
Note: Discover Databases searches either managed or unmanaged databases onlocal instances only.
Required authorization roledb2_dba
Before you beginv Discover Databases does not work with parallel (DB2 Extended-Enterprise
Edition) instances.v Set the DB2DatabaseManager and DB2InstanceManager managed resource types
for the policy region. Refer to “Adding or removing managed resource types” onpage 23 for information.
When you finishNone
ProcedureYou can perform this procedure from the Tivoli desktop only.
Desktop:
Figure 14. DB2 Instance Discovery dialog box
Chapter 3. Setting up IBM Tivoli Monitoring for Databases: DB2 41

1. Double-click the policy region to display the Policy Region dialog box.2. Right-click the instance object icon.3. Select Discover Databases to display the Discover Databases dialog box.4. Select a database from the Available Databases scrolling list.5. Click the left-arrow button to move the database to the Databases Managed by
Tivoli Manager for DB2 scrolling list.
6. Click Add & Close to add the DB2 database object to the policy region andclose the Discover Databases dialog box.
Adding or removing partition group members
ObjectiveTo add or remove the members of database partitions and enable users to limit orextend the number of partitions to monitor as a group.
Background informationChanging the members that belong to a partition group enables you to quicklystart or end the monitoring or the running of tasks on a database partition.
Note: In order for the monitoring changes to take effect, you must redistribute themonitors assigned to the partition group.
Required authorization roledb2_dba
Before you beginSet a partition group. Refer to “Creating partition group objects” on page 35 forinformation.
When you finishNone
Figure 15. Discover Databases dialog box
42 IBM Tivoli Monitoring for Databases: DB2: User’s Guide

ProcedureYou can perform this procedure from the Tivoli desktop only.
Desktop:
1. Double-click the policy region to display the Policy Region dialog box.2. Select the DB2 partition group object icon.3. Right-click and select Change to display the Change DB2PartitionGroup
Members dialog box.4. Select the partitions to add to the partition group from the Available Partitions
scrolling list.5. Click the left-arrow button.6. Optional: Select the partitions to remove from Existing Members scrolling list,
and click the right-arrow button.7. Click OK to accept changes.
Subscribing to notice groups
ObjectiveTo assign which administrators will receive messages by adding them to noticegroups.
Background informationWhen the Tivoli Management Framework product is installed, root administrator isautomatically subscribed to several notice groups specific to the Tivolimanagement environment. The administrators must also be subscribed to thefollowing DB2-specific notice groups.v The DB2Manager Tmw2k notice group contains messages that are generated
when a threshold is reached by an IBM Tivoli Monitoring for Databases: DB2Distributed Monitoring probe.
v The DB2Manager ECC Log notice groups contain messages that are generatedwhen IBM Tivoli Monitoring for Databases: DB2 objects are created or modified.
For additional information about notice group subscriptions, see the TivoliManagement Framework User’s Guide.
Required authorization rolesenior
Before you beginNone
When you finishNone
ProcedureYou can perform this procedure from the Tivoli command line or from the desktop.
Command line: Use the wsetadmin command with the –n option to subscribeadministrators to notice groups from the command line. Use the –N option tounsubscribe administrators.
The following example subscribes administrator Steve Callahan to theDB2Manager Tmw2k notice group:wsetadmin -n “DB2Manager Tmw2k” “Steve Callahan”
Chapter 3. Setting up IBM Tivoli Monitoring for Databases: DB2 43

Desktop:
1. Double-click the Administrators icon from the Tivoli desktop.2. Right-click the administrator icon.3. Select Edit Notice Group Subscriptions to display the Set Notice Groups
dialog box.
Additional Information: The Current Notice Groups list displays the noticegroups to which the administrator is currently subscribed. The AvailableNotice Groups list displays the notice groups to which the administrator cansubscribe.
4. Select one or more notice groups from the Available Notice Groups list, andclick the left-arrow button to move the selection to the Current Notice Groupslist.Additional Information: Double-clicking the selection will also move the noticegroup from one list to the other.
5. Optional: Select one or more of the notice groups in the Current Notice Groupslist, and click the right-arrow button to remove the notice group.
6. Click Change & Close to save the changes and close the Set Notice Groupsdialog box.
Figure 16. Set Notice Groups dialog box
44 IBM Tivoli Monitoring for Databases: DB2: User’s Guide

Chapter 4. Setting up IBM Tivoli Monitoring
This chapter provides a suggested order and the required procedures for setting upIBM Tivoli Monitoring.
Suggested guidelines for setting up your resource modelsTable 11 provides guidelines for the order in which you set up monitoringinformation and the required procedures for setting up IBM Tivoli Monitoring.When you become more familiar with IBM Tivoli Monitoring, you will discoveradditional ways of working with resource models that meet the needs of yourenvironment.
Note: For additional or advanced information on IBM Tivoli Monitoring in theTivoli environment, see the IBM Tivoli Monitoring User’s Guide.
Table 11. Monitoring resources and applications guidelines
Goal See
1. Set up profile managers and profiles toorganize your resource models. This makesthe distribution of resource models moreefficient. You might need to set up multipleprofile managers and profiles within theprofile managers to meet the needs of yourenvironment.
“Creating profile managers andprofiles” on page 46
2. Subscribe endpoints to the profile manager.This determines which resources receive aprofile when the profile is distributed.Profiles contain resource models to runagainst the endpoints (see Step 3).
“Subscribing resources to profilemanagers” on page 48
3. Populate each profile manager/profile withresource models for the resource that youwant to monitor. Include resource modelswith the default values or customize thedefault values to meet the needs of yourenvironment.
“Adding default resource modelsto profiles” on page 49
5. For each profile in your profile manager, dothe following:
v Specify the subscribers that you want todistribute the monitoring profile to anddistribute the profile.
v Specify the subscribers that you want todistribute the monitoring profile to whileusing MDist2.
v Determine if you must rerun any faileddistributions.
“Distributing profiles usingMDist2” on page 52
“Rerunning failed profiledistributions” on page 54
45

Table 11. Monitoring resources and applications guidelines (continued)
Goal See
6. To maintain your profiles and resourcemodels, do the following:
v Determine if you want to clear therecovery actions of an event.
v Determine if you want to reinstate therecovery actions of an event.
v Specify if you want to manage profiles andresource models after they are distributedto endpoints.
v Specify if you want to manage IBM TivoliMonitoring on gateways.
v Determine which resource models weredistributed to an endpoint.
v Determine the specific resource modelsthat are running on each endpoint.
v Use the IBM Tivoli Monitoring Web HealthConsole, Tivoli Enterprise Console, TivoliEnterprise Data Warehouse, or TivoliBusiness Systems Manager to view theinformation being monitored by yourresource models
“Adding or removing built-inactions” on page 95
“Managing profiles and resourcemodels at endpoints” on page 110
“Managing IBM Tivoli Monitoringgateways” on page 111
“Determining which resourcemodels have been distributed toendpoints” on page 112
“Determining which resourcemodels are running on endpoints”on page 112
Creating profile managers and profiles
ObjectiveTo create profile managers and profiles so you can organize and distribute yourresource models more efficiently.
Background informationA monitoring profile is a group of defined resource models that you can distribute(download or push) to a subscribed (marked to receive) managed resource in aprofile manager.
In addition to activating default resource models, profile managers and profiles cangroup resources to enable simultaneous monitoring of multiple resources. You canhierarchically organized the profile managers. The profile manager is the top levelof the organization and contains specific profiles that contain specific resourcemodels. Instances and databases are then subscribed to the profile managers,which enable the monitoring information to be channeled to those resources.
You can create an unlimited number of profile managers, but it is recommendedthat they reflect some logical or functional grouping of database resources or thebusiness’s organizational structure. For example, profile managers could be labeledSales and Marketing, Administration and Finance, and Operations to reflect abusiness organization.
You can create a dataless profile manager that distributes profiles without regard tothe existence of a database on its subscribers. A dataless profile managerdistributes to the system files on endpoints and other managed resources that havea profile database. However, it bypasses the profile database on these systems.
46 IBM Tivoli Monitoring for Databases: DB2: User’s Guide

Therefore, profiles are available only with database profile managers. A profilemanager (database or dataless) cannot subscribe to a dataless profile manager.Likewise, dataless profile managers cannot distribute to other profile managersbecause they require profiles to be written to a profile database.
Required authorization roleadmin
Before you beginSet up the Tmw2kProfile managed resource types. Refer to the IBM TivoliMonitoring User’s Guide for information.
When you finishAdd resource models to the profile. See “Adding default resource models toprofiles” on page 49 or “Adding custom resource models to profiles” on page 92.
ProcedureYou can perform this procedure from the Tivoli command line or from the desktop.
Command line:
1. Use the wcrtprfmgr command to create a profile manager. For example, tocreate a profile manager called ProfMgr2 in the TestRegion policy region, enterthe following command:wcrtprfmgr @PolicyRegion:TestRegion ProfMgr2
2. Optional: Use the wsetpm command to make the policy manager operate indataless mode. For example, to make the profile manager ProfMgr2 dataless,enter the following command:wsetpm -d @ProfileManager:ProfMgr2
where:
-d Specifies that the profile manager operates in a dataless mode.3. Use the wcrtprf command to create a profile. For example, to create a profile
called MarketingProf2 in the ProfMgr2 profile manager, enter the followingcommand:wcrtprf @ProfileManager:ProfMgr2 MarketingProfile MarketingProf2
For additional information about these commands, see the Tivoli ManagementFramework Reference Manual.
Desktop:
1. Open the Policy Region dialog box by doing the following:a. Open the Tivoli desktop.b. Double-click the policy region icon to open the policy region.
2. Click Create and select Profile Manager to open the Create Profile Managerdialog box.
3. Type a unique name in the Name/Icon Label text box.4. Optional : Select the Dataless Endpoint Mode check box to create the profile
manager in dataless mode.5. Click Create & Close to close the Create Profile Manager dialog box.
Additional Information: In the following example, the policy region contains twoprofile manager icons, Manufacturing and Operations. The Manufacturing
Chapter 4. Setting up IBM Tivoli Monitoring 47

profile manager is defined as dataless (the feathers under the Manufacturingprofile manager indicates that it is a dataless profile manager).
6. Double-click the profile manager icon to open the Profile Manager dialog box.7. Click Create and select Profile to open the Create Profile dialog box.8. Type a unique name for the profile in the Name/Icon text box.9. Select the Tmw2kProfile resource from the Type list.
10. Click Create & Close. An icon for the new profile is displayed in the Profilesarea of the Profile Manager dialog box.
Subscribing resources to profile managers
ObjectiveTo add managed resources to a monitoring profile so administrators can definewhich resource to monitor.
Background informationSubscribing resources to a profile manager determines which resources receive aprofile when the profile is distributed. IBM Tivoli Monitoring uses the list ofsubscribers to determine which systems are monitored. To add a subscriber to adistributed monitoring profile, you must add the subscriber to the profile manager.
Note: Resources can also be subscribed to profiles from the IBM Tivoli MonitoringProfile dialog. See “Distributing profiles from the desktop” on page 50.
Required authorization roleadmin
Before you beginCreate a monitoring profile with monitoring sources. See “Creating profilemanagers and profiles” on page 46 for information.
When you finishDistribute the monitoring profile to the subscribed resource. See “Distributingprofiles from the desktop” on page 50 for information.
ProcedureYou can perform this procedure from the Tivoli command line or from the desktop.
Figure 17. Policy Region dialog box
48 IBM Tivoli Monitoring for Databases: DB2: User’s Guide

Command line: Use the wsub command to add subscribers to the profilemanager. For example, to add a database called Sample@bburns as a subscriber tothe profile manager DatabaseMonitors, enter the following command:wsub @ProfileManager:DatabaseMonitors @PolicyRegionName:Sample@bburns
For additional information about these commands, see the Tivoli ManagementFramework Reference Manual .
Desktop:
1. Open the Policy Region dialog box by doing the following:a. Open the Tivoli desktop.b. Double-click the policy region icon to display the policy region.
2. Double-click a profile manager icon to open the Profile Manager dialog box.3. Click Profile Manager and select Subscribers to open the Subscribers dialog
box.4. Select the subscribers to receive the profile distribution from the Available to
become Subscribers scrolling list.5. Click the left-arrow button to move the selected subscribers to the Current
Subscribers scrolling list.6. Click Set Subscriptions & Close to add the subscribers. Subscribers are
displayed in the Subscribers field of the Profile Manager dialog box.
Adding default resource models to profiles
ObjectiveTo add a resource model to a profile using its default values so you can run theresource model immediately.
Background informationA resource model captures and returns information about a resource or application.You set up resource models and distribute them to endpoints. Each resource modelcan monitor multiple resources. Choose the resource models to add to a profilebased on the resources you want to monitor. Adding one or more of these resourcemodels to a profile allows you to begin monitoring resources immediately.
We recommend that you put all of the resource models that you are going todistribute to the same endpoint in a single profile because the distribution occurson a per-profile basis.
You can also use resource models that you have customized by customizing anexisting resource model, or adding a new one and customizing it. See Chapter 8,“Customizing resource models” on page 91 for information about customizingresource models.
Required authorization roleadmin
Before you beginv Create a profile manager and profile. See “Creating profile managers and
profiles” on page 46 for information.v Add subscribers to a profile manager. See “Subscribing resources to profile
managers” on page 48 for information.
Chapter 4. Setting up IBM Tivoli Monitoring 49

v See the IBM Tivoli Monitoring for Databases, Version 5.1.0: DB2 Reference Guide fordetailed information about each resource model.
When you finishDistribute the profile. See “Distributing profiles from the desktop”.
ProcedureYou can perform this procedure from the Tivoli command line or from the desktop.
Command line: Use the wdmeditprf command to add a customized resourcemodel to a profile.
For more information about this command, see the IBM Tivoli Monitoring, Version5.1.0: User’s Guide.
Desktop:
1. Open the IBM Tivoli Monitoring Profile dialog box by doing the following:a. Open the Tivoli desktop.b. Double-click the policy region icon to open the policy region.c. Double-click the profile manager icon to open the profile manager.d. Double-click the profile icon to which you want to add a customized
resource model.2. Click Add With Defaults to open the Add Resource Models to Profile dialog
box.3. Select the resource model category from the Category drop-down list.4. Select the resource model you want from the Resource Model drop-down list.5. Click Add & Close. The resource model is added to the IBM Tivoli
Monitoring Profile.
Distributing profiles from the desktop
ObjectiveTo set distribution options for a profile so you can distribute profiles to specifiedsubscribers.
Background informationYou can distribute profiles to the following groups:
Next level of subscribersDistributes the profile only to the subscribers named in the Distribute toThese Subscribers: scrolling list of the Distribute Profile dialog box. Thisoption does not distribute to subscribers at lower levels of the hierarchy.Perform the distribution process from profile managers at more than onelevel to reach all the profile endpoints if a profile manager with subscribersresides at the next lower level.
All levels of subscribersDistributes the profile to all subscribers in the hierarchy. Consider thefollowing example. You have a profile in which a dataless profile manageris subscribed to a profile manager , and the dataless profile manager has asubscribed endpoint. If you distribute to the next level of subscribers, theprofile manager distributes the profile only to the dataless profile manager.If you distribute to all levels of subscribers, the profile manager distributesthe profile to the dataless profile manager and to the endpoint.
50 IBM Tivoli Monitoring for Databases: DB2: User’s Guide

Select this option if you want to distribute a profile in which your resourceis the only subscriber.
Required authorization roleadmin
Before you beginv Create a profile manager and profile. See “Creating profile managers and
profiles” on page 46 for information.v Add subscribers to a profile manager. See “Subscribing resources to profile
managers” on page 48 for information.v Add a resource model to a profile. See “Adding default resource models to
profiles” on page 49 and“Adding custom resource models to profiles” on page 92for information.
v See the IBM Tivoli Monitoring for Databases, Version 5.1.0: DB2 Reference Guide fordetailed information about each resource model.
When you finishNone.
ProcedureYou can perform this procedure from the Tivoli desktop only.
Desktop:
1. Open the IBM Tivoli Monitoring Profile dialog box by doing the following:a. Open the Tivoli desktop.b. Double-click the policy region icon to open the policy region.c. Double-click the profile manager icon you want to open the Profile
Manager dialog box.d. Double-click the profile you want to distribute to open the IBM Tivoli
Monitoring Profile dialog box.2. Click Profile and select Distribute. The Distribute Profile dialog box opens.3. Select one of the Distribute To options based on the following descriptions:
Next level of subscribersDistributes the profile only to the subscribers named in the Distributeto These Subscribers: scrolling list of the Distribute Profile dialog box.This selection does not distribute to subscribers at lower levels of thehierarchy. Perform the distribution process from profile managers atmore than one level to reach all the profile endpoints if a profilemanager with subscribers resides at the next lower level.
All levels of subscribersDistributes the profile to all subscribers in the hierarchy. Consider thefollowing example. You have a profile in which a dataless profilemanager is subscribed to a profile manager , and the dataless profilemanager has a subscribed endpoint. If you distribute to the next levelof subscribers, the profile manager distributes the profile only to thedataless profile manager. If you distribute to all levels of subscribers,the profile manager distributes the profile to the dataless profilemanager and to the endpoint.
Select this option if you want to distribute a profile in which yourresource is the only subscriber.
4. Select Make each subscriber’s profile an EXACT COPY of this profile fromthe Distribution Will options.
Chapter 4. Setting up IBM Tivoli Monitoring 51

Additional Information: This option overwrites the subscriber’s profile with anexact copy of the profile that you are distributing.
Note: Always select the Make each subscriber’s profile an EXACT COPY ofthis profile option when you distribute a profile to a Tivoli EnterpriseConsole endpoint. Do not select the Preserve modifications insubscriber’s copies of the profile option.
5. Select the subscribers to receive the profile using the following steps:a. Select the list of subscribers that you want to distribute the profile to from
the Do Not Distribute to These Subscribers scrolling list.b. Click the left arrow to move the subscribers to the Distribute to These
Subscribers scrolling list.
Note: Make sure that each subscriber in the Distribute to These Subscribersscrolling list is either a profile manager or a supported Tivolimanagement agent endpoint. IBM Tivoli Monitoring does not supportother types of endpoints.
6. Click one of the following:
Distribute & CloseDistributes the profile immediately, closes the Distribute Profile dialogbox, saves the settings you made, and returns to the IBM TivoliMonitoring Profile dialog box.
DistributeDistributes the profile immediately, saves the settings you made, andleaves the Distribute Profile dialog box open.
ScheduleSchedules the distribution of the profile with the Tivoli Scheduler. Fordetails about using the Tivoli Scheduler, refer to the Tivoli ManagementFramework User’s Guide.
Distributing profiles using MDist2
ObjectiveTo circulate copies of the monitoring profile to subscribers while using MDist2 sothat administrators and users can activate the monitoring process.
Background informationIBM Tivoli Monitoring uses Multiplexed Distribution (MDist2) to performasynchronous profile data transfers through a hierarchy of repeaters. MDist2returns a sequence of responses containing the distribution status from eachendpoint to the application initiating the distribution. These responses are sentback to IBM Tivoli Monitoring in a log file, on the MDist2 command line, orthrough the MDist2 GUI.
IBM Tivoli Monitoring uses the following MDist2 functions:
Asynchronous deliveryIBM Tivoli Monitoring submits a distribution request and immediatelyreceives a distribution identifier and confirmation that the distribution is inprogress. MDist2 uses the callback function to send the final distributionstatus for each endpoint when it completes each endpoint distributioninstead of waiting until all endpoints are distributed.
52 IBM Tivoli Monitoring for Databases: DB2: User’s Guide

Assured deliveryAssures that distributed profiles are delivered to the endpoints when thereare network interruptions, computer shutdowns, or disconnectedendpoints. Assured delivery tries to reestablish the connections until it iseither successful or the distribution time expires. The distribution begins atthe point where it was interrupted.
Check-point and restartAssures that an interrupted data stream resumes from the last successfulcheckpoint. You do not have to resend all the IBM Tivoli MonitoringProfile data when the distribution resumes, but only the data that was notsent when the interruption occurred.
Data depotingStores segments of the profile at a depot close to the endpoint so theendpoints can retrieve the data from the depot instead of from the sourcehost. This reduces network traffic and speeds up the distribution.
Required authorization roleadmin
Before you beginv Create a profile manager and profile. See “Creating profile managers and
profiles” on page 46 for information.v Add subscribers to a profile manager. See “Subscribing resources to profile
managers” on page 48 for information.v Add a resource model to a profile. See “Adding default resource models to
profiles” on page 49 and“Adding custom resource models to profiles” on page 92for information.
v See the IBM Tivoli Monitoring for Databases, Version 5.1.0: DB2 Reference Guide fordetailed information about each resource model.
When you finishNone
ProcedureYou can perform this procedure from the Tivoli command line or from the desktop.
Command line: Use the wdmdistrib command to distribute the profile to thesubscribers of the profile manager. For example, to distribute the default profileDBManager-DBMSMonProfile to an instance endpoint labeled inst1@bburns,enter the following command:wdmdistrib @Tmw2kProfile:DBManager-DBMSMonProfile \@InstanceManager:inst1@bburns
This command updates subscriber databases and configuration files. If nosubscriber is specified, wdistrib updates all subscribers. The syntax variesdepending on the version of Tivoli management region that you installed. Refer tothe Tivoli Management Framework Reference Manual for more information about thewdistrib command.
Desktop:
1. Open the IBM Tivoli Monitoring Profile dialog box by doing the following:a. Open the Tivoli desktop.b. Double-click the policy region icon to open the policy region.
Chapter 4. Setting up IBM Tivoli Monitoring 53

c. Double-click the profile manager icon you want to open the ProfileManager dialog box.
d. Double-click the profile you want to distribute to open the IBM TivoliMonitoring Profile dialog box.
2. Click Profile and select Distribute to display the Distribute Profile dialog box.3. Select one of the Distribute To options based on the following descriptions:
v Next Level of Subscribers Distributes the profile only to the subscribersnamed in the Distribute to These Subscribers: scrolling list of the DistributeProfile dialog box. This selection does not distribute to subscribers at lowerlevels of the hierarchy. Perform the distribution process from profilemanagers at more than one level to reach all the profile endpoints if a profilemanager with subscribers resides at the next lower level.
v All Levels of Subscribers Distributes the profile to all subscribers in thehierarchy. Consider the following example. You have a profile in which adataless profile manager is subscribed to a profile manager, and the datalessprofile manager has a subscribed endpoint. If you distribute to the next levelof subscribers, the profile manager distributes the profile only to the datalessprofile manager. If you distribute to all levels of subscribers, the profilemanager distributes the profile to the dataless profile manager and to theendpoint.Select this option if you want to distribute a profile in which your resource isthe only subscriber.
4. Select one of the Distribute Will options based on the following descriptions:v Preserve modifications in subscribers’ copy of the profile retains changes to
existing monitors in each copy of the profile. If you edit the configuration ofa monitor in the subscriber’s copy, those changes are written to every copy ofthat profile.
v Make subscribers’ profile an EXACT COPY of this profile overwrites thesubscriber’s profile with an exact copy of the profile being distributed.
5. Verify that the Distribute To These Subscribers list includes only thosesubscribers to receive the profile. Use the left and right arrows to move selectedsubscribers between lists.
6. Click Distribute & Close to begin the distribution and close the DistributeProfile dialog box.
7. Optional : Schedule when the distribution will occur by completing thefollowing steps:a. Click Schedule to display the Add Scheduled Job dialog box.b. Set the job options as needed or See “Customizing the scheduling
monitoring period” on page 106 for more information.c. Click Schedule Job & Close to set the schedule.
8. Click Distribute & Close to begin the distribution and close the DistributeProfile dialog box.
9. Click Profile and select Close to close the IBM Tivoli Monitoring Profiledialog box.
Rerunning failed profile distributions
ObjectiveTo verify that the distribution to an endpoint failed so that you can rerun thedistribution for the failed endpoint.
54 IBM Tivoli Monitoring for Databases: DB2: User’s Guide

Background informationWhen a distribution fails, IBM Tivoli Monitoring creates a profile manager thatcontains the endpoint subscribers that failed.
When you successfully redistribute profiles, the software deletes the profilemanager that it created for the failed distribution. A wholly or partiallyunsuccessful redistribution retains the profile manager containing only thesubscribers that were unsuccessful in the redistribution. Continue the process ofcorrecting the errors and retrying the distribution until the profile is successfullydistributed to all endpoints.
Required authorization roleadmin
Before you beginNone
When you finishNone
ProcedureYou can perform this procedure from the Tivoli desktop only.
Desktop:
1. Open the IBM Tivoli Monitoring Profile dialog box by doing the following:a. Open the Tivoli desktop.b. Double-click the policy region icon to open the policy region.
2. Click View and select Refresh from the Policy Region dialog box to see thenew profile managers.
3. Review the new profile manager names to determine and correct the cause ofthe failure. The following profile manager names are derived from a faileddistribution:v The failed distribution creates the following profile manager name due to a
Bad_Interpreter error:OriginalProfileName_Push_Failed_Bad_Interpreter
where:
OriginalProfileNameThe name of the profile that you were distributing when the erroroccurred.
The AMW089E error message is displayed at this point, indicatingthat the resource model type is not compatible with the endpointoperating system. For example, you might have distributed aWindows resource model to a UNIX endpoint.
v The failed distribution creates the following profile manager name due toany other error:OriginalProfileName_Distribution_Failed
where:
OriginalProfileNameThe name of the profile that you were distributing when the erroroccurred.
Chapter 4. Setting up IBM Tivoli Monitoring 55

4. Subscribe the profile managers that contain the failed endpoints to the profilemanager that contained the original profile.
Note: This can be done only if the profile manager used for the originaldistribution was not a dataless endpoint.
5. Distribute the original profile to the failed endpoints by selecting these profilemanagers as the target for the distribution. You can also edit the profilemanagers to delete an endpoint from a group of failed endpoints beforeretrying the distribution.
56 IBM Tivoli Monitoring for Databases: DB2: User’s Guide

Chapter 5. Working with IBM Tivoli Monitoring for Databases:DB2
This chapter describes how to operate and use IBM Tivoli Monitoring forDatabases: DB2.
Table 12 provides an overview of the topics covered in this chapter.
Table 12. Working with IBM Tivoli Monitoring for Databases: DB2 guidelines
Goal Refer to
1. Open a database server endpoint to view thedistributed monitoring profiles and databaseendpoints.
“Opening a DB2 Instanceendpoint”
2. View the current values of the managed resourceproperties (database servers, databases, partitions,and partition members) or change the label attribute.
“Viewing DB2 object properties”on page 58
3. Check the state of a server to determine if it is stillup and running or if it has shut down.
“Updating the state of a server”on page 61
4. Start up or shut down a DB2 database server,partition, or partition group using the IBM TivoliMonitoring for Databases: DB2 software.
“Starting and stopping adatabase instance, partitionserver, or partition group node”on page 62
5. View multiple database endpoints and distributedprofiles for a DB2 database server.
“Opening a database endpoint”on page 63
6. Test the connection between DB2 servers and clients. “Showing client connectioninformation” on page 64
7. Open the DB2 command line processor from theTivoli desktop to issue DB2 commands on Tivolimanaged resources.
“Running DB2 commands fromthe command line processor” onpage 66
8. Launch the DB2 Java control center from the Tivolidesktop so that you can access and modify any DB2objects that are associated with Tivoli objects.
“Launching the DB2 JavaControl Center” on page 67
Opening a DB2 Instance endpoint
ObjectiveTo display the distributed monitoring profiles and database endpoints for aninstance of the DB2 server so that you can view multiple databases and profileswithin a single dialog box.
Background informationWhen you open the DB2 Instance endpoint (from this point forward referred to asan instance), its managed databases and resource models are represented by theinstance dialog box.
57

In addition to the icon representing the managed databases and resource models,this dialog box displays the following information:v DB2InstanceManager object label displayed in the instance dialog box title bar in
the servername_hostname formatv Databases on the server in databasename@servername@hostname formatv Profiles that have been distributed to the databases in
profilename@servername@hostname format
Required authorization roledb2_user
Before you beginCreate a DB2InstanceManager object. Refer to “Creating DB2 instance objects” onpage 26 for information.
When you finishNone
ProcedureYou can perform this procedure from the Tivoli desktop only.1. Double-click the policy region that contains the DB2InstanceManager endpoint.2. Right-click the DB2InstanceManager endpoint icon.3. Select Open to display the instance collection dialog box.
Viewing DB2 object properties
ObjectiveTo display the values of the managed resource properties so that you can view asnapshot of the instance and update the label attribute, if needed.
Background informationViewing DB2 object properties (instances, databases, partitions, and partition groupmembers), enables you to quickly review system resources. Table 13 on page 59 andTable 14 on page 59 list the specific information you can view for each object type.
The DB2 instance properties dialog box contains information about the locationand configuration of the DB2 instance.
Figure 18. DB2 Instance endpoint dialog box
58 IBM Tivoli Monitoring for Databases: DB2: User’s Guide

Table 13. DB2 Instance properties
Endpoint Name of the endpoint where the instance isdefined.
Instance Name Name of the DB2 instance.
Node type DB2 instance type. This parameter can haveone of these values:
v 1 - Database server with local and remoteclients.
v 2 - Partitioned database server with localand remote clients.
Default DB Path Default file path used to create a database.
Database Manager Configuration ReleaseLevel
Informational parameter that identifies therelease level of the configurationinformation.
CPU Speed (millisec/instruction) Estimate of the machine speed of themanaged node. The DB2 SQL optimizer usesthis value to determine access paths. DB2automatically sets this configurableparameter during installation.
Default Client Communication Communication protocols that clientapplications on this instance can use forremote connections. This parameter relatesonly to Default Client Communication(DCE).
IPX Socket Well-known socket number that representsthe instance connection end point for a DB2server. This parameter relates only toinstances that are configured to acceptIPX/SPX connections.
Service Name Name of the TCP/IP port that the serveruses to wait for communications fromremote client nodes. This parameter relatesonly to servers that are configured to acceptTCP/IP connections.
The DB2 database properties dialog box contains information about the locationand state of the database.
Table 14. DB2 Database properties
Endpoint Name of the endpoint where the database isdefined.
Instance Name Name of the DB2 instance.
Database Name Name of the DB2 database.
Database is Consistent No in this field indicates that the databasehas transactions that are not committed orrolled back, which indicates an inconsistentdatabase.
Backup Pending Yes in this field indicates that you mustperform a full backup of the database beforeyou can access it.
Chapter 5. Working with IBM Tivoli Monitoring for Databases: DB2 59

Table 14. DB2 Database properties (continued)
Rollforward Pending If you set this parameter to DATABASE,you must perform a roll-forward recoveryprocedure before you can access thedatabase. If you set this parameter toTABLESPACE, you must roll forward one ormore tablespaces before you can access thedatabase.
Database Territory This shows the territory used by DB2 tocreate the database and to determine thecountry parameter values.
Database Code Set This shows the code set used by DB2 tocreate the database and to determinecodepage parameter values.
Service Name Name of the TCP/IP port that the serveruses to wait for communications fromremote client nodes. This parameter relatesonly to servers that are configured to acceptTCP/IP connections.
The DB2PartitionManager object overrides the DB2DatabaseManager objectproperties to display these properties for each DB2 partition or each member of apartition group.v Endpointv Instance namev Database namev Node numberv Database is consistentv Backup pendingv Rollforward pendingv Database territoryv Database code set
Required authorization roledb2_user
Before you beginCreate either a DB2InstanceManager, DB2DatabaseManager, DB2PartitionManager,or DB2PartitionGroupManager object. Refer to Chapter 3, “Setting up IBM TivoliMonitoring for Databases: DB2” on page 15 for information.
When you finishNone
ProcedureYou can perform this procedure from the Tivoli desktop only.1. Double-click the policy region to display the Policy Region dialog box.2. Right-click the object icon.3. Select Properties to display the DB2 Instance Properties dialog box.
60 IBM Tivoli Monitoring for Databases: DB2: User’s Guide

4. Optional: To update the label name for a DB2InstanceManager, type a newname in the Label text box, and click Set & Close.
Updating the state of a server
ObjectiveTo update the current status of a DB2InstanceManager or DB2PartitionManagerobject so that you can determine whether the server is available for use.
Background informationWhen you issue a check status command from the IBM Tivoli Monitoring forDatabases: DB2 software, an instance status resource model runs on the endpoint.The resource model returns the results and updates the object’s icon to reflect thestatus. A red circle with a minus symbol indicates the icon for a down state.
The down-state symbols for a DB2InstanceManager and DB2PartitionManagerobject are as shown in the table:
Table 15. Down-state icons
DB2InstanceManager object in down state DB2PartitionManager object in down state
Additional Information: When you first create an instance object, use this procedureto check the status and change it to a normal state.
Required authorization roledb2_user
Figure 19. DB2 Instance Properties dialog box
Chapter 5. Working with IBM Tivoli Monitoring for Databases: DB2 61

Before you beginCreate either a DB2InstanceManager object or DB2PartitionManager object. Refer to“Creating DB2 instance objects” on page 26 or “Creating partition objects” onpage 33 for information.
When you finishNone
ProcedureYou can perform this procedure from the Tivoli desktop only.1. Double-click the policy region icon to display the Policy Region dialog box.2. Right-click the object icon.3. Select Check Status to check the status of the object.
Starting and stopping a database instance, partition server, or partitiongroup node
ObjectiveTo start up or shut down a DB2 instance, partition, or partition group object from asingle entry point on the Tivoli desktop.
Background informationThe Startup option can start remote DB2 instances, partition nodes, or partitiongroup nodes. The Shutdown option can stop remote DB2 instances, partitions, orpartition groups. The startup and shutdown functions run the DB2 commandsdb2start and db2stop at the endpoint where the database instances or partitionsreside.
The startup and shutdown commands start and stop the instance on the node ornodes that the partition object represents for DB2 partition and partition groupobjects.
Required authorization roledb2_dba
Before you beginCreate either a DB2InstanceManager, DB2PartitionManager, orDB2PartitionGroupManager object. Refer to “Creating DB2 instance objects” onpage 26, “Creating DB2 database objects” on page 28, “Creating partition groupobjects” on page 35, and “Adding or removing partition group members” onpage 42 for information.
When you finishNone
ProcedureYou can perform this procedure from the Tivoli desktop only.1. Double-click the policy region to display the Policy Region dialog box.2. Right-click the DB2InstanceManager, DB2PartitionManager, or
DB2PartitionGroupManager object icon.3. Complete either of the following commands based on the following
descriptions:v Select Startup to display the Startup DB2 Instance dialog box.
62 IBM Tivoli Monitoring for Databases: DB2: User’s Guide

v Select Shutdown to display the Shutdown dialog box.
Note: The instance object does not shut down if the instance object hasapplications connected or active databases.
4. Click Yes to confirm or No to cancel the operation when prompted to start upor shut down the object.
Opening a database endpoint
ObjectiveTo view multiple database endpoints on a DB2 instance from a single entry pointso that you can view the distributed profiles of a database endpoint.
Background informationWhen you open the database endpoint (from this point forward called database),the profiles that are distributed to it are represented by the profile manager icon inthe database dialog box.
In addition to the icon representing the profile manager, this dialog box displaysthe following information:v The dialog box title bar displays the DB2DatabaseManager object label in the
databasename_servername_hostname format.v The profiles that have been distributed to the database are displayed in
profilename@databasename@servername@hostname format.
Required authorization roledb2_user
Figure 20. Startup DB2 Instance dialog box
Figure 21. Database endpoint dialog box
Chapter 5. Working with IBM Tivoli Monitoring for Databases: DB2 63

Before you beginCreate a DB2DatabaseManager object. Refer to “Creating DB2 database objects” onpage 28 for information.
When you finishNone
ProcedureYou can perform this procedure from the Tivoli desktop only.1. Double-click the policy region to display the Policy Region dialog box.2. Right-click the DB2DatabaseManager icon.3. Select Open to display the database information.
Showing client connection information
ObjectiveTo test the connection between DB2 servers and clients so that you can see if anendpoint can access a DB2 instance.
Background informationClient connectivity tests whether an endpoint can connect to an instance. Whenyou run client connectivity, the endpoint searches the DB2 instance client code anddetermines whether the instance is remote or local. For remote instances, theendpoint creates a catalog entry as a TCP/IP node and attempts to attach to theinstance using the catalog entry. If the endpoint connects to the instance, thedesktop displays the catalog entry that the endpoint creates. If the connection fails,a failure notice is sent to the desktop and the catalog entry is removed. For localinstances, the endpoint connects using the name of the instance that it finds.
These results are output to the Endpoint - Instance Client Connectivity Testdialog box as shown.
This example shows a successful endpoint connectivity test. The instance foundwas local, therefore, the node was not cataloged.
Required authorization roledb2_user
Before you beginCreate a DB2InstanceManager object. Refer to “Creating DB2 instance objects” onpage 26 for more information.
Figure 22. Endpoint - Instance Client Connectivity Test dialog box
64 IBM Tivoli Monitoring for Databases: DB2: User’s Guide

When you finishNone
ProcedureYou can perform this procedure from the Tivoli desktop only.1. Double-click the policy region icon to display the Policy Region dialog box.2. Right-click the DB2InstanceManager icon.3. Select Client connectivity to display the Client connectivity test endpoints
dialog box.
4. Select the gateway that contains the endpoints to test from the Gatewaysscrolling list.
5. Select the endpoints that will test the instance from the Available Endpointsscrolling list.
6. Click the left-arrow button to move the endpoints into the Selected Endpointsscrolling list.
7. Type the username and password of the Tivoli management region on whichyou are testing across regions. If you are not testing across regions, leave thesefields blank.Additional Information: By default, the username and password are the db2eccidentification and password.
8. Click Begin & Close to close the dialog box and start the connectivity test.9. The Endpoint – Instance Client Connectivity Test dialog box displays the
resulting output.10. Click Cancel to close the dialog.
Figure 23. Client connectivity test endpoints dialog box
Chapter 5. Working with IBM Tivoli Monitoring for Databases: DB2 65

Running DB2 commands from the command line processor
ObjectiveTo open the DB2 command line processor from the Tivoli desktop so thatadministrators can issue DB2 commands on selected managed resources.
Background informationYou can launch the DB2 Command Line Processor dialog box from a DB2instance, database, or partition object on the Tivoli desktop. The DB2 CommandLine Processor enables you to issue database manager commands or structuredquery language (SQL) statements interactively.
The command line processor connects to DB2 using the db2ecc password withSYSADM authority. You must use the db2_dba authority to launch the commandline processor.
Note: The command line processor automatically closes and exits the DB2 promptafter 10 minutes, but the DB2 Command Line Processor dialog remainsopen at the desktop. Close and reopen the DB2 Command Line Processordialog to re-establish the connection.
For a complete list of the commands that you can issue, refer to the DB2 CommandReference for the version of DB2 you are using.
Required authorization roledb2_dba
Before you beginv Create either a DB2DatabaseManager, DB2InstanceManager, or
DB2PartitionManager object. Refer to “Creating DB2 instance objects” onpage 26, “Creating DB2 database objects” on page 28, or “Creating partitionobjects” on page 33 for information.
When you finishNone
ProcedureYou can perform this procedure from the Tivoli desktop only.1. Double-click the policy region to display the Policy Region dialog box.2. Right-click the managed resource object.3. Select Start DB2 CLP to display the DB2 Command Line Processor dialog box.4. Type the DB2 command to issue in the Command text box. You can use only
one command at a time.
66 IBM Tivoli Monitoring for Databases: DB2: User’s Guide

5. Click Run to issue the command.6. Scroll through the Output area to review the results.7. Type QUIT in the Command text box to terminate the connection to DB2.8. Click Close to close the DB2 Command Line Processor dialog box.
Launching the DB2 Java Control Center
ObjectiveTo launch the DB2 Java control center from the Tivoli desktop so that you canaccess and modify DB2 objects, such as tables, views, indexes, and triggers, thatare associated with a Tivoli object.
Background informationThe IBM Tivoli Monitoring for Databases: DB2 software supports launching theJava control center on all supported platforms.
Note: You must have an endpoint that is also a managed node when you launchthe Java Control Center from an endpoint object. In addition, you must login to the managed node from the Tivoli desktop.
Tivoli objects launch the Java control center. For example, if a resource modelindicates that a system management tablespace is almost full, the DB2 Java controlcenter launches against that database and removes unnecessary tables.
When you launch the Java control center, the DB2 object tree positions on theobject from which it was launched. This is called launching in context. Only DB2,Version 7.1, supports launching in context. If you are using Windows or UNIX, youmust launch from an endpoint.
Required authorization roledb2_user
Before you beginv Install the DB2 Java control center on the Tivoli endpoint from which it is
launched. Refer to the DB2 Universal Database Administration Getting Startedguide for information.
Figure 24. DB2 Command Line Processor dialog box
Chapter 5. Working with IBM Tivoli Monitoring for Databases: DB2 67

v Create a DB2DatabaseManager, DB2InstanceManager, DB2PartitionManager, orDB2PartitionGroupManager object. Refer to “Creating DB2 instance objects” onpage 26, “Creating DB2 database objects” on page 28, “Creating partition objects”on page 33, or “Creating partition group objects” on page 35 for information.
When you finishNone
ProcedureYou can perform this procedure from the Tivoli desktop only.1. Double-click the policy region to display the Policy Region dialog box.2. Right-click the database instance or database endpoint object.3. Select Launch DB2CC.
Additional Information: When you launch the DB2 Java control center, the objecttree positions itself on the object from which it was launched. However, if youlaunch the control center from an object that is not on the local node and is notcataloged with DB2, the object tree positions itself on System. From thisposition, you must navigate the object tree to the appropriate object to performany tasks that the DB2 Java control center provides.
68 IBM Tivoli Monitoring for Databases: DB2: User’s Guide

Chapter 6. Working with tasks and jobs
A task is an action that must be routinely performed on selected managed nodesthroughout the network. A task defines the executables to be run, the authorizationrole required to execute the task, and the user or group name under which the taskexecutes. The IBM Tivoli Monitoring for Databases: DB2 software providesstandard tasks in a task library. Standard tasks run on any machine withoutconsideration of platform type.
A customized task is a standard task with defined arguments saved in the tasklibrary with a unique name. For example, you can customize a task to save taskoutput results to a file after each execution. Because you can customize taskarguments, the Tivoli environment does not display argument dialogs when yourun the task from the desktop. However, if you run a customized task from thecommand line, you still must specify the task arguments. Running a customizedtask requires additional information before it runs, such as the target of theexecution.
A job is a task with defined and saved arguments that can be executed many timeson specific managed resources. You can create jobs from both standard andcustomized tasks in the IBM Tivoli Monitoring for Databases: DB2 software tasklibrary. Like tasks, you store jobs in task libraries so you can reuse them. After youcreate a job, you can run it immediately using the procedure described in“Running a job” on page 81. You also can schedule jobs to run at certain times inthe Scheduler, as described in “Scheduling a job” on page 82.
Table 16 shows the options to manage tasks and jobs.
Table 16. Working with tasks and jobs
Goal Refer to
1. Running a task to perform a specific operation. “Running a task” on page 69
2. Defining a standard task with specific arguments tocustomize the task.
“Customizing a task” on page 74
3. Creating a job from a task so that it can be scheduled to run. “Creating a job” on page 78
4. Running a job with predefined arguments. “Running a job” on page 81
5. Scheduling jobs to run at specified times. “Scheduling a job” on page 82
The installation process installs the task library in the IBM Tivoli Monitoring forDatabases: DB2 software policy region. We recommend that you do not remove thetask library from this policy region. The task library contains default policies thataffect how the task library works.
The policy region containing the task library defines task and job policies. Defaultpolicies set profile manager options and endpoint for tasks. Validation policiescontrol the creation and execution of tasks.
Running a task
ObjectivePerform a routine action on a selected managed node.
69

Background informationA task is an action that must be routinely performed on selected managed nodesthroughout the network. A task defines the executables to be run, the authorizationrole required to execute the task, and the user or group name under which the taskis run. The product provides standard tasks in a task library. Standard tasks run onany machine without consideration of platform type.
See the introduction of this chapter for more information on tasks.
Required authorization rolesdb2_dba or db2_user
For the authorization role of a specific task, refer to the description of that task inthe IBM Tivoli Monitoring for Databases, Version 5.1.0: DB2 Reference Guide.
Before you beginNone.
When you finishNone.
ProcedureYou can perform this procedure from the Tivoli command line or from the desktop.
Command Line: Use the wruntask command to run a task. Because not all usersuse the same task library, the documentation for the wruntask command does notprovide information for specific tasks. See the “CLI (command line interface)Syntax” and “CLI Example” sections in the IBM Tivoli Monitoring for Databases,Version 5.1.0: DB2 Reference Guide. The “CLI Example” section provides an exampleof how to enter the wruntask command and the task arguments at the commandline.
For more information about the wruntask command, see the Tivoli ManagementFramework Reference Manual.
The following example runs the ECC_Start_Monitoring_Agent task on the DB2server endpoint with a classname of DB2InstanceManager and object label ofDB2@jlove:wruntask -t ECC_Start_Monitoring_Agent -l DB2ManagerAdminTasks \-h @DB2InstanceManager: DB2@jlove
Refer to the CLI Synopsis and Examples sections in the IBM Tivoli Monitoring forDatabases, Version 5.1.0: DB2 Reference Guide for specific instructions on how toenter the task arguments.
Desktop:
1. Open the task library dialog box by doing the following:a. Open the Tivoli desktop.b. Double-click the policy region icon to display the policy region.c. Double-click the IBM Tivoli Monitoring for Databases: DB2 task icon to
display the IBM Tivoli Monitoring for Databases: DB2 Task Library dialogbox.
70 IBM Tivoli Monitoring for Databases: DB2: User’s Guide

2. Double-click the task icon that you want to run to display the Execute Taskdialog box.Additional Information: The Execute Task dialog box is a generic dialog box ofexecution parameters for all tasks.
Figure 25. Task Library dialog box
Chapter 6. Working with tasks and jobs 71

3. Click one of the following check boxes in the Execution Mode group box:v Parallel runs the task simultaneously on all targets. Parallel is typically the
fastest method of execution.—OR—
v Serial runs the task sequentially on all targets in alphabetical order.—OR—
v Staged runs the task on all targets in alphabetical order according to aschedule you specify. Staged execution is useful if you run the task on alarge number of endpoints. Specify the Staging Count (number of targets torun against for each stage) and the Staging Interval (number of secondsbetween each set).
4. Type a timeout value (in seconds) for the task in the Timeout text box.Additional Information: The Timeout value does not stop the task. This valuespecifies the number of seconds the desktop waits for the task to completebefore it issues an error. The task continues to execute on the endpoint withoutdisplay of output results. Setting an early timeout enables your desktop tobecome available again if the task takes a long time to execute. The default is60 seconds. If the task takes longer to complete than the specified Timeout and
Figure 26. Execute Task dialog box
72 IBM Tivoli Monitoring for Databases: DB2: User’s Guide

is running in Serial or Staged mode, the IBM Tivoli Monitoring for Databases:DB2 software moves on to other endpoints after this time expires.
5. Click one or more of the following check boxes in the Output Format groupbox to choose the output returned upon task completion:
HeaderIncludes a descriptive header for each record, such as the task nameand target.
Return CodeIncludes the programming codes produced when the task executes.
Standard ErrorIncludes all error messages encountered when the task executes.
Standard OutputIncludes all information that results from the task execution.
6. Select one of the following in the Output Destination group box to choose anoutput destination:v Click Display on Desktop to display the task output on the desktop.
Additional Information: If you choose Display to Desktop, you have an optionto save the information to a file as an option inside the output display dialogbox.—OR—
v Click Save to File to save the output to a file.
To save the task output to a file, do the following:a. Click the Save to File check box in the Output Destination group box to
display the Destination for Task Output dialog box.
b. Type the name of the endpoint on which to save the output in the On Hosttext box.Additional Information: The endpoint must be a Tivoli client.
c. Type the absolute path name for the output file in the Output File text box.Additional Information: Example: /tmp/mytask.out
d. Click Set & Close to set your choices and return to the Execute Task dialogbox.
7. Choose the endpoints on which you want to run the task by doing one of thefollowing:v Run the task on specific endpoints by doing the following:
a. Select the endpoints from the Available Task Endpoints list.
Note: If you removed the task libraries from the DB2Manager-DefaultPolicyRegion, the Available Task Endpoints scrolling list
Figure 27. Destination for Task Output dialog box
Chapter 6. Working with tasks and jobs 73

will contain all Tivoli endpoints, only some of which are availablefor IBM Tivoli Monitoring for Databases: DB2.
b. Click the left arrow button to move the selected endpoints to the SelectedTask Endpoints list.
—OR—v Run the task on all subscribers of the specified profile managers by doing the
following:a. Select profile managers from the Available Profile Managers list.b. Click the left arrow button to move the selected profile managers to the
Selected Profile Managers list.8. Click Execute to display the task argument dialog box.
Additional Information: For information about how to fill in the task argumentdialog, refer to the task description in the IBM Tivoli Monitoring for Databases,Version 5.1.0: DB2 Reference Guide or click Task Description to display theonline help.
9. Click Set & Execute to run the task.
Customizing a task
ObjectiveTo customize one of the standard tasks in the task library so you can save definedarguments for future executions.
Background informationA customized task is a standard task with defined arguments saved in the tasklibrary with a unique name. For example, you can customize a task to save taskoutput results to a file after each execution. Because you can customize taskarguments, the Tivoli environment does not display argument dialogs when yourun the task from the desktop. However, if you run a customized task from thecommand line, you still must specify the task arguments. Running a customizedtask requires additional information before it runs, such as the target of theexecution.
Required authorization rolesadmin
Figure 28. Configuring task arguments dialog box
74 IBM Tivoli Monitoring for Databases: DB2: User’s Guide

Before you beginNone.
When you finishYou can run the task by following the procedure in “Running a task” on page 69.When you run a customized task, the Tivoli desktop does not display the taskargument dialog.
ProcedureYou can perform this procedure from the Tivoli desktop only.1. Open the task library dialog box by doing the following:
a. Open the Tivoli desktop.b. Double-click the policy region icon to display the policy region.c. Double-click the IBM Tivoli Monitoring for Databases: DB2Task icon to
display the Task Library dialog box.
2. Double-click a task icon to display the Execute Task dialog box for that task.Additional Information: The Execute Task dialog box is a generic dialog box ofexecution parameters for all tasks. Complete this dialog box to run the task asdescribed in “Running a task” on page 69.
Figure 29. Task Library dialog box
Chapter 6. Working with tasks and jobs 75

3. Click Execute to display the task argument dialog box.Additional Information: Each standard task has a unique task argument dialogbox. Below is one example of a task argument dialog box.
Figure 30. Execute Task dialog box
Figure 31. Configure task arguments dialog box
76 IBM Tivoli Monitoring for Databases: DB2: User’s Guide

4. Enter the appropriate values for this customized task.Additional Information: For information about each field in these dialog boxes,see the task description in the IBM Tivoli Monitoring for Databases, Version 5.1.0:DB2 Reference Guide or click Task Description to display the online help.
5. Click Save to display the Save Argument dialog box.
6. Type the following information to define the customized task:a. Type a name for the task in the Name text box.
Additional Information: This name appears in the Library Contents field soyou can view the customized tasks that are based on the parent task.
b. Type an identifier for this task.Additional Information: An identifier is the name of the task icon in the TaskLibrary dialog box. A customized task identifier has two parts. The firstpart should be the standard task name (such as CurrentRunningSQL). Thesecond part should be descriptive information that makes sense to you.For example, you could type SYS. The resulting task name would beCurrentRunningSQL_SYS.The software generates a unique default name (such asCurrentRunningSQL_aaa) if no identifier is entered.To enable filtering for an identifier without the standard task name, editthe tl_def_man_nodes policy method in the task library policy object. Seethe Tivoli Management Framework Reference Manual for more information.
c. Type a description of this task in the Description text box.Additional Information: This description appears when you click TaskDescription in the task argument dialog box for this customized task.
d. Optional: Select the Show by Identifier check box to change the LibraryContents list to use the task identifier instead of the task name.
e. Optional: Click Parent Description to display information about the parenttask from which you are creating a customized task.Additional Information: The task information appears under the headingDescription.
f. Click Save & Close to return to the task argument dialog box.
Figure 32. Saving arguments dialog box
Chapter 6. Working with tasks and jobs 77

7. Click Cancel in the task argument dialog box.8. Click Close in the Execute Task dialog to return to the Task Library dialog
box.9. Click View to display the View drop-down menu.
10. Click Refresh from the View drop-down menu to display the new customizedtask.
Creating a job
ObjectiveTo create a job by defining execution parameters so you can specify a targetenabling you to schedule it to run at certain times in the Scheduler.
Background informationA job is a task with defined and saved arguments that can be executed many timeson specific managed resources. You can create jobs from both standard andcustomized tasks in the IBM Tivoli Monitoring for Databases: DB2 software tasklibrary. Like tasks, you store jobs in task libraries so you can reuse them.
Required authorization rolesadmin
Before you beginNone.
When you finishAfter you create a job, you can run it immediately using the procedure describedin “Running a job” on page 81. You also can schedule jobs to run at certain timesin the Scheduler, as described in “Scheduling a job” on page 82.
ProcedureYou can perform this procedure from the Tivoli command line or from the desktop.
Command Line: Use the wcrtjob command to create jobs from the command line.The syntax is as follows:
wcrtjob –j job_name –l library_name –t task_name –M mode [–s interval –n number]–m timeout –o output_format [–D|–d mannode_name –f file_name] [–h mannode_name][–p prof_manager_name]
where:
–j job_nameThe name of the job being created. Job names can include anyalphanumeric character, an underscore (_), a dash (–), a period (.), and aspace.
–l library_nameSpecifies the task library containing the task to be included in the job.
–t task_nameSpecifies the name of the task to include in the job.
–M modeSpecifies the mode in which the job runs. Valid options are as follows:
parallelRuns the job on all specified endpoints and any subscriberssimultaneously.
78 IBM Tivoli Monitoring for Databases: DB2: User’s Guide

serial Runs the job on one endpoint at a time.
staged Runs the job on a set number of endpoints at specified intervals.
Desktop:
1. Access the task library dialog box by doing the following:a. Open the Tivoli desktop.b. Double-click the policy region icon to display the policy region.c. Double-click the task library icon to display the task library dialog box.
2. Click Create to display the Create drop-down menu.3. Click Job from the Create drop-down menu to display the Create Job dialog
box.
4. Type a descriptive job name in the Job Name text box.
Figure 33. Create Job dialog box
Chapter 6. Working with tasks and jobs 79

Additional Information: The job name identifies the icon on the desktop. Thename can include any alphanumeric character, an underscore (_), dash (–),period (.), or blank space.
5. Select the task on which the job is based from the Task Name list.6. In the Execution Mode group box, select one of the following check boxes:
ParallelRuns the task simultaneously on all targets. Parallel is typically thefastest method of execution.
—OR—
Serial Runs the task sequentially on all targets in alphabetical order.
—OR—
StagedRuns the task on all targets in alphabetical order according to aschedule you specify. Staged execution is useful if you are running thetask on a large number of endpoints. Complete Step 8 to specify theStaging Count (number of targets to run against per stage) and theStaging Interval (number of seconds between each set).
7. In the Execution Parameters group box, type the timeout value (in seconds)for the task in the Timeout text box.Additional Information: This value specifies the number of seconds the IBMTivoli Monitoring for Databases: DB2 software waits for the task or job tocomplete before it issues an error. The default is 60 seconds. If the task takeslonger to complete than the specified Timeout and is running in Serial orStaged mode, the IBM Tivoli Monitoring for Databases: DB2 software moveson to other endpoints after this time expires. The task continues to execute onthe endpoint, even though the IBM Tivoli Monitoring for Databases: DB2software stopped waiting for it to end.
8. Optional: If you selected Staged in Step 6, specify the number of endpoints toinclude in each staged set in the Staging Count text box and the number ofseconds between each set’s startup time in the Staging Interval text box.
9. Click one or more of the following check boxes to choose the output type inthe Output Format group box:
HeaderIncludes a descriptive header for each record.
Return CodeIncludes the programming codes produced when the job executes.
Standard ErrorIncludes all error messages encountered when the job executes.
Standard OutputIncludes all information that results from the job execution.
10. Do one of the following in the Output Destination group box to choose anoutput destination:v Click Display on Desktop to display the job output on the desktop. Go to
Step 12.Additional Information: If you choose Display to Desktop, you have anoption to save the information to a file as an option inside the outputdisplay dialog box.—OR—
80 IBM Tivoli Monitoring for Databases: DB2: User’s Guide

v Click Save to File to save the output to a file and display the Destinationfor Task Output dialog box. Go to Step 11.
11. Do the following in the Destination for Task Output dialog box to save thejob output to a file:a. Type a Tivoli client endpoint name on which to save the output in the On
Host text box.b. Type the absolute path name for the output file in the Output File text
box.Additional Information: Example: /tmp/myjob.out
c. Click Set & Close to set your choices and return to the Create Job dialogbox.
12. Do one of the following to choose the endpoints on which to run the job:v Run the job on specific endpoints by doing the following:
a. Select the endpoints from the Available Task Endpoints list.b. Click the left arrow button to move the selected endpoints to the
Selected Task Endpoints list.–OR–
v Run the job on all subscribers of the specified profile managers by doingthe following:a. Select profile managers from the Available Profile Managers list.b. Click the left arrow button to move the selected profile managers to the
Selected Profile Managers list.13. Click Create & Close to create the job and return to the Task Library dialog
box.
Additional Information: The new job icon appears in the Task Library dialog box.
Running a job
ObjectiveTo execute a job on specific endpoints immediately so you can perform amanagement operation.
Background informationBefore you can run a job, you must create it, as described in “Creating a job” onpage 78.
If you created a job from a standard task, the Tivoli desktop displays the taskargument dialog so that you can fill in any required information.
Figure 34. Destination for Task Output dialog box
Chapter 6. Working with tasks and jobs 81

Jobs created from customized tasks run without further input because all requiredinformation is specified. (See “Customizing a task” on page 74 for informationabout how to create a customized task.)
Required authorization rolesdb2_dba or db2_user
For the authorization role of a specific task, refer to the description of that task inIBM Tivoli Monitoring for Databases, Version 5.1.0: DB2 Reference Guide.
Before you beginNone.
When you finishAfter you create a job, you can set it up to run on a regular schedule as describedin “Scheduling a job” on page 82.
ProcedureYou can perform this procedure from the Tivoli command line or from the desktop.
Command Line: Use the wrunjob command to run jobs from the command line.For more information about this command, see the Tivoli Management FrameworkReference Manual.
The following example uses the wrunjob command to run the Start Database job,which is stored in the DB2ManagerDatabaseTasks task library:wrunjob Start Database-l DB2ManagerDatabaseTasks
Desktop:
1. Open the task library dialog box by doing the following:a. Open the Tivoli desktop.b. Double-click the policy region icon to display the policy region.c. Double-click the task icon to display the task library dialog box.
2. Do one of the following:v Double-click the job icon created from a customized task to begin executing
the job.–OR–
v Double-click the job icon created from a standard task. Go to Step 3.3. Type the values in the task dialog box.
Additional Information: For information about specific fields, see the taskdescription in the IBM Tivoli Monitoring for Databases, Version 5.1.0: DB2Reference Guide or click Task Description to display the online help. The IBMTivoli Monitoring for Databases: DB2 software runs the job and displays theoutput on the desktop or sends it to a file in accordance with the jobspecification.
Scheduling a job
ObjectiveTo schedule jobs to occur regularly so you can routinely perform managementoperations.
82 IBM Tivoli Monitoring for Databases: DB2: User’s Guide

Background informationThe IBM Tivoli Monitoring for Databases: DB2 software uses Scheduler toschedule jobs. Scheduler is a service that enables you to run jobs unattended. Youcan schedule a job to run one time or multiple times. Scheduler notifies you by themanner you select when a job is complete. To schedule a job, the job must exist inthe task library. You create a job by following the procedure described in “Creatinga job” on page 78.
Required authorization rolesadmin
Before you beginNone.
When you finishNone.
ProcedureYou can perform this procedure from the Tivoli command line or from the desktop.
Command Line: Use the wschedjob command to schedule a job in the TaskLibrary from the command line. You can only schedule jobs that already exist inthe task library from the command line. For more information, see the TivoliManagement Framework Reference Manual.
Desktop:
1. Open the IBM Tivoli Monitoring for Databases: DB2 task library dialog box bydoing the following:a. Open the Tivoli desktop.b. Double-click the IBM Tivoli Monitoring for Databases: DB2 policy region
icon to display the policy region.c. Double-click the IBM Tivoli Monitoring for Databases: DB2 task library
icon to display the task library dialog box.2. Drag the job icon that you want to schedule onto the Scheduler icon located
on the Tivoli desktop.3. Optional: Do the following if a task argument dialog box displays:
a. Type the appropriate information for each field in the dialog.Additional Information: Refer to the task description in the IBM TivoliMonitoring for Databases, Version 5.1.0: DB2 Reference Guide or click TaskDescription to display the online help for this task.
b. Click Set & Execute to set the task arguments and open the AddScheduled Job dialog box.
Chapter 6. Working with tasks and jobs 83

4. Type a label for the job icon in the Job Label text box of the Add ScheduledJob dialog box.Additional Information: The label identifies the icon on the desktop. The joblabel can include alphanumeric character, underscores (_), dashes (–), periods(.), and blanks. If you do not specify a label, the job name is used.
5. Do one of the following:v Select the Disable the Job check box to stop a scheduled job from running.
—OR—v Deselect the Disable the Job check box to continue running a scheduled
job.
Additional Information: For more information on job disabling, see the TivoliManagement Framework User’s Guide.
6. Optional: Type a job description to uniquely identify the job in the Descriptionfield.
Figure 35. Add Scheduled Job dialog box
84 IBM Tivoli Monitoring for Databases: DB2: User’s Guide
7. Set the date and time to begin scheduling in the Schedule Job For group box:a. Type a date in the Month, Day, and Year text boxes.b. Enter the time using the Hour and Minute drop-down lists and the AM
and PM radio buttons.8. Optional: Repeat the job by doing the following in the Repeat the Job group
box:a. Do one of the following:
v Select the Repeat the job indefinitely check box to repeat the jobindefinitely.–OR–
v Repeat the job a finite number of times by doing the following:1) Select the Repeat the job check box.2) Type the number of times you want the job to run.
b. Set the interval between start times for the job in the The job should startevery field.
9. Click any of the following check boxes in the When Job Completes group boxto send job completion notification:v Send a notice to a specific group by doing the following:
a. Click the Post Tivoli Notice check box.b. Click Available Groups to display the Available Groups dialog box.c. Select a group from the list of notice groups.d. Click Set to set your group and return to the Add Scheduled Job dialog
box.
Additional Information: You can read notices from the Tivoli desktop byclicking on the Notices icon.
v Send a notice to your desktop by doing the following:a. Click the Post Status Dialog on Desktop check box.b. Type the message you want displayed in the text box next to the check
box.v Send an e-mail to a specified user by doing the following:
a. Click the Send e-mail to check box.b. Type the complete e-mail address in the text box next to the check box.
v Log the job completion status to a file by doing the following:a. Click the Log to File check box.b. Enter the file destination by doing one of the following:
– Type the file destination in the Host and File text boxes.–OR–
– Browse for the file destination by doing the following:1) Click File Browser to display the File Browser dialog.2) Double-click on a host name to display the directories and files
for that host.3) Select a directory and file from the Directories and Files lists.4) Click Set File & Close to return to the Add Scheduled Job dialog
box.10. Optional: Set retry, cancel, or restriction options by doing the following:
Chapter 6. Working with tasks and jobs 85

a. Click Set Retry/Cancel/Restriction Options to display the SetRetry/Cancel Restrictions Options dialog box.
b. Choose one of the following cancel job options:v Deselect the Cancel job check box to have the Scheduler continue trying
the job indefinitely.—OR—
v Set the Scheduler to cancel a job in a specified time frame by doing thefollowing:1) Select the Cancel job check box.2) Type the time frame for the Scheduler to wait before canceling a job
that has not started.c. Click one of the following retry options:
v Click Retry the job until success to retry the job until it runssuccessfully.—OR—
v Specify the number of times a job attempts to run by doing thefollowing:1) Click the Retry the job check box.2) Type the number of attempts to start the job in the text box.3) Type the amount of time the Scheduler waits before retrying in the
The job should retry every field.d. Click any of the following check boxes in the Restrictions group box to
specify the job run times:
During the daySet the beginning and ending hour of day for the job to run.
Figure 36. Set Retry/Cancel Restrictions Options dialog box
86 IBM Tivoli Monitoring for Databases: DB2: User’s Guide

At nightSet the beginning and ending hour of night for the job to run.
During the weekSet the beginning and ending day of the week for the job to run.
On weekendsSet the beginning and ending day of the weekend for the job torun.
e. Click Set to set the options and return to the Add Scheduled Job dialogbox.
11. Click Schedule Job & Close to schedule the job and return to the Tivolidesktop.
Chapter 6. Working with tasks and jobs 87

88 IBM Tivoli Monitoring for Databases: DB2: User’s Guide

Chapter 7. Viewing resource model results with the IBM TivoliMonitoring Web Health Console
This chapter provides an overview of the IBM Tivoli Monitoring Web HealthConsole. For complete information on installing and working with the IBM TivoliMonitoring Web Health Console see the latest version of the IBM Tivoli MonitoringUser’s Guide. The IBM Tivoli Monitoring Web Health Console runs on Netscape 6.xand Internet Explorer 6.x. You can use the IBM Tivoli Monitoring Web HealthConsole for the following purposes:v Checking, displaying, and analyzing the status and health of endpoints that
have distributed resource monitorsv Displaying an endpoint’s real-time and historical data logged to the IBM Tivoli
Monitoring databasev Viewing online and historical data on endpoints as a follow-up to specific
problemsv Starting and stopping the IBM Tivoli Monitoring engine and individual resource
models on selected endpointv Removing a profile from the selected endpoint
OverviewYou can use the IBM Tivoli Monitoring Web Health Console to check, display, andanalyze the status and health of any endpoint with profiles and resource models.Status reflects the state of the endpoint displayed on the IBM Tivoli MonitoringWeb Health Console, such as running or stopped. Health is a numeric valuedetermined by resource model settings. You can also use the Web Health Consoleto work with real-time or historical data from an endpoint that is logged to theIBM Tivoli Monitoring database.
You can use the diagnostic and monitoring capabilities of the IBM TivoliMonitoring Web Health Console to perform targeted analysis of problemsassociated with individual endpoints when an event is sent to the Tivoli EnterpriseConsole. Use the online and historical data to follow up specific problems withsingle endpoints.
Understanding Resource HealthThe IBM Tivoli Monitoring Web Health Console obtains events and indicationsfrom endpoints. The IBM Tivoli Monitoring Web Health Console displays thehealth of each potential problem as a numeric value between 100 (perfect health)and zero (with zero meaning that the conditions for the corresponding event aremet). See Table 17
Table 17. Health Determination Example
Cycle 1 2 3 4 5
CPU% 55 73 54 63 68
Occurrences or Holes H O H O O
Occurrence Count 0 1 1 2 3
Health % 100 75 75 50 25
89

Table 17 on page 89 displays the health percentage changes in steps of 25% because4 occurrences were required to trigger an event; if the indication required 5occurrences, the health percentage would have changed by steps of 20%. Resourcehealth is determined at the indication level and passed up to the endpoint. Thelowest health of any indication in a resource model is shown as the health of thatresource model and the lowest health of any resource model installed on anendpoint is shown as the health of that endpoint. For example, if one indication onone resource model that is installed on an endpoint has a health of zero, the healthof the endpoint is shown as zero. The required occurrences, cycle times, thresholds,and parameters for indications are defined when the resource model is created inthe IBM Tivoli Monitoring Workbench.
Connecting the IBM Tivoli Monitoring Web Health ConsoleYou can connect the IBM Tivoli Monitoring Web Health Console to any Tivolimanagement region server or managed node and configure it to monitor any or allof the endpoints that are found in that region. The IBM Tivoli Monitoring WebHealth Console does not have to be within the region itself, although it could be.To connect to the IBM Tivoli Monitoring Web Health Console you need access tothe server on which the IBM Tivoli Monitoring Web Health Console server isinstalled and the IBM Tivoli Managed Region on which you want to monitorhealth. All user management and security is handled through the IBM Tivolimanagement environment. This includes creating users and passwords as well asassigning authority.
90 IBM Tivoli Monitoring for Databases: DB2: User’s Guide

Chapter 8. Customizing resource models
This chapter provides an overview of IBM Tivoli Monitoring procedures you needto follow to customize resource models.
Overview of IBM Tivoli MonitoringIBM® Tivoli® Monitoring 5.1.1 allows you to deploy preconfigured best practicesresource models as well as standard and customized resource models to automatethe monitoring of essential resources. In this context, a resource is anything thataffects the operation of a computer system and includes physical and logical disks,CPUs, memory, printers, as well as the processes running, and the services, such asLanMan, the Windows event log, the UNIX® syslogd (logging system daemon) andTCP/IP. This allows you to detect bottlenecks and other potential problems anddefine automatic recovery from critical situations. This capability frees systemadministrators from manually scanning extensive performance data. Themonitoring software integrates with other Tivoli Availability solutions, includingTivoli Business Systems Manager® and Tivoli Enterprise Console®.
A resource model captures and returns information, such as database status orserver availability, about a resource or software application in the Tivolimanagement environment. To use a resource model, you must define anddistribute it to an endpoint.
Tivoli provides tools for organizing system resources on the Tivoli desktop. Aprofile manager is the top level of organization. Servers are subscribed to profilemanagers. These subscriptions provide the channel through which resource modelsare distributed to servers. A profile manager also can contains profiles, which arecontainers for application-specific information about a particular type of resource.Each profile contains one or more resource models. You can subscribe resources toa pre-defined profile manager. You can distribute individual profiles within theprofile manager to subscribers of the profile manager. You can group profilemanagers in a way that meets your needs. Profile managers can reflect functionalgrouping of resources, functional grouping of resource models, or any grouping atall. Likewise, a profile can contain any combination of resource models.
You must segregate profiles according to resources: Web servers need Web serverresource models, and database servers need database server resource models. Youcan define each resource model to include information such as how often to checkthe server resource status and what to do when certain conditions are met. Someresource models provide predefined settings and response actions, which you canadjust. Other resource models require you to define all the settings. See the IBMTivoli Monitoring for Databases, Version 5.1.0: DB2 Reference Guide for a description ofindividual settings.
Before running a resource model, you must subscribe the server resource to theprofile manager that contains the profile in which the resource model is stored.You can distribute the profile to the resource. By default, resource models are setup to become active when you distribute them to subscribers. You can activate anddeactivate resource models after they are distributed.
91

Adding custom resource models to profiles
ObjectiveTo specify the platform, cycle time, and threshold values that customize a resourcemodel to meet the needs of your environment and add the resource model to aprofile.
Background informationA resource model captures and returns information about a resource or application.You set up resource models and distributed them to endpoints. A number ofpredefined resource models are installed with the product. To customize basicsettings of a resource model, specify the platform type, cycle time, and thresholdvalues appropriate for your environment. Choose the resource models to add to aprofile based on the resources you want to monitor. Adding one or more of theseresource models to a profile enables you to begin monitoring resourcesimmediately.
Required authorization roleadmin
Before you beginv Create a profile manager and profile. See “Creating profile managers and
profiles” on page 46 for information.v Add subscribers to a profile manager. See “Subscribing resources to profile
managers” on page 48 for information.v See the IBM Tivoli Monitoring for Databases, Version 5.1.0: DB2 Reference Guide for
detailed information about each resource model.
When you finishDistribute the profile. See “Distributing profiles from the desktop” on page 50.
ProcedureYou can perform this procedure from the Tivoli command line or from the desktop.
Command line: Use the wdmeditprf command to add a customized resourcemodel to a profile.
For more information about this command, see the IBM Tivoli Monitoring, Version5.1.0: User’s Guide.
Desktop:
1. Open the IBM Tivoli Monitoring Profile dialog box by doing the following:a. Open the Tivoli desktop.b. Double-click the policy region icon to open the policy region.c. Double-click the profile manager icon to open the Profile Manager dialog
box.d. Double-click the profile icon to which you want to add a customized
resource model.2. Click Add to open the Add Resource Models to Profile dialog box.3. Select the resource model category from the Category drop-down list.4. Select the desired resource model from the Resource Model drop-down list.5. Set the frequency with which the resource model monitors the data in the
Cycle Time text box. Enter a time in seconds.6. Use the following steps to change any of the threshold values:
92 IBM Tivoli Monitoring for Databases: DB2: User’s Guide

a. Select the Threshold Name that you want to change.Additional Information: The description box displays a description of thethreshold that you selected. A dialog box above the description displays thecurrently assigned threshold value. For the default threshold values see theIBM Tivoli Monitoring for Databases, Version 5.1.0: DB2 Reference Guide.
b. Change the currently assigned threshold value to a value appropriate toyour requirements.
c. Click Apply to set and display the new value in the Threshold Value dialogbox.
7. Optional: Click Indications or Parameters to make required modifications toindications and parameters, click Schedule to add schedule information, andclick Logging to add logging information.Additional information: If you do not perform this step, the indications andparameters use the default values shipped with the resource models. See“Customizing indications”, “Customizing parameters” on page 102, and“Customizing the scheduling monitoring period” on page 106 for information.
8. Click Add & Close to save your changes. The IBM Tivoli Monitoring Profiledialog box now shows the customized resource model.
Customizing indications
ObjectiveTo customize indication rules so that resources are monitored and events generatedin the manner most appropriate to your environment.
Background InformationEach resource model triggers an indication if certain conditions defined by theresource model’s thresholds are not satisfied during the monitoring cycle. Eachresource model has predefined thresholds that meet the business needs of mostcustomers; however, you may have specific requirements for which thesethresholds are not appropriate; therefore, you can adjust these values as needed.
An event is used to verify the persistence of a given indication by eliminatingunrepresentative peaks and troughs for the indication. The number of occurrences,with allowance for holes, of an indication defines an event. For example, a processthat generates the Process High CPU indication in one cycle is behaving perfectlynormally, and is of no threat to other processes if the high usage does not repeat.However, an indication that persists over several cycles is a problem.
An occurrence is a cycle during which required conditions are met to generate anindication for a given resource model.
A hole refers to a cycle during which an indication does not occur for a givenresource model. In other words, none of the conditions specified for the generationof the indication are met. This does not mean that none of the thresholds areexceeded.
Required Authorization Roleadmin
Before You Beginv Create a profile manager and profile. See “Creating profile managers and
profiles” on page 46 for information.
Chapter 8. Customizing resource models 93

v Add subscribers to a profile manager. See “Subscribing resources to profilemanagers” on page 48 for information.
v Add a resource model to a profile. See “Adding default resource models toprofiles” on page 49 and“Adding custom resource models to profiles” on page 92for information.
v See the IBM Tivoli Monitoring for Databases, Version 5.1.0: DB2 Reference Guide fordetailed information about each resource model.
When You FinishDistribute the profile to which the resource model belongs. See “Distributingprofiles from the desktop” on page 50.
Optional: Continue customizing the resource model:v Specify if you want a recovery action when a specific event occurs. See “Editing
a built-in action” on page 97v Specify if you want corrective or reporting tasks for an event. See “Specifying
tasks for an indication” on page 99v Specify if you want to receive information on a specific event through a notice.
See “Sending a notice to administrators when an event occurs” on page 101v Specify if you want to customize your parameters to optimize the monitoring
process. See “Customizing parameters” on page 102v Specify if you want the monitoring of resource models to take place on specific
time periods of selected days. See “Creating scheduling rules” on page 104v Determine when the monitoring of resource models takes place. See
“Customizing the scheduling monitoring period” on page 106v Specify if you want the log data collected by a resource model written to a local
database. See “Customizing data logging information” on page 108
ProcedureYou can perform this procedure from the Tivoli command line or from the desktop.
Command Line: Use the wdmeditprf command to customize a resource modelfor a profile.
For more information about this command, see the IBM Tivoli Monitoring, Version5.1.0: User’s Guide.
Desktop:
1. Open the IBM Tivoli Monitoring Profile dialog box by doing the following:a. Open the Tivoli desktop.b. Double-click the policy region icon to display the policy region.c. Double-click the profile manager icon to display the profile manager.d. Double-click the profile icon in which you want to customize a resource
model.2. Select the resource model that you want to customize from the IBM Tivoli
Monitoring Profile dialog box.3. Click Edit to open the Edit Resource Model dialog.4. Click Indications. The Indications and Actions dialog box opens and displays
the indications appropriate to the selected resource model.5. Select the indication for which you want to customize the values of the event
associated with that indication.
94 IBM Tivoli Monitoring for Databases: DB2: User’s Guide

6. Apply the changes to the values that are appropriate to your requirements. Seethe IBM Tivoli Monitoring for Databases, Version 5.1.0: DB2 Reference Guidefor the default resource model settings. The following describes the values thatyou can customize:
Number of OccurrencesSpecifies the number of consecutive times the problem occurs beforethe software generates an indication. You can change this value tospecify the number of times a problem occurs before an indicationgenerates.
Number of HolesDetermines how many cycles that do not produce an indication canoccur between cycles that do produce an indication. This determines ifthe occurrences of an indication are consecutive. Each cycle without anindication is termed a hole. For example, an event that has a value oftwo holes means that when up to two cycles without an indicationoccur between any two cycles with an indication, the cycles with anindication are considered consecutive.
Use the value for the Number of Holes in conjunction with theNumber of Occurrences parameter and the Cycle Time to define atime window for the generation of an event. If, for example, you defineCycle Time as 10 seconds, Number of Occurrences as 5, and Numberof Holes as 2, the time that must elapse before an event occurs isbetween 50 and 130 seconds. The minimum elapsed time is the numberof occurrences multiplied by the cycle time. The maximum timewindow assumes that the maximum number of holes occur betweeneach pair of occurrences, and is determined by the following equation:TW=CT x (Oc + (H x (Oc - 1))
where:
TW Specifies the time window calculated
CT Specifies the cycle time
Oc Specifies the number of occurrences
H Specifies the number of holes
Send TEC EventsSelect this check box to send an event to the Tivoli Enterprise Console.You must have Tivoli Enterprise Console installed and configured.
Send to TBSMSelect this check box to send an event to Tivoli Business SystemsManager’s Common Listener. You must have Tivoli Business SystemsManager installed and configured.
7. Click Apply Changes & Close to save your changes to the indication.
Adding or removing built-in actions
ObjectiveTo add a built-in action so administrators and users can reinstate an event’srecovery actions or to remove a built-in action so administrators and users canclear an event’s recovery actions.
Chapter 8. Customizing resource models 95

Background InformationA built-in action is a recovery action for an event. The actions take positive steps toremedy the situation, or ensure distribution of information about the event to theappropriate authorities or entities.
The Tivoli software has predefined actions for certain events. An action is eitherthe execution of a common information model (CIM) class method, or theexecution of a program. For example, an event that detects the failure of a servicehas the restart of that service as its built-in action. IBM Tivoli Monitoring detectsthe failure of a service and automatically restarts it. Built-in actions are defined bydefault as part of an event when the resource model is created in the IBM TivoliMonitoring Workbench. See the IBM Tivoli Monitoring documentation for moreinformation.
Required Authorization Roleadmin
Before You Beginv You must have previously removed a built-in action to activate Built-In for
adding a built-in action. Use this procedure to reinstate the previously removedbuilt-in action.
v Create a profile manager and profile. See “Creating profile managers andprofiles” on page 46 for information.
v Add subscribers to a profile manager. See “Subscribing resources to profilemanagers” on page 48 for information.
v Add a resource model to a profile. See “Adding default resource models toprofiles” on page 49 and“Adding custom resource models to profiles” on page 92for information.
v See the IBM Tivoli Monitoring for Databases, Version 5.1.0: DB2 Reference Guide fordetailed information about each resource model.
When You FinishDistribute the profile to which the resource model belongs. See “Distributingprofiles from the desktop” on page 50.
Optional: Continue customizing the resource model:v Specify if you want a recovery action when a specific event occurs. See “Editing
a built-in action” on page 97v Specify if you want corrective or reporting tasks for an event. See “Specifying
tasks for an indication” on page 99v Specify if you want to receive information on a specific event through a notice.
See “Sending a notice to administrators when an event occurs” on page 101v Specify if you want to customize your parameters to optimize the monitoring
process. See “Customizing parameters” on page 102v Specify if you want the monitoring of resource models to take place on specific
time periods of selected days. See “Creating scheduling rules” on page 104v Determine when the monitoring of resource models takes place. See
“Customizing the scheduling monitoring period” on page 106v Specify if you want the log data collected by a resource model written to a local
database. See “Customizing data logging information” on page 108
ProcedureYou can perform this procedure from the Tivoli command line or from the desktop.
96 IBM Tivoli Monitoring for Databases: DB2: User’s Guide

Command Line: Use the wdmeditprf command to customize a resource modelfor a profile.
For more information about this command, see the IBM Tivoli Monitoring, Version5.1.0: User’s Guide.
Desktop:
1. Open the IBM Tivoli Monitoring Profile dialog box by doing the following:a. Open the Tivoli desktop.b. Double-click the policy region icon to display the policy region.c. Double-click the profile manager icon to display the profile manager.d. Double-click the profile icon in which you want to customize a resource
model.2. Select a resource model from the IBM Tivoli Monitoring Profile dialog box.3. Click Edit to open the Edit Resource Model dialog box.4. Click Indications. The Indications and Actions dialog box opens and displays
the indications appropriate to the selected resource model.5. Select the indication that has the associated events you want to add or remove.6. Select the action from the Action List panel of the Indications and Actions
dialog box.7. Click Remove to remove the action from the list.
— or —Click Built-in to open the Add Action dialog box.a. Select the action you want to run when an event occurs.b. Enter the number of times you want the action to perform when an
indication generates an event in the Retry field.Additional information: If you set the Retry field to zero, the productcontinually tries to perform the action until the action is successful.
c. Click one of the following to add an action:
Add Adds the selected action with the values specified and keeps theAdd Action dialog box open.
Add & CloseAdds the selected action and closes the Add Action dialog box.
8.
Click one of the following to apply changes:
Apply ChangesSaves the changes made to the built-in actions and leaves theIndications and Actions dialog box open.
Apply Changes and CloseCloses the Indications and Actions dialog box and saves the changesmade to the built-in actions.
Editing a built-in action
ObjectiveSpecifies the number of times the software attempts to execute the built-in actionwhen an event is generated.
Chapter 8. Customizing resource models 97

Background InformationA built-in action is a recovery action for an event. The actions take positive steps toremedy the situation, or ensures distribution of information about the event to theappropriate authorities or entities.
The Tivoli software has predefined actions for certain events. An action is eitherthe execution of a common information model class method, or the execution of aprogram. For example, an event that detects the failure of a service has the restartof that service as its built-in action. IBM Tivoli Monitoring detects the failure of aservice and automatically restarts it. Built-in actions are defined by default as partof an event when the resource model is created in the IBM Tivoli MonitoringWorkbench. See the IBM Tivoli Monitoring documentation for more information.You can removing built-in actions from a resource model using the Tivoli desktop.See “Adding or removing built-in actions” on page 95.
Required Authorization Roleadmin
Before You Beginv Create a profile manager and profile. See “Creating profile managers and
profiles” on page 46 for information.v Add subscribers to a profile manager. See “Subscribing resources to profile
managers” on page 48 for information.v Add a resource model to a profile. See “Adding default resource models to
profiles” on page 49 and“Adding custom resource models to profiles” on page 92for information.
v See the IBM Tivoli Monitoring for Databases, Version 5.1.0: DB2 Reference Guide fordetailed information about each resource model.
When You FinishDistribute the profile to which the resource model belongs. See “Distributingprofiles from the desktop” on page 50.
Optional: Continue customizing the resource model:v Specify if you want to customize your thresholds and events to optimize the
monitoring process. See “Customizing indications” on page 93v Specify if you want corrective or reporting tasks for an event. See “Specifying
tasks for an indication” on page 99v Specify if you want to receive information on a specific event through a notice.
See “Sending a notice to administrators when an event occurs” on page 101v Specify if you want to customize your parameters to optimize the monitoring
process. See “Customizing parameters” on page 102v Specify if you want the monitoring of resource models to take place on specific
time periods of selected days. See “Creating scheduling rules” on page 104v Determine when the monitoring of resource models takes place. See
“Customizing the scheduling monitoring period” on page 106v Specify if you want the log data collected by a resource model written to a local
database. See “Customizing data logging information” on page 108
ProcedureYou can perform this procedure from the Tivoli command line or from the desktop.
Command Line: Use the wdmeditprf command to customize a resource modelfor a profile.
98 IBM Tivoli Monitoring for Databases: DB2: User’s Guide

For more information about this command, see the IBM Tivoli Monitoring, Version5.1.0: User’s Guide.
Desktop:
1. Open the IBM Tivoli Monitoring Profile dialog box by doing the following:a. Open the Tivoli desktop.b. Double-click the policy region icon to display the policy region.c. Double-click the profile manager icon to display the profile manager.d. Double-click the profile icon in which you want to customize a resource
model.2. Select a resource model from the IBM Tivoli Monitoring Profile dialog box.3. Click Edit to open the Edit Resource Model dialog box.4. Click Indications. The Indications and Actions dialog box opens and displays
the indications appropriate to the selected resource model.5. Select the indication that has the associated events you want to customize.6. Select the action to edit from the Action List panel of the Indications and
Actions dialog box.7. Click Edit to open the Edit Current Action dialog box.8. Enter the number of times you want the action to perform when an indication
generates an event in the Retry field.Additional information: If you set the Retry field to zero, the productcontinually tries to perform the action until the action is successful.
9. Click Apply next to the Retry field to apply the changes.10. Click one of the following to close the Edit Current Action dialog box:
Close Closes the Edit Current Action dialog box and saves the original retryvalue.
Modify & CloseCloses the Edit Current Action dialog box and saves the modifiedretry value.
Specifying tasks for an indication
ObjectiveTo specify a task so administrators and users can determine corrective or reportingtasks for an indication.
Background InformationYou can select one or more tasks to perform when an indication generates anevent. You can select one or more tasks for each event. These tasks can access theIBM Tivoli Monitoring event name and thresholds by accessing the environmentvariables.
Required Authorization Roleadmin
Before You Beginv Create a profile manager and profile. See “Creating profile managers and
profiles” on page 46 for information.v Add subscribers to a profile manager. See “Subscribing resources to profile
managers” on page 48 for information.
Chapter 8. Customizing resource models 99

v Add a resource model to a profile. See “Adding default resource models toprofiles” on page 49 and“Adding custom resource models to profiles” on page 92for information.
v See the IBM Tivoli Monitoring for Databases, Version 5.1.0: DB2 Reference Guide fordetailed information about each resource model.
When You FinishDistribute the profile to which the resource model belongs. See “Distributingprofiles from the desktop” on page 50.
Optional: Continue customizing the resource model:v Specify if you want to customize your thresholds and events to optimize the
monitoring process. See “Customizing indications” on page 93v Specify if you want a recovery action when a specific event occurs. See “Editing
a built-in action” on page 97v Specify if you want to receive information on a specific event through a notice.
See “Sending a notice to administrators when an event occurs” on page 101v Specify if you want to customize your parameters to optimize the monitoring
process. See “Customizing parameters” on page 102v Specify if you want the monitoring of resource models to take place on specific
time periods of selected days. See “Creating scheduling rules” on page 104v Determine when the monitoring of resource models takes place. See
“Customizing the scheduling monitoring period” on page 106v Specify if you want the log data collected by a resource model written to a local
database. See “Customizing data logging information” on page 108
ProcedureYou can perform this procedure from the Tivoli command line or from the desktop.
Command Line: Use the wdmeditprf command to customize a resource modelfor a profile.
For more information about this command, see the IBM Tivoli Monitoring, Version5.1.0: User’s Guide.
Desktop:
1. Open the IBM Tivoli Monitoring Profile dialog box by doing the following:a. Open the Tivoli desktop.b. Double-click the policy region icon to display the policy region.c. Double-click the profile manager icon to display the profile manager.d. Double-click the profile icon in which you want to customize a resource
model.2. Select the resource model that you want to customize.3. Click Edit to open the Edit Resource Model dialog box.4. Click Indications. The Indications and Actions dialog box opens and displays
the indications appropriate to the selected resource model.5. Select the indication that you want to generate a task from the Indications
and Actions dialog box.6. Click Tasks in the Action List dialog box. The Tasks dialog box opens.7. Double-click the appropriate task library from the scroll list of the Libraries
panel. The tasks contained in the library are displayed in the Tasks panel.8. Double-click the appropriate task in the Tasks panel.
100 IBM Tivoli Monitoring for Databases: DB2: User’s Guide

9. Specify the appropriate parameters in the Configure Task dialog box.Additional Information: Run the wlsnotif -g command to see the availableNotice Groups.
10. Click Change & Close to add the task to the Action List panel in theIndications and Actions dialog box.
Sending a notice to administrators when an event occurs
ObjectiveTo send a notice in response to an event so administrators can take the appropriateactions or responses.
Background InformationYou can select the IBM Tivoli Monitoring Utility task to send notices in response toan event.
Required Authorization Roleadmin
Before You Beginv Create a profile manager and profile. See “Creating profile managers and
profiles” on page 46 for information.v Add subscribers to a profile manager. See “Subscribing resources to profile
managers” on page 48 for information.v Add a resource model to a profile. See “Adding default resource models to
profiles” on page 49 and“Adding custom resource models to profiles” on page 92for information.
v See the IBM Tivoli Monitoring for Databases, Version 5.1.0: DB2 Reference Guide fordetailed information about each resource model.
When You FinishDistribute the profile to which the resource model belongs. See “Distributingprofiles from the desktop” on page 50.
Optional: Continue customizing the resource model:v Specify if you want to customize your thresholds and events to optimize the
monitoring process. See “Customizing indications” on page 93v Specify if you want a recovery action when a specific event occurs. See “Editing
a built-in action” on page 97v Specify if you want corrective or reporting tasks for an event. See “Specifying
tasks for an indication” on page 99v Specify if you want to customize your parameters to optimize the monitoring
process. See “Customizing parameters” on page 102v Specify if you want the monitoring of resource models to take place on specific
time periods of selected days. See “Creating scheduling rules” on page 104v Determine when the monitoring of resource models takes place. See
“Customizing the scheduling monitoring period” on page 106v Specify if you want the log data collected by a resource model written to a local
database. See “Customizing data logging information” on page 108
ProcedureYou can perform this procedure from the Tivoli command line or from the desktop.
Chapter 8. Customizing resource models 101

Command Line: Use the wdmeditprf command to customize a resource modelfor a profile.
For more information about this command, see the IBM Tivoli Monitoring, Version5.1.0: User’s Guide.
Desktop:
1. Open the IBM Tivoli Monitoring Profile dialog box by doing the following:a. Open the Tivoli desktop.b. Double-click the policy region icon to display the policy region.c. Double-click the profile manager icon to display the profile manager.d. Double-click the profile icon in which you want to customize a resource
model.2. Select the resource model that you want to customize.3. Click Edit to open the Edit Resource Model dialog box.4. Click Indications. The Indications and Actions dialog box opens and displays
the indications appropriate to the selected resource model.5. Select the indication that you want to generate a task from the Indications
and Actions dialog box.6. Click Tasks in the Action List dialog box. The Tasks dialog box opens.7. Double-click the IBM Tivoli Monitoring Utility Tasks library in the scroll list
of the Libraries panel. The tasks contained in the IBM Tivoli MonitoringUtility Tasks library are displayed in the Tasks panel.
8. Double-click dm_mn_send_notice in the Tasks panel. The Configure Taskdialog box opens.
9. Specify the appropriate parameters in the Configure Task dialog box.Additional Information: Run the wlsnotif -g command to see the availableNotice Groups.
10. Click Change & Close to add the task to the Action List panel in theIndications and Actions dialog box.
Customizing parameters
ObjectiveTo customize the parameters of a resource model so administrators and users canoptimize the monitoring process.
Background InformationSome resource models have one or more parameters. Each parameter can take theform of a list of strings, a list of numeric values, a Boolean list of predeterminedvalues from which you can make any combination of selections, or a choice list ofmutually exclusive alternatives.
Note: Certain parameters for IBM Tivoli Monitoring for Databases: DB2 resourcemodels feature selective logging. Selective logging enables you to chooseproperties that you want to log. Selective logging properties are listed in theParameters dialog box. See “Customizing data logging information” on page108 for details on how to enable selective logging.
Required Authorization Roleadmin
102 IBM Tivoli Monitoring for Databases: DB2: User’s Guide

Before You Beginv Create a profile manager and profile. See “Creating profile managers and
profiles” on page 46 for information.v Add subscribers to a profile manager. See “Subscribing resources to profile
managers” on page 48 for information.v Add a resource model to a profile. See “Adding default resource models to
profiles” on page 49 and“Adding custom resource models to profiles” on page 92for information.
v See the IBM Tivoli Monitoring for Databases, Version 5.1.0: DB2 Reference Guide fordetailed information about each resource model.
When You FinishDistribute the profile to which the resource model belongs. See “Distributingprofiles from the desktop” on page 50.
Optional: Continue customizing the resource model:v Specify if you want to customize your thresholds and events to optimize the
monitoring process. See “Customizing indications” on page 93v Specify if you want a recovery action when a specific event occurs. See “Editing
a built-in action” on page 97v Specify if you want corrective or reporting tasks for an event. See “Specifying
tasks for an indication” on page 99v Specify if you want to receive information on a specific event through a notice.
See “Sending a notice to administrators when an event occurs” on page 101v Specify if you want the monitoring of resource models to take place on specific
time periods of selected days. See “Creating scheduling rules” on page 104v Determine when the monitoring of resource models takes place. See
“Customizing the scheduling monitoring period” on page 106v Specify if you want the log data collected by a resource model written to a local
database. See “Customizing data logging information” on page 108
ProcedureYou can perform this procedure from the Tivoli command line or from the desktop.
Command Line: Use the wdmeditprf command to customize a resource modelfor a profile.
For more information about this command, see the IBM Tivoli Monitoring, Version5.1.0: User’s Guide.
Desktop:
1. Open the IBM Tivoli Monitoring Profile dialog box by doing the following:a. Open the Tivoli desktop.b. Double-click the policy region icon to display the policy region.c. Double-click the profile manager icon to display the profile manager.d. Double-click the profile icon in which you want to customize a resource
model.2. Select the resource model that you want to customize.3. Click Edit to open the Edit Resource Model dialog box.4. Click Parameters.5. Select the type of parameter from the Name drop-down list in the Parameters
dialog box.
Chapter 8. Customizing resource models 103

6. Add or delete the parameter values as desired by selecting or clearing thecheck boxes.
7. Click Apply Changes and Close to save your changes.
Creating scheduling rules
ObjectiveTo create schedule rules so administrators and users can determine the timeperiods on selected days when monitoring takes place.
Background InformationIBM Tivoli Monitoring contains a scheduling feature that enables you to determinea period when monitoring takes place and specific scheduling rules. You candivide the overall collection period into active and inactive intervals by applyingone or more schedule rules.
The scheduling rules enable you to define time periods on specific weekdaysduring which monitoring takes place. You can define any number of rules whichallows you set up a complex pattern of resource monitoring for a profile andcovers the periods that you want to monitor. If the profile contains more than oneschedule rule, all the time intervals are respected, and rules are combined byadding together the time periods they define. For example, if you specify a rulethat requests monitoring between 8:00 and 14:00 every day and another thatrequests all-day monitoring on Fridays, the sum of the two rules gives all-daymonitoring only on Fridays, and monitoring between 8:00 and 14:00 on all otherdays. If the second rule instead requested monitoring from 12:00 to 18:00 onFridays, the sum of the rules would give monitoring between 8:00 and 18:00 onFridays and between 08:00 and 14:00 on all other days.
The scheduled times are always interpreted as local times, enabling you to set up asingle rule that monitors the same local time period in different time zones. Alltimes of events or activities reported from endpoints or gateways are also loggedin the local time of the system from where they originated.
The Scheduling dialog box has the following group boxes:
ScheduleSets the data collection period. By default, all resource models are set toalways collect data.
Schedule RulesManages time intervals during which the resource model is active.
Rule EditorCreates and edits schedule rules.
Required Authorization Roleadmin
Before You Beginv Create a profile manager and profile. See “Creating profile managers and
profiles” on page 46 for information.v Add subscribers to a profile manager. See “Subscribing resources to profile
managers” on page 48 for information.v Add a resource model to a profile. See “Adding default resource models to
profiles” on page 49 and“Adding custom resource models to profiles” on page 92for information.
104 IBM Tivoli Monitoring for Databases: DB2: User’s Guide

v See the IBM Tivoli Monitoring for Databases, Version 5.1.0: DB2 Reference Guide fordetailed information about each resource model.
When You FinishDistribute the profile to which the resource model belongs. See “Distributingprofiles from the desktop” on page 50.
Optional: Continue customizing the resource model:v Specify if you want to customize your thresholds and events to optimize the
monitoring process. See “Customizing indications” on page 93v Specify if you want a recovery action when a specific event occurs. See “Editing
a built-in action” on page 97v Specify if you want corrective or reporting tasks for an event. See “Specifying
tasks for an indication” on page 99v Specify if you want to receive information on a specific event through a notice.
See “Sending a notice to administrators when an event occurs” on page 101v Specify if you want to customize your parameters to optimize the monitoring
process. See “Customizing parameters” on page 102v Determine when the monitoring of resource models takes place. See
“Customizing the scheduling monitoring period” on page 106v Specify if you want the log data collected by a resource model written to a local
database. See “Customizing data logging information” on page 108
ProcedureYou can perform this procedure from the Tivoli command line or from the desktop.
Command Line: Use the wdmeditprf command to customize a resource modelfor a profile.
For more information about this command, see the IBM Tivoli Monitoring, Version5.1.0: User’s Guide.
Desktop:
1. Open the IBM Tivoli Monitoring Profile dialog box by doing the following:a. Open the Tivoli desktop.b. Double-click the policy region icon to display the policy region.c. Double-click the profile manager icon to display the profile manager.d. Double-click the profile icon in which you want to customize a resource
model.2. Select the resource model that you want to customize.3. Click Edit to open the Edit Resource Model dialog box.4. Click Schedule to open the Scheduling dialog box.5. Clear the Always check box in the Schedule panel.6. Click New Rule in the Schedule Rules panel.7. Type a name for the rule in the Rule Name text box of the Rule Editor panel.8. Select one or more items in the weekday list to specify the day or days on
which you want the collections active during the collection period.Additional information: Use the Shift or Cutler key as necessary to select morethan one day from the list.
9. Set the Start Time and Stop Time for the collection activity or select the AllDay check box.
Chapter 8. Customizing resource models 105

Additional information: Times are always interpreted as local time where theendpoint engine runs. Setting a time interval of 08:00 to 13:00 ensures thatmonitoring takes place between those times in all time zones to which youdistribute the profile.
10. Click Set Rule. Your new rule appears in the Schedule Rules list.Additional information: To display the details of any rule, select the rule in theSchedule Rules list. Its settings are displayed in the Rule Editor group box.
11. Click Modify & Close to save your rule and close the Scheduling dialog box.
Customizing the scheduling monitoring period
ObjectiveTo customize the scheduling monitoring period of a resource model soadministrators and users can determine when monitoring takes place.
Background InformationIBM Tivoli Monitoring contains a scheduling feature that enables you to determinea period when monitoring takes place and specific scheduling rules.
The scheduling rules enable you to define time periods on specific weekdaysduring which monitoring takes place. You can define any number of rules whichenables you set up a complex pattern of resource monitoring for a profile andcovers the periods that you want to monitor. If a profile contains more than oneschedule rule, all the time intervals are respected, and rules are combined byadding together the time periods they define. For example, if you specify a rulethat requests monitoring between 8:00 and 14:00 every day and another thatrequests all-day monitoring on Fridays, the sum of the two rules gives all-daymonitoring only on Fridays, and monitoring between 8:00 and 14:00 on all otherdays. If the second rule instead requested monitoring from 12:00 to 18:00 onFridays, the sum of the rules would give monitoring between 8:00 and 18:00 onFridays and between 08:00 and 14:00 on all other days.
The scheduled times are always interpreted as local times, enabling you to set up asingle rule that monitors the same local time period in different time zones. Alltimes of events or activities reported from endpoints or gateways are also loggedin the local time of the system from where they originated.
The Scheduling dialog box has the following group boxes:
ScheduleSets the data collection period. By default, all resource models are set toalways collect data.
Schedule RulesManages time intervals during which the resource model is active.
Rule EditorCreates and edits schedule rules.
Required Authorization Roleadmin
Before You Beginv Create a profile manager and profile. See “Creating profile managers and
profiles” on page 46 for information.v Add subscribers to a profile manager. See “Subscribing resources to profile
managers” on page 48 for information.
106 IBM Tivoli Monitoring for Databases: DB2: User’s Guide
v Add a resource model to a profile. See “Adding default resource models toprofiles” on page 49 and“Adding custom resource models to profiles” on page 92for information.
v Create the schedule rules. See “Creating scheduling rules” on page 104 for moredetails.
v See the IBM Tivoli Monitoring for Databases, Version 5.1.0: DB2 Reference Guide fordetailed information about each resource model.
When You FinishDistribute the profile to which the resource model belongs. See “Distributingprofiles from the desktop” on page 50.
Optional: Continue customizing the resource model:v Specify if you want to customize your thresholds and events to optimize the
monitoring process. See “Customizing indications” on page 93v Specify if you want a recovery action when a specific event occurs. See “Editing
a built-in action” on page 97v Specify if you want corrective or reporting tasks for an event. See “Specifying
tasks for an indication” on page 99v Specify if you want to receive information on a specific event through a notice.
See “Sending a notice to administrators when an event occurs” on page 101v Specify if you want to customize your parameters to optimize the monitoring
process. See “Customizing parameters” on page 102v Specify if you want the monitoring of resource models to take place on specific
time periods of selected days. See “Creating scheduling rules” on page 104v Specify if you want the log data collected by a resource model written to a local
database. See “Customizing data logging information” on page 108
ProcedureYou can perform this procedure from the Tivoli command line or from the desktop.
Command Line: Use the wdmeditprf command to customize a resource modelfor a profile.
For more information about this command, see the IBM Tivoli Monitoring, Version5.1.0: User’s Guide.
Desktop:
1. Open the IBM Tivoli Monitoring Profile dialog box by doing the following:a. Open the Tivoli desktop.b. Double-click the policy region icon to display the policy region.c. Double-click the profile manager icon to display the profile manager.d. Double-click the profile icon in which you want to customize a resource
model.2. Select the resource model that you want to customize.3. Click Edit to open the Edit Resource Model dialog box.4. Click the Schedule to open the Scheduling dialog box.5. Clear the Always check box in the Schedule panel.6. Set a Start Date and Stop Date to define the monitoring period.7. Optional: Add one or more schedule rules that determine time periods on the
selected dates that monitoring takes place.
Chapter 8. Customizing resource models 107

8. Click Modify & Close to save your changes.
Customizing data logging information
ObjectiveTo customize data logging information so administrators and users can log datacollected by a resource model and write it in a local database.
Background Information
Note: Certain IBM Tivoli Monitoring for Databases: DB2 resource models featureselective logging. Selective logging enables you to choose properties thatyou want to log. Selective logging properties are listed in the Parametersdialog box. See optional Step 110 in the procedure for details on selectivelogging.
You can view the log data through the IBM Tivoli Monitoring Web Health Consoleafter you write it in a local database. You can store one of the following types ofdata in the database:
Raw dataData written exactly as the resource model collects it. All the monitoredvalues are collected and copied in the database.
Aggregated dataData collected and aggregated at fixed intervals that you define(Aggregation Period). Only the aggregated values are written in thedatabase. The aggregated data is calculated on the basis of one or more ofthe following options:v Maximumv Minimumv Average
Required Authorization Roleadmin
Before You Beginv Create a profile manager and profile. See “Creating profile managers and
profiles” on page 46 for information.v Add subscribers to a profile manager. See “Subscribing resources to profile
managers” on page 48 for information.v Add a resource model to a profile. See “Adding default resource models to
profiles” on page 49 and“Adding custom resource models to profiles” on page 92for information.
v See the IBM Tivoli Monitoring for Databases, Version 5.1.0: DB2 Reference Guide fordetailed information about each resource model.
When You FinishDistribute the profile to which the resource model belongs. See “Distributingprofiles from the desktop” on page 50.
Optional: Continue customizing the resource model:v Specify if you want to customize your thresholds and events to optimize the
monitoring process. See “Customizing indications” on page 93
108 IBM Tivoli Monitoring for Databases: DB2: User’s Guide

v Specify if you want a recovery action when a specific event occurs. See “Editinga built-in action” on page 97
v Specify if you want corrective or reporting tasks for an event. See “Specifyingtasks for an indication” on page 99
v Specify if you want to receive information on a specific event through a notice.See “Sending a notice to administrators when an event occurs” on page 101
v Specify if you want to customize your parameters to optimize the monitoringprocess. See “Customizing parameters” on page 102
v Specify if you want the monitoring of resource models to take place on specifictime periods of selected days. See “Creating scheduling rules” on page 104
v Determine when the monitoring of resource models takes place. See“Customizing the scheduling monitoring period” on page 106
ProcedureYou can perform this procedure from the Tivoli command line or from the desktop.
Command Line: Use the wdmeditprf command to customize a resource modelfor a profile.
For more information about this command, see the IBM Tivoli Monitoring, Version5.1.0: User’s Guide.
Desktop:
1. Open the IBM Tivoli Monitoring Profile dialog box by doing the following:a. Open the Tivoli desktop.b. Double-click the policy region icon to display the policy region.c. Double-click the profile manager icon to display the profile manager.d. Double-click the profile icon in which you want to customize a resource
model.2. Select the resource model that you want to customize.3. Click Edit to open the Edit Resource Model dialog box.4. Click Logging to open the Logging dialog box.5. Select the Enable Data Logging check box in the Data Logging Settings panel.
This enables logging of all raw data collected by the resource model to adatabase.
Note: Resource models do not log data by default. You must select the EnableData Logging check box to log data. If you do not select this check box,resource model data will be lost.
6. Perform the following steps to specify the aggregation rule applied to the databefore it is written to the database:a. Set Hours and Minutes of the Aggregation Period to the required values.b. Select one or more of the following functions to perform on the numerical
data collected during the aggregation period before it is written to thedatabase:
MaximumCalculates and logs the peak value in each aggregation period.
MinimumCalculates and logs the lowest value in each aggregation period.
Chapter 8. Customizing resource models 109
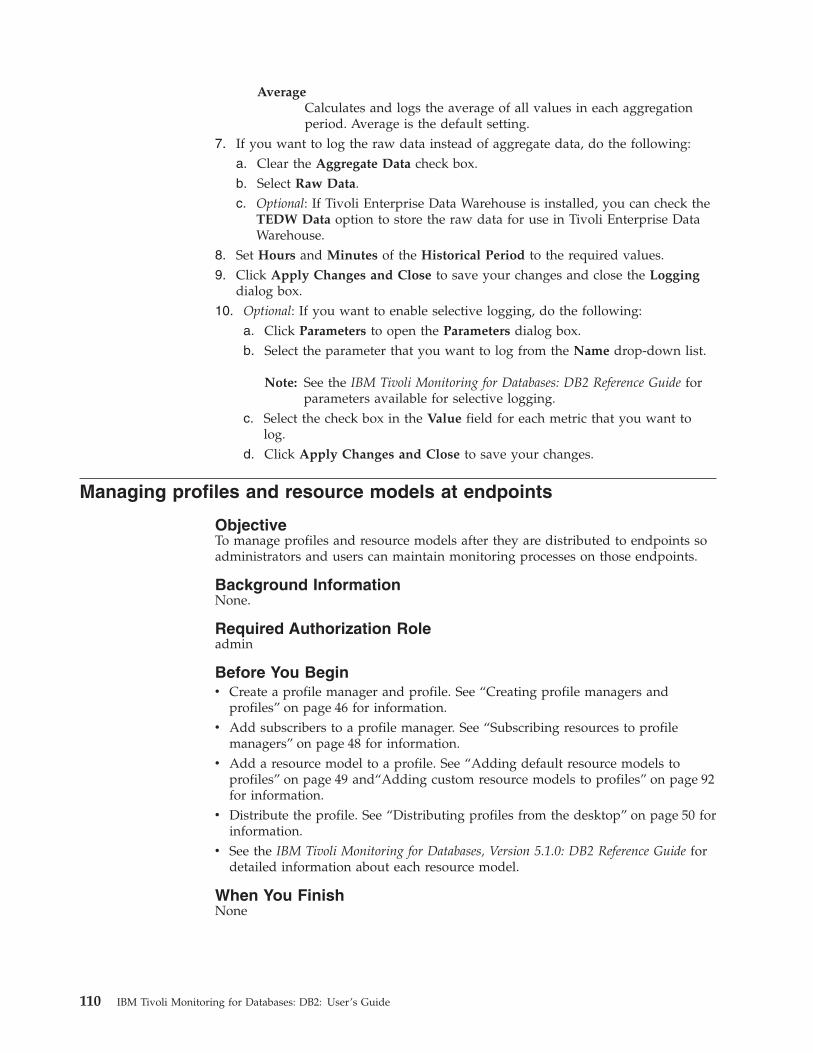
AverageCalculates and logs the average of all values in each aggregationperiod. Average is the default setting.
7. If you want to log the raw data instead of aggregate data, do the following:a. Clear the Aggregate Data check box.b. Select Raw Data.c. Optional: If Tivoli Enterprise Data Warehouse is installed, you can check the
TEDW Data option to store the raw data for use in Tivoli Enterprise DataWarehouse.
8. Set Hours and Minutes of the Historical Period to the required values.9. Click Apply Changes and Close to save your changes and close the Logging
dialog box.10. Optional: If you want to enable selective logging, do the following:
a. Click Parameters to open the Parameters dialog box.b. Select the parameter that you want to log from the Name drop-down list.
Note: See the IBM Tivoli Monitoring for Databases: DB2 Reference Guide forparameters available for selective logging.
c. Select the check box in the Value field for each metric that you want tolog.
d. Click Apply Changes and Close to save your changes.
Managing profiles and resource models at endpoints
ObjectiveTo manage profiles and resource models after they are distributed to endpoints soadministrators and users can maintain monitoring processes on those endpoints.
Background InformationNone.
Required Authorization Roleadmin
Before You Beginv Create a profile manager and profile. See “Creating profile managers and
profiles” on page 46 for information.v Add subscribers to a profile manager. See “Subscribing resources to profile
managers” on page 48 for information.v Add a resource model to a profile. See “Adding default resource models to
profiles” on page 49 and“Adding custom resource models to profiles” on page 92for information.
v Distribute the profile. See “Distributing profiles from the desktop” on page 50 forinformation.
v See the IBM Tivoli Monitoring for Databases, Version 5.1.0: DB2 Reference Guide fordetailed information about each resource model.
When You FinishNone
110 IBM Tivoli Monitoring for Databases: DB2: User’s Guide

ProcedureYou can perform this procedure from the Tivoli command line only.
Command Line:
Note: You must run the following commands on or from a managed node.
Use the wdmcmd command to stop or restart IBM Tivoli Monitoring on one ormore endpoints from a gateway or server.
Use the wdmdistrib command to distribute a profile to one or more subscribers.
Use the wdmeng command to stop or start profiles or resource models atendpoints or to delete profiles at endpoints.
Use the wdmlseng command to return a list and the status of all resource modelsthat have been distributed on a specified endpoint.
Use the wdmtrceng command to set the trace parameters of the IBM TivoliMonitoring engine at the endpoint.
See the IBM Tivoli Monitoring documentation for more information about thewdm commands.
Managing IBM Tivoli Monitoring gateways
ObjectiveTo manage IBM Tivoli Monitoring on gateways so administrators and users canrun monitoring processes on those gateways.
Background InformationNone.
Required Authorization Roleadmin
Before You Beginv Create a profile manager and profile. See “Creating profile managers and
profiles” on page 46 for information.v Add subscribers to a profile manager. See “Subscribing resources to profile
managers” on page 48 for information.v Add a resource model to a profile. See “Adding default resource models to
profiles” on page 49 and“Adding custom resource models to profiles” on page 92for information.
v Distribute the profile. See “Distributing profiles from the desktop” on page 50 forinformation.
v See the IBM Tivoli Monitoring for Databases, Version 5.1.0: DB2 Reference Guide fordetailed information about each resource model.
When You FinishNone
ProcedureYou can perform this procedure from the Tivoli command line only.
Chapter 8. Customizing resource models 111

Command Line: Use the wdmmn command to stop or start selected IBM TivoliMonitoring processes on one or all gateways.
Determining which resource models have been distributed toendpoints
ObjectiveTo determine which resource models have been distributed to an endpoint.
Background InformationOpen an endpoint window from the desktop to see if a resource model has beendistributed to it.
Required Authorization Roleadmin
Before You Beginv Create a profile manager and profile. See “Creating profile managers and
profiles” on page 46 for information.v Add subscribers to a profile manager. See “Subscribing resources to profile
managers” on page 48 for information.v Add a resource model to a profile. See “Adding default resource models to
profiles” on page 49 and“Adding custom resource models to profiles” on page 92for information.
v Distribute the profile. See “Distributing profiles from the desktop” on page 50 forinformation.
v See the IBM Tivoli Monitoring for Databases, Version 5.1.0: DB2 Reference Guide fordetailed information about each resource model.
When You FinishNone
ProcedureYou can perform this procedure from the Tivoli desktop only.
Desktop:
1. Open the Profile Manager dialog box by doing the following:a. Open the Tivoli desktop.b. Double-click the policy region icon to display the policy region.c. Double-click the profile manger icon to display the Profile Manager dialog
box.2. Double-click the endpoint icon from the Subscribers area to open the endpoint
dialog box.3. Double-click the monitoring profile icon to display the IBM Tivoli Monitoring
Profile dialog box, which lists the resource models distributed to the endpoint.
Determining which resource models are running on endpoints
ObjectiveTo determine which resource models are running on an endpoint.
Background InformationUse the Tivoli command line to determine which resource models are running onan endpoint.
112 IBM Tivoli Monitoring for Databases: DB2: User’s Guide

Required Authorization Roleadmin
Before You Beginv Create a profile manager and profile. See “Creating profile managers and
profiles” on page 46 for information.v Add subscribers to a profile manager. See “Subscribing resources to profile
managers” on page 48 for information.v Add a resource model to a profile. See “Adding default resource models to
profiles” on page 49 and“Adding custom resource models to profiles” on page 92for information.
v Distribute the profile. See “Distributing profiles from the desktop” on page 50 forinformation.
v See the IBM Tivoli Monitoring for Databases, Version 5.1.0: DB2 Reference Guide fordetailed information about each resource model.
When You FinishNone
ProcedureYou can perform this procedure from the Tivoli command line only.
Command Line: Use the wdmlseng command to determine which resourcemodels are running on an endpoint. For example, to view the list of resourcemodels on an endpoint, enter the following command:wdmlseng -e <endpoint>
Refer to the IBM Tivoli Monitoring User’s Guide for more information.
Chapter 8. Customizing resource models 113

114 IBM Tivoli Monitoring for Databases: DB2: User’s Guide

Chapter 9. Enabling IBM Tivoli Monitoring for Databases: DB2for Tivoli Enterprise Data Warehouse
This chapter provides information on enabling IBM Tivoli Monitoring forDatabases: DB2 for Tivoli Enterprise Data Warehouse.
OverviewTivoli Enterprise Data Warehouse enables you to access application reports fromvarious Tivoli and customer applications. The infrastructure provides a set ofextract, transform and load (ETL) utilities that you use to extract and move datafrom Tivoli application data stores to a central data warehouse database.
Tivoli Enterprise Data Warehouse provides the following capabilities:v An open architecture for storing, aggregating, and correlating historical data. In
addition to the data collected by IBM Tivoli software, Tivoli Enterprise DataWarehouse has the flexibility and extensibility to enable you to integrate yourown application data.
v Database optimizations for the efficient storage of large amounts of historicaldata and for fast access to data for analysis and report generation.
v The infrastructure and tools necessary for maintaining and viewing the collecteddata. These include the Tivoli Enterprise Data Warehouse application, IBM DB2Universal Database™ Enterprise Edition, the Data Warehouse Center, DB2Warehouse Manager, and a user interface for creating and viewing reports.
v The ability to use your choice of data analysis tools to examine your historicaldata. In addition to the report interface, you can analyze your data using otherproducts such as online analytical processing (OLAP), planning, trending,analysis, accounting, and data mining tools.
v The ability to control access to your historical data. You can keep data aboutmultiple customers and data centers in one central data warehouse, but restrictaccess so that customers can see and work with data and reports based only ontheir data and not any other customer’s data. You can also restrict an individualuser’s ability to access data.
v A zero-footprint client. Users can access Tivoli Enterprise Data Warehousereports from any system by using a Web browser. No special software isrequired on the user’s system.
v Internationalization support. Not only is the report interface localized,application programmers can localize the data stored in the central datawarehouse.
Tivoli Enterprise Data Warehouse consists of the following components:v Control serverv Central data warehousev Data martsv Report interface
Control serverThe control server contains the control database for Tivoli Enterprise DataWarehouse from which you manage your data warehouse.
115

The control server has these subcomponents:v A server that controls communication between the control server, the central
data warehouse server, the data mart server, and the report server.v The control database, which contains metadata for Tivoli Enterprise Data
Warehouse.
The control server uses the following parts of the IBM DB2 product, which youmust install manually before installing the control server. These parts are allautomatically installed when you install IBM DB2 Universal Database EnterpriseEdition on a Microsoft Windows system.v DB2 Serverv The Data Warehouse Center, a component that automates data warehouse
processing. You can use the Data Warehouse Center to define the ETL processesthat move and transform data into the central data warehouse and the starschemas used by the data marts. Then, you can use the Data Warehouse Centerto schedule, maintain, and monitor these processes.
v The warehouse agent, part of DB2 Warehouse Manager.
Central data warehouseThe central data warehouse is a DB2 database that contains the historical data foryour enterprise. The system that hosts the central data warehouse is called thecentral data warehouse server. The central data warehouse component uses IBM DB2Universal Database Enterprise Edition, which you must install manually beforeinstalling the control server.
Data martsA separate DB2 database contains the data marts for your enterprise. Each datamart contains a subset of the historical data from the central data warehouse tosatisfy the analysis and reporting needs of a specific department, team, customer,or application. The system that hosts this DB2 database is called the data martserver. Although you can have many data marts, you can have only one data martserver.
The data mart component requires IBM DB2 Universal Database EnterpriseEdition, which you must install manually before installing the control server.
The warehouse pack for IBM Tivoli Monitoring for Databases: DB2 creates datamarts whose structure is suitable for the report interface. They do this byproviding an extract, transform, and load (ETL) process, called a data mart ETL,that creates the data mart and loads it with data from the central data warehouse.
You can modify an existing data mart, or create new data marts that containslightly different data, to address a reporting need specific to your situation. Tomodify or create a data mart, you must be familiar with database ETL processesand with the internal representation of a data mart as star schemas in the TivoliEnterprise Data Warehouse databases. For information about this, see the Enablingan Application for Tivoli Enterprise Data Warehouse Guide.
Report interfaceThe Tivoli Enterprise Data Warehouse report interface (RPI) provides tools and agraphical user interface that other Tivoli software products use to create anddisplay reports. You can use Tivoli Enterprise Data Warehouse to customize reportsprovided with other Tivoli software and to create new reports. You also use the
116 IBM Tivoli Monitoring for Databases: DB2: User’s Guide

report interface to control access to data marts and to the reports associated with adata mart. The system on which you install the report interface is called the reportserver.
Use the Work with Reports task group in the report interface to manage users,groups, and data marts for Tivoli Enterprise Data Warehouse or to run, create, andview Tivoli Enterprise Data Warehouse reports.
Tivoli Enterprise Data Warehouse reportsTivoli Enterprise Data Warehouse reports display a static view of the data in a datamart. Reports are provided by the warehouse pack for IBM Tivoli Monitoring forDatabases: DB2, along with the data marts required to collect the data used in thereport.
For more information about working with reports, see the Tivoli Enterprise DataWarehouse online help.
Tivoli software products using the Tivoli Enterprise Data Warehouse can provideprepackaged reports that enable you to access specific information about yourbusiness environment. All of these reports are listed in the Manage Reports andReport Output task of the Work with Reports task group in the IBM Console. Thisincludes reports from all Tivoli software products that use the Tivoli EnterpriseData Warehouse report interface. Tivoli software products can also provide adifferent reporting interface.
A Tivoli Enterprise Data Warehouse report uses data from a single data mart.
If you have the appropriate role, you can also create additional reports or modifyexisting reports. Before you can create a new report or modify an existing report,you must understand the structure of the underlying warehouse data and of theoperational data that is the source of that data. For information about the structureof data in the data mart and in the central data warehouse, see the Enabling anApplication for Tivoli Enterprise Data Warehouse Guide.
Table 18. Goals and where to find procedures for enabling IBM Tivoli Monitoring forDatabases: DB2 for Tivoli Enterprise Data Warehouse
Goal Where to find procedures
Work with users and user groups “Accessing the IBM Console” on page 118
“Creating an IBM Console user” on page118
“Assigning roles to a user” on page 119
“Creating a user group” on page 120
“Assigning users to a user group” on page120
“Assigning user groups to a data mart” onpage 121
Chapter 9. Enabling IBM Tivoli Monitoring for Databases: DB2 for Tivoli Enterprise Data Warehouse 117

Table 18. Goals and where to find procedures for enabling IBM Tivoli Monitoring forDatabases: DB2 for Tivoli Enterprise Data Warehouse (continued)
Goal Where to find procedures
Manage Tivoli Enterprise Data Warehousereports
“Running reports” on page 121
“Scheduling reports to run automatically”on page 122
“Modifying default settings for reports” onpage 122
“Creating reports” on page 123
“IBM Tivoli Monitoring for Databases: DB2data marts and reports” on page 124
Accessing the IBM Console
ObjectiveTo display the IBM Console so you can use Tivoli Enterprise Data Warehouse.
Background informationYou perform all Tivoli Enterprise Data Warehouse functions through the IBMConsole. Access the IBM Console using a web browser to connect to TivoliEnterprise Data Warehouse server.
Required authorization rolesuperadmin
Before you beginNone
When you finishNone
ProcedureTo access the IBM Console, complete the following steps:1. Start the web browser.2. Connect to the following URL:
http://<hostname of TEDW server>/IBMConsole3. Enter the default user, ’superadmin’, and the default password, ’password’. It is
recommended that you change the default password after you log in. Tochange the password, click Administer Users and Role and select ManageUsers.
Creating an IBM Console user
ObjectiveTo create an IBM Console user.
Background informationTivoli Enterprise Data Warehouse is displayed using the IBM Console, which isalso used by other Tivoli software products. A user is given access to tasks in theIBM Console based on the roles that are assigned to that user. One user can haveroles for diverse tasks including administering IBM Console users, managing TivoliEnterprise Data Warehouse user groups and data marts, running and viewing the
118 IBM Tivoli Monitoring for Databases: DB2: User’s Guide

output of Tivoli Enterprise Data Warehouse reports, and performing tasksassociated with other Tivoli software products.
Required authorization rolesuperadmin
Before you beginNone.
When you finishThe Tivoli Enterprise Data Warehouse online help also guides you throughadditional tasks for managing users, such as updating or displaying the propertiesof a user and deleting a user.
ProcedureTo create an IBM Console user, complete the following steps from the IBMConsole:1. Select Administer Users and then Create a User.2. Open the Task Assistant and follow the instructions provided in the online help
to create a user.
Assigning roles to a user
ObjectiveTo assign roles to a user.
Background informationThe following Tivoli Enterprise Data Warehouse roles control access to tasks andactivities in the Work with Reports task group:v Warehouse Security Administrator
With this role, a user can create and manage groups and data marts. A user withthis role controls access to data marts by assigning users to groups and bygiving groups access to specific data marts. In effect, this role controls access tothe Tivoli Enterprise Data Warehouse data using user groups and data marts.
v Report roles control a user’s ability to create and modify reports for the datamarts his user groups can access. Assign only one of the following roles to eachuser:– Advanced Report Author
With this role, a user can create, modify, run, and delete public and their ownpersonal reports, and save the output of reports, both public and personal.
– Report AuthorWith this role, a user can run and save the output of public reports and createand modify their own personal reports. They can run public and personalreports, and create, modify, and delete personal reports.
– Report ReaderWith this role, a user can run public reports and view the saved output ofpublic reports.
Required authorization rolesuperuser
Before you beginNone.
Chapter 9. Enabling IBM Tivoli Monitoring for Databases: DB2 for Tivoli Enterprise Data Warehouse 119

When you finishThe Tivoli Enterprise Data Warehouse online help also guides you throughadditional tasks for managing users, such as updating or displaying the propertiesof a user and deleting a user.
ProcedureTo assign a role to a user, complete the following steps from the IBM Console:1. Select Administer Users and Roles and then Manage Users.2. From the table of users, click the context menu icon of a user and select
Properties.3. Follow the instructions in the Task Assistant about assigning roles to the user.
Creating a user group
ObjectiveTo create a user group.
Background informationNone.
Required authorization roleAdministration Authorizations
Before you beginNone.
When you finishThe Tivoli Enterprise Data Warehouse online help also guides you throughadditional tasks for managing user groups, such as updating or displaying theproperties of a user group, adding users to a user group, and deleting a usergroup.
ProcedureTo create a user group, complete the following steps from the IBM console:1. Select Work with Reports and then Manage User Groups.2. In the Manage User Groups window, click the context menu of Root and select
Create.3. Follow the instructions in the Task Assistant about creating user groups.
Assigning users to a user group
ObjectiveTo assign users to user groups.
Background informationYou control access to data in Tivoli Enterprise Data Warehouse data marts byspecifying which user groups (collections of users) can run the reports that accessthe data in each data mart. Each user in a user group is given access to all reportsthat access the data in the data marts to which that user group has access.
By default, Tivoli Enterprise Data Warehouse provides the TWHAdmin user group,which contains a single user: superadmin. You can customize the TWHAdmin usergroup for the needs of your enterprise.
A user can be assigned to more than one user group.
120 IBM Tivoli Monitoring for Databases: DB2: User’s Guide

Required authorization roleAdministration Authorizations
Before you beginNone.
When you finishThe Tivoli Enterprise Data Warehouse online help also guides you throughadditional tasks for managing user groups, such as updating or displaying theproperties of a user group, adding or removing users from a user group, anddeleting a user group.
ProcedureTo assign one or more users to a user group, perform the following steps from theIBM Console:1. Select Work with Reports and then Manage User Groups.2. In the Manage User Groups window, click the context menu icon of a group
and select Properties.3. Follow the instructions in the Task Assistant about assigning users to user
groups.
Assigning user groups to a data mart
ObjectiveTo assign user groups to a data mart.
Background informationGrant access to only those user groups whose users need the data mart to performtasks.
Required authorization roleAdministration Authorizations
Before you beginNone.
When you finishThe Tivoli Enterprise Data Warehouse online help can guide you throughadditional tasks for managing user groups, such as updating or displaying theproperties of a user group, removing users from a user group, and removing datamart access from a user group.
ProcedureTo assign user groups to a data mart, complete the following steps from the IBMConsole:1. Select Work with Reports and then Manage Data Marts.2. In the Manage Data Marts window, in the Data Mart view, click the context
menu icon for the data mart that you want to change and click Properties.3. Select the User Groups tab.
Running reports
ObjectiveTo run a report using the report interface.
Chapter 9. Enabling IBM Tivoli Monitoring for Databases: DB2 for Tivoli Enterprise Data Warehouse 121

Background informationNone.
Required authorization roleAdvRepAuthRole, RepAuthRole, or RepReaderRole
Before you beginNone.
When you finishThe Tivoli Enterprise Data Warehouse online help can also guide you throughadditional tasks for reports, such as displaying the properties of a report anddeleting a report.
ProcedureTo run a report using the report interface, complete the following steps from theIBM Console:1. Select Work with Reports and then Manage Reports and Report Output.2. In the Manage Reports and Report Output window, in the Reports view, click
the context menu icon of a report and select Run.
Scheduling reports to run automatically
ObjectiveTo automatically run reports.
Background informationUsing the Tivoli Enterprise Data Warehouse report interface, you can schedule areport to run automatically when the associated data mart is updated. This ensuresthat when you examine the output of the report, it displays the most recent data inthe warehouse.
Required authorization roleAdvRepAuthRole
Before you beginNone.
When you finishThe Tivoli Enterprise Data Warehouse online help can also guide you throughadditional tasks for reports, such as modifying or displaying the properties of areport and deleting a report.
ProcedureTo schedule a report to run automatically when the associated data mart isupdated, complete the following steps from the IBM Console:1. Select Work with Reports and then Manage Reports and Report Output.2. In the Manage Reports and Report Output window, in the Reports view, click
Reports.3. Click the context menu icon of a report and select Properties.
Modifying default settings for reports
ObjectiveTo modify default settings for report creation.
122 IBM Tivoli Monitoring for Databases: DB2: User’s Guide

Background informationWhen you create or modify a report, you select predetermined values for the timeframe of the report. The predetermined values of Peak Hours and Weekdaysspecified under Filtering in the Time page of report properties can be modified. Dothis by modifying the information in the control database on the control server.
The default value for Peak Hours is 9:00 am through 5:00 PM, or 0900 to 1700. Thisvalue can be modified to reflect different peak hours if necessary.
The default value for Weekdays is Monday through Friday. This value can also bemodified.
The RPI.TimeFilters table contains the following filters and default filter values:
Table 19. Default time filter names and values
TIME_FILTER_NAME TIME_FILTER_VALUES
Peak hours hour(meas_hour) in (9,10,11,12,13,14,15,16,17)
Weekdays dayofweek(meas_date) between 2 and 6
Required authorization roleAdvRepAuthRole
Before you beginNone.
When you finishFor additional information on the properties of the RPI.TimeFilters table, see theEnabling an Application for Tivoli Enterprise Data Warehouse Guide.
ProcedureTo change the values displayed in the report interface, perform the following steps:1. Connect to the control database (TWH_MD).2. Use an SQL statement similar to the following to modify the values for Peak
Hours or Weekdays in the RPI.TimeFilters table. The following example sets theWeekdays filter to represent Sunday through Thursday:
Update RPI.TimeFilters set TIME_FILTER_VALUES =dayofweek(meas_date) between 1 and 5where TIME_FILTER_NAME =Weekdays
After doing this, when a user selects a Weekdays filter for a report in the reportinterface, the data returned is for Sunday through Thursday.
Note: There is no error-checking for the values inserted into the tables for PeakHours and Weekdays. Therefore, ensure that the information you insert intothe tables is correct. You can save a report that contains incorrect values forthese parameters without receiving an error message. The message is notgenerated until the report is run.
Creating reports
ObjectiveTo create a report.
Background informationYou can receive a message that the name you specified is already in use, even ifyou do not have access to the report with that name.
Chapter 9. Enabling IBM Tivoli Monitoring for Databases: DB2 for Tivoli Enterprise Data Warehouse 123

Required authorization roleAdvRepAuthRole or RepAuthRole
Before you beginEnsure that you use descriptive and meaningful names for the reports you create.Report names are unique across all users of Tivoli Enterprise Data Warehouse.
When you finishThe Tivoli Enterprise Data Warehouse online help also guides you throughadditional tasks for reports, such as modifying or displaying the properties of areport and deleting a report.
ProcedureTo create a report, perform the following steps from the IBM Console:1. Select Work with Reports.2. Select Create a Report.
IBM Tivoli Monitoring for Databases: DB2 data marts and reportsThis section describes the data marts, star schemas, and reports used for IBMTivoli Monitoring for Databases: DB2.
IBM Tivoli Monitoring for Databases: DB2 provides the TWH_MART data mart.This data mart uses the following star schemas:v CTD Hourly Instance Star Schemav CTD Hourly Database Star Schema
The TWH_MART data mart provides the following prepackaged health checkreports:
CTD Hourly Minimum Buffer Pool Hit RatioShows the minimum buffer pool ratio at the database level.
CTD Percent Catalog Cache HitsShows the percentage of catalog cache hit ratio.
CTD Hourly Deadlocks DeltaShows the total number of deadlocks for each hour at database level.
CTD Hourly Maximum Percentage Used of Primary LogShows the maximum primary log space used during each hourly period.
CTD Hourly Percentage of Connections UsedShows the minimum percentage of available connections that were used atthe DB2 instance level during each hourly period.
124 IBM Tivoli Monitoring for Databases: DB2: User’s Guide

Appendix A. Authorization roles quick reference
Each IBM Tivoli Monitoring for Databases: DB2 procedure has a requiredauthorization role. The following table summarizes these activities and roles andtells you where to find additional information in this document:
Activity Context Required role For additional information see
Install software Tivolimanagementregion (TMR)
senior and db2_dba IBM Tivoli Monitoring for Databases:Component Installation Guide
Creating policyregions
Policy region senior and policy “Creating an IBM Tivoli Monitoring forDatabases: DB2 policy region” on page 20
Moving objectsinto a subregion
Policy region senior and policy “Moving the Monitoring for DB2 objects”on page 21
Adding managedresource types
Policy region senior and policy “Adding or removing managed resourcetypes” on page 23
Removingmanaged resourcetypes
Policy region senior and policy “Adding or removing managed resourcetypes” on page 23
Creating DB2instance objects
Policy region db2_dba “Creating DB2 instance objects” on page 26
Creating DB2database objects
Policy region db2_dba “Creating DB2 database objects” on page 28
Creating DB2gateway objects
Policy region db2_dba “Creating DB2 gateway objects” on page 31
Creating partitionobjects
Policy region db2_dba “Creating partition objects” on page 33
Creating partitiongroup objects
Policy region db2_dba “Creating partition group objects” on page35
Creatingdiscovery objects
Policy region db2_dba “Creating DB2 Discovery objects” on page37
Discovering DB2servers
Policy region db2_user or db2_dba “Discovering DB2 instances” on page 39
Discovering DB2databases andgateways
Policy region db2_dba “Discovering DB2 databases” on page 41
Adding orremovingpartition groupmembers
Policy region db2_dba “Adding or removing partition groupmembers” on page 42
Subscribing tonotice groups
Administratorscollection
senior “Subscribing to notice groups” on page 43
Opening adatabase serverendpoint
Policy region db2_user “Opening a DB2 Instance endpoint” onpage 57
Viewing DB2object properties
Policy region db2_user “Viewing DB2 object properties” on page58
Updating aserver’s state
Policy region db2_user “Updating the state of a server” on page 61
125

Activity Context Required role For additional information see
Starting adatabase server,partition, orpartition group
Policy region db2_dba “Starting and stopping a database instance,partition server, or partition group node”on page 62
Stopping adatabase server,partition, orpartition group
Policy region db2_dba “Starting and stopping a database instance,partition server, or partition group node”on page 62
Opening adatabase endpoint
Policy region db2_user “Opening a database endpoint” on page 63
Showing clientconnectioninformation
Policy region db2_user “Showing client connection information” onpage 64
Running DB2commands fromthe command lineprocessor
Policy region db2_dba “Running DB2 commands from thecommand line processor” on page 66
Launching theDB2 Java controlcenter
Policy region db2_user “Launching the DB2 Java Control Center”on page 67
Creating a profilemanager and aprofile
Policy region senior “Creating profile managers and profiles” onpage 46
Subscribingresources toprofile managers
Profile manager admin “Subscribing resources to profile managers”on page 48
Adding defaultresource modelsto profiles
IBM TivoliMonitoring profile
admin “Adding default resource models toprofiles” on page 49
Adding customresource modelsto profiles
IBM TivoliMonitoring profile
admin “Adding custom resource models toprofiles” on page 92
Distributingprofiles from thedesktop
IBM TivoliMonitoring profile
admin “Distributing profiles from the desktop” onpage 50
Distributingprofiles usingMDist2
IBM TivoliMonitoring profile
admin “Distributing profiles using MDist2” onpage 52
Rerunning failedprofiledistributions
IBM TivoliMonitoring profile
admin “Rerunning failed profile distributions” onpage 54
Customizingthresholds andevents
IBM TivoliMonitoring profile
admin “Customizing indications” on page 93
Adding orremoving built-inactions
IBM TivoliMonitoring profile
admin “Adding or removing built-in actions” onpage 95
Editing a built-inaction
IBM TivoliMonitoring profile
admin “Editing a built-in action” on page 97
Specifying tasksfor an event
IBM TivoliMonitoring profile
admin “Specifying tasks for an indication” onpage 99
126 IBM Tivoli Monitoring for Databases: DB2: User’s Guide

Activity Context Required role For additional information see
Sending a noticeto administratorswhen an eventoccurs
IBM TivoliMonitoring profile
admin “Sending a notice to administrators whenan event occurs” on page 101
Customizingparameters
IBM TivoliMonitoring profile
admin “Customizing parameters” on page 102
Creatingscheduling rules
IBM TivoliMonitoring profile
admin “Creating scheduling rules” on page 104
Customizing theschedulingmonitoring period
IBM TivoliMonitoring profile
admin “Customizing the scheduling monitoringperiod” on page 106
Customizing datalogginginformation
IBM TivoliMonitoring profile
admin “Customizing data logging information” onpage 108
Managing profilesand resourcemodels atendpoints
IBM TivoliMonitoring profile
admin “Managing profiles and resource models atendpoints” on page 110
Managing IBMTivoli Monitoringgateways
IBM TivoliMonitoring profile
admin “Managing IBM Tivoli Monitoringgateways” on page 111
Determiningwhich resourcemodels have beendistributed toendpoints
Profile manager admin “Determining which resource models havebeen distributed to endpoints” on page 112
Determiningwhich resourcemodels arerunning onendpoints
Profile manager admin “Determining which resource models arerunning on endpoints” on page 112
Running tasks Task library db2_user ordb2_dba(dependingon the task)
“Running a task” on page 69
Customizing tasks Task library admin “Customizing a task” on page 74
Creating a job Task library admin “Creating a job” on page 78
Running jobs Task library db2_user ordb2_dba(dependingon the task)
“Running a job” on page 81
Scheduling jobs Task library admin “Scheduling a job” on page 82
Configuring theTivoli EnterpriseConsole with atask
Task Library senior and super(must have both roles)
“Configuring Event Console using a task”on page 130
Configuring theTivoli EnterpriseConsole with TECcommands
Tivoli EnterpriseConsole
senior and super(must have both roles)
“Configuring Event Console using TivoliEnterprise Console commands” on page133
Viewing events inthe TEC
Tivoli EnterpriseConsole
user “Viewing events in the Tivoli EnterpriseConsole” on page 135
Appendix A. Authorization roles quick reference 127

Activity Context Required role For additional information see
Integrating IBMTivoli Monitoringfor Databases:DB2 with TivoliBusiness SystemsManager
Tivoli BusinessSystems Manager
admin “Integrating IBM Tivoli Monitoring forDatabases: DB2 with Tivoli BusinessSystems Manager” on page 138
Configuring theTivoli EnterpriseConsole eventserver
Tivoli BusinessSystems Manager
senior “Configuring the Tivoli Enterprise Consoleevent server” on page 139
Discoveringresources forTivoli BusinessSystems Manager
Tivoli BusinessSystems Manager
websphereappsvr_admin “Discovering resources for Tivoli BusinessSystems Manager” on page 140
Unistalling IBMTivoli Monitoringfor Databases:DB2 integrationfrom TivoliBusiness SystemsManager
Tivoli BusinessSystems Manager
admin “Uninstalling IBM Tivoli Monitoring forDatabases: DB2 integration from TivoliBusiness Systems Manager” on page 141
128 IBM Tivoli Monitoring for Databases: DB2: User’s Guide

Appendix B. Setting Up the Tivoli Enterprise Console
This appendix provides information about setting up the Tivoli Enterprise Console(TEC) for use with the IBM Tivoli Monitoring for Databases: DB2 software. If youdo not have the Tivoli Enterprise Console or do not want to have IBM TivoliMonitoring for Databases: DB2 send events to it, you do not need to use thisinformation.
This appendix includes the following topics:v Overview of the Tivoli Enterprise Consolev Procedures for setting up the Tivoli Enterprise Console to receive monitoring
and task eventsv Procedures for viewing events in the Tivoli Enterprise Consolev Procedures for setting up automated task execution in response to events
Note: If you plan to track IBM Tivoli Monitoring for Databases: DB2 objects usingTivoli Business Systems Manager, you must first configure Tivoli EnterpriseConsole to forward events to Tivoli Business Systems Manager. For detailson configuring Tivoli Enterprise Console to forward events to TivoliBusiness Systems Manager, see “Configuring the Tivoli Enterprise Consoleevent server” on page 139
Table 20. Setting up the Tivoli Enterprise Console guidelines
Goal Refer to
1. Understand the purpose and capabilities of Tivoli EnterpriseConsole.
“Overview of the Tivoli Enterprise Console” onpage 129
2. Configure Tivoli Enterprise Console to work with IBM TivoliMonitoring for Databases: DB2. You can configure TivoliEnterprise Console by using theECC_Configure_TEC_Classes task or by using TivoliEnterprise Console commands.
“Configuring Event Console using a task” onpage 130
“Configuring Event Console using TivoliEnterprise Console commands” on page 133
3. View events in Tivoli Enterprise Console in order todetermine the appropriate response.
“Viewing events in the Tivoli Enterprise Console”on page 135
Overview of the Tivoli Enterprise ConsoleIn distributed computing environments, it is essential to address events andconditions that can lead to problems. The Tivoli Enterprise Console provides thetools for the following functions:v Receiving events from various sourcesv Processing events using rulesv Grouping events and delegating the groups selectively to administratorsv Responding to events automaticallyv Viewing events at a console
For more information about the Tivoli Enterprise Console, refer to the TivoliEnterprise Console User’s Guide. For a listing of event classes and events, see theTivoli Enterprise Console classes appendix in the IBM Tivoli Monitoring forDatabases: DB2 Reference Guide.
129

EventsIn the Tivoli Enterprise Console environment, an event is an object that hasbeen created using data obtained from a source that is monitored by anevent adapter. Each event is identified by a class name. Class names mayvary and are defined by their respective event adapters.
Sources of eventsThe Tivoli Enterprise Console accepts events from many sources. Typically,Tivoli software is set up so that events are sent in response to changes inan application or system resource. For example, distributed monitors canbe configured to send events as well as report in other ways. Tivoli taskscan send events.
Event processingThe Tivoli Enterprise Console uses rules to process events. A rule is madeup of a set of logic statements. The rule makes decisions on what to dowith the event based on information provided in the event, such as theevent class, event name, severity, location, and description.
A rule’s logic provides one or more responses to the event. A rule can dropinsignificant events, escalate important events, create new events, orrespond to defined relationships of multiple events (event correlation). Itcan also close an old event when a new event indicates that the originalcondition is resolved.
Event groupingThe Tivoli Enterprise Console can filter events into event groups. Theseevent groups are typically organized by function but can also beconfigured by other criteria, such as location or organizational jurisdiction.
Event groups are especially useful for subdividing all the Tivoli EnterpriseConsole events into manageable chunks. Administrators can be assigned toone or more event groups.
Note: This option is not available for Tivoli Enterprise Console, Version3.7. For information on creating event groups for that version, referto the Tivoli Enterprise Console, Version 3.7, User’s Guide.
Viewing eventsThe Tivoli Enterprise Console includes a console where administrators canwatch for incoming events and respond to them. The event console is auseful tool for managing by exception. The Tivoli Enterprise Console canfilter out normal events, respond automatically to anticipated problems,and forward only those events that require human intervention.
Responses to eventsThe Tivoli Enterprise Console normally can provide automatic responses tomany common events, either by executing response programs or executingTivoli tasks. For example, you can set a response program to respond tothe event that is received when a database becomes unavailable. Thespecific response can be to inform an administrator or to attempt automaticrestarts of the database, or a combination of both.
Configuring Event Console using a task
ObjectiveTo configure the Tivoli Enterprise Console in a single step by using theECC_Configure_TEC_Classes task.
130 IBM Tivoli Monitoring for Databases: DB2: User’s Guide

Background informationThe ECC_Configure_TEC_Classes task does all of the following:v Creates a rule base in the directory where you install Tivoli Enterprise Console.v Provides Tivoli Enterprise Console configuration for the specified options. It
adds class and rule set definitions to a valid rule base for the options, if they arenot already defined in the specified rule base.
v Copies a specified rule base into the newly created rule base.v Creates event groups. (This option is not available for Tivoli Enterprise Console,
Version 3.7.)v Loads the rule base.v Restarts the event server.
Refer to the IBM Tivoli Monitoring for Databases, Version 5.1.0: DB2 Reference Guidefor additional information about this task.
You can also configure the Tivoli Enterprise Console by using the Tivoli EnterpriseConsole commands at the command line; however, Tivoli recommends that youuse the ECC_Configure_TEC_Classes task. See “Configuring Event Console usingTivoli Enterprise Console commands” on page 133 for information on configuringthe Tivoli Enterprise Console using the Tivoli Enterprise Console commands.
Required authorization rolesenior and super (must have both roles)
Before you beginEnsure that you have the Tivoli Enterprise Console server installed in the sameTivoli management region where you have IBM Tivoli Monitoring and IBM TivoliMonitoring for Databases: DB2 installed. If you have the Tivoli Enterprise Consoleserver installed on a different Tivoli management region, you have the option ofmaking a two-way connection between the Tivoli management regions. See theTivoli Management Framework User’s Guide for details on properly connecting twoTivoli management regions.
Ensure that you have taken the following steps to properly connect the two Tivolimanagement regions:v Run the wconnect command as a two-way connection.v Ensure that you update the following Tivoli managed resources:
– Register each of the Tivoli management regions in the other Tivolimanagement region’s ManagedNode property.
Note: Use the wlookup command to ensure that you have a validregistration. If your registration is not accurate, use the wupdatecommand to properly register the Tivoli management region on amanaged node.
– Register the Tivoli management region where Tivoli Enterprise Consoleresides on the EventServer managed resource in the Tivoli managementregion where IBM Tivoli Monitoring for Databases: DB2 resides.
Note: Use the wlookup and wregister commands to ensure that you have avalid registration. If your registration is not accurate, use the wupdatecommand to properly register the Tivoli management region in theevent server.
Appendix B. Setting Up the Tivoli Enterprise Console 131

– Register the following IBM Tivoli Monitoring for Databases: DB2 managedresources in the Tivoli management region where Tivoli Enterprise Consoleresides :- DB2InstanceManager- DB2DatabaseManager- DB2Gateway- DB2PartitionManager- DB2PartitionGroupManager- DB2Discovery
Note: Use the wlookup and wregister commands to ensure that you have avalid registration. If your registration is not accurate, use the wupdatecommand to properly register the IBM Tivoli Monitoring for Databases:DB2 managed resources.
See the Tivoli Management Framework Reference Manual for details on the wconnect,wlookup, wregister, and wupdate commands.
If you choose to make a two-way connection between the Tivoli managementregion where Tivoli Enterprise Console resides and the Tivoli management regionwhere IBM Tivoli Monitoring and IBM Tivoli Monitoring for Databases: DB2reside, run the ECC_Send_Files_To_TEC_TMR task after connecting the two Tivolimanagement regions in order to place the required DB2 files on the remote Tivolimanagement region . See the IBM Tivoli Monitoring for Databases: DB2 ReferenceGuide for details on running the ECC_Send_Files_To_TEC_TMR task.
When you finishNone
ProcedureYou can perform this procedure from the Tivoli command line or from the desktop.
Command line: Use the wruntask command to run the task.
See the IBM Tivoli Monitoring for Databases, Version 5.1.0: DB2 Reference Guide forinformation about running the ECC_Configure_TEC_Classes task from thecommand line.
Desktop:
1. Double-click the DB2ManagerAdminTasks task library icon.2. Double-click the ECC_Configure_TEC_Classes icon to display the Execute
Task dialog box.3. Change the value in the Timeout text box from 60 to 600.4. Select the Display on Desktop option to see the output when the task is
executed.5. Select a managed resource in the Available Task Endpoints from the Execution
Targets list.6. Click the left arrow button to move the managed resource into the Selected
Task Endpoints list.Additional Information: The Available Task Endpoints list displays only thosemanaged resources that have Tivoli Enterprise Console servers.
7. Click Execute & Dismiss to display the ECC_Configure_TEC_Classes taskargument dialog box.
132 IBM Tivoli Monitoring for Databases: DB2: User’s Guide

8. Specify the configuration of the Tivoli Enterprise Console based on thefollowing descriptions:v Rule Base Name: Type the name of the rule base to configure. It can be a
new rule base to create or an existing rule base. If you specify an existingrule base, the task checks to make sure that both its class and rule set filesare defined correctly.
Note: Type only the name. Do not enter a full path. If a full path is entered,only the name portion is used.
You must run the wdelrb command on the Tivoli Enterprise Console serverwhen you change an existing rule base. This command removes the currentcopy of the rule base that you are replacing. See the Tivoli Enterprise ConsoleReference Manual for details on the wdelrb command.
v Copy Base Name: Type the name of the rule base to copy. If you do notenter a name, a rule base with the specified name is created, but no rule baseis copied into it.
Note: If you intend to specify a rule base other than Default, be sure thatthe rule base is valid.
v Event Group Name: Type the name of the event group you are creating.
Note: This option is not available for Tivoli Enterprise Console, Version 3.7.v Restart Event Server: Select this box if you want the task to restart the event
server. The new rule base (or modified rule base) does not take effect untilthe event server is restarted.
Note: If you do not have the task restart the event server, you must load therule base and restart the event server manually.
9. Click Set & Execute to run the task.Additional Information: If the Restart Event Server option is specified, this taskstarts the server if it is not running, or stops and restarts it if it is currentlyrunning. If you set the Display on Desktop option (in Step 3), the systemdisplays the results of this task in a dialog box.
Configuring Event Console using Tivoli Enterprise Console commands
ObjectiveTo configure the event console for use with IBM Tivoli Monitoring for Databases:DB2 using the Tivoli Enterprise Console commands.
Background informationThis section includes information on creating and loading a rule base that containsthe IBM Tivoli Monitoring for Databases: DB2 event class definitions and rule sets.The rule base directory is $BINDIR/TME/TEC/rulebase_name. You will need this toconfigure the event console.
Required authorization rolesenior and super (must have both roles)
Before you beginv Ensure that you have the appropriate roles to create event server objects.v Install the Tivoli Enterprise Console server on the same host as the Tivoli
management region server.
Appendix B. Setting Up the Tivoli Enterprise Console 133

v There must be only one Tivoli management region server.v Create and configure a rule base named DB2Base.v Create and configure an event group called DB2BaseEvent.
When you finishNone
ProcedureYou can perform this procedure from the Tivoli command line only.1. Use the wlookup command as follows to verify that the Tivoli Enterprise
Console server has been installed and registered.wlookup -ar EventServer
The wlookup command returns a line similar to the following, however, theobject identification number (OID) will be different.EventServer 1671340084.1.695#Tec::Server#
If you have an interconnected Tivoli management region with an event serverinstalled in each Tivoli management region, each Tivoli Enterprise Consoleserver is reported.
2. Create a new rule base using the wcrtrb command.wcrtrb -S @EventServer:EventServerName \-d $BINDIR/TME/TEC/DB2Base
3. Copy the contents of the Default rule base into the new rule base using thewcprb command.
Note: If your current rule base is not Default, copy your current rule baseinstead.
wcprb -S @EventServer:EventServerName Default DB2Base
4. Import the rule base event class .baroc files by entering the followingcommand:
Note: You must load each .baroc file separately and in the same order as listedin the Tivoli Enterprise Console classes appendix in the IBM TivoliMonitoring for Databases: DB2 Reference Guide
wimprbclass -S @EventServer:EventServerName <eventclass.baroc>
5. Import the rule base rule set file by entering the following command:wimprbrules -S @EventServer:EventServerName <rulebase.rls>
6. Compile the rule base by entering the following command:wcomprules -S @EventServer:EventServerName
7. Load the rule base by entering the following command:wloadrb -S @EventServer:EventServerName DB2Base
8. Select a method to restart the event server based on the following descriptions:v If the event server is running, enter the following commands:
wstopesvr -S @EventServer:EventServer
wstartesvr -S @EventServer:EventServer
v If the event server is not running, enter the following command:wstartesvr -S @EventServer:EventServer
134 IBM Tivoli Monitoring for Databases: DB2: User’s Guide

Viewing events in the Tivoli Enterprise Console
ObjectiveTo view events in the Tivoli Enterprise Console so you can watch for incomingevents and respond to them immediately.
Background informationThe Tivoli Enterprise Console can filter out normal events, respond automaticallyto anticipated problems, and forward only those events that require humanintervention.
Required authorization roleuser
Before you beginv This procedure is not supported in Tivoli Enterprise Console, Version 3.7. You
must use the Tivoli Enterprise Console, Version 3.7 Java user interface to searchfor the DB2 monitor events.
v The example used in this procedure relies on the following assumptions:– The Tivoli Enterprise Console has been configured and it has been configured
to receive DB2 Distributed Monitor events. (The Tivoli Enterprise Console isrepresented on the Tivoli Desktop by an EventServer icon.)
– An event group named DB2EventBase was created when the TivoliEnterprise Console was configured.
– The DB2 instance status monitor has been configured to send an event with aseverity level of FATAL to the Tivoli Enterprise Console when it detects thatthe DB2 instance is unavailable.
– The DB2 instance status monitor has detected this condition and has sent anevent.
When you finishRespond to the event yourself or configure the Tivoli Enterprise Console toautomatically respond to events. Refer to the Tivoli Enterprise Console User’s Guidefor information.
ProcedureYou can perform this procedure from the Tivoli desktop only.1. Double-click the EventServer icon to open the Tivoli Enterprise Console. The
console displays an icon for each event group that you are authorized to view.2. Double-click the DB2EventBase icon. The list of events for that event group is
displayed in the DB2EventBase window.3. Double-click the event icon to display the Event Group Message Viewer dialog
box.Additional Information: You can also click View Message to display the EventGroup Message Viewer dialog box.
Appendix B. Setting Up the Tivoli Enterprise Console 135

136 IBM Tivoli Monitoring for Databases: DB2: User’s Guide

Appendix C. Integrating with Tivoli Business SystemsManager
This chapter provides information on using Tivoli Business Systems Manager tomanage DB2 resources and events.
Integrating DB2 into Tivoli Business Systems Manager includes the following steps:
Goal Refer to
1. Install the IBM Tivoli Monitoring forDatabases: DB2 integration on theTivoli Business Systems Managerserver
“Integrating IBM Tivoli Monitoring forDatabases: DB2 with Tivoli Business SystemsManager” on page 138
2. Configure your Tivoli EnterpriseConsole event server to forward eventsto Tivoli Business Systems Manager
“Configuring the Tivoli Enterprise Consoleevent server” on page 139
3. Define the specific IBM TivoliMonitoring for Databases: DB2 objectsto Tivoli Business Systems Managerusing a discovery task.
“Discovering resources for Tivoli BusinessSystems Manager” on page 140
This chapter also provides a list of the IBM Tivoli Monitoring for Databases: DB2tasks that you can run from Tivoli Business Systems Manager and informationabout uninstalling the IBM Tivoli Monitoring for Databases: DB2 integration fromTivoli Business Systems Manager.
Understanding Tivoli Business Systems ManagerTivoli Business Systems Manager is a business systems management tool thatenables you to graphically monitor and control interconnected businesscomponents and operating system resources. A business resource and its resourcesare referred to as a Line of Business (LOB).
Tivoli Business Systems Manager consists of the following components:
Tivoli Business Systems Manager management serverThe Tivoli Business Systems Manager management server processes all theavailability data that is collected from various sources. Availability data is insertedin the Tivoli Business Systems Manager database, where intelligent agents providealerts on monitored objects and then broadcast those alerts to Tivoli BusinessSystems Manager workstations. The management server processes all user requeststhat originate from the workstation and includes a database server that is builtaround a Microsoft SQL Server database.
Tivoli Business Systems Manager workstationThe Tivoli Business Systems Manager workstation displays objects in customizedviews, called Line of Business Views. Objects are presented in a hierarchicalTreeView so that users can see the relationship between objects. Alerts are overlaidon the objects when the availability of the object is threatened.
137

Tivoli Event EnablementTivoli Event Enablement is installed on the Tivoli Enterprise Console event serverand enables the event server to forward events to Tivoli Business SystemsManager. Tivoli Event Enablement defines event classes and rules for handlingevents related to Tivoli Business Systems Manager.
Task serverThe Tivoli Business Systems Manager task server is installed on the TivoliEnterprise Console event server with Tivoli Event Enablement. It receives taskrequests from the Tivoli Business Systems Manager workstation, runs the tasks onthe Tivoli server on which it is installed, and returns the output to Tivoli BusinessSystems Manager.
PrerequisitesBefore you integrate IBM Tivoli Monitoring for Databases: DB2 into Tivoli BusinessSystems Manager, perform the following prerequisite steps:v Install the Tivoli Business Systems Manager configuration, as described in the
Tivoli Business Systems Manager Installation and Configuration Guide. You mustinstall Tivoli Business Systems Manager Version 1.5 with patch 29.
v Install and configure the Tivoli Event Enablement (with patch 32) on all TivoliEnterprise Console event servers that receive events that you want to forward toTivoli Business Systems Manager. See the Tivoli Business Systems ManagerInstallation and Configuration Guide for more information.
v Configure Tivoli Business Systems Manager to communicate with each TivoliEvent Enablement installed in the previous step. See the Tivoli Business SystemsManager Installation and Configuration Guide for more information.
Integrating IBM Tivoli Monitoring for Databases: DB2 with TivoliBusiness Systems Manager
ObjectiveTo integrate IBM Tivoli Monitoring for Databases: DB2 with Tivoli BusinessSystems Manager so you can receive DB2 events on the Tivoli Business SystemsManager.
Background informationTo enable Tivoli Business Systems Manager to manage DB2 events, you mustinstall an IBM Tivoli Monitoring for Databases: DB2 integration program on theTivoli Business Systems Manager server. This integration program does thefollowing steps:v Defines the DB2 objects in Tivoli Business Systems Managerv Adds IBM Tivoli Monitoring for Databases: DB2 tasks to the object types in
Tivoli Business Systems Managerv Defines a line of business for DB2 resources
Required authorization roleYou must have administrator authority on the Tivoli Business Systems Managerserver.
Before you beginMake sure that your Tivoli Business Systems Manager environment is configuredcorrectly and that you have Tivoli Event Enablement installed on each Tivoli
138 IBM Tivoli Monitoring for Databases: DB2: User’s Guide

Enterprise Console event server that you want to forward events. For moreinformation, see the Tivoli Business Systems Manager Installation and ConfigurationGuide.
When you finishConfigure the Tivoli Enterprise Console event server to forward events to TivoliBusiness Systems Manager. See “Configuring the Tivoli Enterprise Console eventserver” for more information.
ProcedureUse the following steps to install the IBM Tivoli Monitoring for Databases: DB2integration:1. On the Tivoli Business Systems Manager server, insert the IBM Tivoli
Monitoring for Databases, Version 5.1.0: DB2 CD and, from a commandprompt, navigate to the \TBSM directory.
2. Type install to start the installation wizard.3. Click Next on the welcome screen.4. Specify an installation location for the Tivoli Business Systems Manager
integration. The default location is C:\tivoli\itmwas. Click Browse to select adifferent installation location.Click Next to continue.The installation location and total installed size are displayed.
5. Click Next to continue.6. Provide the following Microsoft SQL Server information and click Next to start
the installation.
SQL ServerThe name of the SQL server with which this Tivoli Business SystemsManager server is associated
SQL UseridThe SQL user ID.
SQL PasswordThe password for the user ID defined above.
A progress bar is displayed to show the progress of the installation. Wheninstallation is complete, a message appears.
7. Click Finish to exit the installation wizard.
Configuring the Tivoli Enterprise Console event server
ObjectiveTo configure the Tivoli Enterprise Console event server to forward events to TivoliBusiness Systems Manager.
Background informationBefore Tivoli Enterprise Console event servers can forward events to TivoliBusiness Systems Manager, you must configure them to use a rule base to forwardthe events.
Required authorization roleSenior
Appendix C. Integrating with Tivoli Business Systems Manager 139

Before you beginInstall the Tivoli Event Enablement on each Tivoli Enterprise Console event serverthat you want to forward events to Tivoli Business Systems Manager. For moreinformation, see the Tivoli Business Systems Manager Installation and ConfigurationGuide for more information.
When you finishDefine your DB2 objects to Tivoli Business Systems Manager with theECC_TBSM_Discovery task, as described in “Discovering resources for TivoliBusiness Systems Manager”.
ProcedureUse the Configure Event Server task to configure (or reconfigure) each eventserver. If you installed the Tivoli Event Enablement on the event server, this taskrecognizes that and compiles the rule base that forwards events to Tivoli BusinessSystems Manager. For information on running this task, see “Configuring EventConsole using a task” on page 130.
Discovering resources for Tivoli Business Systems Manager
ObjectiveTo define the specific IBM Tivoli Monitoring for Databases: DB2 objects to TivoliBusiness Systems Manager.
Background informationThe IBM Tivoli Monitoring for Databases: DB2 integration that you installed in“Integrating IBM Tivoli Monitoring for Databases: DB2 with Tivoli BusinessSystems Manager” on page 138 defined the types of objects that you want TivoliBusiness Systems Manager to manage. After you define the object types, you mustdefine the specific objects. You can do this with the ECC_TBSM_Discovery task.This task searches a managed node for objects and sends a DISCOVER event toTivoli Business Systems Manager for each object. The ECC_TBSM_Discovery taskalso maintains a list of the objects that have been discovered and alerts TivoliBusiness Systems Manager when they have been deleted by sending TivoliBusiness Systems Manager a GONE event for each object that no longer exists onthe managed node.
Required authorization roleYou must have administrator authority on the Tivoli Business Systems Managerserver.
Before you beginConfigure your Tivoli Enterprise Console event server, as described in“Configuring the Tivoli Enterprise Console event server” on page 139.
When you finishUse Tivoli Business Systems Manager to view and manage your DB2 objects. Forinformation on using Tivoli Business Systems Manager, see the Tivoli BusinessSystems Manager User’s Guide. For information on the IBM Tivoli Monitoring forDatabases: DB2 tasks that you can run from Tivoli Business Systems Manager, see“Working with Tivoli Business Systems Manager” on page 141.
ProcedureYou can perform this procedure from the command line or the Tivoli desktop.
140 IBM Tivoli Monitoring for Databases: DB2: User’s Guide
Command line: Use the wruntask command to run the ECC_TBSM_Discoverytask from the command line. For information on the CLI syntax for this task, seethe IBM Tivoli Monitoring for Databases: DB2 Reference Guide.
Desktop: Use the following steps to run this procedure as a task:1. In the DB2ManagerAdminTasks task library, double-click the
ECC_TBSM_Discovery task.2. Select the managed node on which you want to search for objects and click
Execute.
If the task completes successfully, you receive a list of the DISCOVER and GONEevents that were sent to Tivoli Business Systems Manager.
Working with Tivoli Business Systems ManagerTivoli Business Systems Manager also monitors the status of resource models.Events generated by the Tivoli Enterprise Console adapter or resource models areforwarded from Tivoli Enterprise Console to Tivoli Business Systems Manager.
For more information about these tasks and resource models, see the IBM TivoliMonitoring for Databases: DB2 Reference Guide.
Uninstalling IBM Tivoli Monitoring for Databases: DB2 integration fromTivoli Business Systems Manager
ObjectiveTo remove the IBM Tivoli Monitoring for Databases: DB2 integration from TivoliBusiness Systems Manager.
Background informationUninstalling the IBM Tivoli Monitoring for Databases: DB2 integration removes theDB2 object definitions and objects from Tivoli Business Systems Manager.
Required authorization roleYou must have administrator authority on the Tivoli Business Systems Managerserver
Before you beginNone
When you finishNone
ProcedureUse the following steps to perform this procedure:1. On the Tivoli Business Systems Manager server, from a command prompt,
navigate to the directory where you installed the IBM Tivoli Monitoring forDatabases: DB2 integration. The default directory is C:\tivoli\itmwas.
2. Type uninstall to start the uninstallation wizard.3. Click Next on the welcome screen.4. The installation location for the Tivoli Business Systems Manager integration is
displayed. Click Next to continue.5. Provide the following Microsoft SQL Server information and click Next to start
the uninstallation:
Appendix C. Integrating with Tivoli Business Systems Manager 141

SQL ServerThe name of the SQL server with which this Tivoli Business SystemsManager server is associated
SQL UseridThe SQL user ID.
SQL PasswordThe password for the user ID defined above.
6. Click Finish to exit the installation wizard.
142 IBM Tivoli Monitoring for Databases: DB2: User’s Guide

Appendix D. Problem determination
This appendix provides information about resolving problems that might occurwhen you run IBM Tivoli Monitoring for Databases: DB2.
Note: For installation and uninstallation issues, see the IBM Tivoli Monitoring forDatabases Installation and Setup Guide.
What is Discovery?
Discovery provides a convenient way of registering multiple DB2 Instanceson one or more endpoints in a single operation. For more informationabout Discovery and using it to register DB2 Instances, see “Creating DB2Discovery objects” on page 37.
What is Tivoli Business Systems Manager Discovery?Tivoli Business Systems Manager Discovery provides a process for findingall DB2 managed node objects and informing Tivoli Business SystemsManager of their existence. The ECC_TBSM_Discovery task from theDB2ManagerAdminTask library performs Tivoli Business SystemsManager Discovery operations. The ECC_TBSM_Discovery task configuresa Tivoli Enterprise Console server for event enablement with a TivoliBusiness Systems Manager server.
What are the port requirements for communication?There are no special firewall considerations for IBM Tivoli Monitoring forDatabases: DB2. IBM Tivoli Monitoring for Databases: DB2 depends on theability of Tivoli Management Framework to communicate with the LCFendpoint and receive upcalls. The ports required to be opened on the LCFendpoint are local ports (0.0.0) and have no firewall implications.
Why are the resource models that I disable now monitoring the database?IBM Tivoli Monitoring enables all resource models when you reboot amachine.
What does ’Unable to start 40’ mean?This message appears in the output from the wdmlseng –e <endpoint_name>CLI. It indicates that a resource model was not started on the endpointbecause the resource model was distributed to an unsupported resourcetype. You can find the following message in the trace_dmxengine.log onUnix endpoints and in the Tmw2k.log on NT/2000 endpoints:ERROR: <Resource Model Internal Name><Resource Model Internal Name> resource model not valid for resource<ResourceType>.
What (Data) Providers are used by the DB2 resource models?The IBM Tivoli Monitoring for Databases: DB2 makes exclusive use of theShell ILT provider.
Where is the trace log for IBM Tivoli Monitoring and how do I set the tracelogging level?
You can find the IBM Tivoli Monitoring trace log in the$LCF_DATDIR/LCFNEW/AMW/logs/trace_dmxengine.log for Unixendpoints and in the $LCF_DATDIR/LCFNEW /Tmw2k/Tmw2k.log forNT/2000 endpoints.
143

You must have previously set the trace log level to 3 in order for these logsto be useful. To set the trace level to 3, enter the following command froma Managed Node command prompt:# wdmtrceng -e <endpoint name> "" 3 -1
After running this command, you must stop the IBM Tivoli Monitoringengine and restart it. Enter the following CLI command from a managednode (not the endpoint) to stop the IBM Tivoli Monitoring engine:# wdmcmd -stop -e <endpoint name>
Enter the following CLI command from a managed node (not theendpoint) to start the IBM Tivoli Monitoring engine:# wdmcmd -restart -e <endpoint name>
Where is trace log for Shell ILT and how do I enable Shell ILT trace logging?You can find the Shell ILT trace log in$LCF_DATDIR/LCFNEW/AMG/logs/ by file names trc_itmcs1.log,trc_itmcs2.log and trc_itmcs3.log. The trc_itmcs2.log and trc_itmcs3.logfiles are written only when their predecessor has reached maximum size.From that point the trace logging rolls over from the trc_itmcs3.log file tothe trc_itmcs1.log file and the cycle repeats.
In order to enable trace logging from Shell ILT, you must edit thefollowing line in the$LCF_DATDIR/LCFNEW/AMG/logs/logging.properties file:
change the lineAMS.ShellTrace.isLogging=false
toAMS.ShellTrace.isLogging=true
After making this edit to logging.properties file, you must stop the IBMTivoli Monitoring engine and restart it. Enter the following CLI commandfrom a managed node (not the endpoint) to stop the IBM Tivoli Monitoringengine:# wdmcmd -stop -e <endpoint name>
Enter the following CLI command from a managed node (not theendpoint) to start the IBM Tivoli Monitoring engine:# wdmcmd -restart -e <endpoint name>
Why does the creation of a DB2InstanceManager object time out?You have a UNIX endpoint and the DB2 Instance home directory does nothave 755 permissions. Set the DB2 Instance home directory to 755 andcreate the DB2InstanceManager object.
Why does a resource model return a value of -999?The resource model did not return a valid value. Review the resourcemodel parameters.
Why does a resource model return a value of -999 and I receive an errormessage?
If you specify an endpoint that is not valid, you might receive thefollowing error message:
144 IBM Tivoli Monitoring for Databases: DB2: User’s Guide

Invalid Endpoint Type. Please verify that you have distributedthis monitor to the correct endpoint.Endpoint Class distributed = <Endpoint Class>Endpoint ID distributed = <Endpoint ID>
To resolve this problem, perform the following steps on the managed nodeand gateway:1. Run the ECC_Stop_Monitoring_Agent task to stop the monitoring
agent on the endpoint.2. Run the ECC_Start_Monitoring_Agent task to restart the monitoring
agent on the endpoint.
If the problem persists, restart the object dispatcher on the Tivolimanagement region server.
Why does a numeric resource model return a value of 32767 or -32767?The resource model did not receive valid data from DB2.
If the resource model normally returns a positive number to representvalid data, it returns a value of 32767 for invalid data. If the resourcemodel normally returns 0 or a negative number to represent valid data, itreturns a value of -32767 for invalid data. Review the resource modelparameters for better data.
Why do the returned values not match the group members of the DB2 partitiongroup when I run a resource model against a DB2 partition group endpoint?
If you defined a DB2 partition group object that you are running resourcemodels against, and you change the members of the DB2 partition groupobject, the IBM Tivoli Monitoring for Databases: DB2 monitoring agentmight not pick up the changed definition right away.
To resolve this problem, perform the following steps on the node wherethe DB2 instance resides:1. Run the ECC_Stop_Monitoring_Agent task to stop the monitoring
agent on the endpoint.2. Run the ECC_Start_Monitoring_Agent task to restart the monitoring
agent on the endpoint.
Why are my resource models not logging data?Resource models do not log data by default. You must select the EnableData Logging check box in the Logging dialog box to log data. If you donot select this check box, resource model data will be lost.
Appendix D. Problem determination 145

146 IBM Tivoli Monitoring for Databases: DB2: User’s Guide

Appendix E. Messages
CTD0001E Instance Monitoring Request Server isnot responding. Monitor not started.
Explanation: A monitoring request resulted in theabnormal termination of the Monitoring Request Server.The monitor was not started.
CTD0002E Instance Monitoring Request Server isnot responding. The Monitor cannotcontinued.
Explanation: A monitoring request resulted in theabnormal termination of the Monitoring Request Server.The monitor cannot continue.
CTD0003E Endpoint is incorrect.
Explanation: The specified endpoint is not runningthe IBM Tivoli Monitoring for Databases endpointfunctionality.
CTD0004I The partition group contains partitionsfrom more than one partitioneddatabase.
Explanation: The monitor cannot be run against thepartition group because the database to be monitoredcannot be determined.
CTD0005I Distributed Endpoint Class is
Explanation: No additional information is availablefor this message.
CTD0006I Distributed Endpoint Object ID is
Explanation: No additional information is availablefor this message.
CTD0007I DB2 Instance Name is
Explanation: No additional information is availablefor this message.
CTD0008I Database Name is
Explanation: No additional information is availablefor this message.
CTD0009I DB2 Version is
Explanation: No additional information is availablefor this message.
CTD0010E Endpoint Type is incorrect.
Explanation: The endpoint type is not correct for therequested operation.
CTD0012I Verify that the monitor has beendistributed to the correct endpoint.
Explanation: No additional information is availablefor this message.
CTD0013I IsMPP is TRUE.
Explanation: The DB2 instance is an ExtendedEnterprise Edition.
CTD0014I IsMPP is FALSE.
Explanation: The DB2 instance is not an ExtendedEnterprise Edition.
CTD0015E Request type is incorrect.
Explanation: The request type is not correct for theintended endpoint.
CTD0016E Exception Occurred.
Explanation: An error has occurred and resulted in anexception.
CTD0017I Shutdown task was started.
Explanation: No additional information is availablefor this message.
CTD0018I Task was started.
Explanation: No additional information is availablefor this message.
CTD0019W No Monitor data for this element wasfound.
Explanation: An internal program error has occurred.Contact your support representative.
CTD0020W This monitor returned no data.
Explanation: An internal program error has occurred.Contact your support representative.
147

CTD0021I This monitor does not have an observedtime period. Wait for the next execution.
Explanation: This monitor needs at least twoperformance snapshots to provide the differences.
CTD0022E Cannot find columns with statistics.
Explanation: An internal program error has occurred.Contact your support representative.
CTD0023E Cannot find valid TableOwnerparameter.
Explanation: A required parameter was not supplied.Contact your support representative.
CTD0024E A valid TableName parameter was notfound.
Explanation: A required parameter was not supplied.Contact your support representative.
CTD0025E The Snapshot index was not found.
Explanation: The Snapshot index does not exist. Aprogram error has occurred. Contact your supportrepresentative.
CTD0026E A valid TablespaceName parameter wasnot found.
Explanation: A required parameter was not supplied.Contact your support representative.
CTD0027W Storage cannot be allocated before thesqlma record is defined.
Explanation: Unable to allocate sufficient memory toget a performance snapshot from DB2.
CTD0028W First struct is not requested snapshottype.
Explanation: A program error has occurred. Contactyour support representative.
CTD0029I The connection is already open.
Explanation: Program error. Contact your supportrepresentative.
CTD0030E SQL Error Code.
Explanation: An SQL error occurred. Refer to the DB2Error Message reference for an explanation.
CTD0031W The allocation of the environmenthandle has failed.
Explanation: Contact your support representative.
CTD0032E An error occurred while allocating anSQL connection to DB2.
Explanation: An SQL connection to DB2 could not beestablished due to a failure to allocate an SQLconnection handle. Contact your supportrepresentative.
CTD0033E An error occurred while opening anSQL connection to DB2.
Explanation: An SQL connection to DB2 could not beestablished.
CTD0034E Allocating statement failed.
Explanation: The allocation statement failed.
CTD0035I Starting Statement.
Explanation: No additional information is availablefor this message.
CTD0036I Number of result columns.
Explanation: No additional information is availablefor this message.
CTD0037E A new error occurred while allocatingthe result set.
Explanation: A new error occurred during theallocation for the result set.
CTD0038I Get number of Columns on NULLstatement.
Explanation: No additional information is availablefor this message.
CTD0039E ResultSet Column Name is incorrect.
Explanation: The specified column name was notfound in the result set.
CTD0040E ResultSet Column Index is not correct.
Explanation: The specified column index was notfound in the result set.
CTD0021I • CTD0040E
148 IBM Tivoli Monitoring for Databases: DB2: User’s Guide

CTD0041I Fetching row.
Explanation: No additional information is availablefor this message.
CTD0042E Global Type is not supported in factory.
Explanation: This is an internal program error.Contact your support representative.
CTD0043I The Monitor Definition was not foundin the SQL Definition Manager.
Explanation: No additional information is availablefor this message.
CTD0044E The Monitor Definition was not found.
Explanation: This is an internal program error.Contact your support representative.
CTD0045E The MonName parameter is not correct.
Explanation: The monitor name parameter MonNameis not a valid value and was not found. This is aninternal program error. Contact your supportrepresentative.
CTD0046E Table space ID was not retrieved.
Explanation: Could not retrieve the tablespaceidentifier. This may be due to an table space namebeing supplied that does not exist.
CTD0047E The Monitor Definition was not foundin the Configuration DefinitionManager.
Explanation: Could not find a definition for themonitor in the Configuration Definition Manager. Thisis an internal program error. Contact your supportrepresentative.
CTD0048E The Monitor Definition was not foundin the SS Definition Manager.
Explanation: A definition for the monitor was notfound in the SS Definition Manager. This is an internalprogram error. Contact your support representative.
CTD0049E The number of nodes on target endpointcannot be determined.
Explanation: No additional information is availablefor this message.
CTD0050E The number of columns is not equal toone.
Explanation: This is an internal program error.Contact your support representative.
CTD0051E No result rows were returned.
Explanation: This is an internal program error.Contact your support representative.
CTD0052E There is more than one result row.
Explanation: This is an internal program error.Contact your support representative.
CTD0053E SQLGS(GetUsage): Cannot accesssyscat.tables.
Explanation: An attempt to access the syscat.tablesresulted in an error.
CTD0054E Cannot find value for requiredparameter:
Explanation: No value was specified for the requiredparameter. This is an internal program error. Contactyour support representative.
CTD0054W Verify the monitor has been distributedto a database endpoint.
Explanation: The monitor used must be distributed toa DB2DatabaseManager or a DB2PartitionManagerobject.
CTD0055E The passed Parameter values do notmatch the Parameter Name List
Explanation: The number of passed parameter valuesmust be equal to what was specified in the ParameterName List.
CTD0056E The Monitor parameters list is incorrect.One or more required Proxyenvironment variables is missing.
Explanation: One or more of the parameters used tostart the monitor is missing or incorrect.
CTD0057I The maxcagents configuration parameterdefault value (-1) has been replaced bymaxagents.
Explanation: No additional information is availablefor this message.
CTD0041I • CTD0057I
Appendix E. Messages 149

CTD0058I The maxcagents configuration parameterdefault value (-1) has been replaced bymax_coordagents.
Explanation: No additional information is availablefor this message.
CTD0059I The maxcagents configuration parameterdefault value (-1) has been replaced bymaxagents minus num_initagents.
Explanation: No additional information is availablefor this message.
CTD0060I The configuration parameter defaultvalue (-1) has been replaced by .75multiplied by fcm_num_rqb.
Explanation: No additional information is availablefor this message.
CTD0061E The current endpoint is NULL.
Explanation: A target endpoint must be specified.
CTD0061I Checking the status of the DB2Monitoring agent.
Explanation: No additional information is availablefor this message.
CTD0062E A DB2InstanceManager endpoint mustbe selected for this monitor.
Explanation: The monitor was not distributed to aDB2InstanceManager endpoint.
CTD0062I Checking the status of the DB2 SNMPagent.
Explanation: No additional information is availablefor this message.
CTD0063E The password for the User ProfileManager could not be retrieved.
Explanation: A valid password for db2ecc could notbe retrieved. Update the db2ecc password using thewdb2chgpw utility.
CTD0063I Checking the status of the DB2 Instance.
Explanation: No additional information is availablefor this message.
CTD0064E Unable to get DB2 instance name.
Explanation: The DB2 instance name could not beobtained. This is required.
CTD0064I The numeric operating system commandwas completed.
Explanation: No additional information is availablefor this message.
CTD0065E Unable to start driver.
Explanation: The driver process did not start. Increasethe diagnostic level of the lcfd log and redistribute.
CTD0065I The character string operating systemcommand has completed.
Explanation: No additional information is availablefor this message.
CTD0066E The syntax is checkService <servicename>.
Explanation: This is an internal program error.Contact your support representative.
CTD0067E Access to Service Control Manager wasdenied.
Explanation: Access to the Service Control Managerwas denied because of a permission violation.
CTD0067I Checking the status of Data replicationApply.
Explanation: No additional information is availablefor this message.
CTD0068I The ServicesActive database does notexist.
Explanation: No additional information is availablefor this message.
CTD0069I Checking the link to Host Name.
Explanation: No additional information is availablefor this message.
CTD0070E Service status could not be determined.
Explanation: An unknown error occurred whilerequesting the status of a service.
CTD0058I • CTD0070E
150 IBM Tivoli Monitoring for Databases: DB2: User’s Guide

CTD0071E Unable to log on to UPM. Check thepassword.
Explanation: The user ID or password does notappear to match what UPM expects.
CTD0071I Enter the password for the local ordomain user ID db2ecc.
Explanation: The password for the local or domainuser ID db2ecc is required.
CTD0072E The monitoring agent subsystem couldnot be installed.
Explanation: The monitoring agent could not bewritten to the required path. Check file permissions.
CTD0072W Cannot determine type of request. Itshould be MonName or TaskName.
Explanation: No additional information is availablefor this message.
CTD0073E Unrecoverable Communications Error.
Explanation: An error occurred while sendinginformation over a named pipe.
CTD0074E The Monitor is not defined.
Explanation: The Monitor is not defined. This is aninternal program error. Contact your supportrepresentative.
CTD0075E The Attribute is not correct.
Explanation: The passed attribute is incorrect. This isan internal program error. Contact your supportrepresentative.
CTD0076E An unknown error occurred whileinstalling the monitoring agent.
Explanation: The monitoring agent received an errorwhile attempting to install the monitoring subsystem.Increase the diagnostic level of the LCF endpoint andcontact your support representative.
CTD0077I Trying %1$s.
Explanation: No additional information is availablefor this message.
CTD0078E The Discovery process received an errorwhile getting results from the endpoint.
Explanation: The Discovery process was unable toretrieve information about the endpoint.
CTD0079I No DB2 Instances were found on theendpoint.
Explanation: An attempt to locate any DB2 Instanceon the endpoint failed.
CTD0080E No db2ecc user ID was found on theendpoint.
Explanation: The required operating system user IDdb2ecc with SYSADM privileges does not exist on thisendpoint.
CTD0081E User ID db2ecc is not a local or domainadministrator.
Explanation: The required operating system user ID ofdb2ecc was found, but is not an administrator.
CTD0082E Access to the system or registryinformation was denied.
Explanation: Information in the system or registry onthe endpoint could not be accessed. Check thepermissions.
CTD0083E An error of unknown origin wasreceived.
Explanation: An error was returned from theoperating system. Its specific origin could not bedetermined.
CTD0084I DB2 Instance %1$s was found.
Explanation: No additional information is availablefor this message.
CTD0085I DB2 Instance discovery task completed.
Explanation: No additional information is availablefor this message.
CTD0086I Discovery Stopped.
Explanation: No additional information is availablefor this message.
CTD0088I The Managed Node where newlycreated DB2InstanceManager objectswill be stored.
Explanation: No additional information is availablefor this message.
CTD0071E • CTD0088I
Appendix E. Messages 151

CTD0089I Instance %1$s is already managed.Object %2$s is in policy region %3$s.
Explanation: No additional information is availablefor this message.
CTD0090I Creating Instance object %1$s forendpoint %2$s.
Explanation: No additional information is availablefor this message.
CTD0091I No match with existing Instance objectswas found.
Explanation: Discovery has determined that anInstance object with identical properties does not existon the endpoint.
CTD0092I DB2InstanceManager object label is%1$s.
Explanation: No additional information is availablefor this message.
CTD0093E An error occurred while installing themonitoring agent.
Explanation: The Monitoring Agent process could notbe installed on the endpoint.
CTD0094I The DB2 Instance is not a DB2 server
Explanation: The DB2 Instance is not a serverInstance.
CTD0095I DB2Discovery object %1$s was created.
Explanation: No additional information is availablefor this message.
CTD0096W The DB2 Instance is already active.
Explanation: The DB2 Instance is already running. Itis not necessary to restart it.
CTD0097E The DB2 function returned error code%7$d.
Explanation: Refer to the DB2 Administration MessageReference documentation for error details.
CTD0098E The DB2 command returned error code%7$d:%8$s.
Explanation: Refer to the DB2 Administration MessageReference documentation for error details.
CTD0099W The DB2 Instance is not active.
Explanation: The DB2 Instance is down.
CTD0100E The operating system system call %7$sreturned error number %8$d.
Explanation: Refer to the operating system’s errorreference manual for error details.
CTD0101W Are you sure that you want to delete theInstance %1$s from the Tivoli database?Deleting this Instance will also deleteall databases in this Instance from theTivoli database.
Explanation: DB2DatabaseManager,DB2PartitionManager, and DB2Gateway are childclasses of the parent Instance class. Deleting the parentwill cause the deletion of all child objects.
CTD0102E The DB2 Command Line Processor wasnot started. Error code is %7$d:%8$s.
Explanation: Refer to your operating system errorcodes and messages information for a completeexplanation of the error.
CTD0103E An error occurred while attaching a DB2Instance on endpoint %1$s: %2$s.
Explanation: An attempt to attach to a DB2 Instanceresulted in an error. Refer to the DB2 Administration:Message Reference documentation for error details.
CTD0104E An error occurred while resolving an IPAddress from hostname.
Explanation: The network NameService could notlocate the hostname. There may be network problemsor the name is not correct.
CTD0105E No DB2 Instances were found on theendpoint.
Explanation: A search was conducted but no localDB2 Instances were found on the endpoint.
CTD0106E A memory allocation error occurred.
Explanation: An attempt to allocate memory toperform an operation failed. There may be insufficientmemory on the machine for all applications to run, or amemory leak has exhausted allocated memory.
CTD0089I • CTD0106E
152 IBM Tivoli Monitoring for Databases: DB2: User’s Guide

CTD0107E An unknown error has occurred.
Explanation: An error was returned while attemptingto attach to a remote or local DB2 Instance. The sourceof the error is not determined. Contact your supportrepresentative for assistance.
CTD0108I Node %1$s has been found in nodecatalog.
Explanation: No additional information is availablefor this message.
CTD0109I Node was not cataloged. Node %1$s hasbeen added.
Explanation: No additional information is availablefor this message.
CTD0110I Remote DB2 Instance attach wassuccessful.
Explanation: No additional information is availablefor this message.
CTD0111I Local DB2 Instance attach wassuccessful.
Explanation: No additional information is availablefor this message.
CTD0112I Remote attach failed: %1$s
Explanation: An attempt to attach to DB2 resulted inan error. Refer to the DB2 Administration MessageReference information for error details.
CTD0113I Local attach failed: %1$s.
Explanation: An attempt to attach to DB2 resulted inan error. Refer to the DB2 Administration MessageReference information for error details.
CTD0114E No db2ecc user ID was found on theendpoint.
Explanation: The operating system user ID db2eccmust be defined on the endpoint and have SystemAdministrator permissions. Check the users guide formore information.
CTD0115E The db2ecc user ID is not a local ordomain administrator.
Explanation: The operating system user ID db2eccmust be defined on the endpoint and have SystemAdministrator permissions.
CTD0115I Stopped.
Explanation: No additional information is availablefor this message.
CTD0116E Access was denied while looking for adb2ecc user ID.
Explanation: The operating system on the endpointdenied access to user information. Check thepermissions and try again.
CTD0116I The node was not cataloged. Instancename %1$s was used.
Explanation: No additional information is availablefor this message.
CTD0117I Instance name %1$s was found.
Explanation: No additional information is availablefor this message.
CTD0118E A DB2Database for a parallel instancecannot be created. Create a DB2Partitionor DB2PartitionGroup instead.
Explanation: A DB2Database does not exist for aparallel instance. Define either a DB2Partition orDB2PartitionGroup.
CTD0119E A DB2PartitionManager for a serialinstance cannot be created. Create aDB2DatabaseManager instead.
Explanation: A DB2PartitionManager is not definedfor a serial instance. Create a DB2DatabaseManagerinstead.
CTD0120E The node number is incorrect for thespecified DB2 instance.
Explanation: The node number does not exist or is notvalid for the specified DB2 instance.
CTD0121E A DB2PartitionGroup for a serialinstance cannot be created. Create aDB2Database instead.
Explanation: A DB2PartitionGroupManager does notexist for a serial instance. Create a DB2Databaseinstead.
CTD0122E The specified node number is notnumeric.
Explanation: The node number must be a positiveinteger value.
CTD0107E • CTD0122E
Appendix E. Messages 153

CTD0123E More than one node number isspecified.
Explanation: The node number may be specified onlyone time.
CTD0124E The instance name is not correct.
Explanation: The instance name does not exist orcontains characters which are not valid alphanumericvalues.
CTD0125E The passwords do not match.
Explanation: The first password value entered doesnot match the second password value entered.
CTD0126I The password was successfully changed.
Explanation: No additional information is availablefor this message.
CTD0127I The DB2InstanceManager object %1$swas created.
Explanation: No additional information is availablefor this message.
CTD0128I DB2Discovery object %1$s was created.
Explanation: No additional information is availablefor this message.
CTD0129I DB2PartitionGroupManager object %1$swas created.
Explanation: No additional information is availablefor this message.
CTD0130E Endpoint for host at specified node wasnot found.
Explanation: The specified node does not exist as anendpoint for the TMR server.
CTD0131E Managed Node was not found.
Explanation: The specified Tivoli gateway or TMRserver was not found.
CTD0132W The message catalog was not found.
Explanation: Contact your system administrator forassistance. If the message catalog cannot be found inthe NLSPATH, contact your local supportrepresentative.
CTD0133E A DB2ECC error has occurred.
Explanation: A general DB2ECC error has occurred.
CTD0134E The field named %7$s is required.
Explanation: Enter the required field.
CTD0135E The database driver cannot be started in%7$s.
Explanation: The database driver was not started.
CTD0136E The specified DB2 Instance is not valid.
Explanation: The specified DB2 Instance either doesnot exist or the name is incorrect.
CTD0137E The DB2 command returned error code%7$d : %8$s.
Explanation: The DB2 command was not completed.
CTD0138E The DB2 Command Line Processorcould not be started.
Explanation: An error occurred starting the DB2Command Line Processor (CLP) for the targetedendpoint.
CTD0139E There is no serial DB2 Instance beingmanaged. At least one is required forthis action.
Explanation: A serial DB2 Instance must be managedto perform the operation.
CTD0140E There is no parallel DB2 Instance beingmanaged. At least one is required forthis action.
Explanation: A parallel DB2 Instance must bemanaged to perform the operation.
CTD0141E The action is not allowed for a DB2Partition Instance.
Explanation: The action is not allowed for a DB2Partition Instance.
CTD0142E The DB2 Instance name is not valid.
Explanation: A DB2 Instance with the specified namewas not found or is incorrect.
CTD0123E • CTD0142E
154 IBM Tivoli Monitoring for Databases: DB2: User’s Guide

CTD0143E An error occurred while opening a pipefor the database driver in %7$s.
Explanation: A named pipe could not be opened onthe endpoint to communicate with DB2.
CTD0144E An error occurred while setting theenvironment in %7$s.
Explanation: The environment was not set.
CTD0145E An unknown error was received fromdriver %7$d in %8$s.
Explanation: An error was returned from theoperating system during normal DB2 driver operation.
CTD0146I Startup was attempted on %7$d nodes.%8$d nodes were successfully started.%9$d nodes were already started. %10$dnodes were not started. %11$s
Explanation: No additional information is availablefor this message.
CTD0147I Shutdown was attempted on %7$dnodes. %8$d nodes were successfullystopped. %9$d nodes were alreadystopped. %10$d nodes were not stopped.%11$s
Explanation: No additional information is availablefor this message.
CTD0148E The DB2 Control Center was notlaunched on %7$s. A desktopenvironment is required to launch theDB2 Control Center.
Explanation: A desktop environment is required tolaunch the DB2 Control Center.
CTD0149E The launch of the DB2 Control Centeron endpoint %7$s failed.
Explanation: The request to start the DB2 ControlCenter on the endpoint failed.
CTD0150E Endpoint %7$s was not found.
Explanation: The specified endpoint does not exist orwas not correct.
CTD0151E The DB2 Control Center on %7$s cannotbe launched because %7$s is not a validendpoint.
Explanation: The specified endpoint for the DB2Control Center does not exist or was not correct.
CTD0152E The object cannot be removed becausethe object is still subscribing to profiles.
Explanation: The previous operation is still inprogress. Wait until the subscription is complete beforeremoving the object.
CTD0153W The specified action is not available forthis version of DB2.
Explanation: The action was not completed.
CTD0154E An attempt to connect to DB2 has failed.The Command Line Processor (CLP)session may have timed out.
Explanation: The DB2 Command Line Processorsession has timed out while attempting to connect toDB2.
CTD0155E The specified DB2 Partition Group hasno members.
Explanation: The command requires that the specifiedDB2 Partition Group have members.
CTD0156E The Database name does not exist or isnot local.
Explanation: The DB2 Database name was not found.
CTD0157I Running in Tivoli bypass mode.
Explanation: No additional information is availablefor this message.
CTD0158E Endpoint name is not correct.
Explanation: The selected endpoint name is notcorrect for this task.
CTD0159I Valid end points are
Explanation: No additional information is availablefor this message.
CTD0160E Task number is incorrect.
Explanation: The task specified by the task numberdoes not exist.
CTD0161E The class name must be set to force allapplications.
Explanation: A Class Name must be set to force allapplications.
CTD0143E • CTD0161E
Appendix E. Messages 155

CTD0162E The Class Name is not correct.
Explanation: The specified Class Name does not exist.
CTD0163I Forcing off all applications.
Explanation: No additional information is availablefor this message.
CTD0164I All applications were successfullyforced.
Explanation: No additional information is availablefor this message.
CTD0165E The class name must be one of thefollowing to get DB2 configuration:
Explanation: Specify a correct class name.
CTD0166I The Get Database Configuration taskhas started.
Explanation: No additional information is availablefor this message.
CTD0167E The specified data type is not correct.
Explanation: No additional information is availablefor this message.
CTD0168E The specified configuration parameter isnot allowed.
Explanation: The specified configuration parameter isnot correct.
CTD0169I The current value for
Explanation: No additional information is availablefor this message.
CTD0170E Get_partitions produced a return code of
Explanation: Getting the list of partitions failed.
CTD0171I The Get Database Configuration taskhas ended.
Explanation: No additional information is availablefor this message.
CTD0172E The class name to get dbmconfiguration must be
Explanation: Specify the correct class name to executethis command.
CTD0173I Get Database Manager Configurationtask was started.
Explanation: No additional information is availablefor this message.
CTD0174E Too many arguments were passed to theGet dbm Configuration task.
Explanation: Correct the number of arguments and tryagain.
CTD0175I The Get Database ManagerConfiguration task has ended.
Explanation: No additional information is availablefor this message.
CTD0176E An error occurred while processing theSQL command. SQLCODE:
Explanation: Refer to the DB2 Reference Guide:Messages and Errors for a detailed explanation.
CTD0177W Warning. The program is continuingwith errors.
Explanation: The program will continue even thoughwarning errors occurred.
CTD0178E This task is not supported on DB2Version 2.
Explanation: No additional information is availablefor this message.
CTD0179E The class name for the Alter Buffer Pooltask must be
Explanation: Specify the correct class name to performan Alter Buffer Pool request.
CTD017E An unknown error occurred whileinstalling the monitoring agent.
Explanation: An error of unknown origin and typeoccurred. Contact your support representative forassistance.
CTD0180I Alter Buffer Pool task has started.
Explanation: No additional information is availablefor this message.
CTD0181I Setting client attach node.
Explanation: No additional information is availablefor this message.
CTD0162E • CTD0181I
156 IBM Tivoli Monitoring for Databases: DB2: User’s Guide

CTD0182I Attaching to the instance.
Explanation: No additional information is availablefor this message.
CTD0183E Selected action is not correct.
Explanation: Choose a valid action.
CTD0184E Error on get_partitions. Return code is
Explanation: Could not retrieve the DB2 Partitionnames.
CTD0185I Alter Buffer Pool task has ended.
Explanation: No additional information is availablefor this message.
CTD0186E The class name to test the CommandLine Interface (CLI) is not correct.
Explanation: The class name to test the CommandLine Interface (CLI) must be DB2InstanceManager,DB2DatabaseManager, DB2ParitionManager orDB2PartitionGroupManager.
CTD0187I Test Command Line Interface (CLI) taskwas started.
Explanation: No additional information is availablefor this message.
CTD0188I Test Command Line Interface (CLI) taskhas ended.
Explanation: No additional information is availablefor this message.
CTD0189E The class name must be
Explanation: Select a valid class name.
CTD0190E The class name must be
Explanation: Select a valid class name.
CTD0191E The class name must be
Explanation: Select a valid class name.
CTD0192E The class name must be
Explanation: Select a valid class name.
CTD0193I Activate Database task has ended.
Explanation: No additional information is availablefor this message.
CTD0194I Activate Database task has started.
Explanation: No additional information is availablefor this message.
CTD0195I Backup Database task has ended.
Explanation: No additional information is availablefor this message.
CTD0196I Backup Database task has started.
Explanation: No additional information is availablefor this message.
CTD0197W Commands ignored. ECTEST9 flag isset.
Explanation: No additional information is availablefor this message.
CTD0198I Create Explain Tables Task has ended.
Explanation: No additional information is availablefor this message.
CTD0199I Create Explain Tables Task has started.
Explanation: No additional information is availablefor this message.
CTD0200E Create Process failed. Return code is
Explanation: The process was not created.
CTD0201E DB2CLP ENV variable fetch failed.Return code is
Explanation: No additional information is availablefor this message.
CTD0202I Deactivate Database task has ended.
Explanation: No additional information is availablefor this message.
CTD0203I Deactivate Database task has started.
Explanation: No additional information is availablefor this message.
CTD0182I • CTD0203I
Appendix E. Messages 157

CTD0204I Drop sample Database task has ended.
Explanation: No additional information is availablefor this message.
CTD0205I Drop sample Database task has started.
Explanation: No additional information is availablefor this message.
CTD0206E An error occurred while allocatingmemory.
Explanation: Memory could not be allocated. Checkand stop non-critical applications. Stop orphanedprocesses.
CTD0207E Error getting Process Completion.Return code is
Explanation: The process could not be completed.
CTD0208E Error occurred during get_partitionstask. Return code is
Explanation: Could not retrieve the partition names.
CTD0209E Error on get_unique task. Return code is
Explanation: Could not retrieve the unique Databaseor Instance name.
CTD0210E Error occurred while reading theEXPLAIN.DDL file.
Explanation: Could not read the EXPLAIN.DDL file.Check the file permissions.
CTD0211E Error occurred while waiting for childprocess to complete. Return code is
Explanation: A timeout occurred while waiting for achild process to complete.
CTD0212E Error occurred while writing to the /tmpdirectory.
Explanation: Permission to write temporary files tothe /tmp directory was not granted.
CTD0213I Force Applications task has ended.
Explanation: No additional information is availablefor this message.
CTD0214I Force Applications task has started.
Explanation: No additional information is availablefor this message.
CTD0215I Get Admin Configuration task hasended.
Explanation: No additional information is availablefor this message.
CTD0216I Get Admin Configuration task hasstarted.
Explanation: No additional information is availablefor this message.
CTD0217I Get Database Configuration task hasended.
Explanation: No additional information is availablefor this message.
CTD0218I Get Database Configuration task hasstarted.
Explanation: No additional information is availablefor this message.
CTD0219I Get Database Manager Configurationtask has ended.
Explanation: No additional information is availablefor this message.
CTD0220I Get Database Manager Configurationtask has started.
Explanation: No additional information is availablefor this message.
CTD0222E Invocation of Command Line Process(CLP) ENV command failed. Returncode is
Explanation: The Command Line Process could not bespawned. The environment to execute the process wasnot established.
CTD0223I Invoke Stored Procedure task hasended.
Explanation: No additional information is availablefor this message.
CTD0204I • CTD0223I
158 IBM Tivoli Monitoring for Databases: DB2: User’s Guide

CTD0224I Invoke Stored Procedure task hasstarted.
Explanation: No additional information is availablefor this message.
CTD0225I List DCS Applications task has ended.
Explanation: No additional information is availablefor this message.
CTD0226I List DCS Applications task has started.
Explanation: No additional information is availablefor this message.
CTD0227I List Applications task has ended.
Explanation: No additional information is availablefor this message.
CTD0228I List Applications task has started.
Explanation: No additional information is availablefor this message.
CTD0230I List Backup/recovery History File taskhas ended.
Explanation: No additional information is availablefor this message.
CTD0231I List Backup/recovery History File taskhas started.
Explanation: No additional information is availablefor this message.
CTD0232I List Node Directory task has ended.
Explanation: No additional information is availablefor this message.
CTD0233I List Node Directory task has started.
Explanation: No additional information is availablefor this message.
CTD0234I Reenter and rerun this task.
Explanation: No additional information is availablefor this message.
CTD0235I Prune Recovery History File task hasended.
Explanation: No additional information is availablefor this message.
CTD0236I Prune Recovery History File task hasstarted.
Explanation: No additional information is availablefor this message.
CTD0237I Quiesce Tablespaces for Table task hasended.
Explanation: No additional information is availablefor this message.
CTD0238I Quiesce Tablespaces for Table task hasstarted.
Explanation: No additional information is availablefor this message.
CTD0239I REORGCHK task has ended.
Explanation: No additional information is availablefor this message.
CTD0240I REORGCHK task has started.
Explanation: No additional information is availablefor this message.
CTD0241I Rebind Package task has ended.
Explanation: No additional information is availablefor this message.
CTD0242I Rebind Package task has started.
Explanation: No additional information is availablefor this message.
CTD0243I Reorganize Table task has ended.
Explanation: No additional information is availablefor this message.
CTD0244I Reorganize Table task has started.
Explanation: No additional information is availablefor this message.
CTD0245I Reset Admin Configuration task hasended.
Explanation: No additional information is availablefor this message.
CTD0246I Reset Admin Configuration task hasstarted.
Explanation: No additional information is availablefor this message.
CTD0224I • CTD0246I
Appendix E. Messages 159

CTD0247I Reset Database Configuration task hasended.
Explanation: No additional information is availablefor this message.
CTD0248I Reset Database Configuration task hasstarted.
Explanation: No additional information is availablefor this message.
CTD0249I Reset Database Manager Configurationtask has ended.
Explanation: No additional information is availablefor this message.
CTD0250I Reset Database Manager Configurationtask has started.
Explanation: No additional information is availablefor this message.
CTD0251I Restart Database task has started.
Explanation: No additional information is availablefor this message.
CTD0252I Restart Database task has started.
Explanation: No additional information is availablefor this message.
CTD0253I Run statistics task has ended.
Explanation: No additional information is availablefor this message.
CTD0254I Run statistics task has started.
Explanation: No additional information is availablefor this message.
CTD0255I The node number is
Explanation: No additional information is availablefor this message.
CTD0256I Update admin Configuration task hasended.
Explanation: No additional information is availablefor this message.
CTD0257I Update admin Configuration task hasstarted.
Explanation: No additional information is availablefor this message.
CTD0258I Update database Configuration task hasended.
Explanation: No additional information is availablefor this message.
CTD0259I Update database Configuration task hasstarted.
Explanation: No additional information is availablefor this message.
CTD0260I Update Database ManagerConfiguration task has ended.
Explanation: No additional information is availablefor this message.
CTD0261I Update Database ManagerConfiguration task has started.
Explanation: No additional information is availablefor this message.
CTD0262I Updating statistics for a specific index isnot supported on DB2 Version 2.
Explanation: No additional information is availablefor this message.
CTD0263I Start Data Replication Capture.
Explanation: No additional information is availablefor this message.
CTD0264I Stop Data Replication Capture.
Explanation: No additional information is availablefor this message.
CTD0265I Start Data Replication Apply.
Explanation: No additional information is availablefor this message.
CTD0266I Stop Data Replication Apply.
Explanation: No additional information is availablefor this message.
CTD0247I • CTD0266I
160 IBM Tivoli Monitoring for Databases: DB2: User’s Guide

CTD0267I Start Data Replication Capture task hasstarted.
Explanation: No additional information is availablefor this message.
CTD0268I Start Data Replication Capture task hasended.
Explanation: No additional information is availablefor this message.
CTD0269I Stop Data Replication Capture task hasstarted.
Explanation: No additional information is availablefor this message.
CTD0270I Stop Data Replication Capture task hasended.
Explanation: No additional information is availablefor this message.
CTD0271I Get Log Sequence task has started.
Explanation: No additional information is availablefor this message.
CTD0272I Get Log Sequence task has ended.
Explanation: No additional information is availablefor this message.
CTD0273I Suspend Data Replication Capture taskhas started.
Explanation: No additional information is availablefor this message.
CTD0274I Suspend Data Replication Capture taskhas ended.
Explanation: No additional information is availablefor this message.
CTD0275I Resume Data Replication Capture taskhas started.
Explanation: No additional information is availablefor this message.
CTD0276I Reinitialize Data Replication Capturetask has ended.
Explanation: No additional information is availablefor this message.
CTD0277I Prune Data Replication Capture task hasstarted.
Explanation: No additional information is availablefor this message.
CTD0278I Prune Data Replication Capture task hasended.
Explanation: No additional information is availablefor this message.
CTD0279I Start Data Replication Apply task hasstarted.
Explanation: No additional information is availablefor this message.
CTD0280I Start Data Replication Apply task hasended.
Explanation: No additional information is availablefor this message.
CTD0281I Stop Data Replication Apply task hasstarted.
Explanation: No additional information is availablefor this message.
CTD0282I Stop Data Replication Apply task hasended.
Explanation: No additional information is availablefor this message.
CTD0283E Unable to change to the capturedirectory.
Explanation: Permissions do not allow changingdirectory to the capture directory.
CTD0284I SetCurrentDirectory return code is
Explanation: No additional information is availablefor this message.
CTD0285E Unable to change to the apply directory.
Explanation: Permissions do not allow changingdirectory to the apply directory.
CTD0286E Logon failed. LogonUser return code is
Explanation: Either the user ID or password does notmatch those assigned on the endpoint.
CTD0267I • CTD0286E
Appendix E. Messages 161

CTD0287E Create process failed.CreateProcessAsUser return code is
Explanation: Could not spawn the child process.
CTD0288E This task is not supported on DB2Version 2.
Explanation: No additional information is availablefor this message.
CTD0289E Error occurred while stopping the DataReplication Apply task.
Explanation: The Data Replication Apply task couldnot be stopped.
CTD0290E The error code was
Explanation: An error occurred and the error code isin the message. Refer to the reference guide for theproduct.
CTD0291E No Apply tasks found for user
Explanation: No Apply Tasks were found for thenamed user.
CTD0292I Create the Admin Server task hasstarted.
Explanation: No additional information is availablefor this message.
CTD0293I Create the Admin Server task hasended.
Explanation: No additional information is availablefor this message.
CTD0294I Create the sample Database task hasstarted.
Explanation: No additional information is availablefor this message.
CTD0295I Create the sample Database task hasended.
Explanation: No additional information is availablefor this message.
CTD0296I Drop the Admin Server task has started.
Explanation: No additional information is availablefor this message.
CTD0297I Drop the Admin Server task has ended.
Explanation: No additional information is availablefor this message.
CTD0298I Get the Admin Server instance task hasstarted.
Explanation: No additional information is availablefor this message.
CTD0299I Get the Admin Server instance task hasended.
Explanation: No additional information is availablefor this message.
CTD0300I List the Profile Registry task has started.
Explanation: No additional information is availablefor this message.
CTD0301I List the Profile Registry task has ended.
Explanation: No additional information is availablefor this message.
CTD0302I Rebind all packages task has started.
Explanation: No additional information is availablefor this message.
CTD0303I Rebind all packages task has ended.
Explanation: No additional information is availablefor this message.
CTD0304I Set the Admin Server ID task hasstarted.
Explanation: No additional information is availablefor this message.
CTD0305I Set the Admin Server ID task hasended.
Explanation: No additional information is availablefor this message.
CTD0306I Set the Profile Registry task has started.
Explanation: No additional information is availablefor this message.
CTD0307I Set the Profile Registry task has ended.
Explanation: No additional information is availablefor this message.
CTD0287E • CTD0307I
162 IBM Tivoli Monitoring for Databases: DB2: User’s Guide

CTD0308I Set up Monitoring Agent task hasstarted.
Explanation: No additional information is availablefor this message.
CTD0309I Set up Monitoring Agent task hasended.
Explanation: No additional information is availablefor this message.
CTD0310I Start the Admin Server task has started.
Explanation: No additional information is availablefor this message.
CTD0311I Start the Admin Server task has ended.
Explanation: No additional information is availablefor this message.
CTD0312I Start DB2 task has started.
Explanation: No additional information is availablefor this message.
CTD0313I Start DB2 task has ended.
Explanation: No additional information is availablefor this message.
CTD0314I Stop the Admin Server task has started.
Explanation: No additional information is availablefor this message.
CTD0315I Stop the Admin Server task has ended.
Explanation: No additional information is availablefor this message.
CTD0316I Stop DB2 task has started.
Explanation: No additional information is availablefor this message.
CTD0317I Stop DB2 task has ended.
Explanation: No additional information is availablefor this message.
CTD0318I Start DB2 SNMP Agent task has started.
Explanation: No additional information is availablefor this message.
CTD0319I Start DB2 SNMP Agent task has ended.
Explanation: No additional information is availablefor this message.
CTD0320I Stop DB2 SNMP Agent task has started.
Explanation: No additional information is availablefor this message.
CTD0321I Stop DB2 SNMP Agent task has ended.
Explanation: No additional information is availablefor this message.
CTD0322E Parameters are not supported on DB2Version 2.
Explanation: Remove the parameters.
CTD0323I Adding the DB2 ECC inittab entry.
Explanation: No additional information is availablefor this message.
CTD0324I Installing the DB2 ECC monitoringservice.
Explanation: No additional information is availablefor this message.
CTD0325W A DB2 ECC inittab entry already exists.
Explanation: There is already an entry in the/etc/inittab file for the DB2 ECC task. Either delete theentry or continue.
CTD0326E Error occurred while adding the inittabentry. Return code is
Explanation: The inittab entry was not added. Checkpermissions for /etc and /etc/inittab.
CTD0327E The user ID or password is missing.Retry.
Explanation: Correct user ID and password arerequired.
CTD0328E An error occurred while installing theMonitoring Agent. Return code is
Explanation: The Monitoring Agent was not installed.Refer to the reference guide for return codeinformation.
CTD0308I • CTD0328E
Appendix E. Messages 163

CTD0329I Removing the DB2 ECC inittab entry.
Explanation: No additional information is availablefor this message.
CTD0330E An error occurred while removing theinittab entry. Return code is
Explanation: The DB2 ECC entry was not removedfrom the /etc/inittab file.
CTD0331I Removing the DB2 ECC monitoringservice.
Explanation: No additional information is availablefor this message.
CTD0332E An error occurred while removing theMonitoring Agent. Return code is
Explanation: The Monitoring Agent task was notremoved.
CTD0333W They have been ignored.
Explanation: No additional information is availablefor this message.
CTD0334I Starting the Monitoring Agent.
Explanation: No additional information is availablefor this message.
CTD0335I The Monitoring Agent has been started.
Explanation: No additional information is availablefor this message.
CTD0336E An error occurred while starting theMonitoring Agent.
Explanation: The Monitoring Agent was not started.
CTD0337W The Monitoring Agent was alreadystarted.
Explanation: The Monitoring Agent is already activeand another was not started.
CTD0338W The agent must be stopped before it canbe restarted.
Explanation: Continue or stop the agent and restart it.
CTD0339E Unable to open the Service Manager.Access is denied.
Explanation: An error occurred opening the ServiceManager. Correct the permissions and try again.
CTD0340E The service manager cannot be opened.The return code is
Explanation: The service manager was not opened.
CTD0341E The Monitoring Service cannot beopened. Return code is
Explanation: The Monitoring Service was not started.
CTD0342E The agent cannot be started because italready running.
Explanation: The Monitoring Service was not started.
CTD0343E The agent cannot be started. Returncode is
Explanation: The monitoring service was not started.
CTD0344E An error occurred while stopping theipc task.
Explanation: The tmdb2ipc process may or may nothave been stopped.
CTD0344I The Monitoring Agent has beenstopped.
Explanation: No additional information is availablefor this message.
CTD0345E No Monitoring Agent were found.
Explanation: A Monitoring Agent is not currentlyrunning.
CTD0346I Stopping the Monitoring Agent.
Explanation: No additional information is availablefor this message.
CTD0347E The monitoring service cannot bestopped because it is not active.
Explanation: An error occurred while attempting toterminate the monitoring service.
CTD0348E The monitoring service cannot bestopped. The return code is
Explanation: An error occurred while attempting toterminate the monitoring service.
CTD0349E Unable to query status of monitoringservice. The return code is
Explanation: Could not get a response from themonitoring service to a status request.
CTD0329I • CTD0349E
164 IBM Tivoli Monitoring for Databases: DB2: User’s Guide

CTD0350I Starting the DB2 Security Service.
Explanation: No additional information is availablefor this message.
CTD0351E The DB2 Security Service could not beopened. The return code is
Explanation: The DB2 Security Service was notopened.
CTD0352E The DB2 Security Service was notstarted because it is already running.
Explanation: The DB2 Security Service was notstarted.
CTD0353E Unable to start the DB2 SecurityService. The return code is
Explanation: The DB2 Security Service was notstarted.
CTD0354I The DB2 Security Service has beenstarted.
Explanation: No additional information is availablefor this message.
CTD0355I Stopping the DB2 Security Service.
Explanation: No additional information is availablefor this message.
CTD0356E The DB2 Security Service was notstopped because it is not active.
Explanation: The request to stop the DB2 SecurityService failed because it was not running.
CTD0357E Unable to stop the DB2 Security Service.The return code is
Explanation: The DB2 Security Service was notstopped.
CTD0358E Unable to query status of DB2 SecurityService. The return code is
Explanation: The DB2 Security Service is notresponding to a status request. Status was not obtained.
CTD0359I The DB2 Security Service has beenstopped.
Explanation: No additional information is availablefor this message.
CTD0360E Error occurred while stopping the DB2SNMP agent.
Explanation: The DB2 SNMP Agent is not respondingto a service termination request.
CTD0361E No DB2 SNMP agent was found.
Explanation: The DB2 SNMP Agent was not running.
CTD0362E Check type is not correct.
Explanation: Incorrect parameter passed to task.
CTD0363E Error occurred while getting group nameattribute.
Explanation: The group name attribute was notretrieved.
CTD0364E Error occurred while getting group IDattribute.
Explanation: The group identifier was not retrieved.
CTD0365E Unable to set the group ID.
Explanation: The Group Identifier was not set.
CTD0366E Error occurred while getting user IDattribute.
Explanation: The user identifier was not retrieved.
CTD0367E Unable to set the user ID.
Explanation: The user ID was not set.
CTD0368E Cannot retrieve group name for
Explanation: Could not retrieve the specified groupname.
CTD0369E The task is not supported on thisplatform.
Explanation: Task was not run on the endpoint.
CTD0370I Reset Audit Configuration task hasstarted.
Explanation: No additional information is availablefor this message.
CTD0371I Reset Audit Configuration task hasended.
Explanation: No additional information is availablefor this message.
CTD0350I • CTD0371I
Appendix E. Messages 165

CTD0372I Get Audit Configuration task hasstarted.
Explanation: No additional information is availablefor this message.
CTD0373I Get Audit Configuration task hasended.
Explanation: No additional information is availablefor this message.
CTD0374I Flush Audit Log task has started.
Explanation: No additional information is availablefor this message.
CTD0375I Flush Audit Log task has ended.
Explanation: No additional information is availablefor this message.
CTD0376I Start DB2 Audit Facility task hasstarted.
Explanation: No additional information is availablefor this message.
CTD0377I Start DB2 Audit Facility task has ended.
Explanation: No additional information is availablefor this message.
CTD0378I Stop DB2 Audit Facility task has started.
Explanation: No additional information is availablefor this message.
CTD0379I Stop DB2 Audit Facility task has ended.
Explanation: No additional information is availablefor this message.
CTD0380I Configure Audit Facility task hasstarted.
Explanation: No additional information is availablefor this message.
CTD0381I Configure Audit Facility task has ended.
Explanation: No additional information is availablefor this message.
CTD0382I Extract DB2 Auditing task has started.
Explanation: No additional information is availablefor this message.
CTD0383I Extract DB2 Auditing task has ended.
Explanation: No additional information is availablefor this message.
CTD0384I Purge Audit Log task has started.
Explanation: No additional information is availablefor this message.
CTD0385I Purge Audit Log task has ended.
Explanation: No additional information is availablefor this message.
CTD0386I Create Import Audit Log task hasstarted.
Explanation: No additional information is availablefor this message.
CTD0387I Create Import Audit Log task hasended.
Explanation: No additional information is availablefor this message.
CTD0388I Prune Audit Log task has started.
Explanation: No additional information is availablefor this message.
CTD0389I Prune Audit Log task has ended.
Explanation: No additional information is availablefor this message.
CTD0390I Set Query Patroller System CostThreshold.
Explanation: No additional information is availablefor this message.
CTD0391I Query Patroller request has started.
Explanation: No additional information is availablefor this message.
CTD0392I Query Patroller request has completed.
Explanation: No additional information is availablefor this message.
CTD0393I Set Query Patroller System QueryThreshold.
Explanation: No additional information is availablefor this message.
CTD0372I • CTD0393I
166 IBM Tivoli Monitoring for Databases: DB2: User’s Guide

CTD0394I Set Query Patroller System AccountingStatus.
Explanation: No additional information is availablefor this message.
CTD0395I Set Query Patroller System Days ToKeep Jobs.
Explanation: No additional information is availablefor this message.
CTD0396I Get Query Patroller System Parameters.
Explanation: No additional information is availablefor this message.
CTD0397I Get Query Patroller User Group IDs.
Explanation: No additional information is availablefor this message.
CTD0398I Get Query Patroller User GroupConfiguration.
Explanation: No additional information is availablefor this message.
CTD0399I Set Query Patroller User Group CostAnalysis Flag.
Explanation: No additional information is availablefor this message.
CTD0400I Set Query Patroller User GroupAuthority Level.
Explanation: No additional information is availablefor this message.
CTD0401I Set Query Patroller User Group MaxQueries.
Explanation: No additional information is availablefor this message.
CTD0402I Set Query Patroller User Group LowPriority.
Explanation: No additional information is availablefor this message.
CTD0403I Set Query Patroller User Group NormalPriority.
Explanation: No additional information is availablefor this message.
CTD0404I Set Query Patroller User Group HighPriority.
Explanation: No additional information is availablefor this message.
CTD0405I Set Query Patroller User GroupThreshold.
Explanation: No additional information is availablefor this message.
CTD0406I Set Query Patroller User GroupManagement Threshold.
Explanation: No additional information is availablefor this message.
CTD0407I Set Query Patroller User Group MaxElapsed Time.
Explanation: No additional information is availablefor this message.
CTD0408I Set Query Patroller User Group MaxResult Rows.
Explanation: No additional information is availablefor this message.
CTD0409I Set Query Patroller User Group AccountID.
Explanation: No additional information is availablefor this message.
CTD0410I Set Query Patroller User Group EmailAddress.
Explanation: No additional information is availablefor this message.
CTD0411I Query Patroller Release All Held Jobs.
Explanation: No additional information is availablefor this message.
CTD0412I Query Patroller Drop All CompleteResult Sets.
Explanation: No additional information is availablefor this message.
CTD0413I Start the DB2 SNMP agent.
Explanation: No additional information is availablefor this message.
CTD0394I • CTD0413I
Appendix E. Messages 167

CTD0414I Stop DB2.
Explanation: No additional information is availablefor this message.
CTD0415I Stop the Admin Server.
Explanation: No additional information is availablefor this message.
CTD0416I Start DB2.
Explanation: No additional information is availablefor this message.
CTD0417I Create the Admin Server.
Explanation: No additional information is availablefor this message.
CTD0418I Create the sample database.
Explanation: No additional information is availablefor this message.
CTD0419I Drop the Admin Server.
Explanation: No additional information is availablefor this message.
CTD0420I Get the Admin Server instance name.
Explanation: No additional information is availablefor this message.
CTD0421I List the Profile Registry.
Explanation: No additional information is availablefor this message.
CTD0422I Rebind all packages.
Explanation: No additional information is availablefor this message.
CTD0423I Set the Admin Server ID.
Explanation: No additional information is availablefor this message.
CTD0424I Set the Profile Registry.
Explanation: No additional information is availablefor this message.
CTD0425I Start the Admin Server.
Explanation: No additional information is availablefor this message.
CTD0426I Activate a database.
Explanation: No additional information is availablefor this message.
CTD0427I Create a backup copy of a database.
Explanation: No additional information is availablefor this message.
CTD0428I Create the explain tables.
Explanation: No additional information is availablefor this message.
CTD0429I Deactivate a database.
Explanation: No additional information is availablefor this message.
CTD0430I Drop the sample database.
Explanation: No additional information is availablefor this message.
CTD0431I Force applications.
Explanation: No additional information is availablefor this message.
CTD0432I Get admin configuration.
Explanation: No additional information is availablefor this message.
CTD0433I Get database configuration.
Explanation: No additional information is availablefor this message.
CTD0434I Get Database Manager configuration.
Explanation: No additional information is availablefor this message.
CTD0435I Invoke a stored procedure.
Explanation: No additional information is availablefor this message.
CTD0414I • CTD0435I
168 IBM Tivoli Monitoring for Databases: DB2: User’s Guide

CTD0436I List DCS applications.
Explanation: No additional information is availablefor this message.
CTD0437I List applications.
Explanation: No additional information is availablefor this message.
CTD0438I List the history file.
Explanation: No additional information is availablefor this message.
CTD0439I List the node directory.
Explanation: No additional information is availablefor this message.
CTD0440I Prune the recovery history file.
Explanation: No additional information is availablefor this message.
CTD0441I Quiesce tablespaces.
Explanation: No additional information is availablefor this message.
CTD0442I Rebind a package.
Explanation: No additional information is availablefor this message.
CTD0443I Reorganize a table.
Explanation: No additional information is availablefor this message.
CTD0444I Reset admin configuration.
Explanation: No additional information is availablefor this message.
CTD0445I Reset database configuration.
Explanation: No additional information is availablefor this message.
CTD0446I Reset Database Manager configuration.
Explanation: No additional information is availablefor this message.
CTD0447I Restart a database.
Explanation: No additional information is availablefor this message.
CTD0448I Run reorgchk.
Explanation: No additional information is availablefor this message.
CTD0449I Run statistics.
Explanation: No additional information is availablefor this message.
CTD0450I Update admin configuration.
Explanation: No additional information is availablefor this message.
CTD0451I Update database configuration.
Explanation: No additional information is availablefor this message.
CTD0452I Update Database Managerconfiguration.
Explanation: No additional information is availablefor this message.
CTD0453I Get Database Manager configuration.
Explanation: No additional information is availablefor this message.
CTD0454I Get the log sequence number.
Explanation: No additional information is availablefor this message.
CTD0455I Suspend Data Replication Capture.
Explanation: No additional information is availablefor this message.
CTD0456I Resume Data Replication Capture.
Explanation: No additional information is availablefor this message.
CTD0457I Reinitialize Data Replication Capture.
Explanation: No additional information is availablefor this message.
CTD0436I • CTD0457I
Appendix E. Messages 169

CTD0458I Prune Data Replication Capture.
Explanation: No additional information is availablefor this message.
CTD0460I The ECC Broadcast Message task wasstarted.
Explanation: No additional information is availablefor this message.
CTD0462I The ECC Broadcast Message task wascompleted.
Explanation: No additional information is availablefor this message.
CTD0463W This task must be run from aDB2InstanceManager orDB2PartitionManager.
Explanation: No additional information is availablefor this message.
CTD0464I ECC Reset Counters task was started.
Explanation: No additional information is availablefor this message.
CTD0465I ECC Reset Counters task wascompleted.
Explanation: No additional information is availablefor this message.
CTD0466I ECC Send Notice started.
Explanation: No additional information is availablefor this message.
CTD0467I ECC Send Notice task was completed.
Explanation: No additional information is availablefor this message.
CTD0468I ECC Set Up Monitoring task wasstarted.
Explanation: No additional information is availablefor this message.
CTD0469I ECC Set Up Monitoring task wascompleted.
Explanation: No additional information is availablefor this message.
CTD0470I ECC Start Monitoring Agent task wasstarted.
Explanation: No additional information is availablefor this message.
CTD0471I ECC Start Monitoring Agent task wascompleted.
Explanation: No additional information is availablefor this message.
CTD0472E Endpoints must be eitherDB2InstanceManager,DB2DatabaseManager, orDB2PartitionManager.
Explanation: No additional information is availablefor this message.
CTD0473I ECC Stop DB2SNMP Agent task wasstarted.
Explanation: No additional information is availablefor this message.
CTD0474I ECC Stop DB2SNMP Agent task wascompleted.
Explanation: No additional information is availablefor this message.
CTD0475I ECC Stop Monitoring Agent task wasstarted.
Explanation: No additional information is availablefor this message.
CTD0476I ECC Stop Monitoring Agent task wascompleted.
Explanation: No additional information is availablefor this message.
CTD0477E The specified Event Server was notfound.
Explanation: No additional information is availablefor this message.
CTD0478I ECC Configure TEC Classes task wasstarted.
Explanation: No additional information is availablefor this message.
CTD0458I • CTD0478I
170 IBM Tivoli Monitoring for Databases: DB2: User’s Guide

CTD0479I ECC Configure TEC Classes wascompleted.
Explanation: No additional information is availablefor this message.
CTD0480I ECC Client Connectivity task wasstarted.
Explanation: No additional information is availablefor this message.
CTD0481I ECC Client Connectivity task wascompleted.
Explanation: No additional information is availablefor this message.
CTD0482E The number of arguments is incorrect.
Explanation: No additional information is availablefor this message.
CTD0483E The task name is not correct.
Explanation: No additional information is availablefor this message.
CTD0484E Endpoints must be eitherDB2InstanceManager,DB2DatabaseManager, orDB2PartitionManager.
Explanation: No additional information is availablefor this message.
CTD0485E Endpoints must be eitherDB2InstanceManager,DB2DatabaseManager, orDB2PartitionManager.
Explanation: No additional information is availablefor this message.
CTD0486E Cannot create the rule base at the EventServer in the rule base directory.
Explanation: No additional information is availablefor this message.
CTD0487E Cannot copy the existing rule base toanother existing rule base.
Explanation: No additional information is availablefor this message.
CTD0488E Cannot copy the TEC rule TBSM helperscript into the TEC scripts directory.
Explanation: No additional information is availablefor this message.
CTD0488I The current contents of the AuditFacility log are as follows:
Explanation: No additional information is availablefor this message.
CTD0489E Copying file
Explanation: No additional information is availablefor this message.
CTD0490I Discovery task succeeded.
Explanation: No additional information is availablefor this message.
CTD0491E Discovery task failed.
Explanation: No additional information is availablefor this message.
CTD0601I The DB2Gateway object %1$s wascreated.
Explanation: No additional information is availablefor this message.
CTD1017I Verify that the correct monitor argumentvalues were specified. There might notbe any active application running in therequested database. Or, one or more ofthe expression elements is null.Therefore, the best possible defaultvalue is used.
Explanation: No additional information is availablefor this message.
CTD1022E Cannot find valid database parameter.
Explanation: A required parameter was not supplied.Contact your support representative.
CTD1066I Checking the status of DataJoinerInstance.
Explanation: No additional information is availablefor this message.
CTD0479I • CTD1066I
Appendix E. Messages 171

CTD1068I Checking the SNA Link to StationName.
Explanation: No additional information is availablefor this message.
CTD1070E Cannot obtain data from %1$d nodes.
Explanation: An error occurred while retrieving therequested information from one or more nodes.
CTD1073E User ID db2ecc was not found on theendpoint.
Explanation: A db2ecc operating system user ID mustbe defined and assigned to the DB2 SYSADM group sothat the DB2 instance can be managed.
CTD1074E The db2ecc user ID is not a local ordomain administrator.
Explanation: A db2ecc operating system user ID mustbe defined and assigned to the DB2 SYSADM group sothat the DB2 instance can be managed.
CTD1075E Access was denied while looking for adb2ecc user ID.
Explanation: An attempt to find the user ID db2eccresulted in an access violation. Check permissions onthe endpoint.
CTD1101E A call to the DB2 server returned anunexpected error.
Explanation: An Application Program Interface (API)call to DB2 returned an error code which is not aknown error code.
CTD1118E Unable to install monitoring agentsubsystem.
Explanation: The monitoring agent provides access tothe DB2 snapshot monitoring system. Contact yoursupport representative for more information.
CTD4004E Essential environment parameter ismissing.
Explanation: A task command or monitor wasattemped without the proper context being set. Set theenvironment variable and run the command again.
CTD1068I • CTD4004E
172 IBM Tivoli Monitoring for Databases: DB2: User’s Guide

Appendix F. Accessibility
Accessibility features help a user who has a physical disability, such as restrictedmobility or limited vision, to use software products successfully. The majoraccessibility features in IBM Tivoli Monitoring for Databases: DB2 enable users to:v Use assistive technologies such as screen-reader software and a digital speech
synthesizer to hear what is displayed on the screenv Operate specific or equivalent features using only the keyboardv Magnify what is displayed on the screen
In addition, the product documentation has been modified to include features toaid accessibility:v All documentation available in both HTML and convertible PDF formats to give
the maximum opportunity for users to apply screen-reader software.v All images provided with alternative text so that users of the documentation
with vision impairments can understand the contents of the images.
Using assistive technologiesAssistive technology products such as screen-readers, function with both thetext-based and graphical user interfaces found in IBM Tivoli Monitoring forDatabases: DB2. Consult the assistive technology product documentation forspecific information about using it to access command line or graphical interfaces.
Additional accessibility features might be included as part of the user interface of aparticular IBM Tivoli Monitoring for Databases: DB2 component. Check with theindividual component’s documentation for any additional information aboutaccessibility.
Magnifying what is displayed on the screenIn all components of IBM Tivoli Monitoring for Databases: DB2 other than the WebHealth Console, users can magnify the screens used by the product’s userinterfaces using facilities provided by the operating systems on which the productis run. For example, in a Windows environment you can change the screen settingsto a lower resolution to enlarge the font sizes of the text on the screen. Informationabout these facilities is provided in the relevant operating system documentation.
Documentation in accessible formatsAll user documentation is provided in HTML format, which can be read directlyby assistive tools such as screen readers, or in convertible PDF format. ConvertiblePDF files are those that can be converted from PDF to HTML by the Adobe PDF toHTML converter. For information about converting PDF documents to HTML, referto the Adobe book Optimizing Adobe PDF Files for Accessibility
Using alternative textAll documentation images are provided with an alternative text that can be readby assistive tools such as screen readers.
173

Using Alternative Text
174 IBM Tivoli Monitoring for Databases: DB2: User’s Guide

Appendix G. Notices
This information was developed for products and services offered in the U.S.A.IBM may not offer the products, services, or features discussed in this document inother countries. Consult your local IBM representative for information on theproducts and services currently available in your area. Any reference to an IBMproduct, program, or service is not intended to state or imply that only that IBMproduct, program, or service may be used. Any functionally equivalent product,program, or service that does not infringe any IBM intellectual property right maybe used instead. However, it is the user’s responsibility to evaluate and verify theoperation of any non-IBM product, program, or service.
IBM may have patents or pending patent applications covering subject matterdescribed in this document. The furnishing of this document does not give youany license to these patents.You can send license inquiries, in writing, to:
IBM Director of Licensing
IBM Corporation
North Castle Drive
Armonk, NY 10504-1785 U.S.A.
For license inquiries regarding double-byte (DBCS) information, contact the IBMIntellectual Property Department in your country or send inquiries, in writing, to:
IBM World Trade Asia Corporation
Licensing
2-31 Roppongi 3-chome, Minato-ku
Tokyo 106, Japan
The following paragraph does not apply to the United Kingdom or any othercountry where such provisions are inconsistent with local law:
INTERNATIONAL BUSINESS MACHINES CORPORATION PROVIDES THISPUBLICATION ″AS IS″ WITHOUT WARRANTY OF ANY KIND, EITHEREXPRESS OR IMPLIED, INCLUDING, BUT NOT LIMITED TO, THE IMPLIEDWARRANTIES OF NON-INFRINGEMENT, MERCHANTABILITY OR FITNESSFOR A PARTICULAR PURPOSE.
Some states do not allow disclaimer of express or implied warranties in certaintransactions, therefore, this statement might not apply to you.
This information could include technical inaccuracies or typographical errors.Changes are periodically made to the information herein; these changes will beincorporated in new editions of the publication. IBM may make improvementsand/or changes in the product(s) and/or the program(s) described in thispublication at any time without notice.
175

Any references in this information to non-IBM Web sites are provided forconvenience only and do not in any manner serve as an endorsement of those Websites. The materials at those Web sites are not part of the materials for this IBMproduct and use of those Web sites is at your own risk.
IBM may use or distribute any of the information you supply in any way itbelieves appropriate without incurring any obligation to you.
Licensees of this program who wish to have information about it for the purposeof enabling: (i) the exchange of information between independently createdprograms and other programs (including this one) and (ii) the mutual use of theinformation which has been exchanged, should contact:
IBM Corporation
2Z4A/101
11400 Burnet Road
Austin, TX 78758 U.S.A.
Such information may be available, subject to appropriate terms and conditions,including in some cases payment of a fee.
The licensed program described in this document and all licensed materialavailable for it are provided by IBM under terms of the IBM Customer Agreement,IBM International Program License Agreement or any equivalent agreementbetween us.
Any performance data contained herein was determined in a controlledenvironment. Therefore, the results obtained in other operating environments mayvary significantly. Some measurements may have been made on development-levelsystems and there is no guarantee that these measurements will be the same ongenerally available systems. Furthermore, some measurement may have beenestimated through extrapolation. Actual results may vary. Users of this documentshould verify the applicable data for their specific environment.
Information concerning non-IBM products was obtained from the suppliers ofthose products, their published announcements or other publicly available sources.IBM has not tested those products and cannot confirm the accuracy ofperformance, compatibility or any other claims related to non-IBM products.Questions on the capabilities of non-IBM products should be addressed to thesuppliers of those products.
All statements regarding IBM’s future direction or intent are subject to change orwithdrawal without notice, and represent goals and objectives only.
This information contains examples of data and reports used in daily businessoperations. To illustrate them as completely as possible, the examples include thenames of individuals, companies, brands, and products. All of these names arefictitious and any similarity to the names and addresses used by an actual businessenterprise is entirely coincidental.
COPYRIGHT LICENSE:
176 IBM Tivoli Monitoring for Databases: DB2: User’s Guide

This information contains sample application programs in source language, whichillustrate programming techniques on various operating platforms. You may copy,modify, and distribute these sample programs in any form without payment toIBM, for the purposes of developing, using, marketing or distributing applicationprograms conforming to the application programming interface for the operatingplatform for which the sample programs are written. These examples have notbeen thoroughly tested under all conditions. IBM, therefore, cannot guarantee orimply reliability, serviceability, or function of these programs. You may copy,modify, and distribute these sample programs in any form without payment toIBM for the purposes of developing, using, marketing, or distributing applicationprograms conforming to IBM’s application programming interfaces.
Each copy or any portion of these sample programs or any derivative work, mustinclude a copyright notice as follows:
© (your company name) (year). Portions of this code are derived from IBM Corp.Sample Programs. © Copyright IBM Corp. _enter the year or years_. All rightsreserved.
If you are viewing this information in softcopy form, the photographs and colorillustrations might not appear.
TrademarksIBM, the IBM logo, Tivoli, the Tivoli logo, AIX, DB2, IBMLink, OS/2, OS/400,Tivoli Enterprise Console, and TME are trademarks or registered trademarks ofInternational Business Machines Corporation or Tivoli Systems Inc. in the UnitedStates, other countries, or both.
Lotus and Lotus Notes are trademarks of International Business MachinesCorporation and Lotus Development Corporation in the United States, othercountries, or both.
Microsoft and Windows NT are registered trademarks of Microsoft Corporation inthe United States, other countries, or both.
Java and all Java-based trademarks and logos are trademarks or registeredtrademarks of Sun Microsystems, Inc. in the United States, other countries, or both.
UNIX is a registered trademark of The Open Group in the United States and othercountries.
Other company, product, and service names may be trademarks or service marksof others.
Appendix G. Notices 177

178 IBM Tivoli Monitoring for Databases: DB2: User’s Guide

Index
Aaccess
to the IBM console 118accessibility xiii, 173actions, recovery 6administrators
defined 8subscribing to notice groups 43
assured delivery 53asynchronous delivery 52authorization roles
assigning 17assigning of Tivoli Enterprise Data
Warehouse roles 119db2_dba 8db2_user 8defined 8list of roles necessary to complete
procedures 125Tivoli Management Framework 8
Bbackup pending, property 59books
feedback xonline xordering x
built-in actionadd 95edit 97remove 95
built-in actionsdefined 6
Ccentral data warehouse 116check–point and restart delivery 53clearing events, concept 4client connectivity 64command line interface (CLI) 9command line processor (CLP), running
DB2 from Tivoli 66commands
db2start 62db2stop 62special characters xivsyntax xivwcdb2dbs 29wcdb2dsc 38wcdb2gateway 31wcdb2inst 27wcdb2pg 36wcdb2pt 34wcomprules 134wcprb 134wcrtjob 78wcrtpr 20wcrtprf 47
commands (continued)wcrtprfmgr 47wcrtrb 134wdistrib 53wdmcmd 111wdmdistrib 111wdmeditprf 50, 92, 94, 97, 98, 100,
102, 103, 105, 107, 109wdmeng 111wdmlseng 111, 113wdmmn 112wdmtrceng 111wgetpr 23wimprbclass 134wimprbrules 134wloadrb 134wlookup 134wmv 21wrunjob 82wruntask 70, 141wschedjob 83wsetadmin 18, 43wsetpm 47wsetpr 23wstartesvr 134wstopesvr 134wsub 49
conceptsclearing events 4events (clearing) 4
configuringTivoli Enterprise Console for Tivoli
Business Systems Manager 139control center, Java 67control server 115CPU speed, property 59create
IBM console user 118jobs 78
Customer Support xiiicustomize
data logging information of resourcemodels 108
indications of resource models 93,99, 101
parameters of resource models 102schedules of resource models 104,
106customized tasks 74
defined 69cycles
defined 2
Ddata depoting delivery 53data logging
customize 108defined 6
data marts 116
data marts (continued)assign to Tivoli Enterprise Data
Warehouse user groups 121database code set, property 60database is consistent, property 59database manager configuration release
level, property 59database name, property 59database objects
creating multiple objects 41database territory, property 60databases
creating objects 28, 31endpoints
defined 63opening 63
object properties 59dataless profile managers
icon 48subscribers 46, 47
DB2 command line processor 66DB2 database
containing data marts 116containing historical data 116
DB2 Java control center 67db2_dba authorization role 8db2_user authorization role 8DB2DatabaseManager
creating multiple objects 41creating objects 28discovering objects 41
DB2Discoverycreating objects 37discovering database objects 41discovering instance objects 39
db2ecc ID, creating 25DB2Gateway
creating objects 31DB2InstanceManager
creating multiple objects 39creating objects 26discovering objects 39
DB2Manager ECC Log notice group 43DB2Manager Tmw2k, notice group 43DB2PartitionGroupManager, creating
objects 35DB2PartitionManager, creating
objects 33db2start command 62db2stop command 62default client communication,
property 59default DB path, property 59desktop interface 9dialog boxes
Add Scheduled Job 84Administrators 18Client connectivity test endpoints 65configure task arguments 76configuring task arguments 74
179

dialog boxes (continued)Create a new DB2Discovery
Object 39Create DB2DatabaseManager 30Create DB2Gateway 32Create DB2InstanceManager 28Create
DB2PartitionGroupManager 37Create DB2PartitionManager 35Create Job 79database endpoint 63DB2 Command Line Processor 67DB2 Instance Discovery 41DB2 Instance Properties 60Destination for Task Output 73, 81Discover databases 30Discover Databases 42Discover DCS databases 33Edit Discovery Endpoints 39Endpoint - Instance Client
Connectivity Test 64Execute Task 72, 76Instance Endpoint 58Navigator 22saving arguments 77Set Managed Resources 24Set Notice Groups 44Set Resource Roles 19Set Retry/Cancel Restrictions
Options 86Startup DB2 Instance 62Task Library 71, 75
directory names, notation xvdiscovering
DB2 databases objects 41DB2 instance objects 39
displayof the IBM console 118
distributed monitoring profiles,viewing 57
distributed systemsdefined 1
distributionendpoint rerun 54profiles from the desktop 50profiles using MDist2 52rerun to endpoint 54
Ee-mail contact xiiiECC_Configure_TEC_Classes task 130ECC_TBSM_Discovery task 140edit
resource models 93, 99, 101, 102, 104,106, 108
endpointsconnectivity 64database
defined 63opening 63
dataless 46, 47defined 8distribution rerun 54instance objects
opening 57managing profiles 110
endpoints (continued)managing resource models 110resource models distributed to 112resource models running on 112viewing properties of 59
environment variables, notation xvevent monitors
defined 4Health Console 5Tivoli Business Systems Manager 5Tivoli Enterprise Console server 5
eventsdefined 4, 130receive 138Tivoli Enterprise Console 130
events (clearing), concept 4extract, transform, and load utilities
access from applications 115
Ffeedback about publications xiii
Ggateway objects
defined 31gateways
management of 111gateways, defined 9Gathering Historical Data Warehouse 2
Hheartbeat function 2historical data
access using Tivoli Enterprise DataWarehouse 115
gathering 2holes 93
defined 3occurrences of 93
IIBM console
access to 118Tivoli Enterprise Data Warehouse
functions available through 118user creation 118
IBM DB2DB2 Server 116Universal Database Enterprise
Edition 116IBM Tivoli Monitoring
about 1gateway management 111overview 91
IBM Tivoli Monitoring for Databases:DB2
integrate with Tivoli Business SystemsManager 138
receive events 138
IBM Tivoli Monitoring for Databases:DB2, installing
setting up and starting the Tivolienvironment 16
iconsDB2DatabaseManager 29DB2Discovery 37DB2Gateway 31DB2InstanceManager 26DB2InstanceManager object in down
state 61DB2PartitionGroupManager 35DB2PartitionManager 33DB2PartitionManager object in down
state 61indications
customize 93defined 3occurrences of 93
installing IBM Tivoli Monitoring forDatabases: DB2
setting up and starting the Tivolienvironment 16
instance name, property 59instance objects
changing label 61checking the state 61creating 26creating multiple objects 39defined 26opening 57properties 58starting 62stopping 62viewing 57
IPX socket, property 59
JJava control center 67job
about 78jobs
creation of 78defined 69running 81schedule of 82
Llogging (data)
defined 6
Mmanaged nodes
run tasks on 69managed resources
defined 1, 8properties 58types
adding 23listed 23removing 23
management server 137
180 IBM Tivoli Monitoring for Databases: DB2: User’s Guide

manualsfeedback xonline xordering x
MDist2assured delivery function 53asynchronous delivery function 52check-point and restart function 53data depoting delivery function 53profile distribution 52
messages 147Monitoring for DB2
moving objects from 21monitoring profiles, defined 46monitors
Tivoli Business Systems Manager 5
Nnode type, property 59notation
environment variables xvpath names xvtypeface xv
notice groupsDB2Manager ECC Log 43DB2Manager Tmw2k 43subscribing 43
notices 175
Ooccurrences 93
defined 3online publications xiioperating systems, ID 25ordering publications xiioverview
IBM Tivoli Monitoring 91
Pparameters
customize 102defined 6
partition group objectscreating 35defined 35members
adding 42removing 42
properties 60starting 62stopping 62
partition objectscreating 33defined 33properties 60starting 62stopping 62
path names, notation xvpolicy regions
creating 20defined 20
problem determination 143
profile managerscreating 46creation of 55dataless 46, 47defined 91setting up 46subscribing resources 48
profilesadding custom resource models
to 92adding default resource models to 49creating 46defined 6, 91distribution from the desktop 50distribution using MDist2 52management at endpoints 110monitoring 46
propertiesdatabase objects 59instance objects 58partition group objects 60partition objects 60
publicationsfeedback xonline xordering x
Rrecovery actions, defined 6remove
Tivoli Business Systems Manager 141report interface 116reports
access from applications 115create 123modify default settings 122name of 124run using the report interface 121schedule to run automatically 122
resource modelbuilt-in action 95
resource modelsadding to profiles 49, 92built-in action 97create schedule rules 104customize data logging
information 108customize indications 93, 99, 101customize parameters 102defined 7distributed to endpoints 112editing of 93, 99, 101, 102, 104, 106,
108management at endpoints 110running on an endpoint 112setup 45
resourcessubscribing 48
resources, manageddefined 1
rollforward pending, property 60
Sschedules
create rules 104customize monitoring 106
schedulingdefined 7jobs 54
scriptssetup_env.csh 17setup_env.sh 17
send notice 101service name, property 59, 60setup
quick-reference 11resource models 45
setup_env.csh script 17setup_env.sh script 17shell, definition 9shutdown object 62standard tasks 70
defined 69star schemas
Tivoli Enterprise Data Warehouse, listof 124
startup object 62subscribing
notice groups 43resources 48
Ttask libraries
customize tasks 74Task server 138tasks
about 70customize 74customized 69defined 69ECC_TBSM_Discovery 140run 69specify for an indication 99standard 69, 70Tivoli Management Framework 7
TEC, See Tivoli Enterprise Console 129thresholds
defined 7Tivoli Business Systems Manager
about 137as monitor, concept 5components of 137configure Tivoli Enterprise
Console 139defining IBM Tivoli Monitoring for
Databases: DB2 objects to 140discovering resources for 140integrate with IBM Tivoli Monitoring
for Databases: DB2 138management server 137prerequisites 138remove 141Task server 138Tivoli Event Enablement 138uninstall 141workstation 137
Tivoli Customer Support xiii
Index 181

Tivoli Enterprise Consoleconfiguring using a task 130configuring using Tivoli Enterprise
Console 133console 130event class
activating 134event server, checking 134events 130
groups 130responses 130sources 130viewing 130, 135
overview 129rule base
activating 134copying 134creating 134loading 134overview 130
Tivoli Enterprise Data Warehouseassign user groups to data marts 121assign users to user groups 120assigning authorization roles 119capabilities 115central data warehouse 116components 115control server 115create reports 123data marts 116functions available through the IBM
console 118list of star schemas 124modify report’s default settings 122overview 115report interface 116report names 124run reports 121schedule reports to run
automatically 122user group creation 120
Tivoli Event Enablement 138Tivoli Management Framework
tasks, defined 7
Uuninstall
Tivoli Business Systems Manager 141user groups
assign Tivoli Enterprise DataWarehouse data marts 121
assign Tivoli Enterprise DataWarehouse users to 120
create 120users
assign Tivoli Enterprise DataWarehouse authorization roles 119
assign to Tivoli Enterprise DataWarehouse user groups 120
IBM console 118
Vvariables, notation for xv
Wwcdb2dbs command 29wcdb2dsc command 38wcdb2gateway command 31wcdb2inst command 27wcdb2pg command 36wcdb2pt command 34wcomprules command 134wcprb command 134wcrtjob command 78wcrtpr command 20wcrtprf command 47wcrtprfmgr command 47wcrtrb command 134wdistrib command 53wdmcmd commands 111wdmdistrib commands 111wdmeditprf command 50, 92, 94, 97, 98,
100, 102, 103, 105, 107, 109wdmeng commands 111wdmlseng command 113wdmlseng commands 111wdmmn command 112wdmtrceng commands 111wgetpr command 23wimprbclass command 134wimprbrules command 134wloadrb command 134wlookup command 134wmv command 21workstation 137wrunjob command 82wruntask command 70, 141wschedjob command 83wsetadmin command 18, 43wsetpm command 47wsetpr command 23wstartesvr command 134wstopesvr command 134wsub command 49
182 IBM Tivoli Monitoring for Databases: DB2: User’s Guide


����
Printed in U.S.A.
SC23-4726-00