ibm® edge2013 - hot spot migration with easytier and v7000
DESCRIPTION
IBM® Edge2013 - Hot Spot Migration with EasyTier and V7000TRANSCRIPT

Technical Edge 2013 | June 10 – 14 Mandalay Bay, Las Vegas, NV _______________________________________________________________________________
Edge2013 1 © 2013 IBM Corporation
1538 Hot Spot Migration with Easy Tier and Storwize V7000 Jeff Ottman

Technical Edge 2013 | June 10 – 14 Mandalay Bay, Las Vegas, NV _______________________________________________________________________________
Edge2013 2 © 2013 IBM Corporation
The following terms are trademarks of International Business Machines Corporation in the United States, other countries, or both: IBM, IBM Logo, on demand business logo, Enterprise Storage Server, xSeries, BladeCenter, eServer, ServeRAID and FlashCopy, System Storage, Tivoli, Easy Tier. The following are trademarks or registered trademarks of other companies. Intel is a trademark of the Intel Corporation in the United States and other countries. Java and all Java-related trademarks and logos are trademarks or registered trademarks of Sun
Microsystems, Inc., in the United States and other countries. Lotus, Notes, and Domino are trademarks or registered trademarks of Lotus Development Corporation. Linux is a registered trademark of Linus Torvalds. Microsoft, Windows and Windows NT are registered trademarks of Microsoft Corporation. SET and Secure Electronic Transaction are trademarks owned by SET Secure Electronic Transaction LLC. UNIX is a registered trademark of The Open Group in the United States and other countries. Storwize is a trademark of Storwize Inc., an IBM company, and used under license by IBM. * All other products may be trademarks or registered trademarks of their respective companies.
Technical Edge 2013 | June 10 – 14 Mandalay Bay, Las Vegas, NV _______________________________________________________________________________
Edge2013 3 © 2013 IBM Corporation
Hybrid Pools and Easy Tier
Introduction We will now explore the Easy Tier function of the Storwize V7000. Easy Tier provides for the automatic placement of ‘hot’ extents to SSDs managed by the cluster. In this lab exercise you will create a hybrid storage pool with both hard disk drive based MDisks and solid state drive based MDisks. Next, you will create volumes within the hybrid storage pool. The IOmeter tool will be used to create IO activity on these volumes hence IO on the underlying drives. We will then monitor utilization. In a later lab, the results will show migration of the hot extents from the HDD-based MDisks to SSD-based MDisks.
Objective Using Remote Desktop, the system GUI and CLI, you will perform the following tasks:
Create a hybrid storage pool to implement Easy Tier technology with SSD-based MDisks
Use Easy Tier to evaluate the IO activity of a volume in a single tier pool Create volumes from a hybrid storage pool Map the new volumes to a host and generate IO activity View the distribution of the volume extents in storage pools Use the Storwize V7000 performance monitor to view current utilization of the
system

Technical Edge 2013 | June 10 – 14 Mandalay Bay, Las Vegas, NV _______________________________________________________________________________
Edge2013 4 © 2013 IBM Corporation
Directions
Part 1: Configuring the Storwize V7000 for Easy Tier
The Storwize V7000 GUI displays the Easy Tier setting and status of storage pools. However, to manually change the Easy Tier setting of a pool, the CLI must be used. We will first change the Easy Tier setting for the single tier COLORDS3K_SATApool. ___1. Select the PuTTY icon from the Adminx desktop. Select the COLOR_SWV7K saved
session and open the CLI. ___2. List the current storage pools to view their attributes. Locate the
COLORDS3K_SATApool entry and note its Easy Tier setting is auto and its status is inactive. Use the following CLI command:
lsmdiskgrp –delim : IBM_2076:PINK_SWV7K:admin>lsmdiskgrp -delim : id:name:status:mdisk_count:vdisk_count:capacity:extent_size:free_capacity:virtual_capacity:used_capacity:real_capacity:overallocation:warning:easy_tier:easy_tier_status:compression_active:compression_virtual_capacity:compression_compressed_capacity:compression_uncompressed_capacity 0:CHERRY_Hybridpool:online:4:2:4.08TB:256:3.99TB:100.00GB:100.00GB:100.00GB:2:80:auto:active:no:0.00MB:0.00MB:0.00MB 1:CHERRYDS3K_SASpool:online:3:0:300.00GB:256:300.00GB:0.00MB:0.00MB:0.00MB:0:80:auto:inactive:no:0.00MB:0.00MB:0.00MB 2:CHERRYDS3K_SATApool:online:3:1:120.00GB:256:110.00GB:10.00GB:10.00GB:10.00GB:8:80:auto:inactive:no:0.00MB:0.00MB:0.00MB

Technical Edge 2013 | June 10 – 14 Mandalay Bay, Las Vegas, NV _______________________________________________________________________________
Edge2013 5 © 2013 IBM Corporation
___3. Currently volumes allocated from the COLORDS3K_SATApool are not being measured by Easy Tier for IO activity. Display the details of the VW_COLOR3 volume and note its Easy Tier setting and status: Lsvdisk VW_COLOR3
IBM_2076:PINK_SWV7K:admin>lsvdisk VW_CHERRY3 id 2 name VW_CHERRY3 IO_group_id 0 IO_group_name io_grp0 status online mdisk_grp_id 2 mdisk_grp_name CHERRYDS3K_SATApool capacity 10.00GB type striped formatted no mdisk_id mdisk_name FC_id FC_name RC_id RC_name vdisk_UID 6005076802938000A800000000000003 throttling 0 preferred_node_id 2 fast_write_state empty cache readwrite udid fc_map_count 0 sync_rate 50 copy_count 1 se_copy_count 0 filesystem mirror_write_priority latency RC_change no . . . se_copy no
easy_tier on easy_tier_status inactive tier generic_ssd tier_capacity 0.00MB tier generic_hdd tier_capacity 10.00GB compressed_copy no uncompressed_used_capacity 10.00GB

Technical Edge 2013 | June 10 – 14 Mandalay Bay, Las Vegas, NV _______________________________________________________________________________
Edge2013 6 © 2013 IBM Corporation
To enable measurement of IO activity on volumes in single tier storage pools, the Easy
Tier setting of the storage pool must be changed via the CLI. ___4. Enter the following command to change the Easy Tier setting to on for the
COLORDS3K_SATApool. List the storage pools to validate the Easy Tier setting and status.
chmdiskgrp –easytier on COLORDS3K_SATApool lsmdiskgrp –delim : IBM_2076:PINK_SWV7K:admin>chmdiskgrp -easytier on CHERRYDS3K_SATApool IBM_2076:PINK_SWV7K:admin>lsmdiskgrp -delim : id:name:status:mdisk_count:vdisk_count:capacity:extent_size:free_capacity:virtual_capacity:used_capacity:real_capacity:overallocation:warning:easy_tier:easy_tier_status:compression_active:compression_virtual_capacity:compression_compressed_capacity:compression_uncompressed_capacity 0:CHERRY_Hybridpool:online:4:2:4.08TB:256:3.99TB:100.00GB:100.00GB:100.00GB:2:80:auto:active:no:0.00MB:0.00MB:0.00MB 1:CHERRYDS3K_SASpool:online:3:0:300.00GB:256:300.00GB:0.00MB:0.00MB:0.00MB:0:80:auto:inactive:no:0.00MB:0.00MB:0.00MB 2:CHERRYDS3K_SATApool:online:3:1:120.00GB:256:110.00GB:10.00GB:10.00GB:10.00GB:8:80:on:active:no:0.00MB:0.00MB:0.00MB
___5. Locate the COLORDS3K_SATApool entry again and now note the Easy Tier setting for
the pool has been changed from auto to on and its status is now active.
Technical Edge 2013 | June 10 – 14 Mandalay Bay, Las Vegas, NV _______________________________________________________________________________
Edge2013 7 © 2013 IBM Corporation
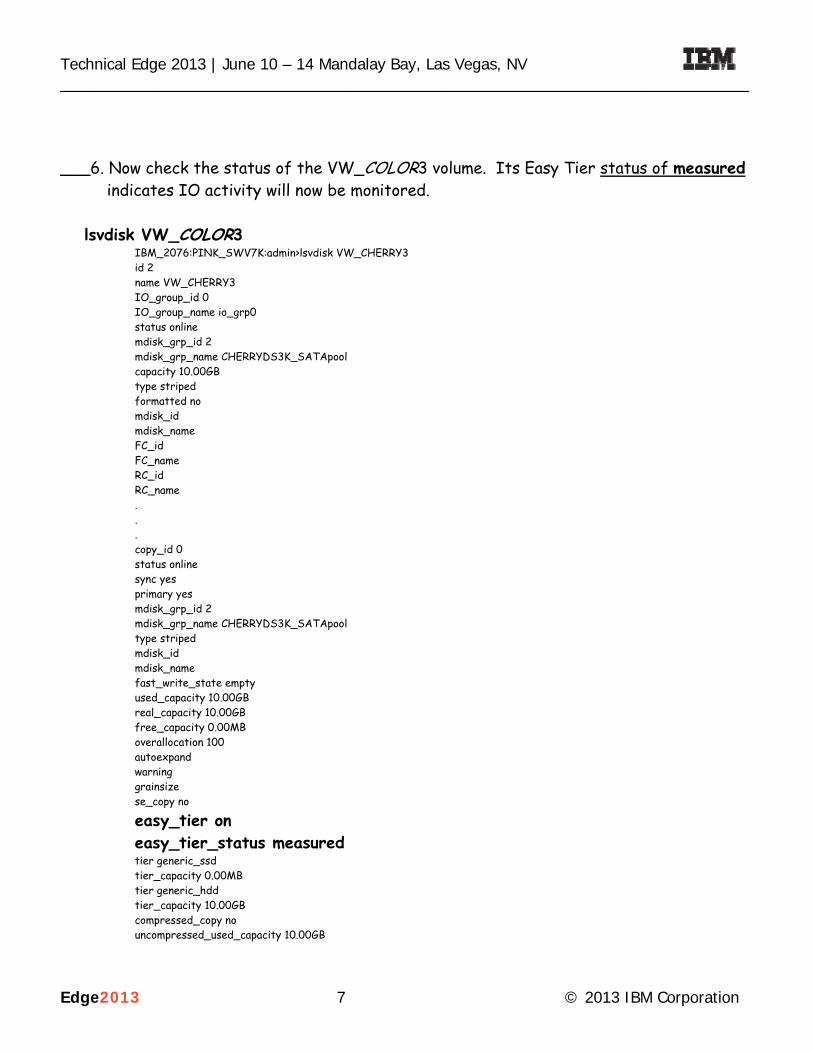
___6. Now check the status of the VW_COLOR3 volume. Its Easy Tier status of measured
indicates IO activity will now be monitored.
lsvdisk VW_COLOR3 IBM_2076:PINK_SWV7K:admin>lsvdisk VW_CHERRY3 id 2 name VW_CHERRY3 IO_group_id 0 IO_group_name io_grp0 status online mdisk_grp_id 2 mdisk_grp_name CHERRYDS3K_SATApool capacity 10.00GB type striped formatted no mdisk_id mdisk_name FC_id FC_name RC_id RC_name . . . copy_id 0 status online sync yes primary yes mdisk_grp_id 2 mdisk_grp_name CHERRYDS3K_SATApool type striped mdisk_id mdisk_name fast_write_state empty used_capacity 10.00GB real_capacity 10.00GB free_capacity 0.00MB overallocation 100 autoexpand warning grainsize se_copy no
easy_tier on easy_tier_status measured tier generic_ssd tier_capacity 0.00MB tier generic_hdd tier_capacity 10.00GB compressed_copy no uncompressed_used_capacity 10.00GB

Technical Edge 2013 | June 10 – 14 Mandalay Bay, Las Vegas, NV _______________________________________________________________________________
Edge2013 8 © 2013 IBM Corporation
Let’s look at a hybrid pool. A pool has already been created with both HDD and SSD-based MDisks. With the Easy Tier default setting of auto this will enable the measurement and automatic data placement functions on volumes in the pool. ___7. Return to the Storwize V7000 GUI. From the navigation tree, select the Pools function
icon and select Volumes by Pool from the pull-down. Click the COLOR_Hybridpool button from the Pools Filter list.

Technical Edge 2013 | June 10 – 14 Mandalay Bay, Las Vegas, NV _______________________________________________________________________________
Edge2013 9 © 2013 IBM Corporation
___8. From the Pools pull-down select MDisks by Pools. Click the + signs in front of the
COLOR_Hybridpool. To see the tier of the MDisks in each pool, right click on the blue title bar and check the Tier box to display the MDisk’s tier.

Technical Edge 2013 | June 10 – 14 Mandalay Bay, Las Vegas, NV _______________________________________________________________________________
Edge2013 10 © 2013 IBM Corporation
View the SSD array configuration. ___9. The tier column is added showing the technology type of the MDisks in the pool.
Technical Edge 2013 | June 10 – 14 Mandalay Bay, Las Vegas, NV _______________________________________________________________________________
Edge2013 11 © 2013 IBM Corporation
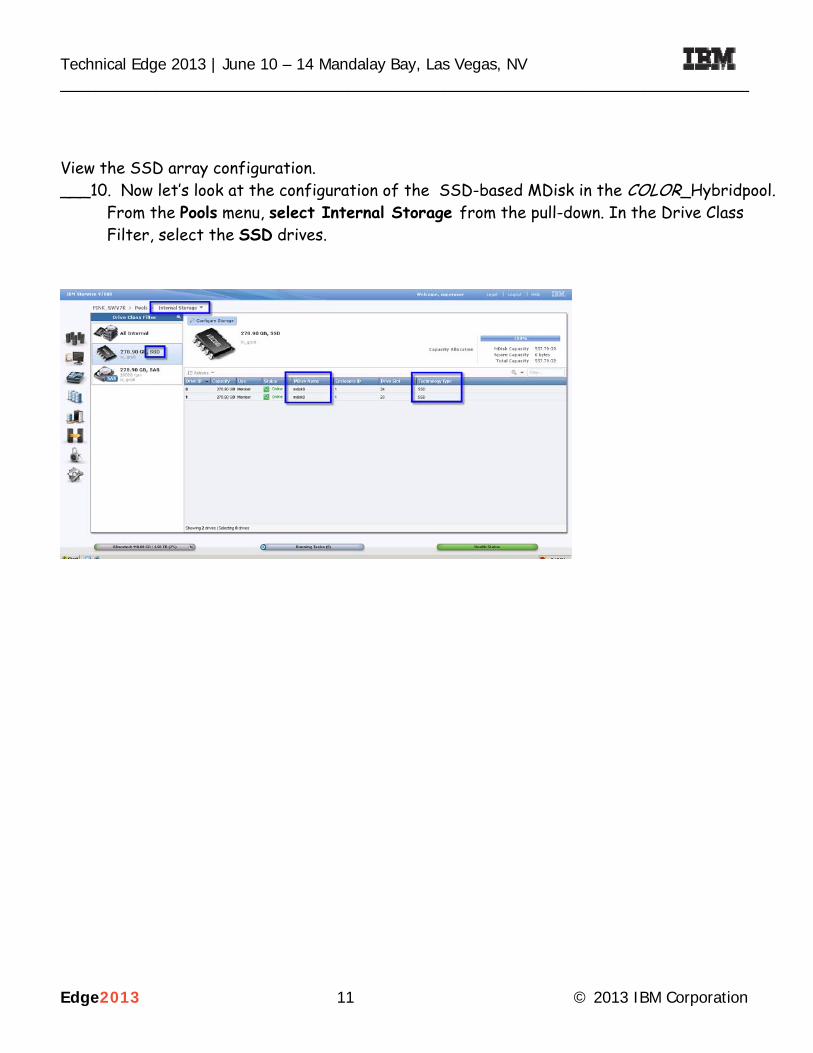
View the SSD array configuration. ___10. Now let’s look at the configuration of the SSD-based MDisk in the COLOR_Hybridpool.
From the Pools menu, select Internal Storage from the pull-down. In the Drive Class Filter, select the SSD drives.
Technical Edge 2013 | June 10 – 14 Mandalay Bay, Las Vegas, NV _______________________________________________________________________________
Edge2013 12 © 2013 IBM Corporation
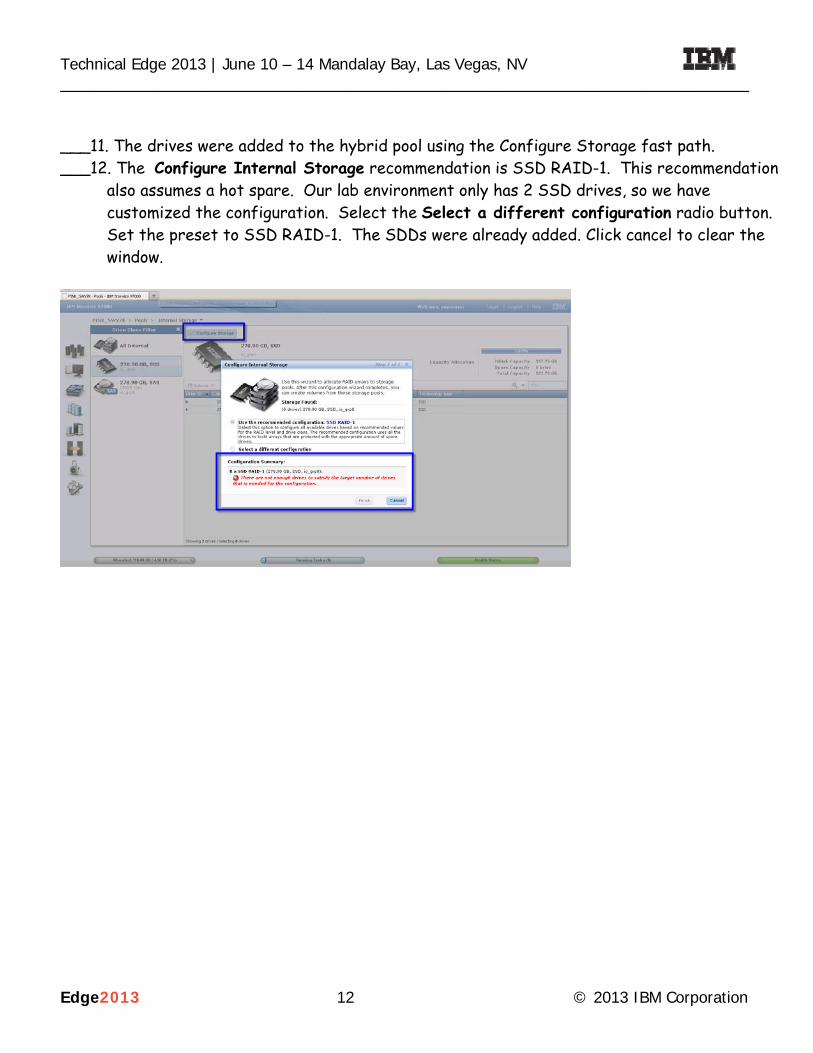
___11. The drives were added to the hybrid pool using the Configure Storage fast path. ___12. The Configure Internal Storage recommendation is SSD RAID-1. This recommendation
also assumes a hot spare. Our lab environment only has 2 SSD drives, so we have customized the configuration. Select the Select a different configuration radio button. Set the preset to SSD RAID-1. The SDDs were already added. Click cancel to clear the window.
Technical Edge 2013 | June 10 – 14 Mandalay Bay, Las Vegas, NV _______________________________________________________________________________
Edge2013 13 © 2013 IBM Corporation
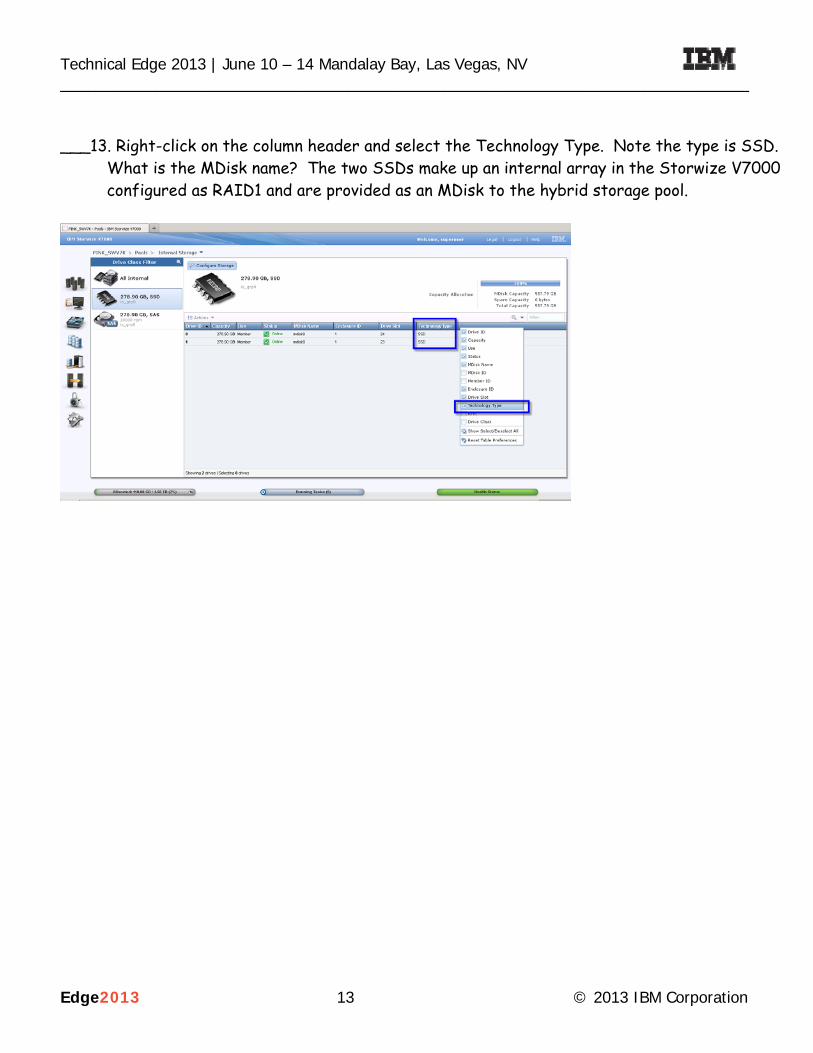
___13. Right-click on the column header and select the Technology Type. Note the type is SSD. What is the MDisk name? The two SSDs make up an internal array in the Storwize V7000 configured as RAID1 and are provided as an MDisk to the hybrid storage pool.

Technical Edge 2013 | June 10 – 14 Mandalay Bay, Las Vegas, NV _______________________________________________________________________________
Edge2013 14 © 2013 IBM Corporation
___14. Select MDisks by Pool from the Pools pull-down.The COLOR_Hybridpool is a hybrid pool.
Since both SSD-based and HDD-based MDisks are in this pool, and since the Easy Tier setting for the pool defaults to auto, the Easy Tier status of the pool became active automatically. Notice the Easy Tier icon is displayed above the pool icon.
Technical Edge 2013 | June 10 – 14 Mandalay Bay, Las Vegas, NV _______________________________________________________________________________
Edge2013 15 © 2013 IBM Corporation
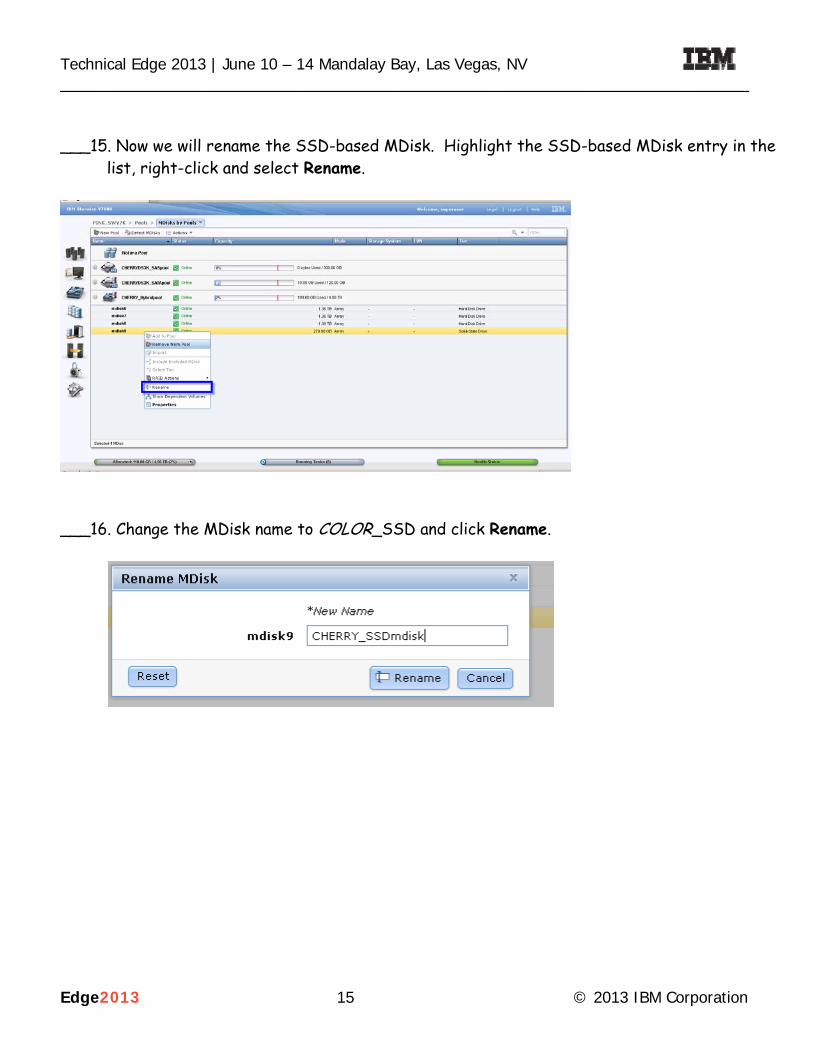
___15. Now we will rename the SSD-based MDisk. Highlight the SSD-based MDisk entry in the
list, right-click and select Rename.
___16. Change the MDisk name to COLOR_SSD and click Rename.

Technical Edge 2013 | June 10 – 14 Mandalay Bay, Las Vegas, NV _______________________________________________________________________________
Edge2013 16 © 2013 IBM Corporation
___17. Review the generated CLI command then click Close.

Technical Edge 2013 | June 10 – 14 Mandalay Bay, Las Vegas, NV _______________________________________________________________________________
Edge2013 17 © 2013 IBM Corporation
___18. The SSD-based MDisk is now renamed in the storage pool list of MDisks. If it is not
displayed right-click on the column header and display the Tier. The pool shows both HDD and SSD tiers.
Technical Edge 2013 | June 10 – 14 Mandalay Bay, Las Vegas, NV _______________________________________________________________________________
Edge2013 18 © 2013 IBM Corporation
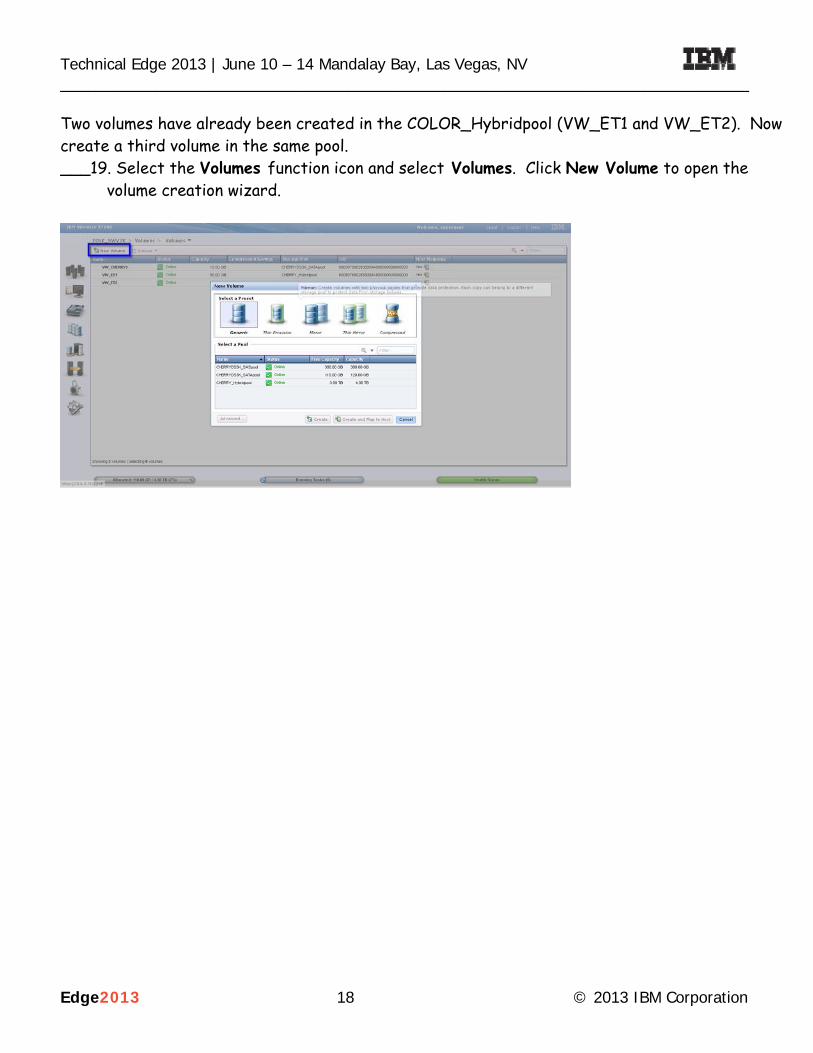
Two volumes have already been created in the COLOR_Hybridpool (VW_ET1 and VW_ET2). Now create a third volume in the same pool. ___19. Select the Volumes function icon and select Volumes. Click New Volume to open the
volume creation wizard.

Technical Edge 2013 | June 10 – 14 Mandalay Bay, Las Vegas, NV _______________________________________________________________________________
Edge2013 19 © 2013 IBM Corporation
___20. Select the Generic preset and the COLOR_Hybridpool storage pool.

Technical Edge 2013 | June 10 – 14 Mandalay Bay, Las Vegas, NV _______________________________________________________________________________
Edge2013 20 © 2013 IBM Corporation
___21. In the Storwize V7000 GUI select the volume icon and select New Volume. Create the
volume as shown below. Use the Generic Preset and name the volumes: VW_ET3, The volume should be 10 GB in size. Select Create and Map to Host.
___22. Review the CLI commands generated, and then click Continue. Next, map the volumes to the COLORWIN1 host. Select COLORWIN1 from the host pull-down.
Technical Edge 2013 | June 10 – 14 Mandalay Bay, Las Vegas, NV _______________________________________________________________________________
Edge2013 21 © 2013 IBM Corporation
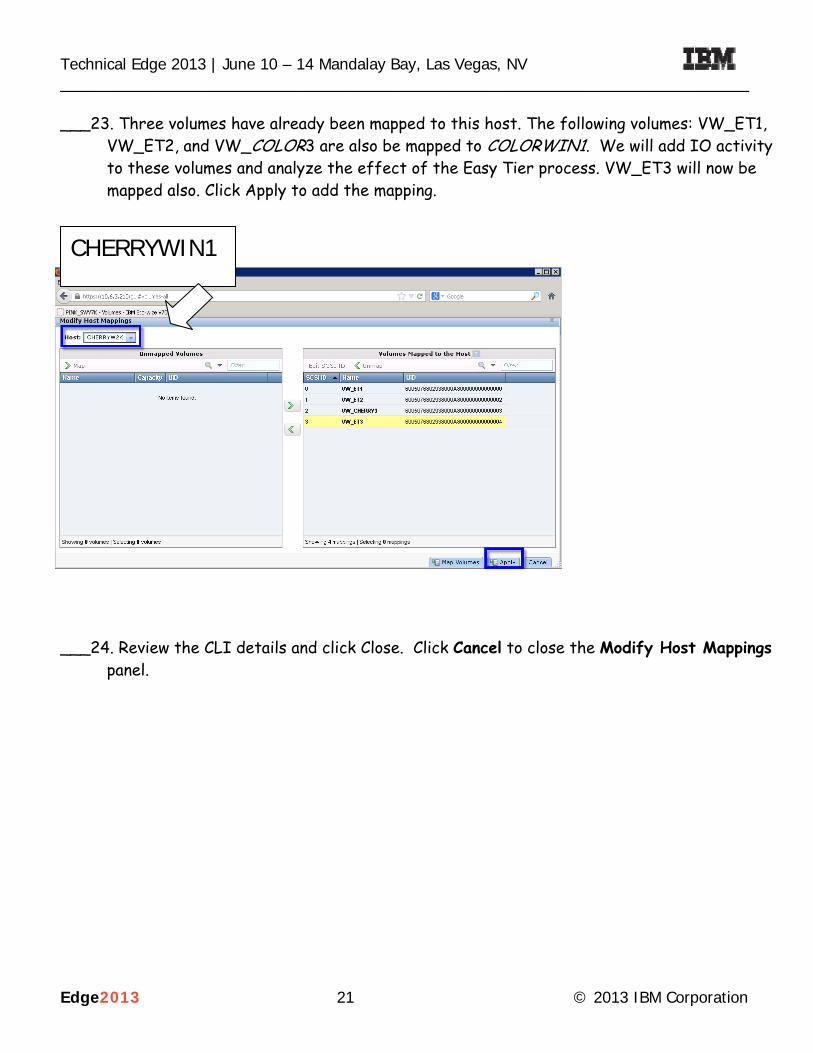
___23. Three volumes have already been mapped to this host. The following volumes: VW_ET1, VW_ET2, and VW_COLOR3 are also be mapped to COLORWIN1. We will add IO activity to these volumes and analyze the effect of the Easy Tier process. VW_ET3 will now be mapped also. Click Apply to add the mapping.
___24. Review the CLI details and click Close. Click Cancel to close the Modify Host Mappings
panel.
CHERRYWIN1
Technical Edge 2013 | June 10 – 14 Mandalay Bay, Las Vegas, NV _______________________________________________________________________________
Edge2013 22 © 2013 IBM Corporation
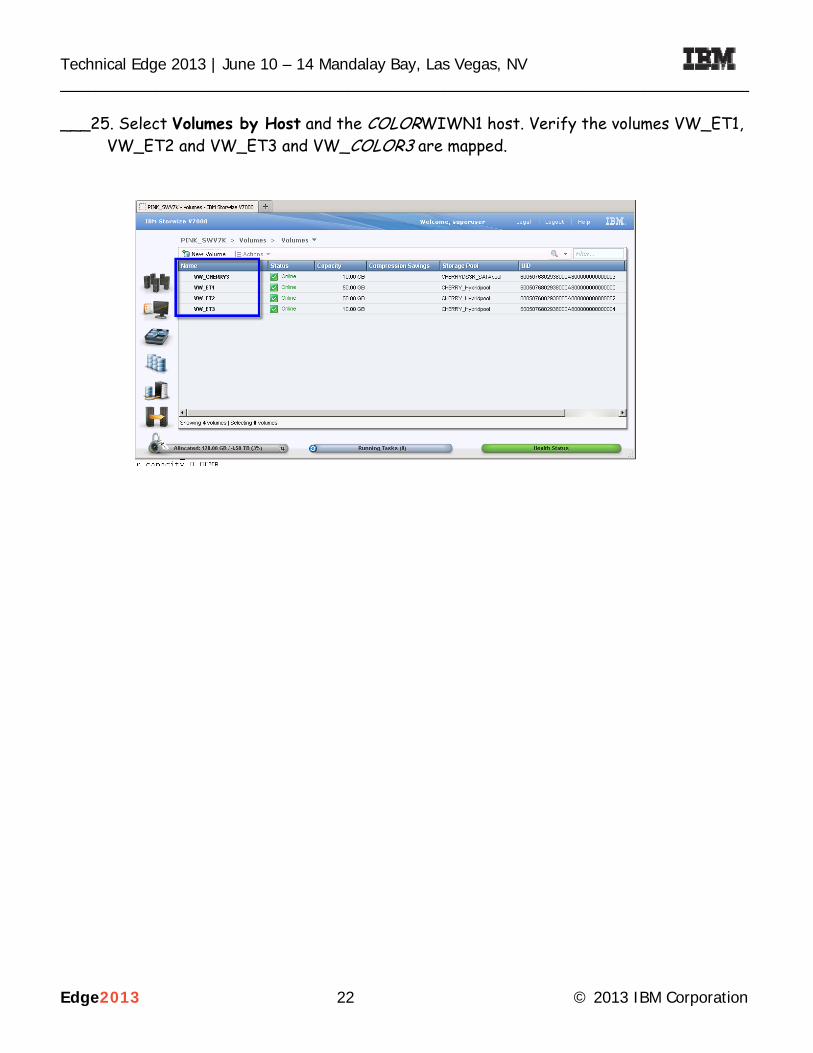
___25. Select Volumes by Host and the COLORWIWN1 host. Verify the volumes VW_ET1, VW_ET2 and VW_ET3 and VW_COLOR3 are mapped.
Technical Edge 2013 | June 10 – 14 Mandalay Bay, Las Vegas, NV _______________________________________________________________________________
Edge2013 23 © 2013 IBM Corporation
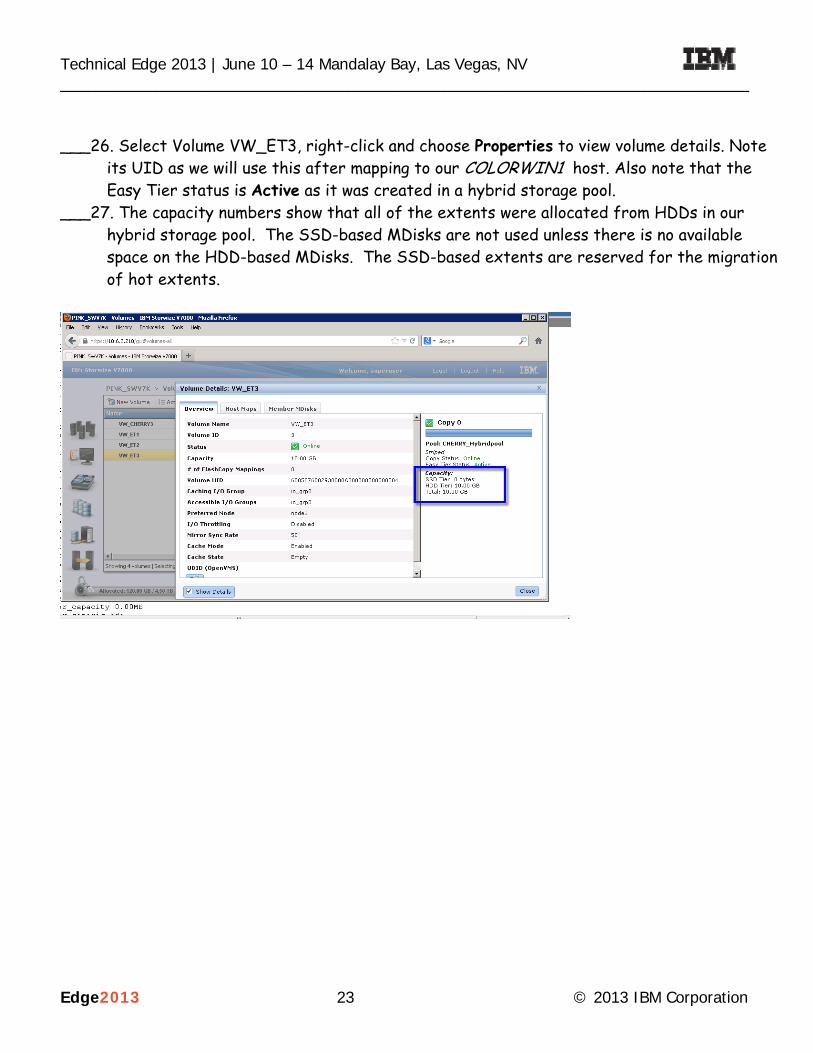
___26. Select Volume VW_ET3, right-click and choose Properties to view volume details. Note
its UID as we will use this after mapping to our COLORWIN1 host. Also note that the Easy Tier status is Active as it was created in a hybrid storage pool.
___27. The capacity numbers show that all of the extents were allocated from HDDs in our hybrid storage pool. The SSD-based MDisks are not used unless there is no available space on the HDD-based MDisks. The SSD-based extents are reserved for the migration of hot extents.

Technical Edge 2013 | June 10 – 14 Mandalay Bay, Las Vegas, NV _______________________________________________________________________________
Edge2013 24 © 2013 IBM Corporation
Now review where the extents for the volumes were allocated, select Member MDisks. From the column header, right-click and check the box next to Tier and uncheck the box next to Storage System. ___28. All extents have been allocated from HDDs in the hybrid pool. Also check the extent
allocation for the VW_ET2 and VW_ET3 volumes - which will be similar. The actual number of extents on each MDisk is also listed.

Technical Edge 2013 | June 10 – 14 Mandalay Bay, Las Vegas, NV _______________________________________________________________________________
Edge2013 25 © 2013 IBM Corporation
___29. The following is the current status of Easy Tier with our single and hybrid pools. Use: lsmdiskgrp <pool name> to verify the Easy Tier status. Storage Pool COLOR_Hybridpool COLORDS3K_SATApool #tiers two one easy_tier (on/auto/of auto auto easy_ tier_status active on

Technical Edge 2013 | June 10 – 14 Mandalay Bay, Las Vegas, NV _______________________________________________________________________________
Edge2013 26 © 2013 IBM Corporation
___30. We will now create Windows disks for the mapped volumes and add IO activity using the
Iometer tool. ___31. Now locate the icon on the Remote Desktop for the COLORWIN1 host. Double-click and
login as Administrator/password. Click Start and then select My Computer->Manage to open Computer Management.
___32. From Computer Management, select Action->Rescan Disks. One new disk is discovered.
First initialize the disks by right-clicking Disk 2 and select Initialize Disk. Select all three disks and click OK.
Technical Edge 2013 | June 10 – 14 Mandalay Bay, Las Vegas, NV _______________________________________________________________________________
Edge2013 27 © 2013 IBM Corporation
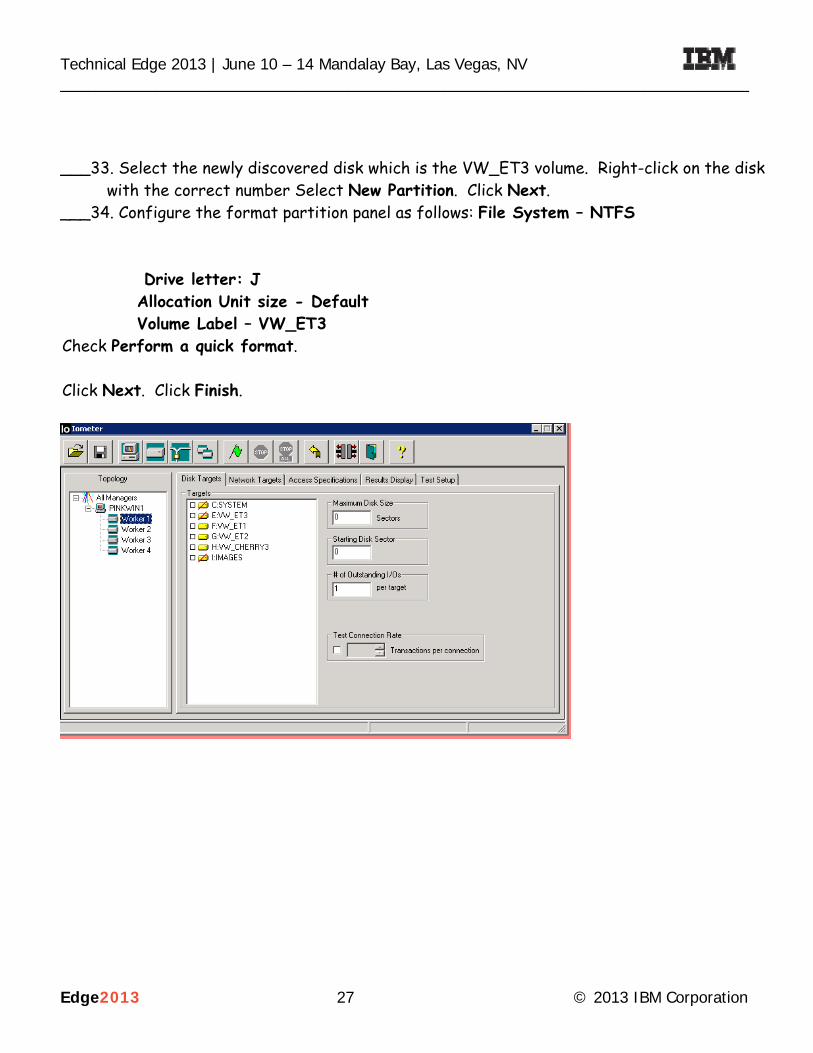
___33. Select the newly discovered disk which is the VW_ET3 volume. Right-click on the disk
with the correct number Select New Partition. Click Next. ___34. Configure the format partition panel as follows: File System – NTFS
Drive letter: J Allocation Unit size - Default Volume Label – VW_ET3
Check Perform a quick format. Click Next. Click Finish.
Technical Edge 2013 | June 10 – 14 Mandalay Bay, Las Vegas, NV _______________________________________________________________________________
Edge2013 28 © 2013 IBM Corporation
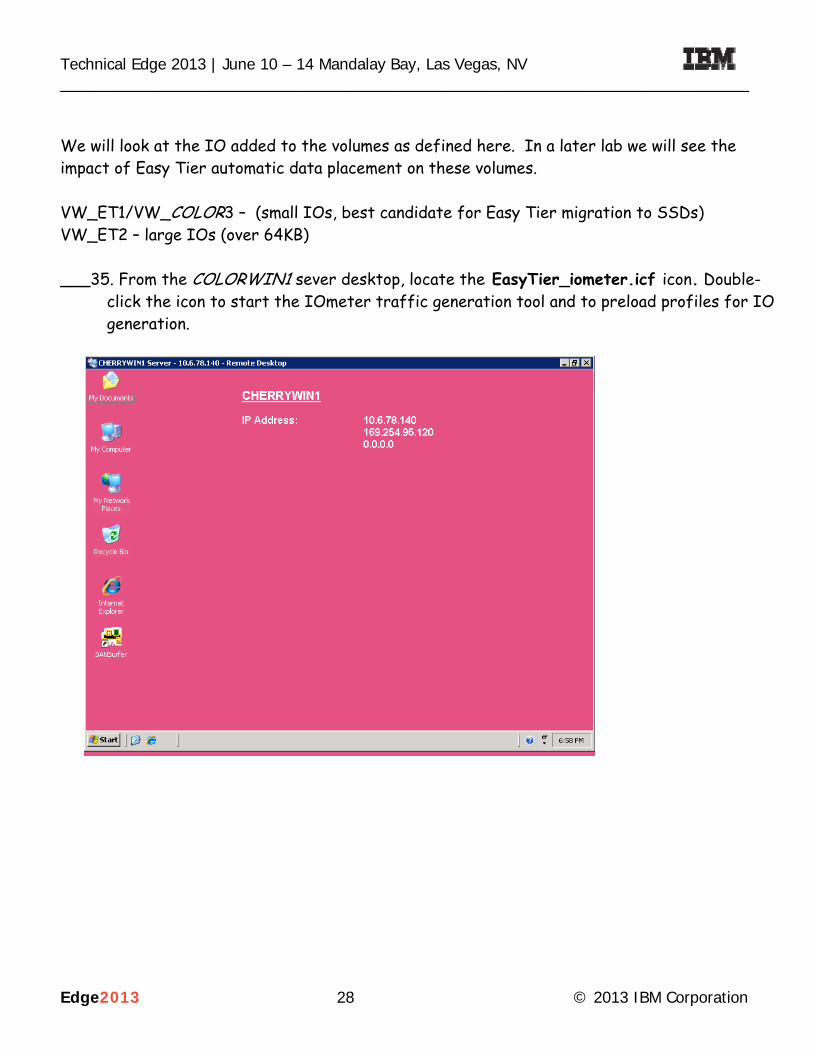
We will look at the IO added to the volumes as defined here. In a later lab we will see the impact of Easy Tier automatic data placement on these volumes. VW_ET1/VW_COLOR3 – (small IOs, best candidate for Easy Tier migration to SSDs) VW_ET2 – large IOs (over 64KB) ___35. From the COLORWIN1 sever desktop, locate the EasyTier_iometer.icf icon. Double-
click the icon to start the IOmeter traffic generation tool and to preload profiles for IO generation.

Technical Edge 2013 | June 10 – 14 Mandalay Bay, Las Vegas, NV _______________________________________________________________________________
Edge2013 29 © 2013 IBM Corporation
The Iometer GUI opens. You should see the COLORWIN1 server listed in the Topology column with a list of Workers. We will configure two of the Workers to generate IO to our created volumes.
CHERRYWIN1
Technical Edge 2013 | June 10 – 14 Mandalay Bay, Las Vegas, NV _______________________________________________________________________________
Edge2013 30 © 2013 IBM Corporation
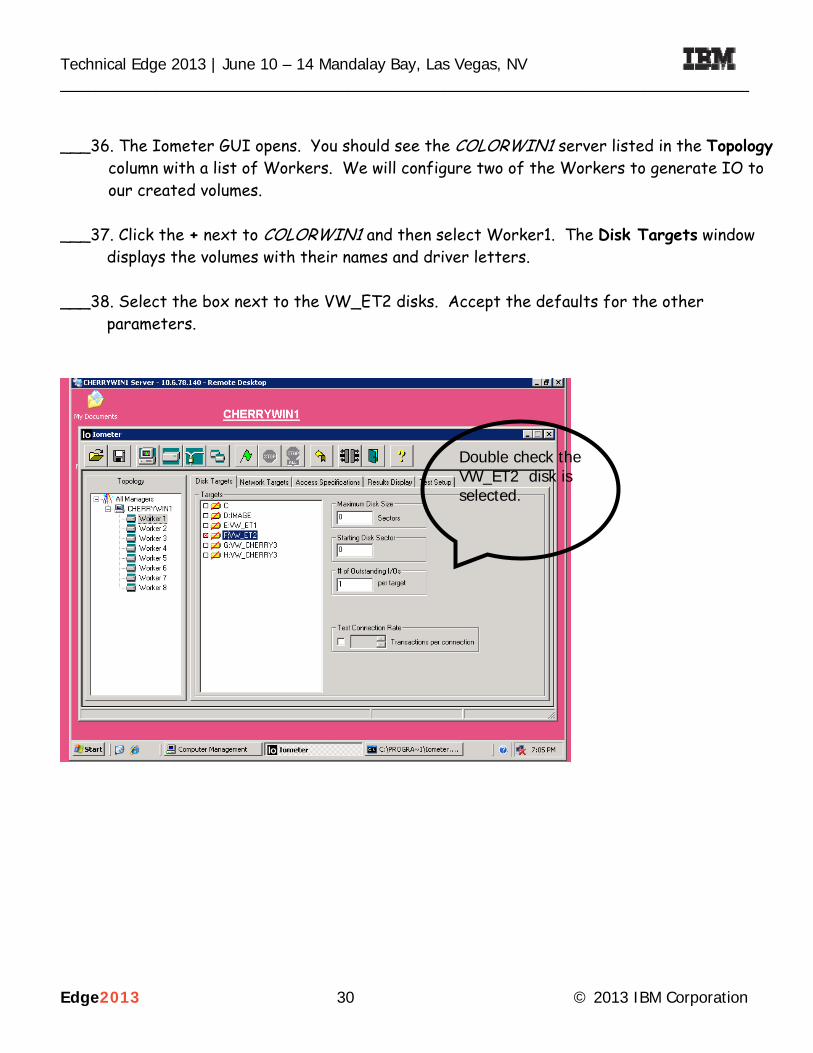
___36. The Iometer GUI opens. You should see the COLORWIN1 server listed in the Topology
column with a list of Workers. We will configure two of the Workers to generate IO to our created volumes.
___37. Click the + next to COLORWIN1 and then select Worker1. The Disk Targets window
displays the volumes with their names and driver letters. ___38. Select the box next to the VW_ET2 disks. Accept the defaults for the other
parameters.
Double check the VW_ET2 disk is selected.

Technical Edge 2013 | June 10 – 14 Mandalay Bay, Las Vegas, NV _______________________________________________________________________________
Edge2013 31 © 2013 IBM Corporation
___39. Select the Access Specification tab. Select VW_ET2 from the Global Access
Specifications list and click the Edit button. The preconfigured specifications are listed. Transfer Request size - 1 M 2KB Percent Read/Write Distribution - 100% Read Name – VW_ET2
a
b
c
Technical Edge 2013 | June 10 – 14 Mandalay Bay, Las Vegas, NV _______________________________________________________________________________
Edge2013 32 © 2013 IBM Corporation
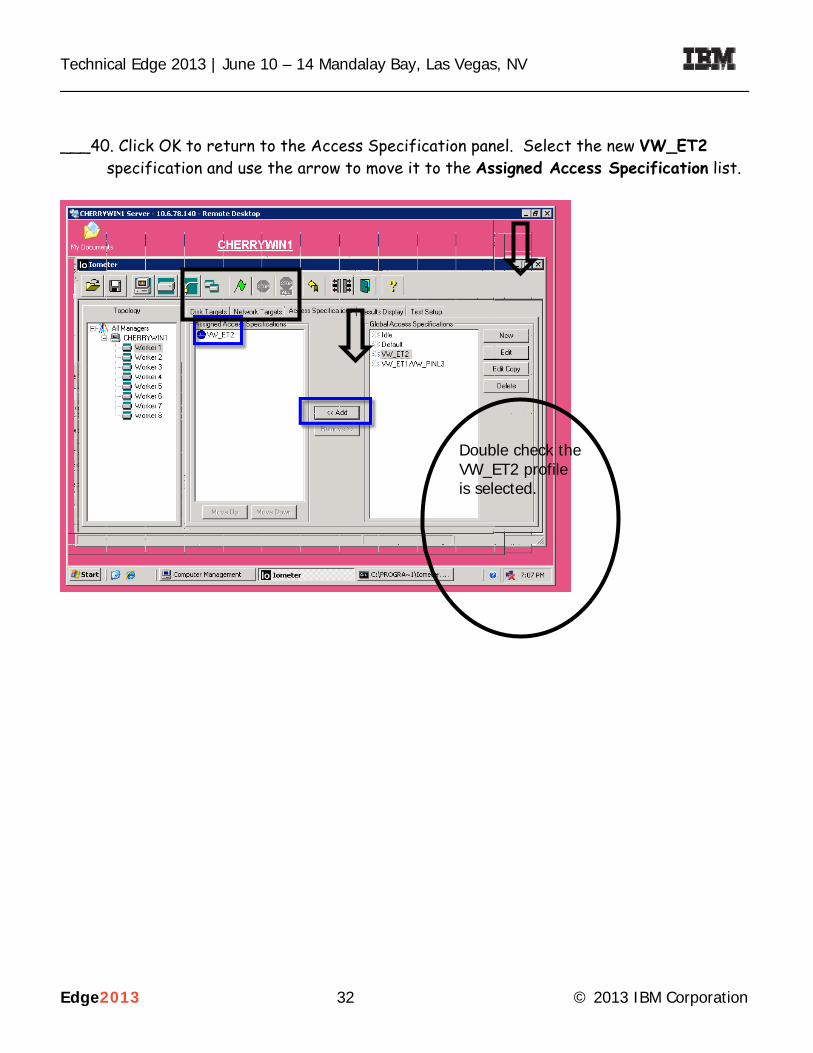
___40. Click OK to return to the Access Specification panel. Select the new VW_ET2
specification and use the arrow to move it to the Assigned Access Specification list.
Double check the VW_ET2 profile is selected.

Technical Edge 2013 | June 10 – 14 Mandalay Bay, Las Vegas, NV _______________________________________________________________________________
Edge2013 33 © 2013 IBM Corporation
___41. Now we will add IO to the VW_ET1 and VW_COLOR3 disk. Select Worker2 from the
Topology list. Select the Disk Target tab and check the boxes next to VW_ET1 and VW_COLOR3. Use the CTRL key to make two disk selections in the box. Accept the defaults for the other parameters. Please verify your set up is similar to the screenshot.
Double check the VW_ET1 and VW_COLOR3 disks are selected.
Technical Edge 2013 | June 10 – 14 Mandalay Bay, Las Vegas, NV _______________________________________________________________________________
Edge2013 34 © 2013 IBM Corporation
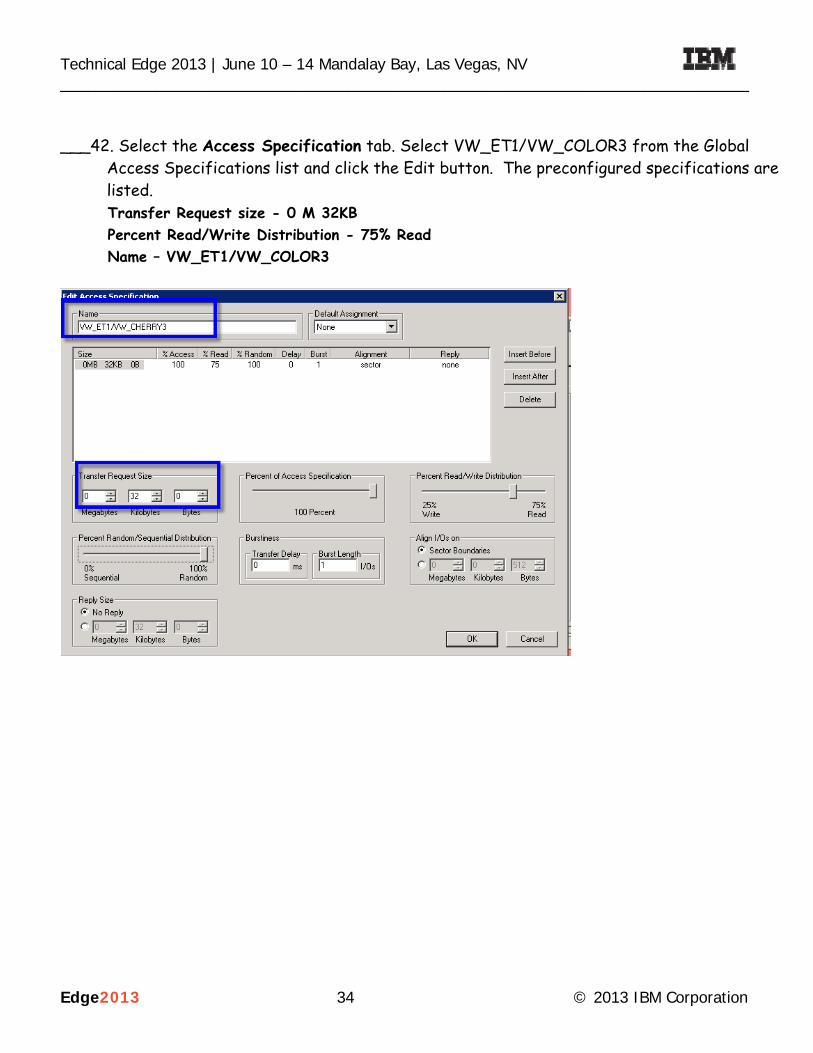
___42. Select the Access Specification tab. Select VW_ET1/VW_COLOR3 from the Global
Access Specifications list and click the Edit button. The preconfigured specifications are listed.
Transfer Request size - 0 M 32KB Percent Read/Write Distribution - 75% Read Name – VW_ET1/VW_COLOR3

Technical Edge 2013 | June 10 – 14 Mandalay Bay, Las Vegas, NV _______________________________________________________________________________
Edge2013 35 © 2013 IBM Corporation
___43. Select VW_ET1/VW_COLOR3 specification and use the arrow to move to the Assigned
Access Specification list.
Double check the VW_ET1/VW_COLOR3 profile is selected.

Technical Edge 2013 | June 10 – 14 Mandalay Bay, Las Vegas, NV _______________________________________________________________________________
Edge2013 36 © 2013 IBM Corporation
___44. We will now start Iometer. The Results Display tab will show IO is being generated and
can be monitored. Select the Results Display tab. Set the Results Since box to Last Update, Move the Update Frequency slider to 1. Click the Green Flag to start IO.
b
a
c
d
Technical Edge 2013 | June 10 – 14 Mandalay Bay, Las Vegas, NV _______________________________________________________________________________
Edge2013 37 © 2013 IBM Corporation
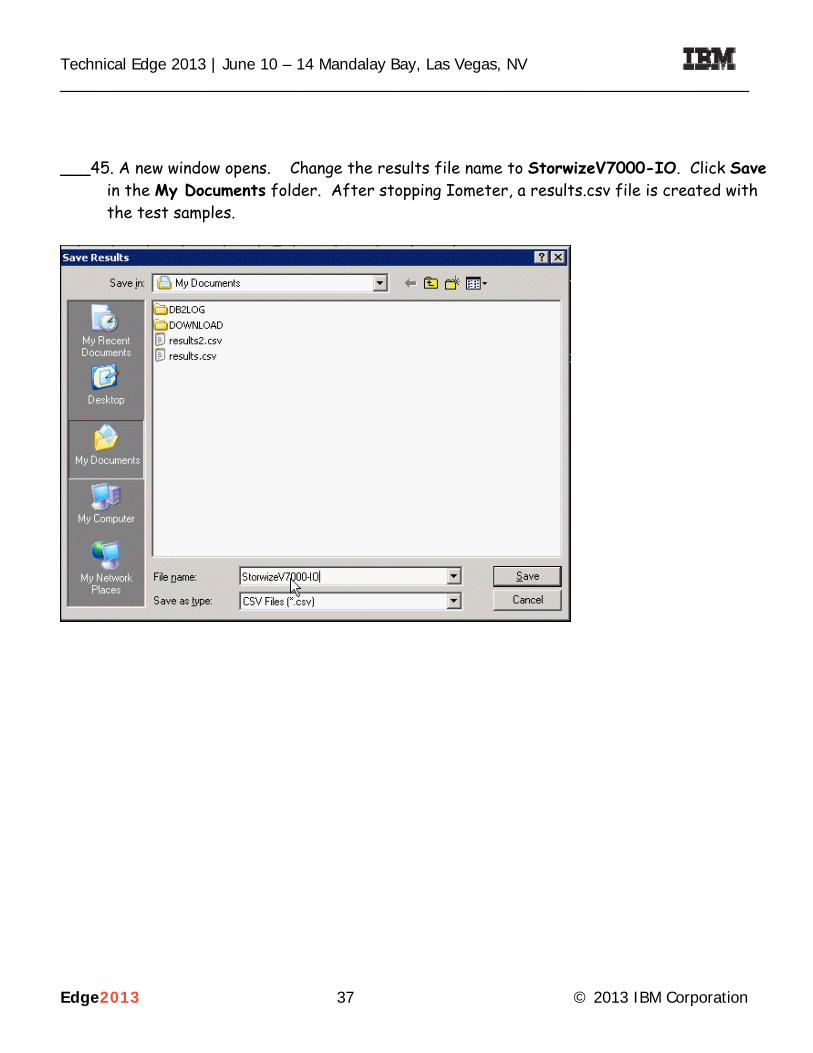
___45. A new window opens. Change the results file name to StorwizeV7000-IO. Click Save
in the My Documents folder. After stopping Iometer, a results.csv file is created with the test samples.

Technical Edge 2013 | June 10 – 14 Mandalay Bay, Las Vegas, NV _______________________________________________________________________________
Edge2013 38 © 2013 IBM Corporation
___46. Once drives are prepared, the current IO activity is displayed on the Results Display
tab. The top status bar shows the Total MBs per Second being generated from all workers. The next two bars show the MBs/sec for Worker1 (VW_ET2) and Worker2 (VW_ET1/VW_COLOR3). You should see no activity in the Total Error Count bar; if it does show activity inform the instructor.

Technical Edge 2013 | June 10 – 14 Mandalay Bay, Las Vegas, NV _______________________________________________________________________________
Edge2013 39 © 2013 IBM Corporation
___47. You will also see the Iometer process running in another window. Verify this does not
show errors.

Technical Edge 2013 | June 10 – 14 Mandalay Bay, Las Vegas, NV _______________________________________________________________________________
Edge2013 40 © 2013 IBM Corporation
___48. Now let’s compare this with the performance information being gathered by the
Storwize V7000 system. Return to the GUI and from the Monitoring functional icon, select the Performance from the pull-down. The performance monitor is displayed on the screen with overall status. Compare the overall MBps being reported with the Total MBs per second counter in Iometer. The Storwize V7000 performance monitor displays metrics at 5 second intervals. You can move the Iometer Update Frequency slider to this value for a closer comparison.

Technical Edge 2013 | June 10 – 14 Mandalay Bay, Las Vegas, NV _______________________________________________________________________________
Edge2013 41 © 2013 IBM Corporation
___49. Along with seeing overall system performance, you can also display performance at a
node level. From the system statistics pull-down select node1. This display is the aggregate performance of volumes owned by node 1. Compare the Total MBps to the Worker1 status bar in the Iometer GUI. Note that you can see CPU utilization, network interface traffic statistics and MDisk activity in the display. Note: the IO is be handled for the VW_ET2 volume by node1 (its preferred node). This can be validated by the information collected in the tables.
Technical Edge 2013 | June 10 – 14 Mandalay Bay, Las Vegas, NV _______________________________________________________________________________
Edge2013 42 © 2013 IBM Corporation
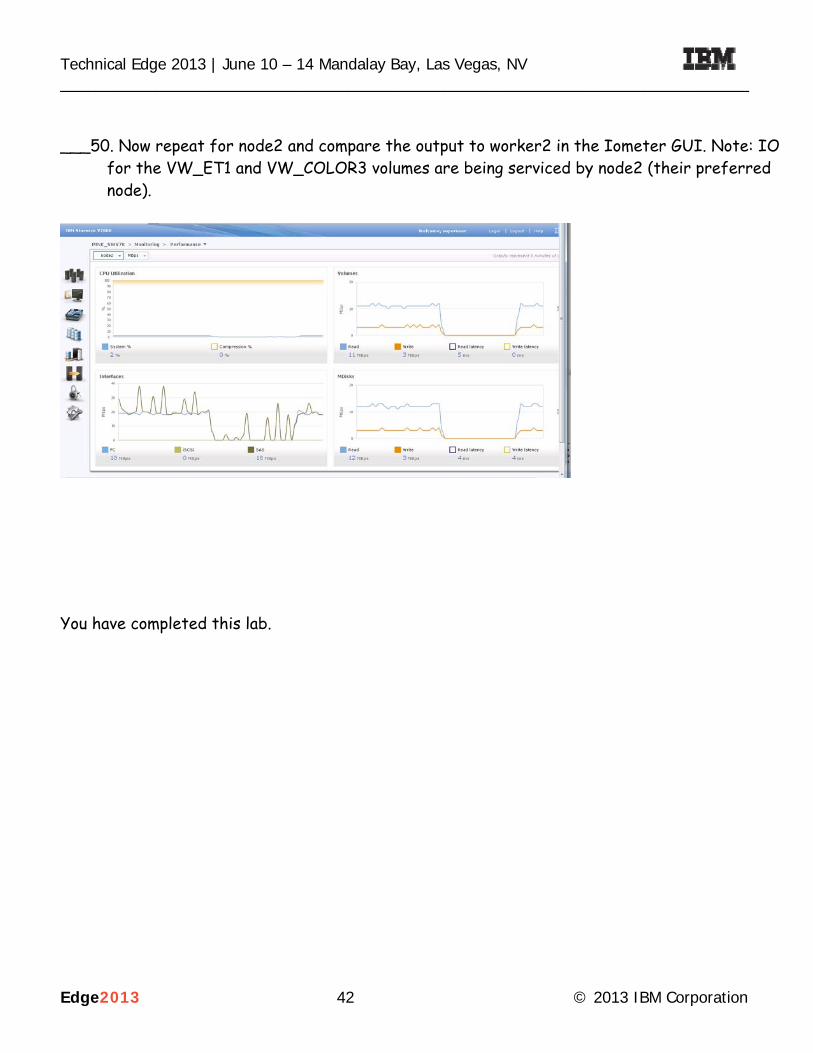
___50. Now repeat for node2 and compare the output to worker2 in the Iometer GUI. Note: IO
for the VW_ET1 and VW_COLOR3 volumes are being serviced by node2 (their preferred node).
You have completed this lab.
Technical Edge 2013 | June 10 – 14 Mandalay Bay, Las Vegas, NV _______________________________________________________________________________
Edge2013 43 © 2013 IBM Corporation
Part2. Easy Tier and STAT Analysis
Introduction We will now continue exploration of the Easy Tier function of the Storwize V7000. Easy Tier provides for migration of ‘hot’ extents to SSD-based MDisks of the cluster. In this lab exercise, we will review changes which have occurred to extent distribution of volumes created in Part1. Also you will use the IBM Storage Advisor Tool to look at current IO utilization on the volumes created in the storage pools.

Technical Edge 2013 | June 10 – 14 Mandalay Bay, Las Vegas, NV _______________________________________________________________________________
Edge2013 44 © 2013 IBM Corporation
Objective Using Remote Desktop, the cluster GUI and CLI, you will perform the following tasks: Use of the IBM Storage Tier Advisor Tool (STAT) Examine the results of measurement of IO on volumes and storage pools where Easy Tier is active Examine the results of automatic data placement on volumes and storage pools where Easy Tier is active
Directions Now let’s begin to look at the volumes we created in Part1. We have generated IO on some of our volumes. Let’s look at the current state of these disks.
Technical Edge 2013 | June 10 – 14 Mandalay Bay, Las Vegas, NV _______________________________________________________________________________
Edge2013 45 © 2013 IBM Corporation
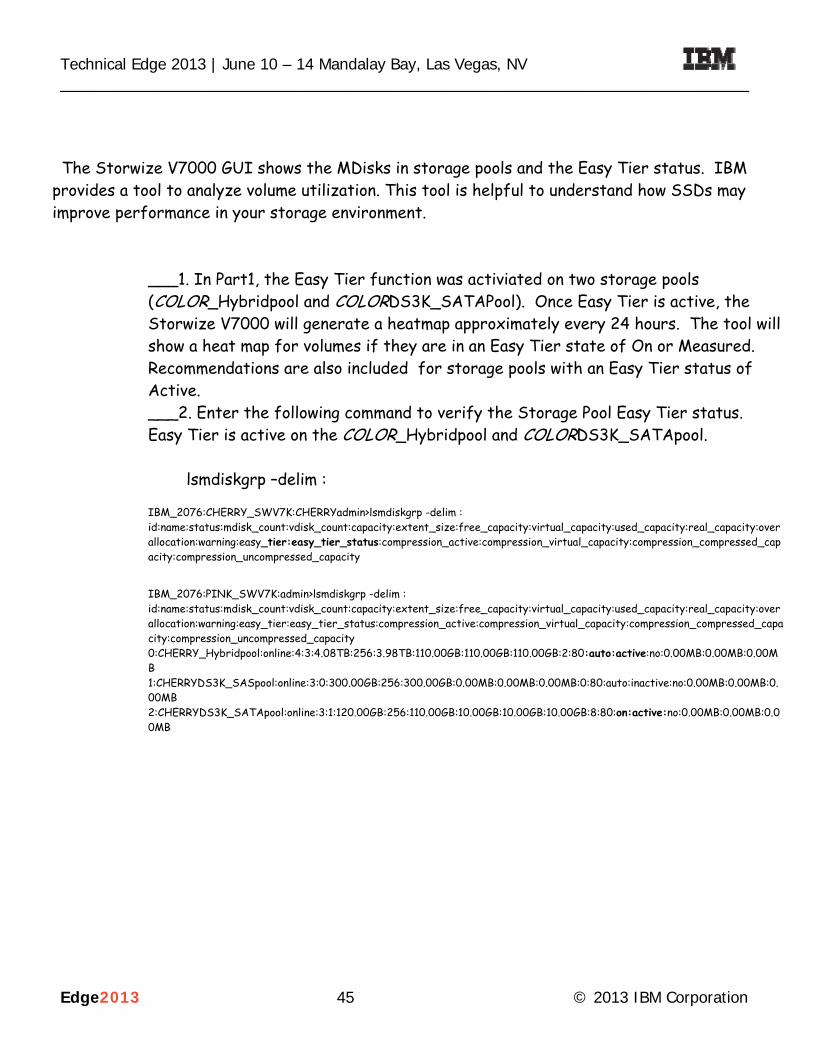
The Storwize V7000 GUI shows the MDisks in storage pools and the Easy Tier status. IBM provides a tool to analyze volume utilization. This tool is helpful to understand how SSDs may improve performance in your storage environment.
___1. In Part1, the Easy Tier function was activiated on two storage pools (COLOR_Hybridpool and COLORDS3K_SATAPool). Once Easy Tier is active, the Storwize V7000 will generate a heatmap approximately every 24 hours. The tool will show a heat map for volumes if they are in an Easy Tier state of On or Measured. Recommendations are also included for storage pools with an Easy Tier status of Active. ___2. Enter the following command to verify the Storage Pool Easy Tier status. Easy Tier is active on the COLOR_Hybridpool and COLORDS3K_SATApool. lsmdiskgrp –delim : IBM_2076:CHERRY_SWV7K:CHERRYadmin>lsmdiskgrp -delim : id:name:status:mdisk_count:vdisk_count:capacity:extent_size:free_capacity:virtual_capacity:used_capacity:real_capacity:overallocation:warning:easy_tier:easy_tier_status:compression_active:compression_virtual_capacity:compression_compressed_capacity:compression_uncompressed_capacity
IBM_2076:PINK_SWV7K:admin>lsmdiskgrp -delim : id:name:status:mdisk_count:vdisk_count:capacity:extent_size:free_capacity:virtual_capacity:used_capacity:real_capacity:overallocation:warning:easy_tier:easy_tier_status:compression_active:compression_virtual_capacity:compression_compressed_capacity:compression_uncompressed_capacity 0:CHERRY_Hybridpool:online:4:3:4.08TB:256:3.98TB:110.00GB:110.00GB:110.00GB:2:80:auto:active:no:0.00MB:0.00MB:0.00MB 1:CHERRYDS3K_SASpool:online:3:0:300.00GB:256:300.00GB:0.00MB:0.00MB:0.00MB:0:80:auto:inactive:no:0.00MB:0.00MB:0.00MB 2:CHERRYDS3K_SATApool:online:3:1:120.00GB:256:110.00GB:10.00GB:10.00GB:10.00GB:8:80:on:active:no:0.00MB:0.00MB:0.00MB
Technical Edge 2013 | June 10 – 14 Mandalay Bay, Las Vegas, NV _______________________________________________________________________________
Edge2013 46 © 2013 IBM Corporation
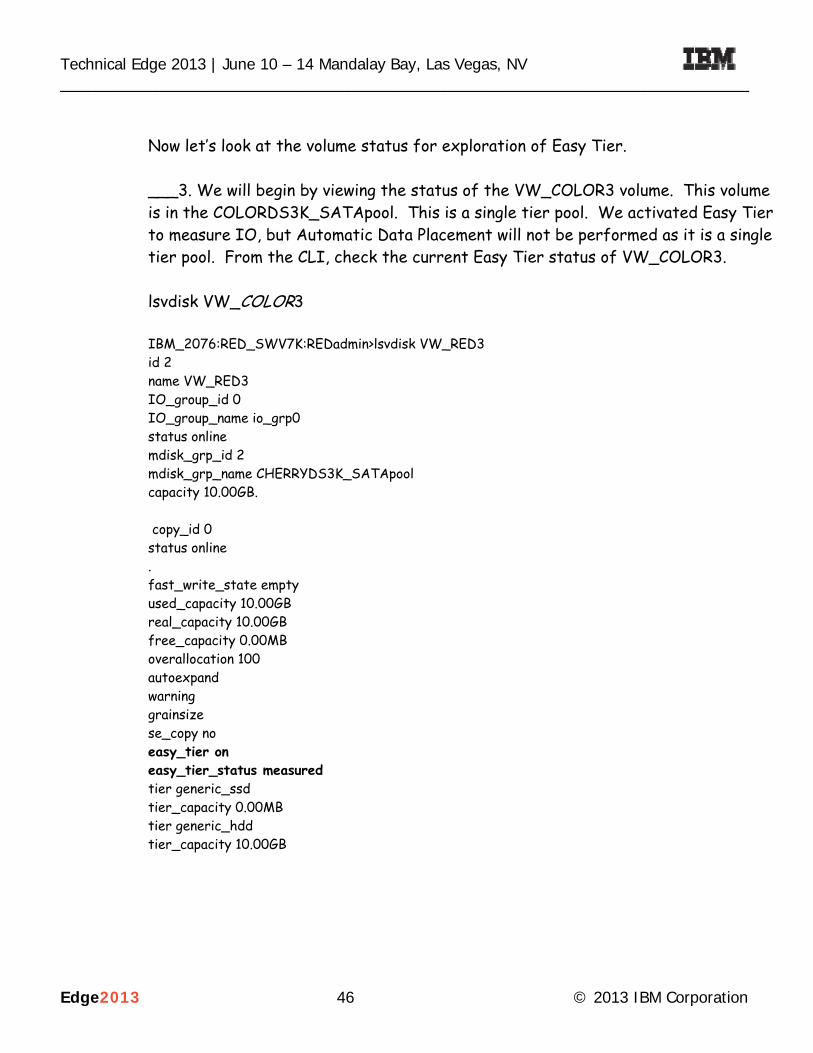
Now let’s look at the volume status for exploration of Easy Tier. ___3. We will begin by viewing the status of the VW_COLOR3 volume. This volume is in the COLORDS3K_SATApool. This is a single tier pool. We activated Easy Tier to measure IO, but Automatic Data Placement will not be performed as it is a single tier pool. From the CLI, check the current Easy Tier status of VW_COLOR3. lsvdisk VW_COLOR3 IBM_2076:RED_SWV7K:REDadmin>lsvdisk VW_RED3 id 2 name VW_RED3 IO_group_id 0 IO_group_name io_grp0 status online mdisk_grp_id 2 mdisk_grp_name CHERRYDS3K_SATApool capacity 10.00GB. copy_id 0 status online . fast_write_state empty used_capacity 10.00GB real_capacity 10.00GB free_capacity 0.00MB overallocation 100 autoexpand warning grainsize se_copy no easy_tier on easy_tier_status measured tier generic_ssd tier_capacity 0.00MB tier generic_hdd tier_capacity 10.00GB
Technical Edge 2013 | June 10 – 14 Mandalay Bay, Las Vegas, NV _______________________________________________________________________________
Edge2013 47 © 2013 IBM Corporation
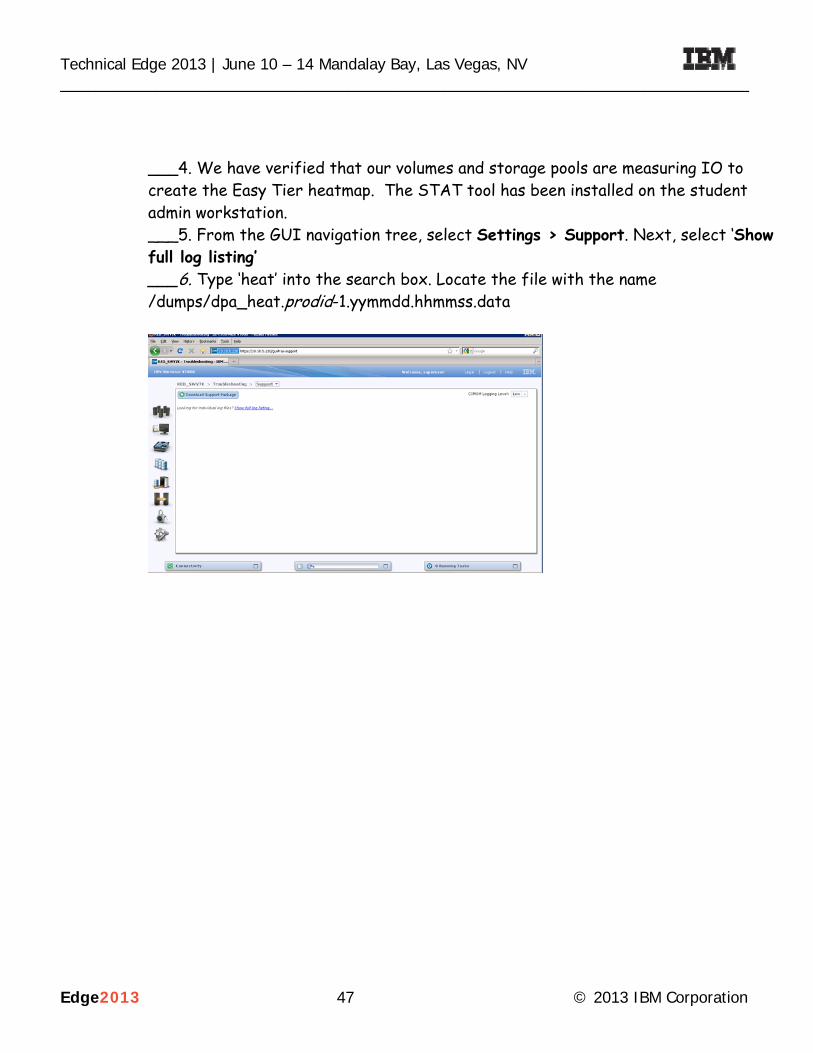
___4. We have verified that our volumes and storage pools are measuring IO to create the Easy Tier heatmap. The STAT tool has been installed on the student admin workstation. ___5. From the GUI navigation tree, select Settings > Support. Next, select ‘Show full log listing’ ___6. Type ‘heat’ into the search box. Locate the file with the name /dumps/dpa_heat.prodid-1.yymmdd.hhmmss.data
Technical Edge 2013 | June 10 – 14 Mandalay Bay, Las Vegas, NV _______________________________________________________________________________
Edge2013 48 © 2013 IBM Corporation
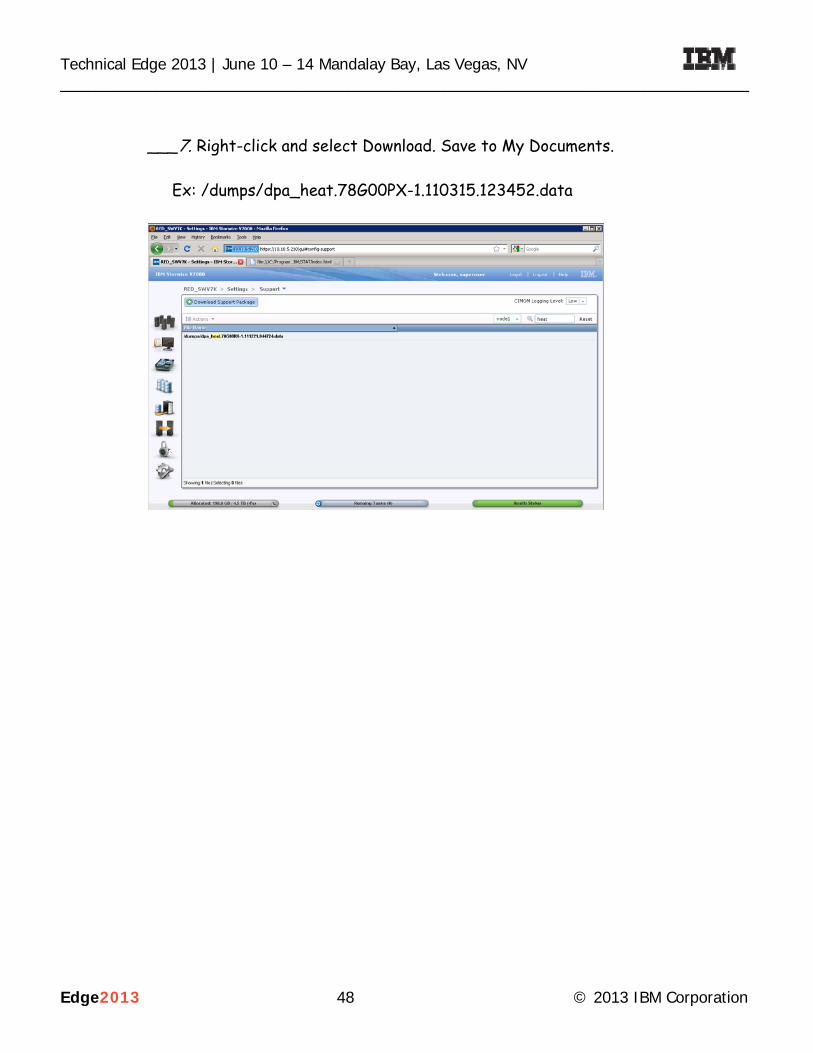
___7. Right-click and select Download. Save to My Documents. Ex: /dumps/dpa_heat.78G00PX-1.110315.123452.data

Technical Edge 2013 | June 10 – 14 Mandalay Bay, Las Vegas, NV _______________________________________________________________________________
Edge2013 49 © 2013 IBM Corporation
___8. Due the length of this lab session, a heatmap has already been downloaded. On the admin desktop server, use the command prompt which has already been open. ___9. Navigate to c:\Program Files\IBM\STAT. Select STAT.exe. To process the heatmap, enter the following command. stat.exe dpa_heat.tst

Technical Edge 2013 | June 10 – 14 Mandalay Bay, Las Vegas, NV _______________________________________________________________________________
Edge2013 50 © 2013 IBM Corporation
___10. An html file has been created. Enter index.html from the command prompt to open the web browser.
___11. The System Summary is displayed. Now we will review the results from our heatmap. The system summary shows the time period for which data was measured. The STAT tool references volume copies and storage pools by their object ID.
Technical Edge 2013 | June 10 – 14 Mandalay Bay, Las Vegas, NV _______________________________________________________________________________
Edge2013 51 © 2013 IBM Corporation
___12. Review the fields of the system summary. Total Volumes Monitored – all volumes with Easy Tier status of On or Measured. What volumes does this include?______________ Total Capacity Monitored – total size of monitored volumes where Easy Tier was On or measured. Hot Data Capacity – total of extents identified as being hot from collected IO on the monitored volumes. Total Capacity on SSDs/Total SSD capacity – total of volumes already on SSDs to the total available SSD drives in the cluster. Does this show that any extents are on SSDs?____________ Estimate Migration time – time needed to move hot extents in hybrid pools from HDD to SSD-based MDisks.

Technical Edge 2013 | June 10 – 14 Mandalay Bay, Las Vegas, NV _______________________________________________________________________________
Edge2013 52 © 2013 IBM Corporation
___13. Now look at the Recommended SSD configuration. These recommendations are the impact on the entire Storwize V7000 cluster if the modifications are made. The pool listed has a storage pool ID of 2.
Recommendation as shown above is to add SSDs to the storage pool.
Technical Edge 2013 | June 10 – 14 Mandalay Bay, Las Vegas, NV _______________________________________________________________________________
Edge2013 53 © 2013 IBM Corporation
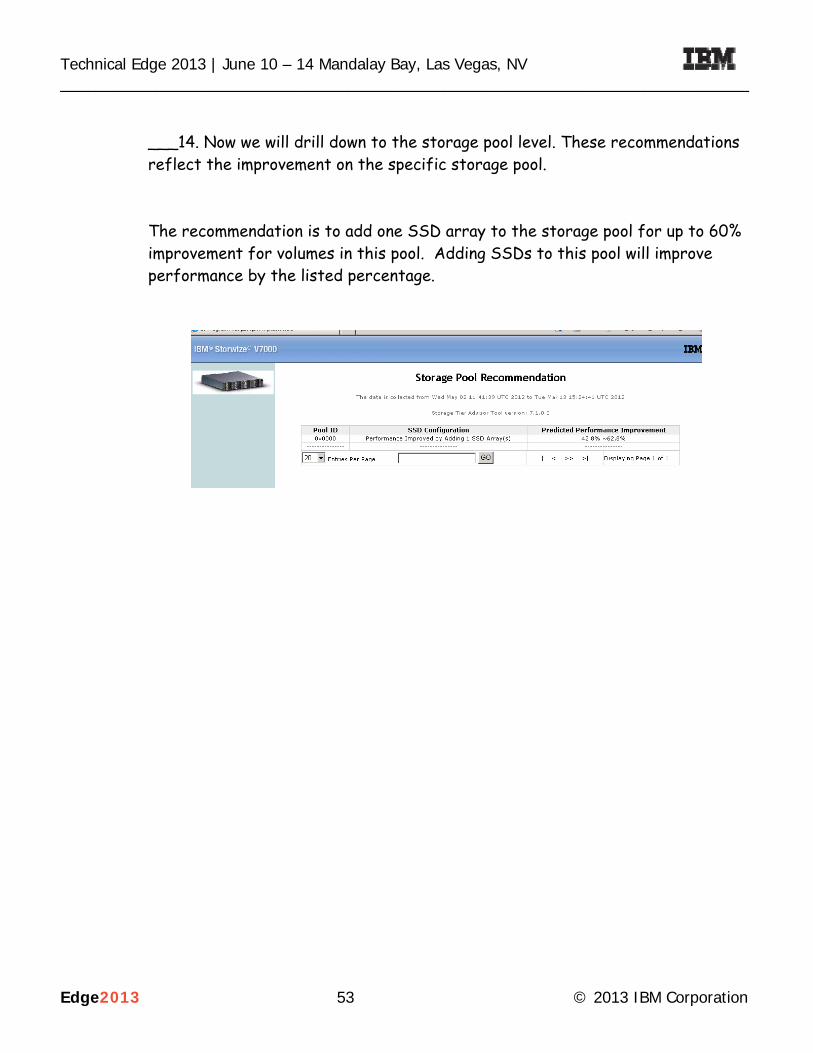
___14. Now we will drill down to the storage pool level. These recommendations reflect the improvement on the specific storage pool. The recommendation is to add one SSD array to the storage pool for up to 60% improvement for volumes in this pool. Adding SSDs to this pool will improve performance by the listed percentage.

Technical Edge 2013 | June 10 – 14 Mandalay Bay, Las Vegas, NV _______________________________________________________________________________
Edge2013 54 © 2013 IBM Corporation
___15. Now from the STAT GUI, select the Volume Heat Distribution panel. This panel lists all volumes where IO has been measured (Volumes with ET status measured or on). Volume ID – Storwize V7000 volume object ID Copy ID – volume copy ID Pool ID – storage pool ID Configured size – volume copy real size in GB Capacity on SSD – extents already migrated Heat Distribution – RED - extents considered to be hot from the IO measurement BLUE –extents considered to be cold
Note, that this volume had hot extents. IO on this volume was less than 64K which reflects it was hot. The actual results you see may not be the same depending on the timing of the heatmap generation and other IO activity.

Technical Edge 2013 | June 10 – 14 Mandalay Bay, Las Vegas, NV _______________________________________________________________________________
Edge2013 55 © 2013 IBM Corporation
___16. Return to the Storwize V7000 GUI and select Volumes. Select the VW_ET1 volume, right-click and select Properties and click Show Details. Review the current Capacity. The volume now shows extents have migrated from the HDD Tier to the SSD Tier. This was performed by the Automatic Data Placement function. What is the current capacity on the SSD Tier?
Technical Edge 2013 | June 10 – 14 Mandalay Bay, Las Vegas, NV _______________________________________________________________________________
Edge2013 56 © 2013 IBM Corporation
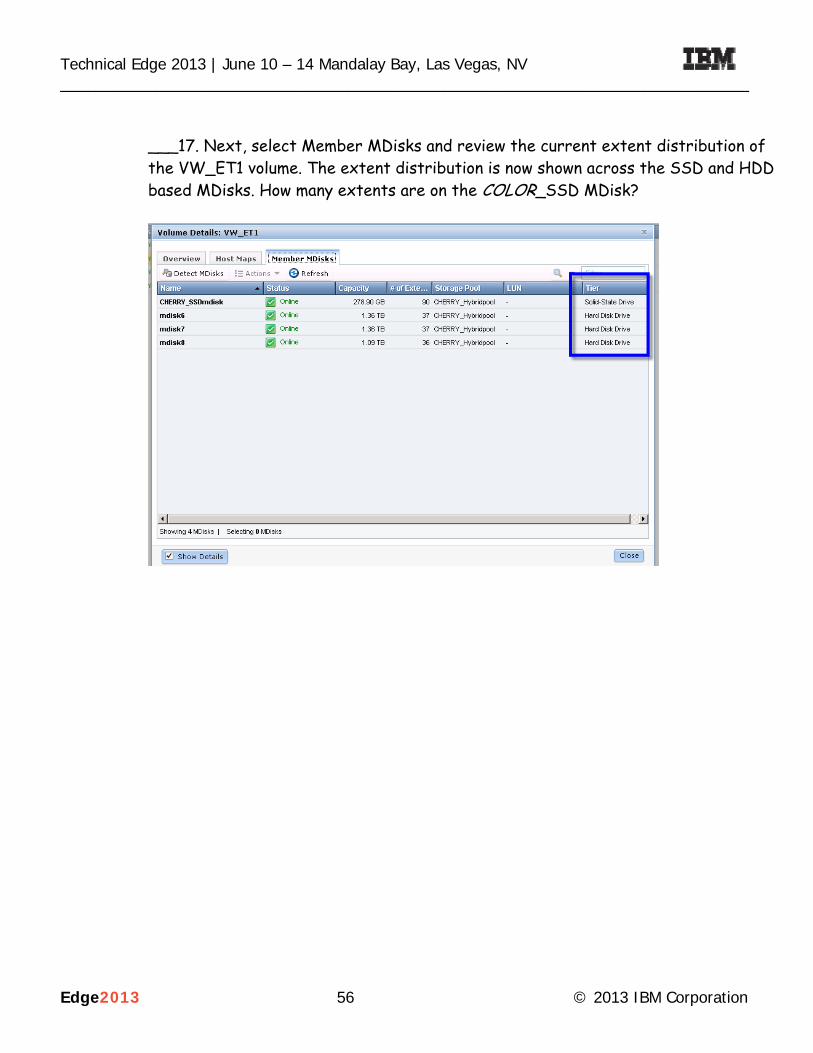
___17. Next, select Member MDisks and review the current extent distribution of the VW_ET1 volume. The extent distribution is now shown across the SSD and HDD based MDisks. How many extents are on the COLOR_SSD MDisk?
Technical Edge 2013 | June 10 – 14 Mandalay Bay, Las Vegas, NV _______________________________________________________________________________
Edge2013 57 © 2013 IBM Corporation
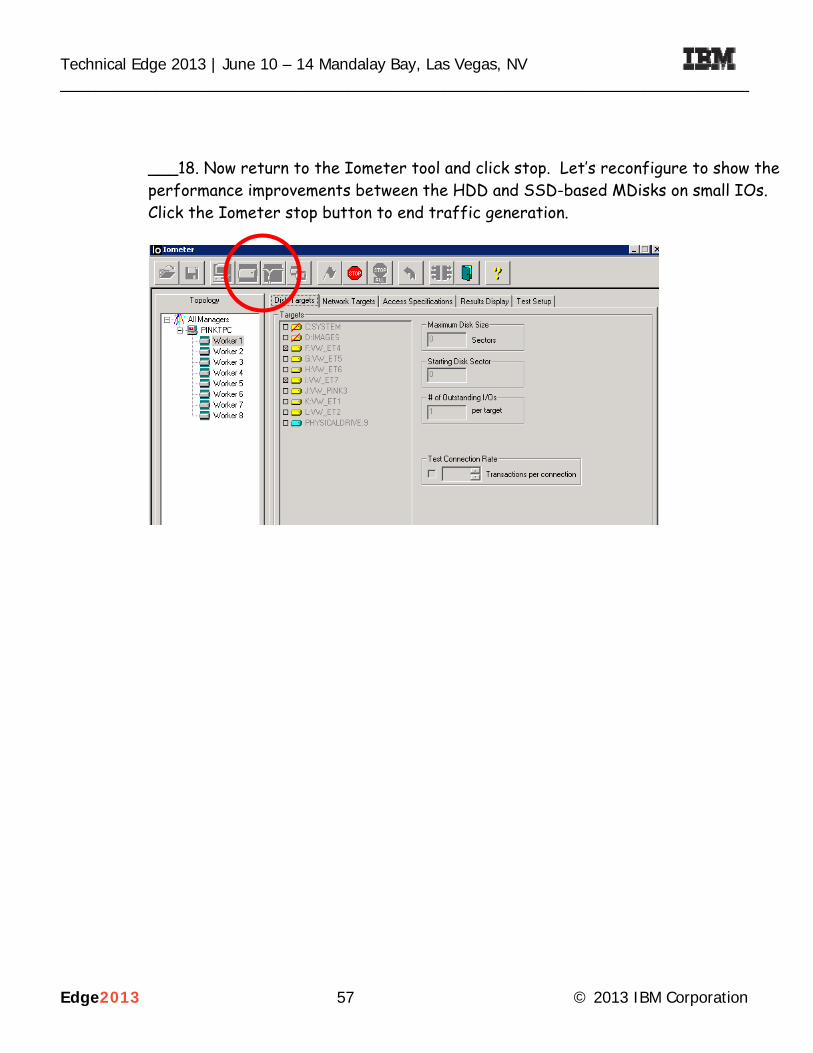
___18. Now return to the Iometer tool and click stop. Let’s reconfigure to show the performance improvements between the HDD and SSD-based MDisks on small IOs. Click the Iometer stop button to end traffic generation.
Technical Edge 2013 | June 10 – 14 Mandalay Bay, Las Vegas, NV _______________________________________________________________________________
Edge2013 58 © 2013 IBM Corporation
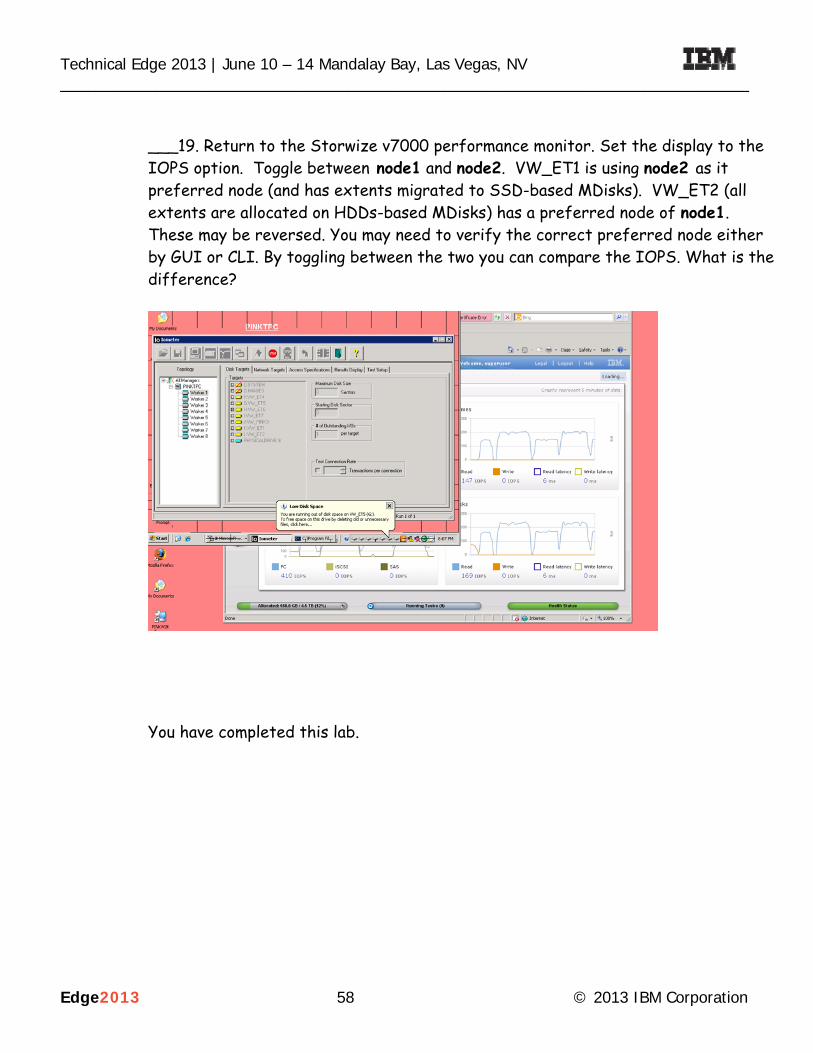
___19. Return to the Storwize v7000 performance monitor. Set the display to the IOPS option. Toggle between node1 and node2. VW_ET1 is using node2 as it preferred node (and has extents migrated to SSD-based MDisks). VW_ET2 (all extents are allocated on HDDs-based MDisks) has a preferred node of node1. These may be reversed. You may need to verify the correct preferred node either by GUI or CLI. By toggling between the two you can compare the IOPS. What is the difference?
You have completed this lab.

Technical Edge 2013 | June 10 – 14 Mandalay Bay, Las Vegas, NV _______________________________________________________________________________
Edge2013 59 © 2013 IBM Corporation

Edge2013 60 © 2013 IBM Corporation