i. overview - polaris® officesupport.polarisoffice.com/en/polarisoffice4.0_ios_guide_en... · i....
TRANSCRIPT

Polaris Office 4.0 User Help Guide
for iOS
I. Overview
1. Polaris® Office 4.0 overview
Polaris® Office 4.0 is a powerful and easy-to-use office product designed for mobile devices. You can create a
document, and organize the data quickly, giving a professional presentation with several taps.
2. Major new updated functions
Intuitive menu and screen interface
Slideshow change-over animation effect
Slideshow pointer and ink
Text file creation and editing
Opening MS Office templates
Opening password-protected files
Smart Art, 3D figure effect expression
PDF loading and response speed improvement
Document templates
Styles like figures, charts, images, and fonts
Copy formatting
Inserting 80 figures, including 3D
Drawing free lines
18 charts including 3D
Document layout change
Multiple object selection
Object alignment and sorting
Chart data, layout, and format change
Mask, shadow, brightness, contrast, and transparency effects
Real-time display of the object size and position value
Function help
Quick scroll
View by document type
Supporting Google Docs, Box.net and WebDAV service
Upload to Twitter and Facebook

II. Home screen
1. Overview
Polaris® Office 4.0 redesigned the home screen, so that users can manage, view, and edit documents more
conveniently.
2. Recent document
You can check the list of recently opened documents at the center of the home screen.
3. File browser
Tap the icon located at the bottom of the recent documents to explore all the files and folders in the local
storage.
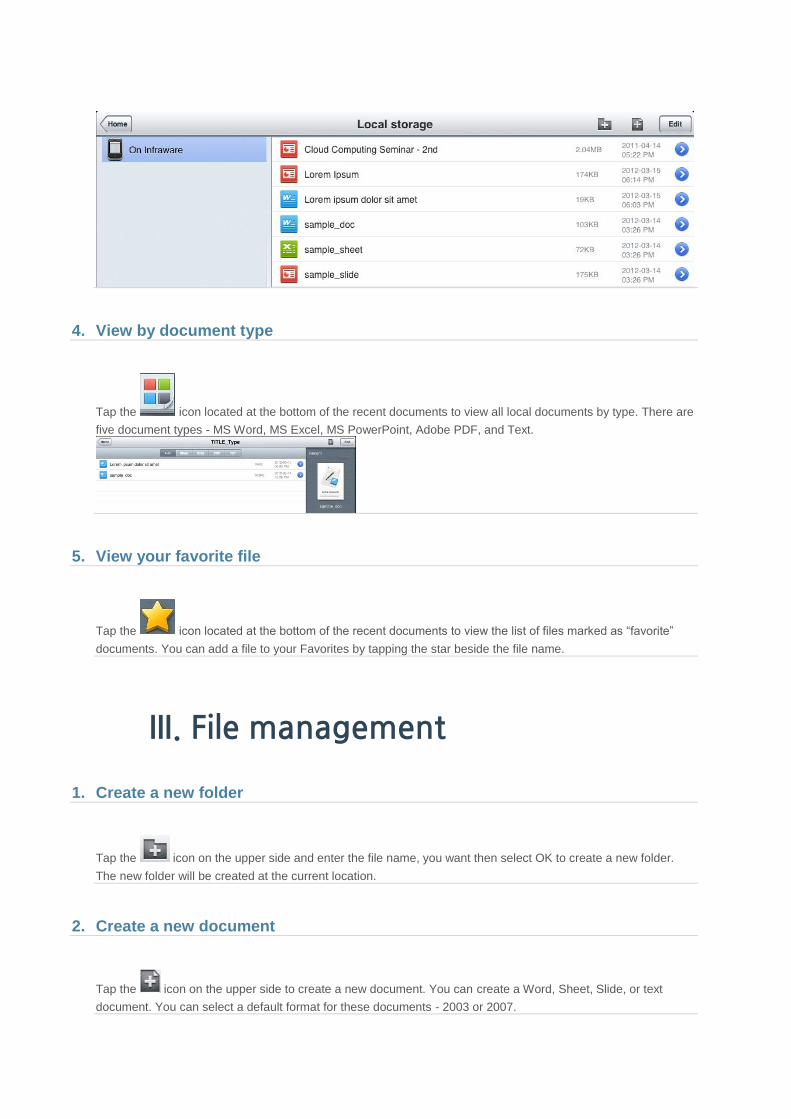
4. View by document type
Tap the icon located at the bottom of the recent documents to view all local documents by type. There are
five document types - MS Word, MS Excel, MS PowerPoint, Adobe PDF, and Text.
5. View your favorite file
Tap the icon located at the bottom of the recent documents to view the list of files marked as “favorite”
documents. You can add a file to your Favorites by tapping the star beside the file name.
III. File management
1. Create a new folder
Tap the icon on the upper side and enter the file name, you want then select OK to create a new folder.
The new folder will be created at the current location.
2. Create a new document
Tap the icon on the upper side to create a new document. You can create a Word, Sheet, Slide, or text
document. You can select a default format for these documents - 2003 or 2007.

3. Move/Copy/Delete a file and folder
Tap the Edit button on the upper side to display a check box beside the file and folder name. Tap the check
button and Tap the Move/Copy/Send/Delete button to move, copy, send, delete the selected file or folder.
4. Rename a file
Tap the button beside the file name to display popup menu. Then, the name of the selected file will be
changed.
5. View file information
Tap the right of a file to display a popup menu. The information on the selected file, such as type, location,
size, and modified date will be displayed.

6. Search a file
Tap the icon on the upper side to display a file search window. Input a search
term in the search window and Tap the “Search” button to search for the file that contains the search term in its
name.
IV. View file
1. Supported file format
MS Word 97~2010 (.doc, .docx, .dot, .dotx)
MS Excel 97~ 2010 (.xls, .xlsx, .xlt, .xltx, .csv)
MS PowerPoint 97~ 2010 (.ppt, .pptx, .pps, .ppsx, .pot, .potx)
Adobe PDF 1.2~1.7 (.pdf)
Text (.txt)
Zip Archives (.zip)
Password-protected files
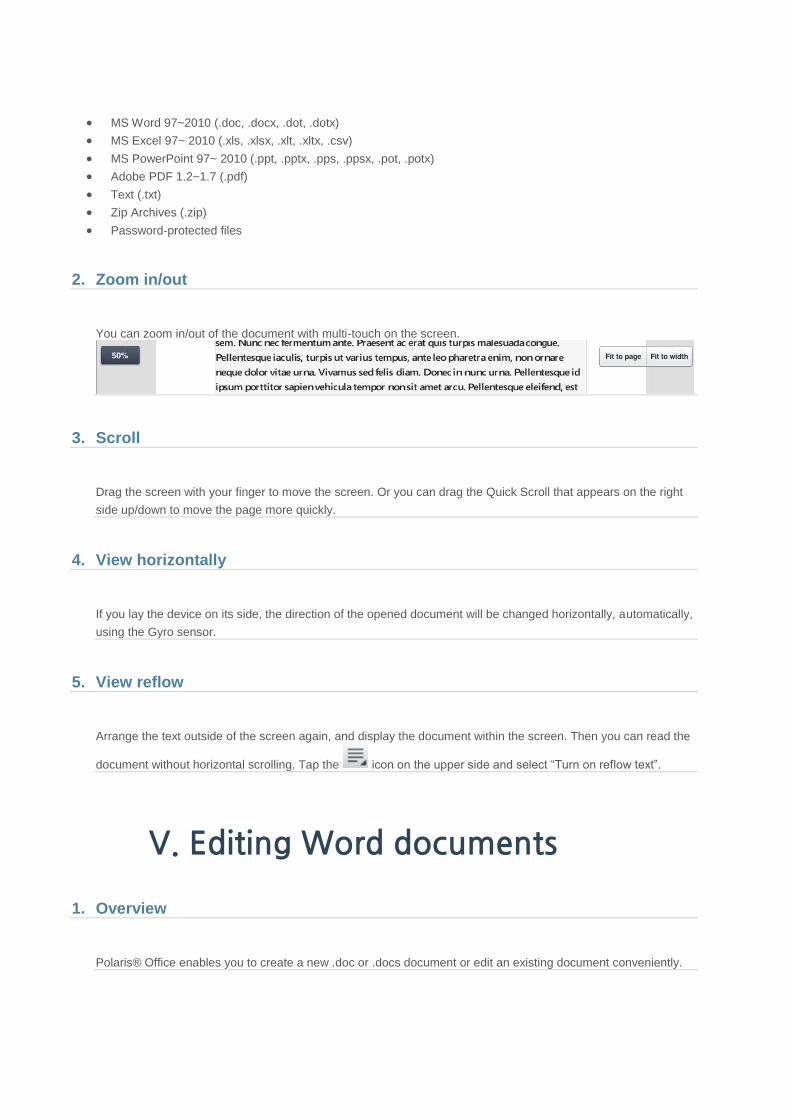
2. Zoom in/out
You can zoom in/out of the document with multi-touch on the screen.
3. Scroll
Drag the screen with your finger to move the screen. Or you can drag the Quick Scroll that appears on the right
side up/down to move the page more quickly.
4. View horizontally
If you lay the device on its side, the direction of the opened document will be changed horizontally, automatically,
using the Gyro sensor.
5. View reflow
Arrange the text outside of the screen again, and display the document within the screen. Then you can read the
document without horizontal scrolling. Tap the icon on the upper side and select “Turn on reflow text”.
V. Editing Word documents
1. Overview
Polaris® Office enables you to create a new .doc or .docs document or edit an existing document conveniently.

2. Select the text
Tap twice and move the left/right pointer on the word or paragraph to adjust the selection area accurately.
3. Cut/Copy/Paste
When you select text, the Cut/Copy/Paste context menu will appear. If you select “Paste” after copying the text,
the text will be inserted at the cursor’s position.
4. Font formatting
Select the text and tap the icon on the upper side to display the Property panel. You can change text size,
color, effect, font, background color, and style.

5. Paragraph formatting
Select the text and tap the icon on the upper side to display the Property tab. You can change the alignment,
spacing, indent, and bullet symbols.
6. Copy formatting
You can copy the font or paragraph formatting applied to text, and apply it other text. When you select the text,
the context menu will appear beside the text. Tap “View more” and select “Copy formatting” on the pop-up menu.
Then, select the text you want to format and select “View more” > “Paste formatting” from the context menu to
paste the copied formatting to the selected text.
7. Insert a figure
Tap the icon on the upper side to insert a figure. When you tap the icon, the objects that can be
inserted will appear. Select an icon. Then, select a figure from the figure page, and insert the selected figure
into the document. Before inserting the figure, you can apply the figure style in advance, using the style menu on
the upper side.

8. Draw a free line
Tap the icon on the upper side to draw a free line. When you tap the icon, the objects that can be
inserted will appear. Select an icon. Then, drag on the document to draw a free line. Release your finger to
stop drawing.
9. Insert an image
Tap the icon on the upper side to insert an image. When you tap the icon, the objects that can be
inserted will appear. Select an icon. Then, select an image from the gallery, or you can insert the image
taken by the camera.
10. Adjust a figure/image size
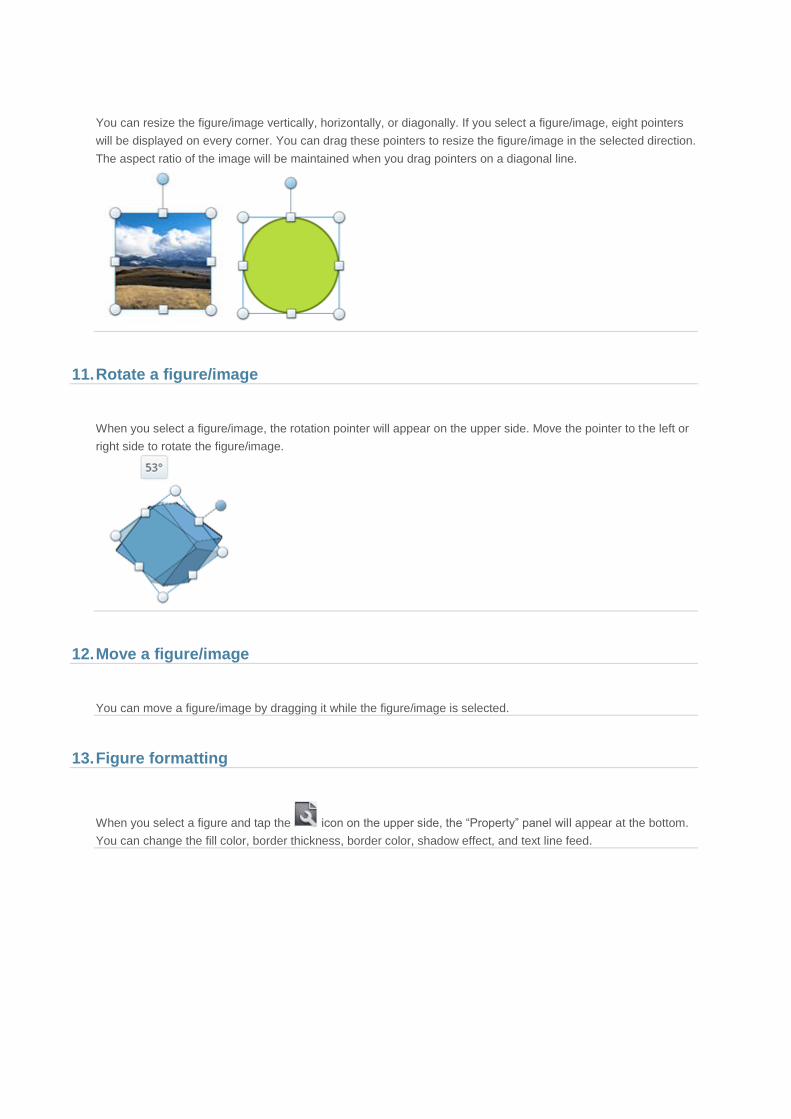
You can resize the figure/image vertically, horizontally, or diagonally. If you select a figure/image, eight pointers
will be displayed on every corner. You can drag these pointers to resize the figure/image in the selected direction.
The aspect ratio of the image will be maintained when you drag pointers on a diagonal line.
11. Rotate a figure/image
When you select a figure/image, the rotation pointer will appear on the upper side. Move the pointer to the left or
right side to rotate the figure/image.
12. Move a figure/image
You can move a figure/image by dragging it while the figure/image is selected.
13. Figure formatting
When you select a figure and tap the icon on the upper side, the “Property” panel will appear at the bottom.
You can change the fill color, border thickness, border color, shadow effect, and text line feed.
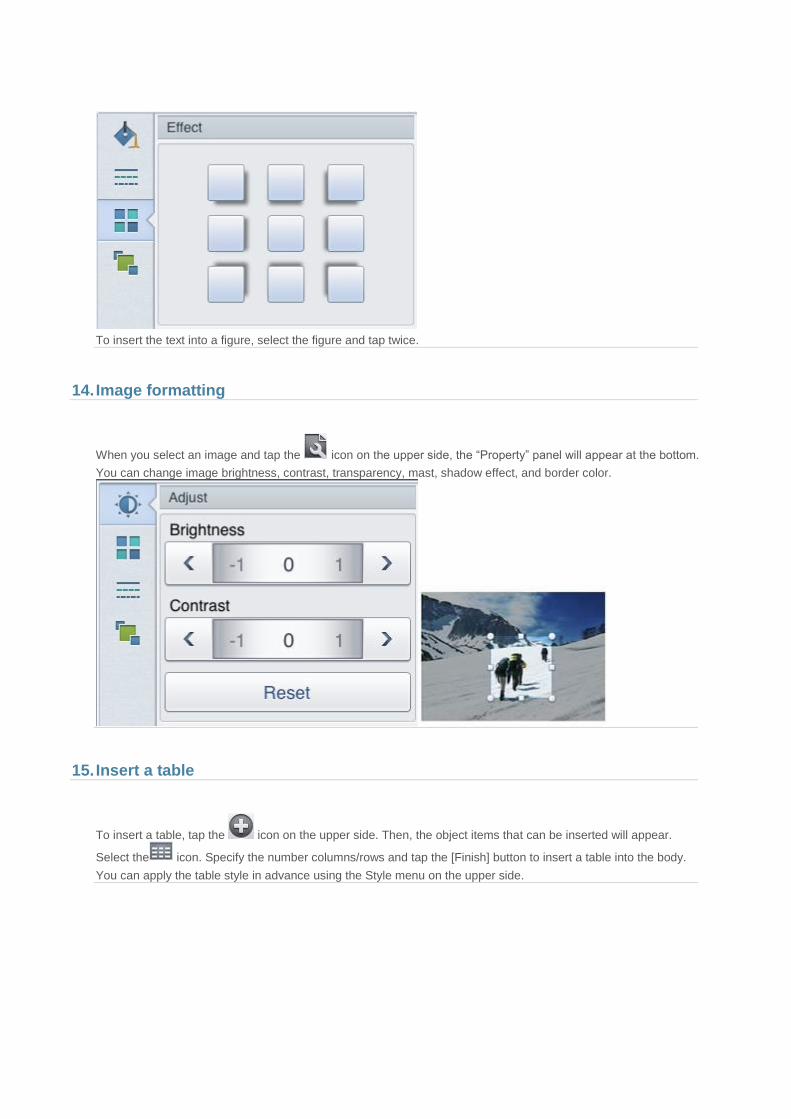
To insert the text into a figure, select the figure and tap twice.
14. Image formatting
When you select an image and tap the icon on the upper side, the “Property” panel will appear at the bottom.
You can change image brightness, contrast, transparency, mast, shadow effect, and border color.
15. Insert a table
To insert a table, tap the icon on the upper side. Then, the object items that can be inserted will appear.
Select the icon. Specify the number columns/rows and tap the [Finish] button to insert a table into the body.
You can apply the table style in advance using the Style menu on the upper side.

16. Edit horizontally
If you lay the device on its side, the direction of the opened document will be changed horizontally, automatically,
using the Gyro sensor. The upper side bar will disappear, and you can edit the document with a wider keyboard.
17. Select multiple objects
If you press a figure and press again, the popup menu will be displayed. You can select "More" then tap "Multi
selection" to multi select other figures or images. Multi-selected objects can be moved, resized, rotated, or
grouped together. If the selected objects are the same type, the style of all objects can be changed at one time.
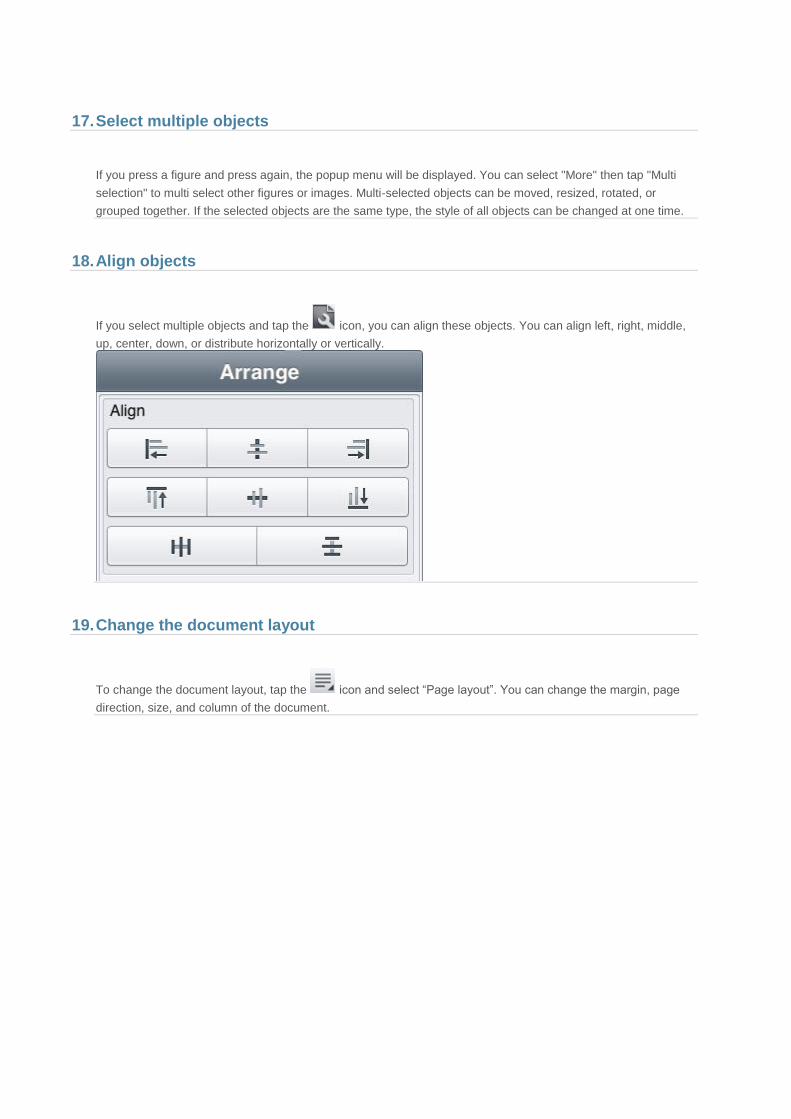
18. Align objects
If you select multiple objects and tap the icon, you can align these objects. You can align left, right, middle,
up, center, down, or distribute horizontally or vertically.
19. Change the document layout
To change the document layout, tap the icon and select “Page layout”. You can change the margin, page
direction, size, and column of the document.

20. Find/Replace the text
To find or replace the text, tap the icon on the top, and select the “Find/Replace” function. If you input a
search term and tap the previous or next icon, you can check the results one-by-one. Tap the icon to set
the “case-sensitive” and “search by word” option, and execute the replace function. If you select the replace
mode, the “Text to replace” window will appear. Tap the "replace" or "replace all" button to replace the text.
21. Undo and Redo
Tap the icon on the upper side to cancel an action, or the icon to redo it.
VI. Editing Spreadsheet documents
1. Overview
Polaris® Office enables you to create a new .xls or .xlsx document or edit an existing document conveniently.
2. Spreadsheet management
You can add, delete, rename, or change the order of several spreadsheets.
Tap the spreadsheet tab on bottom of display to insert new spreadsheet.
Tap the spreadsheet tab on bottom of display to duplicate the selected spreadsheet.
Tap the spreadsheet tab on bottom of display to protect the selected spreadsheet.
Tap the spreadsheet tab on bottom of display to delete the selected spreadsheet.
Double tap the spreadsheet tab on bottom of display to change the name of selected spreadsheet.
Press slightly longer the spreadsheet tab on bottom of display to change the order of spreadsheet.
3. Edit a cell
Tap the cell twice to input data into the cell directly. Or tap the cell once and select the formatting input window
on the upper side to input text.
To input data in several lines, tap the icon on the right side of the formatting input window. To finish
data input, press the Enter key on the keyboard.
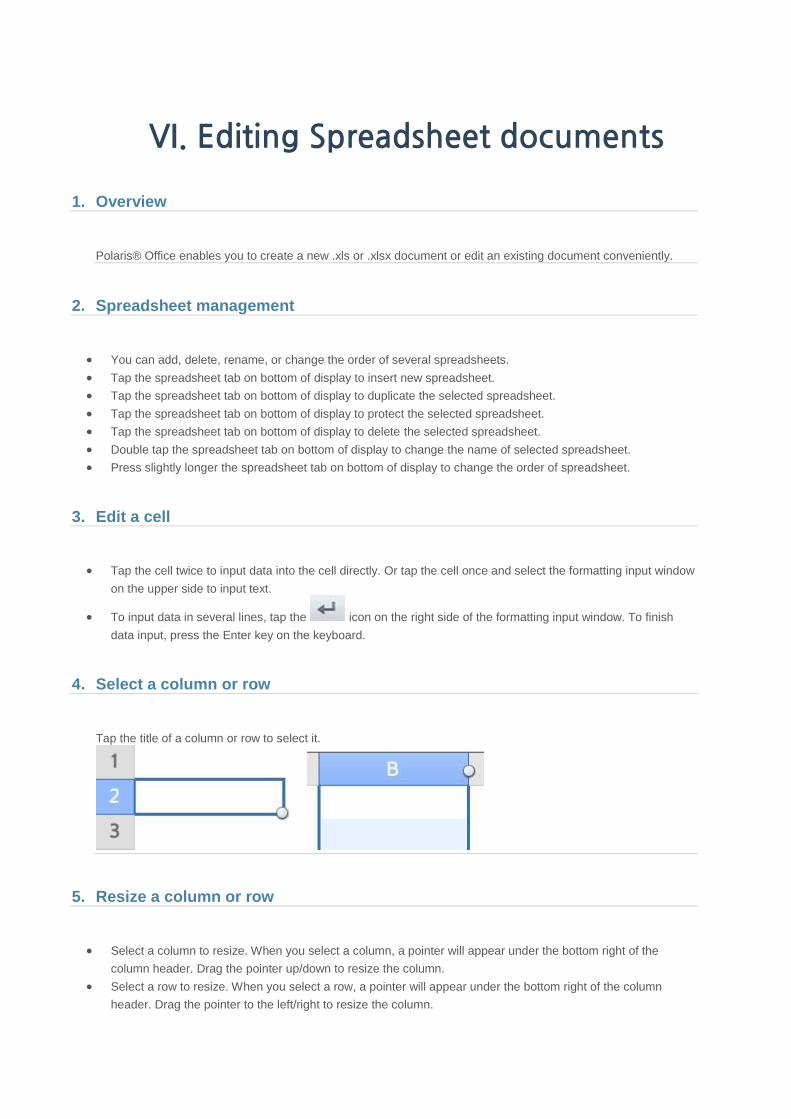
4. Select a column or row
Tap the title of a column or row to select it.
5. Resize a column or row
Select a column to resize. When you select a column, a pointer will appear under the bottom right of the
column header. Drag the pointer up/down to resize the column.
Select a row to resize. When you select a row, a pointer will appear under the bottom right of the column
header. Drag the pointer to the left/right to resize the column.

6. Select a cell range
To select a cell range, hold the pointer displayed at the bottom right of the cell and drag it.
7. Cut/Copy/Paste
To cut or copy a cell, hold the pointer and select a cell range first. If you select a cell, the context menu will
appear automatically. To cut the cell, select the “Cut” icon on the context menu, and select the “Copy” icon to
copy the cell. Select the position to copy to and press the “Paste” icon to paste.
8. Create a formula
You can insert about 350 functions into an expression. Select a cell into which you want to insert the expression
first. Press the icon besides the Equation Editor window to display a list of functions. You can search
through functions in the search window, and view help on the selected function when pressing the function name.
Select a function to insert it. If you select a cell, the data in the selected cell will be entered into the expression.
As the entered data and cell are displayed in the same color, you can edit the expression conveniently.

9. Font formatting
Select a cell and tap the icon on the upper side to display the Property panel. The option will appear that
enables you to change text size, color, effect, or font. If you select an option, it will be applied to the cell in real
time.
10. Align cells
Select a cell and tap the icon on the upper side to display the Property panel. If you press the Align tab on
the panel, horizontal cell alignment and vertical cell alignment options will appear. If you select an option, it will be
applied to the cell in real time.
11. Text line feed
Press the Align tab on the Property panel to align the text to fit into the cell width again. Press the “Text line feed”
icon under the Align tab and change the option to “On”.
12. Number formatting
Select a cell and tap the icon on the upper side to display the Property panel. If you press the Number tab
on the panel, categories will appear, such as General, Number, Currency, Date, etc. Select the category you
want, and select the formatting option for the selected category. Press the "Back" button to return to the sheet
without applying changes.
13. Cell formatting
Select a cell and tap the icon on the upper side to display the Property panel. You can change options by
pressing the Cell tab on the panel, such as fill color, border drawing, border color, and border thickness.
14. Clear a cell
If you select a cell, the context menu will appear automatically. Press the “View more” context menu and select
“Clear”. Press “All” to clear both cell data and formatting. Or press “Content” to delete the cell data only, or press
“Formatting” to clear any cell formatting.
15. Insert a chart
To insert a chart, tap the icon on the upper side. Then, object items that can be inserted will appear. Select
the icon. Select the chart type and the selected chart will be inserted into the sheet. You can apply the chart
style in advance using the Style menu on the upper side.

16. Chart formatting
When you select a chart and tap the icon on the upper side, , the “Property” panel will appear at the bottom.
You can change the chart type, layout, format, and style. For example, you can show or modify the chart title on
the Layout tab, or draw or clear the chart border line on the Format tab.
VII. Editing Slide document
1. Overview
Polaris® Office enables you to create a new .ppt or .pptx slideshow or edit an existing slideshow conveniently.
2. Add a slide
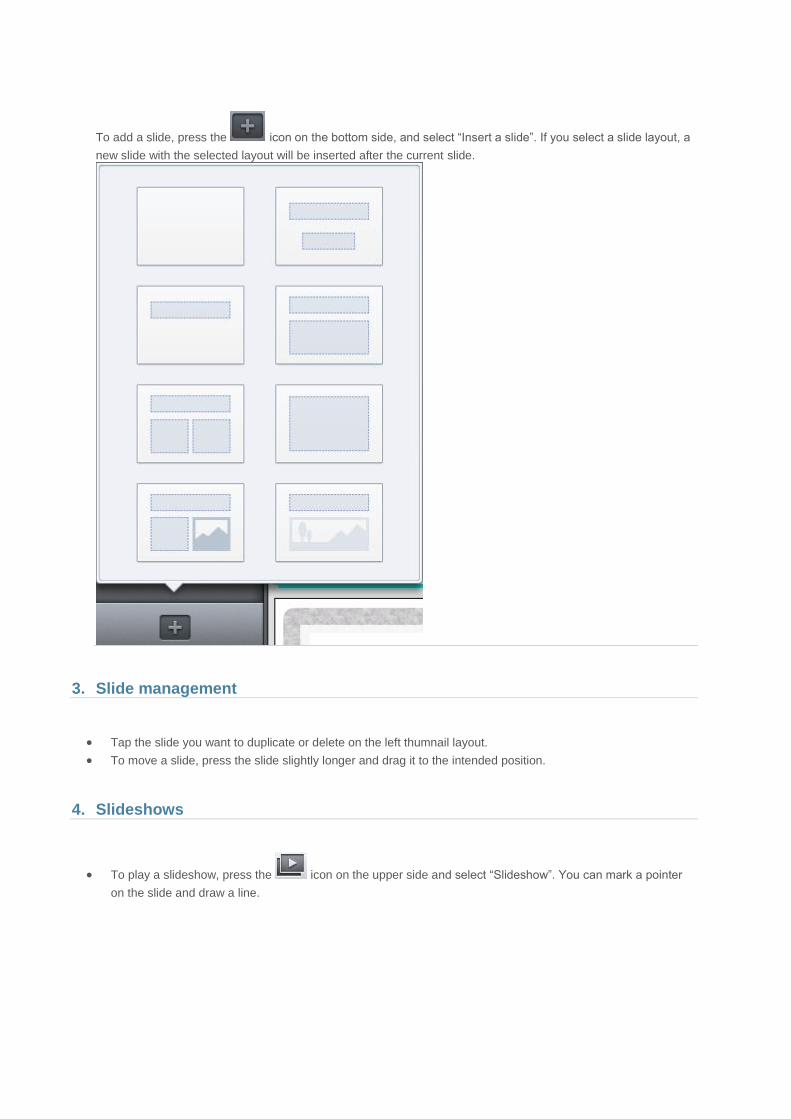
To add a slide, press the icon on the bottom side, and select “Insert a slide”. If you select a slide layout, a
new slide with the selected layout will be inserted after the current slide.
3. Slide management
Tap the slide you want to duplicate or delete on the left thumnail layout.
To move a slide, press the slide slightly longer and drag it to the intended position.
4. Slideshows
To play a slideshow, press the icon on the upper side and select “Slideshow”. You can mark a pointer
on the slide and draw a line.

Tap the slide once to move to the next slide.
Panning left or right side to move the previous or next slide.
To use a pointer, press the slide slightly longer and select the icon. When the pointer is activated, the
pointer mark will appear at the bottom left of the screen. If you tab the upper side of the slide, a pointer will
appear on the tab and disappear quickly. You can change the color of the pointer by pressing the icon at
the bottom left.
To use a pen, press the slide slightly longer and select the icon. When the pen is activated, the pen
mark will appear at the bottom left of the screen. If you drag the pen, a line will be drawn. You can select the
pen color and thickness by pressing the icon at the bottom left. To clear the line drawn, press
the icon at the bottom right and select the line to delete.

To finish a slideshow, press the “Cancel” key. If a line is drawn, the prompt will appear and ask you whether
you want to save the line in the slide or not. If you press OK, it will be saved as a line object inside the slide.
5. Slide notes
To display the slide notes, press the icon. The notes will be displayed at the bottom of the slides. If you
move a slide, the note corresponding to the selected slide will be displayed. You can modify the notes by tapping
on them.
6. Insert a chart

To insert a chart, tap the icon on the upper side. Then, object items that can be inserted will appear. Select
a icon. Select the chart type and the selected chart will be inserted into the slide. You can apply the chart
style in advance using the Style menu on the upper side.
The default data is entered in the inserted chart, and you change it. Tap the chart twice to display the chart data
table. You can modify, add, or delete data by selecting a cell on the table.
VIII. Editing text
1. Overview
Polaris® Office enables you to create a new .txt document or edit an existing document conveniently.
2. Text size
Tap the icon on the upper side to display the Property panel. You can choose up to a 5-point font size.
Select the font size and press the “Finish” button to apply the selected font size to the entire text document.

3. Change background themes
Tap the icon on the upper side to display the Property panel. You can choose up to 3 themes. Select the
theme you want and press the “Finish” button to apply the selected theme to the text document.
4. Change encoding
Tap the icon on the upper side to display the Property panel. Select the encoding type and press the “Finish”
button to apply the selected encoding type to the text document.
IX. Accessing service
1. Overview
Polaris® Office allows you to add a web storage service, such as Google Docs, Box.net, and WebDAV. You
can upload/download a file from/to the added storage service.
To subscribe to Google Docs or see the details, please visit the web site:
https://docs.google.com
To subscribe to Box.net or see the details, please visit the web site:
http://www.box.net
In order to upload/download files to/from the home server, please visit the following site:
http://www.webdav.org

2. Connection
Press the icon on the home screen, and select Google Docs/Box.net/WebDAV. Input the correct e-mail
address and password for the service and press the [Finish] button.
3. Adding several accounts
To add several accounts, press the “Add an account” button and repeat the service access steps. All added
accounts will appear on the cloud service screen.
4. Deleting an account
Panning left or right on the account you wish to delete will cause the delete button to appear. Select 'Confirm' on
the message box which appears in order to delete this account.