hp service manager - integrated windows …€¦ · web viewby default, hp service manager...
TRANSCRIPT

HP Service Manager Single Sign On ImplementationIntegration with Integrated Windows Authentication
For
customerVersion 0.2

Bruno De Graeve
HP Software Professional Services
This document is solely for the use of HP and Customer. No part of this document may be provided, circulated or quoted to third parties or reproduced for distribution outside of the Customer organization without prior written approval from HP.
HP ConfidentialPage 2

Table of Contents
1........................................................................................................................Document Information.....................................................................................................................................................3
2..........................................................................................................................................Introduction.....................................................................................................................................................4
2.1................................................................................Why do we implement SSO?.............................................................................................................................4
2.2...................................HP Documentation about SSO for HP Service Manager.............................................................................................................................5
3...............................................................................................................Installation & Configuration.....................................................................................................................................................6
3.1....................................................................How will the architecture look like ?.............................................................................................................................6
3.2........................................................................................Installation Prerequisites.............................................................................................................................7
3.2.1....................................................................................Install Java 1.6 JDK.....................................................................................................................7
3.2.2............................................................................Install Apache Tomcat 7.....................................................................................................................9
3.3......................................Demo setup IIS -> Tomcat -> HPSM web application...........................................................................................................................10
3.3.1......................................................................................................Install IIS...................................................................................................................10
3.3.2...................................................................................Jakarta ISAPI plugin...................................................................................................................11
3.3.3...................................Create directory structure for JAKARTA_ISAPI...................................................................................................................11
3.3.4....................................................................Content of isapi_redirect files...................................................................................................................12
3.3.5....................................................................Configure workers.properties...................................................................................................................12
3.3.6..........................................................Configure uriworkermap.properties...................................................................................................................13
This document is solely for the use of HP. No part of this document may be provided, circulated or quoted to third parties or reproduced for distribution outside of the HP organization without prior written approval from HP.
HP Confidential 3

3.3.7....................................Configuring the Tomcat ISAPI Connector in IIS...................................................................................................................14
3.3.8....................Enable Integrated Windows Authentication (IWA) on IIS...................................................................................................................23
3.3.9..........................................................................How-to secure jkmanager...................................................................................................................24
3.3.10.................................................................Configuring Internet Explorer...................................................................................................................26
3.3.11........................................................................Request Entity Too Large...................................................................................................................29
3.4...................................................................Creation of HPSM’s SSL-certificates...........................................................................................................................30
3.5..........................................................General HPSM web tier deployment tasks...........................................................................................................................37
3.6.....................................................Service Manager Configuration File Changes...........................................................................................................................38
3.6.1...........................................................................................................Sm.ini...................................................................................................................38
3.6.2..........................................................................................................Sm.cfg...................................................................................................................40
3.7...................................................................................................Configure Tomcat...........................................................................................................................40
3.7.1................................................................................Extraction webtier file...................................................................................................................40
3.7.2.................................................................Configure Tomcat's server.xml...................................................................................................................40
3.7.3....................................................................Changes in HPSM’s web.xml...................................................................................................................40
3.7.4..........................................Changes to HPSM’s application-context.xml...................................................................................................................43
3.7.1......................................................................Changes to log4j.properties....................................................................................................................43
This document is solely for the use of HP. No part of this document may be provided, circulated or quoted to third parties or reproduced for distribution outside of the HP organization without prior written approval from HP.
HP Confidential 4

4.................................................................................................................................Custom java bean...................................................................................................................................................47
4.1...............................................................................How will the setup look like ?...........................................................................................................................47
4.1.................................................................................Edit application-context.xml...........................................................................................................................48
4.1...............................................................................................Copy bean in HPSM...........................................................................................................................50
4.2.......................................................................................Custom bean source code...........................................................................................................................50
4.3.............................................................................................................Screen shots...........................................................................................................................54
4.3.1........................................................................................................Logging...................................................................................................................54
4.3.2........................................................When no matching operator is found...................................................................................................................56
5............................................................................................................................................Monitoring...................................................................................................................................................58
6...................................................................................................................................Debugging SSO...................................................................................................................................................59
This document is solely for the use of HP. No part of this document may be provided, circulated or quoted to third parties or reproduced for distribution outside of the HP organization without prior written approval from HP.
HP Confidential 5

1 Document InformationDistribution List
From Date Phone/Fax/Email
HP - Bruno De Graeve April 20, 2012 [email protected]
To Action* Due Date Phone/Fax/Email
Customer
Inform
HP
Inform
* Action Types: Approve, Review, Inform, File, Action Required, Attend Meeting, Other (please specify)
Version History
Ver. No. Ver. Date Revised By Description Filename
0.1 April 19, 2012 Bruno De Graeve
Initial Draft
0.2 April 20, 2012 Bruno De Graeve
Added chapter for custom java bean
Creation date: Monday, June 18, 2012
Last Update: Tuesday, June 19, 2012
Last saved by: Bruno De Graeve
This document is solely for the use of HP. No part of this document may be provided, circulated or quoted to third parties or reproduced for distribution outside of the HP organization without prior written approval from HP.
HP Confidential 6

2 IntroductionThis document technically describes the Single Sign-On setup for HP Service Manager based on Integrated Windows Authentication (IWA).
2.1 Why do we implement SSO?• HP Service Manager’s single sign-on functionality addresses the complexity of
maintaining duplicate user accounts, multiple passwords, and separate logins across applications.
• By replacing the need to log into multiple applications using the same login and password with a single, secure login process, you can ensure that information is both secure and easily accessed.
• This single sign-on solution provides security and convenience while greatly reducing operational expenses.
Prerequisites for SSO
• Authentication source: a Service Manager single/trusted sign-on implementation requires a web server to accept the pre-authenticated HTTP header information from your authentication software, such as CA SiteMinder, IBM Webseal, Quest’s VSJ-Kerberos or Microsoft’s Integrated Windows Authentication, home-brew authentication solutions, CAS, openSSO, …
• You must install and configure the authentication software separately. See your web server documentation for information about the HTTP headers that your web server expects from your authentication software.
• Web tier (HTTP and web application server) must be compatible with HPSM version
• HPSM RTE installed and configured for SSO
• HPSM web client configured for SSO
• Browser Internet Explorer (IE) or Firefox must be IWA enabled.
• URL should be added to the trusted domains in IE.
HP SM server/client SSL certificates
Until HPSM 7.11, mutual SSL authentication was mandatory when setting up for SSO since. Between HPSM 7.11 and 9.30, SSL certificates were not mandatory anymore although advised by HP. Starting from HPSM 9.30, HP’s security office decided to enable the SSL prerequisite again for a working SSO environment.
However, it’s always HP’s best practice to install client and server certificates when implementing SSO.
Activating single sign-on requires in general that you either create or purchase Secure Socket Layer (SSL) certificates for the SM server, SM Web Tier, and SM Windows
This document is solely for the use of HP. No part of this document may be provided, circulated or quoted to third parties or reproduced for distribution outside of the HP organization without prior written approval from HP.
HP Confidential 7

clients. You can purchase SSL certificates from a certificate authority (CA), which is a trusted third party that issues root digital certificates and confirms certificate authenticity. You use these certificates to create a secure network connection between the SM Windows-client and the SM server, or between the SM Web Tier and the SM server. This document includes the description how to generate your SSL certificates with a self-signed Certificate Authority.
The connection between the user's Web browser and the Web Tier remains unchanged, requires no additional configuration in terms of importing certificates and falls under the responsibility of the customer. HP strongly advises her customer to setup HTTPS between browser and web tier.
Note
HPSM is supported to run against Kerberos to enable SSO and Trusted Sign-On (TSO) security for Apache / Tomcat platforms on the basis it is a ‘Transparent Technology’. By this we mean that Kerberos is implemented at the Apache / Tomcat administration level and would not be expected to impact applications such as the SM web client beyond the expected authentication functionality.
The definition of support for transparent technologies is stated in the Service Manager compatibility matrix available here:
http://support.openview.hp.com/sc/support_matrices.jsp
2.2 HP Documentation about SSO for HP Service Manager
HPSM SSO white paper. Downloadable from http://support.openview.hp.com/selfsolve/document/KM773556
HP SM 9.21/9.30 Help server
HP Knowledge base articles:
o FAQ about HP Service Manager and SSO (Single Sign-On) support. (http://support.openview.hp.com/selfsolve/document/KM742891 )
o How can SSL and SSO work with a certificate authority, such as the MS Certificate Server? (http://support.openview.hp.com/selfsolve/document/KM862296 )
o Running loadbalancer for 2 types of connection: one with SSO and the other without SSO. (http://support.openview.hp.com/selfsolve/document/KM831695 ). This document does not apply for HPSM 9.30.
o Steps to configure SSO for Windows Client. (http://support.openview.hp.com/selfsolve/document/KM1112808 )
o Hands on guide - Setting SSL & SSO (trusted-sign-on) with Service Manager. (http://support.openview.hp.com/selfsolve/document/KM1318768 )
This document is solely for the use of HP. No part of this document may be provided, circulated or quoted to third parties or reproduced for distribution outside of the HP organization without prior written approval from HP.
HP Confidential 8

This document is solely for the use of HP. No part of this document may be provided, circulated or quoted to third parties or reproduced for distribution outside of the HP organization without prior written approval from HP.
HP Confidential 9
3 Installation & ConfigurationThis is a demo setup how Microsoft’s IIS – Apache Tomcat integration might be set up. It will probably differ on each customer’s environment. This set up can be used for a POC and reviewed for Production usage.
In the following paragraphs, screen shots are based on Microsoft’s Windows 2003 server and its included HTTP server IIS (version 6).
This document is solely for the use of HP. No part of this document may be provided, circulated or quoted to third parties or reproduced for distribution outside of the HP organization without prior written approval from HP.
HP Confidential 10

3.1 How will the architecture look like ?
Figure 1: example SSO setup using IWA
Figure 1 shows an example architecture of HPSM integrated with IWA. On the Web Application server, we’ve deployed the HPSM web client (context root /SM9) which is configured for IWA integration (PreAuthenticationFilter is enabled). Custom authentication can be achieved by deploying a custom bean which extends the httpHeaderPreAuthenticationFilter or PreAuthenticationFilter.
This document is solely for the use of HP. No part of this document may be provided, circulated or quoted to third parties or reproduced for distribution outside of the HP organization without prior written approval from HP.
HP Confidential 11

These are detailed steps describing how the integration works:
1. A user requests a resource (on IIS) contained in an application protected by IWA authentication.
2. IIS verifies the credentials (included by IE) with AD. 3. If the authentication is successful, IIS adds the authenticated username to the request
header and redirects the user request to the URL defined in IIS ISAPI redirector plug-in.4. IIS ISAPI redirector forwards the request to the Tomcat Apache Java Protocol (AJP)
Connector5. The HPSM SSO framework performs the log-in operation with the username from the
header
On top of the PreAuthenticationFilter filter, HP Professional Services (HP PSO) created their own bean (HPPSO_iwa_preAuthenticationFilter) which replaces the PreAuthenticationFilter bean because it offers more debugging, upper/lowercase conversion of the credentials set in the header and allows reusing the domain value.
More about in 4 Custom java bean below.
3.2 Installation Prerequisites3.2.1 Install Java 1.6 JDK
The Java JDK will be for instance installed on the server in the directory “D:\localapp\jdk1.6.0_30”. This is done via the installation file “jdk-6u30-windows-i586/x64.exe”.
Download the appropriate version (x86/x64) and at the time of writing (April 2012), 1.6.0_30 was the latest version downloadable from http://www.oracle.com/technetwork/java/javasebusiness/downloads/java-archive-downloads-javase6-419409.html .
This document is solely for the use of HP. No part of this document may be provided, circulated or quoted to third parties or reproduced for distribution outside of the HP organization without prior written approval from HP.
HP Confidential 12

This installation also comes with a bundled JRE1.6. If you want, you can install it in the default location (C:\Program Files\Java\jre) or somewhere else. We rather install it on D:\localapp\jre.
Change the Windows Environment variable ‘JAVA_HOME’ to point to the new JDK via “Start/Configuration Settings/System/Advanced/Environment Variables/New System Variable”
This document is solely for the use of HP. No part of this document may be provided, circulated or quoted to third parties or reproduced for distribution outside of the HP organization without prior written approval from HP.
HP Confidential 13

3.2.2 Install Apache Tomcat 7 Installation Directory
To install Tomcat the provided file “apache-tomcat-7.0.25-windows-XYZ.zip” must be for instance extracted to the directory “D:\localapp\tomcat7”. The extracted directory is the full program directory.
Some prefer the easier way and will use the 32-bit/64-bit Windows Service Installer.
Tomcat binaries can be downloaded from: http://tomcat.apache.org/download-70.cgi
This setup is based on the downloadable 32-bit ZIP archive. Choose the appropriate version according to your OS architecture.
Installation Windows Service
Next step is to create a Windows Service for Tomcat. This can be done via the “service.bat”-command, delivered in the bin-directory.
Run the “service.bat install”- command in the bin-directory and the windows service “Tomcat7” will be installed. If you want another service name, edit first service.bat.
Note:
Due to other versions of Tomcat which are installed on the server, it is possible that the “service.bat”-command doesn’t run properly. If this is the case, the Tomcat variable “CATALINA_HOME” has to be emptied before running the commando. This can be done via the following command
set CATALINA_HOME=
This will only change this variable in our command prompt session.
Changing startup parameters and JVM settings.
This document is solely for the use of HP. No part of this document may be provided, circulated or quoted to third parties or reproduced for distribution outside of the HP organization without prior written approval from HP.
HP Confidential 14

Create the file “setenv.bat” in the Tomcat bin-directory with the following content:
set CATALINA_OPTS=-XX:MaxPermSize=256m -Xms512M -Xmx512M -Dsun.net.client.defaultReadTimeout=600000
set CATALINA_HOME=D:\localapp\Tomcat7
REM default setting is 60 seconds, for customer A: 10 minutes
REM CATALINA_OPTS="$CATALINA_OPTS -Dsun.net.client.defaultReadTimeout=60000 -Dsun.net.client.defaultConnectTimeout=60000"
These parameters will be set when the Tomcat service starts. Instead of using the variable ‘JAVA_OPTS’, we’re manipulating the variable ‘CATALINA_HOME’, which ensures that the change of these variables will only affect this Tomcat service and no other JAVA-applications running on the server.
3.3 Demo setup IIS -> Tomcat -> HPSM web application3.3.1 Install IIS
In the following paragraphs, screen shots are based on Windows 2003 and IIS6.
Note: when using IIS7 and 7.5 think about:
Review the settings we’ve documented and check the settings described in http://tomcat.apache.org/connectors-doc/webserver_howto/iis.html and especially check if this paragraph make sense:
“In a 64 Bit environment - at least for IIS 7 - the used IIS Application Pool should have "Enable 32-bit Applications" set to "False". Otherwise the redirector will not be called and returns an http code 404. If you think, the 32bit version of isapi_redirect.dll would do the job instead, you will get an http code 500, because the library is not loadable into a 64 Bit IIS. ”
By default, IIS enables kernel-mode authentication, which may improve authentication performance and prevent authentication problems with application pools configured to use a custom identity. As a best practice, do not disable this setting if Kerberos authentication is used in your environment and the application pool is configured to use a custom identity.
This document is solely for the use of HP. No part of this document may be provided, circulated or quoted to third parties or reproduced for distribution outside of the HP organization without prior written approval from HP.
HP Confidential 15

3.3.2 Jakarta ISAPI pluginThe Jakarta ISAPI plugin will be used to connect IIS with Tomcat.
With the Jakarta plugin towards Tomcat, the Apache Java Protocol (AJP) is used. For more info, please see text below.
Configure the Tomcat Web container to support the AJP protocol
The Apache AJP protocol is packet-oriented and enables the Web server to communicate with the JSP/servlet container over TCP connections. Again, AJP is used here by IIS HTTP Server to communicate with Tomcat.
To cut down on the expensive process of socket creation, the Web server attempts to maintain persistent TCP connections to the servlet container, and attempts to reuse a connection for multiple request/response cycles. Once the Web server has opened a connection to the servlet container and assigned a connection to a particular request, it will not be used for any other requests until the request handling cycle has terminated. This makes the code at either end of the connection simpler -- although it does cause more connections to be open at once.
Once a connection is assigned to handle a particular request, the basic request information (HTTP headers, and so on) is sent over the TCP connection as a packet. At this point, the servlet container is presumably ready to start processing the request and sends the formatted packet of reply messages back to the Web server.
Source: http://www.ibm.com/developerworks/websphere/library/techarticles/0703_krishnasamy/0703_krishnasamy.html
3.3.3 Create directory structure for JAKARTA_ISAPIThe Jakarta ISAPI plugin will be used to connect Tomcat with IIS1.
1 More information on http://tomcat.apache.org/connectors-doc/reference/iis.html
This document is solely for the use of HP. No part of this document may be provided, circulated or quoted to third parties or reproduced for distribution outside of the HP organization without prior written approval from HP.
HP Confidential 16

1. Consult Isapi documentation on http://tomcat.apache.org/connectors-doc/reference/iis.html
2. Download appropriate binaries from http://tomcat.apache.org/download-connectors.cgi
3. Modify content isapi_redirect-1.2.XY.properties and the file should have the same name as the DLL file (without extension of course).
4. Rename DLL and properties file to isapi_redirect.dll and isapi_redirect.properties
Create the following directory three subdirectories:
bin conf log
for the configuration files of the Jakarta ISAPI Plugin:
This structure will be for instance created in the directory “D:\localapp\Apache\”on the webserver.
The following files need to be placed in de bin-directory:
isapi_redirect.properties isapi_redirect.dll (32 bit or 64 bit, depending on your server OS)
The following files need to be put in the conf-directory:
uriworkermap.properties workers.properties
3.3.4 Content of isapi_redirect files
This document is solely for the use of HP. No part of this document may be provided, circulated or quoted to third parties or reproduced for distribution outside of the HP organization without prior written approval from HP.
HP Confidential 17

In this file the redirect settings used by Jakarta ISAPI can be configured.
# Configuration file for the Jakarta ISAPI Redirector plug-in for IIS
# more information on http://tomcat.apache.org/connectors-doc/reference/iis.html
# this properties file is intended to replace Windows registry settings
# The path to the ISAPI Redirector Extension, relative to the website
# This must be in a virtual directory with execute privileges
#extension_uri=/jakarta/isapi_redirect.dll
## version 1.2.32
extension_uri=/jakarta/isapi_redirect.dll
# Full path to the log file for the ISAPI Redirector
#log_file=$(ISAPI_PATH)\log\$(ISAPI_NAME).log
log_file=D:\localapp\Apache\JAKARTA_ISAPI\log\isapi_redirect.log
# Log level (debug, info, warn, error or trace)
log_level=info
# Full path to the workers.properties file
worker_file=D:\localapp\Apache\JAKARTA_ISAPI\conf\workers.properties
# Full path to the uriworkermap.properties file
worker_mount_file=D:\localapp\Apache\JAKARTA_ISAPI\conf\uriworkermap.properties
# Improve security
#reject_unsafe=1
# custom error page when back end is not there anymore
#error_page=
3.3.5 Configure workers.propertiesThis document is solely for the use of HP. No part of this document may be provided, circulated or quoted to third parties or reproduced for distribution outside of the HP organization without prior written approval from HP.
HP Confidential 18

In this file the load balancing method of Jakarta ISAPI is configured. Two workers are defined: sm9lb for Service Manager and jkstatus for the jkmanager application. For the sm9lb-worker the redirect port settings are defined.
The example below has defined 3 workers for possible load balancing. For this setup we only use one of them (tomcat1).
More information can be found on http://tomcat.apache.org/connectors-doc/reference/workers.html
# workers.properties.minimal -
#
# This file provides minimal jk configuration properties needed to
# connect to Tomcat.
#
ps=\
# The workers that jk should create and work with
#
# Define workers using ajp13
# ------------------------
# First tomcat server
# ------------------------
worker.tomcat1.port=8019
worker.tomcat1.host=16.111.0.12
worker.tomcat1.type=ajp13
worker.tomcat1.lbfactor=1
# ------------------------
# Second tomcat server
# ------------------------
#worker.tomcat2.port=8010
#worker.tomcat2.host=17.111.12.16
This document is solely for the use of HP. No part of this document may be provided, circulated or quoted to third parties or reproduced for distribution outside of the HP organization without prior written approval from HP.
HP Confidential 19

#worker.tomcat2.type=ajp13
#worker.tomcat2.lbfactor=1
# ------------------------
# Third tomcat server
# ------------------------
#worker.tomcat3.port=8011
#worker.tomcat3.host=16.101.12.164
#worker.tomcat3.type=ajp13
#worker.tomcat3.lbfactor=1
################ Define the LB worker
# The advanced router LB worker
##########################################
worker.list=sm9lb
worker.sm9lb.type=lb
#worker.sm9lb.balance_workers=tomcat1,tomcat2,tomcat3
# only worker tomcat1 will be used
worker.sm9lb.balance_workers=tomcat1
worker.sm9lb.socket_keepalive=1
worker.sm9lb.method=S
worker.sm9lb.connection_pool_timeout=40
#worker.sm9lb.max_packet_size= 65536
# Add the status worker to the worker list
worker.list=jkstatus
# Define a 'jkstatus' worker using status
worker.jkstatus.type=status
Note: tomcat1, tomcat2 and tomcat3 are the jvmRoutes defined in Tomcat’s server.xml.
When using one single Tomcat instance, it’s not needed to modify Tomcat’s server.xml.
This document is solely for the use of HP. No part of this document may be provided, circulated or quoted to third parties or reproduced for distribution outside of the HP organization without prior written approval from HP.
HP Confidential 20

See screen shot below:
3.3.6 Configure uriworkermap.propertiesIn this properties file the HPSM web application with example context root smbsc is configured to work with the already configured worker sm9lb. The jkmanager-tag is redirected to the worker jkstatus.
# uriworkermap.properties - IIS
#
# This file provides sample mappings for example wlb
# worker defined in workermap.properties.minimal
# The general syntax for this file is:
# [URL]=[Worker name]
#/admin/*=wlb
#/manager/*=wlb
# Optionally filter out all .jpeg files inside that context
# For no mapping the url has to start with exclamation (!)
!/servlets-examples/*.jpeg=wlb
#
# Mount jkstatus to /jkmanager
# For production servers you will need to secure the access to the /jkmanager url via IIS
#
#/jkmanager=jkstatus
/jkmanager|/*=jkstatus
This document is solely for the use of HP. No part of this document may be provided, circulated or quoted to third parties or reproduced for distribution outside of the HP organization without prior written approval from HP.
HP Confidential 21

# HPSM 9.30 web application
/smbsc|/*=sm9lb
3.3.7 Configuring the Tomcat ISAPI Connector in IIS 3.3.7.1Web Services Extensions for JakartaNote : In case port 80 on IIS cannot be use, continue on 3.3.7.5 You cannot use port 80 ? below.
Open IIS Manager, and expand the Internet Information Services tree, from the <machine name> (local computer), to the Default Web Site,
Verify that the Default Web Site has been stopped,
From the Internet Information Services tree, select the Web Services Extensions node
Right click on the “Web Service Extensions” and select “Add a new Web service extension …” item:
Enter the following line into the ‘Extension name’ field in the opened window: Jakarta Isapi Redirector.
This document is solely for the use of HP. No part of this document may be provided, circulated or quoted to third parties or reproduced for distribution outside of the HP organization without prior written approval from HP.
HP Confidential 22

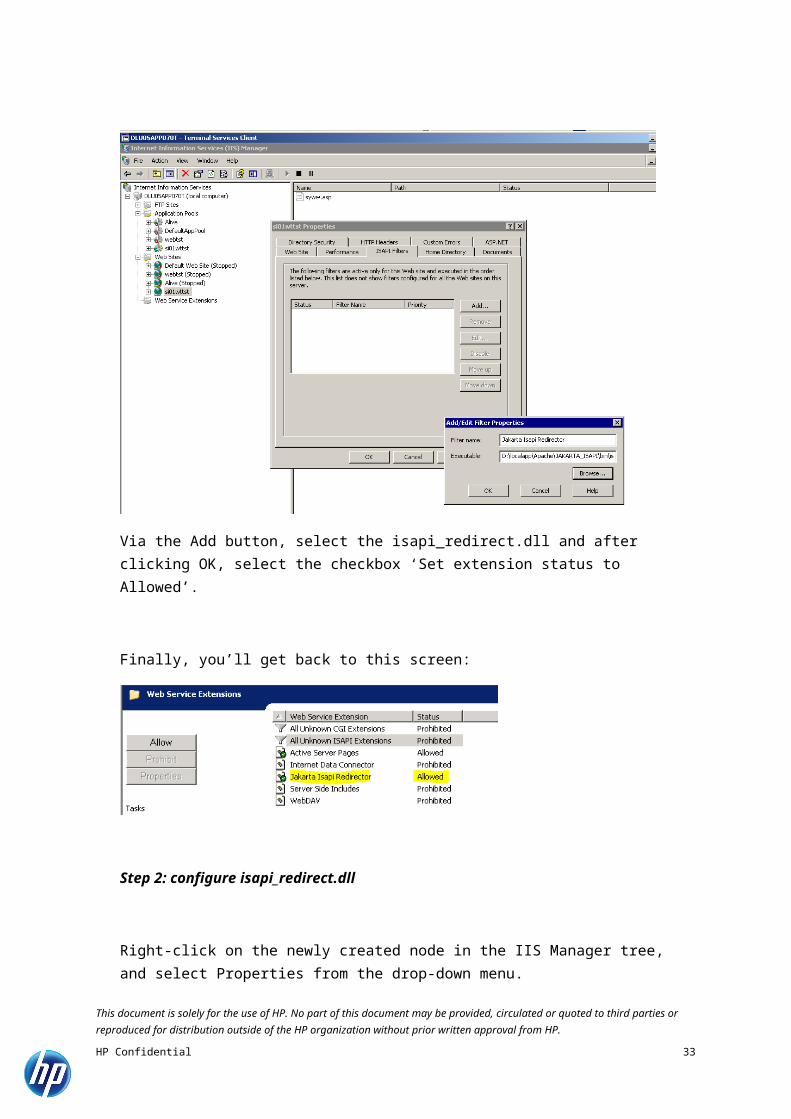
Via the Add button, select the isapi_redirect.dll and after clicking OK, select the checkbox ‘Set extension status to Allowed’.
3.3.7.2Step 2: configure isapi_redirect.dll Right-click on the Default Web Site node in the IIS Manager tree, and select Properties from the drop-down menu.
This document is solely for the use of HP. No part of this document may be provided, circulated or quoted to third parties or reproduced for distribution outside of the HP organization without prior written approval from HP.
HP Confidential 23

From the Default Web Site Properties window, select the ISAPI Filters tab, and click on the Add button,
On the Add/Edit Filter Properties window set the following parameters :
Filter name: Jakarta Isapi Redirector,
Executable: for instance C:\Apache\JAKARTA_ISAPI\bin\isapi_redirect.dll
This document is solely for the use of HP. No part of this document may be provided, circulated or quoted to third parties or reproduced for distribution outside of the HP organization without prior written approval from HP.
HP Confidential 24

3.3.7.3New -> Virtual Directory for Jakarta On the Default Web Site Properties window click OK to save the settings, right click on the Default Web Site node in the IIS Manager tree, and select New -> Virtual Directory... from the drop-down menu. This launches the Virtual Directory Creation Wizard.
From the Virtual Directory Creation Wizard, Virtual Directory Alias, set the Alias to : Jakarta.
From the Virtual Directory Creation Wizard, Web Site Content Directory, set for instance the path to: C:\Apache\JAKARTA_ISAPI\bin\
This document is solely for the use of HP. No part of this document may be provided, circulated or quoted to third parties or reproduced for distribution outside of the HP organization without prior written approval from HP.
HP Confidential 25

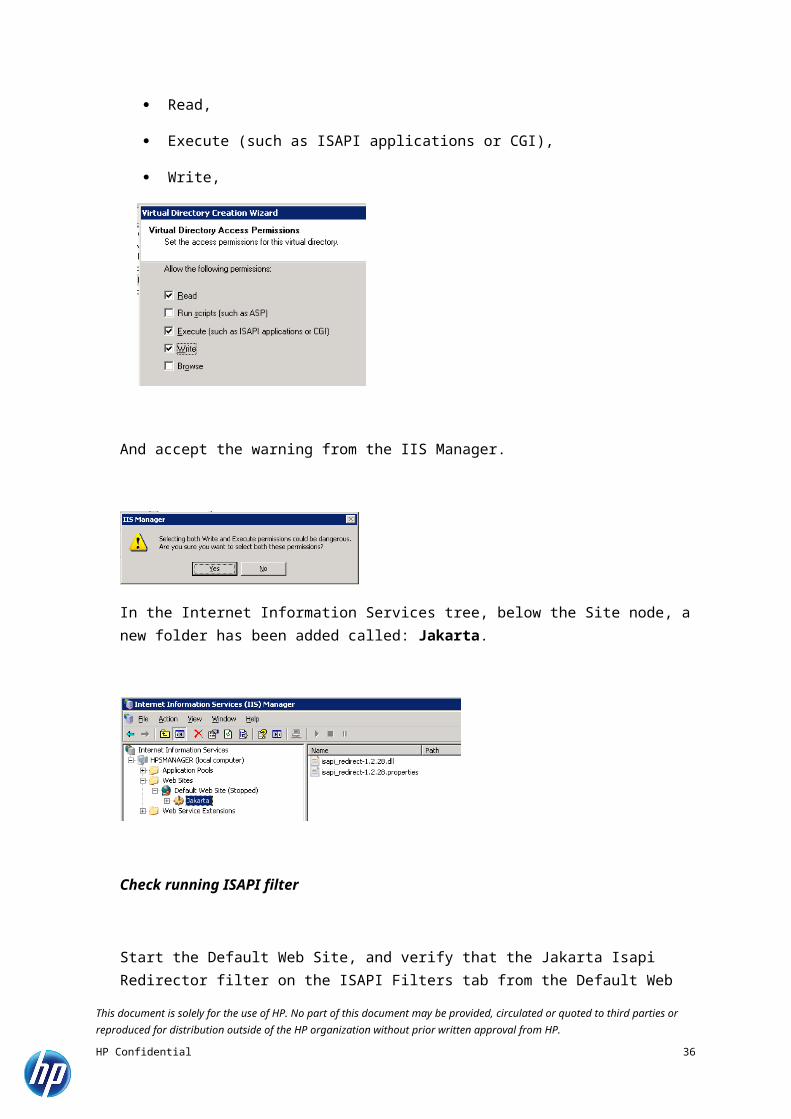
From the Virtual Directory Creation Wizard, Virtual Directory Access Permissions, enable the following checkboxes:
Read, Execute (such as ISAPI applications or CGI), Write,
and accept the warning from IIS Manager,
In the Internet Information Services tree, below the Default Web Site node, a new folder has been added called Jakarta,
3.3.7.4Check running ISAPI filter Start the Default Web Site verify that the Jakarta Isapi Redirector filter on the ISAPI Filters tab from the Default Web
Site Properties window is running, This document is solely for the use of HP. No part of this document may be provided, circulated or quoted to third parties or reproduced for distribution outside of the HP organization without prior written approval from HP.
HP Confidential 26

and that the Priority is set to High,
Note - If you check on its status, you may notice that the ISAPI filter hasn’t been successfully loaded at this stage, even if you have re-started IIS. This is expected behavior and is documented in the IIS6 Operations Guide,
“In an effort to optimize resources in IIS 6.0, an ISAPI filter is not loaded until a request is made to a Web site that requires the ISAPI filter. Until this request is made, IIS Manager does not display the status of the ISAPI filter.”
http://www.microsoft.com/technet/prodtechnol/WindowsServer2003/Library/IIS/93f23233-2a47-4104-b0b4-a7ec0d3116f3.mspx
However, once IIS has served a successful request to it you will see the status of the ISAPI filter change to ‘Loaded’.
3.3.7.5You cannot use port 80 ?Note : If the previous steps were executed, you can ignore this paragraph.
As there is another web site running on port 80 in the customers environment, we will define a new web site that listens on port 81. This document is solely for the use of HP. No part of this document may be provided, circulated or quoted to third parties or reproduced for distribution outside of the HP organization without prior written approval from HP.
HP Confidential 27

Please create a new node under Web Sites with the following properties:
Step 1: Web Services Extensions for Jakarta
Open the IIS Manager, and expand the Internet Information Services tree, from the <machine name> (local computer), down to Web Sites.
This document is solely for the use of HP. No part of this document may be provided, circulated or quoted to third parties or reproduced for distribution outside of the HP organization without prior written approval from HP.
HP Confidential 28

From the Internet Information Services tree, select the Web Services Extensions node
Right click on the “Web Service Extensions” and select “Add a new Web service extension …” item:
Enter the following line into the ‘Extension name’ field in the opened window:
Jakarta Isapi Redirector.
This document is solely for the use of HP. No part of this document may be provided, circulated or quoted to third parties or reproduced for distribution outside of the HP organization without prior written approval from HP.
HP Confidential 29

Via the Add button, select the isapi_redirect.dll and after clicking OK, select the checkbox ‘Set extension status to Allowed’.
Finally, you’ll get back to this screen:
Step 2: configure isapi_redirect.dll
Right-click on the newly created node in the IIS Manager tree, and select Properties from the drop-down menu.
From the Site Properties window, select the ISAPI Filters tab, and click on the Add button:
This document is solely for the use of HP. No part of this document may be provided, circulated or quoted to third parties or reproduced for distribution outside of the HP organization without prior written approval from HP.
HP Confidential 30

On the Add/Edit Filter Properties window set the following parameters :
Filter name: Jakarta Isapi Redirector,
Executable: D:\localapps\Apcache\JAKARTA_ISAPI\bin\isapi_redirect.dll
Step 3: New -> Virtual Directory for Jakarta
On the Node Properties window click on the OK to save the settings,
right-click on the node in the IIS Manager tree,
and select New -> Virtual Directory... from the drop-down menu.
This launches the Virtual Directory Creation Wizard,
This document is solely for the use of HP. No part of this document may be provided, circulated or quoted to third parties or reproduced for distribution outside of the HP organization without prior written approval from HP.
HP Confidential 31

From the Virtual Directory Creation Wizard, Virtual Directory Alias, set the Alias to: Jakarta.
From the Virtual Directory Creation Wizard, Web Site Content Directory set the path to: “D:\localapps\Apache\JAKARTA_ISAPI\bin\”
From the Virtual Directory Creation Wizard, Virtual Directory Access Permissions, enable the following checkboxes:
Read,
Execute (such as ISAPI applications or CGI),
Write,
This document is solely for the use of HP. No part of this document may be provided, circulated or quoted to third parties or reproduced for distribution outside of the HP organization without prior written approval from HP.
HP Confidential 32
And accept the warning from the IIS Manager.
In the Internet Information Services tree, below the Site node, a new folder has been added called: Jakarta.
Check running ISAPI filter
Start the Default Web Site, and verify that the Jakarta Isapi Redirector filter on the ISAPI Filters tab from the Default Web Site Properties window is up and running, and that the Priority is set to: High.
This document is solely for the use of HP. No part of this document may be provided, circulated or quoted to third parties or reproduced for distribution outside of the HP organization without prior written approval from HP.
HP Confidential 33

Note - If you check on its status, you may notice that the ISAPI filter hasn’t been successfully loaded at this stage, even if you have re-started IIS. This is expected behavior and is documented in the IIS6 Operations Guide,
“In an effort to optimize resources in IIS 6.0, an ISAPI filter is not loaded until a request is made to a Web site that requires the ISAPI filter. Until this request is made, IIS Manager does not display the status of the ISAPI filter.”
http://www.microsoft.com/technet/prodtechnol/WindowsServer2003/Library/IIS/93f23233-2a47-4104-b0b4-a7ec0d3116f3.mspx
However, once IIS has served a successful request to it you will see the status of the ISAPI filter change to ‘Loaded’.
3.3.8 Enable Integrated Windows Authentication (IWA) on IISGo to the properties of the Default Web Site and go to the Directory Security tab, click the Edit button from Authentication and Access control.
This document is solely for the use of HP. No part of this document may be provided, circulated or quoted to third parties or reproduced for distribution outside of the HP organization without prior written approval from HP.
HP Confidential 34

Enable “Integrated Windows Authentication” and disable all the rest:
By enabling the checkbox “Integrated Windows Authentication”, we will force Kerberos above NTLM authentication.
3.3.9 How-to secure jkmanagerCreate a new virtual directory “jkmanager” and let it point to the ISAPI log file directory.
This document is solely for the use of HP. No part of this document may be provided, circulated or quoted to third parties or reproduced for distribution outside of the HP organization without prior written approval from HP.
HP Confidential 35
Allow only 127.0.0.1 and local access:
This document is solely for the use of HP. No part of this document may be provided, circulated or quoted to third parties or reproduced for distribution outside of the HP organization without prior written approval from HP.
HP Confidential 36

Beside 127.0.0.1, add also the local IP addresses of the web server (ex. 10.136.17.185):
This is the result when you access jkmanager from the local machine. Only this URL will work: http://localhost:81/jkmanager
This document is solely for the use of HP. No part of this document may be provided, circulated or quoted to third parties or reproduced for distribution outside of the HP organization without prior written approval from HP.
HP Confidential 37

3.3.10 Configuring Internet ExplorerStart the Internet Explorer browser on the machine
on the menu bar click on Tools, and select Internet Options, Select the Security tab, select the Local Intranet content zone, and click on the Sites... button, add the following address to the list of trusted web sites : http://<Fully Qualified Domain
Name of this SM web application server> make sure that the "Require server verification (https:) for all site in this zone" option is not
selected, on the Security tab page, select the Local Intranet content zone, and click on the Custom
Level... button, at the bottom, on the User Authentication, Logon section, select the following option : automatic logon with current username and password
The following screen shots are based on IE8.
This document is solely for the use of HP. No part of this document may be provided, circulated or quoted to third parties or reproduced for distribution outside of the HP organization without prior written approval from HP.
HP Confidential 38

Go to Tools- Internet Options.
Click on the button Sites
This document is solely for the use of HP. No part of this document may be provided, circulated or quoted to third parties or reproduced for distribution outside of the HP organization without prior written approval from HP.
HP Confidential 39

Add your IIS server FQDN (before, uncheck Require server verification if https is not enabled).
Click close
Click button Custom level
This document is solely for the use of HP. No part of this document may be provided, circulated or quoted to third parties or reproduced for distribution outside of the HP organization without prior written approval from HP.
HP Confidential 40

Go to the User Authentication part and change the default "Automatic logon in Intranet Zone" to "Automatic logon with current user name and password"
Click OK and go to the Advanced Tab in Internet Options
Check if Integrated Windows Authentication is enabled (Kerberos authN. instead of NTLM)
This document is solely for the use of HP. No part of this document may be provided, circulated or quoted to third parties or reproduced for distribution outside of the HP organization without prior written approval from HP.
HP Confidential 41

3.3.11 Request Entity Too LargeIn case you get a Request Entity Too Large error in your browser, you should consider these additional steps.
Figure 2: Request Entity Too Large error
This document is solely for the use of HP. No part of this document may be provided, circulated or quoted to third parties or reproduced for distribution outside of the HP organization without prior written approval from HP.
HP Confidential 42

Very often the HTTP header encodes the users group membership in the authorization header. By default Tomcat has an 8k maximum header, whilst users belonging to many groups can have an authorization token that can swell to larger than this size. This explains why you see some people can login and others can't.
To solve this issue, you just change the maxHttpHeaderSize to something larger than the default 8k and you should be set.
In order to change the ISAPI Redirector, look for max_packet_size on http://tomcat.apache.org/connectors-doc/reference/workers.html and don't forget to read the comment about also changing the Tomcat configuration.
On the Tomcat level, we need to change the packetSize.
This attribute sets the maximum AJP packet size in Bytes. The maximum value is 65536. It should be the same as the max_packet_size directive configured for mod_jk. Normally it is not necessary to change the maximum packet size. Problems with the default value have been reported when sending certificates or certificate chains. The default value is 8192.
A useful example can be found on http://builddeploy.blogspot.com/2009/04/resolving-http-error-413-request-entity.html
Example Tomcat AJP port change:
<!-- Define a Coyote/JK2 AJP 1.3 Connector on port 8009 -->
<Connector port="8009"
enableLookups="false" redirectPort="8443" debug="0" tomcatAuthentication=”false” packetSize=20000
protocol="AJP/1.3" />”
The values of packetSize and max_packet_size must be equal !
3.4 Creation of HPSM’s SSL-certificatesStarting from HPSM 9.30, HP’s security office decided to enable the SSL prerequisite for a working SSO environment again.
The official instructions to create the SSL-certificates can be followed from this KB article:
http://support.openview.hp.com/selfsolve/document/KM773556 .
For the SSL certificates which will be deployed on the Customers Environment we’ve used automatic scripts to generate them. These scripts are based on the above knowledge base.
In the attached zip-file, the configuration files for the script can be found. To use the script, the zip-file must be extracted.
This document is solely for the use of HP. No part of this document may be provided, circulated or quoted to third parties or reproduced for distribution outside of the HP organization without prior written approval from HP.
HP Confidential 43

The following list of actions must be followed to generate the certificates for the other environments. This is based on the User Guide which can also be found in the above ZIP-file.
- set the following Windows Environment variable for the certificates:
OPENSSL_CONF %install_path%\TSO-servlet\DSA\openssl.conf(for DSA type certificates)
- configure the openssl.conf for the [ req_distinguished_name ] section to set the values for
your specific DN for your certificate. Only change the following parameters:
countryName_default
stateOrProvinceName_default
localityName_default
0.organizationName_default
organizationalUnitName_default
commonName_default
emailAddress_default
- open the DSA server batch file (server_cert_gen_DSA_v1.1.bat) and set the following parameters to make the certificate generators work:
set JAVA_HOME="<home directory of the Java JRE>"
set DIST_NAME="CN=<FQDN of the SM server>, OU=<department name>, O=<organisation name>, L=<city name>, S=<state/province name>, C=<2 digit country code>"
-the cacerts-file provided in the local JRE-folder will be used; therefore it’s a recommendation to create a backup of your original cacerts-file in case something goes wrong with the certificate creation.
This document is solely for the use of HP. No part of this document may be provided, circulated or quoted to third parties or reproduced for distribution outside of the HP organization without prior written approval from HP.
HP Confidential 44

- open the DSA client batch file (client_cert_gen_DSA_v1.1.bat) and set the following parameters to make the certificate generators work:
set JAVA_HOME="<home directory of the Java JRE>"
set DIST_NAME="CN=<FQDN of the SM client>, OU=<department name>, O=<organisation name>, L=<city name>, S=<state/province name>, C=<2 digit country code>"
- first run the server certificate generator server_cert_gen_DSA_v1.1.bat.
- when asked for the DN values, either accept the default values as set in the openssl.conf file,
or fill in a user-defined values for each parameter,
- on all other questions answer yes,
- in general, you only need to run the server batch file once per server,
The output from the server script server_cert_gen_DSA_v1.1.bat will look like:
# This version of the SC-SM SSL Certificates Creator is based on OPENSSL 1.0.0e,
# it will not work with prior versions.
C:\SSLacme\SC-SM_Cert_Gen_v2\TSO-servlet\DSALocalhost>REM #cls
Could Not Find C:\SSLacme\SC-SM_Cert_Gen_v2\TSO-servlet\DSALocalhost\key
Could Not Find C:\SSLacme\SC-SM_Cert_Gen_v2\TSO-servlet\DSALocalhost\certs
Could Not Find C:\SSLacme\SC-SM_Cert_Gen_v2\TSO-servlet\DSALocalhost\crs
1 file(s) copied.
1 file(s) copied.
This document is solely for the use of HP. No part of this document may be provided, circulated or quoted to third parties or reproduced for distribution outside of the HP organization without prior written approval from HP.
HP Confidential 45

Press any key to continue . . .
_______________________________________________________________________________
Creating a DSA parameter file (dsaparam.pem)
.......+...+..+.....+...+.+..........................+....+++++++++++++++++++++++++++++++++++++++++++++++++++*
..+..+................+..+..+..+..+....+...+...+.........+.........+..........+...............+.............+...+........+.+.+.+.......+....
.........................+....................+...+......+.....+.....+.........................+.................+......+...............+..+
......+.+..............+...................+.+......+..........+.+......+..+.....+...+......+.........+........+.+..............+.........+.
.........+.....+........................................+..............+.......+.........+..+.....+...........+....................+........
...........+.........................+.....+...+.....+.+............+......+.+....+......+.......................+.+....+......+....+.......
.......+.+++++++++++++++++++++++++++++++++++++++++++++++++++*
_______________________________________________________________________________
Press any key to continue . . .
_______________________________________________________________________________
Creating a Self-Signed DSA Certificate (cakey.pem)
_______________________________________________________________________________
Press any key to continue . . .
_______________________________________________________________________________
Creating the root ca certificate (mycacert.pem)
This document is solely for the use of HP. No part of this document may be provided, circulated or quoted to third parties or reproduced for distribution outside of the HP organization without prior written approval from HP.
HP Confidential 46

Loading 'screen' into random state - done
You are about to be asked to enter information that will be incorporated
into your certificate request.
What you are about to enter is what is called a Distinguished Name or a DN.
There are quite a few fields but you can leave some blank
For some fields there will be a default value,
If you enter '.', the field will be left blank.
-----
Country Name (2 letter code) [BE]:
State or Province Name (full name) [BHG]:
Locality Name (eg, city) [Brussels]:
Organization Name (eg, company) [PRTL]:
Organizational Unit Name (eg, section) [DTS]:
Common Name (eg, YOUR name) [PRTL]:
Email Address [[email protected]]:
_______________________________________________________________________________
Press any key to continue . . .
_______________________________________________________________________________
Creating the root PKCS12 certificate (mycacert.pfx)
Loading 'screen' into random state - done
_______________________________________________________________________________
Press any key to continue . . .
This document is solely for the use of HP. No part of this document may be provided, circulated or quoted to third parties or reproduced for distribution outside of the HP organization without prior written approval from HP.
HP Confidential 47

_______________________________________________________________________________
Importing the certificate into the System-wide keystore (cacerts)
Owner: [email protected], CN=PRTL, OU=DTS, O=PRTL, L=Brussels, ST=BHG, C=BE
Issuer: [email protected], CN=PRTL, OU=DTS, O=PRTL, L=Brussels, ST=BHG, C=BE
Serial number: fe44bf8051ad75cd
Valid from: Wed Feb 22 15:32:57 CET 2012 until: Fri Oct 31 15:32:57 CET 2025
Certificate fingerprints:
MD5: 3F:5F:1A:17:12:DB:FA:41:0D:D6:31:F6:8C:10:AE:C7
SHA1: AB:46:81:0B:59:DD:B3:86:C6:D6:2C:1D:BA:F6:FE:28:D2:54:C6:16
Signature algorithm name: SHA1withDSA
Version: 3
Extensions:
#1: ObjectId: 2.5.29.14 Criticality=false
SubjectKeyIdentifier [
KeyIdentifier [
0000: 9C 5F 23 E3 EF 3E 38 6C C6 85 81 FA B4 8C B4 74 ._#..>8l.......t
0010: 70 EF B0 B6 p...
]
]
#2: ObjectId: 2.5.29.19 Criticality=false
BasicConstraints:[
CA:true
PathLen:2147483647
]
This document is solely for the use of HP. No part of this document may be provided, circulated or quoted to third parties or reproduced for distribution outside of the HP organization without prior written approval from HP.
HP Confidential 48

#3: ObjectId: 2.5.29.35 Criticality=false
AuthorityKeyIdentifier [
KeyIdentifier [
0000: 9C 5F 23 E3 EF 3E 38 6C C6 85 81 FA B4 8C B4 74 ._#..>8l.......t
0010: 70 EF B0 B6 p...
]
[[email protected], CN=PRTL, OU=DTS, O=PRTL, L=Brussels, ST=BHG, C=BE]
SerialNumber: [ fe44bf80 51ad75cd]
]
Trust this certificate? [no]: y
Certificate was added to keystore
[Storing certs/cacerts]
_______________________________________________________________________________
Press any key to continue . . .
1 file(s) copied.
_______________________________________________________________________________
Creating the Server keystore (server.keystore)
Generating 1,024 bit DSA key pair and self-signed certificate (SHA1withDSA) with a validity of 5,000 days
for: CN=ax0541.dbb.dexwired.net, OU=DTS, O=PRTL, L=Brussels, ST=BHG, C=BE
Enter key password for <smserver>
(RETURN if same as keystore password):
[Storing key/server.keystore]
This document is solely for the use of HP. No part of this document may be provided, circulated or quoted to third parties or reproduced for distribution outside of the HP organization without prior written approval from HP.
HP Confidential 49

_______________________________________________________________________________
Press any key to continue . . .
_______________________________________________________________________________
Generating the Server request certificate (servercert_request.crs)
Certification request stored in file <crs/servercert_request.crs>
Submit this to your CA
_______________________________________________________________________________
Press any key to continue . . .
_______________________________________________________________________________
Signing the Server request certificate (smservercert.pem)
Loading 'screen' into random state - done
Signature ok
subject=/C=LU/ST=Luxembourg/L=Luxembourg/O=PRTL/OU=DTS/CN=ax0541.dbb.dexwired.net
notBefore=Feb 22 14:33:12 2012 GMT
notAfter=Oct 31 14:33:12 2025 GMT
Getting CA Private Key
_______________________________________________________________________________
Press any key to continue . . .
This document is solely for the use of HP. No part of this document may be provided, circulated or quoted to third parties or reproduced for distribution outside of the HP organization without prior written approval from HP.
HP Confidential 50

-------------------------------------
Stripping all excess info from Client certificate (smserver.pem)
_______________________________________________________________________________
Press any key to continue . . .
_______________________________________________________________________________
Importing Server certificate into Server keystore
Certificate reply was installed in keystore
[Storing key/server.keystore]
- after having run the server certificate generator, run the client part client_cert_gen_DSA_v1.1.bat for DSA type certificates type certificates. The client batch file needs to be run with an input parameter, %1, that specifies the FQDN of the client machine for which the client certificate is being created.
Run the batch file as such:
<C:\..\prompt>client_cert_gen_DSA_v1.1.bat <FQDN of the client machine>
- answer yes to all questions,
- run the client batch file as many times as necessary for each client that needs a client certificate. For the web client you only need one certificate per web app server. For the Eclipse client, each individual client machine needs a unique certificate,This document is solely for the use of HP. No part of this document may be provided, circulated or quoted to third parties or reproduced for distribution outside of the HP organization without prior written approval from HP.
HP Confidential 51

The output from the client script:
Client Key and Certificate creation
_______________________________________________________________________________
Creating the Client keystore (DLU0SAPP070T.dbb.acme.com.keystore)
Generating 1,024 bit DSA key pair and self-signed certificate (SHA1withDSA) with a validity of 5,000 days
for: CN=DLU0SAPP070T.dbb.acme.com, OU=DTS, O=PRTL, L=Brussels, ST=BHG, C=BE
Enter key password for <DLU0SAPP070T.dbb.acme.com>
(RETURN if same as keystore password):
[Storing key/DLU0SAPP070T.dbb.acme.com.keystore]
_______________________________________________________________________________
Press any key to continue . . .
_______________________________________________________________________________
Generating the Client request certificate (clientcert_request.crs)
Certification request stored in file <crs/clientcert_request.crs>
Submit this to your CA
_______________________________________________________________________________
This document is solely for the use of HP. No part of this document may be provided, circulated or quoted to third parties or reproduced for distribution outside of the HP organization without prior written approval from HP.
HP Confidential 52

Press any key to continue . . .
-------------------------------------
Signing the Client request certificate (smclientcert.pem)
Loading 'screen' into random state - done
Signature ok
subject=/C=BE/ST=BHG/L=Brussels/O=PRTL/OU=DTS/CN=DLU0SAPP070T.dbb.acme.com
notBefore=Feb 22 14:36:11 2012 GMT
notAfter=Oct 31 14:36:11 2025 GMT
Getting CA Private Key
_______________________________________________________________________________
Press any key to continue . . .
-------------------------------------
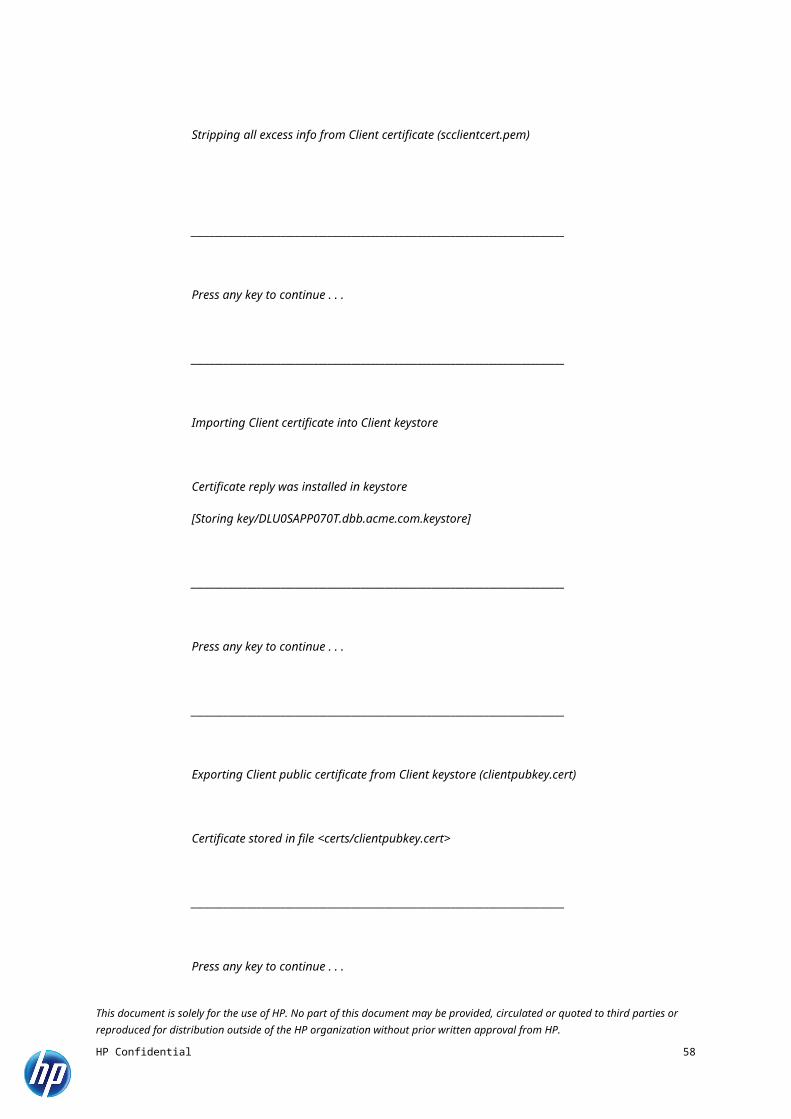
Stripping all excess info from Client certificate (scclientcert.pem)
_______________________________________________________________________________
Press any key to continue . . .
_______________________________________________________________________________
Importing Client certificate into Client keystore
This document is solely for the use of HP. No part of this document may be provided, circulated or quoted to third parties or reproduced for distribution outside of the HP organization without prior written approval from HP.
HP Confidential 53

Certificate reply was installed in keystore
[Storing key/DLU0SAPP070T.dbb.acme.com.keystore]
_______________________________________________________________________________
Press any key to continue . . .
_______________________________________________________________________________
Exporting Client public certificate from Client keystore (clientpubkey.cert)
Certificate stored in file <certs/clientpubkey.cert>
_______________________________________________________________________________
Press any key to continue . . .
_______________________________________________________________________________
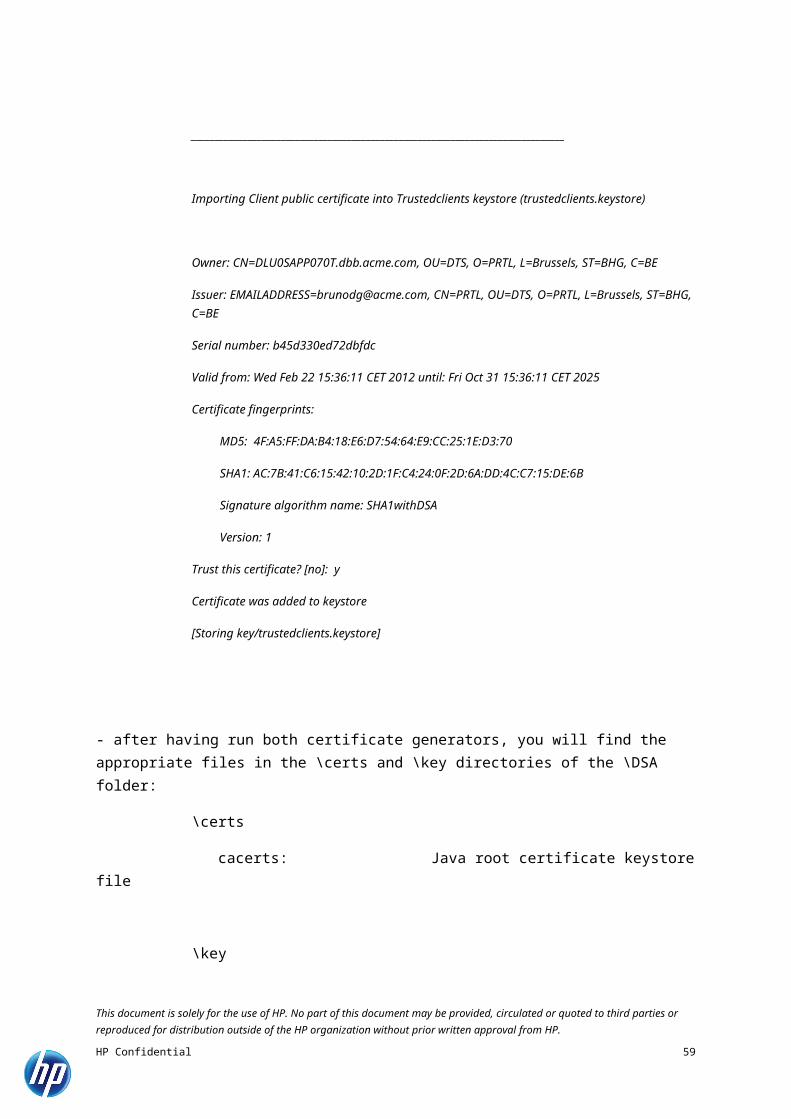
Importing Client public certificate into Trustedclients keystore (trustedclients.keystore)
Owner: CN=DLU0SAPP070T.dbb.acme.com, OU=DTS, O=PRTL, L=Brussels, ST=BHG, C=BE
Issuer: [email protected], CN=PRTL, OU=DTS, O=PRTL, L=Brussels, ST=BHG, C=BE
Serial number: b45d330ed72dbfdc
Valid from: Wed Feb 22 15:36:11 CET 2012 until: Fri Oct 31 15:36:11 CET 2025
Certificate fingerprints:
MD5: 4F:A5:FF:DA:B4:18:E6:D7:54:64:E9:CC:25:1E:D3:70
SHA1: AC:7B:41:C6:15:42:10:2D:1F:C4:24:0F:2D:6A:DD:4C:C7:15:DE:6B
Signature algorithm name: SHA1withDSA
Version: 1
This document is solely for the use of HP. No part of this document may be provided, circulated or quoted to third parties or reproduced for distribution outside of the HP organization without prior written approval from HP.
HP Confidential 54

Trust this certificate? [no]: y
Certificate was added to keystore
[Storing key/trustedclients.keystore]
- after having run both certificate generators, you will find the appropriate files in the \certs and \key directories of the \DSA folder:
\certs
cacerts: Java root certificate keystore file
\key
server.keystore: server keystore with server certificate
<FQDN of the client machine>.keystore:
client keystore with client certificate
trustedclients.keystore: trusted clients keystore with all client certificates
Copy the files to the following locations:
Service Manager server – RUN directory
cacerts
trustedclients.keystore
<server>.keystore
Web servers – Tomcat Directory \webapps\smbsc \WEBINF
cacerts
<webtier>.keystore
This document is solely for the use of HP. No part of this document may be provided, circulated or quoted to third parties or reproduced for distribution outside of the HP organization without prior written approval from HP.
HP Confidential 55

Figure 3: location of SSL certficates
3.5 General HPSM web tier deployment tasks1. Back up your web.xml file, splash screen, style sheets, and any other customizations you made, including your webtier-X.YZ.war (.ear) file.
2. Delete or uninstall the existing webtier-X.YZ.war (.ear) file.
Note: The "Update Application" function in WebSphere Application Server 6.x allows you to redeploy using a new copy of webtier-X.YZ.war (.ear). First, update the web.xml in the webtier-X.YZ.war (.ear) file, and then redo the shared library configuration. For more information, see the IBM WebSphere documentation.
3. Deploy the new webtier-X.YZ.war (.ear) file by following the instructions in the Service Manager Installation Guide.
Note: It is best practice to deploy with a unique context root. For example: /webtier-9.21.168 /sm or /itsm
4. Replace the new versions of any files you customized with your customized versions.
5. Make any new customizations necessary for your deployment. Be sure to set the secureLogin and sslPort parameters and other SSO parameters
6. Restart the Application server.
Note: Before accessing the new Web Tier, HP recommends that all users empty their browser cache.
This document is solely for the use of HP. No part of this document may be provided, circulated or quoted to third parties or reproduced for distribution outside of the HP organization without prior written approval from HP.
HP Confidential 56

7. Enable trustedsignon:1 in sm.ini and/or SSL settings if required on the HPSM application server and restart it.
3.6 Service Manager Configuration File Changes3.6.1 Sm.ini
Changes
- Enable SSO by adding trustedsignon:1
- Add sslConnector:1, ssl:1 and ssl_reqClientAuth:2
- The settings which are needed to work with the SSL certificates:
o keystoreFile:servercert.keystoreo keystorePass:SM930Passwordo ssl_trustedClientsJKS:trustedclients.keystoreo ssl_trustedClientsPwd:SM930Passwordo truststoreFile:cacertso truststorePass:changeit
Example content that can be added to sm.ini:
#####################################################################################
### SSO & SSL parameters
## **********************************************
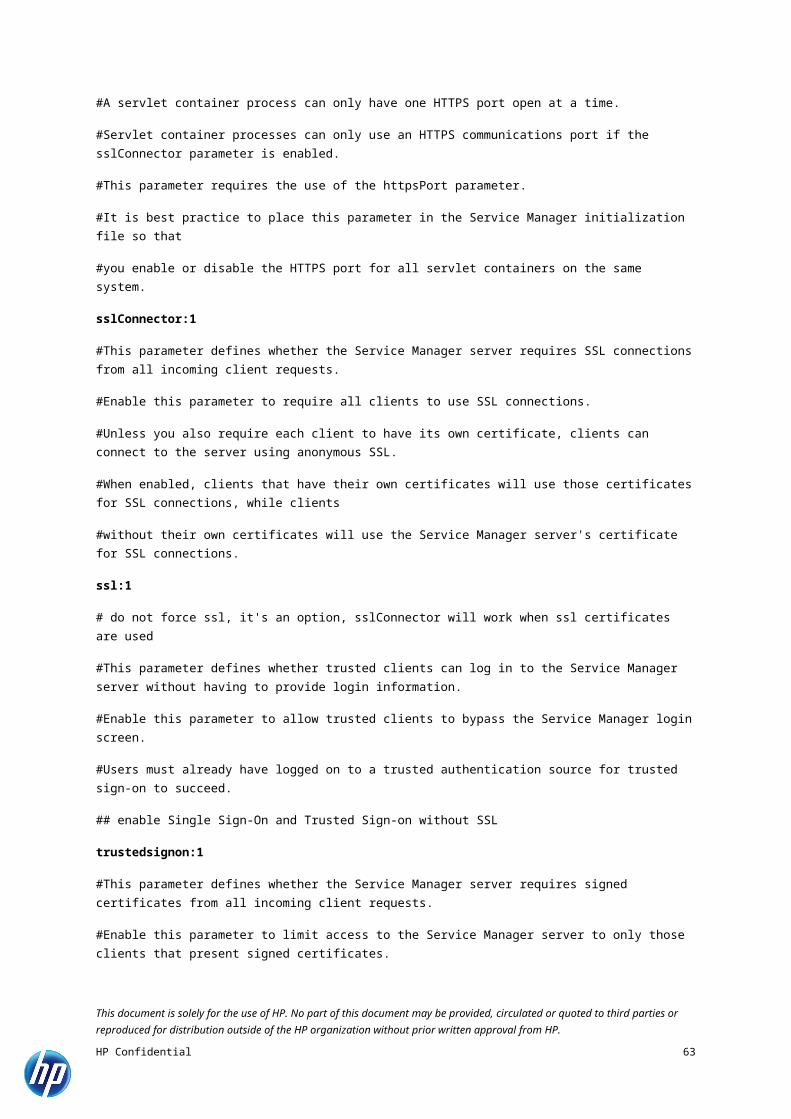
#This parameter defines whether servlet container processes have an HTTPS (SSL-encrypted HTTP) communications port available.
#A servlet container process can only have one HTTPS port open at a time.
#Servlet container processes can only use an HTTPS communications port if the sslConnector parameter is enabled.
#This parameter requires the use of the httpsPort parameter.
#It is best practice to place this parameter in the Service Manager initialization file so that
#you enable or disable the HTTPS port for all servlet containers on the same system.
sslConnector:1
#This parameter defines whether the Service Manager server requires SSL connections from all incoming client requests.
This document is solely for the use of HP. No part of this document may be provided, circulated or quoted to third parties or reproduced for distribution outside of the HP organization without prior written approval from HP.
HP Confidential 57
#Enable this parameter to require all clients to use SSL connections.
#Unless you also require each client to have its own certificate, clients can connect to the server using anonymous SSL.
#When enabled, clients that have their own certificates will use those certificates for SSL connections, while clients
#without their own certificates will use the Service Manager server's certificate for SSL connections.
ssl:1
# do not force ssl, it's an option, sslConnector will work when ssl certificates are used
#This parameter defines whether trusted clients can log in to the Service Manager server without having to provide login information.
#Enable this parameter to allow trusted clients to bypass the Service Manager login screen.
#Users must already have logged on to a trusted authentication source for trusted sign-on to succeed.
## enable Single Sign-On and Trusted Sign-on without SSL
trustedsignon:1
#This parameter defines whether the Service Manager server requires signed certificates from all incoming client requests.
#Enable this parameter to limit access to the Service Manager server to only those clients that present signed certificates.
#When enabled, clients can no longer connect to the Service Manager server using the server's certificate for anonymous SSL.
#Each client must have its own signed certificate.
#If you enable this parameter with the value ssl_reqClientAuth:2 then in addition to presenting client certificates,
#the server validates each client certificate against a list of trusted clients as defined by the trustedClientsJKS parameter.
#The server only allows connections from clients with certificates in the trusted clients list.
ssl_reqClientAuth:2
# SSL files and passwords
truststoreFile:cacerts
truststorePass:HPitsm_9
keystoreFile:w2k8r2x64ccrm.ccrm.bel.hp.keystore
keystorePass:HPitsm_9
ssl_trustedClientsJKS:trustedclients.jks
This document is solely for the use of HP. No part of this document may be provided, circulated or quoted to third parties or reproduced for distribution outside of the HP organization without prior written approval from HP.
HP Confidential 58
ssl_trustedClientsPwd:HPitsm_9
#####################################################################################
Note:
Be aware that by adding all these parameters in sm.ini, you will apply all these settings for all servlets.
If you still need access for a Windows client, you either generate SSL certificates for each client installation or you open an additional servlet in debugnode mode and add ssl:0 to disable SSL.
This document is solely for the use of HP. No part of this document may be provided, circulated or quoted to third parties or reproduced for distribution outside of the HP organization without prior written approval from HP.
HP Confidential 59

3.6.2 Sm.cfgExample setup:
# start a Service Manager LoadBalancer + servlets
# to avoid this error: "Please provide httpsPort or disable sslConnector",
# add sslConnector:0 to the LB instead of adding an extra unused httpsPort
sm -loadBalancer -httpPort:13080 -sslConnector:0
sm -httpPort:13081 –httpsPort:13433
sm -httpPort:13082 –httpsPort:13434
3.7 Configure Tomcat3.7.1 Extraction webtier file
Make sure the Tomcat service is not running.
Rename the webtier war-file delivered with the official installation of Service Manager to “smbsc.war”. Deploy the war-file in the webapps-directory of Tomcat. Start Tomcat in order to have the war-file extracted in the webapps-directory.
After the “smbsc”-directory has been created; the Tomcat-service can be stopped again.
3.7.2 Configure Tomcat's server.xmlThe tomcatAuthentication="false" attribute supported by the AJP protocol connector tells Tomcat to not use its internal (primitive) authentication mechanism, but instead to use remote authentication provided by the front-end web server. This is also explained in http://tomcat.apache.org/tomcat-6.0-doc/config/ajp.html .
Disable tomcat authentication in server.xml for port 8009 (IIS redirects by default from 80 to 8009):
Go to the file “server.xml” in the conf-directory of the Tomcat installation.This document is solely for the use of HP. No part of this document may be provided, circulated or quoted to third parties or reproduced for distribution outside of the HP organization without prior written approval from HP.
HP Confidential 60

Change the following settings:
- AJP Settings
<!-- Define an AJP 1.3 Connector on port 8019 -->
<Connector port="8009" tomcatAuthentication="false" enableLookups="false" protocol="AJP/1.3" redirectPort="8443" />
To
<Connector port="8009" tomcatAuthentication="false" enableLookups="false" protocol="AJP/1.3" redirectPort="8443" />
3.7.3 Changes in HPSM’s web.xml The web.xml-file is located in the WEB-INF-directory of the Service Manager web-container.
Change these settings to enable custom SSO:
Enable SSO:
<context-param>
<param-name>isCustomAuthenticationUsed</param-name>
<param-value>true</param-value>
</context-param>
to
<context-param>
<param-name>isCustomAuthenticationUsed</param-name>
<param-value>false</param-value>
This document is solely for the use of HP. No part of this document may be provided, circulated or quoted to third parties or reproduced for distribution outside of the HP organization without prior written approval from HP.
HP Confidential 61

</context-param>
isCustomAuthenticationUsed2: default is true (even if we use the OOTB authentication), put it on false when you enable SSO or LWSSO.
Enable SSL:
<!-- Control the encryption of network communication between the application server
and the HP Service Manager server -->
<init-param>
<param-name>ssl</param-name>
<param-value>false</param-value>
</init-param>
to
<init-param>
<param-name>ssl</param-name>
<param-value>true</param-value>
</init-param>
secureLogin and sslPort
2 By default, HP Service Manager authenticates web client users by comparing the user name and password to a matching operator record in the system. To enable trusted sign-on you must disable the default authentication method. This causes Service Manager to send the current user name in the HTTP header. Trusted sign-on uses the user name to determine if a web client is already authenticated or not.
Caution: You should only disable this parameter if you are using a trusted sign-on configuration. Disabling this parameter without a trusted sign-on configuration will prevent your web client users from logging in to Service Manager.
This document is solely for the use of HP. No part of this document may be provided, circulated or quoted to third parties or reproduced for distribution outside of the HP organization without prior written approval from HP.
HP Confidential 62
Be sure to set the secureLogin3 and sslPort4 parameters correctly. These settings don’t influence SSO. By default secureLogin is set to true and sslPort to 8443. Verify if your HTTP server (can be IIS, Apache or even Tomcat) is SSL enabled (using HTTPS), if not, set secureLogin to false.
Defaults are true and 8443
Enter the SSL certificate info:
<!-- Specify the CA certificate store to use in encrypted communication -->
<init-param>
<!-- If this value is empty, the JDK's default jre/lib/security/cacerts file is used -->
<!-- If this is a relative path, it will be relative to the web application's deploy directory
but still needs a leading slash -->
3 This parameter controls the encryption of network communication between the Web application server and the Web browser. Enabling this parameter causes Web browsers to use SSL connections to the Web application server.
4 This parameter controls the encryption of network communication between the Web application server and the Web browser. Enabling this parameter causes Web browsers to use SSL connections to the Web application server.
This document is solely for the use of HP. No part of this document may be provided, circulated or quoted to third parties or reproduced for distribution outside of the HP organization without prior written approval from HP.
HP Confidential 63

<param-name>cacerts</param-name>
<param-value>/WEB-INF/cacerts</param-value>
</init-param>
<!-- Specify the client's private keystore to use in encrypted communication. This is necessary
for client authentication when using single sign-on, but not for a standard SSL connection. -->
<!-- If this is a relative path, it will be relative to the web application's deploy directory
but still needs a leading slash -->
<init-param>
<param-name>keystore</param-name>
<param-value>/WEB-INF/<webtier>.keystore</param-value>
</init-param>
<!-- Specify the password for the client's private keystore -->
<init-param>
<param-name>keystorePassword</param-name>
<param-value>clientkeystore</param-value>
Enter the environment specific information:
<!-- Specify the HP Service Manager server host and port location -->
<param-name>serverHost</param-name>
This document is solely for the use of HP. No part of this document may be provided, circulated or quoted to third parties or reproduced for distribution outside of the HP organization without prior written approval from HP.
HP Confidential 64

<param-value>SERVER_FQDN</param-value>
</init-param>
<init-param>
<param-name>serverPort</param-name>
<param-value>13080</param-value>
3.7.4 Changes to HPSM’s application-context.xml
This file can be found in WEB-INF\classes and configure it like this:
Make sure the ‘preAuthenticationFilter’ is added to the string, this will activate the JAVA-bean necessary for the IWA based authentication.
3.7.1 Changes to log4j.properties.
This file can be found in WEB-INF and configure it like this:
log4j.rootLogger=info,R
This document is solely for the use of HP. No part of this document may be provided, circulated or quoted to third parties or reproduced for distribution outside of the HP organization without prior written approval from HP.
HP Confidential 65

#uncomment next line to output to console.
#log4j.appender.stdout=org.apache.log4j.ConsoleAppender
log4j.appender.stdout.layout=org.apache.log4j.PatternLayout
# Pattern to output the caller's file name and line number.
log4j.appender.stdout.layout.ConversionPattern=%5p [%t] (%F:%L) - %m%n
log4j.appender.R=org.apache.log4j.RollingFileAppender
log4j.appender.R.File=${catalina.base}/logs/smbsc.log
log4j.appender.R.MaxFileSize=2000KB
# Keep one backup file
log4j.appender.R.MaxBackupIndex=2
log4j.appender.R.layout=org.apache.log4j.PatternLayout
log4j.appender.R.layout.ConversionPattern=%p %t %c - %m%n
3.7.1.1extended log4j.propertiesWe propose to replace the default log4j.properties with the one described below. It offers debug parameters if needed and fixes timestamp writing in the log files.
Edit <web application.war>/WEB-INF/log4j.properties:
This document is solely for the use of HP. No part of this document may be provided, circulated or quoted to third parties or reproduced for distribution outside of the HP organization without prior written approval from HP.
HP Confidential 66

We’ve added some more debugging options, changed the log path and added timestamps to the lines recorded in the log files.
Content of log4j.properties:This document is solely for the use of HP. No part of this document may be provided, circulated or quoted to third parties or reproduced for distribution outside of the HP organization without prior written approval from HP.
HP Confidential 67

log4j.rootLogger=info,R
## HP PSO: added by BDG: incase extensive debugging is needed
#log4j.rootLogger=debug,R
#uncomment next line to output to console.
#log4j.appender.stdout=org.apache.log4j.ConsoleAppender
log4j.appender.stdout.layout=org.apache.log4j.PatternLayout
# Pattern to output the caller's file name and line number.
## HP PSO: modified by BDG: added %d{HH:mm:ss,SSSS}
log4j.appender.stdout.layout.ConversionPattern=%d{HH:mm:ss,SSSS} %5p [%t] (%F:%L) - %m%n
log4j.appender.R=org.apache.log4j.RollingFileAppender
## HP PSO: modified by BDG
log4j.appender.R.File=/websphere/logs/scei_server/itsmsso.log
## HP PSO: modified by BDG: 100KB -> 20000KB
log4j.appender.R.MaxFileSize=20000KB
# Keep one backup file
## HP PSO: modified by BDG: 1 -> 2
log4j.appender.R.MaxBackupIndex=2
log4j.appender.R.layout=org.apache.log4j.PatternLayout
## HP PSO: modified by BDG: added %d{HH:mm:ss,SSSS}
log4j.appender.R.layout.ConversionPattern=%d{HH:mm:ss,SSSS} %p %t %c - %m%n
## HP PSO: added by BDG: incase extensive debugging is needed
#log4j.logger.com.hp.ov.sm.client.eclipse.web=DEBUG
#log4j.logger.com.hp.ov.cwc=DEBUG
This document is solely for the use of HP. No part of this document may be provided, circulated or quoted to third parties or reproduced for distribution outside of the HP organization without prior written approval from HP.
HP Confidential 68

#log4j.logger.org.acegisecurity=DEBUG
#log4j.logger.com.hp.sw.bto.ast.security=DEBUG
This document is solely for the use of HP. No part of this document may be provided, circulated or quoted to third parties or reproduced for distribution outside of the HP organization without prior written approval from HP.
HP Confidential 69

4 Custom java bean4.1 How will the setup look like ?
Figure 4: customized IWA based SSO
This document is solely for the use of HP. No part of this document may be provided, circulated or quoted to third parties or reproduced for distribution outside of the HP organization without prior written approval from HP.
HP Confidential 70

Figure 4 shows that it is possible to deploy a custom java bean that extends the OOTB beans. In the example show, the HPPSO_iwa_preAuthenticationFilter bean will extend the standard IWA based preAuthenticationFilter.
We often deploy this custom bean because it offers to keep the domain value of the authenticated user. By default, the preAuthenticationFilter will remove the domain value and only keep the userid to match with a HPSM operator record.
Some customers will have duplicate userids in their domains and want to keep the domain to ensure the right person will get the right login profile. The HPPSO_iwa_preAuthenticationFilter allows use to keep the domain value.
4.1 Edit application-context.xmlMake sure the ‘preAuthenticationFilter’ is removed from the filter string and replace it with HPPSO_iwa_preAuthenticationFilter to the filterChainProxy bean.
search for /**=httpSessionContextIntegrationFilter,anonymousProcessingFilter
put the entire line in comment and replace it by:
Additionally, you need to specify the custom bean specifications. You can add it in front of the OOTB preAuthenticationFilter definition:
This document is solely for the use of HP. No part of this document may be provided, circulated or quoted to third parties or reproduced for distribution outside of the HP organization without prior written approval from HP.
HP Confidential 71

<bean id="HPPSO_iwa_preAuthenticationFilter" class="com.hp.ov.cwc.security.acegi.HPPSO_iwa_preAuthenticationFilter">
<property name="authenticationManager">
<ref bean="authenticationManager"/>
</property>
<property name="defaultRole">
<value>ROLE_PRE</value>
</property>
<property name="keepDomain">
<!-- valid values: true / false -->
<value>true</value>
</property>
<property name="domainSeparator">
<!-- example values: . - _ -->
<value>/</value>
</property>This document is solely for the use of HP. No part of this document may be provided, circulated or quoted to third parties or reproduced for distribution outside of the HP organization without prior written approval from HP.
HP Confidential 72

<property name="conversionType">
<!-- valid values: lowercase / uppercase / <null> -->
<value></value>
</property>
<property name="debugInfo">
<!-- valid values: true / false -->
<value>false</value>
</property>
</bean>
When you enable debugInfo, additional information will be written in the log file you’ve defined in log4j.properties.
4.1 Copy bean in HPSMWhere to copy the bean? Place it in <Service Manager>.war\WEB-INF\classes\com\hp\ov\cwc\security\acegi. The security and acegi subfolders do not exist be default. You need to add them yourself.
4.2 Custom bean source code// written by HP PSO - Bruno De Graeve
// requested by HP - Bruno De Graeve
// 20101025
This document is solely for the use of HP. No part of this document may be provided, circulated or quoted to third parties or reproduced for distribution outside of the HP organization without prior written approval from HP.
HP Confidential 73

// mainly used to convert the case (upper or lower) of the request.getRemoteUser value
// it's also possible to add the user's Domain in front of the userid and choose a hyphen between
// example: itsm-falcon instead of falcon
package com.hp.ov.cwc.security.acegi;
import javax.servlet.http.HttpServletRequest;
import org.apache.log4j.*;
public class HPPSO_iwa_preAuthenticationFilter extends PreAuthenticationFilter
//Within the public class, you define which part of the PreAuthenticationFilter
// you want to replace and how to replace it by defining the method
{
// Declaration of private class variables
private String conversionType; // The conversion type for the username (lowercase, uppercase, no conversation)
private String debugInfo; // Enable or disable debugging info.
private String domainSeparator; // choose a character that will serve as separator between the concatenated domain and userid
// improve debug information printing
static Logger logger = Logger.getLogger(HPPSO_iwa_preAuthenticationFilter.class.getName());
public void PrintDebug(String DebugInfoString)
{
// print in the log file defined in log4j.properties
java.text.DateFormat dateFormat = new java.text.SimpleDateFormat("MMM dd, yyyy HH:mm:ss z");
java.util.Date date = new java.util.Date();
//logger.info: will write debug info even if "info" is defined in log4j.properties
This document is solely for the use of HP. No part of this document may be provided, circulated or quoted to third parties or reproduced for distribution outside of the HP organization without prior written approval from HP.
HP Confidential 74

logger.info((new StringBuilder()).append(dateFormat.format(date)).append(" *** HPPSOiwaHeaderPreAuthenticationFilter - ").append(DebugInfoString).toString());
// make also a print in the web application stdout log file
//System.out.println((new StringBuilder()).append(dateFormat.format(date)).append(" *** HPPSOiwaHeaderPreAuthenticationFilter - ").append(DebugInfoString).toString());
}
// Constructor
public HPPSO_iwa_preAuthenticationFilter()
{
// Default values
conversionType = null;
debugInfo = null;
domainSeparator = null;
keepDomain = false;
credentialProvider = null;
}
// Overrule the getAuthenticatedUsername function of the PreAuthenticationFilter & HttpHeaderPreAuthenticationFilter class
// This way, we can change the return value, without the need of recompiling the original source files.
protected String getAuthenticatedUsername(HttpServletRequest httpservletrequest)
{
// Get the username (DOMAIN\\userid) from the HTTP header, using the getRemoteUser function to grap the REMOTE_USER variable value.
String username = null;
String userid = null;
String domain = null;
This document is solely for the use of HP. No part of this document may be provided, circulated or quoted to third parties or reproduced for distribution outside of the HP organization without prior written approval from HP.
HP Confidential 75

if(credentialProvider == null || credentialProvider.getUserName(httpservletrequest) != null && credentialProvider.getUserName(httpservletrequest).equals(""))
{
String remote_user = httpservletrequest.getRemoteUser();
username = httpservletrequest.getRemoteUser();
//String ReturnParameter;
// get conversion type
conversionType = getConversionType();
if(debugInfo.equals("true"))
{
PrintDebug((new StringBuilder()).append("START DEBUG ****************** ").toString());
PrintDebug((new StringBuilder()).append("keepDomain: ").append(keepDomain).toString());
PrintDebug((new StringBuilder()).append("debugInfo: ").append(debugInfo).toString());
PrintDebug((new StringBuilder()).append("conversionType: ").append(conversionType).toString());
PrintDebug((new StringBuilder()).append("Remote User: ").append(remote_user).toString());
PrintDebug((new StringBuilder()).append("Username before conversion: ").append(username).toString());
}
if(username != null)
if(username.length() == 0)
username = null;
else
if(!keepDomain)
// keepDomain = false in application-context.xml by default, the domain will be stripped of the userid stringThis document is solely for the use of HP. No part of this document may be provided, circulated or quoted to third parties or reproduced for distribution outside of the HP organization without prior written approval from HP.
HP Confidential 76

// this is the default behavior since HPSM doesnt't accept userids containing a prefix as DOMAIN\
{
int i = username.indexOf('\\');
username = username.substring(i + 1);
if(debugInfo.equals("true"))
{
PrintDebug((new StringBuilder()).append("keepDomain = false : Operator ID is : ").append(username).toString());
}
}else{
// set keepDomain to true in application-context.xml, it will keep the domain id
// replace the backslashes (DOMAIN\\userid) with a dot -> domain.userid
// Note: HP Service Manager doesn't accept backslashes in operator id's
//username = username.replace('\\','.');
// get the DOMAIN
int i = username.lastIndexOf('\\');
domain = username.substring(0, i);
// get the USERid
int x = username.indexOf('\\');
userid = username.substring(x + 1);
// create a new username based on the domain, a separator set in application-context.xml and the userid
username = domain+domainSeparator+userid;
if(debugInfo.equals("true"))
{
This document is solely for the use of HP. No part of this document may be provided, circulated or quoted to third parties or reproduced for distribution outside of the HP organization without prior written approval from HP.
HP Confidential 77

PrintDebug((new StringBuilder()).append("keepDomain = true : domain is : ").append(domain).toString());
PrintDebug((new StringBuilder()).append("keepDomain = true : domainSeparator is : ").append(domainSeparator).toString());
PrintDebug((new StringBuilder()).append("keepDomain = true : userid is : ").append(userid).toString());
PrintDebug((new StringBuilder()).append("keepDomain = true : Converted Operator ID is : ").append(username).toString());
}
}
// check if conversion to uppercase or lowercase is necessary.
if(conversionType.equals("lowercase"))
{
username = username.toLowerCase();
}
if(conversionType.equals("uppercase"))
{
username = username.toUpperCase();
}
} else
{
username = credentialProvider.getUserName(httpservletrequest);
}
// return the parameter of type String.
if(debugInfo.equals("true"))
{
This document is solely for the use of HP. No part of this document may be provided, circulated or quoted to third parties or reproduced for distribution outside of the HP organization without prior written approval from HP.
HP Confidential 78

PrintDebug((new StringBuilder()).append("HP Service Manager Operator ID after Domain and Case Conversion: ").append(username).toString());
PrintDebug((new StringBuilder()).append("END DEBUG ****************** ").toString());
}
return username;
}
public void setCredentialProvider(CredentialProvider credentialprovider)
{
credentialProvider = credentialprovider;
}
///////////////////////////////////////////////////////////////////
////////////////// parameters found in application-context.xml
///////////////////////////////////////////////////////////////////
// GETTER for the conversion type
public String getConversionType()
{
return conversionType;
}
// SETTER for the conversion type. This runs when the bean is created. Value comes from application-context.xml file.
public void setConversionType(String key)
{
// This is where the value of the conversionType property in the bean will be set in the bean variable.
conversionType = key;
}
This document is solely for the use of HP. No part of this document may be provided, circulated or quoted to third parties or reproduced for distribution outside of the HP organization without prior written approval from HP.
HP Confidential 79

// GETTER for the debug info
public String getDebugInfo()
{
return debugInfo;
}
// SETTER for the Debug Info. This runs when the bean is created. Value comes from application-context.xml file.
public void setDebugInfo(String key)
{
if(key.equals("true") || key.equals("True") || key.equals("TRUE"))
{
debugInfo = "true";
}
else
{
debugInfo = "false";
}
}
// GETTER for the domainSeparator type
public String getdomainSeparator()
{
return domainSeparator;
}
// SETTER for the domainSeparator type. This runs when the bean is created. Value comes from application-context.xml file.
public void setdomainSeparator(String key)
{
// This is where the value of the domainSeparator property in the bean will be set in the bean variable.
domainSeparator = key;
This document is solely for the use of HP. No part of this document may be provided, circulated or quoted to third parties or reproduced for distribution outside of the HP organization without prior written approval from HP.
HP Confidential 80

}
}
4.3 Screen shots
4.3.1 LoggingWhen SSO with the custom bean works, you’ll see that with the settings described above, you’ll achieve this result in the GUI.
Figure 5: logged in HPSM as DOMAIN/userid
When debugInfo is enabled, you’ll get this kind of information in the HPSM web log file (defined in log4j.properties):
This document is solely for the use of HP. No part of this document may be provided, circulated or quoted to third parties or reproduced for distribution outside of the HP organization without prior written approval from HP.
HP Confidential 81

20/04/2012 14:33:11,0021 INFO ajp-bio-8889-exec-3 com.hp.ov.cwc.security.acegi.HPPSO_iwa_preAuthenticationFilter - Apr 20, 2012 14:33:11 CEST *** HPPSOiwaHeaderPreAuthenticationFilter - START DEBUG ******************
20/04/2012 14:33:11,0021 INFO ajp-bio-8889-exec-3 com.hp.ov.cwc.security.acegi.HPPSO_iwa_preAuthenticationFilter - Apr 20, 2012 14:33:11 CEST *** HPPSOiwaHeaderPreAuthenticationFilter - keepDomain: true
20/04/2012 14:33:11,0021 INFO ajp-bio-8889-exec-3 com.hp.ov.cwc.security.acegi.HPPSO_iwa_preAuthenticationFilter - Apr 20, 2012 14:33:11 CEST *** HPPSOiwaHeaderPreAuthenticationFilter - debugInfo: true
20/04/2012 14:33:11,0021 INFO ajp-bio-8889-exec-3 com.hp.ov.cwc.security.acegi.HPPSO_iwa_preAuthenticationFilter - Apr 20, 2012 14:33:11 CEST *** HPPSOiwaHeaderPreAuthenticationFilter - conversionType:
20/04/2012 14:33:11,0021 INFO ajp-bio-8889-exec-3 com.hp.ov.cwc.security.acegi.HPPSO_iwa_preAuthenticationFilter - Apr 20, 2012 14:33:11 CEST *** HPPSOiwaHeaderPreAuthenticationFilter - Remote User: CCRM\falcon
20/04/2012 14:33:11,0022 INFO ajp-bio-8889-exec-3 com.hp.ov.cwc.security.acegi.HPPSO_iwa_preAuthenticationFilter - Apr 20, 2012 14:33:11 CEST *** HPPSOiwaHeaderPreAuthenticationFilter - Username before conversion: CCRM\falcon
20/04/2012 14:33:11,0022 INFO ajp-bio-8889-exec-3 com.hp.ov.cwc.security.acegi.HPPSO_iwa_preAuthenticationFilter - Apr 20, 2012 14:33:11 CEST *** HPPSOiwaHeaderPreAuthenticationFilter - keepDomain = true : domain is : CCRM
20/04/2012 14:33:11,0022 INFO ajp-bio-8889-exec-3 com.hp.ov.cwc.security.acegi.HPPSO_iwa_preAuthenticationFilter - Apr 20, 2012 14:33:11 CEST *** HPPSOiwaHeaderPreAuthenticationFilter - keepDomain = true : domainSeparator is : /
20/04/2012 14:33:11,0022 INFO ajp-bio-8889-exec-3 com.hp.ov.cwc.security.acegi.HPPSO_iwa_preAuthenticationFilter - Apr 20, 2012 14:33:11 CEST *** HPPSOiwaHeaderPreAuthenticationFilter - keepDomain = true : userid is : falcon
20/04/2012 14:33:11,0022 INFO ajp-bio-8889-exec-3 com.hp.ov.cwc.security.acegi.HPPSO_iwa_preAuthenticationFilter - Apr 20, 2012 14:33:11 CEST *** HPPSOiwaHeaderPreAuthenticationFilter - keepDomain = true : Converted Operator ID is : CCRM/falcon
20/04/2012 14:33:11,0023 INFO ajp-bio-8889-exec-3 com.hp.ov.cwc.security.acegi.HPPSO_iwa_preAuthenticationFilter - Apr 20, 2012 14:33:11 CEST *** HPPSOiwaHeaderPreAuthenticationFilter - HP Service Manager Operator ID after Domain and Case Conversion: CCRM/falcon
20/04/2012 14:33:11,0023 INFO ajp-bio-8889-exec-3 com.hp.ov.cwc.security.acegi.HPPSO_iwa_preAuthenticationFilter - Apr 20, 2012 14:33:11 CEST ***
This document is solely for the use of HP. No part of this document may be provided, circulated or quoted to third parties or reproduced for distribution outside of the HP organization without prior written approval from HP.
HP Confidential 82

HPPSOiwaHeaderPreAuthenticationFilter - END DEBUG ******************
20/04/2012 14:33:12,0049 INFO ajp-bio-8889-exec-1 com.hp.ov.sm.client.webtier.SCLogging - Apr 20, 2012 14:33:12 CEST [INFO] MODE: cwc/index.jsp
20/04/2012 14:33:12,0079 INFO ajp-bio-8889-exec-1 com.hp.ov.sm.client.webtier.SCLogging - Apr 20, 2012 14:33:12 CEST [INFO] Setting ssl.enforced because the server requires SSL
20/04/2012 14:33:12,0080 INFO ajp-bio-8889-exec-1 com.hp.ov.sm.client.webtier.SCLogging - Apr 20, 2012 14:33:12 CEST [INFO] Activating SSL in the WebClient
20/04/2012 14:33:14,0355 INFO ajp-bio-8889-exec-1 com.hp.ov.sm.client.webtier.SCLogging - Apr 20, 2012 14:33:14 CEST [INFO] Connecting with preauthenticated user: CCRM/falcon
20/04/2012 14:33:14,0445 INFO ajp-bio-8889-exec-1 com.hp.ov.sm.client.webtier.SCLogging - Apr 20, 2012 14:33:14 CEST [INFO] SOAP connection established with server at https://W2K8R2X64CCRM.CCRM.BEL.HP:13481/SM/ui
In the sm.log file it will look like:
6880( 6232) 04/20/2012 14:33:12 RTE I Language en is valid
6880( 6232) 04/20/2012 14:33:12 RTE I Set trusted sign-on login user to CCRM/falcon
6880( 6232) 04/20/2012 14:33:12 RTE I SOAP client information scguiwweb 9.30.201 (201) at fe80::249d:2f71:356f:2a28 Browser MSIE 7.0 AppServer Apache Tomcat 7.0.23
6880( 5556) 04/20/2012 14:33:12 JRTE I SSL connection accepted
6880( 6232) 04/20/2012 14:33:12 RTE I User CCRM/falcon has logged in and is using a Named license ( 2 out of a maximum 25 )
4.3.2 When no matching operator is found
Figure 6: no matching HPSM operator is found (HPSM9.30 client)
This document is solely for the use of HP. No part of this document may be provided, circulated or quoted to third parties or reproduced for distribution outside of the HP organization without prior written approval from HP.
HP Confidential 83

5 MonitoringA good tool which can be used for the monitoring of tomcat is the program “PSI-Probe“. PSI Probe is a community-driven fork of Lambda Probe distributed under the same open-source license (GPLv2). It is intended to replace and extend Tomcat Manager, making it easier to manage and monitor an instance of Apache Tomcat.
More info can be found on the following website http://code.google.com/p/psi-probe/.
The functionality of PSI Probe:
Unlike many other server monitoring tools, PSI Probe does not require any changes to your existing apps. It provides all of its features through a web-accessible interface that becomes available simply by deploying it to your server. These features include:
Requests: Monitor traffic in real-time, even on a per-application basis.
Sessions: Browse/search attributes, view last IP, expire, estimate size.
JSP: Browse, view source, compile.
Data Sources: View pool usage, execute queries.
Logs: View contents, download, change levels at runtime.
Threads: View execution stack, kill.
Connectors: Status, usage charts.
Cluster: Status, usage charts.
JVM: Memory usage charts, advise GC
Java Service Wrapper: Restart JVM.
System: CPU usage, memory usage, swap file usage.
This document is solely for the use of HP. No part of this document may be provided, circulated or quoted to third parties or reproduced for distribution outside of the HP organization without prior written approval from HP.
HP Confidential 84

6 Debugging SSO Adopt the log4j.properties file for debugging purpose. This is described in paragraph 3.7.1.1
extended log4j.properties above.
Stop the web tier, cleanup all web logs and restart the web tier
Monitor SM log files.
Keep track of time, IP address, login, on which IIS, which webserver and which SM application server the issue occurred.
Additionally, install HTTPWATCH v7 (http://www.httpwatch.com/download/ ) and trace the HTTP traffic which can be analyzed by HP RnD
Install diagnostic.jsp in the root of the web application. Call it be replacing index.do by diagnostic.jsp
This document is solely for the use of HP. No part of this document may be provided, circulated or quoted to third parties or reproduced for distribution outside of the HP organization without prior written approval from HP.
HP Confidential 85

This document is solely for the use of HP. No part of this document may be provided, circulated or quoted to third parties or reproduced for distribution outside of the HP organization without prior written approval from HP.
HP Confidential 86