hp laserjet 5000, 5000 n, and 5000 gn printers partshere ... · one jam per 100 pages, one jam per...
TRANSCRIPT

www.partshere.com Partshere Troubleshooting
Chapter contents
Troubleshooting
guide / additional information for your convenience, as you search for assistance in repairing your machine. Although this information is provided for your convenience it is recommended, for the most part, that a technician inspects your office equipment.
It is recommended to consult with a professional when ordering your printer part(s).
Shop with us while you troubleshoot.
* HP oem parts* HP LaserJet maintenance kits
* Toners for your printer
* HP fuser assembly units
* HP fuser kit 110v & 220v
* Parts assemblies for printers
* Service maintenance parts
* Color laserJet printers
* LaserJet printers and parts
* Hard to find officejet parts
User-friendly SmartSearch!
* Hard to find deskjet parts
To better help our customers - this HP LaserJet 5000 series troubleshooting page is simply a
Troubleshooting the Printing SystemPaper path problems Image quality problems

Partshere Troubleshooting www.partshere.com
General Paper Path TroubleshootingPaper jams occur in the printer when paper does not either reach or clear a photosensor along the printer’s paper path in a specific amount of time. If a paper jam occurs, a ������������� message is displayed on the printer’s Control Panel. The following table contains general questions you may ask and topics to explore prior to troubleshooting. See the ����� section in the Event Log for specific error codes.
Table 7-7. General Paper Path Troubleshooting Questions
Problem Action
What is the frequency of the paper jams (e.g. continuous, one jam per 100 pages, one jam per 1000 pages, etc.)?
Verify with customer. Print or Show Event Log to determine paper jam history. See the Display and Event Log Sections of this Chapter and evaluate Event Log.
Do paper jams only occur when the paper is fed from a particular paper input source (e.g., Tray 1, Tray 2)?
Use Paper Path Test to isolate problem. See next section for details (page 7-42).
Do jams only occur when paper is output to a specific output bin (e.g. face-down output bin, face-up bin)?
Use Paper Path Test to isolate problem.
Do paper jams occur with a specific type of media?
Try known good media. See the HP LaserJet Printer Family Paper Specifications Guide. Note that the guide is bundled with the Service Manual.
Where does the leading edge of the first sheet of paper in the printer’s paper path stop when a jam occurs? Are any sheets of paper damaged or torn?
Attempt to duplicate. Use Paper Path Test to isolate problem. Inspect the paper path and all paper path mechanical assemblies located before the leading paper jam.

www.partshere.com Troubleshooting the Printing System
Is the customer loading the paper trays correctly?
Observe the customer loading paper. Do not fan paper. Refer to proper paper handling procedures in the Paper Specification Guide.
Is the customer overfilling the paper trays?
Ensure paper is NOT over the maximum fill marks in the paper trays. Observe the customer loading paper in trays.
Are the paper tray guides set correctly?
Ensure Tray 2 and 3 left-side paper guide is set correctly at both the front and rear of the tray, and that the front guide is locked into the correct position. For Tray 4, ensure all adjustments are set correctly; front, back, and side at the top and bottom of the tray.
Does the printer need cleaning?
Inspect paper path and paper path rollers. Refer to cleaning procedures in Chapter 4.
When was the User Maintenance performed on the printer?
Determine from PCL Configuration Page the number of pages since the last maintenance (page 7-45). The Printer Maintenance Kit should be installed every 150,000 images.
Table 7-7. General Paper Path Troubleshooting Questions (continued)
Problem Action

Paper Path Test
To perform a Paper Path Test:
1 Press [Menu] until ������ ������ appears
2 Press [Item] until � ��������������� appears.
3 Press [Select].
4 Press [+] to cycle selections until the desired paper tray appears.
5 Press [Select].
6 Press [+] until the desired output bin appears (open the rear output bin to print to it)
7 Press [Select].
8 Press [+] until the desired duplex mode (on or off) appears.
9 Press [Select].
10 Press [+] to cycle selections until the desired number of copies appears. Choose 1, 10, 50, 100, or 500 copies.
11 Press [Select] to perform the Paper Path Test.
Partshere Troubleshooting www.partshere.com

www.partshere.com Troubleshooting the Printing System
Information PagesFrom the printer’s control panel you can print pages that give details about the printer and its current configuration. The following information pages are described here:
● Menu Map
● Configuration Page
● PCL or PS Font List
For a complete list of the printer’s information pages, print a Menu Map and see the Information Menu listed.
Menu Map
To see the current settings for the menus and items available in the control panel, print a control panel menu map:
1 Press [Menu] until ������ ������ appears.
2 Press [Item] until � ���������� appears.
3 Press [Select] to print the menu map.
The content of the Menu Map varies, depending on the options currently installed in the printer. (Many of these values can be overridden from the printer driver or software application.)

Figure 7-4 Menu Map
Partshere Troubleshooting www.partshere.com

www.partshere.com Troubleshooting the Printing System
Configuration Page
Use the Configuration Page to view current printer settings, to help troubleshoot printer problems, or to verify installation of optional accessories, such as memory (DIMMs), paper trays, and printer languages.
Note If an HP JetDirect print server EIO card is installed, a JetDirect Configuration Page will print out as well.
To print a Configuration page:
1 Press [Menu] until� ������ ������ appears.
2 Press [Item] until � ������� ���� ���appears.
3 Press [Select] to print the configuration page.
Figure 7-5 on page 7-46 is a sample Configuration Page. Numbers in the sample printout match the numbers in the table. The content of the Configuration Page varies, depending on the options currently installed in the printer.

Figure 7-5 Configuration Page
Partshere Troubleshooting www.partshere.com

www.partshere.com Troubleshooting the Printing System
Verify installed options
Under “Installed Personalities” on the Configuration page, look for options such as hard disk or DIMM types and sizes.
Verify that the options which are installed in your printer are reflected in the Configuration Page. If an installed device is not shown, reseat the device and print a new Configuration Page.
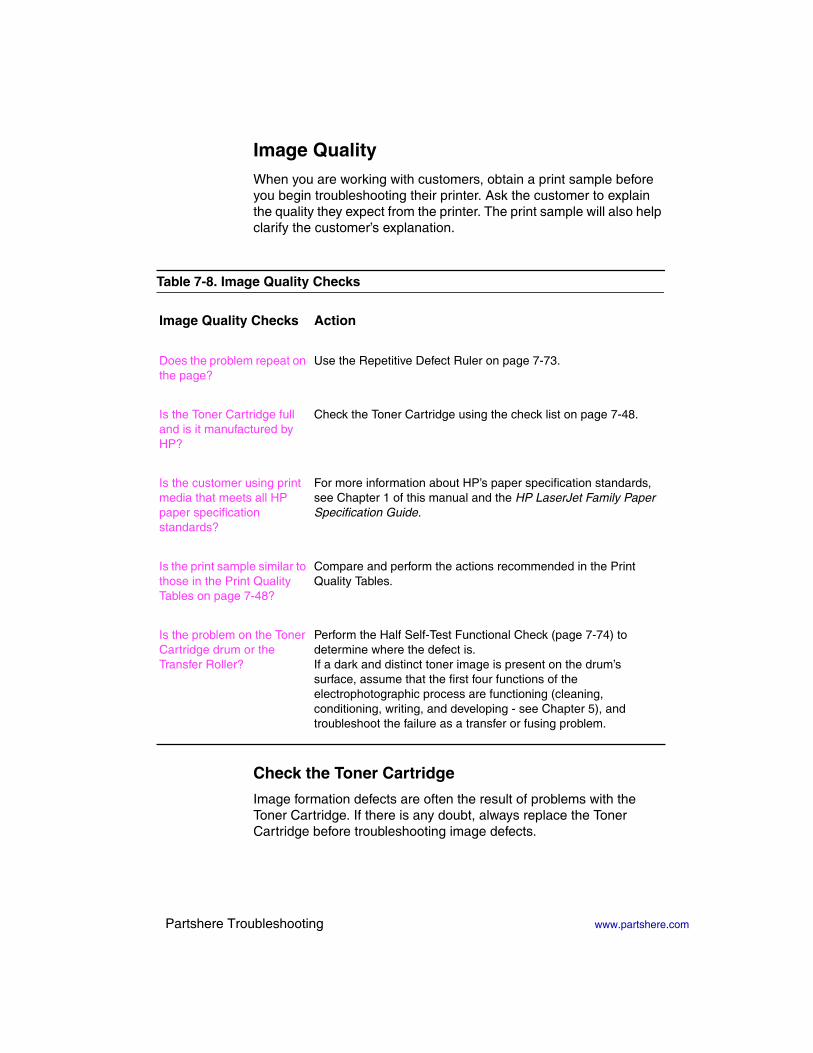
Image QualityWhen you are working with customers, obtain a print sample before you begin troubleshooting their printer. Ask the customer to explain the quality they expect from the printer. The print sample will also help clarify the customer’s explanation.
Check the Toner Cartridge
Image formation defects are often the result of problems with the Toner Cartridge. If there is any doubt, always replace the Toner Cartridge before troubleshooting image defects.
Table 7-8. Image Quality Checks
Image Quality Checks Action
Does the problem repeat on the page?
Use the Repetitive Defect Ruler on page 7-73.
Is the Toner Cartridge full and is it manufactured by HP?
Check the Toner Cartridge using the check list on page 7-48.
Is the customer using print media that meets all HP paper specification standards?
For more information about HP’s paper specification standards, see Chapter 1 of this manual and the HP LaserJet Family Paper Specification Guide.
Is the print sample similar to those in the Print Quality Tables on page 7-48?
Compare and perform the actions recommended in the Print Quality Tables.
Is the problem on the Toner Cartridge drum or the Transfer Roller?
Perform the Half Self-Test Functional Check (page 7-74) to determine where the defect is.If a dark and distinct toner image is present on the drum’s surface, assume that the first four functions of the electrophotographic process are functioning (cleaning, conditioning, writing, and developing - see Chapter 5), and troubleshoot the failure as a transfer or fusing problem.
Partshere Troubleshooting www.partshere.com

www.partshere.com Troubleshooting the Printing System
Use the following list to ensure that the Toner Cartridge is still operable.
● Ensure that the Toner Cartridge has toner. Full Toner Cartridge weight = 1880 grams (66.3 oz.) Empty Weight = 1450 grams (51.1 oz.)
● Check the expiration date of the Toner Cartridge (stamped on the cartridge’s box).
● Check the Toner Cartridge to see if it has been disassembled or refilled.
● Ensure that the Toner Cartridge is seated properly in the printer cavity.
● Inspect the cartridge for leaking toner through worn seals. (If the drum has been manually rotated it may have caused internal damage and toner spills may result.)
Note Toner Cartridges are rated for 10,000 images at 5% coverage. It is possible to wear out the gears and the cartridge seals before ��������is displayed if the 10,000 image expectancy is exceeded. See “EconoMode” below.
● Check the surface of the photosensitive drum in the cartridge to see if it has been damaged or scratched. Touching the drum will contaminate the photosensitive surface and may cause spotting and defects during printing.
● White areas on the page may indicate that the drum has been exposed to light for too long. If white areas appear, stop the printer and wait a few minutes This should eliminate most defective images. If not, the Toner Cartridge may be placed in a dark environment for several days, which may restore some life to the drum.
EconoMode
EconoMode creates draft-quality printing by reducing the amount of toner on the printed page by up to 50%. Advise the customer to turn EconoMode on or off from the printer driver or software application, since those settings override the control panel settings. EconoMode settings can also be accessed from the Print Quality Menu in the Front Panel.
CAUTION HP does not recommend full-time use of EconoMode. If EconoMode is used full-time, it is possible that the toner supply will outlast the mechanical parts in the toner cartridge.

Image Defects
The quality of the printer’s output is subject to the judgment of the user. This section of the manual helps you define print quality defects and understand what factors affect print quality.
The print samples shown in the following figures illustrate some print quality defects. Keep copies of print quality defects encountered in the field with an explanation of their causes for future reference.
The image defects listed below are covered in the following tables.
● Black Lines (perpendicular path) (page 7-51)
● Black Page (page 7-51)
● Blank Page (page 7-53)
● Blank Spots (page 7-55)
● Character Voids (page 7-56)
● Creases (page 7-57)
● Curl (page 7-58)
● Dirt on Back (page 7-59)
● Distorted Image (page 7-59)
● Dropouts (page 7-60)
● Faded Print/Bubbles (page 7-61)
● Gray Background (page 7-63)
● Horizontal Smudges (page 7-64)
● Horizontal White Lines (page 7-65)
● Light Print, Dark Print, or Fade (page 7-65)
● Loose Toner (page 7-66)
● Repetitive Defects (page 7-67)
● Skew (page 7-68)
● Toner Smear (page 7-68)
● Toner Specks (page 7-69)
● Vertical Black Lines (page 7-70)
● Vertical Dots (page 7-71)
● Vertical White Lines (page 7-71)
Hint If you find a defect that is not depicted, record the probable cause along with the conditions in the printing environment and save a copy of the defect for future reference.
Partshere Troubleshooting www.partshere.com

www.partshere.com Troubleshooting the Printing System
Table 7-9. Black Lines (perpendicular path)
Possible Cause Action
Defective Toner Cartridge.
Inspect the Toner Cartridge for a scratched photosensitive drum or toner leaking through worn seals. Replace as necessary.
Fusing Assembly is contaminated or damaged.
Inspect the Fusing Assembly for toner build-up or scratches on the fuser rollers. Try cleaning with alcohol. Replace the Fusing Assembly if damaged.
Static Eliminator teeth are contaminated or defective.
Clean using the blue cleaning tool or compressed air. Replace assembly if damaged.
Table 7-10. Black Page
Possible Cause Action
Defective Toner Cartridge.
Replace the Toner Cartridge.
Light is leaking into the printer.
Ensure all covers are in place.
High voltage contact springs are dirty or defective. The high voltage contacts are mounted on the High Voltage Power Supply PCA and protrude into the toner cartridge cavity.
Inspect and clean the high voltage contacts. If damaged, replace the High Voltage Power Supply PCA.

High voltage power supply circuit is defective (not supplying the correct negative voltage).
Replace the High Voltage Power Supply PCA.
The High Voltage Power Supply is installed improperly. If the High Voltage Power Supply has been removed and replaced, it may not be seated properly.
Remove the DC Controller Board and check the connectors for damage. Reseat the DC Controller Board, being certain to fully seat the connectors.
Bad Primary Charging Roller.
Replace the Toner Cartridge.
DC Controller PCA is defective. If the DC Controller turns on the laser beam continuously, the entire surface of the Photosensitive drum is neutralized causing a completely black page.
Replace the DC Controller PCA.
Laser/ScannerAssembly is faulty (turning laser on continuously).
Replace Laser/Scanner Assembly.
Table 7-10. Black Page (continued)
Possible Cause Action
Defective Toner Cartridge.
Replace the Toner Cartridge.
Light is leaking into the printer.
Ensure all covers are in place.
Partshere Troubleshooting www.partshere.com

www.partshere.com Troubleshooting the Printing System
Connectors between the Laser/Scanner unit and DC Controller are not seated properly or are defective.
Inspect and reseat the connectors. Replace cables as necessary.
Table 7-11. Blank Page
Possible Cause Action
Software Configuration.
Make sure the application is not sending incorrect page length requests, or extra page eject commands.
Network Configuration. Some sharing devices on networks may generate a blank page as a separator.
Check with the Network Administrator.
Multiple Feeds. The printer may be feeding two or more pages at once because the paper is difficult to separate.
Remove the paper from the paper cassette and fan the edges of the paper to separate the pages (see HP LaserJet Printer Family Paper Specifications Guide).
Sealing tape left in Toner Cartridge.
Remove the sealing tape.
Table 7-10. Black Page (continued)
Possible Cause Action
Defective Toner Cartridge.
Replace the Toner Cartridge.
Light is leaking into the printer.
Ensure all covers are in place.
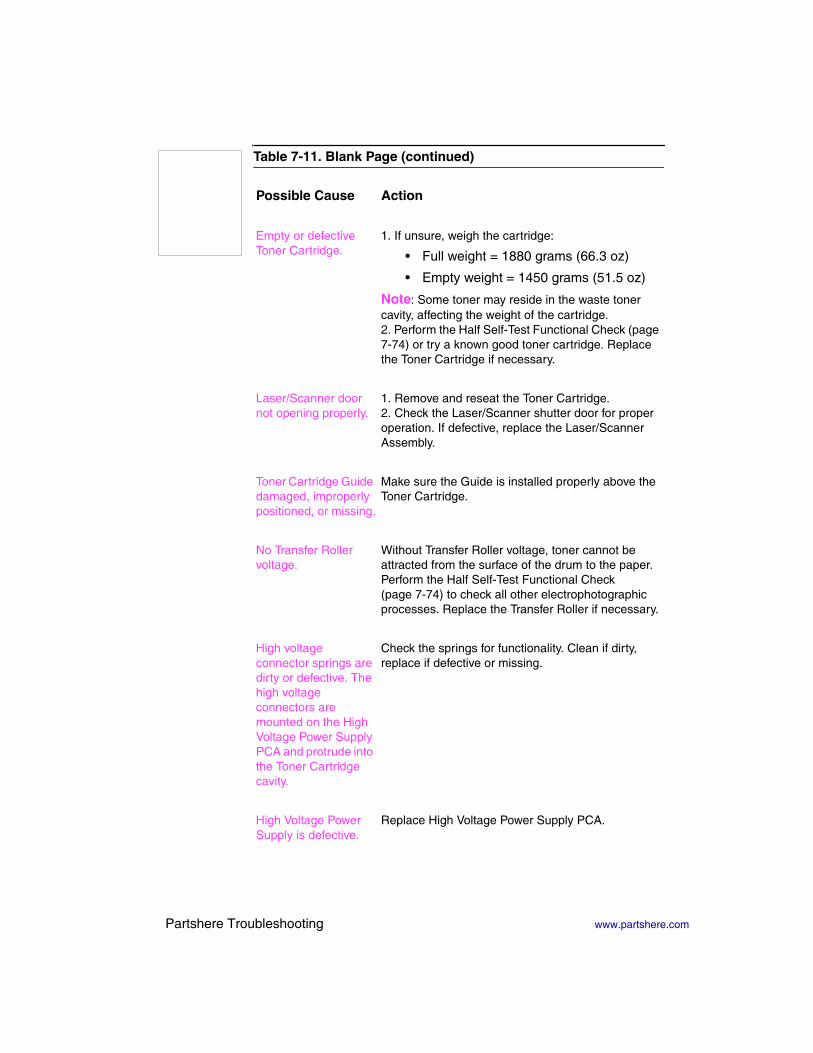
Empty or defective Toner Cartridge.
1. If unsure, weigh the cartridge:
• Full weight = 1880 grams (66.3 oz)
• Empty weight = 1450 grams (51.5 oz)
Note: Some toner may reside in the waste toner cavity, affecting the weight of the cartridge.2. Perform the Half Self-Test Functional Check (page 7-74) or try a known good toner cartridge. Replace the Toner Cartridge if necessary.
Laser/Scanner door not opening properly.
1. Remove and reseat the Toner Cartridge.2. Check the Laser/Scanner shutter door for proper operation. If defective, replace the Laser/Scanner Assembly.
Toner Cartridge Guide damaged, improperly positioned, or missing.
Make sure the Guide is installed properly above the Toner Cartridge.
No Transfer Roller voltage.
Without Transfer Roller voltage, toner cannot be attracted from the surface of the drum to the paper. Perform the Half Self-Test Functional Check (page 7-74) to check all other electrophotographic processes. Replace the Transfer Roller if necessary.
High voltage connector springs are dirty or defective. The high voltage connectors are mounted on the High Voltage Power Supply PCA and protrude into the Toner Cartridge cavity.
Check the springs for functionality. Clean if dirty, replace if defective or missing.
High Voltage Power Supply is defective.
Replace High Voltage Power Supply PCA.
Table 7-11. Blank Page (continued)
Possible Cause Action
Partshere Troubleshooting www.partshere.com

www.partshere.com Troubleshooting the Printing System
DC Controller PCA is defective. The DC Controller supplies the proper voltage to the High Voltage Power Supply PCA.
Replace the DC Controller PCA.
No Developing Bias. 1. Clean the High Voltage Power Supply contacts. With no Developing Bias charge, toner is not attracted to the drum.2. Replace the Engine Controller Board.
No drum ground path. With no ground path the drum cannot discharge. The negative charge on the drum repels toner, and leaves a white page with bubble print. 1. Check the drum ground. 2. Replace the Engine Controller Board.
Defective Laser Scanner Cable Assembly.
Low-level signals exchanged between the Laser Scanner Assembly and the Engine Controller Board may be affecting laser output. Replace the Laser Scanner Cable Assembly.
Table 7-12. Blank Spots
Possible Cause Action
Paper does not meet printer specifications or is stored improperly.
1. Print a few more pages to see if the problem corrects itself.2. Turn over the stack of paper in the tray. Also try rotating the paper 180°.3. Check the paper (or other print media) type and quality. Replace the paper, and advise the customer to use the recommended paper and store it properly.
Defective Toner Cartridge.
Replace the Toner Cartridge.
Table 7-11. Blank Page (continued)
Possible Cause Action

Dirty or deformed Transfer Roller.
Replace the Transfer Roller.
See also “Dropouts” on page 7-60.
Table 7-13. Character Voids
Possible Cause Action
Paper surface too rough. Toner migrates to low spots, leaving higher areas void.
User paper with correct finish (smoothness) meeting HP specifications (see HP LaserJet Printer Family Paper Specifications Guide).
Printing on wrong side of paper. The label on the ream of paper indicates which side to print on. The different surface properties of some papers may cause problems if loaded wrong side up.
Check for the arrow on the paper wrapper. Be sure paper is loaded with the arrow pointing down in the paper trays, or arrow pointing up in Tray 1.
Paper surface too smooth for proper toner adhesion.
User paper with correct finish (smoothness) meeting HP specifications (see HP LaserJet Printer Family Paper Specifications Guide).
Bad transparencies. Transparencies can have this problem because they are not designed for proper toner adhesion.
Use Hewlett-Packard approved transparencies (see HP LaserJet Printer Family Paper Specifications Guide).
Table 7-12. Blank Spots (continued)
Possible Cause Action
Partshere Troubleshooting www.partshere.com

www.partshere.com Troubleshooting the Printing System
Bad Transfer Roller. If the Transfer Roller has finger oils on its surface, is dirty or worn out, this problem can result.
Clean the Transfer Roller using a dry, lint-free cloth. DO NOT touch the Transfer Roller with your fingers. If the problem persists, replace the Transfer Roller Assembly.
Table 7-14. Creases
Possible Cause Action
Paper does not meet printer specifications or is stored improperly.
1. Print a few more pages to see if the problem corrects itself.2. Turn over the stack of paper in the tray. Also try rotating the paper 180°.3. Check the paper (or other print media) type and quality. Replace the paper, and advise the customer to use the recommended paper and store it properly.
Printer’s operating environment does not meet specifications.
Make sure the printer’s operating environment meets specifications.
Paper is loaded incorrectly.
Make sure paper is loaded correctly and that the guides fit properly against the paper stack.
Wrong tray. Print from a different tray (such as Tray 1).
Wrong output bin for paper type.
Print to a different output bin (top or rear output bin).
Obstruction in paper path.
1. Check the paper path for paper or label debris.2. Check for damaged components that could be creasing the paper.
Table 7-13. Character Voids (continued)
Possible Cause Action
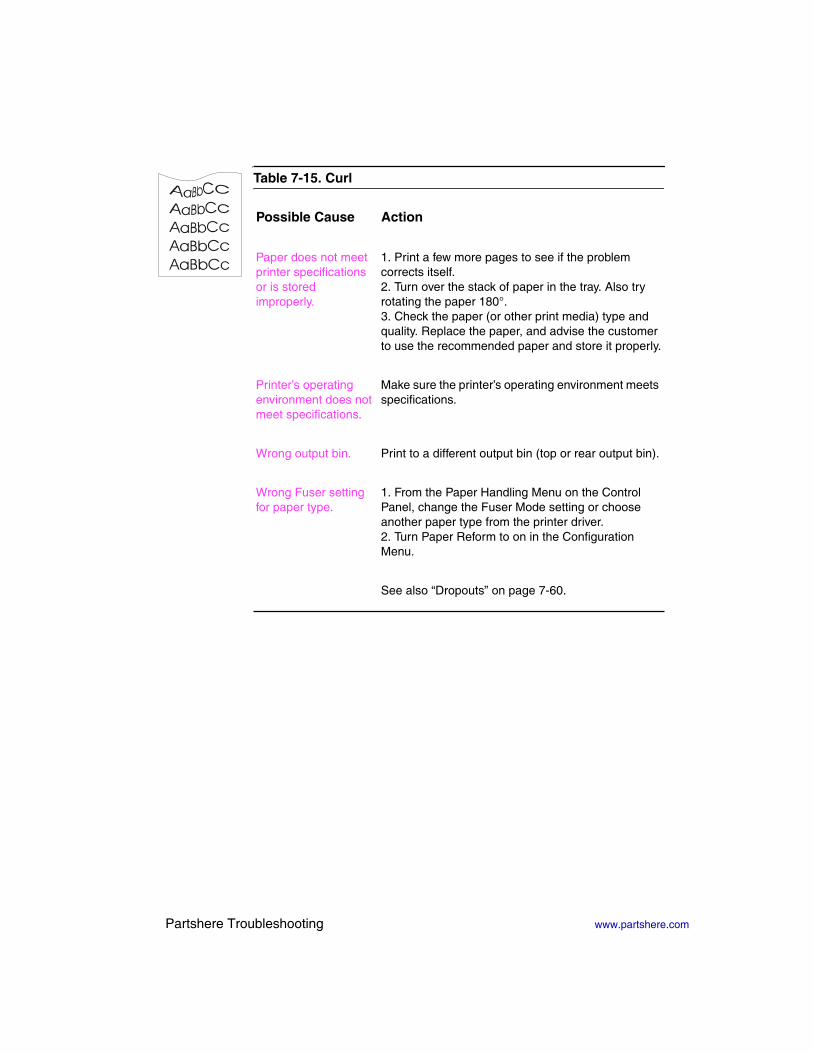
Table 7-15. Curl
Possible Cause Action
Paper does not meet printer specifications or is stored improperly.
1. Print a few more pages to see if the problem corrects itself.2. Turn over the stack of paper in the tray. Also try rotating the paper 180°.3. Check the paper (or other print media) type and quality. Replace the paper, and advise the customer to use the recommended paper and store it properly.
Printer’s operating environment does not meet specifications.
Make sure the printer’s operating environment meets specifications.
Wrong output bin. Print to a different output bin (top or rear output bin).
Wrong Fuser setting for paper type.
1. From the Paper Handling Menu on the Control Panel, change the Fuser Mode setting or choose another paper type from the printer driver.2. Turn Paper Reform to on in the Configuration Menu.
See also “Dropouts” on page 7-60.
Partshere Troubleshooting www.partshere.com
www.partshere.com Troubleshooting the Printing System
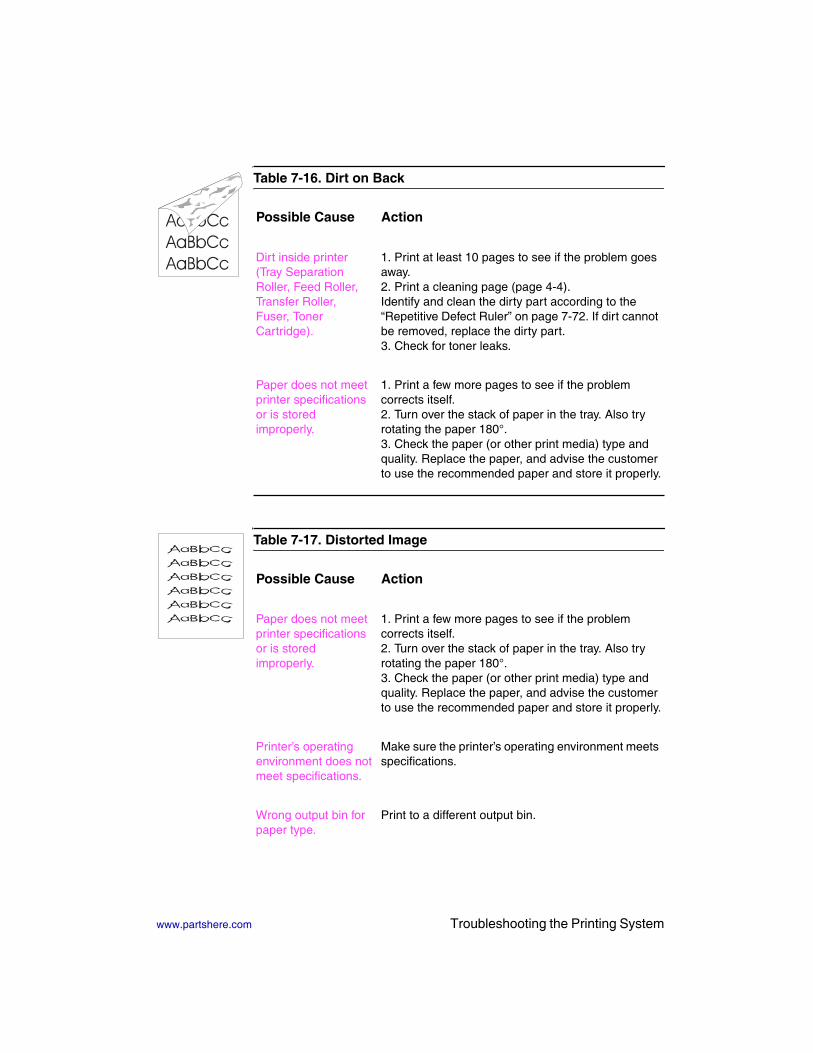
Table 7-16. Dirt on Back
Possible Cause Action
Dirt inside printer (Tray Separation Roller, Feed Roller, Transfer Roller, Fuser, Toner Cartridge).
1. Print at least 10 pages to see if the problem goes away.2. Print a cleaning page (page 4-4).Identify and clean the dirty part according to the “Repetitive Defect Ruler” on page 7-72. If dirt cannot be removed, replace the dirty part.3. Check for toner leaks.
Paper does not meet printer specifications or is stored improperly.
1. Print a few more pages to see if the problem corrects itself.2. Turn over the stack of paper in the tray. Also try rotating the paper 180°.3. Check the paper (or other print media) type and quality. Replace the paper, and advise the customer to use the recommended paper and store it properly.
Table 7-17. Distorted Image
Possible Cause Action
Paper does not meet printer specifications or is stored improperly.
1. Print a few more pages to see if the problem corrects itself.2. Turn over the stack of paper in the tray. Also try rotating the paper 180°.3. Check the paper (or other print media) type and quality. Replace the paper, and advise the customer to use the recommended paper and store it properly.
Printer’s operating environment does not meet specifications.
Make sure the printer’s operating environment meets specifications.
Wrong output bin for paper type.
Print to a different output bin.

Poor connection of cables to the Laser Scanner.
Reseat the cables connected to the Laser Scanner.
Poor connection of cables to the DC Controller Assembly.
Reseat the cables connected to the DC Controller Assembly.
Defective Laser Scanner.
Replace the Laser Scanner.
Defective Engine Controller Board.
Replace the Engine Controller Board.
Table 7-18. Dropouts
Possible Cause Action
Paper might be too smooth.
Check the paper (or other print media) type and quality.
Printer’s operating environment does not meet specifications.
Make sure the printer’s operating environment meets specifications.
Wrong toner density setting.
From the Print Quality Menu on the Control Panel, adjust the toner density setting. Make sure EconoMode is off.
Wrong Fuser setting for paper type.
From the Paper Handling Menu on the Control Panel, change the Fuser Mode setting or choose another paper type from the printer driver.
Single sheet of paper defective.
Try reprinting the job.
Table 7-17. Distorted Image (continued)
Possible Cause Action
Partshere Troubleshooting www.partshere.com

www.partshere.com Troubleshooting the Printing System
Paper does not meet specifications. The paper moisture content, conductivity, or surface finish may not work correctly with the electrophotographic process.
Try a different paper lot (see HP LaserJet Printer Family Paper Specifications Guide).
DC Controller defective (low primary voltage).
Replace the DC Controller.
High Voltage Power Supply PCA defective.
Replace the High Voltage Power Supply PCA.
Transfer Roller defective.
Replace the Transfer Roller.
See also “Blank Spots” on page 7-55.
Table 7-19. Faded Print/Bubbles
Possible Cause Action
No drum ground path. Check the contacts for functionality. If dirty, clean using alcohol; if damaged, replace the High Voltage Power Supply PCA.
Toner supply is low. Shake the cartridge gently to redistribute the toner, or replace the cartridge.
Print Density is set incorrectly.
Change to a darker setting and retry printing.
Table 7-18. Dropouts (continued)
Possible Cause Action

EconoMode is on. EconoMode saves toner by reducing the dot density. This may appear to be a print quality problem in some cases.
Turn EconoMode off.
Paper does not meet specifications. The moisture content, conductivity, or surface finish may not work correctly with the electrophotographic process.
Try a different paper lot (see HP LaserJet Printer Family Paper Specifications Guide).
Transfer Roller is defective or incorrectly installed. If the transfer roller loses conductivity, it cannot effectively pull toner from the drum to the paper.
Inspect the Transfer Roller for proper installation and contact. If the Transfer Roller is damaged, replace it.
Laser/Scanner door is not opening properly.
1. Remove and reseat the toner cartridge.2. Check the Laser/Scanner shutter door for proper operation. If defective, replace the Laser/Scanner Assembly.
High voltage contact springs are dirty or defective. The high voltage contacts are mounted on the High Voltage Power Supply PCA and protrude into the toner cartridge cavity.
Check the contacts for functionality. If dirty, clean using alcohol; if damaged, replace the High Voltage Power Supply PCA.
Table 7-19. Faded Print/Bubbles (continued)
Possible Cause Action
Partshere Troubleshooting www.partshere.com

www.partshere.com Troubleshooting the Printing System
High Voltage Power Supply PCA is defective.
Replace the High Voltage Power Supply PCA.
DC Controller PCA is defective. The DC Controller supplies the proper voltage to the High Voltage Power Supply PCA.
Replace the DC Controller PCA.
Table 7-20. Gray Background
Possible Cause Action
Paper does not meet printer specifications or is stored improperly.
1. Print a few more pages to see if the problem corrects itself.2. Turn over the stack of paper in the tray. Also try rotating the paper 180°.3. Check the paper (or other print media) type and quality. Replace the paper, and advise the customer to use the recommended paper and store it properly.
Inside of printer is dirty (toner may have leaked out of the toner cartridge).
Clean inside of printer (see Chapter 4). Install a new Toner Cartridge if leaking.
Printer’s operating environment does not meet specifications.
Make sure the printer’s operating environment meets specifications.
Printing on envelope seams. Printing on an envelope seam can cause a background scatter problem.
Move the text to an area without seams. If not printing on seams, try a higher print density setting.
Table 7-19. Faded Print/Bubbles (continued)
Possible Cause Action
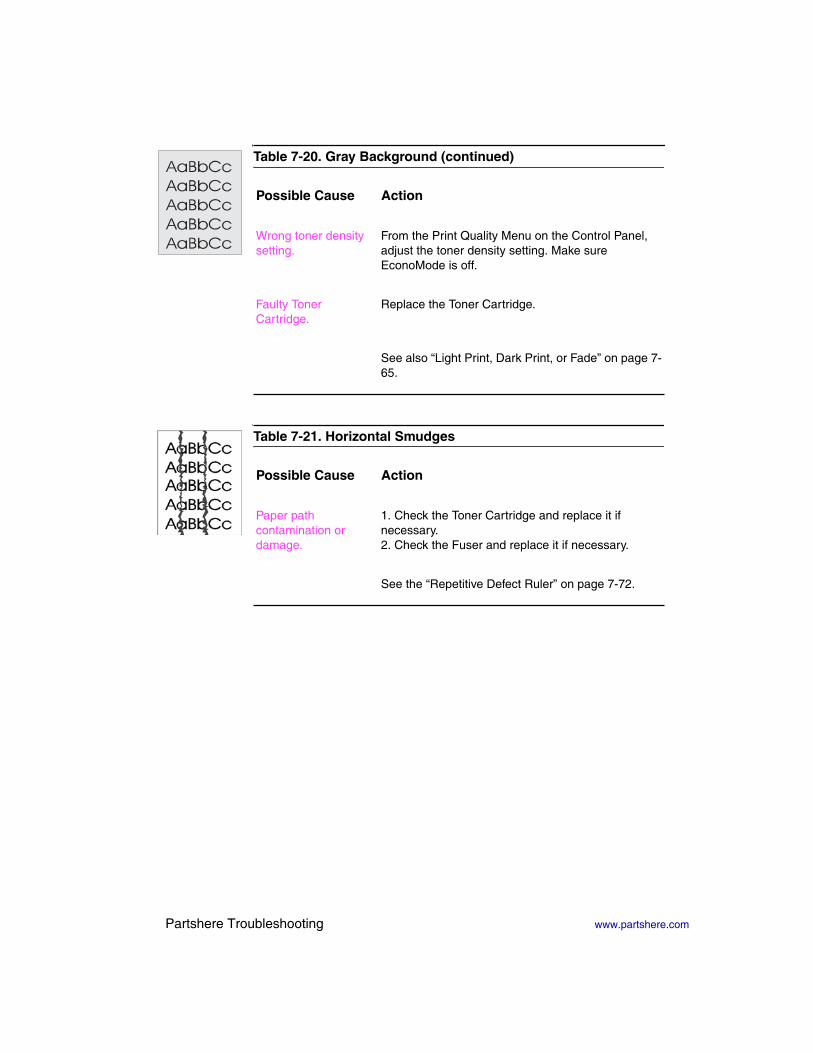
Wrong toner density setting.
From the Print Quality Menu on the Control Panel, adjust the toner density setting. Make sure EconoMode is off.
Faulty Toner Cartridge.
Replace the Toner Cartridge.
See also “Light Print, Dark Print, or Fade” on page 7-65.
Table 7-21. Horizontal Smudges
Possible Cause Action
Paper path contamination or damage.
1. Check the Toner Cartridge and replace it if necessary.2. Check the Fuser and replace it if necessary.
See the “Repetitive Defect Ruler” on page 7-72.
Table 7-20. Gray Background (continued)
Possible Cause Action
Partshere Troubleshooting www.partshere.com

www.partshere.com Troubleshooting the Printing System
Table 7-22. Horizontal White Lines
Possible Cause Action
Lack of toner or faulty Toner Cartridge.
Redistribute the toner in the Toner Cartridge. If the problem continues, replace the Toner Cartridge.
Dirt in the laser path. Clean the laser path. (Remove the Laser Scanner Assembly and clean the lens.)
Defective Fuser. Replace the Fuser Assembly.
Dirty mirror in the Laser Scanner.
Replace the Laser Scanner.
Table 7-23. Light Print, Dark Print, or Fade
Possible Cause Action
Wrong toner density setting.
From the Print Quality Menu on the Control Panel, adjust the toner density setting. Make sure EconoMode is off.
Toner Cartridge is low. Replace the Toner Cartridge.
Transfer Roller is defective.
Replace the Transfer Roller.
Paper does not meet printer specifications or is stored improperly.
1. Print a few more pages to see if the problem corrects itself.2. Turn over the stack of paper in the tray. Also try rotating the paper 180°.3. Check the paper (or other print media) type and quality. Replace the paper, and advise the customer to use the recommended paper and store it properly.

Poor contact to the Engine Controller Board.
1. Clean the contacts if they are dirty. If the problem remains after cleaning, or if parts are damaged or deformed, replace them. 2. Replace the Engine Controller Board if necessary.
Defective Laser Scanner.
Replace the Laser Scanner.
Defective High Voltage Power Supply.
Replace the High Voltage Power Supply PCA.
See also “Faded Print/Bubbles” on page 7-61.
Table 7-24. Loose Toner
Possible Cause Action
Dirt in the printer. 1. Print a few more pages to see if the problem corrects itself.2. Clean the inside of the printer (page 4-2) or use the printer’s cleaning page (page 4-4).
Toner Cartridge is defective.
Replace the Toner Cartridge.
Paper might be too smooth.
Check the paper (or other print media) type and quality.
Wrong Fuser setting for paper type.
From the Paper Handling Menu on the Control Panel, change the Fuser Mode setting or choose another paper type from the printer driver.
Defective Fuser. Replace the Fuser.
Table 7-23. Light Print, Dark Print, or Fade (continued)
Possible Cause Action
Partshere Troubleshooting www.partshere.com
www.partshere.com Troubleshooting the Printing System
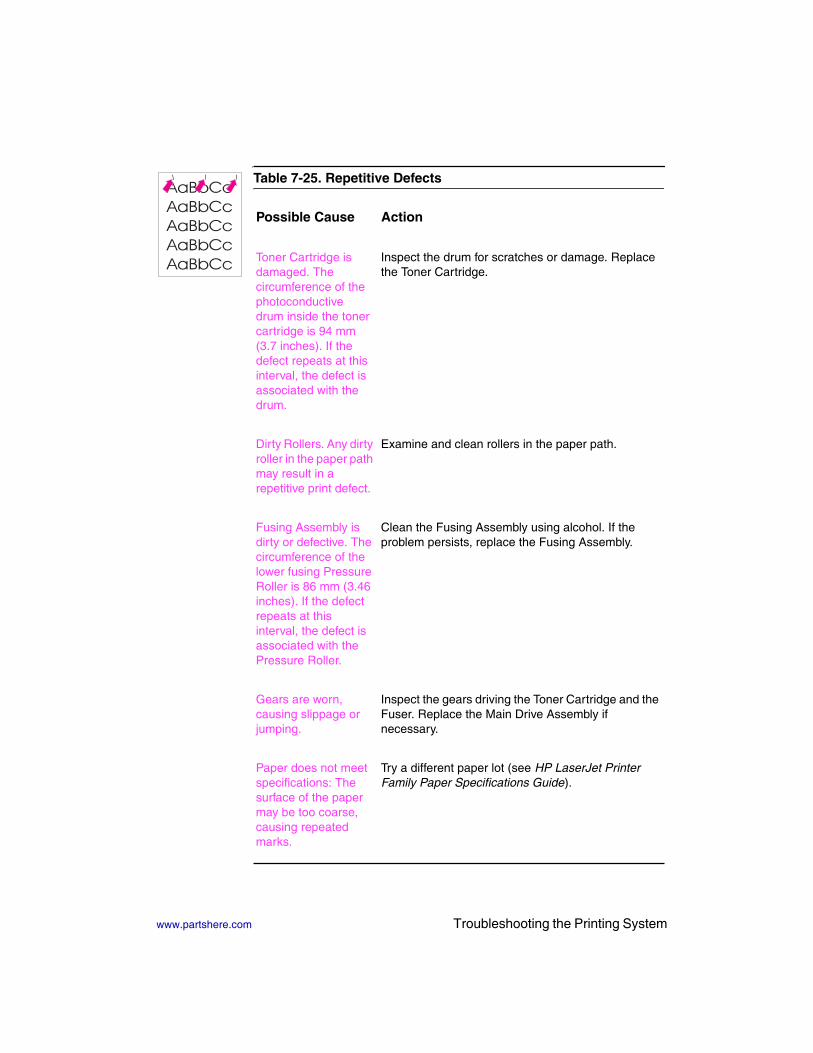
Table 7-25. Repetitive Defects
Possible Cause Action
Toner Cartridge is damaged. The circumference of the photoconductive drum inside the toner cartridge is 94 mm (3.7 inches). If the defect repeats at this interval, the defect is associated with the drum.
Inspect the drum for scratches or damage. Replace the Toner Cartridge.
Dirty Rollers. Any dirty roller in the paper path may result in a repetitive print defect.
Examine and clean rollers in the paper path.
Fusing Assembly is dirty or defective. The circumference of the lower fusing Pressure Roller is 86 mm (3.46 inches). If the defect repeats at this interval, the defect is associated with the Pressure Roller.
Clean the Fusing Assembly using alcohol. If the problem persists, replace the Fusing Assembly.
Gears are worn, causing slippage or jumping.
Inspect the gears driving the Toner Cartridge and the Fuser. Replace the Main Drive Assembly if necessary.
Paper does not meet specifications: The surface of the paper may be too coarse, causing repeated marks.
Try a different paper lot (see HP LaserJet Printer Family Paper Specifications Guide).

Table 7-26. Skew
Possible Cause Action
Paper does not meet printer specifications or is stored improperly.
1. Print a few more pages to see if the problem corrects itself.2. Turn over the stack of paper in the tray. Also try rotating the paper 180°.3. Check the paper (or other print media) type and quality. Replace the paper, and advise the customer to use the recommended paper and store it properly.
Paper is not loaded correctly or trays are not adjusted properly.
Make sure paper is loaded correctly and that the guides fit properly against the paper stack.
Registration Assembly is improperly installed.
Be sure that the Registration Assembly is installed correctly.
Table 7-27. Toner Smear
Possible Cause Action
Dirt in the printer. 1. Print a few more pages to see if the problem corrects itself.2. Clean the inside of the printer (page 4-2) or use the printer’s cleaning page (page 4-4).
Dirty Fusing Rollers. Toner build-up can cause the print on a page to smear.
Remove and inspect the Fusing Assembly for excessive toner build-up. Clean using alcohol.
Paper might be too smooth.
Check the paper (or other print media) type and quality.
Defective Toner Cartridge.
Replace the Toner Cartridge. (See instructions with the Toner Cartridge.)
Partshere Troubleshooting www.partshere.com

www.partshere.com Troubleshooting the Printing System
Wrong Fuser setting for paper type.
From the Paper Handling Menu on the Control Panel, change the Fuser Mode setting or choose another paper type from the printer driver.
Fusing Assembly is defective. The print will smear if the Fusing Assembly is not heated sufficiently to bond the toner image to the paper.
Replace the Fusing Assembly.
The Static Eliminator is dirty or is not grounded, allowing a static charge to remain on the page.
Clean using the blue cleaning tool or compressed air. Replace assembly if damaged.
DC Controller is defective. The DC Controller regulates fusing roller temperature.
If a new Fusing Assembly does not resolve the problem, replace the DC Controller PCA.
Table 7-28. Toner Specks
Possible Cause Action
Dirt in printer. 1. Print a few more pages to see if the problem corrects itself.2. Clean the inside of the printer (page 4-2) or use the printer’s cleaning page (page 4-4).
Table 7-27. Toner Smear (continued)
Possible Cause Action

Paper does not meet printer specifications or is stored improperly.
1. Print a few more pages to see if the problem corrects itself.2. Turn over the stack of paper in the tray. Also try rotating the paper 180°.3. Check the paper (or other print media) type and quality. Replace the paper, and advise the customer to use the recommended paper and store it properly.
Alternating small and standard paper (such as envelopes and letterhead).
To alternate small and standard paper, from the Configuration Menu on the Control Panel, set ������������������.
Table 7-29. Vertical Black Lines
Possible Cause Action
Toner Cartridge not seated properly.
Remove the cartridge and reinsert it.
Toner Cartridge defective.
Replace the cartridge.
Repetitive defect. If the lines are repeated at a consistent interval down the page, this is a repetitive defect.
Refer to “Repetitive Image Defect Ruler.”
Table 7-28. Toner Specks (continued)
Possible Cause Action
Partshere Troubleshooting www.partshere.com

www.partshere.com Troubleshooting the Printing System
Table 7-30. Vertical Dots
Possible Cause Action
Dirty static eliminator teeth.
Clean the static eliminator.
Poor contact between the Static Eliminator and the Engine Controller Board.
Clean the contacts, if dirty. If the problem remains after cleaning, or if parts are damaged or deformed, replace them.
Deformed or deteriorated Transfer Roller.
Replace the Transfer Roller.
Defective DC Controller Assembly.
Replace the DC Controller Assembly.
Table 7-31. Vertical White Lines
Possible Cause Action
Toner Cartridge is nearly empty. This can cause uneven toner distribution.
Remove the Toner Cartridge and shake it gently. The cartridge will soon require replacement.
Toner Cartridge has been exposed to too much light.
Store the Toner Cartridge in a darkened environment for several days. This may restore the photosensitive potential.
Foreign objects in beam path. Any foreign objects will block the light from developing an image on the Photosensitive drum.
Remove the Toner Cartridge and check for damage. Replace the Toner Cartridge if it is damaged.
Remove the Printer Cover and inspect the path from the Laser/Scanner to the Toner Cartridge drum, looking for foreign objects in the beam path.