how to select and install a root watering system · how to select and install a root watering...
TRANSCRIPT
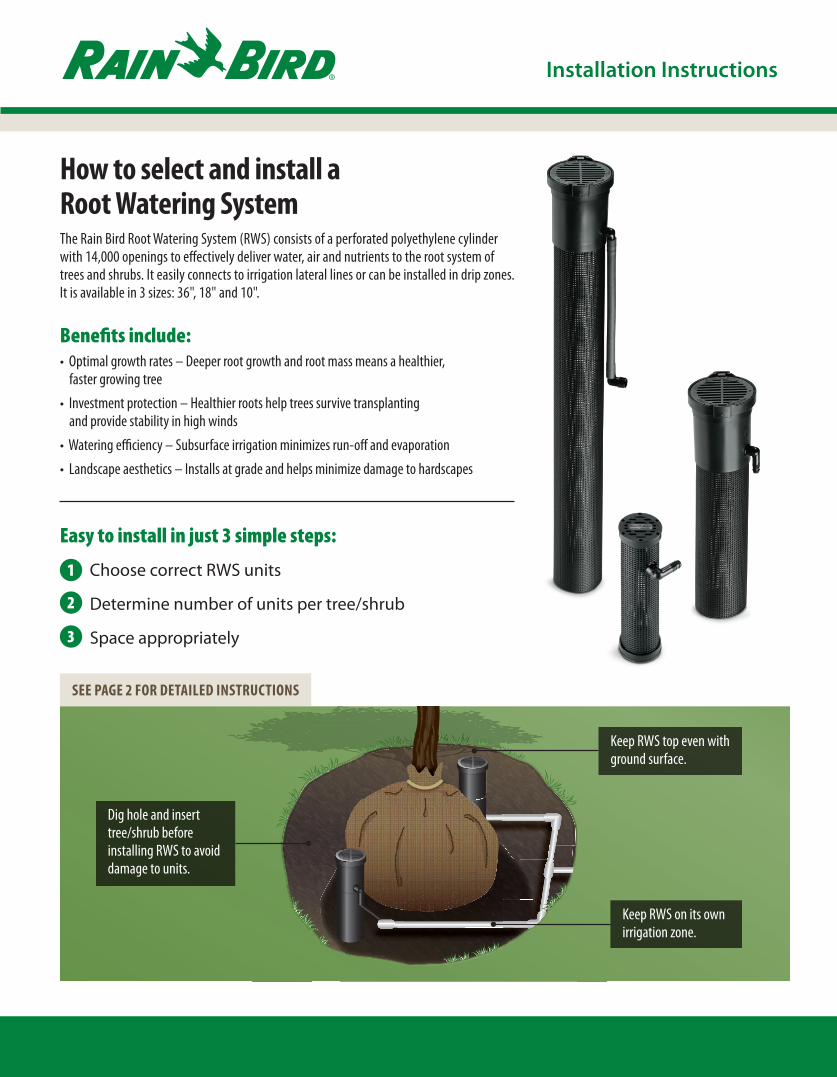
How to select and install a Root Watering SystemThe Rain Bird Root Watering System (RWS) consists of a perforated polyethylene cylinder with 14,000 openings to effectively deliver water, air and nutrients to the root system of trees and shrubs. It easily connects to irrigation lateral lines or can be installed in drip zones. It is available in 3 sizes: 36", 18" and 10".
Benefits include: • Optimal growth rates – Deeper root growth and root mass means a healthier,
faster growing tree
• Investment protection – Healthier roots help trees survive transplanting and provide stability in high winds
• Watering efficiency – Subsurface irrigation minimizes run-off and evaporation
• Landscape aesthetics – Installs at grade and helps minimize damage to hardscapes
Easy to install in just 3 simple steps:
1 Choose correct RWS units
2 Determine number of units per tree/shrub
3 Space appropriately
Dig hole and insert tree/shrub before installing RWS to avoid damage to units.
Keep RWS top even with ground surface.
Keep RWS on its own irrigation zone.
SEE PAGE 2 FOR DETAILED INSTRUCTIONS
Installation Instructions

Rain Bird Corporation 6991 E. Southpoint Road Tucson, AZ 85756Phone: (520) 741-6100Fax: (520) 741-6522
Rain Bird Technical Services (800) RAINBIRD (1-800-724-6247)(U.S. and Canada)
www.rainbird.com® Registered trademark of Rain Bird Corporation© 2016 Rain Bird Corporation 5/16
Installation Instructions
Step 1: Select the correct RWS product. Choose a bubbler flow rate appropriate for your soil type.
RWS Installation Steps The size of the root ball will drive the correct type, quantity and positioning of the RWS units.
Step 2: Determine number of units per tree/shrub.
Step 3: Space relative to root ball.
SMALL TREES & LARGE SHRUBSLARGE TO MEDIUM TREES SHRUBS & SMALL TREES
Root Ball Dia.> 36"
RWS
Root Ball Dia.12" – 36"
Root Ball Dia.< 12"
RWS-M
2 RWS-S Per Shrub
NOTE: If less than 12" apart, use 1 RWS-S between each root ball.
2 RWS-M Per Tree/Shrub
3 or more RWS Per Tree
Isolated Shrub:2 RWS-S equally spaced around root ball.
Dense Plantings:1 RWS-S between each plant.
Equally spaced around root ball.Equally spaced around root ball with no more than 30" between each RWS unit.
36" 18" 10"RWS-S
D40932
FOR MORE INFORMATION: www.rainbird.com/rws