home owner s information pack (hoip) - amazon s3 › scotia-homes... · home owner’s information...
TRANSCRIPT

HOME OWNER’S
INFORMATION PACK (HOIP)
for
FOVERAN VILLAGE, FOVERAN
(applicable to Plots 1-26 & 37-50)
www.scotia-homes.co.uk
Please read this document in conjunction with the NHBC booklet ‘Guide to your new
home – A practical guide to looking after your new home’, the Sales Specification /
Bespoke Options documents (received at reservation stage), plot specific drawings
and Statement detailing Extras/Options (both issued at reservation stage or as you
have confirmed any choice of these).
Rev. 6 24/08/2017

- 2 -
Contents
Page
HOME SAFETY INFORMATION ______________________________________________________________ 4
CUSTOMER CARE _________________________________________________________________________ 4
LABELLING OF KEY SERVICES ______________________________________________________________ 5
NHBC HUG (HOME USER GUIDE) ___________________________________________________________ 5
NPA (NATIONWIDE PROPERTY ASISTANCE) EMERGENCY COVER ______________________________ 8
OPERATING INSTRUCTIONS FOR GAS-FIRED CENTRAL HEATING AND HOT WATER SYSTEM ________ 9
RADIATOR SAFETY PRECAUTIONS AND RADIATOR NOTES ____________________________________ 12
HEATING AND HOT WATER INSTALLATION __________________________________________________ 13
GAS SYSTEM ____________________________________________________________________________ 14
HOT AND COLD WATER SERVICES _________________________________________________________ 14
KITCHENS _______________________________________________________________________________ 21
EXTRACTOR FANS (DMEV SYSTEM) ________________________________________________________ 34
VENTILATION AND AVOIDING CONDENSATION ____________________________________________ 35
TELEVISION INSTALLATION ________________________________________________________________ 37
COMMUNAL DIGITAL TELEVISION AND SATELLITE INSTALLATION (ONLY APPLICABLE TO PLOTS 5-8 &
37-42) __________________________________________________________________________________ 37
TELEPHONE INSTALLATION ________________________________________________________________ 41
FIBRE BROADBAND INTERNET CONNECTIVITY _______________________________________________ 42
WINDOWS AND FRENCH DOORS __________________________________________________________ 42
INTERNAL DOORS ________________________________________________________________________ 46
EXTERNAL DOORS _______________________________________________________________________ 46
GARAGE DOORS ________________________________________________________________________ 47
PROVISION FOR A GROUND FLOOR SHOWER ______________________________________________ 48

- 3 -
OPERATING INSTRUCTIONS FOR THE ELECTRICAL INSTALLATION ______________________________ 48
IF AN ELECTRICAL CIRCUIT FAILS __________________________________________________________ 49
SMOKE, HEAT & CARBON MONOXIDE DETECTORS/ ALARMS _________________________________ 49
WALL TILING ____________________________________________________________________________ 50
SHOWER WALL PANELLING (WHERE FITTED) _________________________________________________ 50
INTERNAL DRAINAGE – ACCESS POINTS ___________________________________________________ 51
FLOOR FINISHES _________________________________________________________________________ 51
ROOF SPACE ____________________________________________________________________________ 52
CONSTRUCTION OF WALLS, PARTITIONS, FLOORS & CEILINGS ________________________________ 53
FIXING TO WALLS, CEILINGS OR FLOORS – IMPORTANT NOTICE ______________________________ 55
EXTERNAL FIXINGS _______________________________________________________________________ 55
EFFLORESCENCE _________________________________________________________________________ 55
EXTERNAL AREAS ________________________________________________________________________ 56
DRAINAGE CONSIDERATIONS ____________________________________________________________ 59
TEMPORARY WASTE WATER TREATMENT PLANT (TWWTP) _____________________________________ 65
METERS _________________________________________________________________________________ 66
UTILITY SUPPLIERS ________________________________________________________________________ 66
LOCAL AUTHORITY REFUSE AND RECYCLING COLLECTION ___________________________________ 67
COUNCIL TAX ___________________________________________________________________________ 68
SCHEDULE OF TEST CERTIFICATES __________________________________________________________ 68
ENERGY RELATED PRODUCTS (ERP) DIRECTIVE ______________________________________________ 69
SCHEDULE OF MATERIALS ________________________________________________________________ 73
NOTE:
The information contained in this document is for our standard house types and may not cover specific
variations requested by you. It is believed to be correct at the time of writing but may be subject to specific
variations in design, materials or any other factors which have effect before, during and after the
construction process. Consequently it should be treated as general guidance and cannot be relied upon
as providing an accurate description of any of the matters illustrated therein.
- 4 -
HOME SAFETY INFORMATION
We are delighted that you have purchased one of our new homes and we
hope very much that you enjoy living in it. We go to great efforts to design
and build our homes to provide you with high levels of safety, but all homes
have inherent risk, and it is our aim to help you identify and manage these
risks.
This Home Owner’s Information Pack contains a lot of information about the
different systems within your new home and you are encouraged to read all
the supplied ‘user manuals’ before using any of your home’s systems or
appliances. Specifically, we would like to draw your attention to some key
risks that are sadly all too often common causes of accidents in domestic
properties:
Gas safety https://www.gassaferegister.co.uk/help-and-advice/gas-safety-in-
the-home/gas-safety-tips/
Carbon monoxide http://www.rospa.com/home-safety/advice/carbon-
monoxide-safety/
Fire safety http://www.firescotland.gov.uk/your-safety.aspx
General home & garden safety http://www.rospa.com/home-
safety/advice/general/home-garden-safety-checklists/
We recommend that you take the time to look at the important safety
information and advice provided in the links (to the right of the above points
and accessible via www.scotia-homes.co.uk). Following the advice will help
keep you and your loved ones safe and able to enjoy your new home in the
future.
If you do have any safety concerns about any aspect of your new home
please contact our customer care department customercare@scotia-
homes.co.uk.
CUSTOMER CARE
Should you need to contact our customer care department and your query
cannot be answered by reference to this document or the information
available within your NHBC HUG (Home User Guide) as detailed below, there
are various contact methods available to you:
Customer Care Department, Scotia Homes Ltd., Balmacassie, Ellon. AB41 8QR
Electronic mail: [email protected]
Telephone: 01358 722441
www.scotia-homes.co.uk

- 5 -
LABELLING OF KEY SERVICES
You may find identification tags throughout your new home, which provide
easy reference for key valves and taps which may be required to isolate
services in the event of an emergency or as part of routine maintenance.
The image below shows briefly what these are in reference to and the
specific tags will be shown throughout this HOIP, alongside more detail as to
their specific function. These are provided as an aid and we recommend that
you familiarise yourself with their location. As with all matters relating to
plumbing, electricity or which may threaten your health and safety, we
suggest the use of a qualified contractor for more complicated works or if you
are not fully competent.
NHBC HUG (HOME USER GUIDE)
Our homeowners are provided with a HUG (Home User Guide) with their new
home.
HUG is an online reference portal for you which has been tailored to your
property. It aims to take some of the strain by providing you with a single,
online place where you can easily and securely access all the information
you need about your new home including local area information, appliance

- 6 -
manuals, floor plans and helpful ”How to” videos, along with key information
relating to your NHBC Buildmark cover. This is hosted by the NHBC and also
has input from Scotia prior to handover.
The HUG also contains a wide variety of answers to frequently asked
questions, maintenance recommendations and important safety information.
Much of this information will be shared with the detail in this document, which
is written specifically for your development. We recommend that you read
both together, and this HOIP is available within your HUG for that purpose.
A brief introductory video to the NHBC HUG can be viewed here:
https://www.youtube.com/watch?v=d-fezWUMkLs#
Shortly after handover, you will receive a welcome email from support@hug-
nhbc.co.uk inviting you to register with HUG. All you need to do is follow the
emailed instructions to start benefitting from everything that HUG has to offer.
If you haven’t received a HUG invitation email, please double check that the
email hasn’t ended up in your spam/junk folder, then please contact us and
we can arrange for the invitation to be resent to you.
Once you’ve registered you can access your HUG whenever you like, 24
hours a day and 7 days a week, by typing http://hug.nhbc.co.uk into your
web browser’s address bar.
Although information is also and initially uploaded to the HUG by Scotia, once
you take ownership of your new home, the HUG also transfers to you for the
life of the NHBC Buildmark warranty. Scotia can only add additional
documentation to your HUG for a period of 60 days after handover.
The document you are reading will already have been uploaded to the HUG,
but it is important to note that, along with other documentation, this will be
accurate at the point of handover and any updates made after the
aforementioned 60 day period cannot be amended on the HUG. For that
reason, any specific information that has been uploaded is intended for
illustration purposes only and is subject to change. Consequently it should be
treated as general guidance and cannot be relied upon as providing an
accurate description of any of the matters illustrated therein. Should you be
considering major changes or are reliant on exact detail, you must check and
confirm this before taking action.
You may choose to upload various forms of information such as utility bills and
other reference information, which you may not wish to pass to a future
owner, but the HUG itself will prove a valuable tool for that future owner
through any remainder of the NHBC warranty period, and may indeed prove
attractive to a prospective purchaser when considering the merits of a
particular property.
Should you sell your property, please be aware that if you wish to transfer
control of the HUG to a new owner or you want to leave the HUG, there is
facility to do this from the “Manage homeowners” page within the HUG. This
gives you the opportunity to delete, move or leave some of the specifications,
manuals or files that are in this HUG.

- 7 -

- 8 -
NPA (Nationwide Property Asistance) EMERGENCY COVER
Your home is covered under NPA’s Home Emergency Assistance Cover for a
period of 24 months from your legal date of entry.
Details of the cover will be provided direct to you by NPA and the following
notes provide some outline points for your information.
The NPA cover includes items such as blocked or burst pipes (where they
occur within your home) and damaged window and door locks to your home
where there is a risk to security. Some examples of what is/ is not covered are
shown in the list below - please note that some of these examples may not
apply to your own property.
In an emergency situation (as defined in the Cover Summary which will be
provided to you direct by NPA) where any of the covered items are affected
you should contact NPA directly instead of Scotia.
At the time of writing, the emergency contact number for NPA is 0345
1552374.
Any non-emergency problem occurring inside your home (and occurring
within 24 months of your legal date of entry and which is not classed as an
emergency by NPA) should be reported to the Scotia customer care
department during normal office hours.
Please also note that any problems in the communal (where applicable)
areas of the building (the corridors, stairwells and external areas) should also
be reported to the factor – these areas are also not covered by NPA.
Examples of what is covered Examples of what is not covered
Internal Plumbing & Drainage (inside
your home)
Repairs to your internal plumbing
and drains including where there is a
loss of water to your property,
Blocked drainage and leaks (inside
your home)
Clearing blocked toilets and waste
pipes (inside your home)
Showers including the shower unit,
controls, outlet or shower head
Replacement of water
tanks/radiators, thermostatic
radiator valves, hot water cylinders
and sanitary ware
Clearing total blockages to your
drainage pipes (inside your home)
Shared drains

- 9 -
External guttering, rainwater
downpipes, rainwater drains and
soakaways
Electrical Emergency & Breakdown
An emergency caused by, or
breakdown of, the domestic
electrical wiring supply system,
including permanent damage
caused by a power cut
All non-permanent wiring/electrics,
e.g. kettles, fairy lights or any other
and appliances with plugs
Shower unit or immersion heater unit
Security
Making your property secure in the
event of broken locks for external
windows and doors that are your
responsibility
Doors (and windows) which do not
secure your property, such as
internal porch doors, internal doors
and internal conservatory doors
Failure of breakdown of the external
locking mechanisms to doors or
windows for outbuildings or a
garage
OPERATING INSTRUCTIONS FOR GAS-FIRED CENTRAL HEATING
AND HOT WATER SYSTEM
Introduction
Your home has been fitted with a gas-fired heating system serving radiators
and also providing a domestic hot water supply. The gas–fired boiler is
normally located in the Kitchen or Utility room (where applicable, please refer
to drawings for specific location) and you will find the operating and
maintenance instructions for the boiler in your handover pack. The boiler has
been set up and commissioned – you should carry out no adjustments to the
boiler.
If, after referring to the user information on the boiler controls in the boiler
instruction manual, you are unable to find the answers to any boiler problems
and the problem is an emergency which has arisen during the first 24 months
after your legal date of entry to the house, then please contact NPA (please
refer to the section on NPA below). If the fault is not an emergency (as
described in the NPA cover summary) and you are still within the warranty
period, then please contact the Scotia Customer Care department during
normal office hours.
You are responsible for the annual maintenance and servicing of the boiler,
this should be arranged through any reputable, Gas Safe registered,
plumbing and heating contractor.

- 10 -
Heating and Domestic Hot Water Controls
The system has the following controls:-
Boiler isolating switch.
Programmable Room Thermostat
Thermostatic radiator valves to radiators (except on the bypass radiator)
1. Boiler Isolating Switch
This switch will normally be found on the wall next to the boiler.
This switch is to isolate the electrical supply to the boiler and should be left on
at all times. Only use this switch if a fault develops on the boiler.
2. Programmable Room Thermostat
Your home has a programmable room thermostat located normally on the
wall in the utility or kitchen area (depending on your house type) and it is
linked to a remote temperature sensor located typically in the hall.
Example of a typical TP9000 Programmable Room Thermostat (the exact model varies
depending on house type and therefore you may have a different model- typically Danfoss
TP7001 or TP9000 programmable room thermostats are installed – the model is marked on the
room thermostat);
Drawing of a typical remote temperature sensor (linked to the programmable room
thermostat);
The programmable room thermostat controls the boiler, telling it when you
require central heating and hot water. It has the facility to give several on/off
times. Temperatures can also be selected for each on/off time. When the
heating is selected on it will operate until the set temperature is achieved.
Note that the temperature is measured by the remote temperature sensor-
not by the programmable room thermostat. The remote temperature sensor
should not be covered or otherwise obstructed as this may impair its ability to
accurately measure the room temperature.

- 11 -
When the system is selected off, the boiler will not operate unless the
temperature drops below the setback temperature selected. You can select
your minimum desired house temperature, normally this can be set between
12 and 16°C. Please refer to the manufacturer’s instructions in your home
owner pack for the programmable room thermostat for further instructions.
3. Thermostatic Radiator Valves
Thermostatic Radiator Valves (TRV’s) are fitted for comfort control i.e. 1 – low
level heat, 5 – maximum level heat. They are fitted to all radiators except
radiators in rooms where there is a room thermostat. They are essential to the
full efficiency of your heating system and allow you to lower temperatures in
unoccupied rooms thus reducing heating costs. TRV’s sense room
temperature changes in individual rooms and adjust the flow of heated water
through the radiators to maintain the desired temperature. Depending on
level of comfort required, 2 – 3 should be selected. Please refer to the
manufacturer’s instructions in your Handover Pack for full details.
Picture showing a typical Thermostatic radiator valve, Note - the type fitted in
your home may vary.
Central Heating
Should your central heating or hot water fail to work, please ensure that all of
the procedures laid out in the boiler manufacturer's literature are followed.
Failure to do this may result in a charge being made for an unnecessary call
out.
Bleeding of Radiators
This should not be required with a sealed system. However, radiators feeling
warm at the bottom but cold at the top would indicate air in the radiator.
There are airing points normally at the top of the radiator. An air-bleeding key
(available at any hardware store) can be used to allow trapped air to
escape.
1. Keep your heating system on low so it remains pressurised, but be aware
that the water in your radiators will be hot, so do take extra care.
2. Attach a radiator key to the bleed valve, usually located at the top and to
one end of the radiator, and slowly begin to turn anti-clockwise.
3. Keep turning until you hear a slight hiss of air. When water begins to escape
instead of air, you know it’s time to close the valve as all of the trapped air

- 12 -
has now escaped. Hot water may spurt out quite quickly so do protect
yourself and the area around.
4. Tighten up the valve by turning the key clockwise.
5. Check the pressure gauge on the boiler, if it is below that recommended in
the manufacturer's instructions, then it will be necessary to top up the system.
See enclosed boiler user guide for full instructions.
You may find the heating filling loop and the central heating drain off valves
identified using the tags below (draining the central heating system should
only be done by a qualified engineer):
Throughout this process you should always place a cloth beneath the valve to
catch any water that might leak from it, which could discolour floor coverings
due to the additives within the heating system
You may find the following video useful as an example of how to bleed a
radiator:
https://www.youtube.com/watch?v=UqK53MPioHI
RADIATOR SAFETY PRECAUTIONS AND RADIATOR NOTES
Myson Premier HE roundtop radiators have been installed in your home.
Should the radiator become chipped or paint damage occur then touch up
paint (RAL 9016) can be purchased from the Myson sales office on 0845 402
3434.
Radiators are hot when in use and as such users should ensure that those who
may come into close proximity to hot radiators are aware of the risks of burns
from prolonged contact.

- 13 -
Where necessary, users should take steps to minimise the risks of burns from
hot radiators (for example where there are very young children in the room).
Where applicable, consideration should be given to placing guards in front of
the radiators or reducing the temperature of individual radiators by turning
the thermostatic radiator valve to a low setting.
Radiators are heavy items and are securely fastened to the wall on
installation, with appropriate fasteners to secure the radiator bracket and suit
the construction of the wall.
Decorative covers (such as the decorative perforated MDF or timber covers
that you can purchase from DIY stores) will significantly reduce the output of
a radiator and thermostatic radiator valves should not be fitted inside these
radiator covers (as this will stop the valves from working efficiently). These
covers are not recommended as they will, by consequence, impede an
individual room’s heat requirement, which your new heating system has been
carefully designed to provide. The only exception to this would be the
comments above regarding safety of young children. If you do need to fit a
radiator cover for this purpose then you should use one of the metal mesh
type covers, similar to a fire place guard, which will not impede the flow of
heat from your radiator into the room.
Radiators should not normally be used for the mounting of clothes racks, cat
beds or other such fixtures. The mounting brackets of the radiator are
designed to support the weight of the radiator itself and water contents,
allowing for an adequate safety margin, and additional weight may
compromise this margin and cause risk of failure, leaks and potential hot
water burns.
Appropriate facilities are required by Building Regulations for internal and/or
external drying facilities and these are provided (please see “Ventilation and
avoiding condensation”). Radiator-mounted drying rails and other devices
may lead to excessive internal moisture and any chips/damage caused to
the radiator itself may compromise the protective coating and potentially
lead to corrosion/failure, which may not be covered by warranties.
Note regarding curtains – Heavy curtains or lined curtains drawn over the
windows are an effective way of reducing any heat loss through the windows
during the autumn and winter months. The sooner you draw the curtains in
the evening the more heat you will save. However, please note that if there is
a radiator located below the window, and the curtains are too long and
cover the radiator then much of the heat generated by the radiators will not
find its way into the room and will instead be wasted out the window. Curtains
covering the thermostatic radiator valves will also interfere with the operation
of the valves.
HEATING AND HOT WATER INSTALLATION
Heating and hot water are provided by an Alpha InTec 34C wall mounted,
high efficiency boiler with a gas saver flue heat recovery unit. A 50 litre
thermal store may also have been installed (this depends on the house type).
- 14 -
Please note that to obtain the maximum performance and efficiency benefits
the gas saver flue (and thermal store, where fitted) must be switched on.
Turning off the gas saver flue will mean you lose efficiency benefits. Turning off
the thermal store (where fitted) will mean you lose efficiency benefits and the
available volume of hot water will be significantly reduced.
A copy of the user manual, installation & service instructions, inspection,
commissioning and service record logbooks for the system are enclosed with
your home owner pack.
An annual gas service of the boiler and inspection/maintenance of the
associated equipment, in accordance with the manufacturer’s instructions, is
required to be carried out by Gas Safe registered personnel. Failure to carry
this out will invalidate the manufacturer’s and NHBC warranties.
GAS SYSTEM
Never obstruct gas boiler flue outlets or any ventilation, if provided, to the
boiler. Never tamper with the gas installation or equipment.
Any alterations to the gas supply pipework or work in construction with any
gas appliance should only be carried out by GasSafe registered personnel.
You are responsible for the annual maintenance and servicing of all gas
appliances such as the gas boiler, oven or hob (as applicable to your home)
and this should be arranged through any reputable, Gas Safe registered
plumbing and heating contractor.
If you suspect a gas leak:
1. Extinguish all naked flames.
2. Do not use any electrical switches or appliances
3. Turn off the gas at the meter.
4. Open all doors and windows.
5. Call the National Gas Emergency Service on its emergency number
which is in the telephone directory under ‘GAS, Gas Emergency’. There is no
call-out charge. The current emergency number at date of preparation of this
document is 0800 111999. This service operates 24 hours a day and 365 days a
year. http://www2.nationalgrid.com/uk/safety/.
Please be aware that this service is an emergency service, defined in the
same way as others, such as the police, fire service etc. Their first and only
priority is safety i.e. they will isolate and make safe any leak as quickly as
possible. Ongoing repair of any faulty appliance etc. does remain the
owner’s responsibility.
HOT AND COLD WATER SERVICES

- 15 -
Mains Cold Water Service
The internal stopcock for the incoming cold water service is located typically
under the kitchen or utility sink which, in an emergency, should be used to
shut off the water in your house.
ere is also an external stopcock located in a boundary box within the public
footpath near your house which also shuts off the water to your house (this is
primarily for the water authority’s use in an emergency).
Make sure that you know where your mains water stopcocks are located so
that you can turn them off quickly in an emergency.
You may find the external tap isolation valve identified using the tag below:
Domestic Hot Water
The Alpha Intec 34C boiler produces domestic hot water in an energy
efficient manner and the operation of this is fully explained in the enclosed
Instruction Manuals. Please also refer to the notes in the Heating and Hot
Water Installation section above.
External Water Tap (if fitted)
Where there is a risk of severe frost, the water supply to any external tap
should be isolated, pipe work drained, and the tap should be left in the open
position. There is normally a shut off valve inside the house to allow you to
easily turn the water off to the garden tap. We also recommend fitting an
insulating external tap cover to external taps during winter months – these
covers are available from any good gardening or DIY store.
Steps to take:

- 16 -
1. Isolate (turn off) the 15mm supply stopcock for the outside tap, which will
either be located under your Kitchen/Utility room sink or beside your boiler
(there may be more than 1 brass stopcock located in this area, 15mm is the
smaller one).
2. Open the outside tap, allow water to escape and leave tap in open
position.
3. Ensure the drain point on the lowest point of the external pipework (small
brass drain valve) is also left open.
4. In Spring and once temperatures are above freezing point, close the
outside tap and turn back on the stopcock inside the house.
You may find the external tap isolation valve identified using the tag below:
Sanitary Ware/Taps
Introductory notes:
Sanitary ware and taps should be cleaned in accordance with the
manufacturer's instructions, copies of which are enclosed in your home owner
pack or are available from the manufacturer’s web site. The following are
some important points to remember when cleaning and maintaining your
sanitary ware and taps. Note that the information in this section covers
standard sanitary ware and fittings being installed at the date of preparation
of this document - if you have asked for different fittings as a client choice
then the following notes may not be applicable.
Baths:

- 17 -
The bath should always be cleaned immediately after use, preferably while
the water is running out and the bath is still warm. Hot soapy water with a
cloth should be used and the bath wiped dry.
Never allow solvents such as dry cleaning agents or paint strippers to come
into contact with an acrylic bath.
Never use gritty or abrasive cleaners on the sanitary ware which can cause
scratches and other damage.
The manufacturer of the bath (where fitted) recommends the use of an anti-
slip mat when a shower is installed over the bath.
WCs
Please note that WC cistern valves should be checked periodically and
maintained as described in the manufacturer’s instructions contained in your
home owner pack. We recommend that if you contact a plumber if you
suspect that a WC valve has developed a fault.
A concealed cistern may be used where a bulkhead will be formed with a
screw-fixed MDF cover which may be removed for access maintenance.
Image below of typical concealed cistern bulkhead top & fixing detail:
Wash hand basin and bath taps:
The following are extracts from the manufacturer’s aftercare instructions for
the wash hand basins and bath (if applicable) taps;
Bristan Prism basin and bath mixer taps (cleaning and care):

- 18 -
Note: if your tap begins to drip then maintenance is required - please refer to
the instructions contained in your hand over pack (extracts of which are also
copied below. We recommend that the maintenance work on your taps is
carried out by a qualified plumber.
Bristan Prism bath filler parts list and maintenance:
Bristan Prism basin mixer tap parts list and maintenance:

- 19 -
Bristan Prism recessed thermostatic dual control shower valve (where
applicable):
The following are extracts from the manufacturer’s instructions for your dual
control shower valves (where fitted);
Bristan Prism shower valve general cleaning instructions:
Bristan Prism shower valve cartridge maintenance:

- 20 -
Note- we recommend that all maintenance work on your shower valve is
carried out by a qualified and experienced plumber.
Bristan Prism dual shower valve operating instructions:
Bristan Prism dual control shower valve – adjusting the temperature:

- 21 -
The shower has been factory set to typically 42 degrees centigrade (this is a
safety feature). It is possible to adjust the temperature setting and the
‘installation instructions and user guide’ for the Bristan thermostatic dual
control shower valve contained in your hand over pack provides details.
Please note we recommend that any adjustments to the temperature setting
must be carried out by a qualified and experienced plumber and you should
be aware that having the setting adjusted so that it can produce higher
temperatures could have safety implications.
Kitchen sink and tap
Please refer to the kitchens section of this Home Owner’s Information Pack for
cleaning and maintenance instructions for the kitchen sink and kitchen mixer
tap.
Isolating valves on pipework to taps
Please refer to the notes on isolation valves contained in the Kitchens section
of this Home Owner’s Information Pack for details of how to use isolating
valves (where fitted).
Thermostatic mixing valve
A thermostatic mixing valve is fitted below the bath. It limits the hot water
temperature at the bath tap to a maximum of 48°C. This is a building
regulation requirement. Access to the thermostatic mixing valve is normally
obtained by removing the bath panel.
The thermostatic mixing valve manufacturer’s instructions recommended that
you arrange for initial temperature checks to be carried out six weeks after
occupation of the property, and then for an annual check to be carried out.
This is to test the water temperature from the tap to make sure that the mixing
valve is operating properly and to ensure the maximum limit of 48°C is not
exceeded.
Hot Water Temperature (kitchen sinks and wash hand basins)
The hot water from your kitchen sink taps and wash hand basins can be very
hot depending upon the boiler settings. The hot water can initially have a low
temperature as cooler water sitting in the pipes is discharged but can then
become hot suddenly. Appropriate care should be taken to avoid risks of
scalding.
KITCHENS
Refer to the manufacturer’s instructions for operating and cleaning of kitchen
appliances, sinks, units and worktops. These are enclosed in your handover
pack (typical extracts from kitchen instructions have also been included
below).
Any appliance fitted within the property such as oven, hob, extractor hood,
etc. will be covered by the manufacturer’s normal warranty. Smeg

- 22 -
appliances only – these are covered by a manufacturer’s 2 year warranty
which is pre-registered, do not re-register this warranty as this may cause the
warranty inadvertently to revert to 1 year. In the event of a fault, a Smeg
contact information sheet is included within the handover material, post
code and plot handover date must be quoted for reference.
Notes on kitchen appliances:
Cooker hood – Please refer to the manufacturer’s instructions for operating,
maintaining and cleaning instructions for the cooker hood (which are
contained in your home owners pack, or are available for download from the
manufacturer’s website).
Please note the following important points which are applicable to all cooker
hoods;
(a) There can be a fire hazard if the grease filters are not maintained as
recommended in the manufacturer’s instructions (the metal grease
filter and the inside of the cooker hood must be cleaned at least once
a month- or more often depending on the sort of cooking and if used
more than 3 hours a day).
(b) Never leave gas hobs lit if not covered by a container- any
accumulation of fats and other cooking residues in the filters may drip
and catch fire from the heat from the ‘open flame’ hob.
(c) Do not cook under the cooker hood if the metal filters are not fitted-
e.g. if you have them removed for cleaning.
(d) You must not produce flames under the cooker hood.
(e) Do not place anything on top of the cooker hood.
(f) Disconnect the appliance from the electricity supply before carrying
out any cleaning or maintenance work.
Connecting appliances – (where applicable)
Electrical connections for cookers and other electrical appliances requiring
wiring work should be made by a qualified electrician using the pre-fitted
wiring and fittings installed for this purpose.
When fitting a dishwasher or washing machine, please ensure the blanked
end of the waste pipe tee piece has been removed. Note – this is not
applicable where a ‘standing waste’ pipe has been provided. Please also
ensure that the water supplies and wastes are securely connected to the
pipework.
Please also note that, where Scotia have not installed a washing machine but
have left a space for one with a cold water supply adjacent to it, then the
home owner is responsible for removal of the cap that has been fitted to the
cold water washing machine valve – please ensure you remove this cap
before making the water connection to your washing machine. Please also
ensure that the appliance water supply and waste pipe is securely
connected to the property’s pipework before turning the appliance on.

- 23 -
An useful video demonstrating the typical process for connection of such
appliances can be viewed here:
https://www.youtube.com/watch?v=0RXYB8e3q5g
You may find washing machine/dishwasher isolation valves identified using
the tags below:
Kitchen sink – care
The following are extracts from the kitchen sink manufacturer’s after-care
instructions (please note that these may be applicable to different products,
depending on specification/your choice of upgrades):

- 24 -
BLANCO UK LTD
Stainless steel – use & care Instructions
How do I clean the surface and prevent stains?
Daily cleaning should be carried out using a cream cleanser such as ‘Cif’ on
a soft cloth. This should be adequate to remove such marks as tea stains and
grease. The everyday film of limescale, which occurs in hard-water areas,
can be quickly removed using ‘Cif’ or ‘Bar Keeper’s Friend’. Should a thicker
layer form, then this will require treatment with a proprietary limescale

- 25 -
remover and a soft brush. Rinse the sink thoroughly after limescale treatment.
‘BlancoPolish’ is recommended for intensive cleaning and to refresh the
surface.
Which substances should not be allowed to come into contact with a
stainless steel surface?
Mortar, cement, plaster, concrete, tile cement, grout, bleach, diluted bleach,
cleaning products with bleaching agents or chlorine, acids, silver dip,
photographic fluids, lengthy contact with salty liquids, hair dye.
Does stainless steel scratch?
BLANCO stainless steel sinks will scratch during normal use. However, the
appearance of the scratches can be made less noticeable using a
proprietary stainless steel cleaner. Also, as the sink ages, the scratches
gradually become less noticeable.
Can stainless steel sinks rust?
Due to the composition of BLANCO sinks, they are incapable of rusting.
However, should the surface of the sink be harbouring particles of, for
example; plumbers swarf, steel wool pads, cast-iron pans, metal filings flushed
through from mains pipeline, then it can give the appearance of having
rusted. Water borne particles are particularly noticeable when new piping
has been installed. These rusted particles should be removed using a
proprietary stainless steel cleaner, e.g. Bar Keeper’s Friend, followed by
thorough rinsing and drying with a soft cloth. If these particles are allowed to
stand for any length it is possible for pitting to take place.
What would happen if I applied excessive heat to the Stainless Steel?
Flames or excessive heat, if applied to Stainless Steel will turn it blue or gold.
This is an irreversible reaction, although chrome or stainless steel polishes (e.g.
‘Autosol’) can effect some improvement.
Kitchen sink mixer (tap) – maintenance
The following is an extract from the Bristan Ruby Kitchen Sink mixer
manufacturer’s instructions;
‘Parts list’ and maintenance notes:

- 26 -
Notes on isolation valves:
Isolation valves may have been fitted to your kitchen sink tap (and also may
have been fitted to utility and bathroom taps) - these valves, where fitted,
allow the water to be turned off to the tap only to allow maintenance work to
be carried out on the tap (instead of shutting off the water to the whole
property). The two diagrams shown below show the isolating valves in the
closed and open positions.
Kitchen units and worktop care notes:
Please refer to the information contained in your home owner’s pack for
information on the manufacturer’s recommendations for kitchen unit and

- 27 -
worktop cleaning and maintenance. We have also included some general
notes below (note that not all of the following information may be applicable
to your home depending on your house type and choices you have made for
your kitchen);
PRODUCT CARE GUIDE & SPECIFICATION
The new doors on your kitchen are made from the finest materials, designed
to give years of satisfaction. To help maintain the original beauty of your
kitchen we recommend following these simple guidelines.
To prevent heat damage to foil wrapped doors we strongly advise that
extractors are always switched on above working hobs.
WOODEN & FOIL WRAPPED DOORS
For persistent marks they can be removed by first using a very mild solution of
water and household detergent (non-abrasive) or sugar soap can be used
which Is good for removing grease. Once the mark is removed the area
should then be wiped over with a damp soft cloth to remove any excess and
then finally dried with a soft, clean cloth. No water should ever be left on any
surface of the door for any length of time. On no account must an abrasive or
solvent cleaner be used as they could damage the surface.
GLASS DOORS
A non-abrasive window cleaner should be used. If the door is leaded, care
should be taken using cleaning solutions on the decorative leading.
Occasional marks can be removed with a soft damp cloth, warm water and
a very mild detergent. Moisture will not harm the surface of these doors but In
order to protect the doors never allow water to lie on any surface, always
wipe away any spillage immediately. Do not use harsh abrasive powders or
solvents as they will damage the surface.
POLYURETHANE LACQURED DOORS
Occasional marks in most cases can be removed with a soft damp cloth.
More persistent marks can be removed using a solution of 50% water and 50%
methylated spirits. Once the mark is removed the area should be wiped over
with a damp cloth to remove any excess and dried with a soft clean cloth.
Do not use other solvents or an abrasive cleaner as these could cause
permanent damage to the surface.
STAINING
The finishes used on various doors will resist most household chemicals.
However damage and discolouration can be caused by some chemicals
and strong dyes such as concentrated fruit juices, beetroot juice etc. If
spillage occurs wipe away and rinse immediately, ensure to leave the door
dry.

- 28 -
When cooking and washing try to ensure there is adequate ventilation.
changes in temperature and humidity should be avoided as much as
possible.
In the production of solid wood and veneered doors great care is exercised in
the selection of material. However, being a "living" natural product it is not
possible nor do we feel desirable to strive for total uniformity of shading and
grain pattern. Our aim is at all times to operate within controlled parameters
which recognise that some variation is both acceptable and aesthetically
pleasing.
Doors constructed from some natural woods may feature sections of sap
within the timber. In the majority of cases this will appear on the reverse of the
door and is deemed an acceptable feature in accordance with the door
specification.
lt is possible during the production process that some styles of PVC wrapped
doors will bow slightly. The extent to which this occurs is carefully controlled
and an acceptable tolerance is deemed as 2mm in every 600mm.

- 29 -
- 30 -
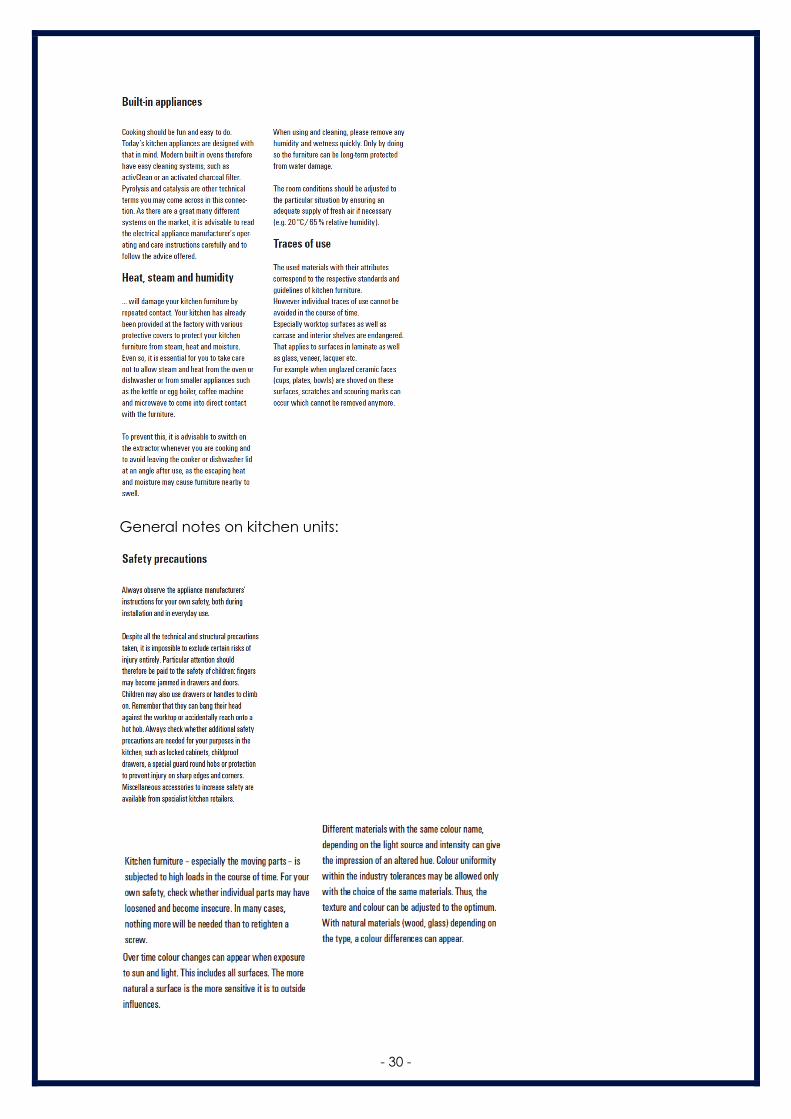
General notes on kitchen units:
- 31 -
Handles:
Kitchen designs are planned with the minimum corner post size as per the
manufacturer’s recommendation to avoid a handle clash. Depending on the
handle choice, the handles may still touch, which is perfectly acceptable,
providing an opening of 85° can still be achieved. As with any door, opening
and closing should be done carefully in order to avoid over-stressing the
hinges or clash with another surface. After-market hinge restrictors can be
obtained from kitchen suppliers in order to limit this angle to the maximum
recommended, as above.
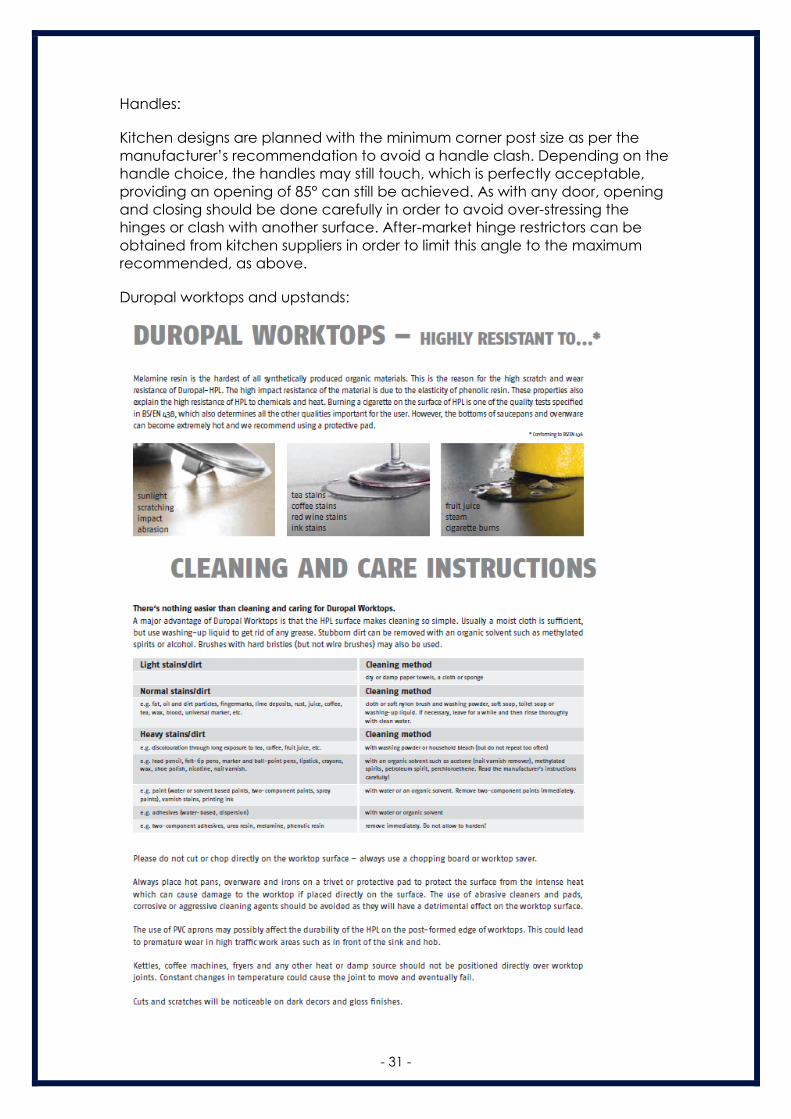
Duropal worktops and upstands:

- 32 -
Silestone® worktops (where fitted):
USE, CLEANING AND MAINTENANCE - SILESTONE® AND ECO BY COSENTINO®
GENERAL ADVICE FOR USE
REGULAR CLEANING AND MAINTENANCE
Silestone® and ECO by Cosentino® are low porous surfaces and therefore
highly resistant to everyday domestic stains. For regular cleaning of Silestone®
or ECO by Cosentino® surfaces, Cosentino S.A. recommends you use Q-
Action. If Q-Action is not available, water and mild/neutral soap is the best
option for regular cleaning.
CLEANING STUBBORN STAINS
The following are some of the actions to be carried out for stubborn stains that
have built up over time:
GREASE STAINS
Apply Q-Action to the stain and leave for 2 minutes then gently scrub with a
sost scouring pad (normally supplied for ceramic hobs) until it disappears.
Rinse immediately with water and dry. If Q-Action is not available, use CIF
Original Cream in the same way.
LIMESCALE (glass marks)
Pour an anti-limescale product (like Viakal or similar) onto the surface and
leave to act for 1 min. Rinse with plenty of water and dry. Follow the
instructions recommended by the manufacturer.
Do not use on any products (taps, sink, etc.) other than the worktop itself as it
might damage their finish.
SILICONE AND PUTTY MARKS
Using a blunt spatula and CleanColorsil or Solvent-based silicon remover (that
does not contain dichloromethane) gently scrub with a sost scouring pad (for
ceramic hobs). Then rinse with plenty of water and dry. We recommend that
the marks are removed at the time of installation.
DIFFICULT STAINS
For difficult stains, pour Q-Action (or CIF Original Cream) onto the affected
area leaving it to act for 2 mins. Next gently scrub with a sost scouring pad (for
ceramic hobs), rinse with plenty of water and dry.
LEATHER FINISH AND VOLCANO TEXTURE COUNTER TOP CLEANING
For the regular cleaning of these surfaces with unpolished textures, Cosentino
recommends the use of Q-Action or water and mild soap. For stubborn stains
use a non-scratch scouring pad without applying too much force. These
- 33 -
textures are rougher and therefore more susceptible to marks making them
high maintenance surfaces.
DO NOT USE ABRASIVE CLEANERS ON LEATHER OR VOLCANO TEXTURES.
REACTION TO KNOCKS
One of the characteristics that makes these surfaces stand out is their high
resistance to knocks. However, avoid striking areas of the surface that due to
the fabrication of design, may be slightly weaker (pointed corners, fine edges,
etc.).
REACTION TO HEAT
Aster using kitchen utensils such as frying pans, saucepans, etc., do not place
them directly on the surface. Leave them on top of a tablemat (if possible
with rubber support) to cool down. The reasoning behind this is that the
thermal shock caused by the difference in temperature (cold/hot) could
damage the surface.
RECOMMENDED PRECAUTIONS
Do not place outdoors or anywhere exposed to direct UV rays.
Do not place objects recently removed from the heat directly on the surface,
use a tablemat/pan stand or similar.
Do not use repellents, sealants, polish, etc.
Do not polish.
Do not use paint strippers, caustic soda, or products with a pH of more than
10. If bleach or solvent is used, it should be diluted with water and never lest in
permanent contact with the product. Avoid all chlorine based products and
any contact with fluorhydric acid.
Do not use degreasing agents with a high mineral content or highly vigorous
products.
Avoiding using metallic scouring pads.
The use of this type of product can lead to the loss of the product guarantee.
Examples of products that should not be used on Silestone® and ECO by
Cosentino® surfaces: Paint strippers, brush or metal cleaning products, oven
cleaning products, methylene chloride cleaning products, acids for
unblocking drains, nail polish remover with acetone, etc.
If any of these products are ever spilled onto the surface, remove as soon as
possible using plenty of water and mild soap.
- 34 -
Please view www.silestone.com and www.ecobycosentino.com for more
information, cleaning methods, general maintenance and guidance
regarding exposure to chemical substances.
In the event of exposure to a chemical not included in this document or the
web page, it will be deemed as improper use and will not be covered by the
guarantee.
Cosentino® is in accordance with the council directive of 21 December 1998
on the approximation of the laws of the Member States regarding materials
and articles intended to come into contact with foodstuffs.
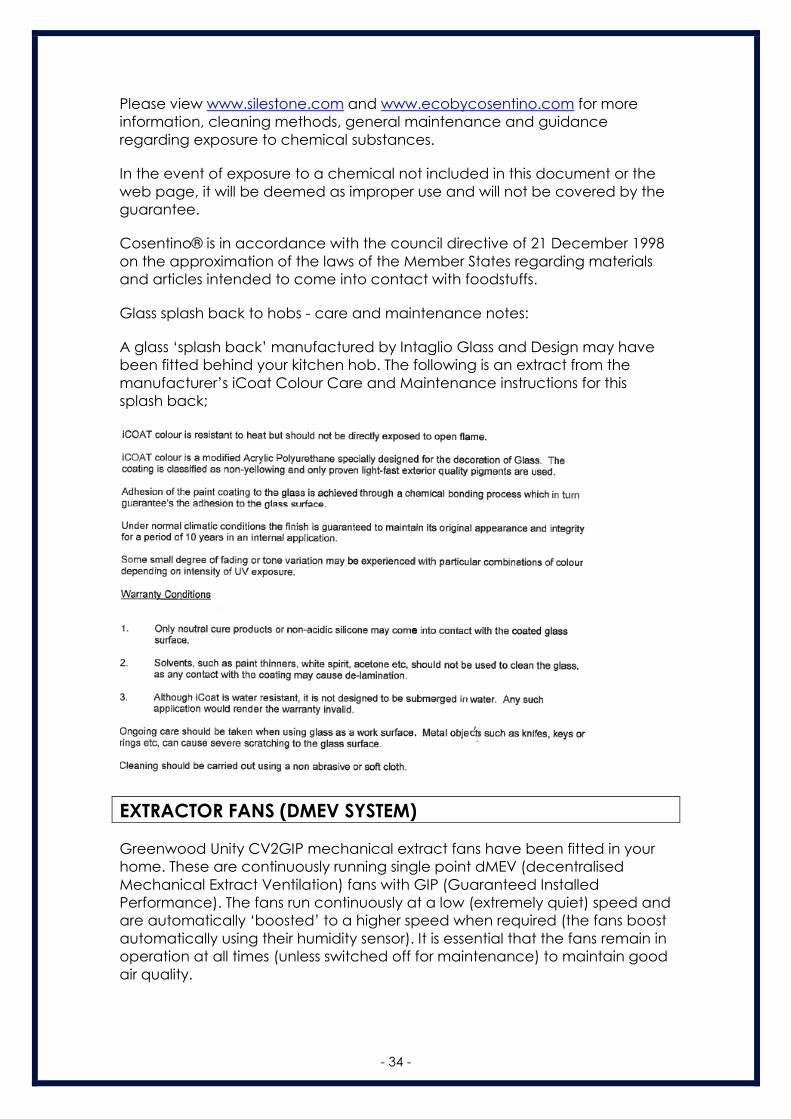
Glass splash back to hobs - care and maintenance notes:
A glass ‘splash back’ manufactured by Intaglio Glass and Design may have
been fitted behind your kitchen hob. The following is an extract from the
manufacturer’s iCoat Colour Care and Maintenance instructions for this
splash back;
EXTRACTOR FANS (DMEV SYSTEM)
Greenwood Unity CV2GIP mechanical extract fans have been fitted in your
home. These are continuously running single point dMEV (decentralised
Mechanical Extract Ventilation) fans with GIP (Guaranteed Installed
Performance). The fans run continuously at a low (extremely quiet) speed and
are automatically ‘boosted’ to a higher speed when required (the fans boost
automatically using their humidity sensor). It is essential that the fans remain in
operation at all times (unless switched off for maintenance) to maintain good
air quality.

- 35 -
Pictures of the Greenwood CV2GIP fan
This is an energy efficient fan designed to provide an economical ventilation
solution to the modern home. It utilises SMART Technology to control humidity
and boost run-on times to minimise the periods of time when it is running at its
highest speed, minimising nuisance running noise and unnecessary energy
wastage and heat loss typically associated with ‘traditional’ extract fans.
Please note that where ‘wet rooms’ (such as en suites, bathrooms etc.) have
windows with trickle vents in the windows - these are to allow you to provide
extra ventilation to these rooms if required. Any statement in manufacturer’s
instructions saying that trickle vents should not be installed in the same rooms
as the fan can be ignored.
Electrical isolator switches (where applicable) for the extractor fans should be
left in the on position to ensure that your home is protected from a build-up of
moisture. Failure to use the extractor fans as they have been designed to be
used may result in a build-up of condensation and/or mould, and may affect
your warranties.
Before carrying out any maintenance or cleaning work on the fans you
should refer to the manufacturer’s instructions contained within your home
owners pack. A qualified electrician should be employed to carry out any
maintenance work on your ventilation fans (apart from general cleaning
which can be done by yourself as long as you follow the procedures for
cleaning as noted in the manufacturer’s instructions).
A. Always isolate the fan from the mains electricity before cleaning it.
B. Do not use solvents to clean the fan.
C. Wipe the front grille (the internal grille) clean using a slightly damp cloth
avoiding getting any water into the internal fan unit. If removing the
grille to wash it, you must ensure that it is fully dry before re-fitting.
D. Cleaning and servicing – extract from manufacturer’s instructions;
E. When re-fitting the internal grille ensure no wires are trapped.
VENTILATION AND AVOIDING CONDENSATION
Condensation will be a problem in all new houses if adequate background
heating and ventilation is not used. All new homes need ‘running-in’ and we
recommend that you read carefully the section within the NHBC booklet
‘Guide to your new home’, subtitled ‘Reducing Condensation’.
Windows may be fitted with “trickle” ventilators at the top of the window.
These can be opened or closed to allow more or less trickle ventilation. We
- 36 -
recommend that, particularly during the ‘running-in’ period, the “trickle”
ventilators are left fully or partially open to maximise the fresh air entering your
home.
The following are general guidelines for your information.
To deal with condensation, take these two steps:
Produce less moisture
Ordinary daily activities produce a lot of moisture very quickly:
Cooking: To reduce the amount of moisture in the kitchen, cover pans and
do not leave kettles boiling, open a window to allow excessive amounts of
steam to be ventilated to the outside.
Washing clothes: Put washing outdoors to dry if you can. Alternatively, please
dry the washing in the bathroom (which is designed to accommodate drying
clothes) with the door closed – the humidistat function of the extractor fan will
help to remove the moist air to the outside (also if weather conditions permit –
the bathroom window can be opened). If you have a tumble dryer, ventilate
it to the outside (unless it is the self-condensing type). D.I.Y. kits are available
for this.
Drying clothes on radiator-mounted airers or on airers in rooms other than the
bathroom may lead to excessive internal moisture.
Ventilate to remove moisture - you can ventilate your home without making
draughts.
Some ventilation is required to expel the moisture, which is produced all the
time, mostly just by normal breathing of occupants. Keep a small window ajar
or a trickle ventilator open when someone is in the room.
You need much more ventilation in the kitchen and bathroom during
cooking, washing up, bathing and drying clothes. This means opening
windows to assist in the ventilation of moisture to the outside and ensuring that
the extractor fans are in full working order.
Close the kitchen and bathroom doors when these rooms are in use. This helps
prevent the moisture reaching other rooms, especially bedrooms, which are
often colder and more likely to get condensation.
Two useful guides to avoiding unnecessary condensation can be viewed
here:
https://hug.nhbc.co.uk/HUG-Portal-
View/content/conn/ContentServer/path/Contribution Folders/PDF
Files/NHBCCondensationinHomes.pdf
https://hug.nhbc.co.uk/HUG-Portal-
View/content/conn/ContentServer/path/Contribution%20Folders/PDF%20Files
/NHBCCondensationinRoofSpaces.pdf

- 37 -
TELEVISION INSTALLATION
A television aerial socket has been provided within the Living Room and,
depending on specification, other rooms (specific room may depend on
house type, please refer to plans). Your individual alterations may have
requested additional points or a ‘returned’ signal to additional points in other
rooms. Depending on these requests, an aerial amplifier may have been
installed alongside the electrical consumer unit and aerial cable run to the
attic space. It is your responsibility to arrange for the supply and installation of
a suitable aerial and final connections.
COMMUNAL DIGITAL TELEVISION AND SATELLITE INSTALLATION
(ONLY APPLICABLE TO PLOTS 5-8 & 37-42)
A television aerial socket has been provided within the Living Room and,
depending on specification, other rooms (specific room may depend on
house type, please refer to plans), to which a communal digital aerial and
satellite signal will be fed. Your individual alterations may have requested
additional points or a ‘returned’ signal to additional points in other rooms.
Further information is provided in the Handover Pack.
The provision of a communal digital television and satellite signal means that
the signal required for both “free” services, such as Freeview, and “upgrade”
services, such as Sky (other providers are available) satellite television can be
viewed, subject to the appropriate reception equipment and subscription
being provided/installed by the home owner.
What does this mean?
Simply, there is no need (and the Deed of Conditions may prohibit) for
multiple TV aerials/satellite dishes to be installed across the development, as
this signal is supplied free of charge to the home, with maintenance of the
common facilities falling under the responsibility of the factor. The TV signal
can be regarded in a similar manner to any other utility, being delivered to
the property just as water and electricity are.
The home owner then has the choice of what they want to do with the signal,
a standard Freeview enabled TV will be simply “plug and go”, with many
upgrade satellite services only requiring subscription/decoder box, but not
additional installation/wiring.
Compatibility with Sky Q or other upgraded satellite services
At the time of writing, the communal satellite facility both within and outside
your new home is ‘ready to go’ for the connection of services such as Sky
+/HD, subject to subscription and receiving equipment being provided by
you or your service provider.
In addition, the communal signal which is fed to your home is capable of
delivering the feed required for upgraded services which are now reaching
the market, such as Sky Q.

- 38 -
However, such services require an upgrade to the final connection
hardware/infrastructure in order to provide the necessary distribution of signal.
This can simply be ‘swapped out’ with standard equipment, which may need
to be done by a TV services contractor before Sky or another provider makes
final connections.
Taking Sky as an example, being the dominant provider, they may only
provide a Sky Q compatible receiver box, which means the additional piece
of hardware described below will definitely be required, even for a “non-Sky
Q” subscription.
In most situations with a communal digital TV/satellite, you will find a fibre
optic device, called a GTU (Gateway Terminal Unit), normally located
adjacent to the electrical consumer unit within an individual property.
A device is now available which can be retro-fitted to this GTU in order to
provide compatibility with Sky Q boxes, as shown below.
This product is a Triax 307368 TMDS 42C dSCR (digital Single Cable Router)
multi-switch, which also retains the ability to deliver older Sky+/HD services.

- 39 -
At the time of writing, a TMDS 42C multi-switch can be installed for in the
region of £135.
What do I need to do?
If you are considering a new subscription with Sky, you will need to arrange
installation of the multi-switch described above, which is not part of the
communal installation. You have the following 3 options:
1. Should the standard terms within the legal missive of the purchase and
construction timescales allow, you can request this multi-switch to be fitted as
a client Extra, which would then be complete for the point of handover.
2. Where time does not allow for this be requested as a client Extra, and
your property has been handed over to you, our Customer Care
department/Home Owner’s Information Pack will provide detail of the
contractor applicable to your development who would arrange an
installation at your direct request.
3. Once the property has been handed over to you, you can arrange a
contractor of your own choice to fit this/a similar product, details of which are
provided in the Home Owner’s Information Pack.
Most reputable TV/satellite/audio-visual contractors will provide the
installation service/s detailed above. A typical contractor used by Scotia is
Campbell & Kennedy – www.campbellkennedy.co.uk.
Should any alternate/additional services and/or products be considered, we
would also recommend engaging the services of a specialist contractor as
per the example detailed above.


- 41 -
TELEPHONE INSTALLATION
The main incoming telephone line point (master point) is normally located in
the living room (specific location depends on house type, please refer to
plans). The telephone connection point is compatible with any BT approved
phone.

- 42 -
It is your responsibility to arrange connection to your chosen telephone
service provider and arrange final connection of secondary socket wiring to
the master point.
FIBRE BROADBAND INTERNET CONNECTIVITY
Infrastructure will be installed at the development to provide FTTP (Fibre to the
Premise) technology, which provides estimated speeds of up to 300Mbps at
the entry point to the home.
Hardware provision for this may include various elements co-located with the
consumer unit. These elements, where fitted, should remain in situ and only be
worked on by a qualified electrical contractor in the event of failure or
modification.
Final connection and service provision within the home remains the
homeowner’s responsibility and ultimate connection speeds will be
dependent on the service provided by the chosen communications provider.
WINDOWS AND FRENCH DOORS
Your home has white inside/ grey outside inward opening tilt and turn
windows and sliding patio doors (where applicable to your house type).
The windows are fitted with lockable window handles to all ground floor
windows and standard (non-locking) handles to all first floor windows (where
applicable), except in the case of combination windows, which are lockable.
A key is supplied to operate the lockable handles and care should be taken
to prevent damage to the handle by trying to force it open when lock is
engaged. The key to combination windows should be retained on the
window jamb.
The first floor handles (except combination windows) are non-locking (no
removable key) to comply with the requirements of the Building Regulations in
respect of emergency fire escape. However, the Building Regulations
recognise that individual home owners may want to fit additional locking
mechanisms to first floor windows after they have moved in to their new home
(for example where there are small children in the room) and if you wish to
install any of the large variety of ‘child restrictor catches’ or any other
additional locking mechanism that are available to your first floor windows
then please note that they must be a ‘quick release’ type (without a key
which might be lost) - a type which does not hinder escape through the
window in the event of an emergency. The restrictor must also be suitable for
the type of window and we also recommend that they are fitted by a skilled
tradesman and that particular care is taken to ensure that they are fitted
strictly in accordance with the restrictor catch manufacturer’s instructions. An
incorrectly fitted additional locking mechanism can damage the window
and lead to window guarantee problems. Advice can also be obtained from
- 43 -
the window supplier (refer to the Schedule of Materials for contact
information).
Notes regarding glass coatings:
To comply with the building regulations all double glazed units installed in your
home will have a low emissivity coating. Low emissivity (Low-E) glazing is a
vital component of an energy efficient window or patio door. It has a surface
coating that allows short wavelength heat from the winter sun to enter your
home through the glazing, while reflecting back into the room the long
wavelength heating produced by your heating system. This reduces heating
costs and minimises internal condensation. Please note that this Low-e
coating has considerable advantages but you should be aware that there
are some minor features, due to the coating of the glass, which you can see
in some or all of the following ways;
• As a tint in the glass
• As a ‘haze’ when viewing through the glass at some angles and in some
lighting conditions
• By the appearance of condensation on the outside of the glass under
certain weather conditions (which is positive proof that the glass is preventing
heat loss from your house)
• There may be minor blemishes visible arising from the coating process
and the tint may also change between individual double glazed units if the
units are made from different batches of glass. These are not detrimental to
the functioning of the unit and are not a defect.
Please note that if you are replacing any of your double glazed units in the
future you should ensure that your glazier uses low emissivity glass in your
windows.
Notes regarding glass specifications (safety glass):
In addition to the note regarding Low-e coatings above, you should also be
aware that certain windows may have either laminated or toughened safety
glass installed. This ‘safety glazing’ is installed to comply with the Building
Regulations.
Any future replacement glazing units should be to the same specifications as
originally fitted. Any competent glazier will be able to identify the glazing
specification used and you should ensure that lower specifications are not
used. Please be aware that some larger windows are of considerable weight
and this must be taken into consideration by any contractor for manual
handling limitations.
It should be noted that windows with safety glazing have characteristics
inherent to the nature of the product and its production process. Specifically
you may find that the windows fitted with safety glass are heavier. In addition
while all double glazed units use ‘processed glass’ (and are subject to an
- 44 -
amount of imperfections occurring during the manufacturing process) safety
glass is more prone to these minor visual imperfections. An example of this is
that when toughened safety glass is being manufactured it is heated to
extremely high temperatures, creating micro-tears which on cooling add
strength to the glass. This process can result in small imperfections or visual
distortions forming on and in the glass- these are not usually noticeable under
normal viewing conditions but may be evident under close inspection. They
are, however, an acceptable characteristic of the finished product and are
not recognised as a defect in the glass itself. Laminated glass, which is
manufactured from several layers, has similar characteristics and it can also
be subject to minor blemishes and imperfections which is a consequence of
the manufacturing process and is not a defect.
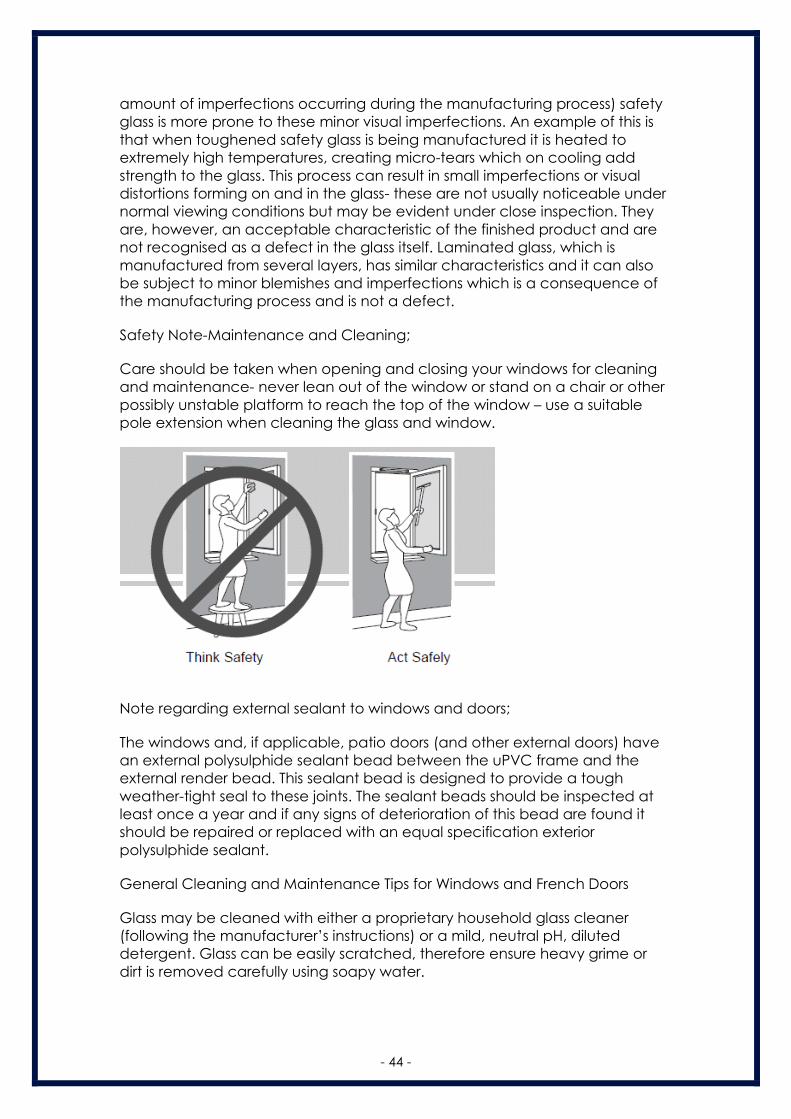
Safety Note-Maintenance and Cleaning;
Care should be taken when opening and closing your windows for cleaning
and maintenance- never lean out of the window or stand on a chair or other
possibly unstable platform to reach the top of the window – use a suitable
pole extension when cleaning the glass and window.
Note regarding external sealant to windows and doors;
The windows and, if applicable, patio doors (and other external doors) have
an external polysulphide sealant bead between the uPVC frame and the
external render bead. This sealant bead is designed to provide a tough
weather-tight seal to these joints. The sealant beads should be inspected at
least once a year and if any signs of deterioration of this bead are found it
should be repaired or replaced with an equal specification exterior
polysulphide sealant.
General Cleaning and Maintenance Tips for Windows and French Doors
Glass may be cleaned with either a proprietary household glass cleaner
(following the manufacturer’s instructions) or a mild, neutral pH, diluted
detergent. Glass can be easily scratched, therefore ensure heavy grime or
dirt is removed carefully using soapy water.
- 45 -
uPVC frames should be cleaned every 3 months with a soap or washing up
liquid and warm water solution.
A non-abrasive proprietary cleaner suitable for plastic may be used for more
stubborn blemishes following the manufacturer’s instructions.
Avoid using solvent based or acid based detergents or abrasive cleaners as
these will damage the uPVC frames and glass.
At least once a year lubricate or oil all moving parts & locking points, using
only clean and non-resinous grease or oil.
Check all components for looseness or wear. If necessary tighten screws.
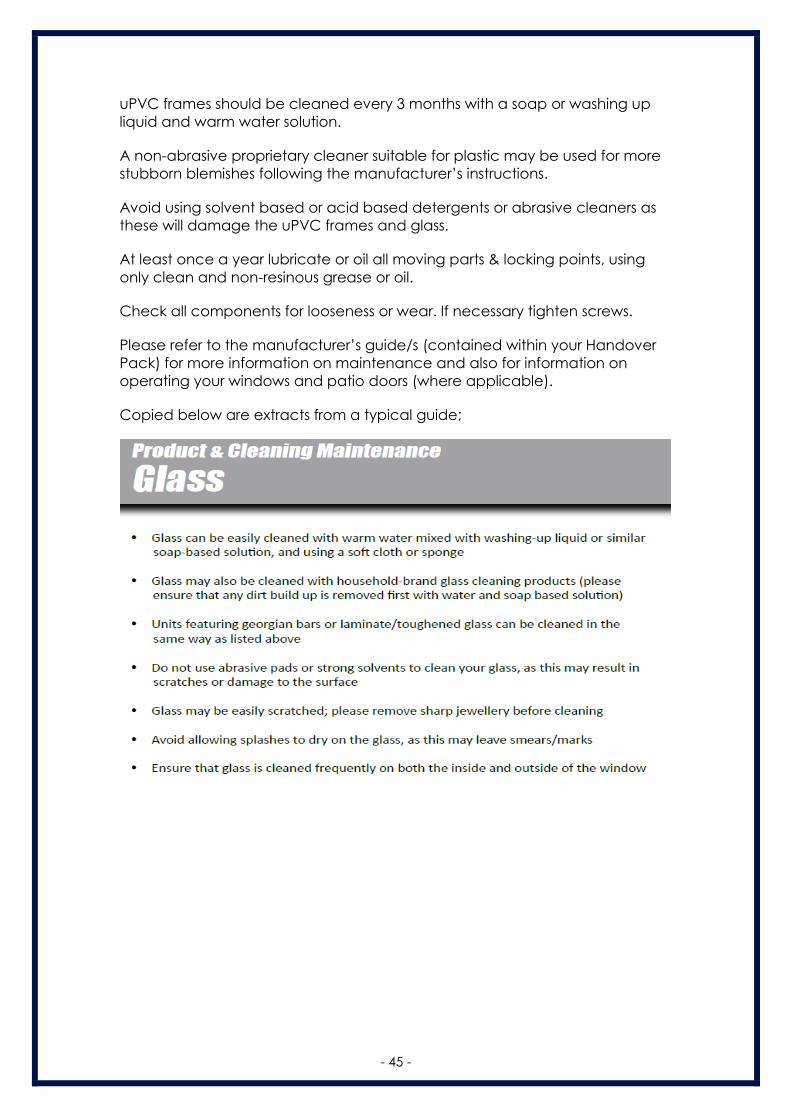
Please refer to the manufacturer’s guide/s (contained within your Handover
Pack) for more information on maintenance and also for information on
operating your windows and patio doors (where applicable).
Copied below are extracts from a typical guide;

- 46 -
INTERNAL DOORS
Internal Doors- General Notes
Handles should be cleaned with a soft non-abrasive cloth and for stubborn
stains mild soapy water may be used. Care should be taken to avoid
scratching surface of handles. The mechanism of the handle should be
lubricated once a year with a light oil. Hinges and latches/locks should be
lubricated on a regular basis with WD40 or similar product.
EXTERNAL DOORS
The external doors fitted to your home are GRP (glass-reinforced plastic)
composite and/or fully glazed doors manufactured by Merlin.
Security locking is accomplished by a 3 stage process:
1. Close door
- 47 -
2. Lift handle upwards to engage locking mechanism
3. Turn the key until locking is completed
General cleaning and maintenance Instructions;
All ironmongery should be cleaned on a regular basis using warm soapy
water. Do not use abrasive or corrosive material to clean the ironmongery as
this will damage the finish to handles, letter plate, eye viewer, chain and rain
deflectors.
Glazing can be cleaned with warm soapy water, avoid using anything which
may scratch the glass.
The multi point locking system and hinges should be lubricated with WD40, or
a similar product, on a regular basis to ensure the smooth operating
capabilities of the cylinder, handle and the locking mechanism. The weather
sill at the base of the door should be kept clear of debris to allow the
drainage holes to function. The rubber gaskets in the sill and door frame
should also be checked periodically for damage and replaced as required.
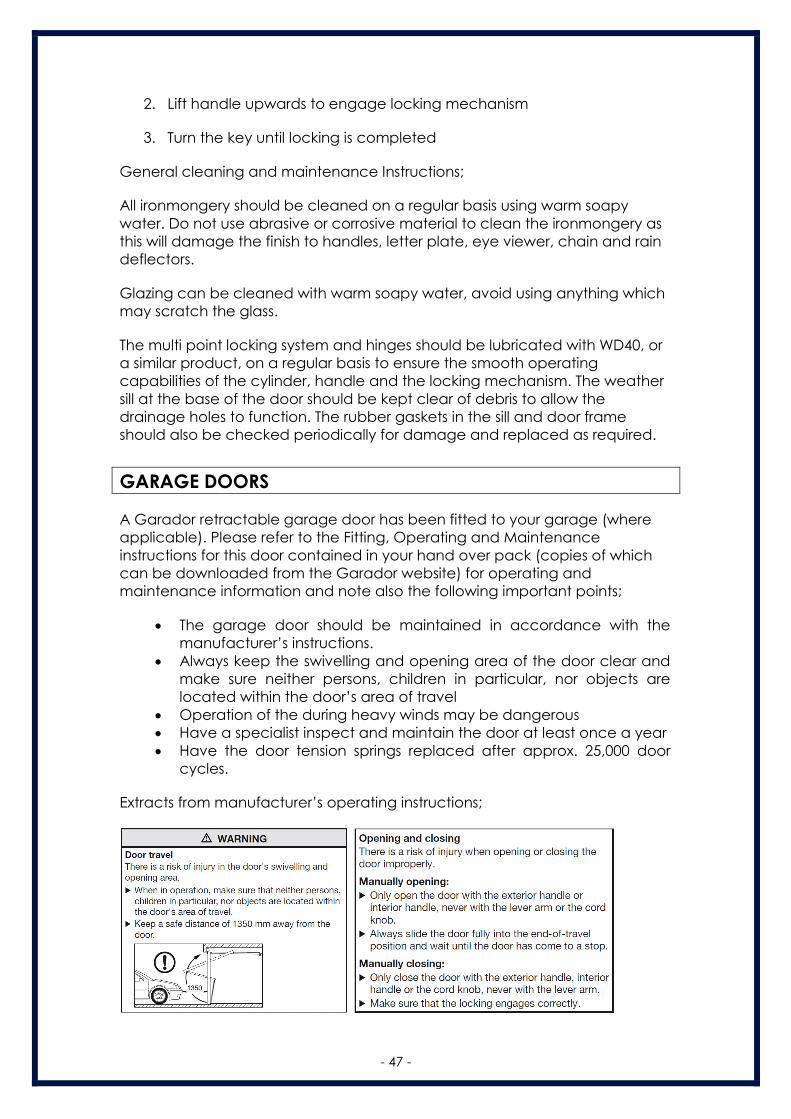
GARAGE DOORS
A Garador retractable garage door has been fitted to your garage (where
applicable). Please refer to the Fitting, Operating and Maintenance
instructions for this door contained in your hand over pack (copies of which
can be downloaded from the Garador website) for operating and
maintenance information and note also the following important points;
The garage door should be maintained in accordance with the
manufacturer’s instructions.
Always keep the swivelling and opening area of the door clear and
make sure neither persons, children in particular, nor objects are
located within the door’s area of travel
Operation of the during heavy winds may be dangerous
Have a specialist inspect and maintain the door at least once a year
Have the door tension springs replaced after approx. 25,000 door
cycles.
Extracts from manufacturer’s operating instructions;

- 48 -
PROVISION FOR A GROUND FLOOR SHOWER
Some 2 storey house types include provisions for the installation of a shower
on the ground floor of your home if you should need one at any point in the
future (unless you have asked for a ground floor shower to be installed as a
client upgrade).
In most instances the location identified for part or all of this future accessible
shower is in the cupboard next to or within the ground floor toilet. Where
provision has been made for a possible future shower, a 100mm diameter
drainage pipe has been installed under the floor to suit a future shower.
The pipe is installed with a cap and is located just under the top of the
concrete floor. Any installer will require to ‘break through’ the floor in this
specific location in order to make connection to your home’s drainage
system.
If you decide to install a shower in this location in the future please note that,
depending on the type of shower you are considering using, we recommend
that you consult a qualified heating engineer as your hot water system may
need to be upgraded in order to accommodate the shower. Please ensure
that all plumbing, electrical and joinery works are carried out by competent
tradesmen. This may also require the removal of partitions and the installation
of an additional/replacement extractor fan.
OPERATING INSTRUCTIONS FOR THE ELECTRICAL INSTALLATION
The Consumer Control Unit for your property is located, typically, within a
cupboard, please refer to drawings for the specific location. It contains
labelled main isolator, RCDs and circuit breakers or “trip switches”.
This is a device that controls the electricity supply to your home, splitting the
incoming electric supply into various electrical circuits around your home.
The consumer control unit contains Main Switch, RCBOs (Residential Current
circuit Breaker with Overload protection), RCD (Residual Current Device) and
MCBs (Miniature Circuit Breakers). The main switch is normally ‘ON’. In order to
isolate all supplies, switch to ‘OFF’. It may also include a dedicated MCB for a
subsidiary consumer unit located within a detached garage, where
applicable.
There are two RCDs in your consumer unit. Each RCD protects a section of the
consumer unit. They are designed to ‘trip’ when there is an electrical leakage
to earth thereby giving protection to personnel. An RCD would normally trip
before an MCB.
These circuit breakers and RCDs are all designed to trip if there is a fault in a
circuit, or if a faulty appliance is switched on. This helps to prevent serious
accidents that may result in damage and injury. Under fault conditions these
will be in the ‘tripped position’.

- 49 -
We recommend that the electrical installation in your home is inspected and
tested at intervals not exceeding every 10 years.
IF AN ELECTRICAL CIRCUIT FAILS
NOTE: Electricity is dangerous and can kill. If you are unsure of any aspect of
your electrical installation, please consult a qualified electrical contractor –
you should do this in the first instance unless you are entirely confident of the
steps below.
A circuit may trip OFF. If this happens, you should follow the procedure set out
below.
1. Check with the aid of a torch whether the RCD (mid position) or MCB
(fully down) is in the OFF position.
2. Switch RCD (press down then push to the fully up position) or MCB to ON
position.
3. If the RCD does not re-set, switch off all the MCBs, re-set the RCD then
switch on each MCB individually until the faulty circuit is identified.
4. To identify the cause of the fault switch off all appliances in that circuit,
re-set the RCD and MCB, then switch back on each appliance until the
defective appliance is found.
Over-filling kettles, irons etc. can cause this type of fault.
N.B.
It is important to ensure that the bulbs used in light fittings do not exceed the
rating for that fitting.
SMOKE, HEAT & CARBON MONOXIDE DETECTORS/ ALARMS
Depending on your house type, your home is fitted with smoke detectors in
the living room (or dining area) and the ground and, where applicable, first
floor halls/bedrooms.
Also a heat detector has been fitted in the kitchen area and a CO (Carbon
Monoxide) alarm has been fitted in the vicinity of the gas fired boiler. These
alarms are mains operated with battery back-up and connected to bedroom
lighting circuits. The smoke detectors are extremely sensitive to smoke and
dust particles of any kind and can be activated by the likes of burning toast.
The heat detector in the kitchen is less likely to cause ‘false alarm’ problems
as it is not responsive to any type of smoke or fumes, only heat such as
generated by a chip pan type fire (but not from smoke caused by burning
toast or similar). The CO detector monitors Carbon Monoxide levels and its
alarm will activate if safe levels are exceeded.

- 50 -
You must read and fully familiarise yourself with the instructions for the smoke,
heat and CO detectors. Copies of the instructions are contained in your
home owner pack and are also available for downloading from the
manufacturer’s website - the instructions contain vital information on the
operation and maintenance of your detectors.
If any of the smoke detectors are activated you should check the property
and, if no reason for its activation is found, it could be a nuisance alarm
caused by cooking smoke reaching one of your smoke detectors or
something similar. If this occurs, open a window to clear the smoke or dust
and the alarm will cease and test/ maintain the detector as described in its
instructions. Please note that smoke alarms are interconnected so that when
one is activated, all alarms will sound.
If the heat detector activates you should follow the advice contained in the
heat detector instructions.
If the CO alarm activates please carry out the instructions contained in your
carbon monoxide alarm instructions. Depending on the type of CO alarm
fitted these instructions typically include the following - ventilate the area, turn
off appliances, evacuate the property, get medical help for anyone suffering
from the effects of CO poisoning, ring your gas supplier or other supplier on
their emergency number, do not re-enter the property until the alarm has
stopped (if the alarm has been silenced by pressing the Test/Hush button,
wait at least 5 minutes to allow the alarm to check that the CO has cleared).
Do not use the fuel burning appliance(s) again until they have been checked
by an expert. In the case of gas appliances this must be a Registered Gas
Installer.
To reset or to test the smoke, heat and CO detectors follow the
manufacturer’s instructions as enclosed in your Handover Pack.
The back-up batteries should be changed as recommended by the
manufacturer and an intermittent beep normally indicates that the battery
needs to be replaced. The CO detector sensor module typically must be
replaced after 5 years of operation (refer to its instructions).
WALL TILING
Wall tiles and in particular the grout between tiles should be regularly cleaned
using a proprietary tile/grout cleaner in accordance with the manufacturer’s
instructions.
Grout should be inspected and any areas which become loose should be
replaced.
SHOWER WALL PANELLING (WHERE FITTED)
Laminate wall aqua panelling (where fitted) should be cleaned by using hot
water and a mild detergent applied with soft cloths or soft nylon brush. Non-
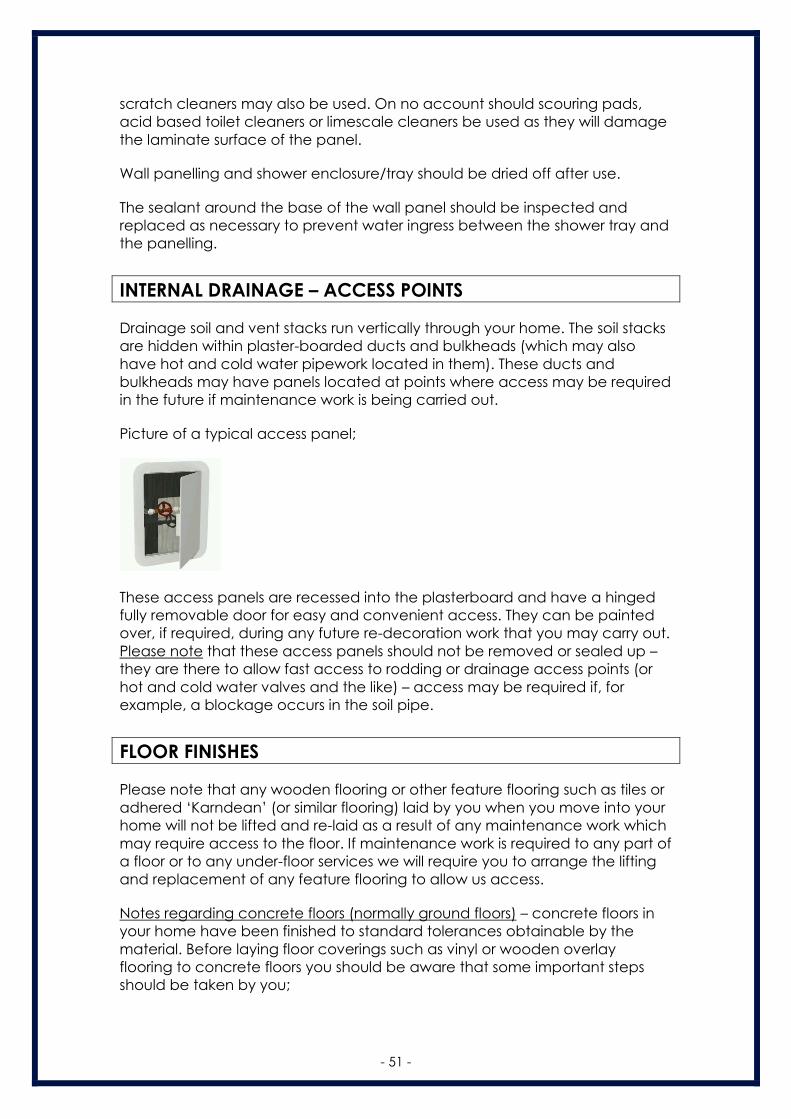
- 51 -
scratch cleaners may also be used. On no account should scouring pads,
acid based toilet cleaners or limescale cleaners be used as they will damage
the laminate surface of the panel.
Wall panelling and shower enclosure/tray should be dried off after use.
The sealant around the base of the wall panel should be inspected and
replaced as necessary to prevent water ingress between the shower tray and
the panelling.
INTERNAL DRAINAGE – ACCESS POINTS
Drainage soil and vent stacks run vertically through your home. The soil stacks
are hidden within plaster-boarded ducts and bulkheads (which may also
have hot and cold water pipework located in them). These ducts and
bulkheads may have panels located at points where access may be required
in the future if maintenance work is being carried out.
Picture of a typical access panel;
These access panels are recessed into the plasterboard and have a hinged
fully removable door for easy and convenient access. They can be painted
over, if required, during any future re-decoration work that you may carry out.
Please note that these access panels should not be removed or sealed up –
they are there to allow fast access to rodding or drainage access points (or
hot and cold water valves and the like) – access may be required if, for
example, a blockage occurs in the soil pipe.
FLOOR FINISHES
Please note that any wooden flooring or other feature flooring such as tiles or
adhered ‘Karndean’ (or similar flooring) laid by you when you move into your
home will not be lifted and re-laid as a result of any maintenance work which
may require access to the floor. If maintenance work is required to any part of
a floor or to any under-floor services we will require you to arrange the lifting
and replacement of any feature flooring to allow us access.
Notes regarding concrete floors (normally ground floors) – concrete floors in
your home have been finished to standard tolerances obtainable by the
material. Before laying floor coverings such as vinyl or wooden overlay
flooring to concrete floors you should be aware that some important steps
should be taken by you;

- 52 -
(1) You should have your floor covering installer check the moisture content
of the concrete floor. This is particularly important if you are laying the
floor covering immediately after moving into your home, as the
concrete floor may still be drying out and moisture can affect some
flooring materials. If necessary you should allow the concrete floor to dry
out sufficiently before laying any flooring which may be affected by
moisture or the concrete floor should be treated in accordance with the
flooring supplier’s recommendations before installing any vinyl or
wooden or other feature type flooring.
(2) Concrete floors will normally need a self-levelling screed applied prior to
laying any vinyl or overlay type floor covering, again in accordance
with the floor covering installer’s recommendations.
Notes regarding Chipboard Flooring - Chipboard flooring (normally to the first
floor) should be prepared in accordance with manufacturer’s
recommendations prior to fitting of vinyls, wooden overlays or ceramic floor
tiles. Also note that chipboard flooring may have service ducts installed
(sections of flooring which can be removed to allow access to pipes and
other services). We have installed these ducts so that they are level with the
adjacent floor – however it should be noted that because timber floors
naturally shrink as they dry this drying shrinkage of the floor may result in minor
differences in level between the duct cover and the surrounding floor. This
may become evident with some types of thin floor coverings and your choice
of floor coverings should take this possibility into account.
Note regarding installation of carpets to staircases – carpet smooth
edge/gripper strips must be glued or screwed to timber staircases – not
nailed. Scotia will accept no responsibility for risers damaged due to nailing of
carpet grippers.
ROOF SPACE
The attic space has not been designed to allow for storage. Do not use the
attic space for storage. Flooring the roof space and using it for storage may
cause deflection in the roof structure.
The attic has mineral wool insulation between and over ceiling joists. This
insulation can cause skin irritation. If handling the insulation it is recommended
that appropriate protective clothing and equipment be worn.
Care should also be taken if entering the attic – the ceiling plasterboard
between the joists will not support your weight and there may be service
pipes, extract fan ducting and cables hidden by the insulation that you can
damage by inadvertently stepping on them.
Typically 2 storey houses have attic access hatches located in a bedroom
ceiling - but if the attic access hatch is located in the first floor hall ceiling in
close proximity to the stairwell then particular care should be taken if you are
entering or exiting the attic space to avoid falling into the stairwell. Do not

- 53 -
stand on or use the stairwell balustrade as a support if entering or exiting the
attic.
It is advised that you do not enter the attic space. The attic access hatches
should only be used by competent tradesmen for access to the attic space
for any essential maintenance works.
CONSTRUCTION OF WALLS, PARTITIONS, FLOORS & CEILINGS
The following notes provide, for your information, outline details of the
construction for each part of your home.
This information is generalised and particular areas of your home may differ –
always seek appropriate advice and carry out detailed investigation works
before making any alteration to your home in the future.
External walls:
The house external walls comprise a 100mm thick block-work with render (and
in some cases a facing brick) finish, 50mm wide cavity and EcoWalltf timber
framed kit inner leaf. The timber-framed inner leaf comprises; a reflective
breather membrane on the cavity side on a 9mm sheathing board, on
140mm thick load bearing timber studs at maximum 600mm centres, with
140mm thick mineral wool insulation (FrameTherm 35) between the studs,
30mm PIR insulation fitted to the inside of the studs, and a reflective vapour
control layer fitted on the inside face of the PIR insulation.
On the inside of the timber kit there is a 38mm timber framed service void and
12.5mm thick plasterboard lining.
Safety Note – all external walls are load bearing and must not be altered
without getting professional advice.
Indicative diagram of a Typical EcoWall timber framed external wall for your information;

- 54 -
Party walls:
(Walls between houses- where applicable). These walls comprise two 90mm
thick timber panels with 9mm sheathing boarding to the cavity side and a
50mm cavity between the panels. Acoustic insulation is fitted between the
timber studs. On the room side a layer of 19mm thick plasterboard plank is
fitted and then this is over laid with 12.5mm plasterboard. Where there are
sockets or other items or electrical services installed on the party walls a
service void is also formed using 38mm thick timber framing overlaid with a
layer of 12.5mm plasterboard lining.
Safety Note – all party walls are load bearing and are constructed to a fire
resistant specification – they must not be altered in any way. If any damage
occurs to plasterboard and plank linings to the house side of the party walls
the damage must be repaired immediately.
All partitions:
Timber framed partitions with 15mm thick plasterboard each side. Mineral
wool acoustic insulation is fitted in the partitions to bedroom, bathroom and
other such areas.
SAFETY NOTE – some internal walls are loadbearing, so do not remove or alter
them, or make substantial alterations to them, without getting professional
advice.
Ground floor:
Concrete floor slab on rigid board insulation with damp proof membrane and
sand blinding on up-fill. Plots 1-3 will have a screed finish above the concrete
floor slab due to a variation in the insulation specification in these plots (ref.
ITC-1126).
First floors;
Intermediate floors comprise engineered I joists with a 15mm decking board
on top of the joists and a 22mm thick flooring overlay. 15mm plasterboard
linings to the underside of the I joists. A layer of acoustic insulation is installed
between the joists.
Safety note – all floor joists are load bearing and must not be cut or notched
without first getting professional advice.
Top floor ceilings:
Plasterboard fixed to the underside of the roof trusses.
Future alterations – should you consider making any alterations to your home
in the future such as altering the partition layout or forming a new opening
through a wall you should check relevant Local Authority permissions and/or
use the services of a qualified architect before starting.

- 55 -
The external wall service voids, internal partitions, 1st floors and attic space
may all have services such as pipes and cables installed in them – refer to the
safety precautions below if installing any fixings into these parts of your home.
Appropriate proprietary fixings should always be used to suit the wall
construction (see below).
FIXING TO WALLS, CEILINGS OR FLOORS – IMPORTANT NOTICE
Wall fixings (for pictures, mirrors etc.) must be of the appropriate type for the
type of walls described above. Be very careful if nailing or drilling into walls,
ceilings or floors to avoid contact with any pipes or electric cables which may
lie hidden behind the surface. We recommend that you use a services
detector (cable detector) before drilling or nailing – it can reduce the risk of
serious injury. If using power tools to install a fixing, you should always use a
R.C.D. (residual current device). You should also always check for pipes and
cables before drilling or nailing into floors or ceilings.
Note for any houses with under-floor heating (if applicable) - you should never
drill or nail into any floor which has under-floor heating fitted.
In addition to the above please note that fixings should never be made to the
following wall areas:-
a) Directly above or below any electrical socket outlet, switch or
appliance.
b) Directly horizontal to any electrical socket outlet, switch or appliance.
This is because electrical cables run in these areas.
EXTERNAL FIXINGS
Any external fixings should only be made with consideration to the Deed of
Conditions.
EFFLORESCENCE
The appearance of a white deposit on external walls is caused by
‘efflorescence’. This is a consequence of drying out and can often occur
after a new house is constructed and is drying out. It can also occur when a
wall dries out after period of heavy rain or in the spring as a result of drying out
after a wet winter. As well as external wall materials such as block-work and
mortar joints, it can also occur on products such as precast window sills,
driveway paviours and paving slabs and also internally on concrete floors and
areas of similar construction.
The efflorescence is caused by natural salts being drawn out of the wall
materials while drying out and is quite normal. It is neither harmful nor
detrimental to the performance of the material and, whilst it may look

- 56 -
unsightly, the majority usually disappears over time. The advice given by most
brick, block, cement and precast concrete manufacturers is that it is best
dealt with by the combined effect of time and weather. If efflorescence
occurs externally on your home it is our policy to follow this advice and allow it
to disappear naturally. It will usually disappear within a few weeks, washed
away by normal rainfall. This process may take some time to draw out and
remove all of the natural salts causing the efflorescence however it should be
apparent that each time the efflorescence appears it will be in decreasing
amounts.
Whilst natural weathering is the preferred cure for external efflorescence, if
you wish (where it is in a safely accessible location) you can speed up the
process by brushing down with a stiff non-metallic brush (not a wire brush),
making sure that the deposit does not enter the wall at a lower level. Any
remaining deposit can be removed or reduced using a minimum quantity of
clean water. We advise that you do not use any proprietary cleaning agents
as some varieties contain a concentration of acid, which can permanently
affect the appearance of the wall materials. A power washer should not be
used as it can damage mortar joints and the wall materials if used incorrectly.
Our advice is that you let the weather deal with external efflorescence.
Other external areas, such as concrete slabs and pathways, may be prone to
efflorescence of a slightly different appearance, including red/yellow/brown
stains which look similar to rust. This may be caused by the presence of iron
oxide in the base materials of the concrete and can indeed cause
noticeable variations for a period between neighbouring installations of the
same concrete product. Again, this effect has no material impact on the
performance or durability of the concrete and it should be temporary.
Care should be taken if applying lawn treatments/weed-killing chemicals in
proximity to concrete and stone surfaces as chemical reactions may also
cause a rust-like effect which may prove difficult to clean and take time to
erode via rainfall.
If efflorescence occurs on internal concrete floors or other such areas then it
too can be removed by brushing with a non-metallic brush and then
removing the deposits with a vacuum cleaner. Internally occurring
efflorescence should disappear quicker after brushing and vacuuming than
external efflorescence as the home is dried out by the heating.
Should persistent efflorescence occur internally which does not disappear
after removing it by the methods described above, then please contact
Scotia Homes’ Customer Care department for further advice.
EXTERNAL AREAS
Manholes give access to the underground drains - do not obstruct or cover
them with soil. You may need to provide access to them quickly if there is a
blockage. Please note that there are live underground services cables in the

- 57 -
ground around your house. Great care MUST be taken if digging or carrying
out excavation work in the vicinity of live underground cable routes.
Underground cables may be found just below the surface, although they are
normally laid between 0.45m to 1.0m deep from the surface. Reduced depth
may result from ground disturbance after laying or because the cable had to
be laid over an underground obstruction. Even shallow excavations (e.g. for
post holing and fencing work or for garden features such as ponds) may be a
source of danger.
If you do uncover a cable during excavation work - ALWAYS assume it is live.
If in any doubt contact a qualified person to seek advice before carrying out
excavation work.
Garden and exterior areas maintenance - caring for your garden.
Fencing and gates – boundary fencing has been finished with a water based
satin wood-stain in a colour approximate to RAL 7016. Re-treatment should be
done in the same or similar colour.
Depending on the layout of the external areas for your particular plot, some
or all of the following notes may be applicable;
Caring for the grass (including trees and shrubs where they have been
provided) in your garden is essential. This will ensure that the planting is
successfully established and your garden thrives.
The rear gardens of most new homes are finished in rotovated topsoil,
allowing you the opportunity of designing and landscaping to your own
requirements. It is important that the landscaping is carried out as soon as
possible after the date of the handover, as it is only by working the soil that it
will remain aerated and weeds will be prevented from becoming established.
This will also help to establish the finished level of the soil and ensure it drains
more effectively- so reducing the potential of any flooding during wet
weather conditions (see also maintenance of garden areas below). However,
if there has been rain please take this into consideration when carrying out
landscaping work to your rear garden – let the topsoil dry out sufficiently
before working on it - compacting wet topsoil will damage it making it
unsuitable for good drainage or good grass or plant growth.
The areas to the front of your home may be turfed and/or have shrubs,
hedging or trees planted in them.
There follows some important care and maintenance requirements for your
garden ground;
Maintenance of garden areas;
Watering of turf and planted areas – In the absence of regular heavy rainfall
you should water turf at least twice a week – daily if the weather is hot and
dry – after moving in. A newly turfed garden looks deceptively mature but the
new grass has only a very small reserve of moisture in the soil attached to the

- 58 -
turf. Until the grass roots grow into the underlying soil the turf is prone to drying
out and shrinking. This can leave unsightly gaps. Light rain is often not enough
to sufficiently water the turf and underlying soil. The best way to irrigate your
garden is by using an oscillating sprinkler. Trees, shrubs and hedging also need
copious watering after planting. As with turf, the roots have not yet grown into
the surrounding soil and can only pick up moisture from a very limited area.
Planning permission for planting schemes usually requires that planting shown
on the approved plans is maintained for a specified period of time. This
obligation is passed on to you once you take up ownership of the property.
Scotia Homes does not replace turf, trees, hedging or shrubs that have failed
due to a lack of watering.
Damage to turf – Walking on turf before it has properly settled in can cause
considerable damage. Dents and hollows made on new turf will not
disappear and are often difficult to repair. It usually takes about a month to
become firm enough to walk on, but this can vary according to weather and
soil conditions. If you are installing or removing a sprinkler use wide boards to
spread your weight and minimise damage.
Mowing turf – it is recommended that you do not mow the turf for at least the
first week after moving in. Let it grow to establish itself and make sure before
mowing for the first time that its roots have grown down into the soil below.
For the first cut leave the grass higher than normal and then gradually reduce
the height in subsequent mowings until you reach the height you want.
Turf areas – In order to assist drainage of these areas the turf requires to be
regularly aerated, to a minimum depth of 25/30mm by spiking the turf with a
garden fork or spade.
For better results deeper spiking (100-150mm deep) with an appropriate tool
proprietary tool should be carried out and the holes filled with a free draining
material such as a lawn dressing or horticultural sand.
In the event that your lawn does become waterlogged you should, wherever
possible, avoid walking on it until it dries out.
Garden areas – If you intend to create a lawn we would recommend that
you seek expert advice on the preparation and sowing of the grass seed or
laying of turf as clay soils particularly will require the addition of sharp sand,
organic matter or compost to aid drainage.
For the preparation and continued maintenance of your garden areas for
growing plants/trees/bushes etc., we would recommend that you follow
advice available online from the Royal Horticultural Society or other similar
gardening websites as these provide tips and advice on how to get the best
out of your garden and the type of plants best suited to clay soils.
Additional notes for garden areas;
Rotary clothes dryer – If a rotary clothes dryer has been provided, please note
that children should not play with this product – it is recommended that when
not in use it is folded and stored safely out of the reach of children.

- 59 -
Damp proof courses – there are damp proof courses built into your external
walls to prevent damp from the ground soaking up the outside walls. These
are normally approximately 150mm from the ground level around your house.
It is important that these damp proof courses are kept clear – if you are
carrying out any landscaping or ground-works alongside your external walls
then please ensure that you do not cover these damp proof courses
(including any cavity weep vents) or otherwise bridge them, allowing damp
to rise up past the damp proof course.
DRAINAGE CONSIDERATIONS
The rainwater and any driveway drainage has been designed to comply with
Local Authority Regulations (such as planning, building control and roads
construction consent conditions) and SEPA (Scottish Environment Protection
Agency) requirements including SUDS (Sustainable Urban Drainage Systems)
requirements. In simplified terms these regulations require us to ensure that the
drainage systems designed and installed around your home collects any
rainwater which falls onto your house and surrounding plot and drains it away
in a responsible manner.
There are a number of very important points that you should be aware of in
relation to the drainage around your home;
Alterations to your driveway or parking spaces (or other areas within your plot
curtilage). It is important that rainwater does not run off your plot onto the
adjacent roads and footpaths (this is particularly important where the road is
adopted by the local authority). We have designed the access driveway to
ensure that any rainwater falling onto it either runs off into your plot where it
soaks away into the ground or is collected into a gully or a permeable surface
is used on the drive (such as gravel). If you subsequently make any alterations
to your drive you must bear this in mind and make sure you have obtained
the necessary permissions from the relevant local authority. For example if you
have a gravel drive which slopes down to the road outside your home and
you decide to have it tarred then you will also have to install suitable
drainage to deal with any rainwater which falls onto the drive. Failure to
make such drainage provision will be likely to lead to the local authority
demanding that the original surface be reinstated. Also if you extend your
drive over garden ground you must ensure that existing drainage provisions
are adequate. Finally, it should also be noted that if you are changing the
surface of your driveway the local council may require that an initial portion
of your drive must be a ‘hard surface’ – not stone chippings or gravel or
similar loose surface- again it is important that you obtain the necessary
permissions prior to making any alteration to your drive.
Alterations to your garden ground. Removal of garden areas and installation
of, for example, large impermeable patio areas or a large area of other hard
standing will reduce the area of ground available to soak up rainwater and
could lead to flooding problems if adequate drainage is not installed at the
same time. If you decide to ‘slab over’ your garden ground you must also
ensure that you make adequate provision for dealing with any rainwater to

- 60 -
avoid increasing the risks of flooding your own and your neighbours
properties.
Maintenance of the drainage system. It is essential that the drainage systems
installed around your property are maintained to keep them in good working
order. This not only ensures that any rainwater which falls onto your house and
plot is dealt with efficiently, but will ensure that risk of flooding to your home
and your neighbours is minimised. Similarly the foul drainage needs
maintained to keep it in good working condition and to ensure it does not
become blocked or damaged. Depending on the particular drainage
systems installed around your home the following general maintenance notes
should be adhered to (where applicable);
Rainwater gutters and downpipes- depending on the likes of tall trees and
other sources of debris in the surrounding area rainwater gutters require to be
cleaned out on a regular basis to prevent debris and dirt finding its way into
the underground rainwater drainage system and either blocking it or
reducing its effectiveness. Keeping the rainwater gutters clear also reduces
the possibility of them over flowing during thunder storms or periods of very
heavy rain- a leaking or over flowing gutter could damage the external
envelope of your home and lead to damp and other problems.
Underground rainwater and foul drainage pipes- you are responsible for the
maintenance and repair of your underground drainage pipes from your
house to the disconnecting manholes. Disconnecting manholes are normally
located in your access drive or in the front garden. To minimise problems with
your underground drainage it is essential that inappropriate items are not
allowed to enter your underground drainage pipes as per the further notes
below.
Drives / parking areas (if installed) – porous paving grids - paving grids are a
strong interlocking 100% recycled cellular porous plastic paving grid system for
grass reinforcement, ground stabilisation & gravel retention for regular
trafficked surfaces (pedestrian and vehicles). These can be installed with
either a grass or gravel filled surface, with gravel being used for the majority of
driveways.
Images of typical paving grids:
Gravel drives (where applicable)– these are generally maintenance free and
only need raked level on occasion to remove any rutting caused by cars or
footpath traffic and the gravel may need ‘topped’ up from time to time to
keep it looking at its best.

- 61 -
Garden ground – please refer to the maintenance information contained in
the previous ‘External Areas’ section.
Avoiding blocked drains. The foul drainage system from your home is
designed to take used water from sinks, showers, baths and toilet waste. The
drainage is not designed to take inappropriate items such as wipes (baby,
personal cleaning and the like), sanitary items, cotton wool, cotton buds,
disposable nappies, cooking fat or oil or grease and similar substances.
Blocked drains can lead to flooding of your property and your neighbouring
properties. A majority of blocked drains are caused by inappropriate items
being put down the toilet or fat, oil or grease being put down the sink. Please
refer to the Scottish Water material on the following pages for more
information.

- 62 -


- 65 -
Water butts. If you decide to install a water butt to one or more of your
rainwater downpipes please ensure that you also fit an over-flow back into
the rainwater downpipe (to avoid the water butt over-flowing and causing
flooding) and that any water butts are located in accordance with any
relevant Deed of Conditions. Kits for water butt overflows are available in any
good garden centre.
TEMPORARY WASTE WATER TREATMENT PLANT (TWWTP)
A temporary plant for the treatment of waste water will be operational from
first completions up until the point at which mains sewerage is extended to
the development by Scottish Water. This is located within public open space
at the South-East corner of the development.
Operation and maintenance of this plant will be the responsibility of the
factor and will be covered by their charges, as originally noted in the
factoring information sheet. It is anticipated that this charge would be
reflected by a commensurate decrease of sewerage charges within the
Council Tax charges until mains sewerage is connected.
As with any other similar development infrastructure, such as electricity
substations etc., the TWWTP should not be interfered with.
Image showing above-ground elements of plant:
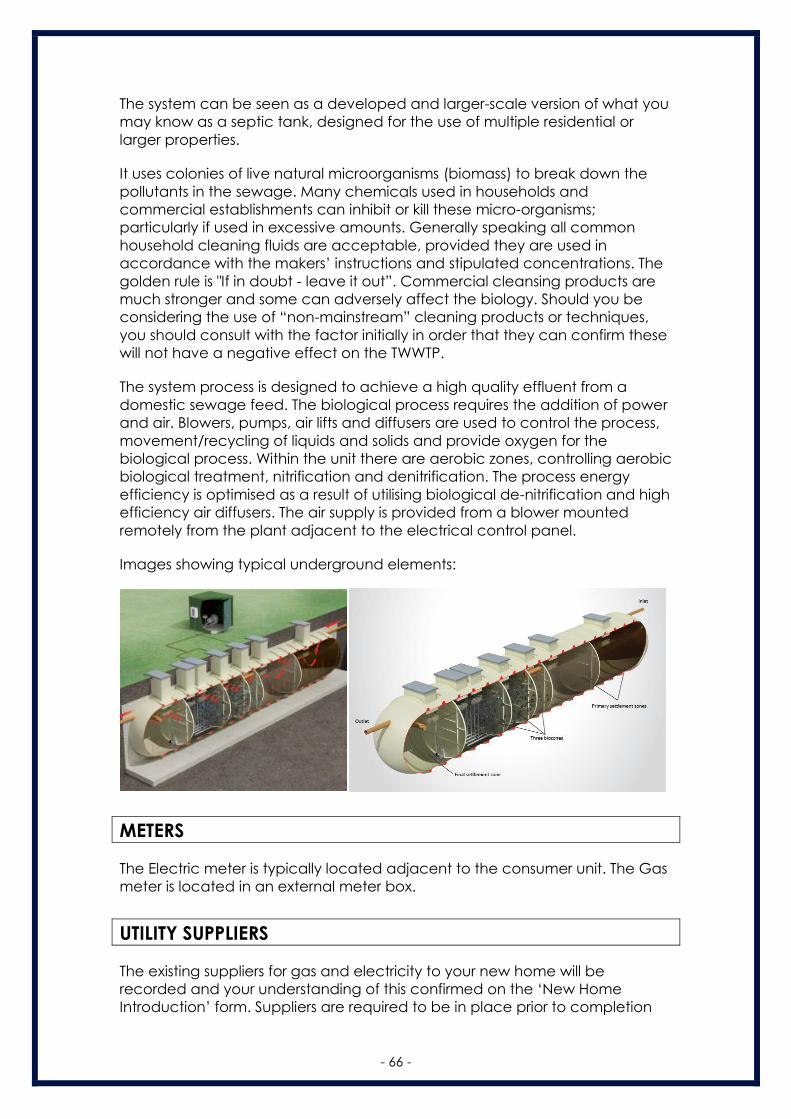
- 66 -
The system can be seen as a developed and larger-scale version of what you
may know as a septic tank, designed for the use of multiple residential or
larger properties.
It uses colonies of live natural microorganisms (biomass) to break down the
pollutants in the sewage. Many chemicals used in households and
commercial establishments can inhibit or kill these micro-organisms;
particularly if used in excessive amounts. Generally speaking all common
household cleaning fluids are acceptable, provided they are used in
accordance with the makers’ instructions and stipulated concentrations. The
golden rule is "If in doubt - leave it out”. Commercial cleansing products are
much stronger and some can adversely affect the biology. Should you be
considering the use of “non-mainstream” cleaning products or techniques,
you should consult with the factor initially in order that they can confirm these
will not have a negative effect on the TWWTP.
The system process is designed to achieve a high quality effluent from a
domestic sewage feed. The biological process requires the addition of power
and air. Blowers, pumps, air lifts and diffusers are used to control the process,
movement/recycling of liquids and solids and provide oxygen for the
biological process. Within the unit there are aerobic zones, controlling aerobic
biological treatment, nitrification and denitrification. The process energy
efficiency is optimised as a result of utilising biological de-nitrification and high
efficiency air diffusers. The air supply is provided from a blower mounted
remotely from the plant adjacent to the electrical control panel.
Images showing typical underground elements:
METERS
The Electric meter is typically located adjacent to the consumer unit. The Gas
meter is located in an external meter box.
UTILITY SUPPLIERS
The existing suppliers for gas and electricity to your new home will be
recorded and your understanding of this confirmed on the ‘New Home
Introduction’ form. Suppliers are required to be in place prior to completion
- 67 -
for the purposes of installing infrastructure, making connections, and testing
various features of the property. At the time of writing, the supplier for both
gas and electricity (where applicable) will be British Gas at the point of
handover.
Once you have taken possession of your new home and ownership has been
legally transferred, it of course becomes your own right to decide which
particular supplier you wish to use. It is at this point that meter readings are
recorded on handover documentation, thereby denoting the change in
responsibility for payment of ongoing bills. This same documentation,
specifically the Handover Certificate, also includes MPAN (Meter Point
Administration Number) and MPRN (Meter Point Reference Number) details,
which are determined well in advance of construction completion and
provide supply point identification for your new home.
It is strongly recommended that you keep this Handover Certificate in a safe
place.
Utility suppliers are then provided, by us, with these readings and confirmation
of change of responsibility in order that they may start to invoice you directly
as a private customer and homeowner.
From this point, it is possible for you to review, and indeed change, the tariff
and/or supplier for gas and/or electricity. Although the administration of the
changed contact details may take a little time for some suppliers to update,
all that is required to process a change is simply the MPAN and/or MPRN
details as a starting point.
Whilst there is an inevitable time period during which specific contact details
applicable to an address are updated to current suppliers and this is subject
to administrative process, the use of correct MPAN/MPRN details as noted
above should provide sufficient reference for review and/or change of
supplier after the point of handover.
N.B. Some developments may already be fitted with ‘smart’ meters, which
allow for both remote taking of meter readings and a separate display of
usage and costs. These meters are progressively being installed in both new
and existing properties, and will become prevalent in the near future. Should
your new home be fitted with a ‘smart’ meter and you choose to change
supplier, please be aware that you may lose some ‘smart’ functionality if the
chosen supplier is not yet compliant with this technology.
LOCAL AUTHORITY REFUSE AND RECYCLING COLLECTION
The development has been planned to incorporate the required storage
stances for wheeled bins and routes for collection vehicles. The responsibility
for organising a wheeled bin with the local council (Aberdeenshire Council) is
your own, and you may have already done so, if not, please utilise the
contact details for the council below.

- 68 -
NOTE: Plots 13, 14, 16 and 17 share a designated collection point for refuse
which is located opposite the shared access to these four plots. Waste and
recycling collection will be done from this point and wheeled bins/containers
should be left there on the designated collection days, as per the council
calendar.
Should you have any queries or need advice regarding Waste and Recycling,
perhaps for additional bins, advice on special collections or waste collection
calendars in your area, please contact the Aberdeenshire Council Waste
Team on 0845 6003900 or at [email protected]
COUNCIL TAX
The local authority will be aware of the new homes which are within your
development, with a responsibility for payment of council tax falling upon the
new owner (yourself). The authority will have made a banding valuation for
your own property type and will issue payment instructions and schedules
accordingly.
Should you not receive confirmation of this from Aberdeenshire Council or have
any questions, please contact their Revenues and Benefits team at:
• E-mail: [email protected]
• Phone: 0845 6081201
• Letter: PO Box 18533, Inverurie, AB51 5WX
• https://www.aberdeenshire.gov.uk/council-tax/
SCHEDULE OF TEST CERTIFICATES
ALPHA INTEC GAS BOILER
Installation and servicing instructions (including service record) are contained
in your hand over pack.

- 69 -
ENERGY RELATED PRODUCTS (ERP) DIRECTIVE
On 26th September 2015 a new Energy related Product (ErP) directive from
the EU came into force.
The ErP directive was designed to help the EU achieve its target to reduce
energy use by 20% and increase the share of renewable energies by 20% by
2020. It affects all space and water heaters, ensuring they meet minimum
efficiency requirements, and require the same type of energy efficiency
labels as fridges and freezers.
You will still be able to install products purchased prior to 26th September
2015, but after this date, boiler manufacturers and installers have to ensure
that the products they use and the systems they commission, meet the
minimum requirements within this new Energy related Products directive.
Space and water heating products are required to have an energy label,
already familiar on other white goods such as A+++ rated
dishwashers/washing machines, and manufacturers are only able to sell
compliant products after 26th September 2015.
Boiler manufacturers are responsible for ensuring their products have
compliant energy labelling while the installer is responsible for providing the
energy labelling for a complete heating system. A system efficiency figure is
calculated, based on the different components of the system (boiler,
controls, renewables etc.), which is then added to the energy efficiency label
to complete the installation.
The example below shows the kind of information you can expect to see. An
example of a label for the heating system used by Scotia Homes and
compliant with the ErP directive is shown on the following pages.
Source: HHIC

- 70 -

- 71 -

- 72 -

- 73 -
SCHEDULE OF MATERIALS
Item
Description
Supplied by
Tel No./Website
Structural
timber frame
Including floor and roof
joists, eaves, fascia
boards and gable barge
boards.
Deeside
Timberframe
Limited,
Stonehaven
01569 767123
http://www.deesidetimberfra
me.com/
Windows Deceuninck 2800 profile
white inside/ anthracite
grey outside uPVC tilt
and turn and fixed pane
windows.
Merlin Network
(Scotland)
01383 821182
http://www.merlinnetwork.co
.uk/
Roof windows Fakro GB RAL 7022
external finish, white
internally.
Rembrand Timber
Merchants,
Dundee
01382 323200
http://www.rembrand.co/
Patio doors Merlin Network white
inside/ anthracite grey
outside uPVC sliding
patio doors.
Merlin Network
(Scotland)
01383 821182
http://www.merlinnetwork.co
.uk/
Internal Door
Leafs
Premdor Ladder
moulded solid core
internal door leafs.
Orchard Timber
Products, Forfar
01307 474800
http://www.orchardtimberpr
oducts.co.uk/
Ironmongery
for internal
doors
Door Handles – Carlisle
Brass Trend ref SZM 160
CPSN (polished chrome/
satin finish). Bathroom
thumbturn and release-
Carlisle Brass Serozzetta
ref SZM004-CP, polished
chrome.
Williams
Ironmongery,
Aberdeen
01224 644441
http://www.williamsironmong
ery.com/contact/
External
Doorsets
Deceuninck GRP/uPVC
composite external
doorsets (grey
outer/white inner).
Merlin Network
(Scotland)
01383 821182
http://www.merlinnetwork.co
.uk/
Garage doors
(where
applicable)
Garador Carlton
Retractable framed
garage door factory
finished colour anthracite
grey.
Keyline,
Aberdeen
01224 576100
http://www.keyline.co.uk/stor
e/1101
Skirting
boards &
Door Facings
MDF 95 x 14mm skirtings
and 70 x 18mm facings,
18mm thick MDf cill
boards, 18mm thick MDF
bulkhead tops.
Fleming
Buildbase,
Aberdeen
01224 258200
http://www.buildbase.co.uk/
storefinder/store/Aberdeen-
1228
Wardrobe
doors
Sliding mirror doors. Swan-Robes Ltd.,
Alva
01259 762669
http://www.swanrobes.co.uk
/
Kitchen Units
& Worktops
Nobilia range with
laminate worktops.
James Laing &
Son Ltd, Inverurie,
Aberdeenshire
01467 620311
http://www.laings.com/
Kitchen
Appliances
Various, principally Smeg
(depending on
plot/Extras).
James Laing &
Son Ltd, Inverurie,
Aberdeenshire
01467 620311
http://www.laings.com/
Kitchen sink
and sink mixer
tap
Rangemaster Glendale
stainless steel inset sink 1
½ bowl and drainer with
Bristan Ruby monobloc
sink mixer.
Plumbase,
Aberdeen
01224 561100
http://www.plumbase.co.uk/
Utility room
sink and taps
Leisure inset stainless steel
single bowl sink with
Plumbase,
Aberdeen
01224 561100
http://www.plumbase.co.uk/

- 74 -
Item
Description
Supplied by
Tel No./Website
Bristan high neck chrome
pillar taps.
Sanitary-ware
(standard
bathroom)
Ideal Standard Tempo 1
tap hole wash hand
basin and semi pedestal
with chrome plated
Bristan Prism basin mixer.
Ideal Standard Tempo
Cube 1700 x 700 bath
with Unilux panel and
chrome plated Bristan
Prism bath filler. Ideal
standard Tempo WC pan
close coupled or back-
to-wall with Tempo
cistern or concealed
cistern and Tempo seat
and cover.
Plumbase,
Aberdeen
01224 561100
http://www.plumbase.co.uk/
Sanitary-ware
(standard en-
suite – where
applicable to
house type)
Ideal Standard Tempo 1
tap hole wash hand
basin and semi pedestal
with chrome plated Prism
basin mixer. Ideal
standard Tempo WC pan
close coupled or back-
to-wall with Tempo
cistern or concealed
cistern and Tempo seat
and cover. Just Fusion
shower tray with Bristan
Prism thermostatic dual
control shower valve with
adjustable riser with
Ideal Standard Synergy
chrome/ clear glass
enclosure.
Plumbase,
Aberdeen
01224 561100
http://www.plumbase.co.uk/
Central
Heating + Hot
Water System
Alpha Intec boiler, gas
saver unit and
associated controls and
valves (including thermal
store where fitted).
Plumb Center,
Aberdeen
01224 626497
http://www.plumbcenter.co.
uk/branch/aberdeen-drain/
Radiators Myson Premier HE. Plumb Center,
Aberdeen
01224 626497
http://www.plumbcenter.co.
uk/branch/aberdeen-drain/
Radiator
Valves
Danfoss RASC2 (15mm). Plumb Center,
Aberdeen
01224 626497
http://www.plumbcenter.co.
uk/branch/aberdeen-drain/
Communal TV
facility and
internal
switching
(ONLY APPLICABLE TO
PLOTS 5-8 & 37-42)
Campbell &
Kennedy,
Glasgow
0141 952 1933
https://www.campbellkenne
dy.co.uk/contact/
Switches,
Sockets and
electrical
accessories
Click Mode Range
switches and sockets.
Holland House
Electrical Co Ltd,
Aberdeen
01224 638129
http://www.hollandhouseele
ctrical.co.uk/
Stairwell wall
light fitting
Astro KYO 7075 Holland House
Electrical Co Ltd,
Aberdeen
01224 638129
http://www.hollandhouseele
ctrical.co.uk/

- 75 -
Item
Description
Supplied by
Tel No./Website
Extract Fans Greenwood extract fans. Holland House
Electrical Co Ltd,
Aberdeen
01224 638129
http://www.hollandhouseele
ctrical.co.uk/
Smoke, Heat
+ CO
detectors
Aico Ei141 smoke
detectors, Aico
Ei261ENRC CO detectors
and Aico Ei144 heat
detectors (where fitted).
Holland House
Electrical Co Ltd,
Aberdeen
01224 638129
http://www.hollandhouseele
ctrical.co.uk/
External light
fittings
Front Doors - Searchlight
up and down wall light
ref 7008-2SS.
Back doors -Ansell
A100PC 100w bulkead
light with polycarbonate
lens.
Holland House
Electrical Co Ltd,
Aberdeen
01224 638129
http://www.hollandhouseele
ctrical.co.uk/
Gutters and
downpipes
Marley deepflow gutters
and circular downpipes.
Drain Center,
Aberdeen
01224 626497
http://www.plumbcenter.co.
uk/branch/aberdeen-drain/
Roof Tiles Marley Edgemere
interlocking concrete
roof tiles with Marley
Modern ridge tile, Marley
Universal verge units and
Marley Modern hip tiles
(where applicable).
Marley Contract
Services, Glasgow
0141 761 4321
http://www.marleycontracts
ervices.co.uk/
Flat roofs Sarnafil single ply roofing
membrane.
BriggsAmasco,
Aberdeen
01224 662380
https://briggsamasco.co.uk/
Attic
insulation
Glass fibre mineral wool
insulation in attic space
(350mm thick loft roll 40).
Supplied and
installed by
Logical Insulation
Solutions Ltd,
Grangemouth
01324 477090
http://www.logicalinsulations.
co.uk/
Precast door
thresholds
Natural colour smooth
precast concrete.
Inverurie Precast,
Inverurie
01467 624367
http://www.inverurieprecast.
co.uk/
External walls
Render
Dry Dash Roughcast
Stonepack Nordic Chips
on stonepack silver sand
and snowcrete white
cement top coat with
white Renderplas RS15
stop beads, MJX15
movement joint beads
and B20 bellcast beads.
Keyline,
Aberdeen
01224 576100
http://www.keyline.co.uk/stor
e/1101
Facing brick Blockley black facing
brick
Bricklink Ltd.,
Bellside
01698 501400
http://bricklink.co.uk/
Timber
fencing
Timber fencing and
gates to gardens
NOTE:
Finished in water based
satin woodstain in a
colour approximate to
RAL 7016, this colour
should be maintained
during the course of any
re-treatment.
TBC
TBC
Plot
landscaping
Including turf, planting
(where applicable), grey
riven precast concrete
Hard landscaping
– JKR Contractors
Ltd.
JKR - 01358 701 665
http://www.jkrcontractors.co
m/

- 76 -
Item
Description
Supplied by
Tel No./Website
paving slabs, Bodpave
for driveways etc.
Soft landscaping
– Beechwood
Services Ltd.
Beechwood - 01561 321139
http://www.beechwoods.co.
uk/
Paint to
Internal Walls
(standard
decoration)
Dulux Trade super matt
emulsion (colour white to
bathrooms and toilets,
colour Timeless to all
other walls).
Dulux Decorator
Centre, Aberdeen
01224 573044
https://www.duluxdecorator
centre.co.uk/stores/aberdee
n
Paint to
ceilings
(standard
decoration)
Dulux Trade super matt
emulsion colour white.
Dulux Decorator
Centre, Aberdeen
01224 573044
https://www.duluxdecorator
centre.co.uk/stores/aberdee
n
Paint to
skirting
boards,
internal doors,
internal door
facings,
staircase
spindles etc.
(standard)
Dulux Quick Dry
Satinwood (colour white)
Dulux Decorator
Centre, Aberdeen
01224 573044
https://www.duluxdecorator
centre.co.uk/stores/aberdee
n
Note - Not all items or colours are applicable to all properties
Scotia (Foveran Village) Limited
Balmacassie, Ellon, AB41 8QR ● Tel: 01358 722441 ● Fax: 01358 723499
Email: [email protected] ● www.scotia-homes.co.uk