high availability cluster
TRANSCRIPT

Date: June, 2015Subject: High Availability Cluster User GuideSoftware: HA ClusterSoftware Version: 4.0.4 Part Number: 3000-hac-4.0.4 000059-B
Copyright © 2015 Nexenta Systems, ALL RIGHTS RESERVEDwww.nexenta.com
High Availability Cluster User Guide 4.0.4

ii
High Availability Cluster User Guide
Copyright © 2015 Nexenta Systems, ALL RIGHTS RESERVEDwww.nexenta.com
Copyright © 2015 Nexenta SystemsTM, ALL RIGHTS RESERVED
Notice: No part of this publication may be reproduced or transmitted in any form or by any means, electronic or mechanical, including photocopying and recording, or stored in a database or retrieval system for any purpose, without the express written permission of Nexenta Systems (hereinafter referred to as “Nexenta”).
Nexenta reserves the right to make changes to this document at any time without notice and assumes no responsibility for its use. Nexenta products and services only can be ordered under the terms and conditions of Nexenta Systems’ applicable agreements. All of the features described in this document may not be available currently. Refer to the latest product announcement or contact your local Nexenta Systems sales office for information on feature and product availability. This document includes the latest information available at the time of publication.
Nexenta, NexentaStor, NexentaEdge, and NexentaConnect are registered trademarks of Nexenta Systems in the United States and other countries. All other trademarks, service marks, and company names in this document are properties of their respective owners.
This document applies to the following product versions:
Product Versions supported
NexentaStor 4.0.4

Copyright © 2015 Nexenta Systems, ALL RIGHTS RESERVEDwww.nexenta.com iii
High Availability Cluster User Guide
Preface . . . . . . . . . . . . . . . . . . . . . . . . . . . . . . . . . . . . . . . . . . . . . . . . . . . . . . . . . . . . . . . . . . . . . . .vii
1 Introduction . . . . . . . . . . . . . . . . . . . . . . . . . . . . . . . . . . . . . . . . . . . . . . . . . . . . . . . . . . . . . . . . . . . .1
About the Nexenta HA Cluster . . . . . . . . . . . . . . . . . . . . . . . . . . . . . . . . . . . . . . . . . . . . . . . . . . . . . . . 1
Storage Failover . . . . . . . . . . . . . . . . . . . . . . . . . . . . . . . . . . . . . . . . . . . . . . . . . . . . . . . . . . . . . . . . . . . 2
Exclusive Access to Storage . . . . . . . . . . . . . . . . . . . . . . . . . . . . . . . . . . . . . . . . . . . . . . . . . . . . . . . . . . 2
About SCSI Reservation . . . . . . . . . . . . . . . . . . . . . . . . . . . . . . . . . . . . . . . . . . . . . . . . . . . . . . . . . . . . . 2
Service Failover . . . . . . . . . . . . . . . . . . . . . . . . . . . . . . . . . . . . . . . . . . . . . . . . . . . . . . . . . . . . . . . . . . . .3
Sample Network Architecture . . . . . . . . . . . . . . . . . . . . . . . . . . . . . . . . . . . . . . . . . . . . . . . . . . . . . . . . 3
Additional Resources . . . . . . . . . . . . . . . . . . . . . . . . . . . . . . . . . . . . . . . . . . . . . . . . . . . . . . . . . . . . . . . 4
2 Configuring the HA Cluster . . . . . . . . . . . . . . . . . . . . . . . . . . . . . . . . . . . . . . . . . . . . . . . . . . . . . . . .5
About Configuring the HA Cluster . . . . . . . . . . . . . . . . . . . . . . . . . . . . . . . . . . . . . . . . . . . . . . . . . . . . . 5
Prerequisites . . . . . . . . . . . . . . . . . . . . . . . . . . . . . . . . . . . . . . . . . . . . . . . . . . . . . . . . . . . . . . . . . . . . . . 5
Binding the Nodes using SSH . . . . . . . . . . . . . . . . . . . . . . . . . . . . . . . . . . . . . . . . . . . . . . . . . . . . . . . . . 6
Registering the HA Cluster . . . . . . . . . . . . . . . . . . . . . . . . . . . . . . . . . . . . . . . . . . . . . . . . . . . . . . . . . . . 7
Adding a Virtual IP Address . . . . . . . . . . . . . . . . . . . . . . . . . . . . . . . . . . . . . . . . . . . . . . . . . . . . . . . . . . 8
Modifying the Default Netmasks . . . . . . . . . . . . . . . . . . . . . . . . . . . . . . . . . . . . . . . . . . . . . . . . . 8
Configuring the HA Cluster . . . . . . . . . . . . . . . . . . . . . . . . . . . . . . . . . . . . . . . . . . . . . . . . . . . . . . . . . . 9
Adding a Shared Volume to the HA Cluster . . . . . . . . . . . . . . . . . . . . . . . . . . . . . . . . . . . . . . . . . . . . 9
Importing a Shared Volume . . . . . . . . . . . . . . . . . . . . . . . . . . . . . . . . . . . . . . . . . . . . . . . . . . . . . . . . .11
Removing a Shared Volume . . . . . . . . . . . . . . . . . . . . . . . . . . . . . . . . . . . . . . . . . . . . . . . . . . . . . . . . .12
3 Heartbeat and Network Interfaces . . . . . . . . . . . . . . . . . . . . . . . . . . . . . . . . . . . . . . . . . . . . . . . . .13
About Heartbeat and Network Interfaces . . . . . . . . . . . . . . . . . . . . . . . . . . . . . . . . . . . . . . . . . . . . .13
Heartbeat Mechanism . . . . . . . . . . . . . . . . . . . . . . . . . . . . . . . . . . . . . . . . . . . . . . . . . . . . . . . . . . . . .13
Modifying Heartbeat Properties . . . . . . . . . . . . . . . . . . . . . . . . . . . . . . . . . . . . . . . . . . . . . . . . . . . . .14
4 Configuring Storage Failover . . . . . . . . . . . . . . . . . . . . . . . . . . . . . . . . . . . . . . . . . . . . . . . . . . . . . .15
About Configuring Storage Failover . . . . . . . . . . . . . . . . . . . . . . . . . . . . . . . . . . . . . . . . . . . . . . . . . .15
Cluster Configuration Data . . . . . . . . . . . . . . . . . . . . . . . . . . . . . . . . . . . . . . . . . . . . . . . . . . . . . . . . .15
Mapping Information . . . . . . . . . . . . . . . . . . . . . . . . . . . . . . . . . . . . . . . . . . . . . . . . . . . . . . . . . . . . . .16
Contents

Copyright © 2015 Nexenta Systems, ALL RIGHTS RESERVEDwww.nexenta.com
High Availability Cluster User Guide
iv
NFS/CIFS Failover . . . . . . . . . . . . . . . . . . . . . . . . . . . . . . . . . . . . . . . . . . . . . . . . . . . . . . . . . . . . . . . . .16
Configuring iSCSI Targets for Failover . . . . . . . . . . . . . . . . . . . . . . . . . . . . . . . . . . . . . . . . . . . . . . . . .17
Configuring Fibre Channel Targets for Failover . . . . . . . . . . . . . . . . . . . . . . . . . . . . . . . . . . . . . . . . . 18
Setting the HA Cluster to ALUA Mode . . . . . . . . . . . . . . . . . . . . . . . . . . . . . . . . . . . . . . . . . . . .18
Changing the HBA Port Mode . . . . . . . . . . . . . . . . . . . . . . . . . . . . . . . . . . . . . . . . . . . . . . . . . . .19
Creating a Target Group . . . . . . . . . . . . . . . . . . . . . . . . . . . . . . . . . . . . . . . . . . . . . . . . . . . . . . .19
Adding WWNs to an Initiator Group . . . . . . . . . . . . . . . . . . . . . . . . . . . . . . . . . . . . . . . . . . . . .20
Creating a Zvol . . . . . . . . . . . . . . . . . . . . . . . . . . . . . . . . . . . . . . . . . . . . . . . . . . . . . . . . . . . . . . .21
Mapping a Zvol . . . . . . . . . . . . . . . . . . . . . . . . . . . . . . . . . . . . . . . . . . . . . . . . . . . . . . . . . . . . . . .21
5 Advanced Setup . . . . . . . . . . . . . . . . . . . . . . . . . . . . . . . . . . . . . . . . . . . . . . . . . . . . . . . . . . . . . . . .23
About Advanced Setup . . . . . . . . . . . . . . . . . . . . . . . . . . . . . . . . . . . . . . . . . . . . . . . . . . . . . . . . . . . .23
Setting Failover Mode . . . . . . . . . . . . . . . . . . . . . . . . . . . . . . . . . . . . . . . . . . . . . . . . . . . . . . . . . . . . .23
Setting Manual Failover Mode . . . . . . . . . . . . . . . . . . . . . . . . . . . . . . . . . . . . . . . . . . . . . . . . . .24
Setting Automatic Failover Mode . . . . . . . . . . . . . . . . . . . . . . . . . . . . . . . . . . . . . . . . . . . . . . . .24
Adding a Virtual IP Address and Hostname . . . . . . . . . . . . . . . . . . . . . . . . . . . . . . . . . . . . . . . . . . . .25
Managing Additional Volumes . . . . . . . . . . . . . . . . . . . . . . . . . . . . . . . . . . . . . . . . . . . . . . . . . . . . . .26
Managing Global Cluster Properties . . . . . . . . . . . . . . . . . . . . . . . . . . . . . . . . . . . . . . . . . . . . . . . . . .26
About Auto-Sync Replication in the HA Cluster Environment . . . . . . . . . . . . . . . . . . . . . . . . . . . . .28
Creating an Auto-Sync Service in the HA Cluster Environment . . . . . . . . . . . . . . . . . . . . . . . . . . . .29
Establishing the SSH-binding for an Auto-Sync Service . . . . . . . . . . . . . . . . . . . . . . . . . . . . . . . . . . .29
Binding a NexentaStor Appliance to a Virtual IP Address . . . . . . . . . . . . . . . . . . . . . . . . . . . . . . . . .30
6 System Operations . . . . . . . . . . . . . . . . . . . . . . . . . . . . . . . . . . . . . . . . . . . . . . . . . . . . . . . . . . . . . .31
About System Operations . . . . . . . . . . . . . . . . . . . . . . . . . . . . . . . . . . . . . . . . . . . . . . . . . . . . . . . . . .31
Viewing the HA Cluster Status . . . . . . . . . . . . . . . . . . . . . . . . . . . . . . . . . . . . . . . . . . . . . . . . . . . . . . .31
Manually Triggering a Failover . . . . . . . . . . . . . . . . . . . . . . . . . . . . . . . . . . . . . . . . . . . . . . . . . . . . . .32
Verifying Shared Volume Status . . . . . . . . . . . . . . . . . . . . . . . . . . . . . . . . . . . . . . . . . . . . . . . . . . . . .33
Viewing Support Logs . . . . . . . . . . . . . . . . . . . . . . . . . . . . . . . . . . . . . . . . . . . . . . . . . . . . . . . . . . . . . .34
Operations with a Shared Volume . . . . . . . . . . . . . . . . . . . . . . . . . . . . . . . . . . . . . . . . . . . . . . . . . . .34
7 Upgrading HA Cluster . . . . . . . . . . . . . . . . . . . . . . . . . . . . . . . . . . . . . . . . . . . . . . . . . . . . . . . . . . .35
About Upgrading HA Cluster . . . . . . . . . . . . . . . . . . . . . . . . . . . . . . . . . . . . . . . . . . . . . . . . . . . . . . . .35
About SAS SSD Firmware Upgrade . . . . . . . . . . . . . . . . . . . . . . . . . . . . . . . . . . . . . . . . . . . . . . . . . . .35
Overview of the Upgrade Process . . . . . . . . . . . . . . . . . . . . . . . . . . . . . . . . . . . . . . . . . . . . . . . . . . . .35

Copyright © 2015 Nexenta Systems, ALL RIGHTS RESERVEDwww.nexenta.com
High Availability Cluster User Guide
v
Verifying the Status of a Shared Volume(s) . . . . . . . . . . . . . . . . . . . . . . . . . . . . . . . . . . . . . . . . . . . .36
Failing Over the Shared Volume(s) . . . . . . . . . . . . . . . . . . . . . . . . . . . . . . . . . . . . . . . . . . . . . . . . . . .36
Upgrading High Availability Cluster from Version 3.1.x to 4.0.4 . . . . . . . . . . . . . . . . . . . . . . . . . . .37
Overview of the Rolling Upgrade Procedure . . . . . . . . . . . . . . . . . . . . . . . . . . . . . . . . . . . . . . .37
Verifying the Status of the High Availability Cluster . . . . . . . . . . . . . . . . . . . . . . . . . . . . . . . . .38
Upgrading the Secondary Node . . . . . . . . . . . . . . . . . . . . . . . . . . . . . . . . . . . . . . . . . . . . . . . . .38
Upgrading Primary Node . . . . . . . . . . . . . . . . . . . . . . . . . . . . . . . . . . . . . . . . . . . . . . . . . . . . . . .40
Completing the Post-Upgrade Procedures . . . . . . . . . . . . . . . . . . . . . . . . . . . . . . . . . . . . . . . . .40
Upgrading NexentaStor Plugins . . . . . . . . . . . . . . . . . . . . . . . . . . . . . . . . . . . . . . . . . . . . . . . . .40
Re-joining Microsoft Windows Active Directory . . . . . . . . . . . . . . . . . . . . . . . . . . . . . . . . . . . .41
Remounting a System Volume . . . . . . . . . . . . . . . . . . . . . . . . . . . . . . . . . . . . . . . . . . . . . . . . . .41
8 Testing and Troubleshooting . . . . . . . . . . . . . . . . . . . . . . . . . . . . . . . . . . . . . . . . . . . . . . . . . . . . . .43
Repairing a Broken Cluster Service . . . . . . . . . . . . . . . . . . . . . . . . . . . . . . . . . . . . . . . . . . . . . . . . . . .43
Replacing a Faulted Node . . . . . . . . . . . . . . . . . . . . . . . . . . . . . . . . . . . . . . . . . . . . . . . . . . . . . . . . . .44
Restoring a Faulted Node . . . . . . . . . . . . . . . . . . . . . . . . . . . . . . . . . . . . . . . . . . . . . . . . . . . . . . . . . .44
Fixing Slow Performance . . . . . . . . . . . . . . . . . . . . . . . . . . . . . . . . . . . . . . . . . . . . . . . . . . . . . . . . . . .45

This page intentionally left blank
Copyright © 2015 Nexenta Systems, ALL RIGHTS RESERVEDwww.nexenta.com
High Availability Cluster User Guide
vi
viiCopyright © 2015 Nexenta Systems, ALL RIGHTS RESERVEDwww.nexenta.com
High Availability Cluster User Guide
Preface
This documentation presents information specific to Nexenta products. The information is for reference purposes and is subject to change.
Intended Audience
This documentation is intended for Network Storage Administrators. It assumes that you have experience NexentaStor and with data storage concepts, such as NAS, SAN, NFS, and ZFS.
Documentation History
The following table lists the released revisions of this documentation
Contacting Support
Methods for contacting support:
• Visit the Nexenta customer portal or partner portal. Log in and browse a knowledge base.
• Using the NexentaStor user interface, NMV (Nexenta Management View):
a. Click Support.
b. Select an action:
• Send by email
Send the support request to the Nexenta support email.
• Save to disk
Saves the support information to the /var/tmp directory on the HA Cluster appliance.
c. Complete the request form.
d. Click Make Request.
• Using the NexentaStor command line, NMC (Nexenta Management Console):
a. At the command line, type support.
b. Complete the support wizard.
Table 1: Documentation Revision History
Revision Date Description
3000-hac-4.0.4 FP1-000059-A June, 2015 GA

viii
High Availability Cluster User Guide
Copyright © 2015 Nexenta Systems, ALL RIGHTS RESERVEDwww.nexenta.com
Comments
Your comments and suggestions to improve this documentation are greatly appreciated. Send any feedback to [email protected] and include the documentation title, number, and revision. Refer to specific pages, sections, and paragraphs whenever possible.

1Copyright © 2015 Nexenta Systems, ALL RIGHTS RESERVEDwww.nexenta.com
1Introduction
This section includes the following topics:
• About the Nexenta HA Cluster
• Storage Failover
• Exclusive Access to Storage
• About SCSI Reservation
• Service Failover
• Sample Network Architecture
• Additional Resources
About the Nexenta HA Cluster
The Nexenta HA (High-Availability) Cluster consists of two NexentaStor appliances and provides a storage volume-sharing service. You manage both systems actively for shared storage, although only one system provides the access to a shared volume at a time. After you create a volume on one server and bring it under cluster control, then, when HAC detects a system failure, it transfers ownership of the shared volumes to the other server in the Cluster pair.
HA Cluster provides server monitoring and failover. Protection of services, such as iSCSI, involves cooperation with other modules such as the SCSI Target plugin.
An HA Cluster includes:
• NexentaStor Appliances
Runs a defined set of services and monitors each other for failures. HAC connects these NexentaStor appliances through various communication channels, through which they exchange heartbeats that provide information about their states and the services that reside on them.
• Cluster Service
A transferable unit that consists of:
• Application start-up and shutdown code
• Network identity and appliance data
You can migrate services between cluster appliances manually, or automatically, if one appliance fails.

High Availability Cluster User Guide
2Copyright © 2015 Nexenta Systems, ALL RIGHTS RESERVED
www.nexenta.com
Storage Failover
The primary benefit of HA Cluster is to detect storage system failures and transfer ownership of the shared volumes to the alternate NexentaStor appliance. All configured volume services can fail over to the other server. HA Cluster ensures service continuity during exceptional events, including power outages, appliances that run out of memory or crash, and other failures.
Currently, the minimum time to detect that an appliance has failed is approximately 10 seconds. The failover and recovery time is largely dependent on the amount of time it takes to fail over the data volume on the alternate appliance. Best practices to reduce the failover time include using fewer zvols and file systems for each data volume.
HA Cluster triggers failover if one of the nodes is unavailable. To ensure availability of the nodes, HA Cluster monitors the state of the nodes through network, disk, and (optionally) serial heartbeats. If one node does not respond to any of the configured heartbeats, then HA Cluster transfers and brings online all shared services on the other node.
HA Cluster also monitors the status of network interfaces that are used for shared volume services. If the network interface associated with a shared volume service goes down, the HA Cluster triggers the failover.
Exclusive Access to Storage
You access a shared volume exclusively through the appliance that currently owns the corresponding volume-sharing service. To ensure this exclusivity, HA Cluster provides reliable fencing through the utilization of multiple types of heartbeats. Fencing is the process of isolating a node in an HA Cluster, and/or protecting shared resources when a node malfunctions. Heartbeats, or pinging, allow for constant communication between the servers. The most important of these is the disk heartbeat. Generally, additional heartbeat mechanisms increase reliability of the cluster's fencing logic; the disk heartbeats, however, are essential.
HA Cluster can reboot the failed appliance in certain cases:
• Failure to export the shared volume from the active node to the passive node. This functionality is analogous to Stonith, the technique for fencing in computer clusters.
On disk systems which support a SCSI reservation, you can place reservation on a disk before accessing the file systems, and set the system to panic if it loses the reservation. This feature also serves to protect the data on a disk system.
About SCSI Reservation
In a cluster environment multiple hosts have access to the same shared storage. To control access to the shared storage SCSI reservations are used.
HA Cluster supports SCSI-2 reservation. Therefore, when one HA Cluster node has access to a shared volume, it applies SCSI reservation to the disk drives in the shared volume. The reserved disk drives do not process commands from the alternate HA Cluster node until the lock is released.
SCSI reservations are not applied to spare devices or heartbeat drives.

Copyright © 2015 Nexenta Systems, ALL RIGHTS RESERVEDwww.nexenta.com 3
High Availability Cluster User Guide
For more information, contact [email protected].
Service Failover
As discussed previously, system failures result in the failover of ownership of the shared volume to the alternate node. As part of the failover process, HA Cluster migrates the storage services that are associated with the shared volume and restarts the services on the alternate node.
Sample Network Architecture
A sample cluster hardware setup includes:
• Two bare metal x86/64-bit systems with a shared SAS storage
• Two network interface cards (not mandatory, but good practice)
Nexenta recommends that you separate management and network traffic, so the heartbeat traffic goes through the management network.
The following illustration is an example of an HA Cluster deployment of a Nexenta iSCSI environment. The host server attaches to iSCSI LUNs in the JBOD, which are connected to the Nexenta appliances nodeA and nodeB. The NexentaStor appliances use the active/passive function of the HA Cluster.
The following diagram shows an example of HA Cluster configuration.
SHARED VOLUME
CLIENT SIDE NETWORK
ETHERNET NETWORK
PRIMARY PATH ALTERNATE PATH
NEXENTA APPLIANCE:
node A
NEXENTA APPLIANCE:
node B
JBODs
Sun StorageJ4400
SATA
1000GB7.2 Krpm
OK
SATA
1000GB7.2 Krpm
OK
SATA
1000GB7.2 Krpm
OK
SATA
1000GB7.2 Krpm
OK
SATA
1000GB7.2 Krpm
OK
SATA
1000GB7.2 Krpm
OK
SATA
1000GB7.2Krpm
OK
SATA
1000GB7.2Krpm
OK
SATA
1000GB7.2Krpm
OK
SATA
1000 GB7.2Krpm
OK
SATA
1000 GB7.2Krpm
OK
SATA
1000 GB7.2Krpm
OK
SATA
1000GB7.2 Krpm
OK
SATA
1000GB7.2 Krpm
OK
SATA
1000GB7.2 Krpm
OK
SATA
1000GB7.2Krpm
OK
SATA
1000GB7.2Krpm
OK
SATA
1000GB7.2Krpm
OK
SATA
1000 GB7.2Krpm
OK
SATA
1000 GB7.2Krpm
OK
SATA
1000 GB7.2Krpm
OK
SATA
1000GB7.2 Krpm
OK
SATA
1000GB7.2 Krpm
OK
SATA
1000GB7.2 Krpm
OK

High Availability Cluster User Guide
4Copyright © 2015 Nexenta Systems, ALL RIGHTS RESERVED
www.nexenta.com
Additional Resources
Nexenta has various professional services offerings to assist with managing HA Cluster. Nexenta strongly encourages a services engagement to plan and install the plugin. Nexenta also offers training courses on high availability and other features.

5Copyright © 2015 Nexenta Systems, ALL RIGHTS RESERVEDwww.nexenta.com
2Configuring the HA Cluster
This section includes the following topics:
• About Configuring the HA Cluster
• Prerequisites
• Binding the Nodes using SSH
• Registering the HA Cluster
• Adding a Virtual IP Address
• Configuring the HA Cluster
• Adding a Shared Volume to the HA Cluster
• Importing a Shared Volume
• Removing a Shared Volume
About Configuring the HA Cluster
You can configure and manage the HA Cluster through the appliance’s web interface, the Nexenta Management View (NMV), or the Nexenta Management Console (NMC).
Prerequisites
Before configuring the HA Cluster, complete the following tasks:
• Configure two bare metal NexentaStor appliances.
See NexentaStor Installation Guide.
• Connect a shared storage to the NexentaStor appliances.
• Create a shared volume on the primary HA node.
See NexentaStor User Guide, section “Creating a volume”.
• Bind the NexentaStor appliances using SSH.
See Modifying the Default Netmasks.
• Register the HA Cluster plugin on both NexentaStor appliances.
Note:This section applies to new installations of HA Cluster. When upgrading, you save and restore the configuration from your previous cluster, so the following sections do not apply.

High Availability Cluster User Guide
6Copyright © 2015 Nexenta Systems, ALL RIGHTS RESERVED
www.nexenta.com
See Registering the HA Cluster.
• Configure virtual IP address for the shared volume and modify the NexentaStor host table.
See Adding a Virtual IP Address
Binding the Nodes using SSH
Before you configure the SSH bindings, complete the steps in Modifying the Default Netmasks. You must bind the two HA nodes together with the SSH protocol so that they can communicate.
To bind the two nodes, using NMV:
1. Click Settings > Network.
2. In the Network panel, click SSH-Bind.
3. In the Binding type field, select HA-pair.
4. Specify the following:
• Host name of the remote HA Cluster node
• IP address of the remote HA Cluster node
• Password for user root on the remote HA Cluster node.
5. Optionally, modify the default SSH port number and user name.
The user must have administrative privileges.
When in doubt, use default settings.
6. Optionally, select Bidirectionally.
7. Click Bind.
8. If you did not select Bidirectionally, repeat Step 1 — Step 5 and Step 7 on the other node.
To bind the two nodes, using NMC:
1. Log in to one of the NexentaStor appliances
2. Type the following:
nmc:/$ setup network ssh-bind
3. Type the host name of the NexentaStor appliance that you want to bind.
4. Type the root password.
5. Repeat Step 1 — Step 4 on the other node.
6. To verify that you set up the bindings correctly, type:
nmc:/$ show network ssh-bindings
Note:You must bind the appliances using either default failover hostnames or the hostnames that you specified in the /etc/hosts file. HA Cluster does not support binding using IP addresses.

Copyright © 2015 Nexenta Systems, ALL RIGHTS RESERVEDwww.nexenta.com 7
High Availability Cluster User Guide
Registering the HA Cluster
HA Cluster is pre-installed on the NexentaStor appliance. You can use it right after installation using temporary trial license, or enter the permanent license that you received from Nexenta.
To register HA Cluster, using NMV:
1. Click Settings > HA Cluster.
2. Accept the HA Cluster license agreement.
3. If you get a warning that HA Cluster is not running, click Start RSF.
NexentaStor starts the HA Cluster daemon.
4. Request an HA Cluster license key or type the existing one.
When prompted select one of the following options:
• If you have Internet connection:
1)Click Confirm.
2)When prompted, accept the HA Cluster license agreement.
3)Type your e-mail address.
The temporary HA Cluster license automatically registers on your NexentaStor appliance. The license package is also sent to the provided e-mail address.
4)When prompted, click OK.
• If you do not have an access to the Internet:
1)Click Manual.
2)Select an HA node.
3)Type the HA Cluster license.
You must have a hard copy of the HA Cluster license to use this functionality. This functionality is provided for servers that do not have access to the Internet.
4)Click OK.
5)Repeat Step 1 - Step 4 for the second node.
You can install a temporary 45-days trial license.
5. Alternatively, you can type a permanent HA Cluster license.
Note:You may get a warning that you do not have sufficient number of appliances to create an HA Cluster group. If you get this warning, see Modifying the Default Netmasks.
Note:If the other HA Cluster node is unlicensed, NMV notifies you about that. Click Yes to install the HA license to the other node.

High Availability Cluster User Guide
8Copyright © 2015 Nexenta Systems, ALL RIGHTS RESERVED
www.nexenta.com
Adding a Virtual IP Address
There is a name associated with a shared volume service that is referred to as a virtual shared service hostname, or virtual IP address (VIP). The network clients use the virtual hostname to connect to the shared volume.
You must specify a VIP and a corresponding virtual shared service hostname in the NexentaStor IP table.
The appliances in the HA cluster group must be resolvable to each other. This means they must be able to detect each other on the network and communicate. When you create an SSH-binding, NexentaStor automatically adds records to the IP host tables on both appliances. You can verify that the records were added correctly when you add a VIP.
For each host a single line should be present with the following information:
IP_address hostname [aliases...]
To verify hostnames, using NMC:
1. Log in to the NMC on one of the NexentaStor appliances.
2. Type the following to open the /etc/hosts file:
nmc:/$ setup appliance hosts
3. Using the vim editor commands, type a virtual IP address for the shared volume.
Example:
Internet host table::1 localhost127.0.0.1 localhost192.168.11.1 <nodeA nodeA.example.com> loghost 192.168.10.1 <nodeB nodeB.example.com>192.168.1.1 <shared_hostname>
4. Repeat Step 1 — Step 3 for nodeB.
See Also:
• Adding a Shared Volume to the HA Cluster
Modifying the Default Netmasks
When you add a volume service to the HA Cluster, NexentaStor assigns a default netmask for the class of IP network it is on. However, you may need to change the default netmasks according to your configuration changes.
To modify the default netmask, using NMC:
1. Type the following to open the /etc/netmasks file for nodeA:
nmc:/$ setup appliance netmasks
Note: Use the failover hostname to add a shared volume.

Copyright © 2015 Nexenta Systems, ALL RIGHTS RESERVEDwww.nexenta.com
High Availability Cluster User Guide
9
2. Add the netmask for each network address:
Example:
192.168.1.0 255.255.255.0192.168.13.0 255.255.255.0192.168.0.0 255.255.0.0
Repeat Step 1 — Step 2 for nodeB.
Configuring the HA Cluster
Before you configure the HA Cluster, verify that you completed the steps in Adding a Virtual IP Address and Modifying the Default Netmasks. You need to configure multiple options for the HA cluster before you can use it successfully.
To configure an HA cluster, using NMV:
1. On the first node, select Settings > HA Cluster.
2. In the Cluster Settings panel, click Initialize.
3. Type or change the Cluster name.
4. Optionally, type a description.
5. Select Enable Network Monitoring
The cluster monitors the network for nodes.
6. Click Configure.
7. Click Yes.
To configure an HA cluster, using NMC:
1. Type:
nmc:/$ create group rsf-cluster
2. Follow the on-screen instructions.
3. Verify that you created the HA Cluster group, type:
nmc:/$ show group rsf-cluster
Note: You cannot assign a NexentaStor appliance to more than one HA Cluster.
Note:If you bound the appliances using SSH, the hostnames of NexentaStor nodes are automatically selected as nodes of the HA Cluster.

Copyright © 2015 Nexenta Systems, ALL RIGHTS RESERVEDwww.nexenta.com
High Availability Cluster User Guide
10
Adding a Shared Volume to the HA Cluster
After you configure an HA Cluster, you are prompted to add a shared volume to the volume service. Alternatively, you can add a shared volume to the Cluster at a later time.
To add a shared volume to HA Cluster, using NMV:
1. In the Cluster Settings panel, click Volumes.
2. Select a volume from the drop-down menu.
3. Type the Failover Hostname and netmask.
Use the failover hostname that you have previously specified in the /etc/hosts file.
Example:
192.168.60.22 <shared_hostname>
4. If you did not set up the failover hostname, NMV prompots you to type the IP address for the shared volume.
5. Select Primary appliance.
6. Optionally, modify initial and standard timeouts for the HA Cluster services.
7. Select Heartbeat devices.
If you use multiple JBODs, select drives from different JBODs as heartbeat devices. General practice is to assign 2 — 6 (max) heartbeat drives.
8. Select failover interfaces for both nodes.
9. Click Add this volume to the cluster.
10. Click Confirm.
To create a shared service, using NMC:
1. Type:
nmc:/$ setup group rsf-cluster <cluster_group_name> shared-volume add
System response:
Shared volume : <shared-volume>
2. Select heartbeat devices.
Note: You can also type NONE.
Warning:Do not assign SSDs as heartbeat devices. Heartbeat devices perform a constant periodic write of the heartbeat signature from each node which can reduce the life of SSDs.
Note:To ensure better performance and reliability, use non-primary network interfaces for heartbeats.

Copyright © 2015 Nexenta Systems, ALL RIGHTS RESERVEDwww.nexenta.com
High Availability Cluster User Guide
11
System response:
HB disks for 'shared-volume' : c1t5d0, c1t6d0
3. Specify a virtual IP address for the selected volume.
Example:
VIP1 Shared logical hostname : <shared_hostname>
4. Select network interfaces for the selected VIP(s) on both HA Cluster nodes.
5. Specify Failover Netmask.
Example:
VIP1 Failover Netmask : 255.255.255.0
System response:
Stop adding VIPs? (y/n)
6. Confirm the VIP configuration by typing y.
7. If you want to add additional VIPs, type n and repeat Step 3 - Step 5.
8. Select the Main node.
Main node, or Primary node, is the NexentaStor appliance where the shared volume is imported after you complete the HA Cluster configuration.
9. Optionally, modify the Initial timeout and Standard timeout.
System response:
Enable SCSI PGR reservation by typing y. Adding shared volume '<vol1>', please wait ...Jan 8 23:20:49 nodeA RSF-1[19746]: [ID 702911 local0.alert] RSF-1 cold restart: All services stopped.Waiting for add operation to complete ........... done.
HA CLUSTER STATUS: HA-ClusterNodeA: <shared-volume> running auto unblocked <shared_hostname e1000g1 20 8NodeB: <shared volume> stopped auto unblocked <shared_hostname> e1000g1 20 8
Note:
If you did not define a hostname/IP address for the shared volume, NMC prompts you to modify the NexentaStor host table.
Example:
Internet host table::1 localhost127.0.0.1 localhost192.168.60.107 <nodeA nodeA.example.com> loghost 192.168.60.79 <nodeB nodeB.example.com>192.168.60.22 <shared_hostname>

Copyright © 2015 Nexenta Systems, ALL RIGHTS RESERVEDwww.nexenta.com
High Availability Cluster User Guide
12
Importing a Shared Volume
To put a shared volume under cluster control, you may need to import it. The volume may get exported when you upgrade a NexentaStor appliance, or if a NexentaStor appliance is unavailable.
To import a shared volume, using NMV:
1. Click Data Management > Data Sets.
2. In the All Volumes panel, click Import.
3. Click Import for the relevant volume.
To import a shared volume, using NMC:
Type:
nmc:/$ setup volume import
Removing a Shared Volume
You can remove a shared volume from the HA Cluster control any time. The remove operation does not delete any data on the volume. The volume remains imported on the active HA Cluster node. However, the volume becomes unavailable through the failover hostname.
To remove a shared volume, using NMV:
1. In the Cluster Settings panel, click Volumes.
2. Select the Remove a volume tab.
3. Select a volume.
4. Click .
To remove a shared volume, using NMC:
1. Type:
nmc:/$ setup group rsf-cluster <cluster> shared-volume <shared-volume> remove
System response:
Remove shared volume <shared-volume> and restart HA Cluster <cluster> ? (y/n)
2. Confirm the operation by typing y.
System response:
Removing shared volume <shared-volume>, please wait ...

13Copyright © 2015 Nexenta Systems, ALL RIGHTS RESERVEDwww.nexenta.com
3Heartbeat and Network Interfaces
This section includes the following topics:
• About Heartbeat and Network Interfaces
• Heartbeat Mechanism
• Modifying Heartbeat Properties
About Heartbeat and Network Interfaces
A NexentaStor appliance in the HA Cluster constantly monitors the state and status of the other appliances in the Cluster through heartbeats. Because HA Cluster servers must determine that an appliance (member of the cluster) has failed before taking over its services, you configure the cluster to use several communication channels through which to exchange heartbeats.
Heartbeat Mechanism
The loss of all heartbeat channels represents a failure. If an appliance wrongly detects a failure, it may attempt to start a service that is already running on another server, leading to so-called split brain syndrome. This can result in confusion and data corruption. Multiple, redundant heartbeats prevent this from occurring.
HA Cluster supports the following types of heartbeat communication channels:
• Heartbeat/Reserved devices
Accessible and writable from all appliances in the cluster or VDEV labels of the devices in the shared volume.
If you select the heartbeat devices, VDEV labels for devices in the shared volume perform the heartbeat function. If a shared volume consists of a few disks, NexentaStor uses VDEV labels for one or more disks for the heartbeat mechanism.You can specify which disks.
The heartbeat mechanism uses sectors 512 and 518 in the blank 8K space of the VDEV label on each of the selected heartbeat devices. Therefore, the heartbeat drives are still used to store data.
• Network Interfaces
The preferred heartbeat connection is a dedicated "cross-over" connection between the nodes. You can also use or add any other interface type (simple, IPMP, aggregate) for additional resiliency.

High Availability Cluster User Guide
14Copyright © 2015 Nexenta Systems, ALL RIGHTS RESERVED
www.nexenta.com
Modifying Heartbeat Properties
When you define a cluster, you define the heartbeat properties. However, you can modify them later, if needed.
To change heartbeat properties, using NMV:
1. Click Settings > HA Cluster.
2. In Cluster Settings, click Heartbeats.
Adding device heartbeats
1. Click the Volume Heartbeats tab.
2. Right click on a disk and select a vdev.
3. Click Save Settings.
Adding network heartbeats
1. Click the Appliance Heartbeats tab.
2. Right click on Network heartbeats and select Add a network heartbeat.
3. In the Create network heartbeat dialog, type the IP address or a hostname available on a remote NexentaStor appliance.
4. Optionally, click Test.
5. Click OK.
6. Click Save Settings.
To change heartbeat properties, using NMC:
1. Type:
nmc:/$ setup group rsf-cluster <cluster_name> hb_properties
System response:
• Enable inter-appliance heartbeat through primary interfaces?: Yes | No
2. Follow the on-screen instructions.
Note: A NexentaStor node can only be a member of one HA Cluster.
Note:You can click the Recommend Disk Layout button to automatically create the heartbeat configuration.

15Copyright © 2015 Nexenta Systems, ALL RIGHTS RESERVEDwww.nexenta.com
4Configuring Storage Failover
This section includes the following topics:
• About Configuring Storage Failover
• Cluster Configuration Data
• Mapping Information
• NFS/CIFS Failover
• Configuring iSCSI Targets for Failover
• Configuring Fibre Channel Targets for Failover
About Configuring Storage Failover
HA Cluster detects storage system failures, and then transfers ownership of shared volumes to the alternate NexentaStor appliance. HA Cluster ensures service continuity in the presence of service level exceptional events, including power outage, appliance running out of memory, or crashing, etc.
HA Cluster failover does not repair disk failures. Therefore, if one or more disks in the shared volume are unreachable, you cannot repair them using failover. Moreover, HA Cluster does not detect disk and volume failures. If you execute failover for a degraded volume, the failover operation may take long time or hang the system. Therefore, Nexenta recommends that you always verify that shared volume is in healthy state, before executing failover.
Cluster Configuration Data
When you configure SCSI targets for either FC or iSCSI in a cluster environment, make sure that you are consistent with configurations and mappings across the cluster members. HA Cluster automatically propagates all SCSI Target operations. However, if the alternate node is not available or not configured at the time of the configuration change, problems can occur. By default, the operation results in a warning that the remote update failed.
Execute all FC and iSCSI configuration changes after you place the volume under cluster control. Otherwise, the changes will not be reflected on the other node.
You can also set HA Cluster to synchronous mode. In this case, the action fails completely if the remote update fails.

High Availability Cluster User Guide
16Copyright © 2015 Nexenta Systems, ALL RIGHTS RESERVED
www.nexenta.com
To set the synchronous mode, using NMC:
1. Type:
nmc:/$ setup appliance nms property rsf_config_update_synchronous
System response:
View or modify NMS property ‘rsf_config_update_synchronous'. RSF-1 Appliance configuration update mode. 1 - Strict Synchronous update across the cluster, 0 - Asynchronous update, if synchronous update fails. Navigate with arrow keys (or hjkl), or Ctrl-C to exit.
2. Select an appropriate value:
• 1 — Strict Synchronous update across the cluster
• 0 — Asynchronous if synchronous update fails.
To protect local configuration information that did not migrate, periodically save this configuration to a remote site (perhaps the alternate node) and then use NMC commands to restore it in the event of a failover.
The restore command restores previously saved configuration data that includes:
• Target groups
• Host groups (stmf.config)
• Targets
• Initiators
• Target portal groups (iscsi.conf)
Mapping Information
Use SCSI Target to map zvols from the cluster nodes to client systems. It is critical that the cluster nodes contain the same mapping information. Mapping information is specific to the volume and is stored with the volume itself.
The cluster software attempts to keep the HA configuration in sync between the nodes. In certain situations, such as making SCSI Target changes with one of the two cluster nodes offline, the configuration may become out-of-sync. An out-of-sync configuration takes longer to fail over and in some cases may require administrator’s actions to resolve.
NFS/CIFS Failover
You can use HA Cluster to ensure the availability of NFS shares to users. However, note that HA Cluster does not detect the failure of the NFS server software.
NFS/CIFS settings are volume-level properties that migrate between nodes automatically upon failover. However, settings such as idmap may need to be defined on both nodes
HA Cluster does not detect CIFS server failures.

Copyright © 2015 Nexenta Systems, ALL RIGHTS RESERVEDwww.nexenta.com 17
High Availability Cluster User Guide
Configuring iSCSI Targets for Failover
You can use HA Cluster to failover iSCSI volumes from one cluster node to another. The target IQN moves as part of the failover.
Setting up iSCSI failover involves setting up a zvol in the shared volume.
If you create iSCSI zvols before marking the zvol’s volume as a shared cluster volume, then when you share the cluster volume as an active iSCSI session it may experience some delays. Depending on the network, application environment and active workload, you may also see command level failures or disconnects during this period.
When you add a shared volume to a cluster which has zvols as back up storage for iSCSI targets, it is vital that you configure all client iSCSI initiators, regardless of the operating system, to access those targets using the shared logical hostname. The shared logical hostname is specified when the volume service was created, and is not the real hostname associated with one of the appliances.
The cluster manages all aspects of the shared logical hostname configuration. Therefore, do not configure the shared logical hostname manually. Furthermore, unless the shared volume service is running, the shared logical hostname is not present on the network, however, you can verify it with the ICMP ping command.
To configure iSCSI targets on the active appliance, using NMV:
1. Click Data Management > SCSI Target.
2. In the zvols panel, click create.
3. Make the virtual block device > 200MB.
HAC automatically migrates the newly created zvol to the other appliance on failover. Therefore, you do not have to duplicate it manually.
4. From the iSCSI pane, click iSCSI > Target Portal Groups and define a target portal group.
HAC automatically replicates the newly created target portal group to the other appliance.
To create an iSCSI target and add it to the target portal group, using NMV:
1. Click iSCSI > Targets.
This limits zvol visibility from client initiators to the target portal group. The newly created iSCSI target is automatically replicated to the other appliance.
2. Type a name and an alias.
The newly created iSCSI target displays in the Targets page.
Note:You perform the process of creating a zvol and sharing it through iSCSI separately from the HA Cluster configuration.
Note:It is critical that the IPv4 portal address is the shared logical hostname specified when the volume service was created, instead of a real hostname associated with one of the appliances.

High Availability Cluster User Guide
18Copyright © 2015 Nexenta Systems, ALL RIGHTS RESERVED
www.nexenta.com
To create a LUN mapping to the zvol, using NMV:
1. From the SCSI Target pane, click Mappings.
This creates a LUN mapping to the zvol for use as backup storage for the iSCSI target. The newly created LUN mapping is automatically migrated to the other appliance on failover.
2. On the client, configure the iSCSI initiator to use both the IQN of the iSCSI target created and the shared logical hostname associated with both the volume service and the target portal group to access the zvol through iSCSI.
Failover time varies depending on the environment. As an example, initiating failover for a pool containing six zvols, the observed failover time is 32 seconds. Nodes may stall while the failover occurs, but otherwise recover quickly.
See Also:
• “Managing SCSI Targets” in the NexentaStor User Guide
• SCSI Target FC User Guide
Configuring Fibre Channel Targets for Failover
To configure the fiber channel targets for HA Cluster failover, you must complete the following tasks:
• Setting the HA Cluster to ALUA Mode
• Changing the HBA Port Mode
• Creating a Target Group
• Adding WWNs to an Initiator Group
• Creating a Zvol
• Mapping a Zvol
Setting the HA Cluster to ALUA Mode
The FC target is tied to the WWN. WWN is hardware based and since each FC HBA has a different HW WWN, it cannot be fallen over. When you enable the Asymmetric Logical Unit Access (ALUA) mode, NexentaStor nodes can communicate the FC ports on the second node with the first.
Therefore, COMSTAR presents the exported LUNs on the second node in STANDBY state. This would be similar to having the same LUN presented via two different IP addresses for iSCSI. Normal running mode is to have the first head doing the FC work with the FC port with the LUNS in ACTIVE mode, and the second NexentaStor node would have the same LUNs in STANDBY mode. In case of a failover, the ACTIVE port becomes STANDBY and the STANDBY becomes ACTIVE.
Warning: Before you configure ALUA, verify that you do not have iSCSI targets configured on both HA Cluster nodes.

Copyright © 2015 Nexenta Systems, ALL RIGHTS RESERVEDwww.nexenta.com 19
High Availability Cluster User Guide
To set the HA Cluster to ALUA mode:
1. Log in to an HA Cluster node.
2. Click Settings > HA Cluster.
3. Select Advanced > GLobal Cluster Properties.
4. Select the Enable ALUA mode checkbox.
See Also:
• Adding WWNs to an Initiator Group
• Creating a Zvol
• Creating a Target Group
Changing the HBA Port Mode
As a prerequisite for configuring Fibre Channel targets, change the HBA port modes of both appliances from Initiator mode to Target mode.
To change the HBA port mode, using NMV:
1. Click Data Management > SCSI Target Plus
2. Select Fibre Channel > Ports.
3. Select Target from the Mode dropdown menu.
4. Once you change the HBA port modes of both appliances from Initiator mode to Target mode, reboot both appliances so the Target mode changes can take effect.
See Also:
• Creating a Target Group
• Setting the HA Cluster to ALUA Mode
• Creating a Zvol
Creating a Target Group
To use ALUA, create an FC target using the desired FC ports from both nodes. Failure to create a target group with FC ports from both nodes may result in the inability of a SCSI client to maintain access to the storage upon a failover event.
Target FC ports are identified as:
• Local
An FC port that resides on the node that you are configuring.
• Remote
An FC port that resides on the second node in the same cluster.
To ensure proper failover, a Target Group must have at least one local and one remote port defined within it.

High Availability Cluster User Guide
20Copyright © 2015 Nexenta Systems, ALL RIGHTS RESERVED
www.nexenta.com
To create a target group, using NMV:
1. Click Data Management > SCSI Target Plus.
2. In the SCSI Target panel, click Target groups.
3. Click Create or here.
4. In the Group Name field, type the name of the target group.
5. Select at least one local and one remote FC ports.
See Also:
• Adding WWNs to an Initiator Group
• Creating a Zvol
• Mapping a Zvol
Adding WWNs to an Initiator Group
You must configure an initiator group for each SCSI client, or group of clients. Depending on the configuration of your SAN, some SCSI client initiators may not be visible on some nodes. Therefore, you may need to manually add the client initiator information for initiators that are not visible to the node that you are working on. Alternatively, you can create an initiator group on one node and assign initiators that are visible to that node. After which, you need to modify the initiator group from the other node by adding initiators visible from that second node.
To create an initiator group, using NMV:
1. Log in to an HA Cluster node.
1. Click Data Management > SCSI Target.
2. In the SCSI Target panel, click Initiator Groups.
3. In the Manage Groups of Remote Initiators window, click here.

Copyright © 2015 Nexenta Systems, ALL RIGHTS RESERVEDwww.nexenta.com 21
High Availability Cluster User Guide
4. In the Create New Initiator Group window:
5. In the field Group Name, specify a custom group name
6. In the Additional Initiators field, type the WWNs of additional initiators not visible to this node, separated by comma.
7. Click Create.
See Also:
• Creating a Zvol
• Mapping a Zvol
• Creating a Target Group
Creating a Zvol
Create a zvol using the required FC LUNs.
To create a zvol, using NMV:
1. Click Data Management > SCSI Target.
2. In the ZVOLS panel, click Create.
3. In the Create a New ZVOL window, fill in the required fields and click Create.
4. Proceed to Mapping a Zvol.
For more information, see NexentaStor User Guide.
See Also:
• Mapping a Zvol
• Adding WWNs to an Initiator Group
• Creating a Target Group
Mapping a Zvol
To ensure LUN visibility and failover capability, map the zvol that you created using the FC LUNs to appropriate initiator and target groups.
To map a zvol:
1. Click Data Management > SCSI Target.
2. In the ZVOLS panel, click Mapping.
Note:If you do not have target or initiator groups, you can Share the zvol. If you share a zvol, it is visible to all network clients.

High Availability Cluster User Guide
22Copyright © 2015 Nexenta Systems, ALL RIGHTS RESERVED
www.nexenta.com
3. In the Manage Mappings window, click here.
4. In the Create New Mapping dialog, fill the required fields.
5. Click Create.
See Also:
• Creating a Zvol
• Creating a Target Group
• Adding WWNs to an Initiator Group

23Copyright © 2015 Nexenta Systems, ALL RIGHTS RESERVEDwww.nexenta.com
5Advanced Setup
This section includes the following topics:
• About Advanced Setup
• Setting Failover Mode
• Adding a Virtual IP Address and Hostname
• Managing Additional Volumes
• Managing Global Cluster Properties
• About Auto-Sync Replication in the HA Cluster Environment
• Creating an Auto-Sync Service in the HA Cluster Environment
• Establishing the SSH-binding for an Auto-Sync Service
• Binding a NexentaStor Appliance to a Virtual IP Address
About Advanced Setup
This section describes advanced functions of HA Cluster, such as setting the failover mode, adding virtual hostnames and volumes, and other miscellaneous options.
Setting Failover Mode
The failover mode defines whether or not an appliance attempts to start a service when it is not running. There are separate failover mode settings for each appliance that can run a service.
You can set the failover to the following modes:
• Setting Manual Failover Mode
• Setting Automatic Failover Mode
Note:To avoid unwanted failover events, set failover mode to manual every time you perform any maintenance.

High Availability Cluster User Guide
24Copyright © 2015 Nexenta Systems, ALL RIGHTS RESERVED
www.nexenta.com
Setting Manual Failover Mode
In manual mode, the HA Cluster service does not initiate the failover when it detects a failure. However, it generates warnings when the parallel appliance is not available. If the appliance cannot obtain a definitive answer about the state of the service, or the service is not running anywhere else, the appropriate timeout must expire before you can take any action. To ensure that an appliance starts its primary service(s) on boot up, the primary service failover modes are typically set to automatic.
To set the failover mode to manual, using NMV:
1. Click Advanced Setup > Cluster Operations > Set all Manual.
2. Click Yes to confirm.
To set the failover mode to manual, using NMC:
Type:
nmc:/$ setup group rsf-cluster <cluster_name> shared-volume <volume_name> manual
Setting Automatic Failover Mode
In automatic mode, the appliance attempts to start the service when it detects that there is no available parallel appliance running in the cluster. Automatic failover mode is the default setting.
To set the failover mode to automatic, using NMV:
1. Click Advanced Setup > Cluster Operations > Set all Automatic
2. Click Yes to confirm.
To set the failover mode to automatic, using NMC:
Type:
nmc:/$ setup group rsf-cluster <cluster_name> shared-volume <volume_name> automatic
To stop all services in the Cluster, using NMV:
1. Click Stop All Services.
2. Click Yes to confirm.
Note:Setting a service to manual mode when the service is already running does not stop that service, it only prevents the service from starting on that appliance.
Note:Before HAC performs an operation, it saves the state of the services in the cluster, which you can later re-apply to the cluster using the restore button. Once HA Cluster restores the service state, it clears the saved state.

Copyright © 2015 Nexenta Systems, ALL RIGHTS RESERVEDwww.nexenta.com
High Availability Cluster User Guide
25
Adding a Virtual IP Address and Hostname
You can add a VIP, or shared hostname, when you create an HA Cluster. You can also add additional VIPs later. Additional VIPs provide the access to a shared volume using an additional IP address.
To add a virtual IP address, using NMV:
1. In the Cluster Settings panel, click Advanced.
2. Click Additional Virtual Hostnames.
3. Select a shared volume from the drop-down list.
4. Click Add a new virtual hostname.
5. Select an interface for each node.
6. Click Add.
7. If prompted, type the IP address of the failover node, then click Add.
8. Click Save Settings.
9. Click OK to confirm the modifications.
To add a virtual IP address, using NMC:
1. Type:
nmc:/$ setup group rsf-cluster <HA Cluster> vips add
2. Select the HA Cluster service.
3. Type a virtual hostname.
4. If you type the IP address or hostname, that one or more HA Cluster nodes cannot resolve, NexentaStor prompts you to modify the local host tables.
• If you want to modify the local host tables:
1.Type y.
2.Type the IP address and host name.
• Alternatively, you can configure the DNS server settings.
1.Type n.
2.Log in to your DNS server and add the host name and IP address pair to the DNS settings.
3.Repeat Step 1 — Step 3 and Step 5 — Step 10.
5. Select a network interface for this node.
Note:
Type the IP address that is not in use and that is accessible from both nodes of the HA Cluster. You can add the hostname and IP address pair to the NexentaStor host tables.See Modifying the Default Netmasks.

Copyright © 2015 Nexenta Systems, ALL RIGHTS RESERVEDwww.nexenta.com
High Availability Cluster User Guide
26
Nexenta recommends that you configure additional network interfaces rather than specifying the primary network interface.
6. Select network interface for the remote node.
7. Type the failover netmask.
8. Confirm the settings by typing y.
System response:
Stop adding VIPs? (y/n)
9. Type y to finish adding VIPs.
10. Alternatively, type n to add more VIPs and repeat Step 1 — Step 9.
Managing Additional Volumes
When you configure an HA Cluster, you usually add a shared volume to the cluster service. Later you can add additional volumes, or remove existing volumes to/from the cluster service.
To add ore remove volumes to a cluster service:
1. In the Cluster Settings panel, click Advanced.
2. Click Additional Volumes.
3. Select a shared volume from the drop-down list.
4. Add or remove a volume from the cluster service.
• If you want to add a volume to the cluster service, drag the volume from the left panel and drop in the right panel.
• If you want to remove a volume from the cluster service, drag the volume from the right panel and drop in the left panel.
5. Click Save Settings.
Managing Global Cluster Properties
You can manage the global cluster properties from the Advanced tab in NMV, and add an advanced level of control for fine-tuning the HA cluster.
To manage global cluster properties using NMV:
1. Click Settings > HA Cluster.
2. Select the Advanced > Global Cluster Properties tab.
3. Modify the properties as required

Copyright © 2015 Nexenta Systems, ALL RIGHTS RESERVEDwww.nexenta.com
High Availability Cluster User Guide
27
.
Table 5-1: Global Cluster Properties
Property Description
Comstar support Enable failover support for the iSCSI targets on a per pool basis.
Use ZFS cache file on pool import Configure ZFS cache for all pools in the cluster. This saves a cache of information about the pool and the devices it is found on. This enables rapid importing of a pool without scanning all of the devices on your system.By default, the option is set to on, the recommended setting.
Event notification Enable the cluster event notification
Force iSCSI group creation Forces iSCSI view creation using the Group All function, if an iSCSI view refers to a group that is not found on the node to which the volume is failing over.
Enable ALUA mode Makes a SCSI target available from both nodes, even though it is physically present on only one node. The target with the node is considered active. The other node is considered passive.When used in conjunction with client side multi-pathing, ALUA ensures target rescanning is not required on failover. It also ensures that the path to the standby node is valid even when not in use (because the multi-path client continuously checks the state of the standby node and the path to the standby target).
HA Plugin javascript debugging Enables or disables javascript debugging for HA Cluster. This property is used for getting and analyzing support information. Internet Explorer is not supported.
Failover State is sticky If enabled, during failover the failover mode is transferred to the alternate node. If disabled, the failover mode is not transferred. High Availability Cluster has the following failover modes: • Automatic• Manual

Copyright © 2015 Nexenta Systems, ALL RIGHTS RESERVEDwww.nexenta.com
High Availability Cluster User Guide
28
About Auto-Sync Replication in the HA Cluster Environment
NexentaStor supports Auto-Sync replication to and from an HA Cluster.
You can configure Auto-Sync replication for the following:
• From a volume under the HA Cluster control to a volume on a standalone NexentaStor appliance.
• From a volume on a standalone NexentaStor appliance to a volume under the HA Cluster control.
• From a volume under the HA Cluster control to another volume under an HA Cluster control.
If you configure an Auto-Sync service in the HA Cluster environment, configure the following:
• Create ssh-bindings between the non-HA NexentaStor appliance and each of the HA Cluster node using hostnames.
If you create an Auto-Sync service that replicates from an HA volume to another HA volume, all nodes must be bind to each other.
• Bind the non-HA appliance to the virtual address (VIP) of the HA Cluster group.
In case of the HA volume to the HA volume replication, create bindings for VIPs on every node.
When one of the HA nodes is unavailable, the shared volume service fails over to the healthy node and remains available through VIP. Therefore, Auto-Sync does not interrupt replication.
If you bind to the IP address or host name of an HA node and the node goes down, the shared volume becomes unavailable. Therefore, the Auto-Sync replication interrupts.
• When you create an Auto-Sync service, select a dataset located on the shared-volume or the whole shared volume as destination.
When you bind an appliance through VIP, you must select a shared volume as destination. Local volumes are not available through VIP.
Note:You must add IP address/hostname pairs for all nodes in the /etc/hosts file on every node.
Note:
When you create an Auto-Sync service to establish a replication schedule to and from clustered appliances, management components are stored on the appliance on which you create the service. Therefore, if you want to create a replication schedule from primary to secondary node, you may want to create the service in a backwards manner. First you create an Auto-Sync schedule from secondary to primary node. Then, you reverse the direction of replication using the flip-direction command. In that case, management components are stored on the secondary node. This will significantly simplify recovery operations in case of a failure on primary node. Using the reverse-service command to change the direction of replication in HA Cluster configurations is not supported.
Copyright © 2015 Nexenta Systems, ALL RIGHTS RESERVEDwww.nexenta.com
High Availability Cluster User Guide
29
Creating an Auto-Sync Service in the HA Cluster Environment
Make sure that you configured your appliance as described in About Auto-Sync Replication in the HA Cluster Environment.
To create an Auto-Sync service in the HA Cluster environment:
1. Bind the non-HA NexentaStor appliance to both nodes of the HA Cluster using the Regular SSH binding option.
See Establishing the SSH-binding for an Auto-Sync Service.
2. Bind the non-HA appliance to the VIP using the VIP SSH binding option.
See Binding a NexentaStor Appliance to a Virtual IP Address.
3. Create an Auto-Sync service specifying the shared-volume as destination.
See Auto-Sync User Guide, Section Creating an Auto-Sync Service Instance.
Establishing the SSH-binding for an Auto-Sync Service
SSH-binding, aka SSH Public Key Based Authentication, is an easy way to make two High Availability Cluster appliances communicate through secure connection. When you create an ssh-binding the public key from the remote HA Cluster appliance is written to the authorized key file on the local appliance.
You need to create the ssh-biding for the following:
• Local-to-remote replication
• Remote-to-local Auto-Sync replication
• Replication between HA Cluster appliance and the HA Cluster group
If you create the SSH-binding to replicate data from or to an HA Cluster group, see Creating an Auto-Sync Service in the HA Cluster Environment.
To establish the SSH-binding for Auto-Sync service, using NMV:
1. Click Settings > Network.
2. In the Network panel, click SSH-Bind.
3. In the Binding type field, select Regular.
4. In the Remote Server field, type the IP address of the remote High Availability Cluster appliance.
5. In the Remote User field, type the name of the user with root credentials.
Note:
For disaster recovery to and from HA Cluster configurations, set up remote-to-local (R2L) Auto-Sync service on the NexentaStor appliance(s) that is planned to be used as a disaster recovery site. Use the flip-direction command to replicate data from disaster recovery site to primary site.

Copyright © 2015 Nexenta Systems, ALL RIGHTS RESERVEDwww.nexenta.com
High Availability Cluster User Guide
30
6. Type the remote super user password.
7. Optionally, select the Bidirectionally checkbox.
8. Click Bind.
The new SSH-binding displays in the Summary Network Settings window, in the SSH Bound Hosts list.
To establish an SSH-binding for Auto-Sync service, using NMC:
1. Type:
nmc:/$ setup network ssh-bind
2. Type the IP address or host name of a remote HA Cluster appliance.
3. Type the remote appliance Super User password.
4. Repeat Step 1 - Step 3 on the remote node.
Binding a NexentaStor Appliance to a Virtual IP Address
Before you begin the task described in this section, successfully complete the following tasks described in About Auto-Sync Replication in the HA Cluster Environment and Creating an Auto-Sync Service in the HA Cluster Environment.
To bind a NexentaStor appliance to a virtual IP address:
1. Click Settings > Network.
2. In the Network panel, click SSH-Bind.
3. In the Binding type field, select VIP.
4. Select a virtual IP address.
5. Click Bind.
Note:If ssh-binding fails, you can manually configure the /etc/hosts/ file, which contains the Internet host table. Type setup appliance hosts to access the file.)
Note:You must first bind this NexentaStor appliance to each node of the HA Cluster as described in About Auto-Sync Replication in the HA Cluster Environment.

31Copyright © 2015 Nexenta Systems, ALL RIGHTS RESERVEDwww.nexenta.com
6System Operations
This section includes the following topics:
• About System Operations
• Viewing the HA Cluster Status
• Viewing the HA Cluster Status
• Manually Triggering a Failover
• Verifying Shared Volume Status
• Viewing Support Logs
• Operations with a Shared Volume
About System Operations
There are a variety of commands and GUI screens to help you with daily cluster operations. There is a set of cluster-specific commands to supplement NMC.
Viewing the HA Cluster Status
You can view the status of the HA Cluster and heartbeats at any time.
To view the HA Cluster configuration, using NMV:
1. In the Cluster Settings panel, click Status.
2. Click the tabs to view Cluster Status and Heartbeat Status.
To view the HA Cluster configuration, using NMC:
1. Type:
nmc:/$ show group rsf-cluster <cluster_name>
Example:
nmc:/$ show group rsf-cluster HA-Cluster
System response:
PROPERTY VALUEname : HA-Clusterappliances : [NodeA NodeB]machinesigs : {"NodeA":"XXXXXXXXXX","NodeB":"YYYYYYYYYY"}hbipifs : NodeA:NodeB: NodeB:NodeA:netmon : 1

High Availability Cluster User Guide
32Copyright © 2015 Nexenta Systems, ALL RIGHTS RESERVED
www.nexenta.com
info : Nexenta HA-Clustergeneration : 1refresh_timestamp : 1375745271.30001type : rsf-clustercreation : Jan 8 22:34:50 2014
SHARED VOLUME: ha-volsvc-ha-vol-shared-vol-name : ha-volsvc-ha-vol-ipdevs : ha-vol NodeA:e1000g0 NodeB:e1000g0svc-ha-vol-ipdevs-IPv6 :svc-ha-vol-attached-vols :svc-ha-vol-main-node : NodeAsvc-ha-vol-inittimeout : 20svc-ha-vol-runtimeout : 8svc-ha-vol-mhdc-disable : nsvc-ha-vol-monitor : {"NodeA":{"monitor":"","ipdevs":{"e1000g0":""}},"NodeB":{"monitor":"","ipdevs":{"e1000g0":""}}}svc-ha-vol-resdisks : NodeA:c1t3d0 NodeB:c1t1d0
HA CLUSTER STATUS: HA-ClusterNodeA:ha-vol running auto unblocked ha-vol e1000g0 20 8NodeB: ha-vol stopped auto unblocked ha-vol e1000g0 20 8
Manually Triggering a Failover
You can manually trigger a failover between systems when needed. Performing a failover from the current appliance to the specified appliance causes the volume sharing service to stop on the current appliance, and the opposite actions take place on the passive appliance. Additionally, the volume exports to the other node.
To manually trigger a failover, using NMC:
1. Verify that shared volume is in healthy state by typing:
nmc:/$ zpool status <shared-volume>
Example:
pool: <shared-volume> state: ONLINE scan: none requestedconfig:
NAME STATE READ WRITE CKSUM <shared-volume> ONLINE 0 0 0 mirror-0 ONLINE 0 0 0 c1t8d0 ONLINE 0 0 0 c1t5d0 ONLINE 0 0 0 mirror-1 ONLINE 0 0 0
Note: You must first set all cluster operations to manual mode.

Copyright © 2015 Nexenta Systems, ALL RIGHTS RESERVEDwww.nexenta.com 33
High Availability Cluster User Guide
c1t9d0 ONLINE 0 0 0 c1t6d0 ONLINE 0 0 0
errors: No known data errors
2. Type:
nmc:/$ setup group rsf-cluster <cluster_name> failover
Verifying Shared Volume Status
Verify the status on the shared volume service using NMV or NMC.
To view the status of a shared volume using NMV, in the Cluster Settings panel, click Status.
To view the status of a shared volume, using NMC:
Type:
nmc:/$ show group rsf-cluster
System response:
HA CLUSTER STATUS: HA-ClusternodeA: vol1-114 stopped manual unblocked 10.3.60.134 e1000g0 20 8nodeB: vol1-114 running auto unblocked 10.3.60.134 e1000g0 20 8
Viewing Support Logs
Gather the information about HA Cluster events or errors from the HA Cluster log file.
To view support logs, using NMV:
Click View Log.
Warning:If any disk drive from the shared volume is in state DEGRADED, you must replace the faulted drive(s) before executing failover. Otherwise, failover may take long time, or your system may freeze.
Copyright © 2015 Nexenta Systems, ALL RIGHTS RESERVEDwww.nexenta.com
High Availability Cluster User Guide
34
To view support logs, using NMC:
Type:
nmc:/$ show group rsf-cluster <cluster name> log
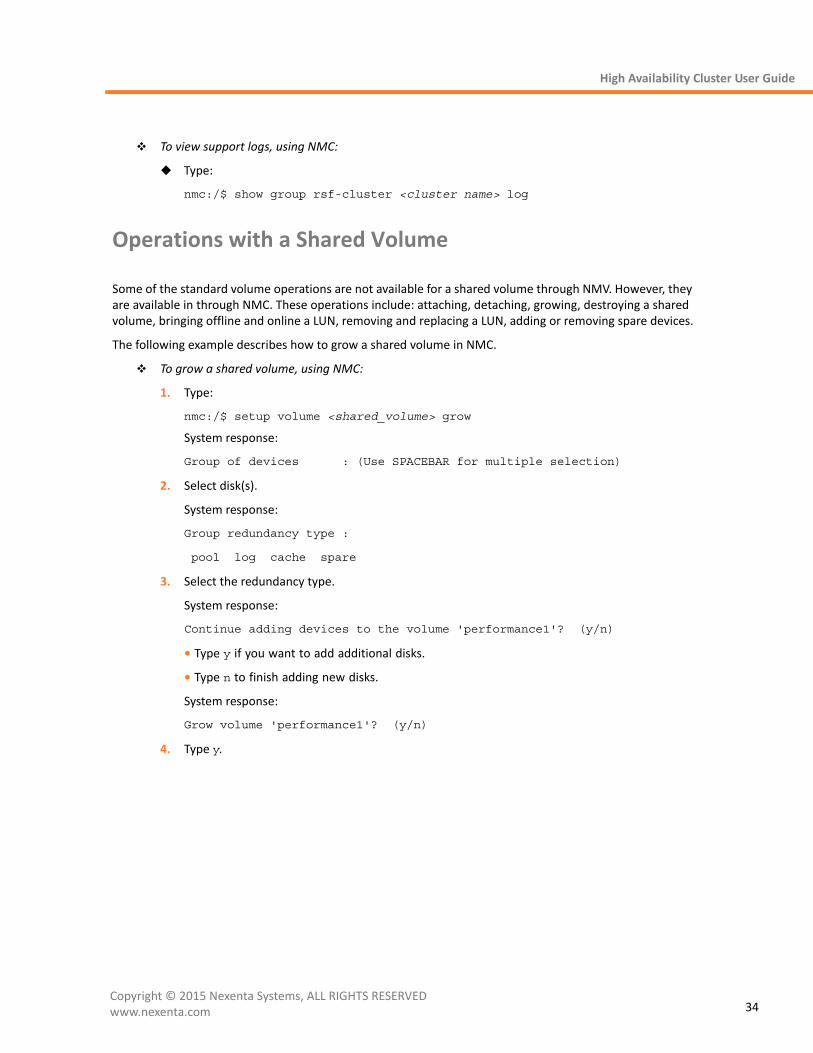
Operations with a Shared Volume
Some of the standard volume operations are not available for a shared volume through NMV. However, they are available in through NMC. These operations include: attaching, detaching, growing, destroying a shared volume, bringing offline and online a LUN, removing and replacing a LUN, adding or removing spare devices.
The following example describes how to grow a shared volume in NMC.
To grow a shared volume, using NMC:
1. Type:
nmc:/$ setup volume <shared_volume> grow
System response:
Group of devices : (Use SPACEBAR for multiple selection)
2. Select disk(s).
System response:
Group redundancy type :
pool log cache spare
3. Select the redundancy type.
System response:
Continue adding devices to the volume 'performance1'? (y/n)
• Type y if you want to add additional disks.
• Type n to finish adding new disks.
System response:
Grow volume 'performance1'? (y/n)
4. Type y.

35Copyright © 2015 Nexenta Systems, ALL RIGHTS RESERVEDwww.nexenta.com
7Upgrading HA Cluster
This section includes the following topics:
• About Upgrading HA Cluster
• About SAS SSD Firmware Upgrade
• Overview of the Upgrade Process
• Verifying the Status of a Shared Volume(s)
• Failing Over the Shared Volume(s)
• Upgrading High Availability Cluster from Version 3.1.x to 4.0.4
About Upgrading HA Cluster
Use the procedure described in this chapter to upgrade the HA Cluster.
Nexenta recommends that you schedule the upgrade for a maintenance period.
For instructions on how to upgrade NexentaStor 3.1.x to 4.0.4, see: Upgrading High Availability Cluster from Version 3.1.x to 4.0.4.
See Also:
• Sample Network Architecture
About SAS SSD Firmware Upgrade
If you use STEC ZeusRAM™ SAS SSDs, you must upgrade their firmware to version C023 before upgrading NexentaStor to 3.1.6 and later to version 4.x. You need to use the sTec Device Manager (SDM) tool kit version sdmcmd-2.0.0.134-b002 for the upgrade.
For more information, contact sTec.
High Availability Cluster User Guide
36Copyright © 2015 Nexenta Systems, ALL RIGHTS RESERVED
www.nexenta.com
Overview of the Upgrade Process
The list below describes the upgrade process. A detailed description of how to do the tasks follows this section.
1. Verify that all shared volumes are in healthy state.
See Verifying the Status of a Shared Volume(s).
2. Upgrade the NexentaStor node on which shared volumes are exported.
• About Upgrading HA Cluster
Verifying the Status of a Shared Volume(s)
You must verify that all shared volumes are ONLINE before you start the upgrade. If one or more shared volume(s) are in state DEGRADED, the upgrade will fail.
To verify the state of a shared volume, using NMC:
1. Type:
nmc:/$ zpool status <shared-volume>
Example:
pool: <shared-volume> state: ONLINE scan: none requestedconfig:
NAME STATE READ WRITE CKSUM <shared-volume> ONLINE 0 0 0 mirror-0 ONLINE 0 0 0 c1t8d0 ONLINE 0 0 0 c1t5d0 ONLINE 0 0 0 mirror-1 ONLINE 0 0 0 c1t9d0 ONLINE 0 0 0 c1t6d0 ONLINE 0 0 0
errors: No known data errors
2. Replace disk drives with state DEGRADED, if any, with healthy disk drives.
See Also:
• About Upgrading HA Cluster
• About SAS SSD Firmware Upgrade
• NexentaStor Installation Guide

Copyright © 2015 Nexenta Systems, ALL RIGHTS RESERVEDwww.nexenta.com
High Availability Cluster User Guide
37
Failing Over the Shared Volume(s)
To protect the shared volume, you failover the shared volume to the node you are not upgrading. After upgrading the node and before upgrading the other node, you failover the shared volume back to the newly upgraded node.
To failover the active node to the passive node:
1. To set the failover mode to manual, type:
nmc:/$ setup group rsf-cluster <cluster_name> shared-volume <volume_name> manual
2. Type Y to confirm mode change.
3. Log in to the active node and type the following to fail it over to the passive node:
nmc:/$ setup group rsf-cluster <cluster_name> <passive_node_name> failover
See Also:
• Verifying the Status of a Shared Volume(s)
• NexentaStor Installation Guide
Upgrading High Availability Cluster from Version 3.1.x to 4.0.4
The rolling upgrade procedure allows you to maintain datastore availability while working on a node in the cluster. However, an unforeseen issue may occur that may require a reboot or stopping the HA Cluster. To prevent user impact, execute the upgrade during a maintenance window.
Overview of the Rolling Upgrade Procedure
The rolling upgrade procedure includes the following steps:
1. Verify the health of the existing environment.
2. Move all volumes to primary node.
3. Set cluster operation to manual mode.
4. Upgrade secondary node to the latest 3.1.6 fix pack.
5. Fail over all shared volumes to secondary node.
6. Upgrade primary node to the latest 3.1.6 fix pack.
7. Verify the health of the cluster.
8. Upgrade secondary node to 4.0.4.

High Availability Cluster User Guide
38Copyright © 2015 Nexenta Systems, ALL RIGHTS RESERVED
www.nexenta.com
9. Move volumes from secondary to primary.
10. Upgrade primary node to 4.0.4.
11. Verify cluster status.
12. Set the High Availability Cluster failover mode to Automatic.
13. Move volumes back to normal operation.
Verifying the Status of the High Availability Cluster
Before starting the upgrade, verify that the HA Cluster functions correctly.
To verify the status of the High Availability Cluster:
1. Verify that all faults have been cleared:
nmc:/$ show faults
2. Verify that the nodes of HA Cluster can communicate
nmc:/$ show network ssh-binding
3. Save a copy of the cluster configuration:
nmc:/$ setup appliance configuration save
4. Copy system backup files to a safe location using scp.
The system backup files are stored in /volumes/.config.
5. Verify the status of Auto-Sync, Auto- Tier, and Auto-Snap jobs:
nmc:/$ show auto-sync
nmc:/$ show auto-snap
nmc:/$ show auto-tier
6. If any of the jobs are running, disable them:
nmc:/$ setup auto-sync disable
nmc:/$ setup auto-snap disable
nmc:/$ setup auto-tier disable
7. Set the HA Cluster mode to manual:
nmc:/$ setup group rsf-cluster <cluster-name> manual
Upgrading the Secondary Node
After you complete steps described in Verifying the Status of the High Availability Cluster, proceed to upgrading the HA Cluster nodes.
To upgrade the secondary node, using NMC:
1. Verify that no volumes are imported on this node:
nmc:/$ show volume

Copyright © 2015 Nexenta Systems, ALL RIGHTS RESERVEDwww.nexenta.com
High Availability Cluster User Guide
39
2. Failover all nodes to primary node:
nmc:/$ setup group rsf-cluster <cluster-name> failover
3. Update the repository sources:
nmc:/$ setup appliance repository
4. Type
:!wq
System response:
Re-read 'APT' service configuration?
5. Type y.
NexentaStor re-reads the repository sources configuration.
6. Disable Multi NMS:
nmc:/$ setup appliance nms property srvpool_cnt_intial 0
7. View the NexentaStor version:
nmc:/$ show appliance version
If the NexentaStor version number is 3.1.6, proceed to Step 9.
8. Upgrade to version 3.1.6:
nmc:/$ setup appliance upgrade -v
9. Upgrade to version 4.0.4:
nmc:/$ setup nexentastor upgrade
During the upgrade NexentaStor backs up the existing configuration, verifies the state of syspool, verifies whether any 3rd party software installed on the NexentaStor appliance, and upgrades to version 4.0.4.
Follow the interactive questions during the upgrade process, the final question will request to reboot.
10. When prompted, enable active checkpoint by typing: Yes.
11. Verify the NexentaStor version:
nmc:/$ show appliance version
12. Verify that the status of the HA Cluster node is available.
nmc:/$ show group rsf-cluster <cluster-name>
13. Set the failover mode to Manual:
nmc:/$ setup group rsf-cluster <cluster-name> manual
14. Failover the shared volume(s) from primary node to secondary node:
nmc:/$ setup group rsf-cluster <cluster-name> failover
15. Verify that shared volumes are imported on this node:
nmc:/$ show volume

High Availability Cluster User Guide
40Copyright © 2015 Nexenta Systems, ALL RIGHTS RESERVED
www.nexenta.com
16. Verify that clients can connect to the NexentaStor shared folders:
nmc:/$ show share
17. Proceed to Upgrading Primary Node.
Upgrading Primary Node
After you complete the steps described in Verifying the Status of the High Availability Cluster and Upgrading the Secondary Node, upgrade the primary node. Primary node is the HA Cluster node on which shared volume(s) was initially imported.
To upgrade the primary node, using NMC:
1. Log in to the upgraded secondary node.
2. Set that the failover mode on the secondary node to automatic.
3. Log in to primary node, using NMC.
4. Verify that all volumes are exported:
nmc:/$ show volume
5. Complete steps from Step 3 to Step 12 in Upgrading the Secondary Node on primary node.
6. Failover the shared volumes to the primary node.
7. Verify the NexentaStor version
nmc:/$ show appliance sysinfo
Completing the Post-Upgrade Procedures
After you upgrade both HA Cluster nodes you may need to perform post-upgrade procedures including:
• Upgrading NexentaStor Plugins
• Re-joining Microsoft Windows Active Directory
• Remounting a System Volume
Upgrading NexentaStor Plugins
If you need to upgrade other NexentaStor plugins, complete the steps described in this section on both HA Cluster nodes.
To upgrade NexentaStor plugins, using NMC:
1. Log in to bash:
nmc:/$ option expert_mode =1
nmc:/$ !bash

Copyright © 2015 Nexenta Systems, ALL RIGHTS RESERVEDwww.nexenta.com
High Availability Cluster User Guide
41
2. Type:
# apt-key update
# apt-get update
3. Upgrade the required plugins by typing:
# setup appliance upgrade
4. Repeat Step 1 to Step 3 on other node.
Re-joining Microsoft Windows Active Directory
During the upgrade, HA Cluster node may un-join the Microsoft Active Directory domain.
To re-join the Microsoft Windows Active Directory, using NMC:
1. Log in to one of the HA Cluster nodes.
2. Type.
nmc:/$ setup network service cifs-server join_ads
3. Log in to other HA Cluster node.
4. Repeat Step 2
Remounting a System Volume
If a system volume becomes unmounted during the upgrade, you must remount it. You may need to perform this procedure on both HA Cluster nodes.
To remount a system volume:
1. Verify that a system volume is mounted:
1. In NMV, click Settings > Appliance.
2. In the Upgrade Checkpoints pane, click View.
You should see the list of upgrade checkpoints.
3. If you do not see any upgrade checkpoints:
1) Log in to NMC.
2) Switch to bash.
nmc:/$ option expert_mode =1
nmc:/$ !bash
3) Type:
# mkdir /syspool
# mount -f zfs syspool /syspool

High Availability Cluster User Guide
42Copyright © 2015 Nexenta Systems, ALL RIGHTS RESERVED
www.nexenta.com
4) Open the /etc/vfstab file for editing:
# vi /etc/vfstab
5) To ensure syspool is mounted on every boot, add the following line:
syspool - /syspool zfs - yes -
Example:
#device device mount FS fsck mount mount#to mount to fsck point type pass at boot options
syspool - /syspool zfs - yes -
6) Save the changes:
:!wq
2. Repeat Step 1 on the other node, if needed.
Note: Use <TAB> to separate entries.
43Copyright © 2015 Nexenta Systems, ALL RIGHTS RESERVEDwww.nexenta.com
8Testing and Troubleshooting
This chapter includes the following topics:
• Repairing a Broken Cluster Service
• Replacing a Faulted Node
• Restoring a Faulted Node
• Fixing Slow Performance
Repairing a Broken Cluster Service
NexentaStor tracks various appliance components and their state. If and when failover occurs (or any service changes to a broken state), NexentaStor sends an email to the administrator describing the event.
You can execute the repair command for a cluster service. The repair command forces the import operation of a shared volume. Therefore, the shared volume must be exported on both nodes.
There are two broken states:
• Broken_Safe
A problem occurred while starting the service on the server, but it was stopped safely and you can run it elsewhere.
• Broken_Unsafe
A fatal problem occurred while starting or stopping the service on the server. The service cannot run on any other server in the cluster until it is repaired.
To repair a shared volume which is in broken state, using NMC:
1. Verify that volume is exported on both NexentaStor nodes by typing:
nmc:/$ zpool status
The output should not include the information about the shared volume.
2. Repeat Step 1 on other node.
3. Execute the volume repair operation:
nmc:/$ setup group rsf-cluster shared-volume repair <cluster_name> <volume_name>
Note:During the NexentaStor installation, you set up SMTP configuration and test so that you can receive emails from the appliance.
Warning:Manually verify and troubleshoot the volume before marking the state as repaired. Failure to do so could result in the cross-mounting of the volume that can lead to data corruption.

High Availability Cluster User Guide
44Copyright © 2015 Nexenta Systems, ALL RIGHTS RESERVED
www.nexenta.com
This initiates and runs the repair process.
Replacing a Faulted Node
NexentaStor provides a capability to restore a failed node in a NexentaStor, in case the state changes to out of service. There is no need to delete the cluster group on another node and reconfigure it and all of the cluster services.
To replace a faulted node, using NMC:
1. Set up the same configuration on a new hardware. Verify that the following components are identical on the old and new NexentaStor nodes:
• NexentaStor versions
You must use identical NexentaStor versions for both NexentaStor nodes.
• Network settings
• SSH bindings
• Heartbeats
2. Type:
nmc:/$ setup group rsf-cluster <group_name> replace_node
After executing the command, the system asks you to choose which node to exclude from the cluster and which new node to use instead. NexentaStor checks host parameters of the new node and if they match the requirements of the cluster group, the old one is replaced by a new one.
Restoring a Faulted Node
NexentaStor provides the setup group rsf-cluster <group_name> restore-node command that assists in repairing an NexentaStor node after software failure. You can use this command to repair the NexentaStor configuration if you had to reinstall or restore from a backup the NexentaStor and NexentaStor software on the same hardware. You cannot use this command if you reinstalled the software on new hardware.
To restore a faulted node:
1. Install the NexentaStor software on the faulted node.
See NexentaStor Installation Guide.
2. Alternatively, rollback NexentaStor to a previously saved checkpoint.
See NexentaStor Installation Guide, section Rolling Back to a Checkpoint.
3. Apply the NexentaStor license key if required.
See NexentaStor Installation Guide.
4. Install the NexentaStor plugin.
Copyright © 2015 Nexenta Systems, ALL RIGHTS RESERVEDwww.nexenta.com 45
High Availability Cluster User Guide
See NexentaStor Installation Guide, section Plugins.
5. Restore the SSH-binding configuration.
See Binding the Nodes using SSH
6. On the healthy NexentaStor node, run:
nmc:/$ setup group rsf-cluster <group-name> restore-node
7. Verify status of the NexentaStor on the NexentaStor Status page.
Fixing Slow Performance
Microsoft Windows 2008 R2 clients may experience slower performance on READ operations. Such conditions may occur in HA Cluster configurations where the primary node loses access to the shared dataset because of cable disconnect or GPIC failure. The result of backend HBA related issues causes the standby node to start accessing to the data.
Microsoft Windows 2008 R2 will continue to send READ commands to the faulted node which requires the READ operations to be proxied to the standby node, which after the fault is now the active node for the data set. The proxying of commands will increase the latency of the I/O operation by up to 4 times normal response time which will be seen as slow READ operations to the initiator.
You can fix this by making the READ requests return a SCSI check condition to the FC initiator when the READ operation is submitted to the faulted controller. Returning a check condition is not performed by default due to other FC clients. For example, VMWare ESXi that are unable to discover LUNs after an HA Cluster failover occurs if READ operations return a SCSI check condition.
To fix the slow performance issue:
1. Log in to bash on one node:
nmc:/$ option expert-mode =1nmc:/$ !bash
2. Open /etc/system for editing:
# vi /etc/system
3. Scroll down and add the following line:
set stmf_sbd:stmf_standby_fail_reads = 1
4. Save the changes:
# :wq
5. Reboot the node.
6. Repeat Step 1 to Step 5 on the other node.

This page intentionally left blank
46Copyright © 2015 Nexenta Systems, ALL RIGHTS RESERVED
www.nexenta.com
High Availability Cluster User Guide

3000-hac-4.0.4 FP1-000059-A
Global Headquarters451 El Camino Real, Suite 201Santa Clara, CA 95050USA
Copyright © 2015 Nexenta Systems, ALL RIGHTS RESERVEDwww.nexenta.com