hicom 300 optiset e standard optiset e advance / advance...
TRANSCRIPT

Hicom 300optiset E standardoptiset E advance / advance plusoptiset E memory
s

2

3
User Guide
Introduction .............................................................................................. 5
Executive / Secretary Features .............................................................. 7
Dial Executive / Dial Secretary ................................................................. 7
Answering Calls for Executive/s ............................................................... 8
Ring Transfer ............................................................................................ 9
Representative Secretary ....................................................................... 10
Voice Calling ........................................................................................... 11
Standard Features ................................................................................. 13
Internal and External Dialling ................................................................. 13
Dialling the Switchboard ......................................................................... 13
Call Transfer ........................................................................................... 14
Enquiry Call ............................................................................................ 15
Toggle Between Calls ............................................................................. 16
8 Way Conference .................................................................................. 17
Call Pickup ............................................................................................. 19
Second Call Camp-on ............................................................................ 20
Transfer a Second Caller ........................................................................ 21
Call Park ................................................................................................. 22
Call Back ................................................................................................ 23
External Line Reservation ...................................................................... 25

4
Call Diversion Features ........................................................................ 26
Fixed Call Forwarding ............................................................................. 26
Variable Call Forwarding ......................................................................... 28
PIN Features .......................................................................................... 29
Electronic Telephone Lock ...................................................................... 29
Mobile Class of Service .......................................................................... 30
Follow Me ............................................................................................... 31
Optional Features .................................................................................. 32
Speed Dialling via Programme Key ........................................................ 32
Individual Abbreviated Dialling ................................................................ 33
System Abbreviated Dialling ................................................................... 34
Stored Number Redial ............................................................................ 35
Timed Reminder ..................................................................................... 36
Night Service .......................................................................................... 37
Key Settings ........................................................................................... 38
optiset E Menu Functions ....................................................................... 40
optiset E memory .................................................................................... 42
Electronic Notebook ............................................................................... 43
User Guide - Cont’d
5
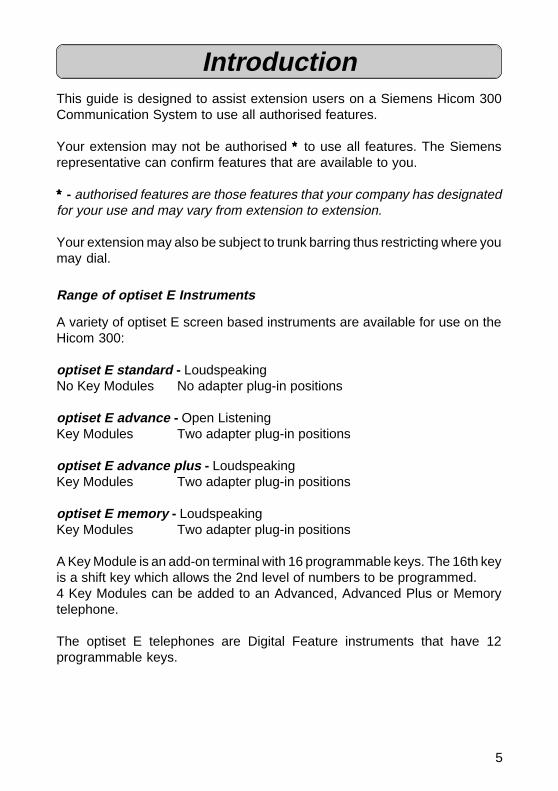
IntroductionThis guide is designed to assist extension users on a Siemens Hicom 300Communication System to use all authorised features.
Your extension may not be authorised ∗∗∗∗∗ to use all features. The Siemensrepresentative can confirm features that are available to you.
∗∗∗∗∗ - authorised features are those features that your company has designatedfor your use and may vary from extension to extension.
Your extension may also be subject to trunk barring thus restricting where youmay dial.
Range of optiset E Instruments
A variety of optiset E screen based instruments are available for use on theHicom 300:
optiset E standard - LoudspeakingNo Key Modules No adapter plug-in positions
optiset E advance - Open ListeningKey Modules Two adapter plug-in positions
optiset E advance plus - LoudspeakingKey Modules Two adapter plug-in positions
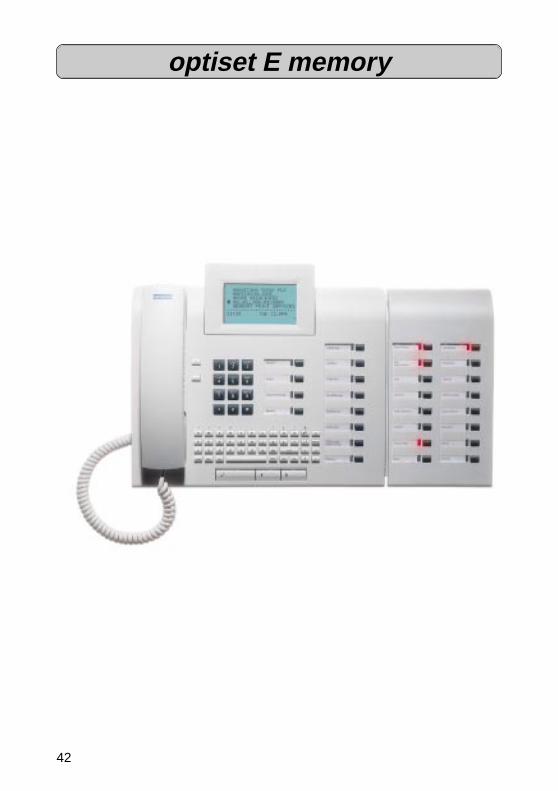
optiset E memory - LoudspeakingKey Modules Two adapter plug-in positions
A Key Module is an add-on terminal with 16 programmable keys. The 16th keyis a shift key which allows the 2nd level of numbers to be programmed.4 Key Modules can be added to an Advanced, Advanced Plus or Memorytelephone.
The optiset E telephones are Digital Feature instruments that have 12programmable keys.

6
Introduction - Cont’dThe telephones are easily recognised by three dialogue keys namely:
✔ Yes KeyForward Scroll KeyBackward Scroll Key
The Siemens optiset E Digital Feature telephones operate via a Menu-controlled User Guidance Display System.
The display will automatically offer you a choice of the available options mostsuited to the task you are about to carry out.
Glossary
LED - Light Emitting DiodeToggle - Alternating between callsDDS - Direct Destination Select (External number)DSS - Direct Station Select (Extension number with busy and ringing
indication)

7
Dial Executive / Dial SecretaryThe Dial Exec / Dial Sec keys have multiple functionsThese keys provide direct access to the executive or secretary without usingthe Transfer option.The LED indicates when the executive or secretary is busy on a call.
Transfer a Call to the Executive or Secretary.
- press Dial Executive / Dial Secretary key- announce call- replace handset
Dial Executive or Secretary
- press Dial Executive / Dial Secretary key
Exe
cutiv
e / S
ecre
tary
Fea
ture
s

8
Answering Calls for Executive/sWhen the secretary is FREE, calls for the executive/s will ring on thesecretary’s extension.
Answer Call for Executive/s when FREE
SOURCE OF CALLFOR EXEC 1/2/3/4
- lift handset or press Speaker key
Transfer the call
- press Dial Executive key- announce the call- replace handset or press Speaker key
When the secretary is BUSY, calls for her executive/s will flash on PickupExecutive key/s and a ping ring will warn her of holding call/s.
Answer Call for Executive when BUSY
- ask your current caller to hold on- press flashing Pickup Executive key
You are now connected to your executive’s call and your original call is on hold.
Transfer the Second Call
- press Dial Executive key- announce the call- scroll to Transfer option- press ✔✔✔✔✔ key to confirm Transfer option
Secretary is reconnected to first caller.

9
Ring TransferCalls for the executive can be forced from the secretary to the executive foranswering.This feature can be activated from either extension.
Activate Ring Transfer
- press Ring Transfer key- Ring Transfer LED is on
CALL TRANSFER TO EXECACTIVATED
Incoming calls for the executive which normally ring on the secretary’sextension will now be diverted to the executive’s extension.
Cancel Ring Transfer
- press Ring Transfer key- Ring Transfer LED goes off
CALL TRANSFER TO EXEC
deactivated

10
Representative SecretaryWhen a secretary is temporarily absent another digital telephone may benominated to receive the calls for the executive/s.Calls for the secretary will not be forwarded.
Programme Representative Secretary
- press Service Menu key- press Representative Secretary key- dial nominated person’s extension number- press ✔✔✔✔✔ key to confirm SAVE? option- Representative Secretary LED is on
Deactivate Representative Secretary
- press Representative Secretary key- Representative Secretary LED goes off
Reactivate Representative Secretary
- press Representative Secretary key- Representative Secretary LED is on
When the executive presses the Dial Secretary key, the call is routed to theRepresentative Secretary.
Change Representative Secretary destination
- press Service Menu key- press Representative Secretary key- press ✔✔✔✔✔ key to confirm New Entry? option- dial nominated person’s extension number- press ✔✔✔✔✔ key to confirm SAVE? option- Representative Secretary LED is on
11
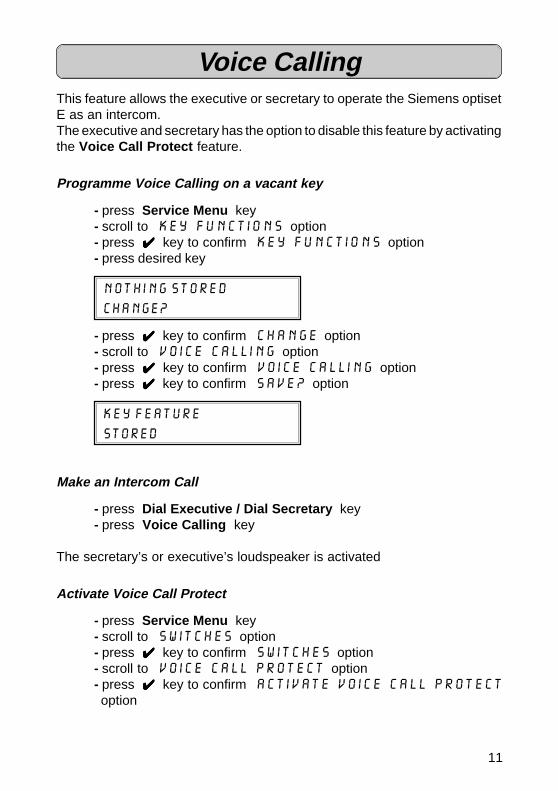
Voice CallingThis feature allows the executive or secretary to operate the Siemens optisetE as an intercom.The executive and secretary has the option to disable this feature by activatingthe Voice Call Protect feature.
Programme Voice Calling on a vacant key
- press Service Menu key- scroll to Key Functions option- press ✔✔✔✔✔ key to confirm Key Functions option- press desired key
NOTHING STOREDCHANGE?
- press ✔✔✔✔✔ key to confirm Change option- scroll to Voice Calling option- press ✔✔✔✔✔ key to confirm Voice Calling option- press ✔✔✔✔✔ key to confirm SAVE? option
KEY FEATURESTORED
Make an Intercom Call
- press Dial Executive / Dial Secretary key- press Voice Calling key
The secretary’s or executive’s loudspeaker is activated
Activate Voice Call Protect
- press Service Menu key- scroll to Switches option- press ✔✔✔✔✔ key to confirm Switches option- scroll to Voice Call Protect option- press ✔✔✔✔✔ key to confirm Activate Voice Call Protectoption

12
Voice Calling - Cont’dIf Voice Call Protect is activated on the extension to which you wish to makea Voice Call, the Voice Call key will not activate the loudspeaker
PROTECTED
13
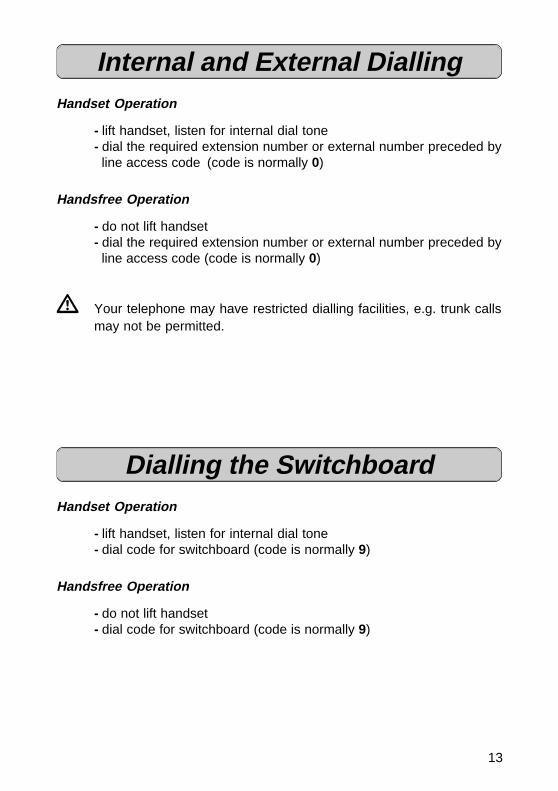
Internal and External DiallingHandset Operation
- lift handset, listen for internal dial tone- dial the required extension number or external number preceded by
line access code (code is normally 0)
Handsfree Operation
- do not lift handset- dial the required extension number or external number preceded by
line access code (code is normally 0)
V Your telephone may have restricted dialling facilities, e.g. trunk callsmay not be permitted.
Dialling the SwitchboardHandset Operation
- lift handset, listen for internal dial tone- dial code for switchboard (code is normally 9)
Handsfree Operation
- do not lift handset- dial code for switchboard (code is normally 9)
Sta
ndar
d F
eatu
res

14
Call TransferYou may transfer an internal or external call from your extension to any otherextension or to the switchboard.
Transfer to a Free Extension (Announcing the Call)
- press ✔✔✔✔✔ key to confirm Consultation option- dial required extension- announce the call and replace handset
Transfer to a Free Extension (Call not Announced)
- press ✔✔✔✔✔ key to confirm Consultation option- dial required extension- replace handset when ring tone is heard- the call has now been transferred
Transfer to a Busy Extension
- press ✔✔✔✔✔ key to confirm Consultation option- dial required extension- replace handset when busy tone is heard- the call has now been transferred to the busy extension.
If the busy extension terminates the call within a predetermined time, thetransferred call will ring the extension.
Transfer Using the Dial Keys
- press the required Dial (DSS) key- announce the call when the extension answers- replace handset
Return to Caller
If no reply or busy tone is received, you may return to the caller withoutattempting to transfer the call.
- scroll to Return to held call? option- press ✔✔✔✔✔ key to confirm Return to held call? option- you are reconnected to the caller
15
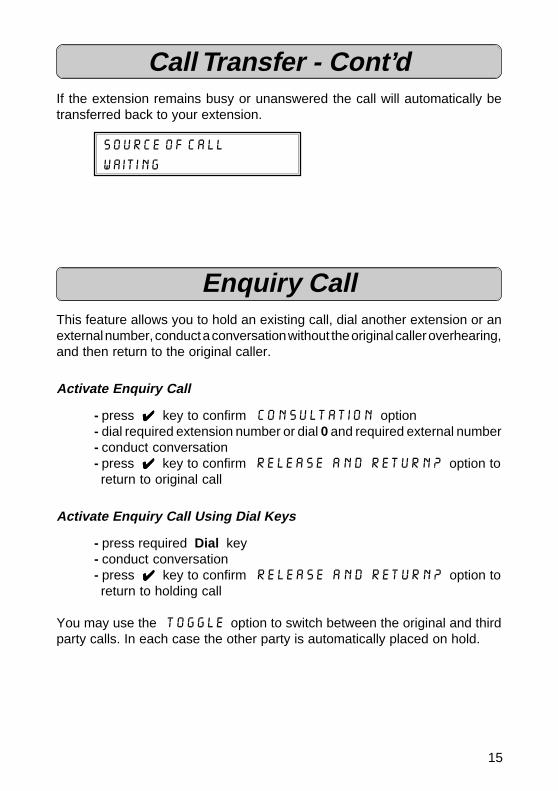
Call Transfer - Cont’dIf the extension remains busy or unanswered the call will automatically betransferred back to your extension.
SOURCE OF CALLwaiting
Enquiry CallThis feature allows you to hold an existing call, dial another extension or anexternal number, conduct a conversation without the original caller overhearing,and then return to the original caller.
Activate Enquiry Call
- press ✔✔✔✔✔ key to confirm Consultation option- dial required extension number or dial 0 and required external number- conduct conversation- press ✔✔✔✔✔ key to confirm Release and Return? option toreturn to original call
Activate Enquiry Call Using Dial Keys
- press required Dial key- conduct conversation- press ✔✔✔✔✔ key to confirm Release and Return? option toreturn to holding call
You may use the Toggle option to switch between the original and thirdparty calls. In each case the other party is automatically placed on hold.

16
Toggle Between CallsYou have a call on the line and wish to make a second call and want to togglebetween both calls.
Activate Toggle
- press ✔✔✔✔✔ key to confirm Consultation option- dial the required extension or external number
or- press Dial/DSS key
Once you have the second call on the line
- scroll to Toggle option- press ✔✔✔✔✔ key to confirm Toggle option- keep on pressing ✔✔✔✔✔ key to confirm Toggle option each time youwish to speak to the holding caller
or
You have a call on the line and wish to answer a second call and want to togglebetween both calls.
- press Call Pickup keyor
- press Pickup Executive key
You may use the Toggle option to switch between the original and thirdparty calls. In each case the other party is automatically placed on hold.
Disconnect either Party
- toggle to the party you wish to disconnect- scroll to release and return option- press ✔✔✔✔✔ key to confirm release and return option- you will now be connected to the remaining caller
V The waiting party cannot hear your conversation.

17
8 Way ConferenceThis feature allows you to bring up to seven parties into an existing conversationon your extension.The seven parties could be external, internal or a mix of both.
Activate Conference
- you are engaged on a call- press ✔✔✔✔✔ key to confirm Consultation option- dial required extension or 0 and external number- scroll to Conference? option- press ✔✔✔✔✔ key to confirm Conference? option- conference tone is heard and all three parties are connected
CONF 1 - 2 - 3
Add more parties to the Conference
- press ✔✔✔✔✔ key to confirm Consultation option- dial required extension or 0 and external number- scroll to Add to Conference? option- press ✔✔✔✔✔ key to confirm Add to Conference? option- conference tone is heard and all four parties are connected
CONF 1 - 2 - 3 - 4
Repeat the procedure to add more parties to the conference.
Disconnect one of the Parties
- press 2 / 3 / 4 / 5 / 6 / 7 / 8 to select the party you wish to disconnect- scroll to Release Partner? option- press ✔✔✔✔✔ key to confirm Release Partner? option- the party is now disconnected from the conference

18
8 Way Conference - Cont’dTransfer the Conference to Another Extension
- press ✔✔✔✔✔ key to confirm Consultation option- dial required extension- scroll to Transfer Conference option- press ✔✔✔✔✔ key to confirm Transfer Conference option- you have now transferred the conference to the extension
Consult with an Extension or External Party when you are Busy witha Conference
- press ✔✔✔✔✔ key to confirm Consultation option- dial required extension or 0 and external number- consult with the party- press ✔✔✔✔✔ key to confirm Return to Conference option- you are now reconnected to the conference

19
Call PickupThe Call Pickup feature allows you to answer any ringing extension in yourpickup group from your telephone.
Activate Call Pickup
An extension within your pickup group is ringing
- Call Pickup LED flashes- a ping ring will also alert you to an incoming call
SOURCE OF CALLDESTINATION OF CALL
- lift handset, listen for internal dial tone- press Call Pickup key- you have now answered the call
or
- Call Pickup LED flashes- a ping ring will also alert you to an incoming call
SOURCE OF CALL
DESTINATION OF CALL
- press Call Pickup key- you have now answered the call for handsfree operation

20
Second Call Camp-onThis feature allows a second call to camp on your extension when you are busyon a call.The caller will receive ringing tone instead of busy tone.
Activate Second Call Camp-on
- press Service Menu Key- scroll to Switches option- press ✔✔✔✔✔ key to confirm switches option- press ✔✔✔✔✔ key to confirm camp-on? option- press ✔✔✔✔✔ key to confirm activate camp-on? option
Second callactivated
When you are busy on a call and a second call arrives it will be signalled bythe flashing of your Call Pickup LED and on all other digital instruments in yourPickup Group.A ping ring will also alert you to the next call.
If you do not use the Call Pickup feature to answer the second call then it willbe routed to your Fixed Call Forward destination.
Deactivate Second Call Camp-on
- press Service Menu Key- scroll to Switches option- press ✔✔✔✔✔ key to confirm switches option- press ✔✔✔✔✔ key to confirm camp-on? option- press ✔✔✔✔✔ key to confirm deactivate camp-on? option
Second calldeactivated

21
Transfer a Second CallerAnswer Second Call
If you are busy on a call when the Call Pickup LED flashes and you wish toanswer the waiting call.
- ask existing caller to hold- press Call Pickup key- first call is placed on hold- second call is now on the line
Transfer Second Call
- press ✔✔✔✔✔ key to confirm Consultation option- dial required extension- scroll to Transfer option- press ✔✔✔✔✔ key to confirm Transfer option- first call is now on the line
Return to Call
If you receive no reply or busy tone, you can return to the second call.
Return to Second Call
- scroll to Release and Return option- press ✔✔✔✔✔ key to confirm Release and Return option- second call is now on the line
You can either Toggle between the two remaining calls or disconnect thesecond caller and return to the first call.
Disconnect the Second Call
- scroll to Release and Return option- press ✔✔✔✔✔ key to confirm Release and Return option- first call is now on the line

22
Call ParkCalls may be parked on your optiset E for retrieval from your telephone or anyother digital telephone in your Call Pickup group which is equipped with a Parkkey.
V Only ONE call per pickup group may be parked at a time.
Park a Call
- press Park key- Park LED flashes- replace handset or press Speaker key- Park LED remains flashing
Retrieve a Parked Call
- Park LED is flashing- lift handset, listen for internal dial tone- press Park key- Park LED is off- call is now on the line
or
- press Park key- Park LED is off- call is now on line for handsfree operation
23
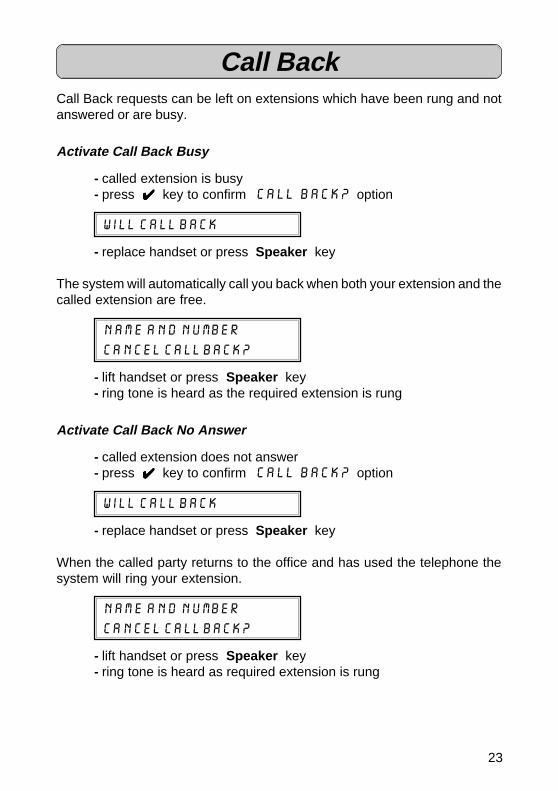
Call BackCall Back requests can be left on extensions which have been rung and notanswered or are busy.
Activate Call Back Busy
- called extension is busy- press ✔✔✔✔✔ key to confirm Call Back? option
WILL CALL BACK
- replace handset or press Speaker key
The system will automatically call you back when both your extension and thecalled extension are free.
NAME AND NUMBERCANCEL CALL BACK?
- lift handset or press Speaker key- ring tone is heard as the required extension is rung
Activate Call Back No Answer
- called extension does not answer- press ✔✔✔✔✔ key to confirm Call Back? option
WILL CALL BACK
- replace handset or press Speaker key
When the called party returns to the office and has used the telephone thesystem will ring your extension.
NAME AND NUMBERCANCEL CALL BACK?
- lift handset or press Speaker key- ring tone is heard as required extension is rung
24
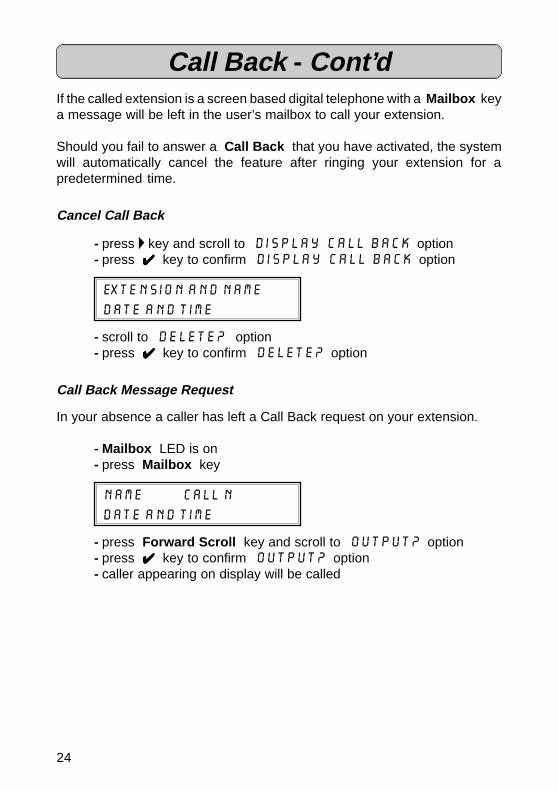
Call Back - Cont’dIf the called extension is a screen based digital telephone with a Mailbox keya message will be left in the user’s mailbox to call your extension.
Should you fail to answer a Call Back that you have activated, the systemwill automatically cancel the feature after ringing your extension for apredetermined time.
Cancel Call Back
- press key and scroll to Display Call Back option- press ✔✔✔✔✔ key to confirm Display Call Back option
EXTENSION AND NAMEDATE AND TIME
- scroll to Delete? option- press ✔✔✔✔✔ key to confirm Delete? option
Call Back Message Request
In your absence a caller has left a Call Back request on your extension.
- Mailbox LED is on- press Mailbox key
NAME CALL NDATE AND TIME
- press Forward Scroll key and scroll to Output? option- press ✔✔✔✔✔ key to confirm Output? option- caller appearing on display will be called
25
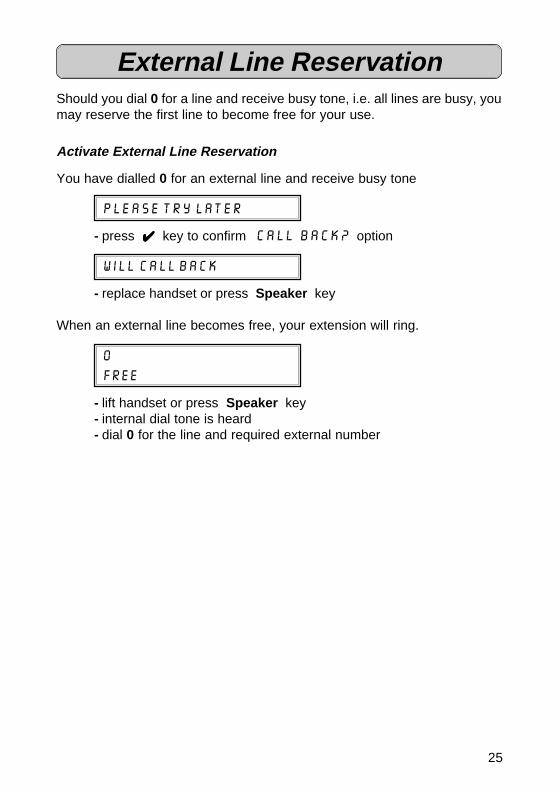
External Line ReservationShould you dial 0 for a line and receive busy tone, i.e. all lines are busy, youmay reserve the first line to become free for your use.
Activate External Line Reservation
You have dialled 0 for an external line and receive busy tone
PLEASE TRY LATER
- press ✔✔✔✔✔ key to confirm Call Back? option
WILL CALL BACK
- replace handset or press Speaker key
When an external line becomes free, your extension will ring.
0FREE
- lift handset or press Speaker key- internal dial tone is heard- dial 0 for the line and required external number

26
Fixed Call ForwardingYour line can be forwarded to a fixed destination for answering.This can be to either a Digital, analogue extension or external number.
Programme Fixed Call Forwarding
- press Service Menu key- press Call Forward key twice
NOTHING STOREDNEW ENTRY?
- press ✔✔✔✔✔ key to confirm New Entry? option- dial required extension number or 0 and external number- press ✔✔✔✔✔ key to confirm SAVE? option- Call Forward LED is on
FORWARDING TOEXTENSION NAME
The Fixed Call Forward destination has now been permanently programmed.Calls will now go to the Fixed Call Forward destination immediately.
Deactivate Fixed Call Forwarding
- press Call Forward key- Call Forward LED is off
FORWARDINGDEACTIVATED
When the Fixed Call Forward destination has been programmed butdeactivated, it will serve as Call Forward No Answeri.e. if your extension rings for longer than a predetermined time it willautomatically divert to the Fixed destination.
Cal
l Div
ersi
on F
eatu
res

27
Fixed Call Forwarding - Cont’dReactivate Fixed Call Forwarding
- press Call Forward key- Call Forward LED is on
FORWARDING TOEXTENSION NAME
Calls will now go to the Fixed Call Forward destination immediately .
Change Fixed Call Forwarding Destination
- press Service Menu key- press Call Forward key TWICE
FORWARDINGNEW ENTRY?
- press ✔✔✔✔✔ key to confirm New Entry? option- dial extension number- press ✔✔✔✔✔ key to confirm SAVE? option- Call Forward LED is on
FORWARDING TOEXTENSION NAME

28
Variable Call ForwardingThis is a temporary Call Forwarding feature which allows you to divert all yourcalls to a destination of your choice and will override your Fixed CallForwarding destination.
Programme Variable Call Forwarding
- press Service Menu key- press Call Forward ONCE only- dial extension number or 0 and external number- press ✔✔✔✔✔ key to confirm SAVE? option- Call Forward LED is on
FORWARDING TOEXTENSION NAME
Cancel Variable Call Forwarding
- Call Forward LED is on- press Call Forward key- Call Forward LED is off
Calls will now ring as normal on your extension.Your Fixed Call Forward destination will be restored.

29
PIN
Fea
ture
sElectronic Telephone Lock
This feature allows you to lock your extension by dialling your PIN, whichprevents unauthorised use of your extension. The PIN assigned to yourextension will be provided by your System Administrator.
Lock your Extension
- dial ∗∗∗∗∗ 21 and your PIN
CARRIED OUT
Your extension will now be restricted to local or internal calls only.Special dial tone will be heard to remind you that the feature is activated.
Unlock your Extension
- dial # 21 and your PIN
CARRIED OUT
V You will still be able to receive calls when your extension is locked.

30
Mobile Class of ServiceThis feature allows you to activate your own Class of Service (barring level)on any extension.
Activate Mobile Class of Service
- dial ∗∗∗∗∗ 25 and your PIN
ENTER ID EXTENSION
Call will now register against your name on the Telephone ManagementSystem
Cancel Mobile Class of Service
- dial # 25
IDENTIFICATION DELETED
V Should you forget to cancel your PIN at the remote extension, contactthe extension and ask them to dial # 25. The PIN will however beautomatically cancelled if the extension is not used for a predeterminedtime.

31
Follow MeThis feature allows you to activate Call Forwarding at a remote extension toenable calls to follow you from extension to extension.
Activate Follow Me
When you arrive at the remote extension where you wish to receive calls madeto your extension.
- lift handset, listen for internal dial tone- dial ∗∗∗∗∗ 25 and your PIN- dial ∗∗∗∗∗ 10- replace handset
Incoming calls to your extension will now divert to this extension.When you activate this feature it transfers various facilities to this extensione.g. Barring Restrictions, Stored Number Redial etc.
Cancel Follow Me
At the Remote Extension
- lift handset, listen for internal dial tone- first dial # 10 (this cancels your Call Forwarding)- dial # 25 (this cancels your PIN)- listen for confirmation tone- replace handset
V Should you forget to cancel your PIN at the remote extension, contactthe extension and ask them to dial # 25. The PIN will however beautomatically cancelled if the extension is not used for a predeterminedtime.The Call Forward can be cancelled from your own extension.
32
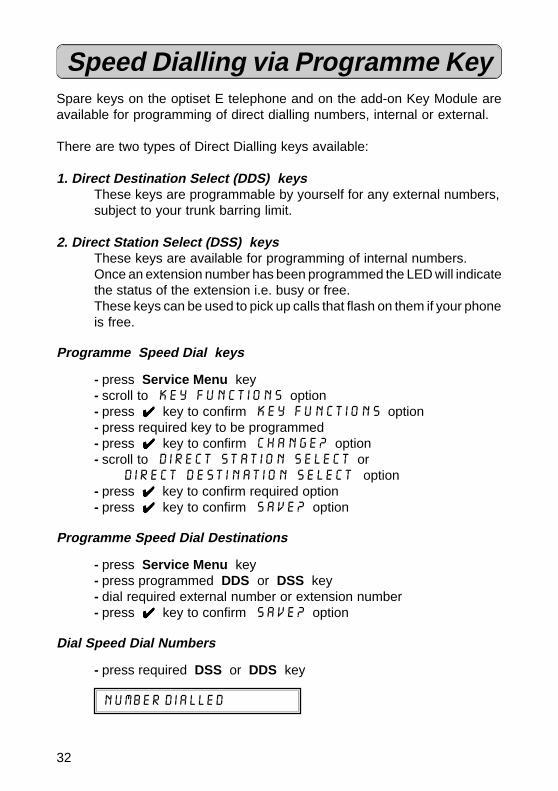
Speed Dialling via Programme KeySpare keys on the optiset E telephone and on the add-on Key Module areavailable for programming of direct dialling numbers, internal or external.
There are two types of Direct Dialling keys available:
1. Direct Destination Select (DDS) keysThese keys are programmable by yourself for any external numbers,subject to your trunk barring limit.
2. Direct Station Select (DSS) keysThese keys are available for programming of internal numbers.Once an extension number has been programmed the LED will indicatethe status of the extension i.e. busy or free.These keys can be used to pick up calls that flash on them if your phoneis free.
Programme Speed Dial keys
- press Service Menu key- scroll to Key Functions option- press ✔✔✔✔✔ key to confirm Key Functions option- press required key to be programmed- press ✔✔✔✔✔ key to confirm change? option- scroll to Direct Station Select or
Direct Destination Select option- press ✔✔✔✔✔ key to confirm required option- press ✔✔✔✔✔ key to confirm SAVE? option
Programme Speed Dial Destinations
- press Service Menu key- press programmed DDS or DSS key- dial required external number or extension number- press ✔✔✔✔✔ key to confirm SAVE? option
Dial Speed Dial Numbers
- press required DSS or DDS key
NUMBER DIALLED
Opt
iona
l Fea
ture
s

33
Individual Abbreviated DiallingIn addition to the System Abbreviated Dialling lists you may programme 10additional numbers, under the dial keypad digits 0 - 9 , for your exclusive use.These numbers will however be subject to any trunk barring limits which applyto your extension.
Programme Numbers
- press Service Menu key- press ✔✔✔✔✔ key to confirm Destinations option- scroll to Speed Dialling option- press ✔✔✔✔✔ key to confirm Speed Dialling option- dial access code 0 - 9- press ✔✔✔✔✔ key to confirm New Entry? option- dial 0 and external number- press ✔✔✔✔✔ key to confirm SAVE? option
Dial Numbers
- press Service Menu key- scroll to Use Speed Dialling option- press ✔✔✔✔✔ key to confirm Use Speed Dialling option- dial access code 0 - 9
or- press Quick Dial key- dial access code 0 - 9- wait whilst system dials the number
Programme a Quick Dial key
First programme a spare key as a Direct Destination Select (DDS) key(see Programme Speed Dial keys section on page 39)
- press Service Menu key- press programmed DDS key- press ✔✔✔✔✔ key to confirm new number? option- dial # 81- press ✔✔✔✔✔ key to confirm SAVE? option

34
System Abbreviated DiallingThe system allows for the storage of 16000 external telephone numbersdivided into 16 groups, each containing 1000 numbers. You can have accessto only two groups i.e. 2000 numbers.By utilising the System Abbreviated Dialling, you will be permitted to dialspecific numbers that would be outside your normal trunk barring limits.
Use the System Abbreviated Dialling
- select the relevant access code from the Abbreviated Dialling Directory- dial the relevant code XXXXX
DIALLED NUMBER
- wait whilst the system dials the number
The system will dial the required external number, the time taken will varyaccording to the type of main exchange to which your Hicom 300 is connected.

35
Stored Number RedialThis feature allows you to store any number for later re-dialling. The numbermay be stored for as long as required.
Store a Number
You have dialled a number and have not been answered or the number is busy,do not disconnect.
- press Redial key
STORED
- replace handset or press Speaker key
Redial the Number
- press Redial key
DIALLED NUMBER
- the number is now automatically dialled by the system
The number will remain stored until another number is stored, thus erasing theprevious number.

36
Timed ReminderTimed reminders or alarms can be programmed to remind you of meetings orappointments.This feature has to be programmed on a key.
Programme Timed Reminder on a Key
- press Service Menu key- scroll to Key Functions option- press ✔✔✔✔✔ key to confirm Key Functions option- press required key- scroll to Reminder option- press ✔✔✔✔✔ key to confirm Reminder option- press ✔✔✔✔✔ key to confirm SAVE? option
Set Timed Reminder (e.g. 3:30 PM)
- press Service Menu key- press Reminder key- enter 1530- press ✔✔✔✔✔ key to confirm SAVE? option- Remind LED is on
Alarm will sound for 40 seconds at 15:30, or stop if Remind key is pressed.If Remind key is not pressed, the alarm will be repeated after 5 minutes andthen automatically cancelled.
Display Timed Reminders
- Remind LED is on- press Remind key to scroll for alarms
REMINDER15:30

37
Timed Reminder - Cont’dCancel Timed Reminders
- press Service Menu key- press Remind key until required alarm is displayed- scroll to Delete? option- press ✔✔✔✔✔ key to confirm Delete? option
DELETED
- Remind LED goes off if this is the last remaining alarm
Night ServiceWhen the Night Bell rings
- dial ∗∗∗∗∗ 88- you are now connected to the caller
Check with System Administrator if any other type of Night Service isoperational.

38
Key SettingsThe Plus (+) and Minus (–) keys allow for the individual settings of the levelsof speech, ringing, ring tones and warning tone volume.
Change Speech Volume
- whilst busy on a call- press + or – keys to adjust Speech volume- press + and – keys simultaneously to store setting
Change Ringer Volume, Ringer Pitch or Warning Tone Volume
To Change Ringer Volume
- do not lift handset- press + and – keys simultaneously- press ✔✔✔✔✔ key to confirm Ringer Volume? option- press + or – keys to adjust Ringer Volume- press + and – keys simultaneously to store setting
To Change Ringer Pitch
- do not lift handset- press + and – keys simultaneously- scroll to Ringer Pitch? option- press ✔✔✔✔✔ key to confirm Ringer Pitch? option- press + or – keys to adjust Ringer Pitch- press + and – keys simultaneously to store setting
To Change Warning Tone Volume
- do not lift handset- press + and – keys simultaneously- scroll to Warning Tone? option- press ✔✔✔✔✔ key to confirm Warning Tone? option- press + or – keys to adjust Warning Tone Volume- press + and – keys simultaneously to store setting

39
Key Settings - Cont’dTo Change Hands-free Mode
- do not lift handset- press + and – keys simultaneously- scroll to Hands-free Mode option- press ✔✔✔✔✔ key to confirm Hands-free Mode option
SOUND PROOFED
- press + key
NORMAL ROOM
- press + key
REVERBERATING
- press ✔✔✔✔✔ key to confirm one of the above options- press + and – keys simultaneously to store setting

40
Variable Call Forward
òService
òï Destinations
ò Switches ð
òUse Speed Dial
ò
ï Key Functions
òVoice Mail Services (51/52)
òPIN/COS (67)
òReminder (7)
ò Additional Functions ð
òPhone Test (91)
òCancel
Variable Call Forward (11)
Fixed Call Forwarding (12)
Speed Dial
Save Number Redial
DDS (14)
DSS (15)
Return?
1 Camp-on
2 DND
3 Voice Call Protect
4 Call Forward
5 Voice Calling
6 DSS
7 DDS
8 Conference
9 Park
10 Paging
11 Hunting
12 Output
13 Remind
14 Data
15 Messenger Call
Return?
Camp-on (21)
DND (22)
Voice Call Protect (23)
Hunt Group (24)
Call Forward (25)
Return?
Display Suppression (81)
Return?
optiset E Menu Functions

41
42
optiset E memory
43
Electronic NotebookProgramme External Numbers and Names
- press MENU key- press 8 key- enter required name- press 8 key- enter required number (preceded by 0 for external no.)- press 8 key- enter additional information (i.e. company name or cell number)- press 8 key
(up to 5 rows can be used for other information)- press END key to exit Electronic Notebook functions
Dial External Number
- press first letter of required name- required name or all names starting with this letter are displayed- press Ç or È keys to scroll to required name- press 8 key- wait whilst the system dials the number
Edit a Number
- press first letter of required name- press EDIT key- press Ç or È keys to scroll to required section to edit- enter changes- press END key to exit Electronic Notebook functions
differentdifferentdifferentdifferentdifferent

44
Siemens Telecommunications (Pty) Ltd. Private Bag X71 Halfway House 1685