heat transfer vinyl frequently asked questions (faqs) · 2019-01-18 · my heat transfer vinyl...
TRANSCRIPT
Heat Transfer VinylFrequently Asked Questions (FAQs)
Q: What do I need before I start?
A: Getting started is simple! You’ll need an idea for a design,
something to put that design on and then the fun stuff. Grab some
ImPRESSED Vinyl™ heat transfer vinyl and something to cut it
with. This can include a Silhouette or Cricut machine; scissors; or
an Exacto knife if you are more old-fashioned.
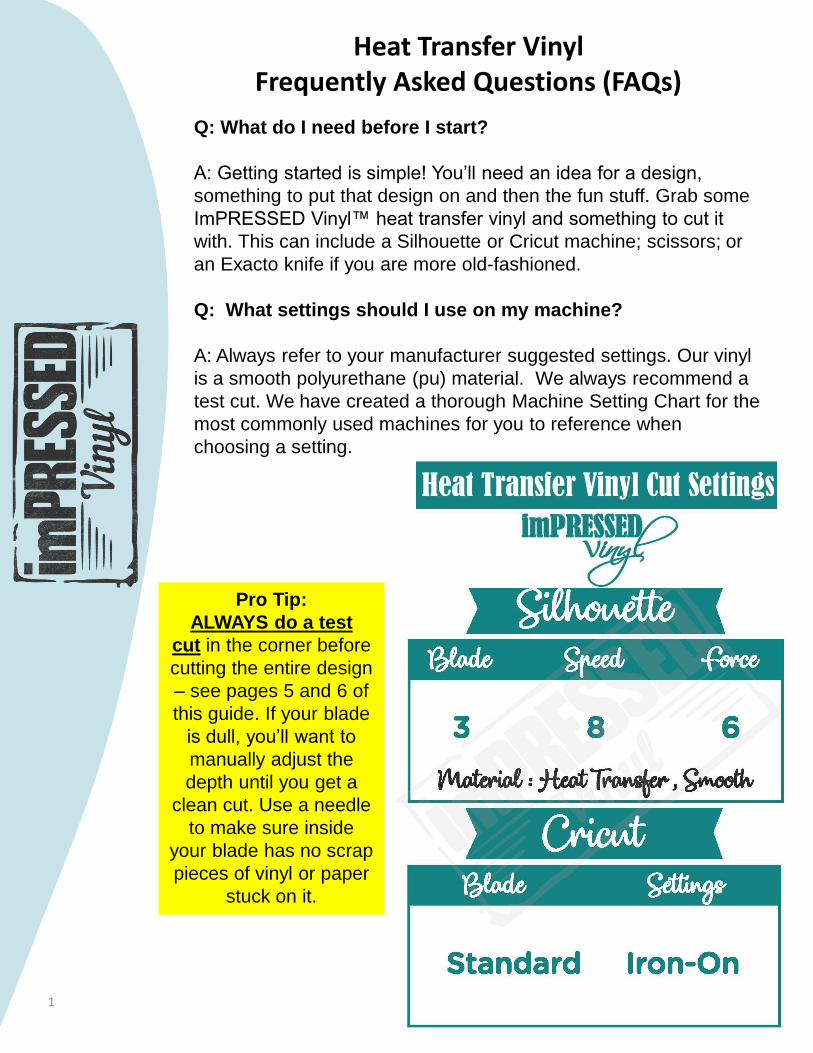
Q: What settings should I use on my machine?
A: Always refer to your manufacturer suggested settings. Our vinyl
is a smooth polyurethane (pu) material. We always recommend a
test cut. We have created a thorough Machine Setting Chart for the
most commonly used machines for you to reference when
choosing a setting.
Pro Tip:
ALWAYS do a test
cut in the corner before
cutting the entire design
– see pages 5 and 6 of
this guide. If your blade
is dull, you’ll want to
manually adjust the
depth until you get a
clean cut. Use a needle
to make sure inside
your blade has no scrap
pieces of vinyl or paper
stuck on it.
1

Q: Does your vinyl come with the transfer film on it?
A: Yes! Each sheet of vinyl has a clear carrier sheet.
Q: On which side do I cut the HTV?
A: Our vinyl has a shiny side and a matte side. Always place
the HTV on your mat with the shiny side down. The shiny
side of the material is the clear carrier sheet. The carrier sheet
holds your design in place while applying to your garment. The
carrier sheet is not intended to be cut during the cutting
process. This is why you always need to mirror your design
before cutting. During heat application, the carrier side
(shiny side) will be face up on your garment. Remember to
use some Teflon to protect your design when applying
heat. So…mirror your image; cut with the shiny side down
and iron with the shiny side up
Q: What heat setting should I use?
A: Just like with the machine settings you should check out
your manufacturer’s suggested setting. But for more info, you
can refer to our heat setting charts on the next two pages
Q: Do you have to wait until the vinyl is cool before
removing the clear film?
A: Yes! After you cut your design and pressed it, you will want
to allow the design to cool for 45-60 seconds before peeling
of the clear carrier sheet. Our Vinyl is COLD Peel. Removing
the carrier sheet while still warm or hot may cause the design
to stretch or warp as the carrier is being removed.
Heat Transfer VinylFrequently Asked Questions (FAQs)
2

Heat Settings for Iron or Heat Press
Heat Transfer VinylFrequently Asked Questions (FAQs)
3

Heat Settings for Cricut Easypress™
Heat Transfer VinylFrequently Asked Questions (FAQs)
4
Heat Transfer VinylHow to Perform a Test Cut
Performing a test cut using Silhouette Studio
After selecting your cut settings, it’s important to always perform a test
cut. This will ensure a good cut every time without wasting a large
amount of HTV. If your test cut didn’t cut smoothly, adjust the blade
depth or the force (for thicker materials) and do another test cut until
it’s perfect.
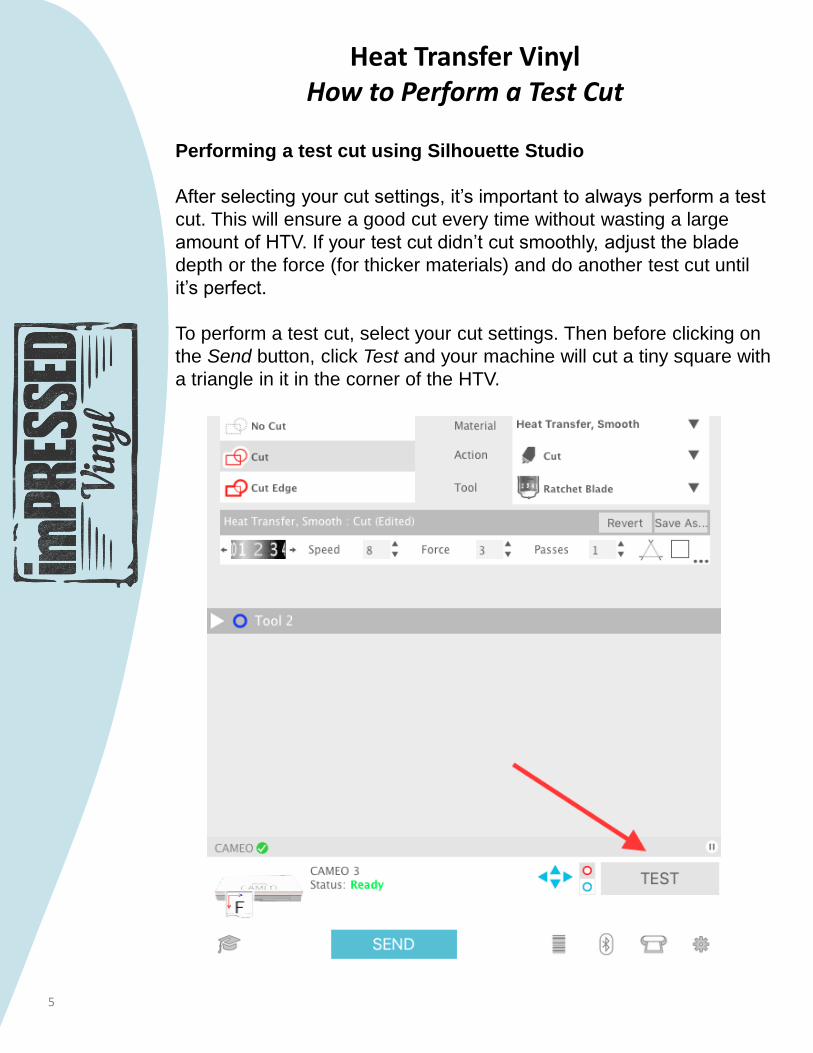
To perform a test cut, select your cut settings. Then before clicking on
the Send button, click Test and your machine will cut a tiny square with
a triangle in it in the corner of the HTV.
5

Heat Transfer VinylHow to Perform a Test Cut
Performing a test cut using Silhouette Studio
Use a pair of craft tweezers and begin weeding the test cut.
As you can see here, the middle triangle started to lift off as
well. This means the test cut wasn’t deep enough.
Repeat the test cut and adjust the blade depth or increase the
force. This second test cut was much better:
6

Heat Transfer VinylTroubleshooting Common Issues
7
Your design cut backwards
Remember to mirror your image before cutting. In Silhouette
Studio, right-click your design and select flip horizontally. Don’t
forget to remove the original from the design screen before you
send it to cut.
Design didn’t cut all the way through and is difficult to
weed
There are several reasons this could happen:
• Your blade is dull or chipped
• The cut settings were not correct for the material
• There are scrap pieces stuck next to the blade
I don’t have a Teflon sheet
If you don’t have a Teflon sheet, a thin cloth or piece of
parchment paper will work as well. The purpose is to create a
heat barrier so you don’t burn your HTV from the direct heat of
the iron.
My heat transfer vinyl keeps lifting off when I try to peel
the carrier sheet off
Here are several reasons why your vinyl may not be sticking:
• You’re peeling it off before it has completely cooled (allow
45 sec – 1 minute to cool)
• You did not give the HTV enough time to adhere (some
heavy materials require a little more press time)
• Your iron isn’t hot enough
• You’re not applying enough pressure during
application (this is the most common issue – see next
page)
• You’ve pressed TOO long and the vinyl has melted and will
not stick

Heat Transfer VinylTroubleshooting Common Issues
8
I am using a regular home iron – and the vinyl isn’t
adhering well.
• Use the highest cotton setting for your iron (no steam)
• With large designs, you will need to make sure you apply
the pressure evenly to every area.
• We don’t recommend using a padded ironing board or
anything that will impact you from getting a really firm
press. Use a hard heat resistant surface (e.g., a
countertop, floor or table).
• Press VERY HARD -- Good pressure is when your arms
literally shake from pushing down.
• You also need to make sure you are pressing for enough
time (25 secs per area)---a good rule of thumb to know if
you applied enough heat is if you are able to see the
weave of the fabric through the vinyl. If you can’t-- press for an additional 5 seconds in increments until you do.
The image to
the right an
example of a
good press
where you
can see the
fibers of the
cloth through
the vinyl
Heat Transfer VinylTroubleshooting Common Issues
9
My heat transfer vinyl is starting to peel off after going
through the washing machine
Sounds like your vinyl didn’t adhere very well. Be sure to add
enough heat and pressure for a solid press on your fabric. For
longer-lasting HTV designs, wash inside out in cool/warm
water. Avoid very hot water & the dryer.
The vinyl is shrinking
You provided way too much heat
I completely ruined my shirt
Not necessarily, in certain situations you can remove a vinyl
image from a shirt:
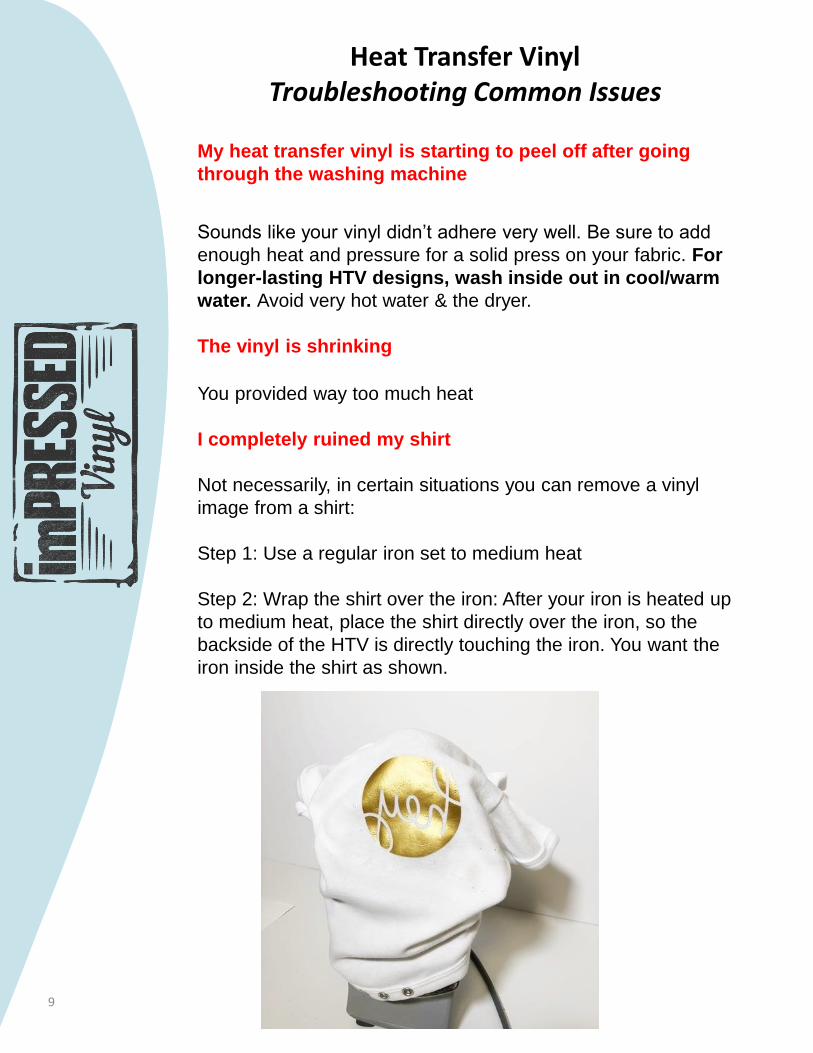
Step 1: Use a regular iron set to medium heat
Step 2: Wrap the shirt over the iron: After your iron is heated up
to medium heat, place the shirt directly over the iron, so the
backside of the HTV is directly touching the iron. You want the
iron inside the shirt as shown.
Heat Transfer VinylTroubleshooting Common Issues
10
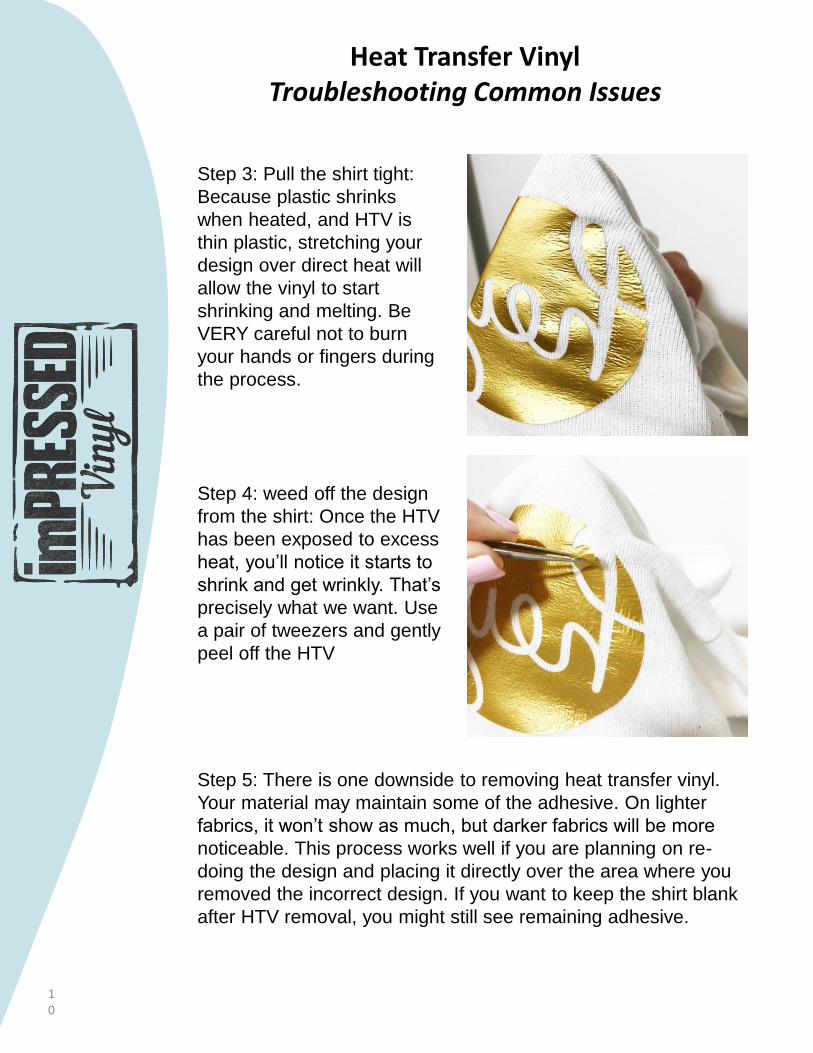
Step 3: Pull the shirt tight:
Because plastic shrinks
when heated, and HTV is
thin plastic, stretching your
design over direct heat will
allow the vinyl to start
shrinking and melting. Be
VERY careful not to burn
your hands or fingers during
the process.
Step 4: weed off the design
from the shirt: Once the HTV
has been exposed to excess
heat, you’ll notice it starts to
shrink and get wrinkly. That’s
precisely what we want. Use
a pair of tweezers and gently
peel off the HTV
Step 5: There is one downside to removing heat transfer vinyl.
Your material may maintain some of the adhesive. On lighter
fabrics, it won’t show as much, but darker fabrics will be more
noticeable. This process works well if you are planning on re-
doing the design and placing it directly over the area where you
removed the incorrect design. If you want to keep the shirt blank
after HTV removal, you might still see remaining adhesive.