health library instructor resources on thepointlwwhealthlibrary.com/documentlibrary/hl united...
TRANSCRIPT

Health Library Instructor Resources on
thePoint
Instructor Ancillary User Manual
Document revision: 1.1

Updated 02/06/2017 Page 2
Table of Contents
Table of Contents ..................................................................................................... 2
Chapter 1: Welcome to your resources on thePoint! 3
Section A: thePoint Basics ...................................................................................... 4 What is thePoint? ...................................................................................................... 5 Accessing Resources on thePoint ............................................................................ 6 My Content ............................................................................................................... 7 Resources Available ................................................................................................. 8
Chapter 2: Test Generator Access 10 Section A: Installing the Test Generator ............................................................... 11
Downloading the Test Generator – Windows .......................................................... 12
Downloading the Test Generator – Mac ................................................................. 16
Locating the Test Generator – Mac ........................................................................ 20 IT Changed the Question Bank Location ................................................................ 21
Section B: Using the Diploma Test Generator ..................................................... 24 Platform Overview .................................................................................................. 25 Adding Questions ................................................................................................... 27
Editing Questions .................................................................................................... 29 Creating an Exam ................................................................................................... 30
Customizing the Exam Layout ................................................................................ 33 Saving the Exam ..................................................................................................... 35 Exporting ................................................................................................................. 36

Updated 02/06/2017 Page 3
Chapter 1: Welcome to your resources on thePoint!
Chapter Overview
In this chapter The table below lists the sections and topics in this chapter.
Topic See Page
Section A: thePoint Basics 4

Updated 02/06/2017 Page 4
Section A: thePoint Basics
Section Overview
In this section The table below lists the topics in this section.
Topic See Page
What is thePoint? 5
Accessing Resources on thePoint 6
My Content 7
Resources Available 8

Updated 02/06/2017 Page 5
What is thePoint?
What is thePoint?
ThePoint is a site comprised of all of Wolters Kluwer Health’s educational
titles. The site provides access to various study and classroom resources for
students and instructors such as:
question banks
power point presentations
test generators
videos
assessments
Information: The resources available vary by title.
The student ancillaries (i.e. videos, assessments, etc.) are already integrated
into Health Library. The instructor ancillary materials will now be available
to you via thePoint!
Benefits Accessing instructor ancillaries on thePoint saves you time! You no longer
need to create your own PowerPoint Presentations, find appropriate images,
create Lab Materials from scratch, or come up with test questions for your
exams!
Gaining Access As part of your facility’s subscription to Health Library, we have set your
facility up with a faculty account on thePoint so that you can access various
instructor materials for the titles in the subscribed collections.
Collections with instructor resources include:
Sciences Collections: Anatomical, Basic, Integrated Basic, Premium
Basic
Pharmacy Collections: Clinical, Integrated, Premium
Speech, Language, and Hearing
Physical Therapy
Occupational Therapy
Physician Assistants: Core Education Only

Updated 02/06/2017 Page 6
Accessing Resources on thePoint
Site URL http://thePoint.lww.com
Home Page
Selecting one of the options above will determine the ad experience that you will
see throughout your time on the site. This selection also affects the Training
and Support materials that will be available.
Information: If you select “Student” by mistake, it will not affect your account.
You can correct the choice by deleting the cookies and cache on your
computer and accessing it again.
Logging in Select the Return User button in the upper-right corner of the page. You will
then be asked to login using the username and password that was supplied by
your Facility Administrator.

Updated 02/06/2017 Page 7
My Content
What is this? As a subscriber to a Health Library collection that includes educational titles,
you are automatically provided access to the instructor content for those titles.
When you login to thePoint, you will be taken to a My Content page that will
reflect all of the titles to which your facility has subscribed.
Note: This list will only include titles that contain instructor ancillary
materials. If a title does not offer instructor ancillaries, it will not be added to
your account on thePoint. All student ancillary materials are integrated and
available directly via http://lwwhealthlibrary.com.
As you begin to navigate throughout the site, you can always return to this
page by selecting the My Content option on the green toolbar at the top of
the page.
Viewing Available Resources
Follow the steps below to locate the instructor ancillaries for a specific title.
Step Action
1 Locate the title whose ancillaries you would like to view in the list.
2 Locate and select the Instructor Resources link below the title of the product.
Example:
Result: You will be transported to the list of instructor ancillaries.

Updated 02/06/2017 Page 8
Resources Available
What is available to you?
The instructor ancillaries available will vary by title. In many cases, you will
find resources such as:
PowerPoint Presentations
Image Banks
Test Generators
LMS Course Cartridges
PowerPoint Presentations
If you wish to use or edit the PowerPoint Presentations, simply select the
PowerPoint Presentations option from the ancillaries list.
Result: You will be presented with a list of Chapters that offer PowerPoint
Presentations.
Select the Chapter that you wish to access, and you will be able to view the
presentation or choose to download the file.
Example:
Continued on next page

Updated 02/06/2017 Page 9
Resources Available, Continued
LMS Course Cartridges
The LMS Course Cartridge option will allow you to download all of the
available instructor ancillaries in a Blackboard, Angel, or Moodle compatible
format so that you can easily import the materials into your Learning
Management System.
Example:
Answers If a textbook offers questions throughout the text or offers a workbook, you
will often find an answer key in the instructor ancillary area as well.
Test Generator The Test Generator files will allow you to download the Wimba Diploma
Test Generator for the textbook. The next Chapter will review how to
download, install, and utilize the Test Generator.

Updated 02/06/2017 Page 10
Chapter 2: Test Generator Access
Chapter Overview
In this chapter The table below lists the sections and topics in this chapter.
Topic See Page
Section A: Installing the Test Generator 11
Section B: Using the Diploma Test Generator 24

Updated 02/06/2017 Page 11
Section A: Installing the Test Generator
Section Overview
In this section The table below lists the topics in this section.
Topic See Page
Downloading the Test Generator – Windows 12
Downloading the Test Generator – Mac 16
Locating the Test Generator – Mac 20
IT Changed the Question Bank Location 21

Updated 02/06/2017 Page 12
Downloading the Test Generator – Windows
What is a Test Generator?
One of the most sought after pieces of instructor content is the “Diploma Test
Generator”. You can download the Diploma Test Generator and the content
(all in one download) for the textbook you are using for your course. You are
then provided with the ability to easily create tests/exams for your students.
Where is it located?
The Diploma Test Generator is available for download via links on thePoint
under each book’s Instructor Resources area.
Example:
How to Install Follow the steps below to download and install the Test Generator on a
Windows Operating System.
Step Action
1 Select Diploma Test Generator Question: Windows Version from the Instructor
Resources section of thePoint.
2 Select Save.
3 Save the file to your desktop.
Result: The file will save as a .zip file on the desktop.
4 Right-click the icon.
Continued on next page

Updated 02/06/2017 Page 13
Downloading the Test Generator – Windows, Continued
How to Install, (continued)
Step Action
5 Select Extract All.
Result: The “Extract Compressed” window will open.
6 Select the Browse button.
7 Select Desktop from the folders provided on the left of the next pop-up window.
8 Select Extract.
Result: The .exe file for the test generator will now appear on the desktop.
9 Right-click the .exe file.
10 Use the table below to determine the next step.
IF the option to
“Run as Administrator”…
AND it is a … THEN…
appears n/a move on to Step 11.
does not appear personal
computer
Verify that you have administrative user
privileges on the computer, as this is a
requirement of the program.
does not appear Work computer Your will need to contact the company IT
department to gain administrative privileges
to install the software. The administrative
privileges are only
Continued on next page

Updated 02/06/2017 Page 14
Downloading the Test Generator – Windows, Continued
How to Install, (continued)
Step Action
11 Select Run as Administrator.
Result: The installation wizard will appear.
12 Agree to the terms and conditions page.
13 Select Next.
14 When the Question Bank Folder box appears, do not change the location listed.
Note: If this location is changed, the test generator will not open properly.
15 Select Next.
16 When the Select Program Folder box appears, do not change the location listed.
Note: If this location is changed, the test generator will not open properly.
17 Select Next through the remaining screens.
18 Select No when prompted to register.
Result: The completion box will appear.
Continued on next page

Updated 02/06/2017 Page 15
Downloading the Test Generator – Windows, Continued
How to Install, (continued)
Step Action
19 Uncheck the box next to Run Diploma now.
20 Select Finish.
Result: An icon for the title will now appear on the desktop.
Users with Multiple Titles
If you have multiple titles and are using the test generators for each, you may
not want to have an icon for each title on your desktop.
Delete the individual title icons from the desktop. You can open the program
by following the path below:
Start
All Programs
Diploma 6 folder
Select Diploma from the list that appears
Result: You will then be prompted with a list of all of the test generators that
are installed. You can select the content that you wish to view from there.

Updated 02/06/2017 Page 16
Downloading the Test Generator – Mac
What is a Test Generator?
One of the most sought after pieces of instructor content is the “Diploma Test
Generator”. You can download the Diploma Test Generator and the content
(all in one download) for the textbook you are using for your course. You are
then provided with the ability to easily create tests/exams for your students.
Where is it located?
The Diploma Test Generator is available for download via links on thePoint
under each book’s Instructor Resources area.
Example:
How to install Follow the steps below to download and install the Test Generator on a MAC
Operating System.
Step Action
1 Select Diploma Test Generator Question: Macintosh Version from the Instructor
Resources section of thePoint.
Result: The file will automatically go into the “Downloads” area of the Safari
browser.
2 Once the download is complete, select the Go option from the Finder Menu Bar at
the top of the page.
Example:
Continued on next page

Updated 02/06/2017 Page 17
Downloading the Test Generator – Mac, Continued
How to install, (continued)
Step Action
3 Select Downloads from the drop down menu that appears.
Screen Shot:
Result: The file will appear in the list to the right.
4 Double-click the file name from the list.
Result: It will appear under Devices in the lower left corner of the window.
Continued on next page

Updated 02/06/2017 Page 18
Downloading the Test Generator – Mac, Continued
How to install, (continued)
Step Action
5 Double-click the line listed under “Devices” for the product.
Result: The “Device” screen will open.
6 Select the Diploma 6 for Mac OS X option.
7 Select Continue on the next two screens that appear.
Screen Shot:
8 Select Continue and then Agree when the License Agreement appears.
9 Select Macintosh HD when asked to Select a Destination.
Screen Shot:
Continued on next page
Updated 02/06/2017 Page 19
Downloading the Test Generator – Mac, Continued
How to install, (continued)
Step Action
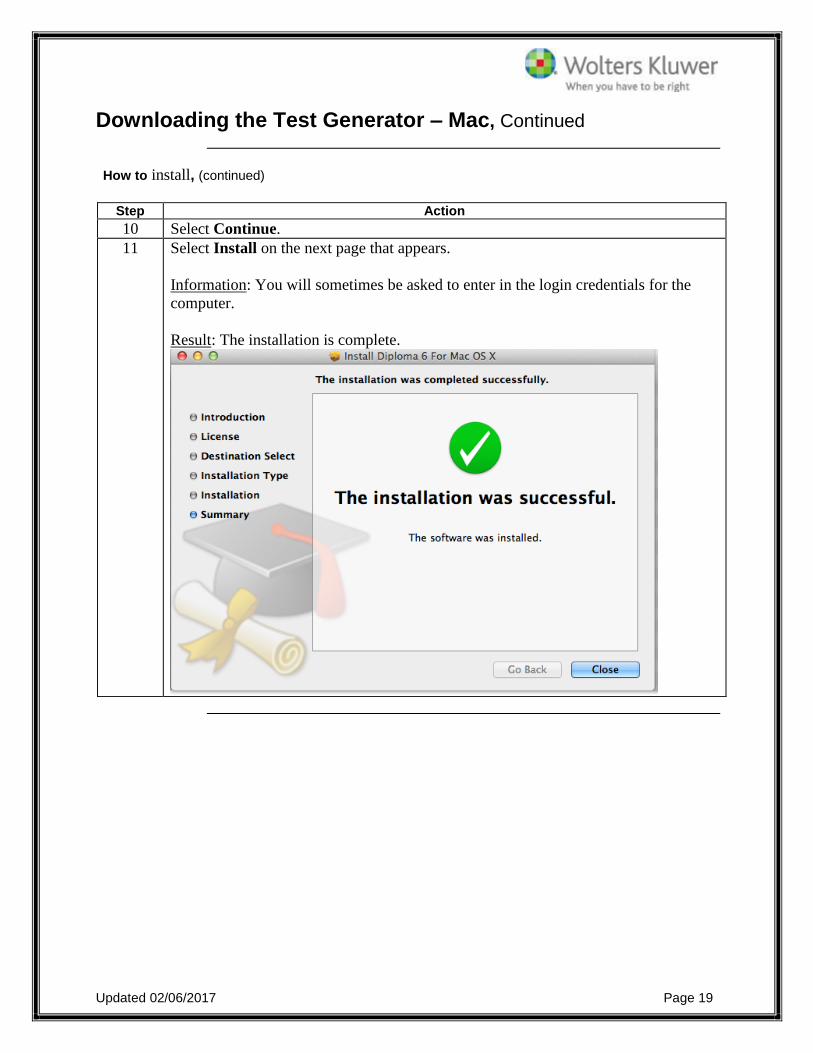
10 Select Continue.
11 Select Install on the next page that appears.
Information: You will sometimes be asked to enter in the login credentials for the
computer.
Result: The installation is complete.
Updated 02/06/2017 Page 20
Locating the Test Generator – Mac
Why do I need this?
The Mac installation does not add an icon to the desktop automatically. The
instructions below will allow you to locate the program.
How to locate Follow the steps below to location the Test Generator on Mac Operating
Systems.
Step Action
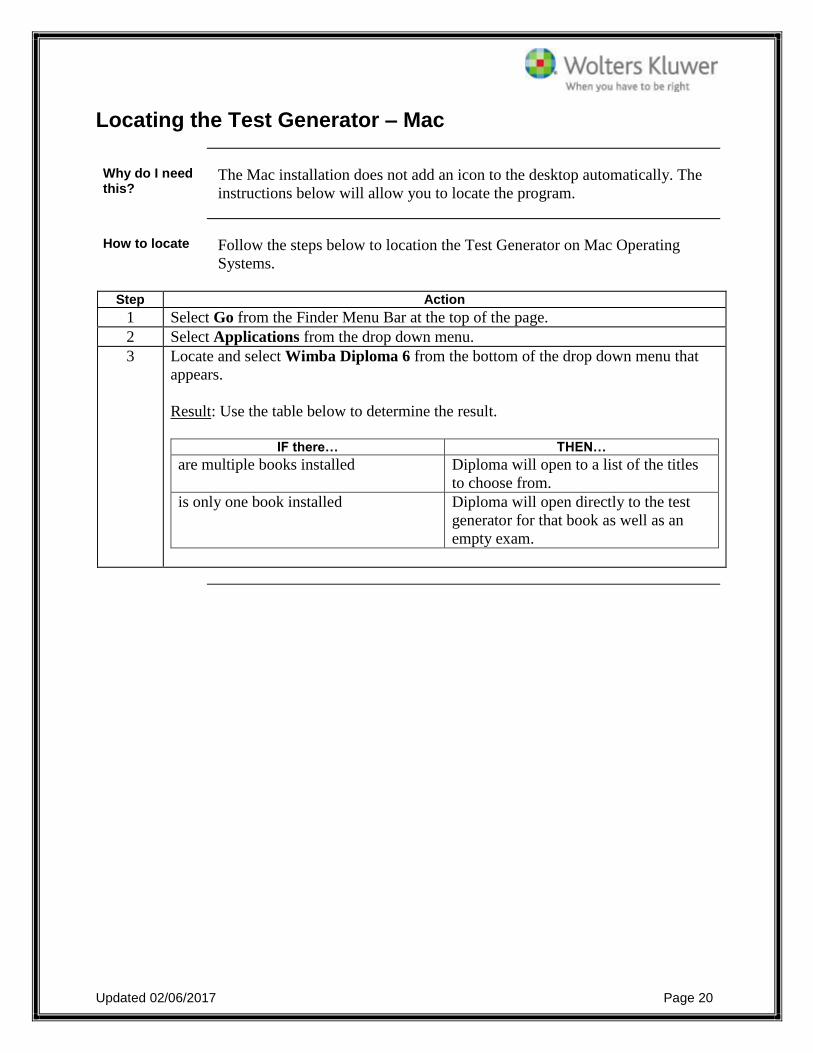
1 Select Go from the Finder Menu Bar at the top of the page.
2 Select Applications from the drop down menu.
3 Locate and select Wimba Diploma 6 from the bottom of the drop down menu that
appears.
Result: Use the table below to determine the result.
IF there… THEN…
are multiple books installed Diploma will open to a list of the titles
to choose from.
is only one book installed Diploma will open directly to the test
generator for that book as well as an
empty exam.

Updated 02/06/2017 Page 21
IT Changed the Question Bank Location
Problem Sometimes, IT personnel will alter the installation to save the Question Bank
folder into a different location than where the installation intended.
Reference: Steps 14 and 16 of “Downloading the Test Generator – Windows”
Changing this location will force the program to open without any questions
because Diploma is looking in a specific location.
Resolution In order to fix this issue, you must find the location of the Question Bank
folder that was installed and re-map the Diploma platform to look in that
location.
How to fix it Follow the steps below to correct the issue detail above.
Step Action
1 Locate the .exe file that was extracted in Step 8 of the “Downloading the Test
Generator – Windows” topic.
2 Right-click the .exe file.
3 Use the table below to determine the next step.
IF the option to
“Run as Administrator”…
AND it is a …
THEN…
appears n/a move on to Step 11.
does not appear personal
computer
Verify that you have administrative user
privileges on the computer, as this is a
requirement of the program.
does not appear Work computer Your will need to contact the company IT
department to gain administrative privileges
to install the software. The administrative
privileges are only
Continued on next page

Updated 02/06/2017 Page 22
IT Changed the Question Bank Location, Continued
How to fix it, (continued)
Step Action
4 Select Run as Administrator.
Result: The installation wizard will appear.
5 Agree to the terms and conditions page.
6 Select Next.
7 When the Question Bank Folder box appears, write down the location that is listed.
8 Select Cancel to stop the installation.
9 Select the Start button on your computer.
10 Select All Programs.
11 Locate and select the Diploma 6 folder in your programs list.
12 Select the Diploma option that appears.
Result: A pop-up window will appear with a listing of any titles that are currently
installed to the test generator. Generally, if the IT personnel that installed the
program changed the location of the Question Bank file, this window will be empty.
Continued on next page

Updated 02/06/2017 Page 23
IT Changed the Question Bank Location, Continued
How to fix it, (continued)
Step Action
13 Select Browse.
14 Go to the location that you wrote down in Step 7.
Note: Many times, you can simply type the location into the location bar at the top
of the window and select <enter>. This will transport you exactly where you need
to be.
15 Select the Question Bank.
16 Select Open.
Result: The Question Bank will be added to the window that opened in Step 12.
17 Select the Question Bank title from the window.
Information: The Question Bank title will match the title of the book.
18 Select Open.
Result: The test generator will open with all of the questions.

Updated 02/06/2017 Page 24
Section B: Using the Diploma Test Generator
Section Overview
In this section The table below lists the topics in this section.
Topic See Page
Platform Overview 25
Adding Questions 27
Editing Questions 29
Creating an Exam 30
Customizing the Exam Layout 33
Saving the Exam 35
Exporting 36

Updated 02/06/2017 Page 25
Platform Overview
Screen Shot Below is a screen shot of the Diploma Test Generator once it has been
opened.
Chapter List The left side of the page provides a listing of each chapter in the book.
Selecting any of these chapters will allow you to toggle between chapters and
select questions from throughout.
Caution: You will not be able to copy questions from multiple chapters at a
time. You can put questions from multiple chapters in the same exam;
however, you will have to copy them from each chapter separately.
Question List The top-center of the page shows a listing of all of the questions that are
available for the particular chapter that has been selected from the Chapter
List.
Individual Questions
The bottom-center of the page shows the specific question details for any
question that has been selected from the Question List. This information
includes:
Full question
Answer Choices
Correct Answer
Continued on next page

Updated 02/06/2017 Page 26
Platform Overview, Continued
Copying Randomly
At the top of the Diploma platform, there is an option to Copy Randomly.
Upon selecting this button, you will prompted to enter in the number of
questions that you would like to copy to a new exam.
Example:
When you are ready to copy the questions, select Copy Now.
Result: The Diploma system will randomly select that number of questions
(15 when using the above example) to an exam. The questions will be
selected from whatever chapter you have clicked on in the Chapter List pane.
Filter Questions
At the top of the Diploma platform, there is an option to Filter Questions.
Upon selecting this button, you will be provided the following options:
Filter By
Filter By will allow you to filter using the following parameters:
Question Format
Chapter
Client Needs
Cognitive Level
Difficulty
Integrated Process
Objective
Page and Header
Once you have chosen a parameter, the selection box will open to select from
the options within that parameter.

Updated 02/06/2017 Page 27
Adding Questions
Why do I need this?
The option to add questions to the test generator is a great way to customize
the program to fit your class needs.
How to do it Follow the steps below to add questions to the test generator.
Step Action
1 Select the chapter to which you would like to add the question from the Chapter List
on the left side of the page.
2 Scroll to the bottom of the Question List pane.
Note: There will be blank space at the bottom of each question list for exactly this
purpose.
3 Click anywhere in the white space at the bottom of the Question List pane.
Result: A line will highlight.
4 Right-Click on the highlighted line.
5 Select New Question.
Result: You will be prompted to select the type of question you would like to create
as well as how many questions.
6 Select the parameters for your question.
7 Select OK.
Result: A blank question will be added to the bottom of the Question List pane for
that chapter.
Continued on next page

Updated 02/06/2017 Page 28
Adding Questions, Continued
How to do it, (continued)
Step Action
8 Double-click the blank question line.
Result: A blank question box will appear.
9 Enter in the question.
10 Enter in the answer choices.
11 Select the radio button for the correct answer.
Result: The lock icon next to the correct answer will change to reflect “locked”.
12 Select the X in the upper-right corner to save the question.
Caution: Do NOT select the Save option. This will save the question as a file on
your computer.
Insert The “Insert” option on the tool bar allows you to insert any of the following
into your question:
Table
Image
Equation
Plots
Ole Objects
Hyperlinks
Continued on next page

Updated 02/06/2017 Page 29
Adding Questions, Continued
Format The “Format” option on the tool bar allows you to format the question
differently, such as:
Characters
Paragraphs
Borders
Spelling
Answers The “Answers” option on the tool bar allows you to:
Add another answer choice
Insert an answer choice wherever your mouse/cursor is selected currently
Remove an answer choice wherever your mouse/cursor is selected
currently
Change the correct answer
Lock/Unlock the answers
New The “New” option on the tool bar allows you to add new:
Questions
Instructions
References
More Button The “More” button in the lower-right corner of the window will open to the
following options:
Properties – allows you to alter the question format, references, and add a
description.
Information Fields – allows you to set the Chapter, Client Need, etc. to
which the question is associated.
Feedback – allows you to enter feedback regarding each answer and the
overall question. This can appear on the answer key.
Hints – allows you to associate a hint with the question.
Editing Questions
How to Edit At any time, a question can be double-clicked and edited in the same ways
that are detailed throughout the “Adding Question” topic.

Updated 02/06/2017 Page 30
Creating an Exam
Why do I need this?
This topic will provide you with details regarding creating an exam for the
first time and some of the features available to customize the exam.
How to do it Follow the steps below to create a new exam.
Step Action
1 Select one or more questions that you would like to add to the exam.
Information: You can select multiple questions from a chapter by holding down the
<CTRL> key while selecting.
2 Select Copy to new Exam from the bottom/center of the page.
Example:
Result: All questions will be added to an exam window:
Continued on next page

Updated 02/06/2017 Page 31
Creating an Exam, Continued
Adding Questions to the exam
To add additional questions to the exam from Diploma, simply go back to the
test generator, select the next question/set of questions and select Copy to
Exam 1 from the bottom/center of the page.
Result: The questions will be added to the bottom of the existing exam.
To add your own question to the exam, simply right click in the open space
below the questions you have added and select “New Question.”
Reference: Additional instructions/information can be found in the “Adding
Questions” topic.
Adding Instructions
Follow the steps below to add instructions to the exam.
Step Action
1 Highlight the line of the exam below where you would like the instructions to appear.
Example: If you would like the instructions to fall directly below the Name line, you
will need to highlight the first question.
2 Right click your mouse.
3 Select New Instruction.
Result: A blank instruction line will appear.
Continued on next page

Updated 02/06/2017 Page 32
Creating an Exam, Continued
Adding Instructions, (continued)
Step Action
4 Double click the blank instruction line.
Result: An editable instruction window will appear.
5 Type the instructions in the open field.
6 Select the X in the upper-right corner of the window.
Caution: You do not need to select the “Save” option. This will save the instruction
as a file to your computer.
Result: The instructions will be added to the exam.
Scrambling Questions
You have the ability to scramble questions once they have been added to the
exam. To do so, select Question from the tool bar. At the bottom of the drop
down menu, there will be an option to Scramble Questions.
Information: Additional scrambling options are available by selecting the
bottom option in the drop down menu.
Updated 02/06/2017 Page 33
Customizing the Exam Layout
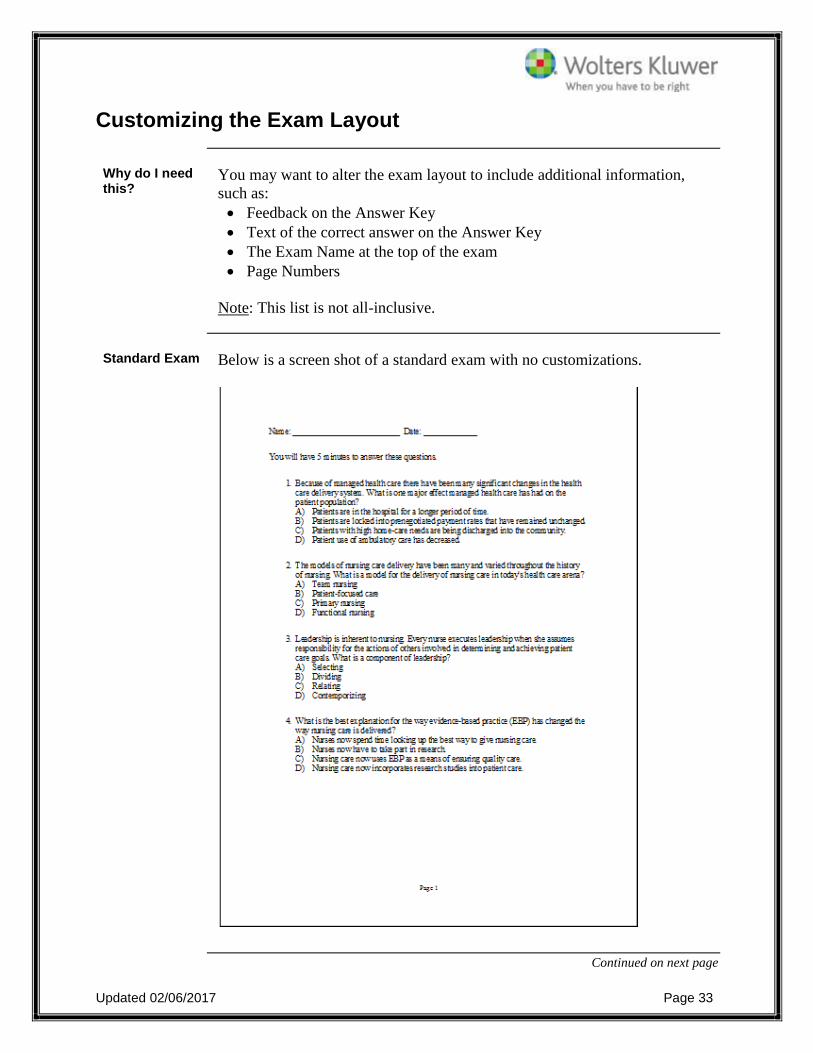
Why do I need this?
You may want to alter the exam layout to include additional information,
such as:
Feedback on the Answer Key
Text of the correct answer on the Answer Key
The Exam Name at the top of the exam
Page Numbers
Note: This list is not all-inclusive.
Standard Exam Below is a screen shot of a standard exam with no customizations.
Continued on next page

Updated 02/06/2017 Page 34
Customizing the Exam Layout, Continued
Standard Answer Key
Below is a screen shot of a standard answer key with no customizations.
Where can customizations be made?
To make customizations to the exam/answer key, select Print Preview. You
will then need to select Page Setup from the menu bar.
Headers & Footers
One of the most common customizations is the Headers and Footers of the
exam. Below are some of the options that other instructors have found most
useful.
Include File Description: This will include the name of the exam at the top
of the exam.
Include Page Number: This will include the page number of the document.
Continued on next page

Updated 02/06/2017 Page 35
Customizing the Exam Layout, Continued
Question Appearance
The Question Appearance area gives you control over how the questions
appear on the exam, such as:
Permitting page breaks within question text (defaults to not-checked)
Blank line between the question and the answer choices
Offering Multiple Choice questions in multiple columns, short answer
style, etc.
Note: This list is not all-inclusive.
Answer Key Another of the most common customizations is the Answer Key. Below are
some of the options that other instructors have found most helpful.
Text of Multiple-Choice Correct Answers
Feedback: Includes any feedback that may be associated with the question or
correct answer for this question.
Chapter Values: Gives the instructor the chapter from which the question
was taken.
Saving the Exam
Naming Convention
Saving the exam is exactly like saving any file; however, whatever the file is
saved as becomes the Exam Name or File Description. This will be what
appears at the top of the exam if the File Description option is turned on
during customization.

Updated 02/06/2017 Page 36
Exporting
Why do I need this?
You may find that you need to export your exams to other formats depending
on the intended use.
Example:
Microsoft Word: This is helpful if you intend on emailing the exam to
your students (take-home exams).
Blackboard Format: This is used when you would like to import the
exam into Blackboard to be taken directly from your facility’s LMS.
How to do it Follow the instructions below to export an exam from Diploma.
Step Action
1 Select File from the menu bar within the exam.
2 Select Export.
Note: Once an export method has been selected, it will automatically appear in a drop
down menu when “Export” is selected in the future.
Result: You will be presented with a list of possible formats.
3 Select the format that you wish to use.
Information: RTF for word processors is used for exporting to Microsoft Word.
(This is the option we will be using for this example.)
4 Select Next.
Result: You will be prompted to select your exporting parameters.
5 Select the parameters that you would like to use.
Continued on next page

Updated 02/06/2017 Page 37
Exporting, Continued
How to do it, (continued)
Step Action
6 Select OK.
Result: You will be prompted to choose where the document will save.
7 Select the location to which you would like the document to save.
8 Select Save.
Result: The exam will save to that location.
Canvas If your school uses the LMS, "Canvas", you can export your exams and
questions banks from Diploma into Canvas using the export format IMS QTI.
If you have any problems with the export into Canvas, you should go to
http://support.blackboardcollaborate.com and submit a ticket to the Diploma
Support team for assistance.