have fun with cupcakes! - the chefs...
TRANSCRIPT

CUPCAKES!have fun with
Page 2 Have fun with cupcakes!
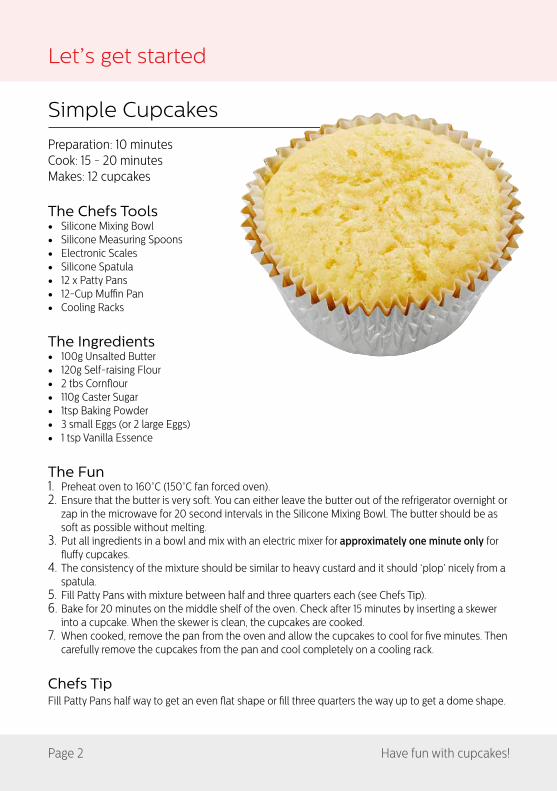
Simple Cupcakes Preparation: 10 minutes Cook: 15 - 20 minutes Makes: 12 cupcakes
The Chefs Tools• Silicone Mixing Bowl• Silicone Measuring Spoons• Electronic Scales• Silicone Spatula• 12 x Patty Pans• 12-Cup Muffin Pan• Cooling Racks
The Ingredients• 100g Unsalted Butter• 120g Self-raising Flour• 2 tbs Cornflour• 110g Caster Sugar• 1tsp Baking Powder• 3 small Eggs (or 2 large Eggs)• 1 tsp Vanilla Essence
The Fun1. Preheat oven to 160°C (150°C fan forced oven).2. Ensure that the butter is very soft. You can either leave the butter out of the refrigerator overnight or
zap in the microwave for 20 second intervals in the Silicone Mixing Bowl. The butter should be as soft as possible without melting.
3. Put all ingredients in a bowl and mix with an electric mixer for approximately one minute only for fluffy cupcakes.
4. The consistency of the mixture should be similar to heavy custard and it should ‘plop’ nicely from a spatula.
5. Fill Patty Pans with mixture between half and three quarters each (see Chefs Tip).6. Bake for 20 minutes on the middle shelf of the oven. Check after 15 minutes by inserting a skewer
into a cupcake. When the skewer is clean, the cupcakes are cooked. 7. When cooked, remove the pan from the oven and allow the cupcakes to cool for five minutes. Then
carefully remove the cupcakes from the pan and cool completely on a cooling rack.
Chefs Tip Fill Patty Pans half way to get an even flat shape or fill three quarters the way up to get a dome shape.
Let’s get started
Have fun with cupcakes! Page 3
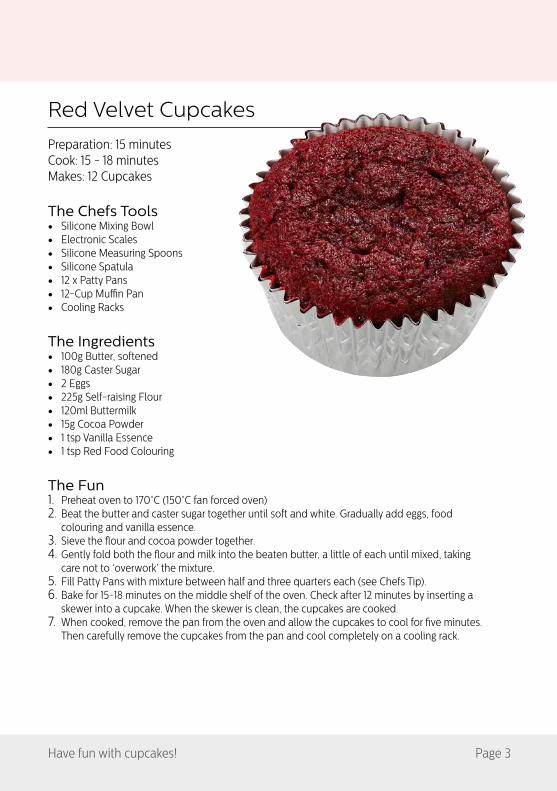
Red Velvet Cupcakes Preparation: 15 minutesCook: 15 - 18 minutesMakes: 12 Cupcakes
The Chefs Tools• Silicone Mixing Bowl• Electronic Scales• Silicone Measuring Spoons• Silicone Spatula• 12 x Patty Pans• 12-Cup Muffin Pan• Cooling Racks
The Ingredients• 100g Butter, softened• 180g Caster Sugar• 2 Eggs• 225g Self-raising Flour• 120ml Buttermilk• 15g Cocoa Powder• 1 tsp Vanilla Essence• 1 tsp Red Food Colouring
The Fun1. Preheat oven to 170°C (150°C fan forced oven)2. Beat the butter and caster sugar together until soft and white. Gradually add eggs, food
colouring and vanilla essence.3. Sieve the flour and cocoa powder together.4. Gently fold both the flour and milk into the beaten butter, a little of each until mixed, taking
care not to ‘overwork’ the mixture. 5. Fill Patty Pans with mixture between half and three quarters each (see Chefs Tip).6. Bake for 15-18 minutes on the middle shelf of the oven. Check after 12 minutes by inserting a
skewer into a cupcake. When the skewer is clean, the cupcakes are cooked. 7. When cooked, remove the pan from the oven and allow the cupcakes to cool for five minutes.
Then carefully remove the cupcakes from the pan and cool completely on a cooling rack.
Page 4 Have fun with cupcakes!
12 3 4
5
Cream Cheese Icing Butter Cream
The real fun begins: Icing
Let’s get decorating: Piping
The Fun Beat all ingredients together until light and fluffy. (Start on a low speed to avoid creating a cloud of icing sugar… very messy! ☺)
How to fill a Piping Bag
1. Cut the tip of a Piping Bag suitable to fit the Nozzle you wish to use.
2. Tie a rubber band around the top of the Piping Bag above the Nozzle to make it easier to fill the bag with icing. This way you won’t have any waste. Simply snip the elastic band off when you are ready to start piping (taking care not to nick the Piping Bag).
3. Holding the Piping Bag with one hand, fold the top of the bag down with the other hand to form a ‘cuff’ over your hand.
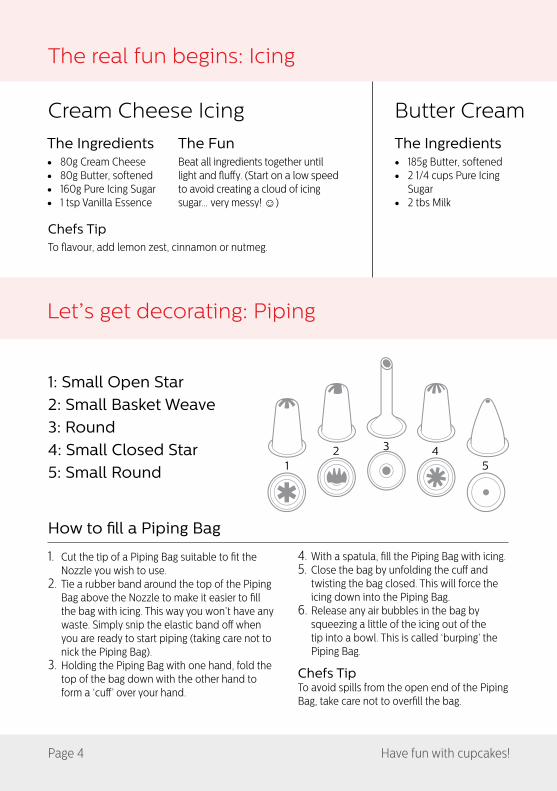
1: Small Open Star 2: Small Basket Weave 3: Round 4: Small Closed Star 5: Small Round
The Ingredients• 80g Cream Cheese• 80g Butter, softened• 160g Pure Icing Sugar• 1 tsp Vanilla Essence
The Ingredients• 185g Butter, softened • 2 1/4 cups Pure Icing
Sugar• 2 tbs Milk
4. With a spatula, fill the Piping Bag with icing. 5. Close the bag by unfolding the cuff and
twisting the bag closed. This will force the icing down into the Piping Bag.
6. Release any air bubbles in the bag by squeezing a little of the icing out of the tip into a bowl. This is called ‘burping’ the Piping Bag.
Chefs TipTo avoid spills from the open end of the Piping Bag, take care not to overfill the bag.
Chefs TipTo flavour, add lemon zest, cinnamon or nutmeg.

Have fun with cupcakes! Page 5
Chocolate GanacheButter Cream
The fun1. Place cream into the saucepan and
slowly bring to boil. When cream has come to boil remove from the heat and add chocolate and stir until chocolate has melted and your ganache mixture is smooth and silky.
2. Allow ganache to cool into a thick mixture.
The Ingredients• 130g Dark Chocloate• 60g Cream
How to pipe a Swirl & Rose
Piping Nozzle: Small Closed Star or Small Open Star
1. Holding Piping Bag at 90° angle, pipe a spiral of icing starting at the outer edge and working inward.
2. End spiral at the center of the cupcake. Stop pressure and pull Piping Nozzle straight up and away. For a fuller spiral, pipe a second smaller spiral on top of first spiral.
Chefs TipTo pipe a Rose, simply reverse your swirl, starting at the centre of the cupcake and working outwards.
How to pipe a Sunflower
Piping Nozzle: Small Closed Star or Small Open Star
1. Hold piping bag at 90° angle and pipe individual petals from the outer edge to the centre of the cupcake.
2. Repeat until the top of the cupcake is covered is covered with petals.
The Fun 1. Beat together
butter and icing sugar, when pale and fluffy add milk.
2. Flavour and colour as desired.
Swirl = Pipe the swirl from outside to inside
Rose = Pipe the swirl from inside to outside
Icing

Page 6 Have fun with cupcakes!
All about Fondant: Tips & Tricks
Preparing fondantTo prepare the fondant, soften it by kneading gently. This will make it easier to roll out and make 3D shapes.
Coloured fondantIf you are colouring your own fondant, we recommend using powdered or gel food colouring, liquid food colouring will make the fondant too wet.
How to colour fondant1. Roll fondant into a ball, kneading
until it's soft and pliable. Using a toothpick, add dots of food colour in several spots.
2. Knead colour into your fondant ball using disposable kitchen gloves to avoid staining your hand with the food colouring.
3. Continue kneading until colour is evenly blended; add a little more colour if required.
Rolling fondantWhen rolling fondant, lift and rotate regularly to avoid the fondant sticking to the Rolling Mat.Ensure your fondant is at least 5mm thick. Any thinner and your fondant may crack.
Storing fondantTo keep unused fondant soft and usable, place in a plastic bag, removing as much air as possible before sealing in an airtight container.
Covering cupcakes with fondantCover top of cupcake with either ganache, butter cream or cream cheese icing to secure fondant layer to the cupcake. This will also add a little extra yumminess to your cupcake!
Attaching fondant accents / shapes to fondant covered cupcakes1. Brush back of fondant decoration
with damp brush. Take care to use just a little water or the fondant decoration will slide around the cupcake.
2. Position decoration onto fondant-covered cupcake. Press lightly with finger to smooth if needed.
Pre-made fondant comes in huge range of colours and is available from craft stores, cake supply stores and online.

Have fun with cupcakes! Page 7
Butterflies
The Tools• Pink Fondant• Palette Knife• Rolling Mat• Rolling pin• Textured Sheet• Piping Bag• Piping Nozzle• Medium Butterfly Cutter
The Fun 1. Using the Rolling Mat, roll
out a piece of coloured fondant with the Rolling Pin so that the fondant is approximately 5mm thick.
2. Place Textured Sheet on fondant as shown and, with the Rolling Pin, gently roll over the top of the sheet to create a pattern.
3. Remove Textured Sheet, taking care not to stretch the fondant as this may distort the pattern.
4. With the Medium Butterfly Cutter press firmly into the textured fondant.
5. To create ‘flying’ butterflies, make a ‘valley’ from a small sheet of cardboard as shown.
6. Place butterflies into the ‘valley’ and dry for approximately two hours.
Your butterflies are ready to fly! See page 5 for tips on piping an icing swirl.
Create stylish cupcakes with layered shapes
Impress family and friends with these beautiful cupcake designs by mixing and matching different sizes, shapes, textures and colours for your very own professional looking cupcakes!
Pro decorating tips

Page 8 Have fun with cupcakes!
Quilted Pillow with Silver Heart
The Tools• Red Fondant• Palette Knife• Rolling Mat• Medium Heart Cutter• Round Cutter (select the size appropriate to the
top of your cupcake)• Silver Cachous Balls (available from
supermarkets, cake decorating or craft stores)
The Fun1. Using the Rolling Mat, roll out a piece of red
fondant with the Rolling Pin so that the fondant is approximately 5mm thick.
2. Using a Round Cutter, cut a disc to fit the top of your cupcake.
3. Cover the top of the cupcake with either ganache, butter cream or cream cheese icing to secure fondant disc to the cupcake.
4. With a Palette Knife score lines horizontally on the fondant, approximately 10 – 15mm apart.
5. Turn cupcake 45 degrees and repeat horizontal lines to create a diamond quilted pillow effect.
6. Using the Medium Heart Shape Cutter, press lightly to cut a heart shape from the fondant. Use the Palette Knife or a toothpick to lift heart easily from the fondant.
7. To complete, press Silver Cachous Balls into the heart-shaped cavity.
And voila! A gorgeous cupcake made with love!
Pro decorating tips

Have fun with cupcakes! Page 9
Little Piggy
The Chefs Tools• Pink and Green Fondant• Palette Knife• Rolling Mat• Large Round Cutter (body)• Small Round Cutter (head)• Round Scalloped-edge Cutter (choose size
appropriate to the top of your cupcake)
The Fun 1. Using the Rolling Mat, roll out a piece of green
fondant with the Rolling Pin so that the fondant is approximately 5mm thick.
2. Using the Round Scalloped-edge Cutter, cut a disc to fit the top of your cupcake.
3. Cover top of cupcake with either ganache, butter cream or cream cheese icing to secure green round fondant disc to the cupcake.
4. To make Piggy’s body, roll out pink fondant with the Rolling Pin so that the fondant is approximately 3 - 5mm thick.
5. Body and head: with the Large and Small Round Cutters, cut a round each to form Piggy’s body and head.
6. Snout: with your fingers roll a small piece of pink fondant and flatten.
7. Limbs: to create Piggy’s ears, legs and tail, rollout small pieces of pink fondant as shown.
8. Assemble: to put Piggy together, refer to page 6: Attach fondant accents / shapes to fondant covered cupcakes.
And this little piggy cried wee wee wee all the way home to the party!☺

Page 10 Have fun with cupcakes!
Leaf
The Tools• Green Fondant• Palette Knife or toothpick• Rolling Mat• Rolling Pin
1. Roll a small piece of green fondant into a ball as shown.2. Flatten by pressing ball of fondant between your palms, or on the Rolling Mat with
your fingers or the Rolling Pin.3. Using your fingers, work the round into the shape of a leaf, similar to a tear drop. With
a Palette Knife or toothpick, press lightly into the leaf to draw the veins of the leaf.4. When complete, allow the leaf to dry (approximately two 2 hours).
Roses
The Tools• Red Fondant• Palette Knife• Rolling Mat• Rolling Pin
1. On the Rolling Mat, roll out a small piece of fondant in the colour of your rose to form a snake as shown.
2. With the Rolling Pin, roll out the snake so that it’s flat (3-5 mm thick).
3. To create a rose, start rolling the fondant with your fingers at one end as shown, pinching at the base as you roll.
4. Continue rolling between your fingers until you have a rose the size you desire, pinching off the excess fondant.
5. When complete, allow the rose to dry (approximately two hours)
Pro decorating tips
Have fun with cupcakes! Page 11
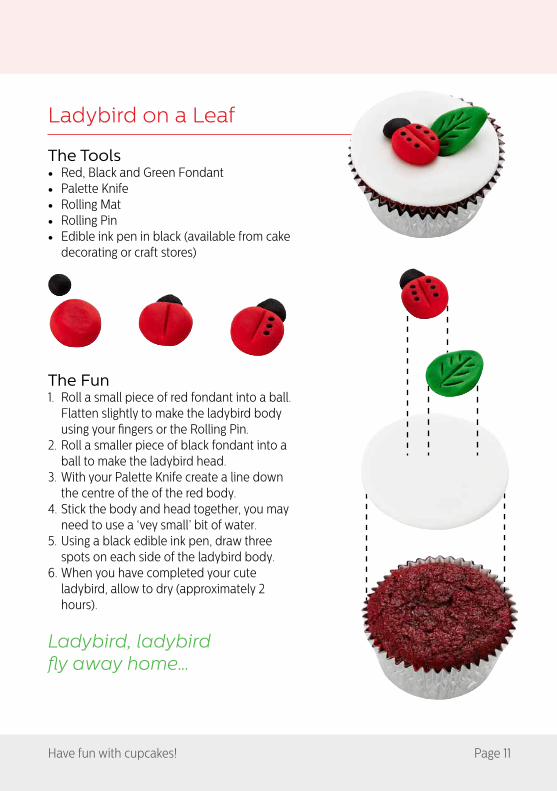
Ladybird on a Leaf
The Tools• Red, Black and Green Fondant• Palette Knife• Rolling Mat• Rolling Pin• Edible ink pen in black (available from cake
decorating or craft stores)
The Fun 1. Roll a small piece of red fondant into a ball.
Flatten slightly to make the ladybird body using your fingers or the Rolling Pin.
2. Roll a smaller piece of black fondant into a ball to make the ladybird head.
3. With your Palette Knife create a line down the centre of the of the red body.
4. Stick the body and head together, you may need to use a ‘vey small’ bit of water.
5. Using a black edible ink pen, draw three spots on each side of the ladybird body.
6. When you have completed your cute ladybird, allow to dry (approximately 2 hours).
Ladybird, ladybird fly away home…

Page 12 Have fun with cupcakes!
Contents of this Kit:
6 x Double Edged Round/Scalloped Cookie Cutters 25 x Stainless Steel Cookie Cutters (Letters) 27 x Stainless Steel Cookie Cutters (Assorted Shapes) 1 x 23cm Palette Knife 100 x Patty Pans 1 x Rolling Pin1 x Rolling Mat 2 x Piping Bags 5 x Plastic Icing Nozzles2 x Texture Sheets 1 x 12-Cup Muffin Pan1 x A5 Booklet (12 pages)1 x Tin Box
For up to date information on product Use and Care and Warranty details, please visit www.chefstoolbox.com
For more recipes, please refer to our website
www.chefstoolbox.com
Tin can also be used as a cake tin to transport yum yums!