guide+on+configuring+dynamic+vlan+802.1x+authentication_1
TRANSCRIPT
Guide on Configuring Dynamic vlan 802.1x Authentication
Step-by-Step procedure for configuring dynamic vlan 802.1x authentication using Brocade switch

1
Table of Contents
Install Windows 2008 R2 NPS for RADIUS Authentication ........................................................................... 2
Install and Configure Dynamic Host Configuration Protocol (DHCP) on Windows Server 2008 R2 ........... 14
Switch Configuration ................................................................................................................................... 22
Windows 7 configuration(client pc) ............................................................................................................ 23
Connect to the User .................................................................................................................................... 26
Machine Authentication ............................................................................................................................. 33

2
Install Windows 2008 R2 NPS for RADIUS Authentication
First go into Server Manager. Highlight Roles on the left side, then in the Role Summary section click Add Roles on the far right.
3
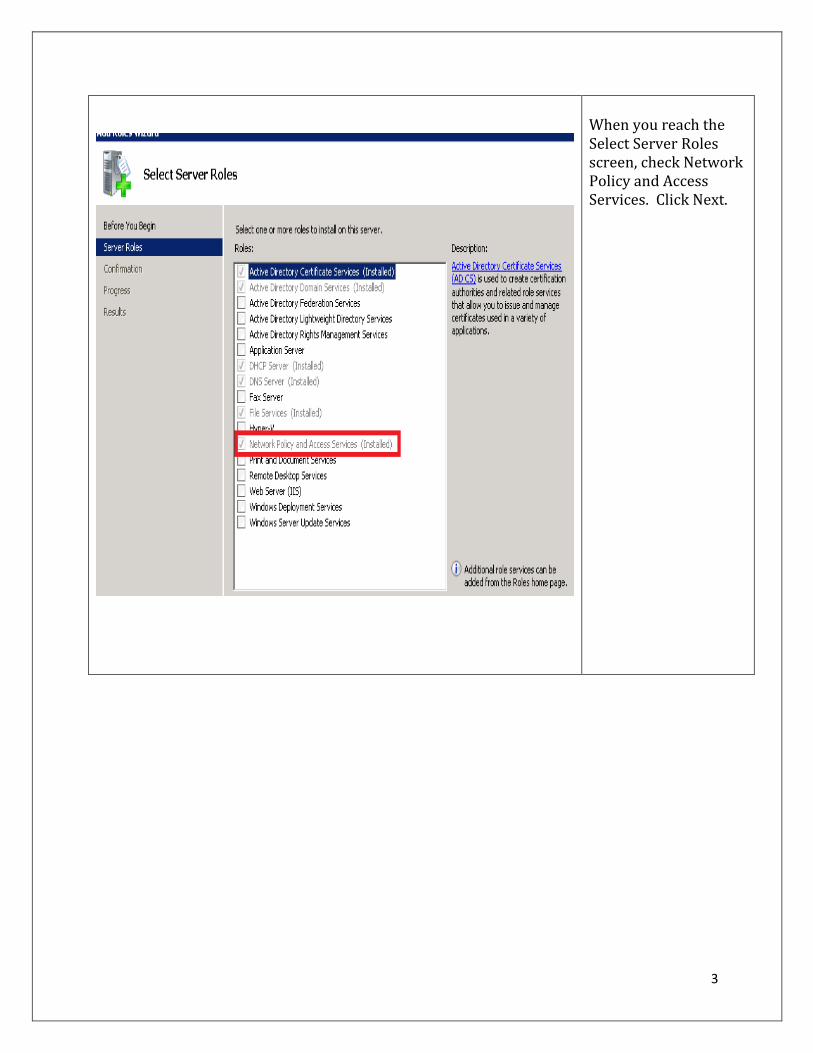
When you reach the Select Server Roles screen, check Network Policy and Access Services. Click Next.

4
Check Network Policy Server only, then click Next. Then click Install and confirm the install was successful.
5
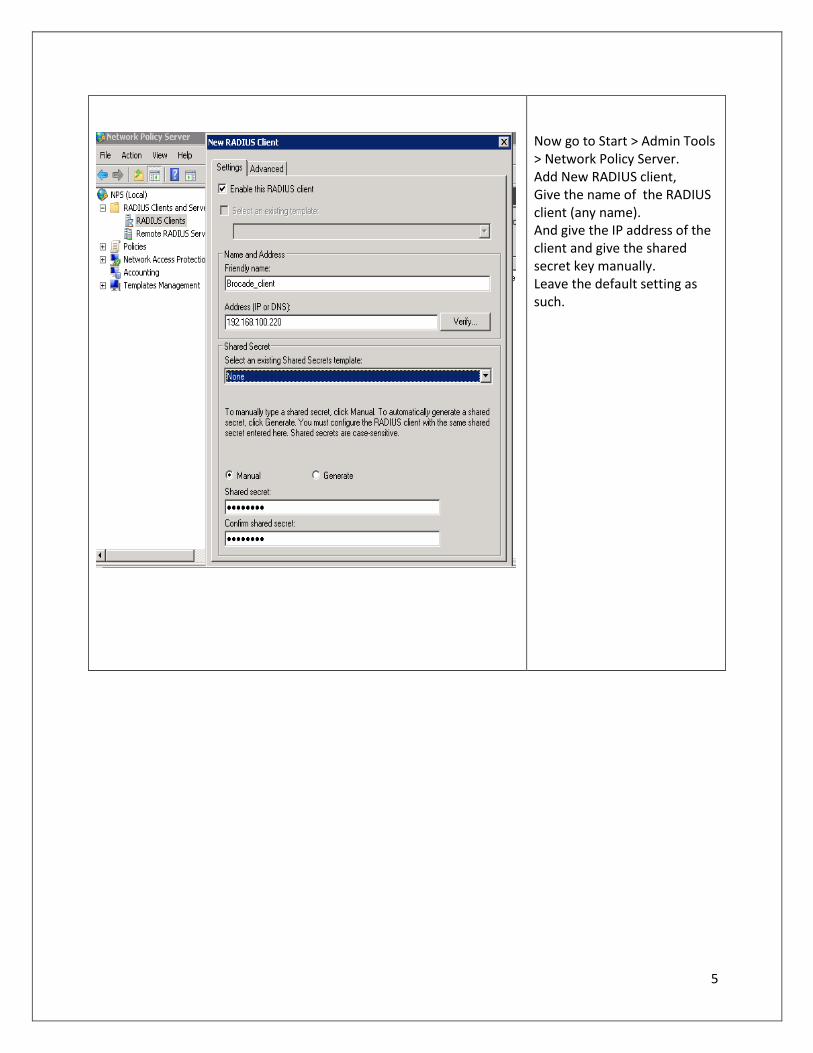
Now go to Start > Admin Tools > Network Policy Server. Add New RADIUS client, Give the name of the RADIUS client (any name). And give the IP address of the client and give the shared secret key manually. Leave the default setting as such.
6
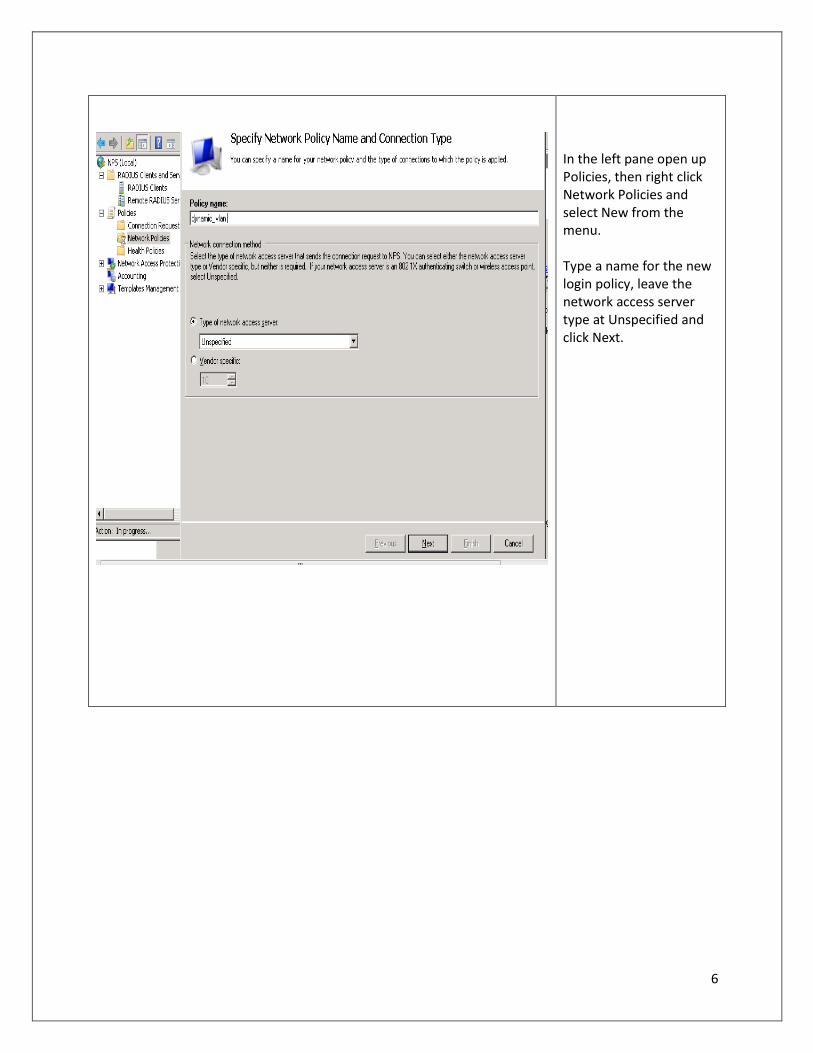
In the left pane open up Policies, then right click Network Policies and select New from the menu. Type a name for the new login policy, leave the network access server type at Unspecified and click Next.
7
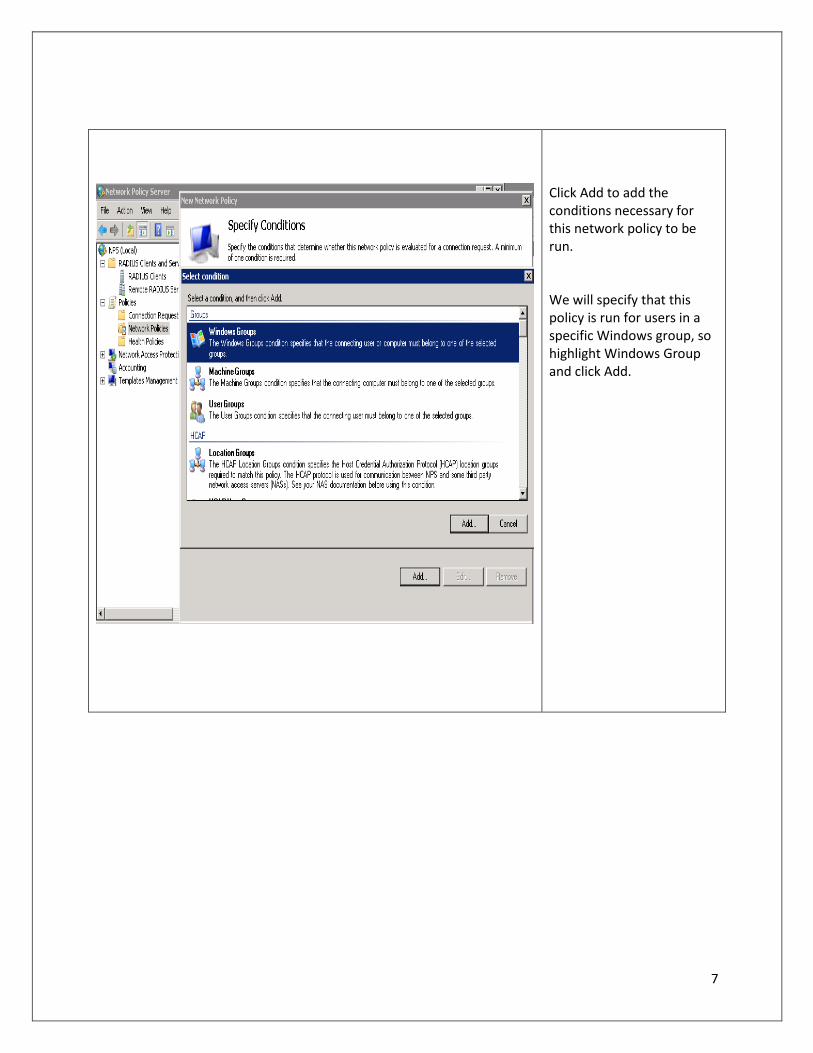
Click Add to add the conditions necessary for this network policy to be run. We will specify that this policy is run for users in a specific Windows group, so highlight Windows Group and click Add.
8
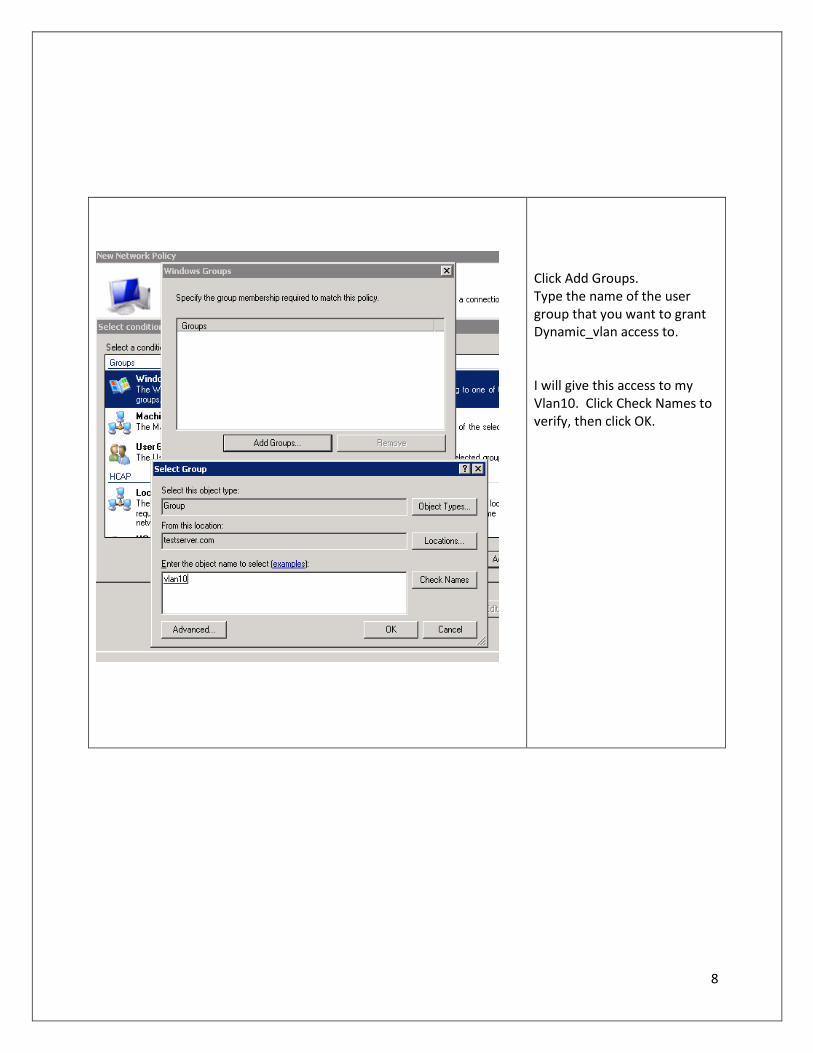
Click Add Groups. Type the name of the user group that you want to grant Dynamic_vlan access to. I will give this access to my Vlan10. Click Check Names to verify, then click OK.
9
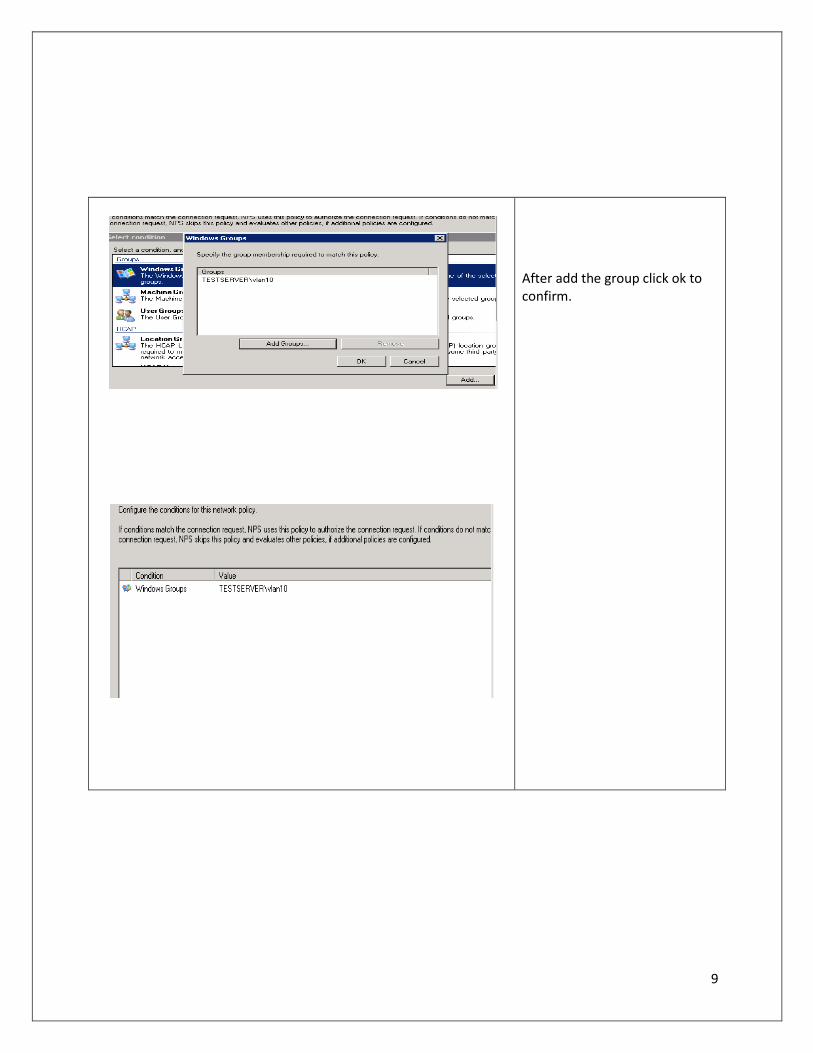
After add the group click ok to confirm.
10
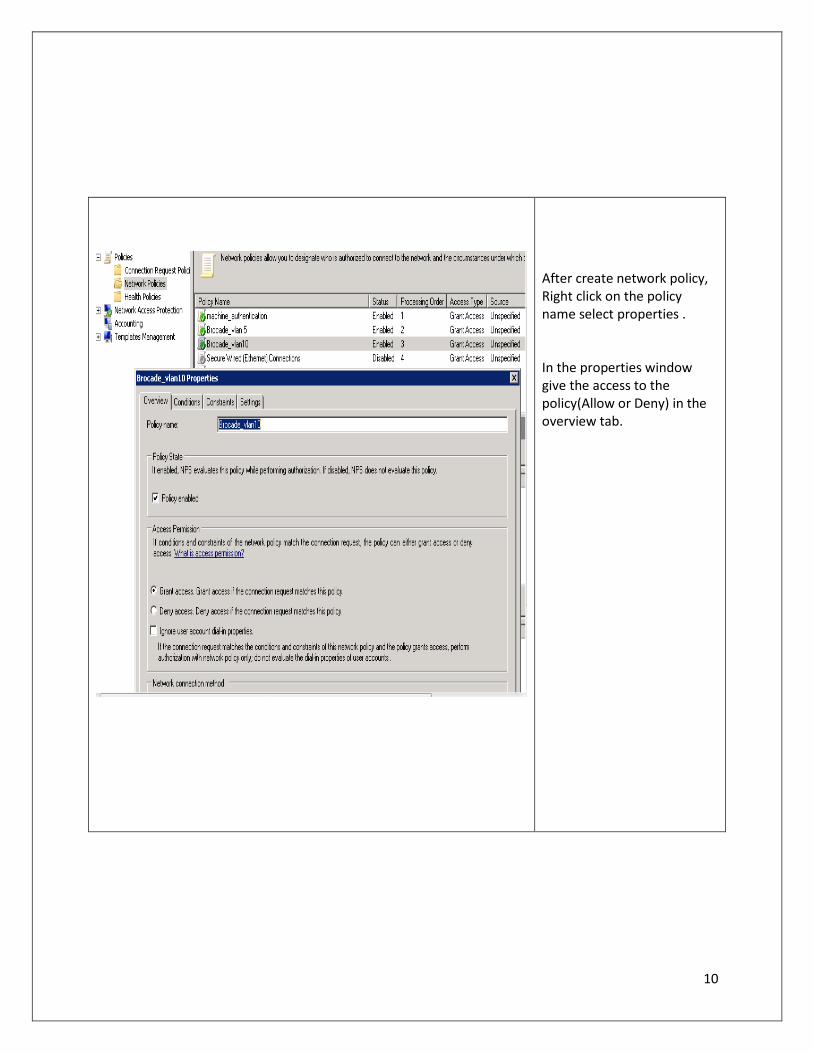
After create network policy, Right click on the policy name select properties . In the properties window give the access to the policy(Allow or Deny) in the overview tab.

11
In the constraints tab select the authenticate method for allow access only to those clients that authenticate with the PEAP(Protected Extensible Authentication method )

12
In the settings add the following attributes. 1.Tunnel-Medium type select the 802.1x 2.Tunnel_Pvt_group_ ID give the vlan id number for assign the user who match this network policy. 3.Tunnel-Type select the virtual LANs(vlan).
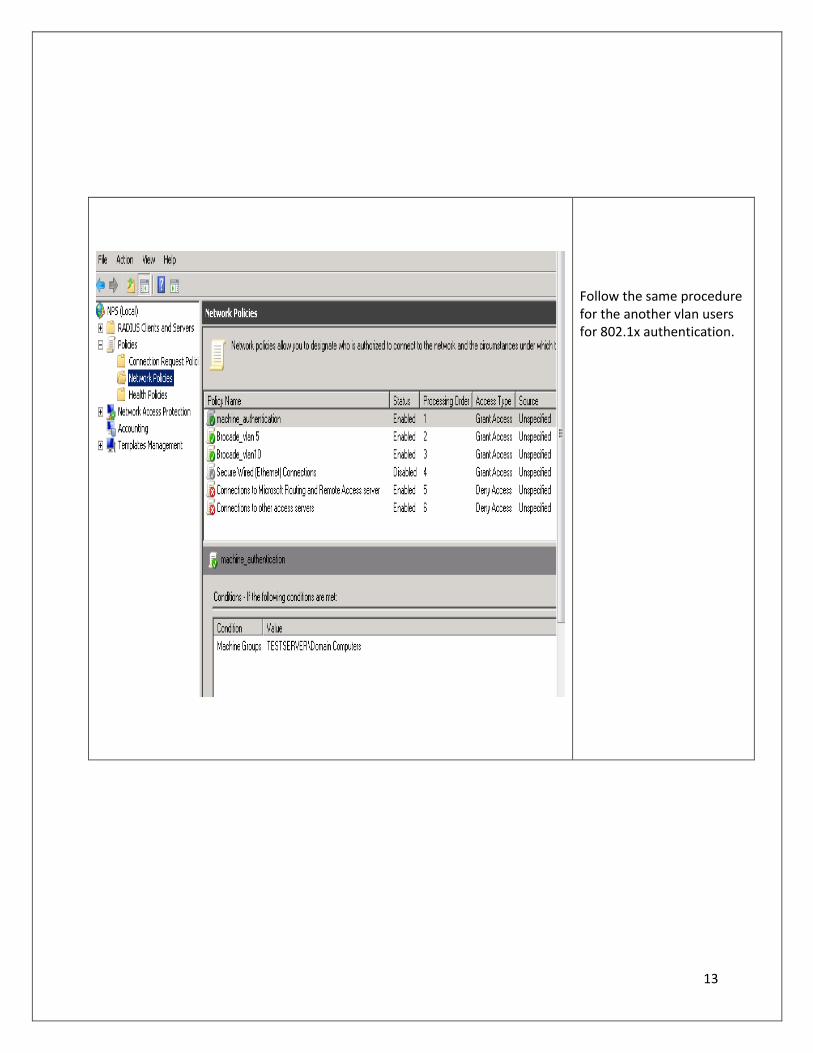
13
Follow the same procedure for the another vlan users for 802.1x authentication.

14
Install and Configure Dynamic Host Configuration Protocol (DHCP) on
Windows Server 2008 R2
For install the DHCP server in windows 2008 R2, follow this guide to install the DHCP server in
the server manager.
http://www.howtogeek.com/99723/how-to-set-up-dhcp-in-server-2008-r2/
After started the DHCP service in the server, add the scopes for the different vlans with the IP
range.
15
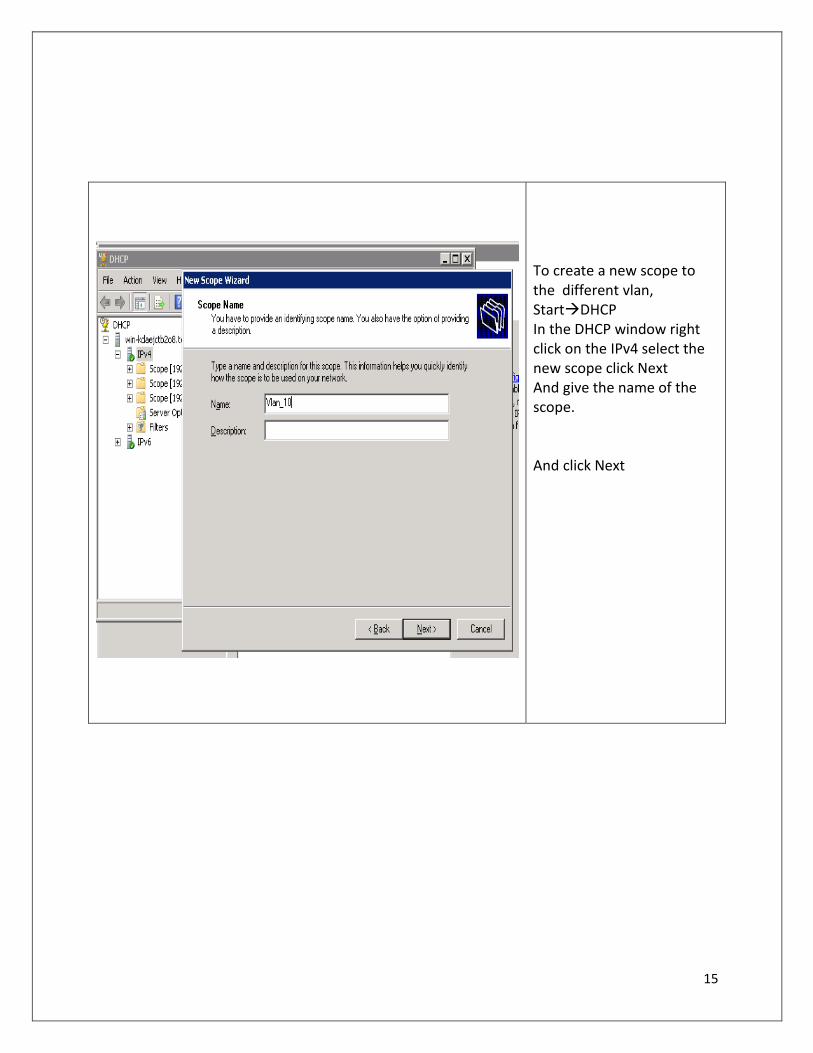
To create a new scope to the different vlan, StartDHCP In the DHCP window right click on the IPv4 select the new scope click Next And give the name of the scope. And click Next

16
Give the IP address range start IP address and End IP address for the DHCP server release the vlan user. Click Next.
17
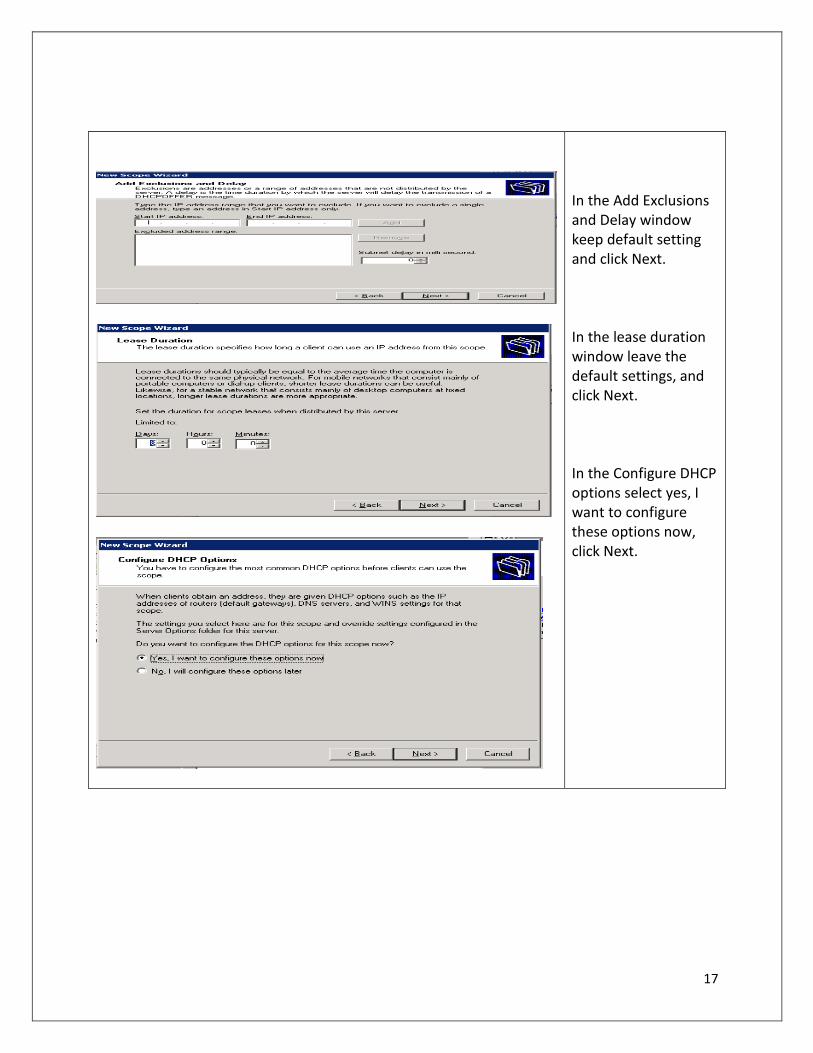
In the Add Exclusions and Delay window keep default setting and click Next. In the lease duration window leave the default settings, and click Next. In the Configure DHCP options select yes, I want to configure these options now, click Next.
18
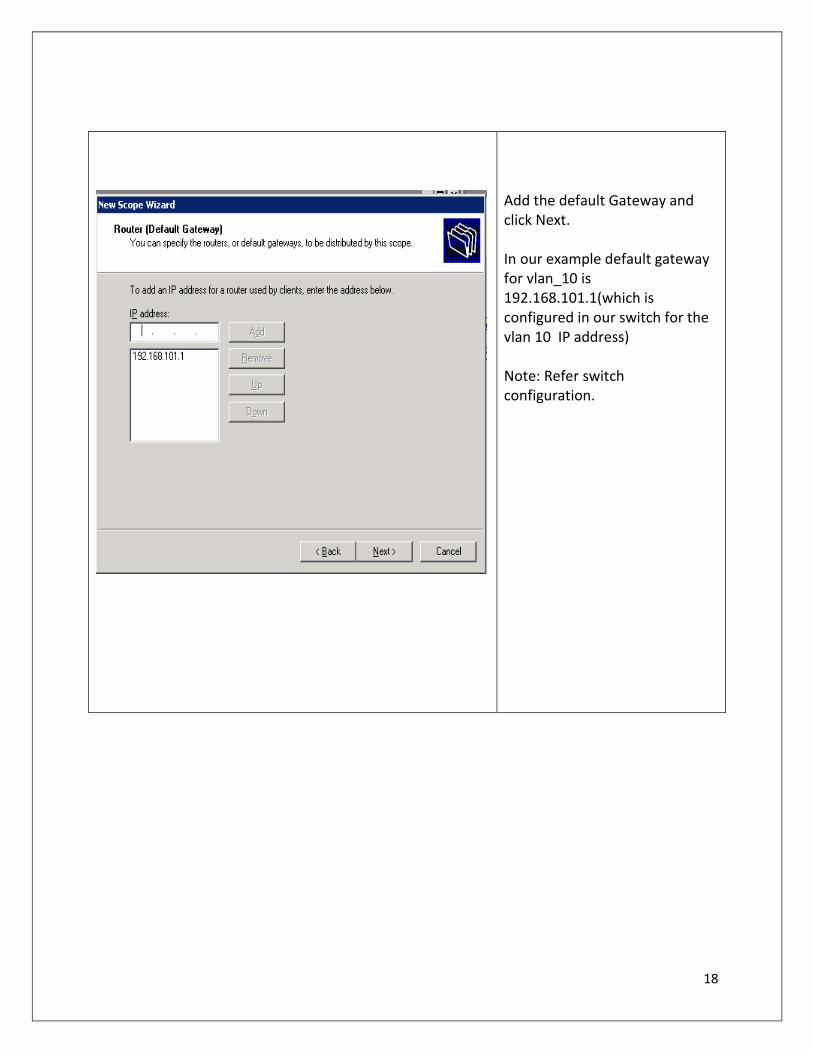
Add the default Gateway and click Next. In our example default gateway for vlan_10 is 192.168.101.1(which is configured in our switch for the vlan 10 IP address) Note: Refer switch configuration.

19
Add the domain name and DNS Server IP. Click Next. In the WINS server window leave the default setting. Note: 192.168.100.66 is the windows server 2008 R2 IP address which is run DNS and DHCP services. Click Next.

20
Activate scope, select the yes, I want to activate this scope now. Click Next. Click Finish.
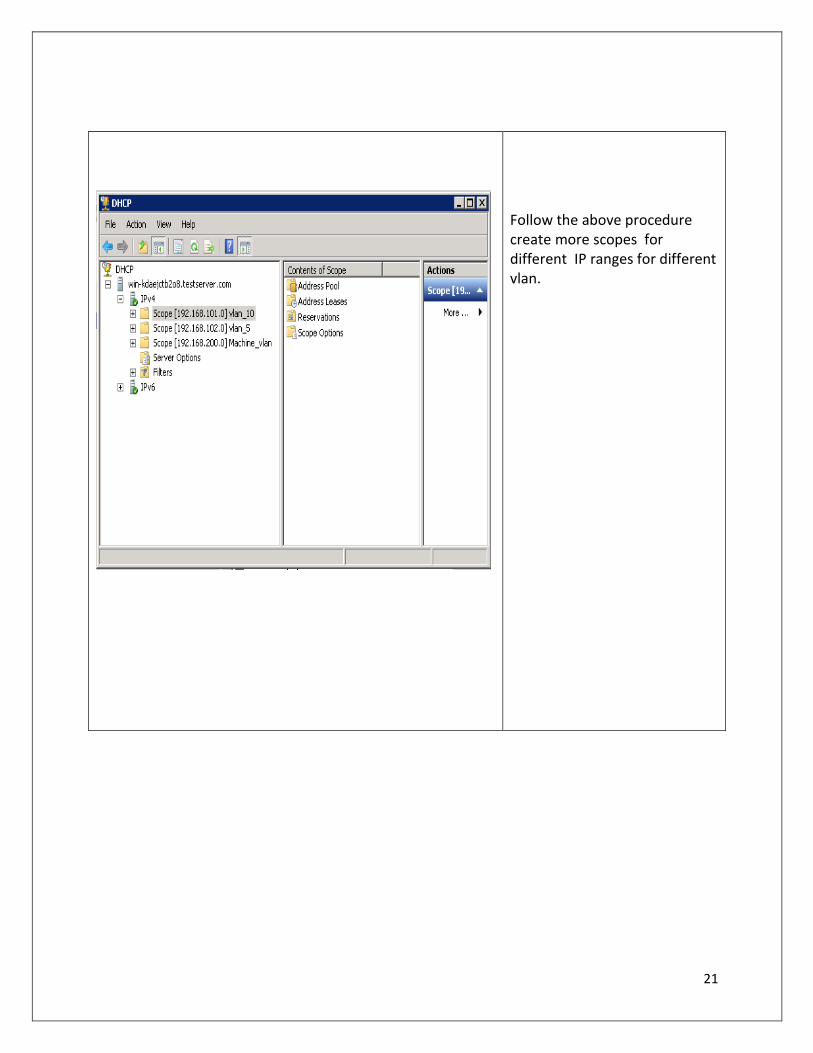
21
Follow the above procedure create more scopes for different IP ranges for different vlan.
22
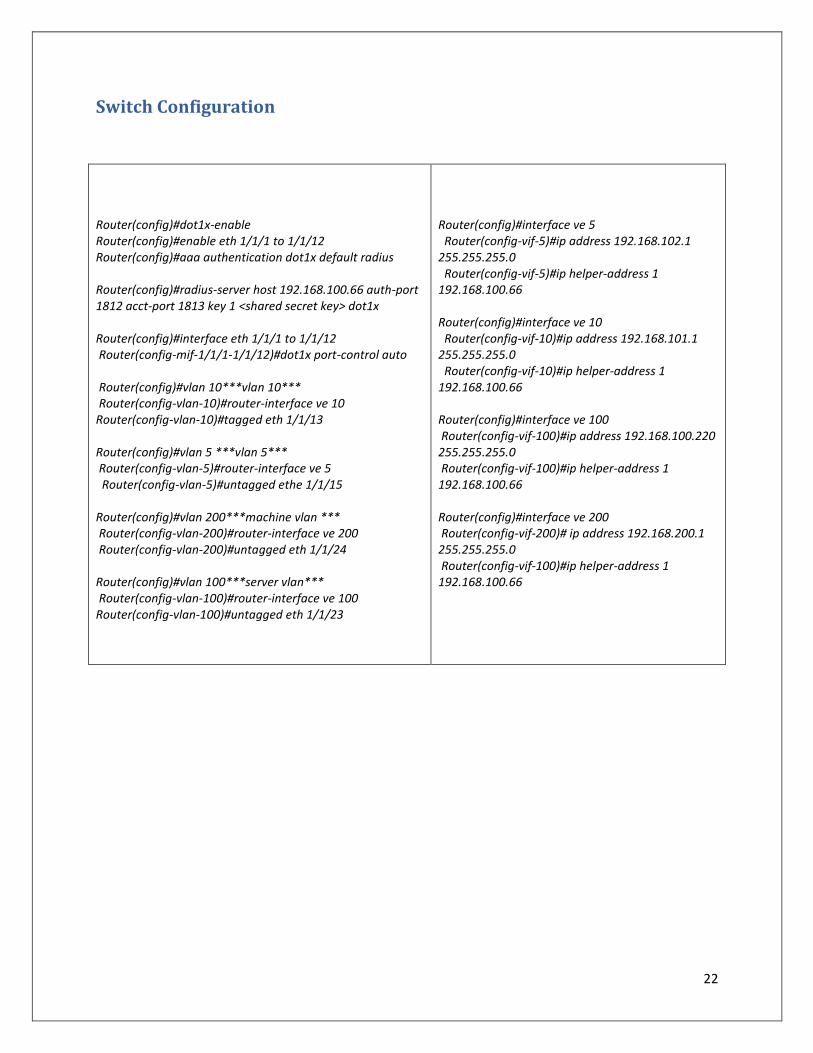
Switch Configuration
Router(config)#dot1x-enable Router(config)#enable eth 1/1/1 to 1/1/12 Router(config)#aaa authentication dot1x default radius Router(config)#radius-server host 192.168.100.66 auth-port 1812 acct-port 1813 key 1 <shared secret key> dot1x Router(config)#interface eth 1/1/1 to 1/1/12 Router(config-mif-1/1/1-1/1/12)#dot1x port-control auto Router(config)#vlan 10***vlan 10*** Router(config-vlan-10)#router-interface ve 10 Router(config-vlan-10)#tagged eth 1/1/13 Router(config)#vlan 5 ***vlan 5*** Router(config-vlan-5)#router-interface ve 5 Router(config-vlan-5)#untagged ethe 1/1/15 Router(config)#vlan 200***machine vlan *** Router(config-vlan-200)#router-interface ve 200 Router(config-vlan-200)#untagged eth 1/1/24 Router(config)#vlan 100***server vlan*** Router(config-vlan-100)#router-interface ve 100 Router(config-vlan-100)#untagged eth 1/1/23
Router(config)#interface ve 5 Router(config-vif-5)#ip address 192.168.102.1 255.255.255.0 Router(config-vif-5)#ip helper-address 1 192.168.100.66 Router(config)#interface ve 10 Router(config-vif-10)#ip address 192.168.101.1 255.255.255.0 Router(config-vif-10)#ip helper-address 1 192.168.100.66 Router(config)#interface ve 100 Router(config-vif-100)#ip address 192.168.100.220 255.255.255.0 Router(config-vif-100)#ip helper-address 1 192.168.100.66 Router(config)#interface ve 200 Router(config-vif-200)# ip address 192.168.200.1 255.255.255.0 Router(config-vif-100)#ip helper-address 1 192.168.100.66

23
Windows 7 configuration(client pc)
StartRun Type ncpa.cpl press enter. In Network connections right click on the Local connection and go to properties. Select authentication tab Check the Enable IEEE 802.1X authentication fot dot1x authetiction Select PEAP in the network authentication method. Click settings
24
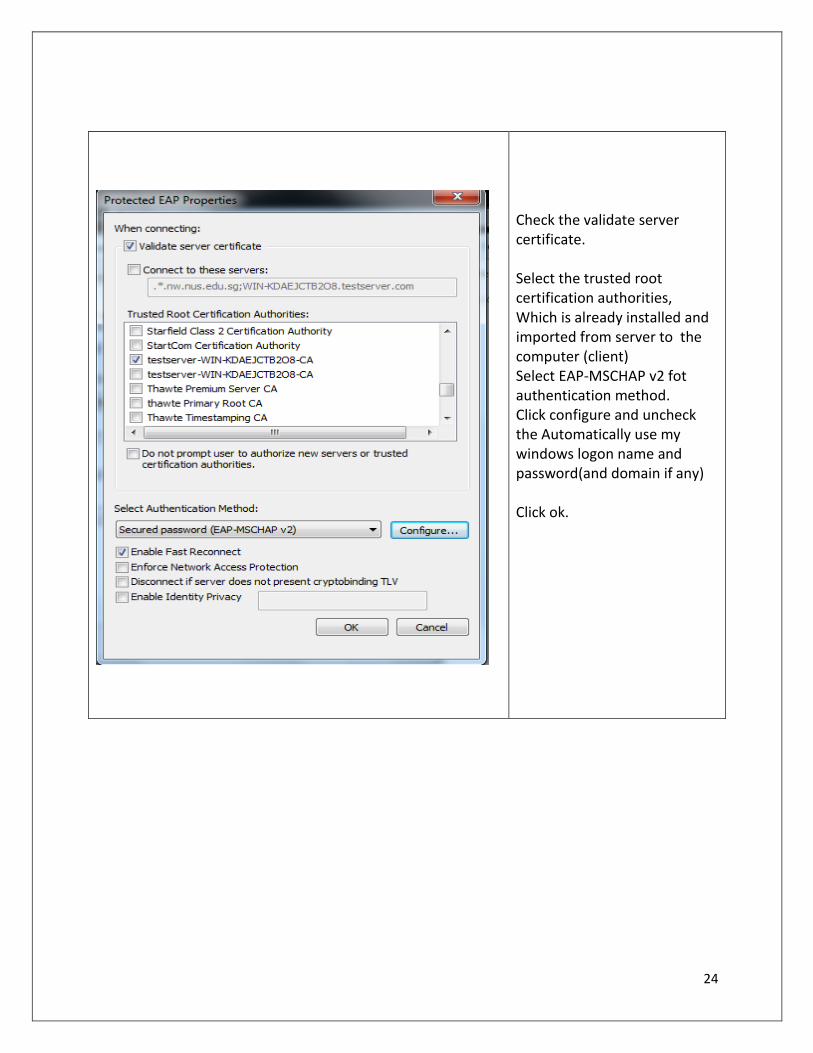
Check the validate server certificate. Select the trusted root certification authorities, Which is already installed and imported from server to the computer (client) Select EAP-MSCHAP v2 fot authentication method. Click configure and uncheck the Automatically use my windows logon name and password(and domain if any) Click ok.
25
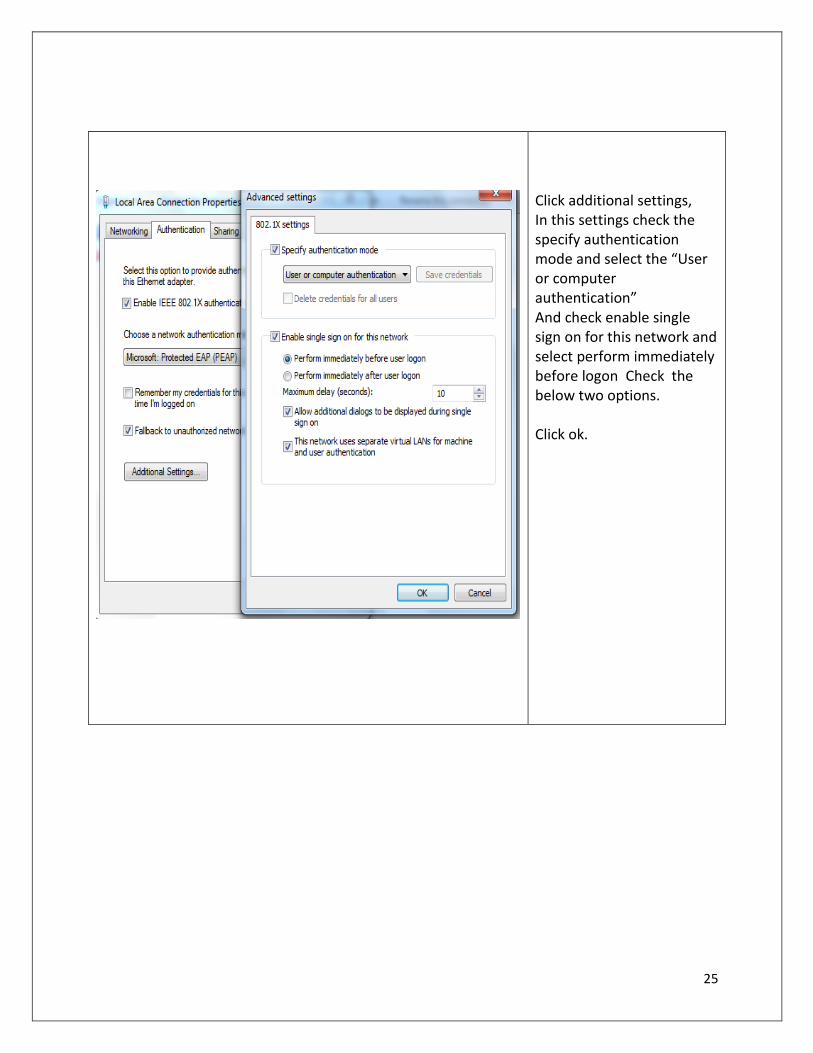
Click additional settings, In this settings check the specify authentication mode and select the “User or computer authentication” And check enable single sign on for this network and select perform immediately before logon Check the below two options. Click ok.

26
Connect to the User
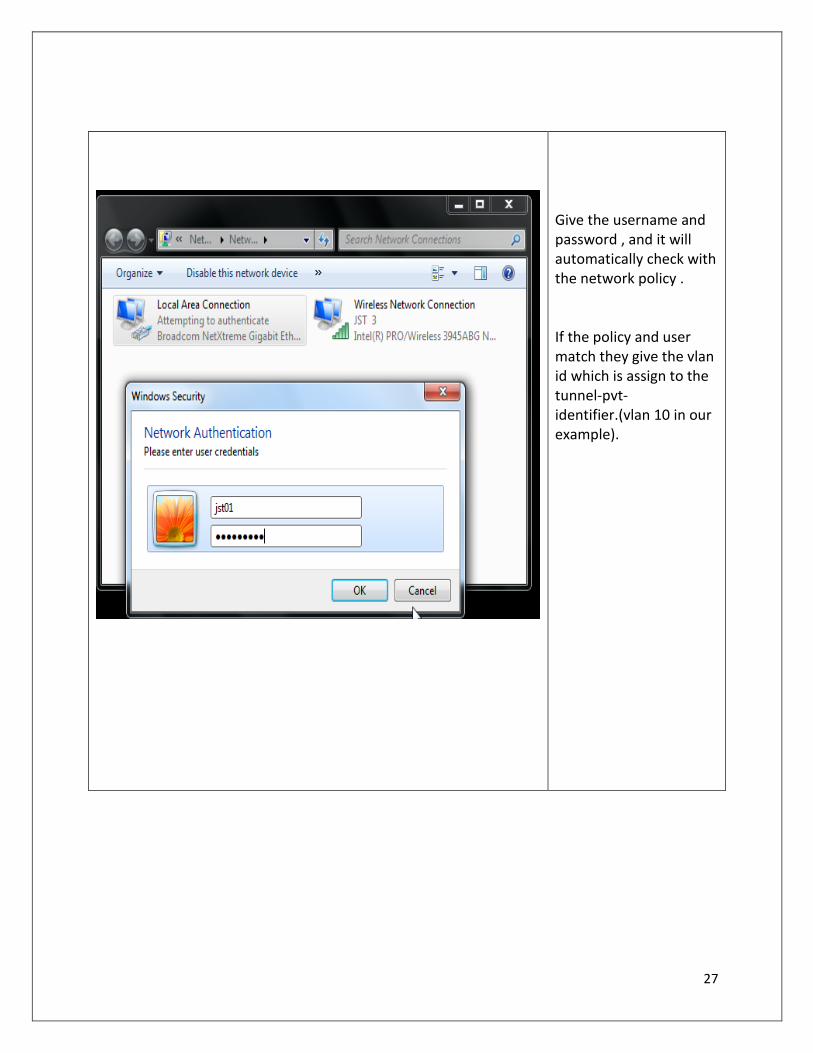
When you connect the cable from switch (dot1x enabled port) to client computer, they ask you to username and password to connect to the network.
27
Give the username and password , and it will automatically check with the network policy . If the policy and user match they give the vlan id which is assign to the tunnel-pvt-identifier.(vlan 10 in our example).
28
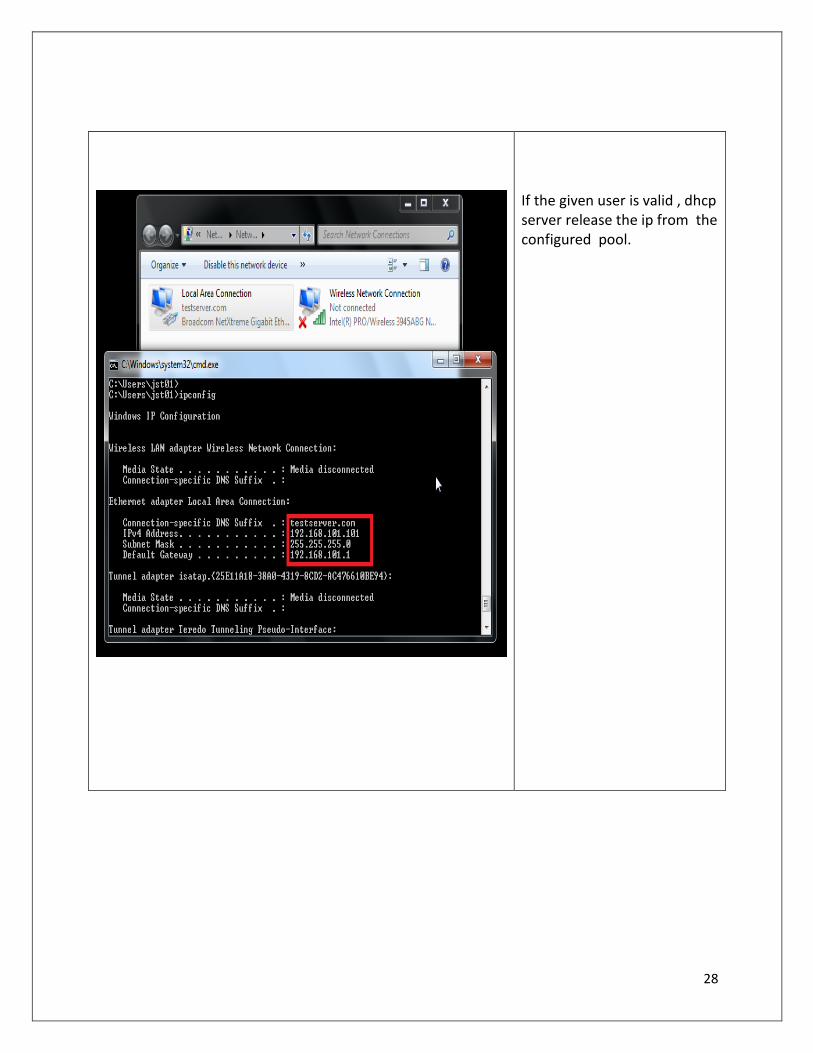
If the given user is valid , dhcp server release the ip from the configured pool.
29
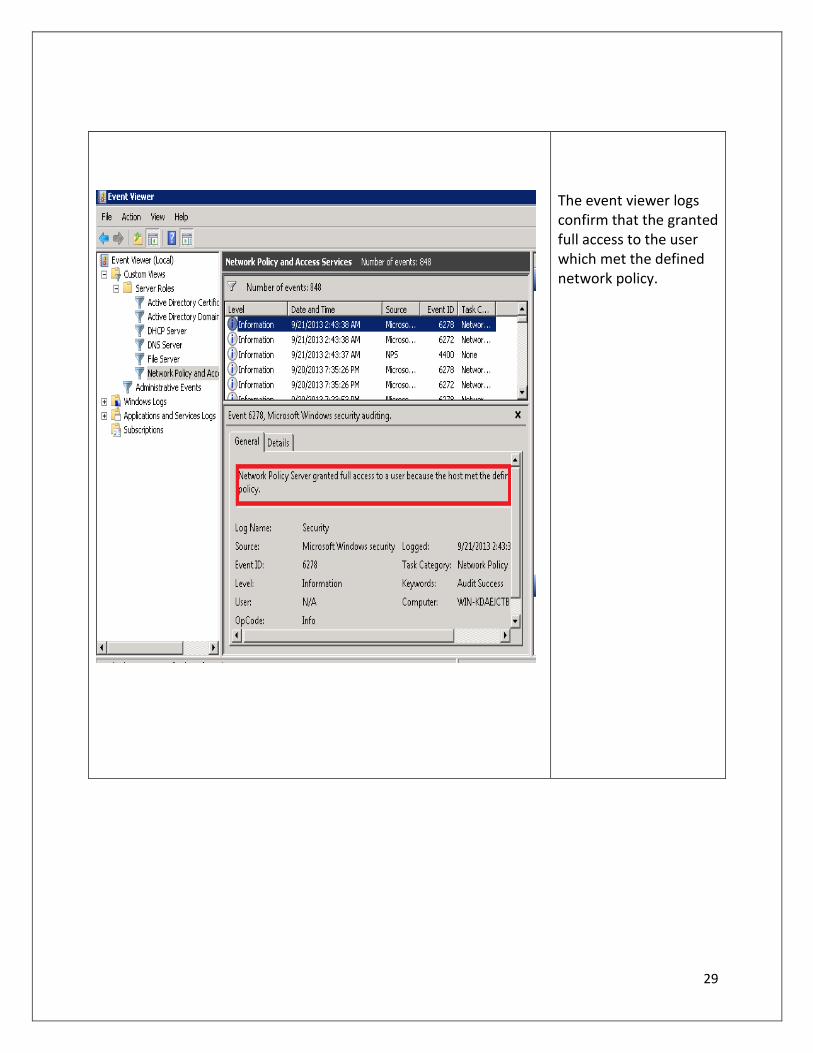
The event viewer logs confirm that the granted full access to the user which met the defined network policy.

30
DHCP logs also shows that they have releases the ip from configured pool. In our example the releases the they releases the 192.168.101.101 for the user Ramkumar(pc)from vlan 10 scope pool.
31
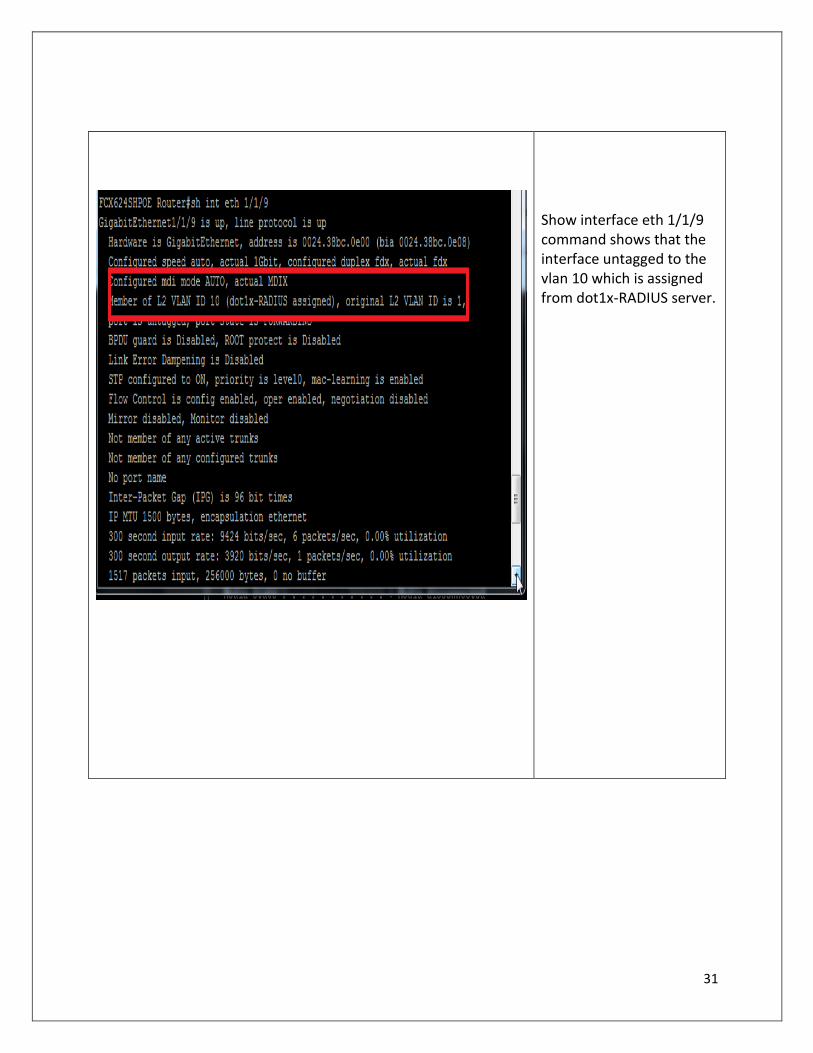
Show interface eth 1/1/9 command shows that the interface untagged to the vlan 10 which is assigned from dot1x-RADIUS server.

32
This logs from the switch shows that the interface 1/1/9 is assigned for the vlan 10 and the current connected computer MAC is 0016.d32e.2437
33
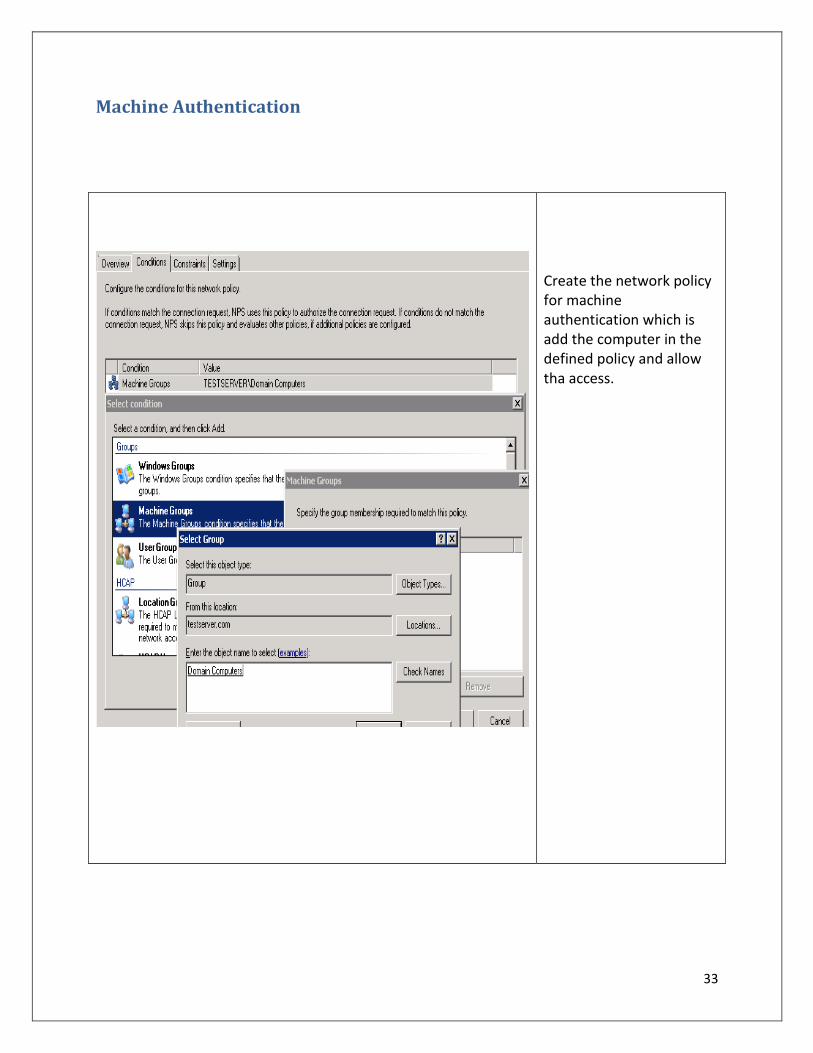
Machine Authentication
Create the network policy for machine authentication which is add the computer in the defined policy and allow tha access.
34
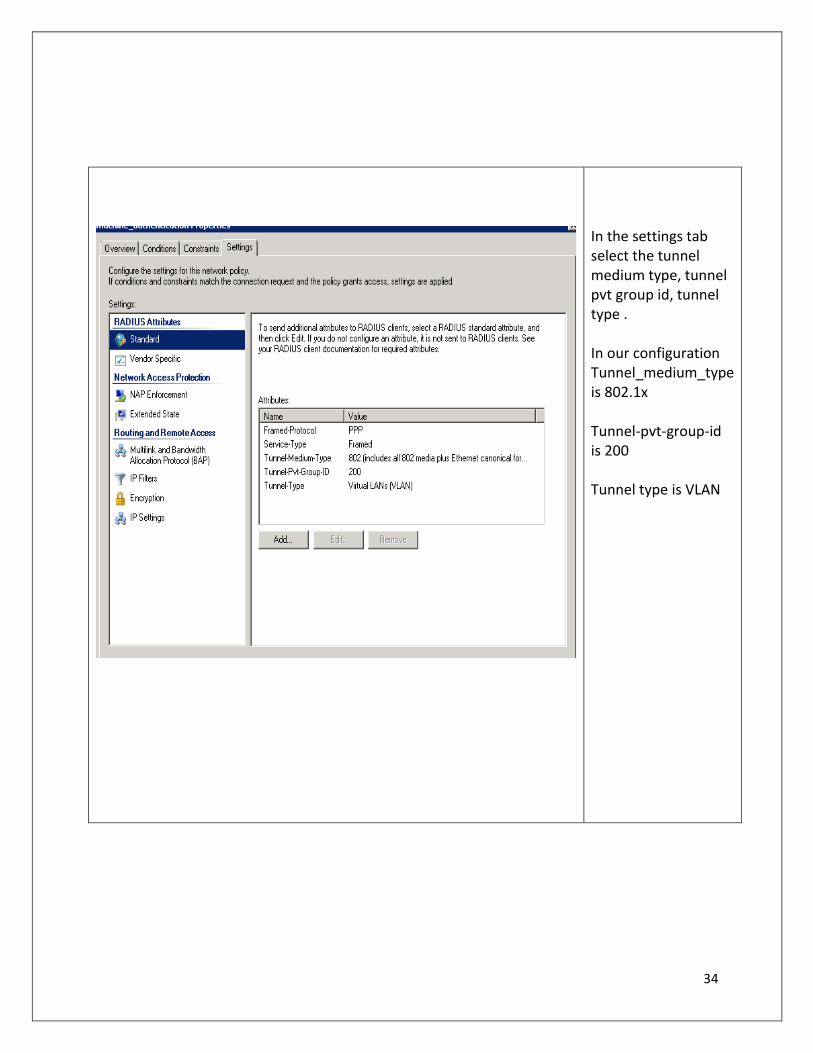
In the settings tab select the tunnel medium type, tunnel pvt group id, tunnel type . In our configuration Tunnel_medium_type is 802.1x Tunnel-pvt-group-id is 200 Tunnel type is VLAN
35
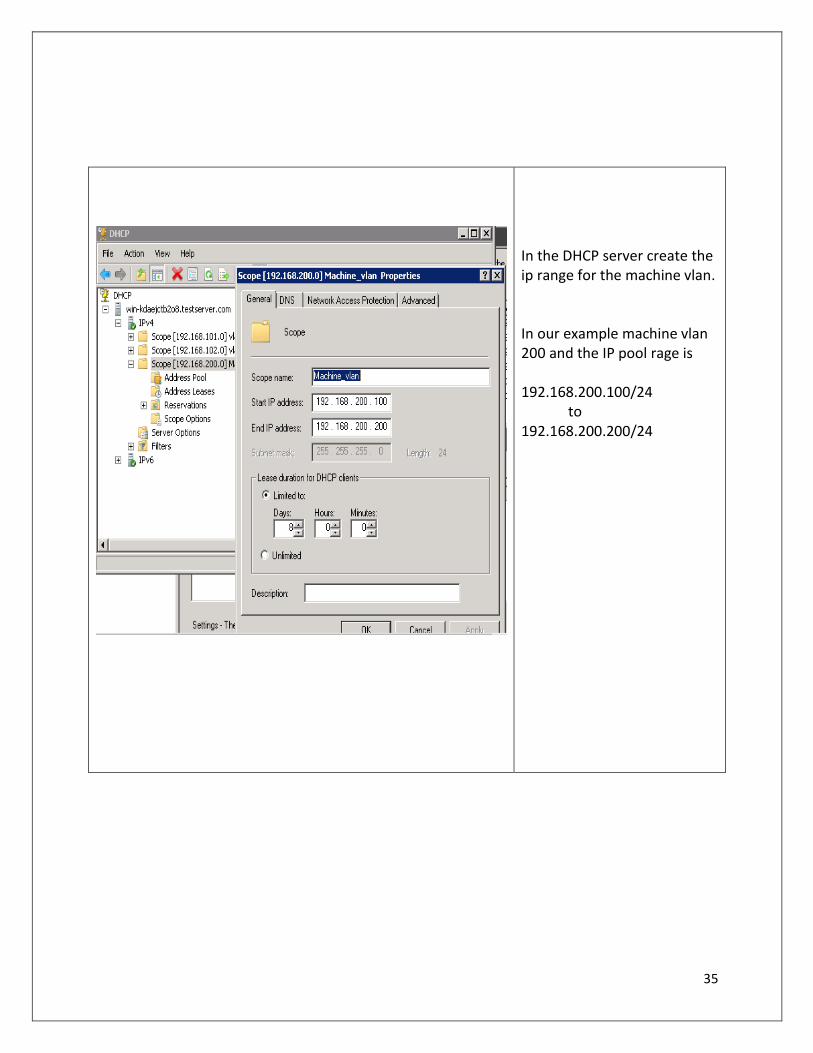
In the DHCP server create the ip range for the machine vlan. In our example machine vlan 200 and the IP pool rage is 192.168.200.100/24 to 192.168.200.200/24

36
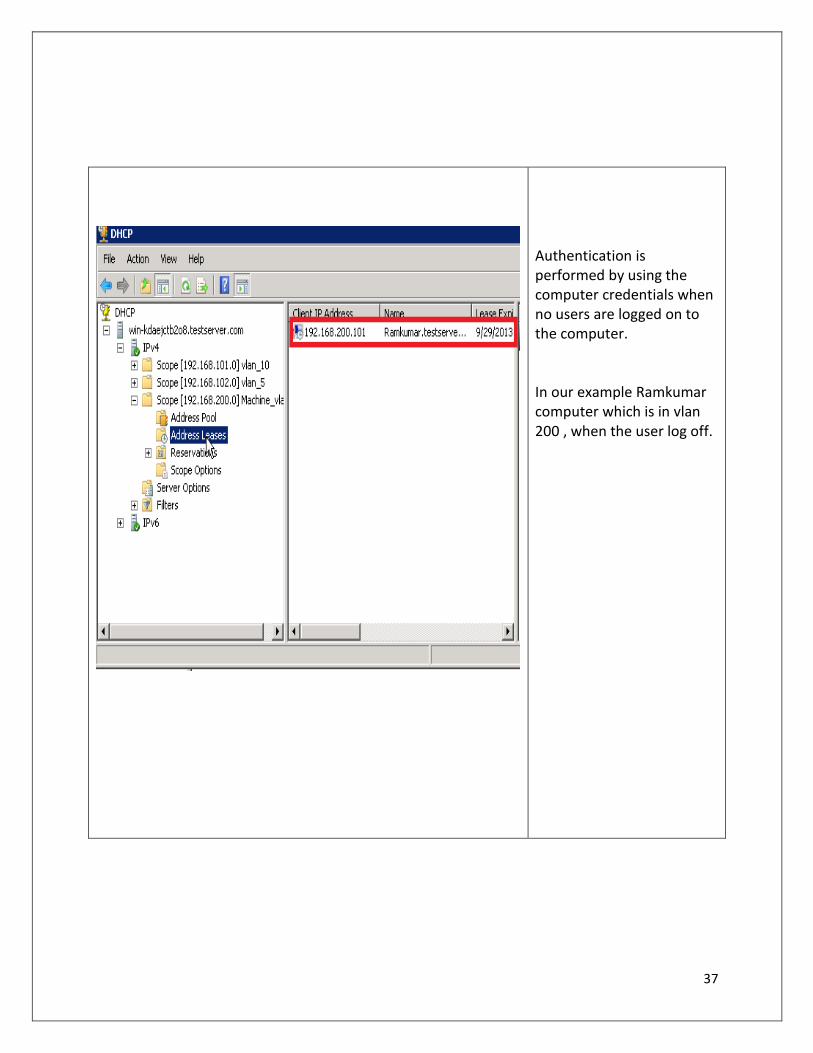
For the computer authentication select “user or computer authentication” in specify authentication mode. An 802.1X always uses security credentials based on the current state of the computer. Authentication is performed by using the computer credentials when no users are logged on to the computer. When a user logs on to the computer, authentication is always performed by using the user credentials.
37
Authentication is performed by using the computer credentials when no users are logged on to the computer. In our example Ramkumar computer which is in vlan 200 , when the user log off.

38
When logoff the user the computer authenticate using the machine authentication and releases the 192.168.200.101 IP. When a user logs on to the computer, authentication is always performed by using the user credentials.

39
Network Policy server granted full access to the RAMKUMAR machine.