guidelines for using ise authoring and delivery tool · o license level (the license assigned to...
TRANSCRIPT
Guidelines for using ISE Authoring and Delivery Tool
1
Guidelines for using ISE Authoring and Delivery Tool
Author: Panagiotis Zervas (UPRC), WP5 Leader
Date: 17/2/2015
Guidelines for using ISE Authoring and Delivery Tool
2
Table of Contents
1. How to use the ISE Authoring Tool? .................................................................................. 3
2. How to use the ISE Delivery Tool? ................................................................................... 10
Annex 1: Educational Metadata of a Lesson/Educational Scenario ........................................ 13
Table of Figures Figure 1: Register to the ISE Portal ............................................................................................ 3
Figure 2: Available ISE Communities ......................................................................................... 4
Figure 3: Detailed Page of an ISE Community ........................................................................... 4
Figure 4: Create New ISE Lesson/Scenario ................................................................................ 5
Figure 5: ISE Authoring Tool – My Lesson Plans and Educational Scenarios ............................ 5
Figure 6: ISE Authoring Tool – Add Metadata to my ISE Lesson/Scenario ................................ 6
Figure 7: ISE Authoring Tool – Add Content to the 5 Inquiry Activities .................................... 6
Figure 8: ISE Authoring Tool – Add an eLearning Tool to my ISE Lesson/Scenario ................... 7
Figure 9: Adding new information/sub-activity/resource ......................................................... 7
Figure 10: Adding guidelines only visible for the Teacher ........................................................ 7
Figure 11: ISE Authoring Tool – Add Problem Solving Questions to my ISE Lesson/Scenario .. 8
Figure 12: ISE Authoring Tool – Preview an ISE Lesson/Scenario ............................................. 8
Figure 13: ISE Authoring Tool – Finalize an ISE Lesson/Scenario and post it to an ISE
Community ................................................................................................................................ 9
Figure 14: A draft ISE Lesson/Scenario at Teachers’ Profile in ISE Portal ................................. 9
Figure 15: A detailed view of a draft ISE Lesson/Scenario at Teachers’ Profile in ISE Portal .... 9
Figure 15: Deliver an ISE Lesson/Scenario ............................................................................... 10
Figure 16: Teacher’s URL and Students’ URL produced by the ISE Authoring Tool ................ 10
Figure 17: ISE Lesson/Scenario – Teacher’s Login ................................................................... 11
Figure 18: ISE Lesson/Scenario – Teacher’s View .................................................................... 11
Figure 19: ISE Lesson/Scenario – Assessment Data as presented to the Teacher .................. 12
Figure 20: ISE Lesson/Scenario – Student’s Login ................................................................... 12

Guidelines for using ISE Authoring and Delivery Tool
3
1. How to use the ISE Authoring Tool? In order to upload an ISE Lesson/Scenario to the ISE Authoring Tool the steps below should be followed: 1. Create an account to the ISE Portal at: http://portal.opendiscoveryspace.eu/select_ise_community (see Figure 1) (If you come from the ISE website (http://www.inspiring-science-education.net/) click on “community portal” to go to the ISE portal)
Figure 1: Register to the ISE Portal
2. Login with your credentials and join the desired ISE Community or create your own, where your ISE Lesson/Scenario will be stored and will be available for other ISE teachers. You can access the available ISE Communities here: http://portal.opendiscoveryspace.eu/ise_communities (see Figure 2). If you have no community yet join the “ISE community”. If you join a community you have to wait until the administrator of the community accept you as member.

Guidelines for using ISE Authoring and Delivery Tool
4
Figure 2: Available ISE Communities
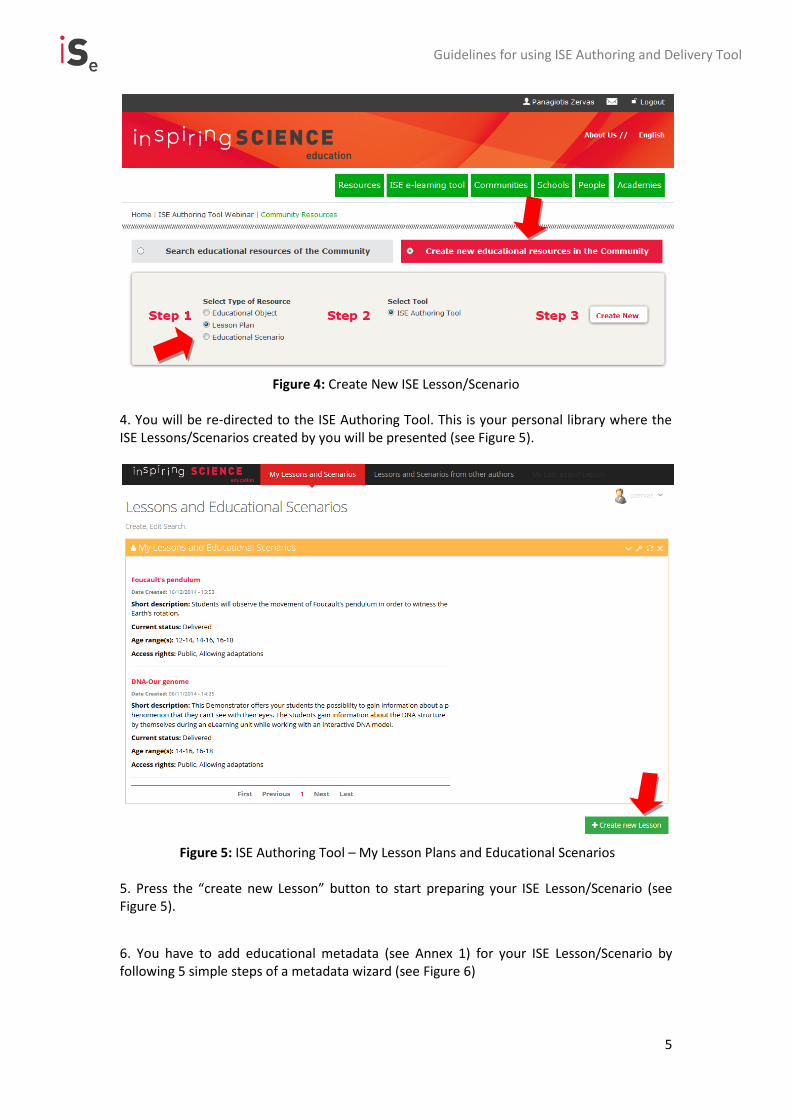
3. After joining an ISE Community, click the option “resources”, so as to create new resources for the ISE Community and then select “Create new educational resources in the community”. Select type of educational resource: “Lesson Plan”, select tool: “ISE Authoring Tool” and then press “Create New” (see Figure 3 and Figure 4).
Figure 3: Detailed Page of an ISE Community
Guidelines for using ISE Authoring and Delivery Tool
5
Figure 4: Create New ISE Lesson/Scenario
4. You will be re-directed to the ISE Authoring Tool. This is your personal library where the ISE Lessons/Scenarios created by you will be presented (see Figure 5).
Figure 5: ISE Authoring Tool – My Lesson Plans and Educational Scenarios
5. Press the “create new Lesson” button to start preparing your ISE Lesson/Scenario (see Figure 5).
6. You have to add educational metadata (see Annex 1) for your ISE Lesson/Scenario by following 5 simple steps of a metadata wizard (see Figure 6)

Guidelines for using ISE Authoring and Delivery Tool
6
Figure 6: ISE Authoring Tool – Add Metadata to my ISE Lesson/Scenario
7. You have to add content (namely, text, images and videos) to the five (5) Inquiry Activities of your ISE Lesson/Scenario (see Figure 7). Moreover, you can search to the ISE Tools Repository and add eLearning Tools to your ISE Lesson/Scenario (see Figure 8). Please address directly the students who will work with your lesson/scenario. If you want to give additional information or instruction to the teacher, please add an extra box for this called “guidelines” (see Figure 9 and Figure 10). Don’t forget to add Problem Solving Questions at the end of the first four Inquiry Activities of your ISE Lesson/Scenario (see Figure 11)
Figure 7: ISE Authoring Tool – Add Content to the 5 Inquiry Activities

Guidelines for using ISE Authoring and Delivery Tool
7
Figure 8: ISE Authoring Tool – Add an eLearning Tool to my ISE Lesson/Scenario
Figure 9: Adding new information/sub-activity/resource
Figure 10: Adding guidelines only visible for the Teacher

Guidelines for using ISE Authoring and Delivery Tool
8
Figure 11: ISE Authoring Tool – Add Problem Solving Questions to my ISE Lesson/Scenario
7. You can save your ISE Lesson/Scenario any time by pressing the orange button at the bottom right (“Save Lesson”). Moreover, you can preview your ISE Lesson/Scenario by pressing the green button at the bottom right (see Figure 12).
Figure 12: ISE Authoring Tool – Preview an ISE Lesson/Scenario
8. When finished by adding the content of your ISE Lesson/Scenario at all Inquiry Activities, your Lesson/Scenario is ready to be delivered to a class with students (please refer to section 2). (If you just tested the Authoring tool or tried out something please leave your scenario as draft) 9. Please note that after finishing the aforementioned step the Lesson/Scenario will keep the status “draft” unless you press the “Set Status to Final” option (please see Figure 13). This means that immediately the Lesson/Scenario will be posted to the ISE Community from where you entered the ISE Authoring Tool (see Figure 3 and Figure 4). If you want to keep the Lesson/Scenario as draft the Lesson/Scenario will be presented ONLY in your ISE Profile

Guidelines for using ISE Authoring and Delivery Tool
9
and not in the ISE Community from where you entered the ISE Authoring Tool (see Figure 14 and Figure 15). Finally, it should be noted that if the license level of your Lesson/Scenario is “Private” it will remain visible only in your profile at the ISE Portal (even if the status is “Final”). In order to make it visible in an ISE Community, you have to set it as “Final” but also to provide a public license level in Lesson’s/Scenario’s metadata (namely, public not allowing adaptations.
Figure 13: ISE Authoring Tool – Finalize an ISE Lesson/Scenario and post it to an ISE
Community
Figure 14: A draft ISE Lesson/Scenario at Teachers’ Profile in ISE Portal
Figure 15: A detailed view of a draft ISE Lesson/Scenario at Teachers’ Profile in ISE Portal

Guidelines for using ISE Authoring and Delivery Tool
10
2. How to use the ISE Delivery Tool? In order to deliver an ISE Lesson/Scenario with a class of students the steps below should be followed: 1. Click on “my Lessons and Scenarios” tab at the top of the page. You will see your newly created ISE Lesson/Scenario as presented in Figure 5. 2. Click on “Deliver Lesson” button, which is located on the right of the title of your ISE Lesson/Scenario (see Figure 16).
Figure 16: Deliver an ISE Lesson/Scenario
3. The system will produce two unique URLs, namely (see Figure 17):
the Teacher URL, which should be used by the teacher, so as to monitor students’ data
The Student URL, which should be used by the students to access the ISE Lesson/Scenario, see the content and answer to the problem solving questions
Figure 17: Teacher’s URL and Students’ URL produced by the ISE Authoring Tool
4. To access the ISE Lesson/Scenario as a Teacher, you should use the Teacher URL (produced by the ISE authoring tool). Please select a username and an e-mail to enter the

Guidelines for using ISE Authoring and Delivery Tool
11
Lesson/Scenario. Please keep these credentials safe in order to access again the Lesson/Scenario in the future (see Figure 18). When accessing a Lesson/Scenario as a teacher, you are able to see the answers to the problem solving questions and guidelines for executing the Lesson/Scenario with the students (see Figure 19). Moreover, you are able to see the visualized data of students’ answers to problem solving questions (see Figure 20)
Figure 18: ISE Lesson/Scenario – Teacher’s Login
Figure 19: ISE Lesson/Scenario – Teacher’s View

Guidelines for using ISE Authoring and Delivery Tool
12
Figure 20: ISE Lesson/Scenario – Assessment Data as presented to the Teacher
4. In order the students to access the ISE Lesson/Scenario, they should be provided with the Student URL (produced by the ISE authoring tool). The students should be informed to select a nickname and a passphrase to enter the Lesson/Scenario (see Figure 21). They should be also informed to remember these credentials, so as to re-use them and retrieve their previous status, in case that their browsers stop working (for any reason)
Figure 21: ISE Lesson/Scenario – Student’s Login
Guidelines for using ISE Authoring and Delivery Tool
13
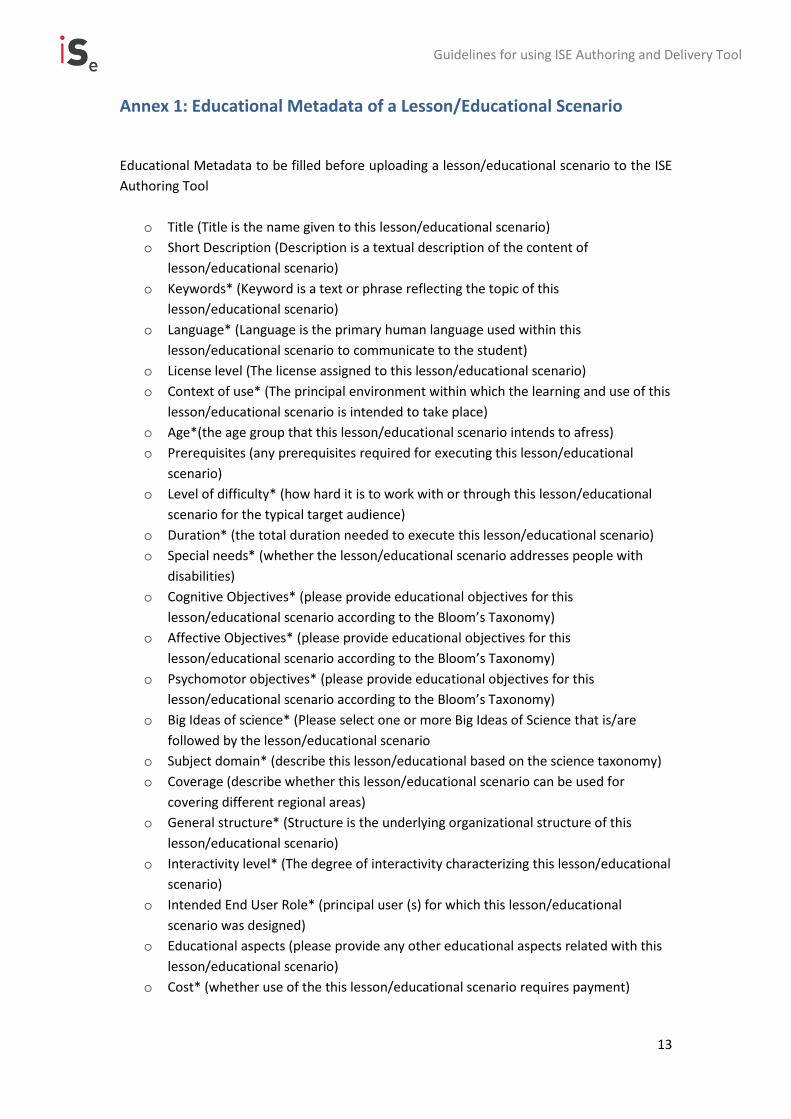
Annex 1: Educational Metadata of a Lesson/Educational Scenario
Educational Metadata to be filled before uploading a lesson/educational scenario to the ISE
Authoring Tool
o Title (Title is the name given to this lesson/educational scenario)
o Short Description (Description is a textual description of the content of
lesson/educational scenario)
o Keywords* (Keyword is a text or phrase reflecting the topic of this
lesson/educational scenario)
o Language* (Language is the primary human language used within this
lesson/educational scenario to communicate to the student)
o License level (The license assigned to this lesson/educational scenario)
o Context of use* (The principal environment within which the learning and use of this
lesson/educational scenario is intended to take place)
o Age*(the age group that this lesson/educational scenario intends to afress)
o Prerequisites (any prerequisites required for executing this lesson/educational
scenario)
o Level of difficulty* (how hard it is to work with or through this lesson/educational
scenario for the typical target audience)
o Duration* (the total duration needed to execute this lesson/educational scenario)
o Special needs* (whether the lesson/educational scenario addresses people with
disabilities)
o Cognitive Objectives* (please provide educational objectives for this
lesson/educational scenario according to the Bloom’s Taxonomy)
o Affective Objectives* (please provide educational objectives for this
lesson/educational scenario according to the Bloom’s Taxonomy)
o Psychomotor objectives* (please provide educational objectives for this
lesson/educational scenario according to the Bloom’s Taxonomy)
o Big Ideas of science* (Please select one or more Big Ideas of Science that is/are
followed by the lesson/educational scenario
o Subject domain* (describe this lesson/educational based on the science taxonomy)
o Coverage (describe whether this lesson/educational scenario can be used for
covering different regional areas)
o General structure* (Structure is the underlying organizational structure of this
lesson/educational scenario)
o Interactivity level* (The degree of interactivity characterizing this lesson/educational
scenario)
o Intended End User Role* (principal user (s) for which this lesson/educational
scenario was designed)
o Educational aspects (please provide any other educational aspects related with this
lesson/educational scenario)
o Cost* (whether use of the this lesson/educational scenario requires payment)

Guidelines for using ISE Authoring and Delivery Tool
14
o Copyright and other restrictions* (whether copyright or other restrictions apply to
the use of this lesson/educational scenario)
*pre-defined values to select