guidebook to smart-home technology: volume 1...bona fide homekit app, as apple has been relying...
TRANSCRIPT

Guidebook to Smart-home Technology: Volume 1
The Digitized.House Editors
23 August 2016

TABLE OF CONTENTS
1. Apple HomeKit sprouts a Home app in iOS 10 2 ...............................................................
2. iDevices bridges Apple HomeKit and Amazon Alexa worlds 6 ...................................
3. Flexible climate and lighting control with Lutron Caséta and Smart Bridge 13 ...
4. Three shades of the Nest Learning Thermostat 20 ..........................................................
5. Spaces debuts in redesigned Nest app 26 ............................................................................
6. Belkin WeMo grows up: Nest Learning Thermostat integration 31 .........................
7. Smart-home power broker: SmartThings Hub from Samsung 39 ..............................
8. About Digitized.House Magazine 49 .....................................................................................

1. Apple HomeKit sprouts a Home app iniOS 10
It has been two years since Apple first announced the development of
HomeKit—their entry into the realm of smart-home automation and
integration—at their 2014 Worldwide Developers Conference (WWDC). The first
public release of HomeKit appeared in iOS 8.1, and third-party products
supporting it—such as the iDevices Switch and the Lutron Caséta Wireless
devices—began appearing in the smart-home marketplace in late 2015. But
conspicuously absent from both iOS 8 and the current iOS 9 was the presence of a
bona fide HomeKit app, as Apple has been relying entirely on disparate apps from
third-party providers developing products under the Works with Apple HomeKit
program. By the way, Apple refers to these third-party smart-home products as
accessories.
That all changes in iOS 10, a major upgrade to Apple’s mobile operating system
for their family of iPhones, iPads, and iPods announced at the recent 2016 edition
of WWDC. For the first time, there will be a native Home app, which can be
launched from the home screen or through Siri voice commands. The upshot of
this HomeKit upgrade—set to be released later in 2016—will be a holistic,
2

integrated home automation console, and may be Apple’s first serious threat to
the emerging dominance of competing smart-home automation platforms and
apps, such as those from Alphabet’s Nest Labs, Samsung SmartThings, Wink, and
others.
With the forthcoming upgrade to iOS 10, Apple gives their HomeKit smart-home
automation environment a face on the home screen in the form of the new Home
app.
Among the new or upgraded features resulting from this deeper integration of
HomeKit in iOS 10:
The native Home app to enable managing and controlling of the selected home●
3

location in one place (HomeKit enables configuration of multiple home
locations—for example, a primary residence and a vacation home)
Three main tabs, including Home, Rooms, and Automation●
Display of notifications based on the status of accessories●
Management of accessories individually, or grouping them into automated●
scenes so they can work together through a single gesture or single Siri voice
command
Management of accessories remotely, outside of the local home network●
Favorite Scenes buttons for activation of configured scenes and display of●
current status
Favorite Accessories buttons for controlling individual accessory actions and●
display of current status
Setting of automatic triggers to operate accessories based on time of day,●
location, or action
Additional automation enabled through integration with apps of the Apple TV●
set-top box (which also gets a major software upgrade later this year, in the form
of a new version of the tvOS).
Apple TV is also destined for a software upgrade later in 2016, which will include
additional integration with HomeKit and third-party smart-home automation
apps.
4

In concert with this upcoming iOS 10 release, Apple also will be delivering a major
software upgrade for the Apple Watch in the form of watchOS 3. Effective with
the upgrade, there will be a native Home app on the Apple Watch for the first
time, with many of the same capabilities as those available on iOS 10.
Apple says third-party support for HomeKit is expanding globally, and nearly 100
home automation products have been released so far in 2016, including
thermostats, lights, window shades, door locks, video cameras, and more. We
anticipate this flurry of products will likely escalate given this forthcoming
release of the new Home app, which will literally be front and center on the
screens of millions of iOS, watchOS, and tvOS devices. We will be testing these
upcoming upgrades and products in our Digitized House Zero Energy Living Lab
home as they become available. Stay tuned.
More info about this topic:
Apple previews iOS 10, the biggest iOS release ever
Apple previews watchOS 3
Powerful new Siri capabilities and single sign-on are coming to Apple TV
5

2. iDevices bridges Apple HomeKit andAmazon Alexa worlds
Apple HomeKit accessories can often be islands of smart-home automation. That
is largely due to the current HomeKit architecture on iOS, where accessory
manufacturers develop standalone apps for pairing and controlling their family of
accessories. iDevices, one of the first companies to release products through the
Works with Apple HomeKit program, seeks to bridge the gap to worlds beyond
HomeKit by recently upgrading their app to support the Amazon Alexa voice
service—the software engine behind the popular Amazon Echo speaker line.
By definition, all HomeKit accessories can already be controlled by Apple Siri
voice commands, so the addition of Alexa support gives iDevices accessory
owners another method of voice control in their homes. Whereas Siri requires a
nearby iOS mobile device for processing spoken commands, an Amazon Echo
speaker running Alexa can reside across the room yet still faithfully accept and
execute commands. Amazon refers to this capability as far-field voice recognition.
6
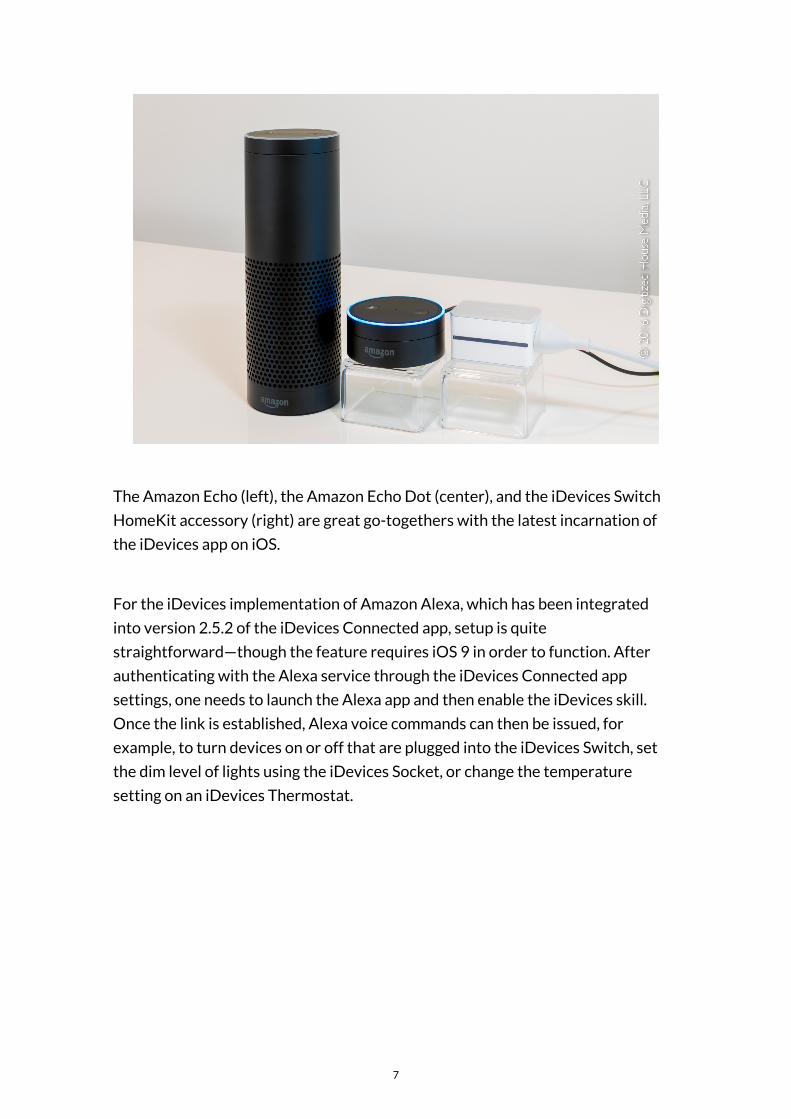
The Amazon Echo (left), the Amazon Echo Dot (center), and the iDevices Switch
HomeKit accessory (right) are great go-togethers with the latest incarnation of
the iDevices app on iOS.
For the iDevices implementation of Amazon Alexa, which has been integrated
into version 2.5.2 of the iDevices Connected app, setup is quite
straightforward—though the feature requires iOS 9 in order to function. After
authenticating with the Alexa service through the iDevices Connected app
settings, one needs to launch the Alexa app and then enable the iDevices skill.
Once the link is established, Alexa voice commands can then be issued, for
example, to turn devices on or off that are plugged into the iDevices Switch, set
the dim level of lights using the iDevices Socket, or change the temperature
setting on an iDevices Thermostat.
7

The version 2.5.2 update to the iDevices Connected app for Apple iOS devices
offers an easy-to-configure route to the integration of smart-home accessories.
To get the most reliable results when linking new devices with Alexa, we found it
best to first use the Check Now button within the iDevices Connected app
settings to establish or refresh the link, followed by launching the Alexa app and
doing a scan from the Your Devices tab. You will also want to repeat this same link
and scan process in the event a device name is changed in iDevices.
In our Digitized House Zero Energy Living Lab home, we configured an iDevices
Switch (see our related review, Testing HomeKit waters with the iDevices Switch)
to control an air filtration system, and then renamed the device Air Purifier in the
app. After performing a link and scan process, the voice commands “Alexa, turn
Air Purifier on” or “Alexa, turn Air Purifier off” worked flawlessly. We used both
the original Amazon Echo as well as the new Amazon Echo Dot in our testing, and
both worked equally well.
8

In the case of the iDevices Switch, ongoing energy consumption data for the
connected device can be accessed by clicking down into the app.
iDevices accessories can also be included in Alexa groups, so a single voice
command could, for example, be spoken to turn off an entire room full of
connected devices—even if those devices are from a combination of HomeKit and
non-HomeKit accessory makers. That equates to a very effective smart-home
automation bridge for homeowners inclined to use voice commends.
Of course, configuring iDevices to use Alexa does not preclude the use of Siri, so a
given device control scenario can be accomplished through an Alexa or Siri voice
command, directly through a tap in the iDevices app, or via actions configured as
iDevices Scenes/Schedules. There is one caveat here related to the Alexa support
provided by iDevices. While the HomeKit architecture enables accessories from
one manufacturer to be discoverable and controllable via an app by another
manufacturer, the Alexa support in iDevices applies only to genuine iDevices
accessories.
9
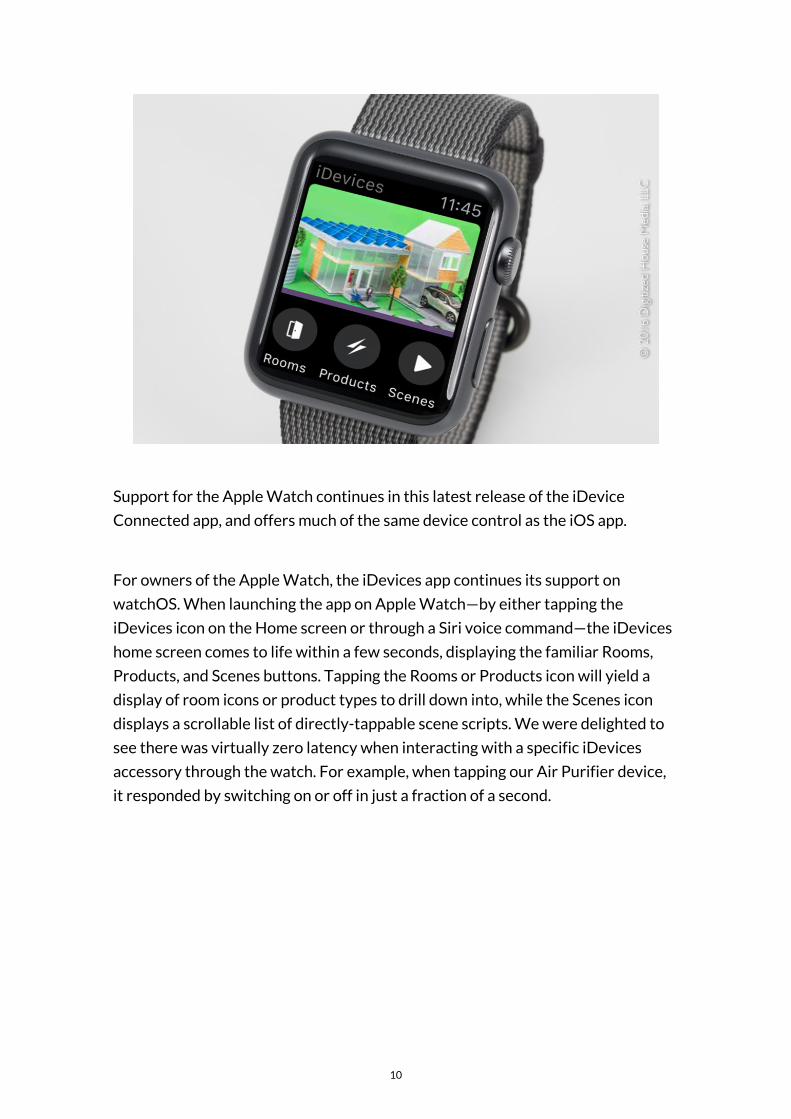
Support for the Apple Watch continues in this latest release of the iDevice
Connected app, and offers much of the same device control as the iOS app.
For owners of the Apple Watch, the iDevices app continues its support on
watchOS. When launching the app on Apple Watch—by either tapping the
iDevices icon on the Home screen or through a Siri voice command—the iDevices
home screen comes to life within a few seconds, displaying the familiar Rooms,
Products, and Scenes buttons. Tapping the Rooms or Products icon will yield a
display of room icons or product types to drill down into, while the Scenes icon
displays a scrollable list of directly-tappable scene scripts. We were delighted to
see there was virtually zero latency when interacting with a specific iDevices
accessory through the watch. For example, when tapping our Air Purifier device,
it responded by switching on or off in just a fraction of a second.
10

When tapping on an iDevices accessory in the Apple Watch app, we discovered
there was a virtually instantaneous response from the connected device.
iDevices scenes are also directly accessible from the Apple Watch.
11

We applaud iDevices for taking the step to open up their smart-home accessories
to control through Amazon Alexa, and we expect this advancement may
encourage more homeowners to begin taking the HomeKit plunge. Stay tuned as
Apple readies their upgrade to iOS 10, where HomeKit will undergo a major
advancement through the launch of the new Home app. You can read more about
that upcoming technology shift in our recent article, Apple HomeKit sprouts a
Home app in iOS 10.
More info about this topic:
iDevices website
Amazon Alexa and Echo website
Apple HomeKit website
Testing Apple HomeKit waters with the iDevices Switch
12

3. Flexible climate and lighting controlwith Lutron Caséta and Smart Bridge
If we were writing the definitive guidebook for smart-home technology
integration, the probability is high that we would add flexibility to the guide’s
checklist of desirable attributes for these dwellings. In what could be viewed as a
nod to that as-yet-unpublished work, electronics maker Lutron has elevated
flexibility to the forefront with recent updates to its Caséta Wireless app and
Smart Bridge. This home-automation framework links Lutron’s wireless product
lines—including Caséta Wireless light switches, dimmers, and remote controls
plus Serena wireless window shades—to mobile apps running on iOS, Apple
Watch, and Android devices.
13

The Lutron Caséta Wireless in-wall lighting dimmer can be used for new installs
or retrofits, and works seamlessly with the Smart Bridge and app to enable smart-
home automation and scenes.
But wait, there’s much more: This mantra of flexibility the Smart Bridge brings is
manifested not only through smartphone in-app gestures and automated scenes
for Lutron products, but also through very smooth integrations with the popular
Works with Nest and Works with Apple HomeKit programs. In addition, many
leading smart thermostats—including those from Carrier, ecobee, Honeywell,
Lutron, as well as Nest—can be easily integrated into the app.
We have long been advocates of the standalone Lutron Caséta Wireless in-wall
switches, dimmers, and diminutive Pico remotes and have deployed many of them
in and around our Digitized House Zero Energy Living Lab home. These wireless
devices have proven to be very easy to install in either initial or retrofit
applications, and most importantly, function reliably for the many LED can lights
we have throughout the home. In addition to providing smooth dimming of our
LED lights, these devices are engineered for a long wireless range. For example, in
our testing we have found the range of the Pico remotes to be excellent when
paired with in-wall switches—we have them clipped to the visors in our cars to
enable one-touch entry pathway lighting, and they work without fail when the car
14

is within 100 feet or so of the garage and house.
When integrated with an existing Lutron Caséta Wireless environment, the Smart
Bridge gateway enables a broad range of additional features and linkages to
smart thermostats and other devices.
With the addition of the Smart Bridge—an unassuming small white box that
requires a hard-wired Ethernet connection to your smart-home network—none
of those positive traits and analog click-ability of the standalone Caséta Wireless
environment go away. In fact, every Caséta or Serena component becomes
digitally controllable from the mobile app, though you can elect to turn off your
phone or unplug the Smart Bridge entirely and continue to use them in the usual
analog method by pressing their built-in buttons. That’s nice flexibility.
15

The Home Page in the Lutron mobile app provides clickable access to Lights &
Shades, Scenes, and Thermostats—and is available in versions for iOS, Apple
Watch, and Android devices.
The smartphone app is cleanly designed and includes a Home Page with Lights &
Shades, Scenes, and Thermostats sections. Adding supported Lutron devices to
the Lights & Shades section is straightforward, and simplifies the setup process
for configuring these devices over that used in standalone mode. We began by
adding all of our wall-mounted Lutron dimmer switches to the app, which is easily
accomplished by pressing the bottom paddle of the switch for 10 seconds or so
then clicking through the setup process. Once all of the dimmers are added,
everything else can be done from the app. Want to associate a given Pico remote
with a bank of wall switches controlling overhead LED lights? Instead of visiting
the respective rooms and pressing button sequences on the wall dimmer and
remote to program, all of that can be done from your armchair through the app.
After you have added one or more Lutron devices, Scenes can then be configured.
Scenes are point-and-click smart-home automation actions for Lutron light
switches and window shades. These can be triggered manually through icon clicks
in the app or via a flexible automated schedule configured by day-of-week-, time-,
or sunrise/sunset-driven parameters. For example, one could configure an Arrival
16

scene for turning on specific lights at a specific level of intensity; that scene can
then be triggered by clicking an icon in the app, through the built-in geofencing
features of the Lutron app and its location awareness of a smartphone, or on a
schedule.
If you have any of the supported smart thermostats already in your home, these
can be easily added directly to the Thermostats section through the Lutron app by
authorizing access to the respective vendor’s online management tools. Once that
process is complete, the thermostat will appear in the Lutron app and can be
controlled directly from there if desired. In the case of our home’s trio of Nest
thermostats, controls for temperature, Home/Away, and cooling/heating mode
became visible.
A single Caséta Wireless in-wall dimmer can be controlled by up to 10 of these
small Pico remotes. Here, Lutron’s tabletop pedestal is used for easy access to this
remote on a nearby coffee table.
Some of the more useful and flexible automations we have seen are enabled
through the Works with Nest program. Effective with the release of version 3.3 of
the Lutron app mated with version 2 of the Smart Bridge, homes with Nest
thermostats and Nest Protect smoke and carbon monoxide (CO) detectors
become the benefactors of deeper integrations. For example, by taking advantage
17

of the Nest Home/Away Assist feature, Lutron devices can be seamlessly linked
to control lights or shades based on the comings and goings of the home’s
residents. For those homeowners with Nest thermostats concerned about
maximizing energy conservation efforts when they are away, this integration only
sweetens the deal.
Following recent updates to the Lutron app, deeper integrations through the
Works with Nest program have been enabled, taking advantage of the
Home/Away Assist and Emergency features in Nest products.
Similarly, through the Works with Nest Emergency feature, homes fitted with one
or more Nest Protects can have their lights automatically switched on and shades
opened when a smoke or CO event is detected. There is one caveat, here,
however, in that the more-complex Lutron Scenes cannot be used with the Works
with Nest program—we would like to see this capability added in a future release
of the app.
Through its certification with the Works with Apple HomeKit program, all of the
Lutron devices in the home can become controllable from other iOS HomeKit
apps or through Siri voice commands. For example, we have the iDevices Switch
installed on our network, which is a HomeKit-compatible smart-plug device. After
18

we added the Lutron Smart Bridge to our network, the Lutron devices became
immediately visible and controllable through the iDevices Connect app.
Furthermore, any HomeKit-compatible smart thermostat can be integrated and
controlled through the Lutron app.
When using the iOS version of the Lutron app, the Today tab in Notification
Center can be configured to include up to 5 active scene icons.
There are other available integrations here, including lighting control
through Amazon Alexa, automation recipes for the If This Then That (IFTTT)
environment, and more. All of these additional integrations can only add to the
high degree of flexibility the Lutron Smart Bridge and Caséta Wireless app can
bring to the increasingly-digitized house.
More info about this topic:
Lutron Caséta Wireless website
Works with Nest program
Works with Apple HomeKit program
19

4. Three shades of the Nest LearningThermostat
Nest Learning Thermostats may be a svelte package of brains, software brawn, and eye
candy for your home’s walls. But can they survive a date with a zero-energy, triple-zone
home?
The Digitized.House Zero Energy Living Lab house was designed from the ground
up to be nearly all-electric, with the expectation that we would offset the bulk of
that electrical usage with rooftop-mounted solar photovoltaics. The only
exception to that effectively zero-combustion posture was in the kitchen, where
the cooktop was fueled by propane as the gourmet-chef-in-residence was not
willing to live with one of the new induction cooktops or a more conventional
electric cooktop.
As the home was architected, everything else in the house was designed to be
100-percent electrically powered, including the remainder of the major
appliances and all mechanical systems: the aerobic waste treatment system, the
rainwater harvesting and potable water treatment system, the water heating and
recirculation system, and of course the entire HVAC and fresh-air intake system.
20

Installed in the great room, this Nest thermostat controls the downstairs zone.
We used the optional, Nest-provided rectangular backing plates, painted to
match the wall.
In this part of the U.S.—central Texas—where maximum daytime summer
temperatures can often exceed 100 degrees (F) for days in a stretch, many
moderately-sized, conventionally-constructed homes are equipped with 2 or 3 (or
more, in the case of very large homes) independently operating central HVAC
systems. Cooling in each of these systems is normally delivered through an
electrically-powered air conditioner/evaporator while heating is provided by an
integrated, natural gas-powered furnace.
This type of arrangement effectively results in a zoned home, as there is one
thermostat installed for every independent HVAC system. By contrast, building
science experts often prescribe what is referred to as a zoned system, which
typically consists of a single HVAC system designed to be managed by multiple
thermostats controlling the delivery of conditioned air into multiple zones.
In the case of the Zero Energy Living Lab house, where mechanical components
were selected to minimize energy consumption while maximizing quality of life
for the home’s occupants, our designers followed the zoned system approach. In
21

this two-story home’s mechanical room, we installed a single ClimateMaster
Tranquility ground-source geothermal heat pump system to meet all cooling and
heating needs.
The heart of the Zero Net Energy Living Lab home’s mechanical room: a
ClimateMaster Tranquility ground-source geothermal heat pump.
A single, centrally-located Rheem high-efficiency air handler and a series of
Aprilaire mechanical dampers were installed to create a triple-zoned system,
enabling the occupants to fine-tune the delivery of cool or warm air as needed.
Due to the tight building envelope, an additional Aprilaire mechanical damper was
integrated into the system to regulate the infusion of fresh, filtered air into the air
handler and throughout the home on a smart, scheduled basis 7×24.
As the home was buttoned up and the systems came online in early 2013 for
initial blower-door testing runs, conventional programmable thermostats were
installed in each of the 3 zones. Functionally, these seemed to work acceptably,
but were quite difficult to program through their wall-mounted LCD panel
interfaces. Then we experienced a momentary power outage. In that instant, all 3
thermostats reset themselves to their factory default configurations; they
22

apparently had no onboard backup batteries to retain their settings. So long,
schedules.
The 2nd-generation Nest thermostat on the wall in the upstairs zone.
At the time we were contemplating a replacement product, smart thermostats
were entering the residential market, with Nest leading the charge via their
game-changing platform. As we discussed this potential retrofit with our builder’s
HVAC experts, they informed us they had previously steered away from Nest as
they found the 1st generation thermostat was not compatible with their typical
zoned system scenario. However, Nest had just upgraded their hardware
platform to the 2nd generation.
So a couple of important questions were floated. First, would these 2nd-
generation Nests work in a multiple-zone installation? And secondly, would there
be a wrinkle in trying to configure the installation in a less-than-standard solo
ground-source geothermal heat pump configuration? Checking with the Nest
support team produced encouraging affirmative responses on both counts.
23

A Nest smart thermostat stands guard over the master bedroom zone.
Our installation, then, consisted of a trio of the 2nd generation Nests—one each
on the walls in the downstairs, upstairs, and master bedroom zones—and after an
hour or so our installer had all three communicating seamlessly with the solo heat
pump, each other, and the Nest cloud. In this configuration, a hard-wired zone
controller box from ClimateMaster managed the digital bit arbitrations among
the respective comfort zones, each equipped with mechanical dampers standing
guard over dedicated sections of ductwork.
How well does this single-heat-pump, triple-zoned setup work with the Nests?
Splendidly. Living in a near-zero-energy house, one must be ever vigilant about
energy consumption, and the Nests go a long way toward minimizing kilowatts
consumed for cooling, heating, and circulating fresh air throughout the house
based on how the occupants are typically using or not using it.
For example, the Auto-Away feature, where the Nests automatically set
themselves back when they sense the house is unoccupied, is a notable energy
saver. And the now-standard ability to remotely adjust the Nests anytime,
anywhere through the app is much appreciated, particularly on those days when
life throws you a curve.
24

Getting in the zone with the Nest app. The Downstairs zone is actively delivering
cool air, while the Master Bedroom and Upstairs zones lie dormant
While Nest likes to tout the sophistication of their thermostats to auto-program
themselves based on nothing more than the comings, goings, and adjustments
made by the home’s occupants, we found that less valuable than the ability to
easily click, drag, copy, and paste in the Nest smartphone or tablet app to tweak
schedules in the 3 zones we have.
Here in this home, getting to a state of effective zoning is so crucial in keeping to
our near-zero-energy goals and most importantly, ensuring the delivery of
comfortably-conditioned and healthy air into the respective zones only when and
if it is needed. And on those 100-degree+ (F) summer days in Texas where cooling
is king, as well as on other occasions year-round where the home’s zones are
calling for conditioned air, the Nests do their part to deliver admirably on those
goals.
More info about this topic:
Nest website
25

5. Spaces debuts in redesigned Nest app
In advance of the planned fall launch of the Nest Cam Outdoor, smart-home
technology company Nest Labs has released version 5.6 of the Nest app, which
brings new device organization options to the software. With the debut of the
Spaces feature, homeowners can group Nest-branded products by room to
enable at-a-glance status of devices based on their locations in the home.
In addition to Spaces, the refreshed app reflects an effort by Nest to enhance
functionality for Nest cameras by unlocking more features, which are enabled for
the Nest Cam Indoor and Dropcam products as well as the forthcoming Nest Cam
Outdoor.
26

Nest has redesigned their app to include the new Spaces feature, where
homeowners can group Nest-branded products by room to enable at-a-glance
status from the home screen.
Prior to this app release, individual Nest Learning Thermostats and Nest cameras
were displayed in a flat array of scrollable icons on the home screen, while Nest
Protect Smoke + CO Alarms were represented as a single icon that could be
tapped to see the the status of individual Protects below. With the new
hierarchical Spaces—activated by simply turning the setting on in the Nest
menu—the home screen immediately transforms into rectangular groupings of
device icons, based on locations that were set when the devices were added.
27

Before: Prior to version 5.6 of the app, multiple Nest Learning Thermostats, Nest
Protects, and Nest cameras were displayed as a flat array of scrollable icons on
the home screen.
After: When the Spaces feature is switched on in version 5.6 of the app, Nest
products appear in a hierarchy of room locations, based on the room tags
associated with each device.
Before or after Spaces is activated, Nest devices can be assigned to any of the
predefined room name locations, or alternatively can be assigned to user-defined
28

custom room names. A label feature also enables individual devices to be
renamed from their default names to another desired name.
With this iteration of Spaces, room rectangles alphabetically sort based on the
room name, and can’t be reordered by dragging. Now, one could force the
ordering by defining custom room names prefaced with numerals or other
characters, for example, 1. Great Room | 2. Master Bedroom or A. Great Room | B.
Master Bedroom and so on. But we would prefer a click-and-drag capability here
for optimal flexibility.
On the tablet app with the Spaces feature activated, touching a Nest product icon
within a room expands the device on the right in split-screen mode.
There is an additional caveat here with Spaces related to the Nest Protect—which
annunciates its room name and the alarm type when an event is detected—in that
only predefined room names can be spoken. In settings, another predefined room
name can alternatively be selected to have the Protect announce that name, or
you can choose to switch off the spoken name portion of the alarm event.
There are a number of additional features for Nest camera users that debut in the
29

redesigned app, including:
Camera feeds on the home screen have been expanded from icons to full-screen●
width, and enhanced with live streams that are displayed when the app is
connected to a WiFi network
Live views from cameras can be shared with other users via a password-●
protected feature through Secure Private Camera Sharing
Video resolution for the Dropcam Pro has been upgraded to 1080p format●
An automatic video quality adjustment feature has been implemented to●
optimize the viewing experience.
The new Nest app also works with the Apple Watch for the first time, and enables
direct control of Nest Learning Thermostats as well as delivery of notifications
from other Nest products. The app requires watchOS 2.0 or greater, and also runs
on Android Wear devices at version 5.1.1 or higher. And of course, the app is
compatible with Apple mobile devices (iOS 8 or greater), Android mobile devices
(version 4 or greater), and the latest versions of leading web browsers running on
Apple OS X (version 10.9 or higher) and Windows 7 or higher.
More info about this topic:
Nest App website
Nest to weather the elements with Nest Cam Outdoor
30

6. Belkin WeMo grows up: Nest LearningThermostat integration
The WeMo smart-home automation ecosystem has been expanding steadily with
more supported accessories from parent company Belkin as well as from third-
party companies, but to date has not offered the benefit of integration with
heating and cooling systems. With a recent upgrade to version 1.15 of the app,
WeMo has taken a giant step toward becoming a more formidable force in today’s
smart home. And that is largely due to the addition of very smooth integrations
with the popular Nest Learning Thermostat through the Works with Nest
program.
31

With a recent app upgrade, the WeMo home automation ecosystem gets a big
boost by integrating the Nest Learning Thermostat through the Works with Nest
program.
WeMo is a hub-less home automation setup, meaning the system does not require
the presence of a dedicated home automation hub. In contrast to the competing
Samsung SmartThings or Wink systems—which require the installation of one or
more dedicated hardware hubs on the private home network plus a
corresponding smartphone app—WeMo requires only the WeMo app and a
minimum of one WeMo-compatible product in order to function. In that regard,
the WeMo operational model is very similar to that of the software-based Apple
HomeKit environment. Unfortunately, WeMo accessories cannot be integrated
with Apple HomeKit, though that could be subject to change in the future.
Belkin offers a number of native WeMo-branded automation accessories,
including the wall-pluggable WeMo Switch and Insight Switch, the in-wall Light
Switch, the versatile Maker, and NetCam WiFi cameras. In addition to the
integration with Nest, the list of supported products includes offerings from
several other companies, including the Crock-Pot slow cooker and Mr. Coffee
coffeemaker from Jarden Consumer Solutions, Lightify lighting solutions from
Osram Sylvania, and others. WeMo accessories can also be controlled by Amazon
32

Alexa voice commands through the Amazon Echo and Amazon Dot products, and
scripted for robotic actions through the If This Then That (IFTTT) home
automation website and app.
Belkin offers a number of WeMo-branded accessories, including the WeMo
Maker (left) and WeMo Insight Switch (right), which can be used to control lights
and other devices.
A basic WeMo automation setup
The setup of a basic WeMo home automation system is very straightforward, and
consists of first downloading the WeMo app from the Apple App Store for iOS
devices or the Google Play store for Android devices, followed by plugging in or
installing a supported WeMo accessory, and then finally configuring the
accessory on the home WiFi network through the app.
Once setup is completed, the accessory can then be controlled directly through
gestures in the WeMo app or programmatically through the setting of in-app
rules—user-configurable settings for triggering actions based on time of day, day
of week, motion detection, and other factors.
Through the Remote Access feature, WeMo accessories can be controlled by
33

authorized mobile devices, both within the secure local home network as well as
remote locations outside of the home. This is enabled through secure
communications between the smartphone app and the WeMo Remote Cloud
Server. A Forget and Disable button in the app facilitates revoking access to
Remote Access services for a specific mobile device. The WeMo app is also
designed to automatically produce notifications in the event an accessory
requires a firmware update, which can typically be accomplished by simply
acknowledging the notification event.
A test bed for WeMo and Nest integration
We have a number of WeMo products integrated into the testing
infrastructure of our Digitized House Zero Energy Living Lab home, including the
WeMo Insight Switch and WeMo Maker. In the case of the Insight Switch—a
WiFi-enabled device that is able to remotely turn off or on any appliance,
electronics, or lighting fixture plugged into its single electrical outlet as well as
capture real-time and cumulative energy consumption data—we configured it to
control a floor lamp that was fitted with a pair of LED lamps. And in the case of the
WeMo Maker—a flexible, WiFi-enabled device designed to automate control of a
single low-voltage device or sensor—we wired and configured one to control the
opening and closing of a garage door.
The 3rd generation of the Nest Learning Thermostat.
34

For the Nest component of the testing, we utilized our existing trio of second-
generation Nest Learning Thermostats we employ to control our energy-efficient,
ground-source geothermal heat pump heating and cooling system. The Nest
thermostats were configured on the same secure private WiFi network as the
WeMo accessories, and were also connected to the Nest cloud through a
standard Nest account.
Through the WeMo app, we authorized access to our Nest account and then all 3
of our Nest thermostats appeared on the WeMo home screen.
In order to authorize integration with Nest, we selected the Connect to Nest
menu option in WeMo settings, and then provided our Nest account credentials
when requested. Once that was completed, all 3 of our Nest thermostats
appeared in the WeMo home screen.
Working with Works with Nest
The Works with Nest integration for WeMo is currently limited to the Nest
Learning Thermostat, so, for example, any Nest Protect smoke detectors in the
home will not be accessible or visible from WeMo. But the existing integration
experience is very well done, functional, and quite useful.
35

From within the WeMo app, each Nest thermostat can be individually controlled,
including adjusting the temperature, selecting the desired mode, and setting the
Home or Away status.
First and foremost, each Nest thermostat can be individually controlled within the
WeMo app, including adjusting the temperature, selecting the mode (heat, cool,
heat/cool or off), and setting the Home or Away status. The app also displays the
current temperature and set point, the Nest Sense icon (for example, display of
the Nest Leaf when the thermostat is in energy-saving mode), and humidity
reading.
This integration works seamlessly, and we can envision homeowners with
automation setups consisting primarily of WeMo-compatible accessories and
Nest thermostats choosing to forego the Nest app and using WeMo exclusively
for day-to-day control tasks. Of course, the native Nest app or the Nest website
would still be required for adjusting Nest schedules and deeper configuration
settings, but we find these functions are accessed quite infrequently after the
Nests have been configured and progress through their initial Auto-Schedule
period.
But the more interesting aspect of the integration from a home automation and
energy-conservation perspective is the ability to have WeMo-controlled lights
36

and devices turn on or off based on the Home or Away status of a Nest
thermostat. This feature will work with the Wemo Insight Switch, Light Switch,
Maker, and Switch.
An energy-saving benefit of the Works with Nest integration in WeMo is the
ability to have WeMo-controlled lights and devices turn on or off based on the
Home or Away status of a Nest thermostat.
In order to facilitate this aspect of the testing, we set a WeMo rule to turn off the
floor lamp connected to our WeMo Insight Switch when the Nest thermostat was
placed in Away mode. Then, when we manually set the thermostat to Away
mode—by selecting Away on the Nest thermostat itself, in the native Nest app, or
from within the WeMo app—the floor lamp immediately switched off.
Additionally, this rule will run whenever the Nest thermostat automatically goes
into Away mode through the Nest Home/Away Assist or Auto-Away features.
Conversely, we set another WeMo rule to switch on the same floor lamp when a
Nest thermostat was placed in Home mode—either manually through selecting
the mode, or automatically through the detected arrival of one of the home’s
occupants when Nest Home/Away Assist is active. In this case, an arrival event
37

can be detected through the presence of an authorized smartphone user as
configured in the Nest app. This rule also worked without fail in our testing. You
can read much more about how the Nest Home/Away Assist or Auto-Away
features are designed work in this article on the Nest support website.
Taking the home automation plunge with WeMo
For homeowners considering taking steps toward turning their dwelling into a
smart home, WeMo offers a well-integrated set of accessory options that are
quite straightforward to set up, simple to automate with point-and-click rules,
and function smoothly and reliably. When the WeMo ecosystem is extended
through the integration of one or more Nest Learning Thermostats, the resulting
system takes a large step forward in potential convenience and energy savings.
More info about this topic:
Belkin WeMo website
Nest Learning Thermostat website
Works with Nest program
38

7. Smart-home power broker:SmartThings Hub from Samsung
In the powers-that-be battle for dominance on the evolving smart-home
automation front, electronics giant Samsung took its opening shot across the
driveway in August of 2014 with its acquisition of smart-hub vendor SmartThings.
Earlier in 2014, mega-players Google and Apple also made their respective forays
into the smart-home tech field: Google acquired smart thermostat pioneer Nest
Labs, and Apple announced support for its iOS-only HomeKit integration
platform.
39

Smart-home automation in a box? The Samsung SmartThings Hub connects to a
home network through an Ethernet port. The hub also has an integrated battery
backup feature and USB ports for future devices.
All of these three largely-do-it-yourself platforms have been evolving and
expanding their device support since then, but there are plenty of other players in
the fray as all, including the likes of the Belkin WeMo environment, Iris by Lowe’s,
the Wink hub, and many more. But Samsung made one of most notable recent
advances in this genre of Internet of Things (IoT) technology with the launch of
the SmartThings Hub V2 in September of 2015.
Hub, hub-lite, or hub-free?
Before we get into the details of the latest SmartThings Hub, it is worth noting the
diversity of approaches these three big players are taking to smart-home
automation. With SmartThings, the center of the universe is the standalone hub
itself, a router-like device that must be plugged into the Ethernet network of the
home. In addition to Samsung SmartThings-branded devices and sensors,
many third-party products and sensors can connect through the hub’s support for
the ZigBee, Z-Wave, and Bluetooth protocols, as well as the usual IP.
40

With support for the ZigBee, Z-Wave, and Bluetooth protocols—as well as the
usual IP—the SmartThings Hub is a formidable power broker in a battle among
DIY smart-home giants. The SmartThings-branded Water Leak Sensor (left) and
diminutive Arrival Sensor (center) are easy-to-configure surrogates.
By contrast, Google (or Alphabet) and its Nest Labs sibling take a distinctly
different approach and simply require the installation of at least one Nest
product—for example, the WiFi-connected Nest Thermostat or Nest Protect
smoke detector—as the minimum prerequisite for integrating other devices into
their automation ecosystem. Non-Nest devices and products can then connect in
various ways with the platform after achieving certification through the Works
with Nest program.
And in the case of Apple HomeKit, the Apple side of the platform is pure software
and does not require a dedicated in-home automation hub. HomeKit is integrated
into the code base of iOS 8.1 or later and runs on compatible mobile devices, such
as the iPhone and iPad. In order for third-party devices to connect, vendors need
to certify their products through the Works with Apple HomeKit program; these
devices will typically have an on-board HomeKit-compatible chip. For example,
the iDevices Switch is one such product we have previously tested in our labs.
41

Enter Samsung SmartThings Hub V2
We purchased our hub off the shelf at a local BestBuy store, at a cost of $99. The
SmartThings Hub V2 is the first network router-type device we have seen with an
integrated backup power supply: A set of 4 AA batteries installed in the bottom
can continue to power the hub and process some alerts and automations in the
event of a power outage. We would love to see router manufacturers take this
approach with their products.
Installation of the hub was exceedingly simple, though keep in mind access to
power and an open Ethernet port are requirements. Once the hub was connected
inside our mechanical room, we used version 2.1.0 of the SmartThings Mobile app
for iOS (the app is also available for Android, plus Windows 8.1 and 10 devices) to
complete the setup process for our Digitized House Zero Energy Living Lab home.
A few days after we activated our system, SmartThings automatically pushed out
a hub firmware update to version 000.014.00032.
With this latest iteration of the app, main navigation is enabled through four icons
in a dock at the bottom of the screen, including Dashboard, My Home, Routines,
and Marketplace.
At launch of the SmartThings Mobile iOS app, the Dashboard appears with the
Smart Home Monitor. One can assemble a holistic DIY home-front security
system on this panel, replete with standard Arm (Away), Arm (Stay), and Disarm
buttons.
42

Dashboard becomes the home page when the app launches, and this
comprehensive Smart Home Monitor feature provides an at-a-glance status
report for security intrusion, fire, carbon monoxide, water leaks, and info from
other key sensors. One can use Dashboard to assemble a holistic do-it-yourself
(DIY) home-front security system, replete with standard Arm (Away), Arm (Stay),
and Disarm buttons.
Accessed from the My Home button, the Rooms panel can include any number of
user-definable rooms or areas per home location. Tapping a room reveals all of
the devices and sensors associated with that room.
The My Home button gives access to the Rooms, Things, and Family tabs. Rooms
are specific to each location, and can include any number of associated devices
and sensors—each with a typically-clickable status indicator. Things are the
essence of SmartThings, and includes the individual devices and sensors that have
been added to the location and activated. Family is an at-a-glance status page for
various location sensors that report their status as absent or present at the
location, including devices such as the SmartThings Arrival Sensor that can, for
example, be attached to a child’s backpack and then trigger notifications as the
sensor arrives or departs. Smartphones running the SmartThings app can also be
added as location sensors with no additional hardware.
43

Out of the box, SmartThings is pre-configured with four clickable recipes called
Routines, including Good Morning, Good Night, Goodbye, and I’m Back.
Additional Routines can be created for desired home usage models or events.
Routines are groupings of user-configurable device automation recipes for time-
of-day, arrival, departure, or on-demand events. These recipes can include actions
related to lights, switches, and dimmers, plus locking and unlocking doors,
opening or closing garage doors, adjusting thermostats, arming or disarming the
Smart Home Monitor, and setting the Away, Home, or Night modes.
Marketplace provides access for adding new Things and SmartApps. For adding
new Things, a series of hierarchical menus enable adding a diverse array of new
devices and sensors that can be located throughout the home. For example, under
the Climate Control menu, selecting Vents> Keen Home enables adding the Keen
Home Smart Vent, and also gives direct access to device-specific documentation
and support. We can only wish other apps were as friendly.
44

The Notifications pane includes an integrated text-messaging-like Messages
feature for delivery of activity notifications. SmartThings can also be configured
to deliver the notifications through text messaging.
One of the most powerful features of the SmartThings platform is
SmartApps—applets that can perform specific actions for devices and sensors
based on internal and external events. For example, the Dashboard’s Smart Home
Monitor is itself a SmartApp, but there are many more under constant
development from the SmartApps team as well as from developers in the
community.
A new hamburger menu at the top right facilitates setting up additional
SmartThings home locations, plus access to Notifications—a dual-purpose pane
with a text-messaging-like Messages feature and a detailed Activity Feed.
Connecting devices and sensors
For this initial testing exercise, we purchased the following Samsung
SmartThings-branded devices: Arrival Sensor, Multipurpose Sensor, and Water
Leak Sensor. Each of these native sensors were simple to add to our system, and
worked flawlessly, instantly reporting their status changes as instructed to the
SmartThings app and generating alerts according to how we configured them.
45

Things are the essence of SmartThings, and consist of devices and sensors that
have been added to the system. On this panel, each installed Thing is
accompanied by a status indicator that is updated in real time.
The Arrival Sensor is a small, key-fob-sized device that can keep track of the
comings and goings of people, pets, cars, and most any other potentially-mobile
object. An upside when the sensor is attached to a keychain: the SmartThings app
can be used to trigger a beeping tone to help you track down misplaced keys.
The Multipurpose Sensor—a two-piece ZigBee device primarily designed as a
door, window, or garage door open/close sensor—is multi-talented and can also
detect vibration, orientation, and temperature. The temperature sensor
component, for example, can be independently selected in a SmartApp to trigger
an action while the open/close component is configured in a separate SmartApp.
Similarly, the primary role of the Moisture Sensor is of course detection of water
through the exposed metal contacts on its underside, but it also has an onboard
temperature sensor component that can be independently selected for
monitoring.
Making beautifully-automated music and more
We were delighted to discover that we could integrate our existing wireless music
46
system—from Sonos—into SmartThings without adding any special hardware.
Through the Marketplace pane, we selected Sonos (Labs) to discover all four sets
of Sonos speakers in the home. In order to control the speakers from the
SmartThings app, we installed the Speaker Control SmartApp. Going deeper, we
installed the Mood Music SmartApp, which can enable playing a specific song or
station based on virtually any detectable event in SmartThings. For example,
based on the approach of a specific Arrival Sensor, Sonos can play a specific track
in a specific room.
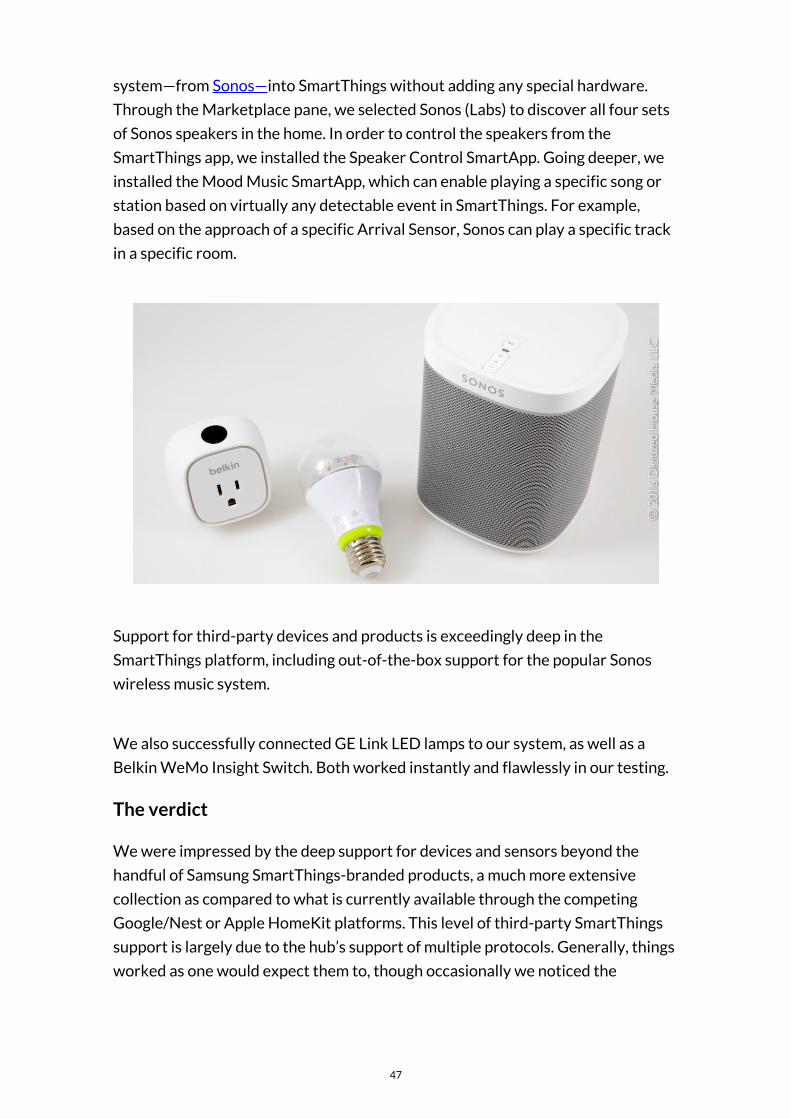
Support for third-party devices and products is exceedingly deep in the
SmartThings platform, including out-of-the-box support for the popular Sonos
wireless music system.
We also successfully connected GE Link LED lamps to our system, as well as a
Belkin WeMo Insight Switch. Both worked instantly and flawlessly in our testing.
The verdict
We were impressed by the deep support for devices and sensors beyond the
handful of Samsung SmartThings-branded products, a much more extensive
collection as compared to what is currently available through the competing
Google/Nest or Apple HomeKit platforms. This level of third-party SmartThings
support is largely due to the hub’s support of multiple protocols. Generally, things
worked as one would expect them to, though occasionally we noticed the
47

SmartThings app would not properly report the status of a device (in particular,
whether a specific Sonos speaker set was playing or paused). But overall, we think
SmartThings is an excellent platform and we see a bright future for it. Samsung
states on their website there are over 200 connectable devices, and we would not
doubt that figure.
Samsung has also announced SmartThings support for their line of 2016 Smart
TVs as well as integrating IoT hubs into their 2016 SUHD TVs. We will delve into
that set of integrations in a future article.
Certainly, each of the smart-home platforms are embroiled in constant states of
change, with device and sensor support rapidly advancing, yet as one would
expect there continues to be minimal integration between them. This tendency
toward closed ecosystems should relax somewhat going forward as the software
layers and communications protocols get smarter and more universally adopted.
Google and Nest, for example, are continuing to solicit support for their behind-
the-scenes software layers, the Nest Weave application protocol, as well as
Thread, the accompanying networking protocol designed for the expected mesh
networks in the world of IoT. But currently, there is no native support for Thread
in SmartThings, so the three Nest thermostats and two Nest Protects we have in
our lab home essentially exist in their own virtually-networked world.
Stay tuned. The smart-home journey is sure to be a thrilling ride.
More info about this topic:
Samsung SmartThings website
Sonos website
48
8. About Digitized.House Magazine
So what is the raison d’être of Digitized.House Magazine? Quite simply, we have
architected our all-digital publishing mission to guide you along the winding road
toward making your dwelling a smart, sustainable, digitally-safe, energy-efficient,
and healthy place to live. As we continue to ramp up our ecosystem, we are
delivering original editorial, video, photographic, and multimedia content across
the categories of smart-home tech and automation, end-to-end sustainability,
high-performance and zero-energy home ownership, digital home-front security,
healthful living elements, the Internet of Things (IoT), and much more.
Tune into our primary website at digitized.house and our Apple News Channel,
plus our social media channels—including Facebook, Instagram,
and Twitter—where we are posting fresh content as it emerges from our
publishing machine. Thank you for coming aboard—it is sure to be an exciting
journey!
Tom Kolnowski
Chief Content Officer and Founder
digitized.house
All content, photographic imagery, and creative elements: © 2016 Digitized House Media, LLC.
49