guía del usuario. - verizon wireless · getting to know your watch. 6. about your watch. your...
TRANSCRIPT

User guid
e.M
FL69361201 (1.0
)
This booklet is made from 98% post-consumer recycled paper.This booklet is printed with soy ink. Printed in Mexico
User guide.Guía del usuario.

Copyright©2016 LG Electronics, Inc. All rights reserved.LG and the LG logo are registered trademarks of LG Corp.Watch Urbane is a trademark of LG Electronics, Inc.All other trademarks are the property of their respective owners.

About This User Guide
Thank you for choosing LG. Please carefully read this user guide before using the device for the first time to ensure safe and proper use. Visit the LG website at www.lg.com to obtain the latest version of this manual.
• Descriptions are based on the device's default settings.• Some content and illustrations may differ from your device depending
on the region, service provider, software version, or OS version, and are subject to change without prior notice.
ENGLISH
2
Getting to Know Your Watch ....... 4Accessories ................................................ 5
About Your Watch ...................................... 6
Charging Your Watch ................................. 9
If the Screen Freezes ...............................11
Replacing the SIM card ............................12
Turning the Watch On and Off .................16
Using the Touch Screen ............................17
Connecting the Watch to Your Companion Device ...................... 18Setting up Your Companion Device .........19
Pairing Your Watch with Your Companion Device ....................................20
Connecting to Another Companion Device .......................................................21
How to Use Your Watch ............. 22Waking Your Watch ..................................23
Dimming the Screen .................................23
Changing the Watch Face ........................23
Notification Cards ....................................24
Blocking Notifications .............................25
Call Notifications .....................................26
Do Not Disturb Mode ..............................26
Seeing Battery Remaining and Date ........27
Controlling the Sound Setting .................27
Turning Your Screen Off with Theater Mode ........................................................28
Boosting Screen Brightness ....................28
Opening the Settings Menu .....................28
Managing Storage ....................................29
Tasks Using Voice Command ...... 30Using Your Voice to Control Your Watch ...............................................31
Changing the Apps You Use for Voice Actions .....................................................32
Taking or Viewing a Note .........................32
Setting a Reminder ..................................33
Seeing Your Step Count ...........................33
Using the Heart Rate Sensor ...................34
Sending a Text ..........................................36
Sending and Reading Email ......................37
Using your Calendar .................................38
Navigating ................................................38
Setting a Timer .........................................39
Using the Stopwatch ...............................39
Setting an Alarm ......................................40
Managing Your Alarms .............................41
Table of Contents

3
Apps ............................................ 42Opening the Apps Installed on your Watch .......................................................43
Downloading Other Apps.........................45
Settings ....................................... 46Opening the Settings Menu .....................47
Adjusting the Display Brightness ............47
Changing Your Watch Face ......................47
Changing the Font Size ............................47
Using Gestures .........................................48
The Always-on Screen Setting ................48
Managing Sound Settings ........................48
Changing Wi-Fi Settings ..........................49
Changing Bluetooth Settings ..................50
Changing Network Settings ....................50
Managing Your Location Services............51
Turning Airplane Mode On/Off ................51
Setting Accessibility Options ..................51
Setting Date & Time .................................52
Setting a Screen Lock ..............................52
Managing Permissions .............................52
Turning Your Watch Off ...........................52
Getting Information about Your Watch ..53
More Information ........................ 54Open Source Software Notice Information ..............................................55
Trademarks ...............................................55
Regulatory Information ...........................55
How to Update Your Device .....................56
Safety Information...................... 57General Safety & Handling .......................58
Safety Tips ...............................................59

Getting to Know Your WatchGetting to Know Your Watch

Getting to Know Your Watch 5
AccessoriesThe following accessories are provided with your device.
• Quick Start Guide• Charging cord• Travel adaptor• SIM card cover opener
NOTE• Always use genuine LG accessories. The supplied accessories are designed only
for this device and are not compatible with other devices. • The accessories supplied with your device and any other available accessories
may vary depending on the region or your service provider.

Getting to Know Your Watch 6
About Your WatchYour watch comes with the SIM card pre-installed.
Power Button
Contacts Button
LG Health Button
Touch Screen
FRONT
NOTE • The touch screen must not come into contact with any other electrical devices.
Electrostatic discharge can result in the touch screen malfunctioning.• Changing the wrist straps to metal straps might cause Bluetooth®/Wi-Fi
connectivity problem.
Getting to Know Your Watch 7
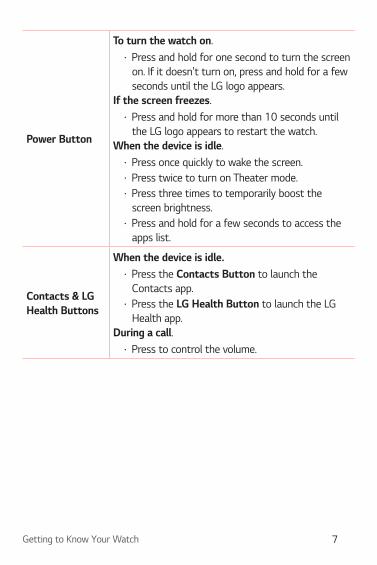
Power Button
To turn the watch on:• Press and hold for one second to turn the screen
on. If it doesn't turn on, press and hold for a few seconds until the LG logo appears.
If the screen freezes:• Press and hold for more than 10 seconds until
the LG logo appears to restart the watch. When the device is idle:
• Press once quickly to wake the screen. • Press twice to turn on Theater mode.• Press three times to temporarily boost the
screen brightness.• Press and hold for a few seconds to access the
apps list.
Contacts & LG Health Buttons
When the device is idle:• Press the Contacts Button to launch the
Contacts app.• Press the LG Health Button to launch the LG
Health app.During a call:
• Press to control the volume.

Getting to Know Your Watch 8
Charging Terminals
BACK
Heart Rate Sensor
Microphone
SIM Card Cover
Barometer
WARNING• Keep the microphone and barometer holes clear.• Any damage to the barometer or microphone resulting from accidents,
unreasonable use, tampering or other causes not arising from defects in material or workmanship may void the Limited Warranty.
• Exerting excessive force on the watch band may cause it to break.
NOTE • Changing the wrist straps to metal straps might cause Bluetooth®/ Wi-Fi
connectivity problems.

Getting to Know Your Watch 9
Charging Your WatchBefore using your watch for the first time, you should charge the battery. Use the charging cord provided with your watch to charge its battery.The supplied charging cord will allow you to charge from a power outlet or from a computer. The charging cord is equipped with a magnet inside. Do not leave metal objects nearby when not connected with the watch. Contact with metal may damage the travel adaptor or a PC.
NOTE • When the battery power is low, the battery icon may show as empty. If
the battery charge is completely empty, the watch cannot be turned on immediately after connecting the charger. Leave an empty battery to charge for a few minutes before turning the device on. Some features are not available while the battery is charging.
WARNING: Take these precautions to avoid corrosion of the charging terminals
• Exposure to sweat or other foreign materials while using your device may affect the charging terminals causing them to corrode while charging.
• To prevent this, wipe the charging terminals with a cloth before charging.
1 Locate the charging terminals on both the watch and the charging cord.
Charging Terminals

Getting to Know Your Watch 10
NOTE• The charging cord is designed to only be used with the watch and is not
compatible with other devices.• To maximize battery life, make sure that the battery is fully charged before you
use it for the first time.
2 Connect the charging cord to a power source.• To charge from a power outlet, connect the USB plug on the charging
cord to the travel adaptor, then plug the travel adaptor into an outlet.• To charge from a PC, insert the USB plug on the charging cord into a
USB port on the PC.
NOTE • Make sure the cradle on the charging cord is firmly connected to the watch
before connecting to the travel adaptor or a PC.
Getting to Know Your Watch 11
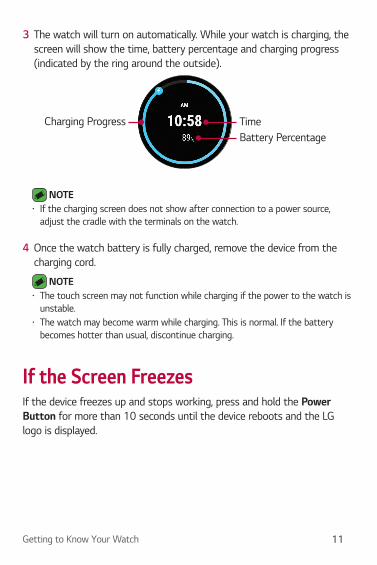
3 The watch will turn on automatically. While your watch is charging, the screen will show the time, battery percentage and charging progress (indicated by the ring around the outside).
Charging Progress TimeBattery Percentage
NOTE • If the charging screen does not show after connection to a power source,
adjust the cradle with the terminals on the watch.
4 Once the watch battery is fully charged, remove the device from the charging cord.
NOTE• The touch screen may not function while charging if the power to the watch is
unstable.• The watch may become warm while charging. This is normal. If the battery
becomes hotter than usual, discontinue charging.
If the Screen FreezesIf the device freezes up and stops working, press and hold the Power Button for more than 10 seconds until the device reboots and the LG logo is displayed.

Getting to Know Your Watch 12
Replacing the SIM cardYour watch comes with the SIM card installed. Follow these steps if you need to replace the SIM card.
NOTE• Please turn off the device before you insert or remove a SIM card.
1 Open the SIM card cover using SIM card cover opener as shown below. Align the SIM card cover opener with the holes located on the back of the watch, and then turn the cover counter-clockwise until the SIM card cover direction indicator reaches the UNLOCK position.
SIM Card Cover Opener
Direction Indicator
NOTE• Do not use excessive force when you turn the SIM card cover using the SIM
card cover opener.
Getting to Know Your Watch 13
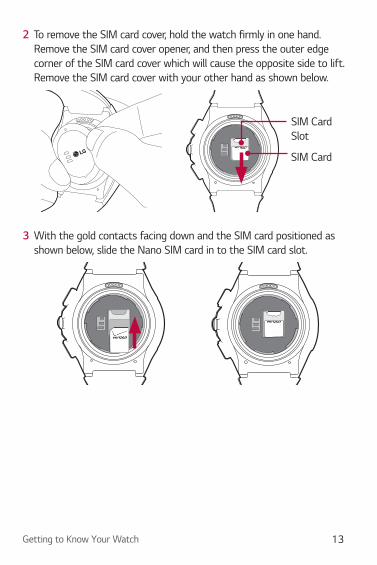
2 To remove the SIM card cover, hold the watch firmly in one hand. Remove the SIM card cover opener, and then press the outer edge corner of the SIM card cover which will cause the opposite side to lift. Remove the SIM card cover with your other hand as shown below.
SIM Card Slot
3 With the gold contacts facing down and the SIM card positioned as shown below, slide the Nano SIM card in to the SIM card slot.
SIM Card

Getting to Know Your Watch 14
4 Close the SIM card cover using the SIM card cover opener as shown below. Align the SIM card cover opener with the holes located on the back of the watch, then turn the cover clockwise until the SIM card cover direction indicator reaches the LOCK position.
SIM Card Cover Opener
SIM Card Cover Sealing
PadDirection Indicator
NOTE • Foreign materials on the SIM card cover sealing pad or SIM card cover may
allow water to get into your watch. Keep the cover clean and remove any foreign material before replacing the cover.

Getting to Know Your Watch 15
Unlocking the SIM cardIf you insert a SIM card with a PIN lock, you have to enter the unlock code to be able to use it in the watch. If the SIM card PIN lock is turned off, disregard this section.1 After turning the watch on, swipe up from the bottom of your watch
screen until the SIM Locked screen appears.2 Tap the SIM Locked screen.3 Enter the unlock code.
Getting to Know Your Watch 16
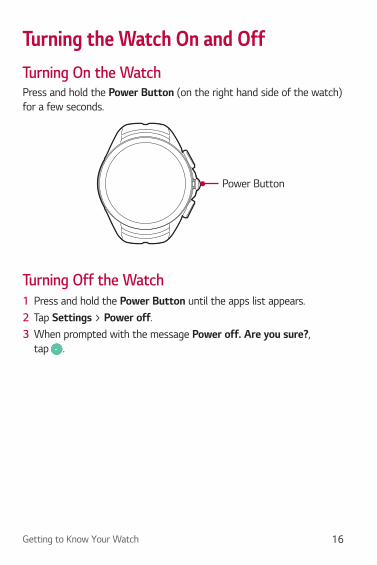
Turning the Watch On and OffTurning On the WatchPress and hold the Power Button (on the right hand side of the watch) for a few seconds.
Power Button
Turning Off the Watch1 Press and hold the Power Button until the apps list appears.2 Tap Settings > Power off.3 When prompted with the message Power off: Are you sure?,
tap .

Getting to Know Your Watch 17
Using the Touch ScreenHere are some tips on how to navigate on your watch.
• Tap or touch – A single finger tap selects items, links, shortcuts, and letters on the on-screen keyboard.
• Touch and hold – Touch and hold an item on the screen by touching it and not lifting your finger until an action occurs.
• Swipe or slide – To swipe or slide, quickly move your finger across the surface of the screen, without pausing when you first touch it.
Tap or touch Touch and hold Swipe or slide
Touch Screen Tips• Do not leave non-moving images for an extended period. This may
cause image burn-in on the screen.• Applications that show the same screen for more than 10 minutes
are not recommended because they may cause screen damage that is not covered by the warranty.
• Due to the touchscreen, this device is not suitable for the visually impaired.

Connecting the Watch to Your Companion DeviceConnecting the Watch to Your Companion Device

Connecting the Watch to Your Companion Device 19
Setting up Your Companion DeviceBefore pairing, please do the following on your smartphone or tablet.
NOTE• To make calls with your watch, your companion device needs to be an Android
smartphone.
1 Make sure the companion device is running Android 4.3 or higher and supports Bluetooth®.• If your companion device is not Android 4.3 or later, please check with
your manufacturer for a possible software update.2 Make sure your companion device supports Android Wear.
• To find out, visit http://g.co/WearCheck from your companion device.3 Turn on Bluetooth on your companion device if it isn’t already on.4 Make sure your companion device is next to your watch. 5 On your companion device, download the Android Wear app from
the Play Store and install it. Check that the Android Wear app is installed and updated to the latest version.
6 On your companion device, make sure you are using the most recent version of Message+ as your default messaging app. (You can check for updates in the Play Store .)
7 If you’re connecting your watch to a smartphone, make sure Advanced Calling is turned on. On your phone, go to Settings > Advanced Calling > Activate Advanced Calling.
8 Make sure your companion device is connected to mobile data or a Wi-Fi network. You need a data connection to set up your watch for the first time.
9 Keep your watch charging during setup.

Connecting the Watch to Your Companion Device 20
NOTE• Your watch will turn on automatically while charging. Depending on the
software installed, your watch may automatically download and install an update.
• Depending on the network connection, the setup process might take over 20 minutes.
Pairing Your Watch with Your Companion DeviceFollow these steps to pair your watch with your companion device.1 Keep your watch connected to the charging cord through the entire
pairing process.2 Turn on the watch and swipe the welcome screen left to begin.3 Tap a language.
NOTE • If the battery is less than 20%, your watch may not move to the next step.
4 Swipe left and follow the onscreen instructions until the watch name is displayed.
5 Open the Android Wear app on your companion device.6 On your companion device, you’ll see a list of nearby devices. Tap your
watch’s name.7 You’ll see a pairing code on your companion device and watch. Check
that the codes match.8 Tap Pair on your companion device to start pairing.9 You’ll see a confirmation message on your watch once it is paired. This
can take a few minutes.10 Follow the onscreen instructions to complete the initial setup.

Connecting the Watch to Your Companion Device 21
NOTE• To set up your watch to make calls, open the Calling Setup app on your watch
and follow the instructions.
Connecting to Another Companion DeviceYour watch connects to one mobile device at a time. If you want to connect your watch to a different device, you must reset your watch using the Unpair with phone setting on your watch.
NOTE• The Disconnect LG Watch Urbane option in the Android Wear app on
your phone does not unpair your devices.
Unpairing and Resetting Your WatchThis setting unpairs the watch from your companion device and resets your watch’s settings to their factory default values and deletes all of your data.1 Press and hold the Power Button until the apps list appears.2 Tap Settings > Unpair with phone.3 When prompted, tap to confirm.
WARNING• Factory reset erases all data from your watch's memory and all watch data
from your phone. After reseting, your watch is ready to connect to another companion device.
How to Use Your WatchHow to Use Your Watch

How to Use Your Watch 23
Waking Your WatchIf your watch’s screen is dimmed, you can wake up the watch by doing any of the following:
• Touch the screen.• Turn your wrist so your watch face is upright.• Press the Power Button on the watch.
Dimming the Screen• Press the Power Button on the watch.OR• Cover the watch face with your palm until it vibrates.
Changing the Watch Face1 Touch and hold anywhere on the watch face for a few seconds. 2 Swipe the screen right or left to browse designs, then tap to choose
one.
NOTE • You can also change and download watch faces through the Android Wear
app on your phone.
How to Use Your Watch 24
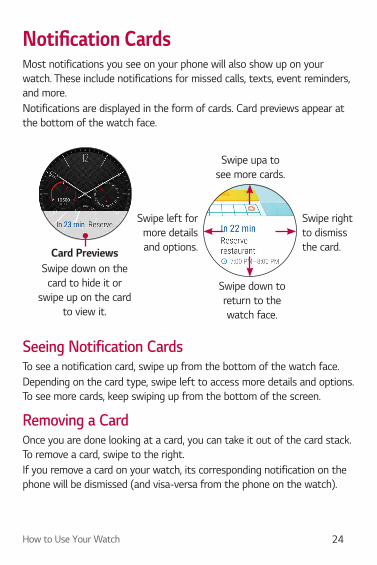
Notification CardsMost notifications you see on your phone will also show up on your watch. These include notifications for missed calls, texts, event reminders, and more.Notifications are displayed in the form of cards. Card previews appear at the bottom of the watch face.
Card PreviewsSwipe down on the
card to hide it or swipe up on the card
to view it.
Swipe upa to
see more cards.
Swipe down to return to the watch face.
Swipe left for more details and options.
Swipe right to dismiss the card.
Seeing Notification CardsTo see a notification card, swipe up from the bottom of the watch face.Depending on the card type, swipe left to access more details and options. To see more cards, keep swiping up from the bottom of the screen.
Removing a CardOnce you are done looking at a card, you can take it out of the card stack. To remove a card, swipe to the right.If you remove a card on your watch, its corresponding notification on the phone will be dismissed (and visa-versa from the phone on the watch).
How to Use Your Watch 25
Bringing a Card BackIf you mistakenly removed a card, you will have a few seconds to swipe down from the top of your watch’s screen and tap the Undo button to get it back. If you’ve swiped away the last card in your stack, you will need to swipe up from the bottom of the screen to see the Undo button.
Blocking NotificationsIf you get notifications on your phone that you don’t want to see on your watch, you can stop specific apps from showing their notifications on your watch.
Blocking Apps Using Your Watch1 On your watch, show a notification card from the app you want to
block.2 Swipe left until you see . 3 Tap > to confirm.
Blocking Apps Using the Android Wear App1 On your phone, open the Android Wear app.2 Tap > Block app notifications > .3 Select the app you want to block.

How to Use Your Watch 26
Call NotificationsYou can get an instant alert when your phone receives an incoming call. The notification shows the caller's number and/or contact information on your watch and lets you accept or decline the call.
NOTE• If you set the 'Play phone audio on watch' option on in the Bluetooth Device
menu in Settings, you will be able to receive call notifications, accept incoming calls, and make outgoing calls on your phone via your watch (Settings > Bluetooth > Play phone audio on watch > ON).
• If the Advanced Calling function is activated on your phone, you can make and receive calls.
Swipe right to answer a call
Incoming call notification
Swipe left to reject a call
Do Not Disturb ModeYou can change whether or not to allow notification cards to show up on your watch. To change the Do Not Disturb setting, swipe down from the top of your watch’s screen. The current Do Not Disturb setting is shown. Tap it to turn it on or off.
Do Not Disturb Alarms Only: Your watch will not show any notifications while this setting is turned on.
NOTE • Some content may differ from your device depending on the OS version.

How to Use Your Watch 27
Seeing Battery Remaining and DateSwipe down from the top of the watch face.
Battery RemainingDate
NOTE • Some content may differ from your device depending on the OS version.
Controlling the Sound SettingYou can turn the sound for notifications on or off. From the watch face, swipe down from the top of the screen, then swipe to the left.
• Tap the Sound icon to turn it On or Off.

How to Use Your Watch 28
Turning Your Screen Off with Theater ModeYou can turn off your watch’s screen so that the display does not light up and notifications do not appear.
• Press the Power Button twice quickly. OR
1 If your screen is dimmed, touch the screen to wake up the watch.2 Swipe down from the top of the screen. Swipe left until you see
Theater mode . Tap the icon to turn it on.3 To turn off Theater mode, press the Power Button.
Boosting Screen BrightnessYou can turn up the brightness temporarily if you are outdoors in a sunny spot. The extra brightness will last for a few seconds and turn off automatically.
• Press the Power Button three times quickly. OR
1 If your screen is dimmed, touch the screen to wake up the watch.2 Swipe down from the top of the screen. Swipe left until you see
Brightness Boost . Tap the icon to turn it on.
Opening the Settings Menu• Press and hold the Power Button until the apps list appears, then tap
Settings .OR• If your screen is dimmed, touch the screen to wake up the watch,
swipe left until the apps list appears, then tap Settings .

How to Use Your Watch 29
Managing StorageThrough the Android Wear app on your phone, you can see:
• How much storage space is available• Total storage space on your watch• Apps or services that are using your watch’s storage
To See the Storage Details1 Make sure your watch and phone are within Bluetooth range.2 On your phone, open the Android Wear app.3 Tap > tap your watch's name if you have multiple devices > Watch
storage.

Tasks Using Voice commandTasks Using Voice Command

Tasks Using Voice Command 31
Using Your Voice to Control Your WatchYour watch has a menu of simple tasks that it can do for you. Anything in its list can also be initiated by your voice. Just say “OK Google” or swipe to the left on the watch face until you see Speak now, then say your command or question.For example, when you have the Speak now screen shown, you can tap Start stopwatch in the tasks listed below the speak prompt. To do the same thing with your voice, just say “OK Google, start stopwatch” from most screens.
NOTE• To use the OK Google voice command feature, a data or Wi-Fi connection
is required on your paired phone, and the devices must be within Bluetooth range.
• Some voice actions are not available in all languages and countries.
Open Speak Now Directly1 If your screen is dimmed, tap the screen to wake up the watch.2 From the watch face, say “OK Google”. You will see the Speak now
prompt. 3 Say your command or ask your question.
Open Speak Now from the Power Button1 If your screen is dimmed, tap the screen to wake up the watch.2 Press and hold the Power Button until the apps list appears.3 Swipe left until you see the Speak now prompt. 4 Swipe down to choose the task you want or say what you want to do.
NOTE • You will see the 3 apps for the tasks that you most recently requested at the
top of the tasks list on the Speak now screen.

Tasks Using Voice Command 32
Changing the Apps You Use for Voice ActionsYou can set which apps to use for different voice actions. For example, you can change the app you use for setting alarms or sending messages.1 On your phone, open the Android Wear app.2 A list of actions is displayed at the bottom of the screen.3 Scroll and tap an action, then choose from the available apps.
NOTE • You can also download apps that work with Android Wear from the
Play Store app.
Taking or Viewing a NoteYou can tell your watch to create a note or view existing notes using QuickMemo+ or Android apps like Google Keep.1 If your screen is dimmed, tap the screen to wake up the watch.2 From the watch face, say “OK Google” or press and hold the Power
Button until the apps list appears, then swipe left until you see the Speak now prompt.
3 Say "Take a note". 4 Say your note when prompted (e.g., "Try the new restaurant on Main
Street"). Your note will automatically be saved after a few seconds. Tap the X to cancel without saving it.
If you install two or more note taking apps on your phone, select the app you want to use, and it will become the default app for future notes.
NOTE: If you installed QuickMemo+ or Google Keep on your phone: • The app turns the words you speak into text. When you have finished
speaking, your text note is saved to QuickMemo+ or Google Keep on your mobile device.
• View and edit your notes by opening the app on your mobile device.

Tasks Using Voice Command 33
Setting a ReminderYou can tell your watch to set a reminder. When a reminder is set, a card will appear at the reminder time.1 If your screen is dimmed, tap the screen to wake up the watch.2 From the watch face, say “OK Google” or press and hold the Power
Button until the apps list appears, then swipe left until you see the Speak now prompt.
3 Say "Remind me".4 Complete your reminder when prompted. Your reminder will
automatically save after a few seconds (tap the X before it finishes saving to cancel it.)
Seeing Your Step CountYou can view your step count goal, the number of steps you have taken today and each day over the last week, as measured by the Fit app. 1 If your screen is dimmed, tap the screen to wake up the watch.2 From the watch face, say “OK Google” or press and hold the Power
Button until the apps list appears, then swipe left until you see the Speak now prompt.
3 Say "Show me my steps". You will see your step count goal, a bar chart of your daily step counts, and a list of your daily step totals.
Tasks Using Voice Command 34
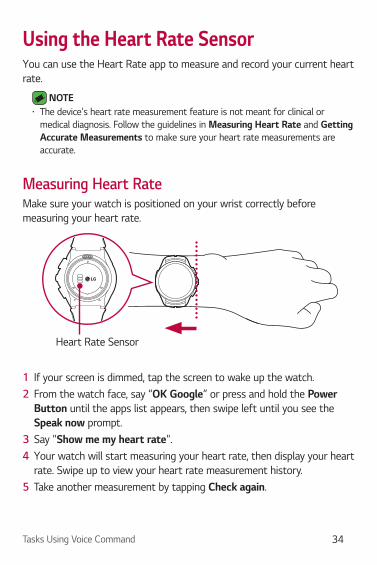
Using the Heart Rate SensorYou can use the Heart Rate app to measure and record your current heart rate.
NOTE • The device's heart rate measurement feature is not meant for clinical or
medical diagnosis. Follow the guidelines in Measuring Heart Rate and Getting Accurate Measurements to make sure your heart rate measurements are accurate.
Measuring Heart RateMake sure your watch is positioned on your wrist correctly before measuring your heart rate.
Heart Rate Sensor
1 If your screen is dimmed, tap the screen to wake up the watch.2 From the watch face, say “OK Google” or press and hold the Power
Button until the apps list appears, then swipe left until you see the Speak now prompt.
3 Say "Show me my heart rate". 4 Your watch will start measuring your heart rate, then display your heart
rate. Swipe up to view your heart rate measurement history.5 Take another measurement by tapping Check again.

Tasks Using Voice Command 35
NOTE• Wearing your watch too loosely or moving a lot may cause inaccurate
measurements.• Never look directly at the heart rate sensor light as this may damage your
eyes.• Escaping light may lead to inaccurate measurements. Wear your watch below
your wrist bone so it sits flat against your skin to prevent light from leaking out while measuring your pulse.
Getting Accurate MeasurementsHeart rate readings may be inaccurate depending on the conditions and your surroundings. Follow these steps for more accurate heart rate readings:
• Never measure your heart rate after smoking or drinking alcohol. Smoking and/or alcohol can affect your heart rate.
• Never take heart rate measurements at low temperatures. Keep yourself warm when you measure your heart rate.
• Users with thin wrists may find their heart rate measurements are inaccurate.
• When measuring your pulse for workout purposes, take the measurement while seated and relaxed before exercise, then proceed with your workout.
• If the measurement significantly differs from predicted values, relax and measure again in 30 minutes.
• Confirm your pulse by taking repeated measurements (about 5 times).
• If you speak, yawn, or breathe deeply during the measurement, you may see inaccurate values.
• Your circulation, blood pressure, or skin condition can affect the light reflection process and may lead to inaccurate measurements.
• If light reflection is blocked by body hair or other items, you may obtain inaccurate measurements.
Tasks Using Voice Command 36
• If the heart rate sensor is dirty, wipe the sensor and try again for a more accurate measurement.
• Your watch measures your heart rate using a light reflection process. Light reflection may affect your watch's ability to take an accurate heart rate reading.
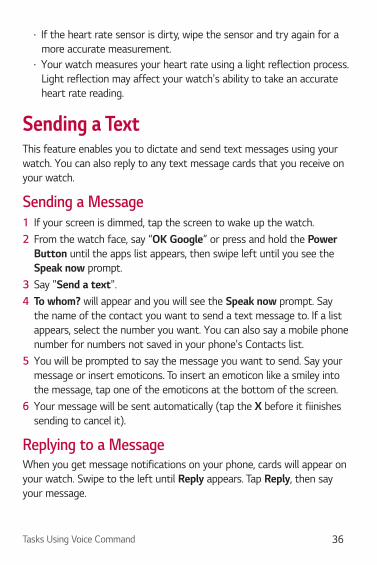
Sending a TextThis feature enables you to dictate and send text messages using your watch. You can also reply to any text message cards that you receive on your watch.
Sending a Message1 If your screen is dimmed, tap the screen to wake up the watch.2 From the watch face, say “OK Google” or press and hold the Power
Button until the apps list appears, then swipe left until you see the Speak now prompt.
3 Say "Send a text". 4 To whom? will appear and you will see the Speak now prompt. Say
the name of the contact you want to send a text message to. If a list appears, select the number you want. You can also say a mobile phone number for numbers not saved in your phone's Contacts list.
5 You will be prompted to say the message you want to send. Say your message or insert emoticons. To insert an emoticon like a smiley into the message, tap one of the emoticons at the bottom of the screen.
6 Your message will be sent automatically (tap the X before it fiinishes sending to cancel it).
Replying to a MessageWhen you get message notifications on your phone, cards will appear on your watch. Swipe to the left until Reply appears. Tap Reply, then say your message.
Tasks Using Voice Command 37
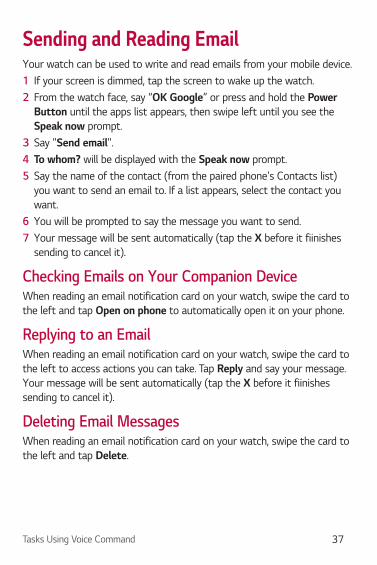
Sending and Reading EmailYour watch can be used to write and read emails from your mobile device.1 If your screen is dimmed, tap the screen to wake up the watch.2 From the watch face, say “OK Google” or press and hold the Power
Button until the apps list appears, then swipe left until you see the Speak now prompt.
3 Say "Send email".4 To whom? will be displayed with the Speak now prompt. 5 Say the name of the contact (from the paired phone's Contacts list)
you want to send an email to. If a list appears, select the contact you want.
6 You will be prompted to say the message you want to send. 7 Your message will be sent automatically (tap the X before it fiinishes
sending to cancel it).
Checking Emails on Your Companion DeviceWhen reading an email notification card on your watch, swipe the card to the left and tap Open on phone to automatically open it on your phone.
Replying to an EmailWhen reading an email notification card on your watch, swipe the card to the left to access actions you can take. Tap Reply and say your message. Your message will be sent automatically (tap the X before it fiinishes sending to cancel it).
Deleting Email MessagesWhen reading an email notification card on your watch, swipe the card to the left and tap Delete.

Tasks Using Voice Command 38
Using your CalendarYou can view events scheduled on your mobile device's calendar using your watch.1 If your screen is dimmed, tap the screen to wake up the watch.2 From the watch face, say “OK Google” or press and hold the Power
Button until the apps list appears, then swipe left until you see the Speak now prompt.
3 Say "Agenda". You will see a list of scheduled events.4 Tap an event to view the event's details.
NavigatingYou can find your way to a selected destination using your watch.1 If your screen is dimmed, tap the screen to wake up the watch.2 From the watch face, say “OK Google” or press and hold the Power
Button until the apps list appears, then swipe left until you see the Speak now prompt.
3 Say "Navigate", followed by the location.

Tasks Using Voice Command 39
Setting a TimerThe watch can be used as a countdown timer. Once you set a timer, a card is displayed with the countdown. 1 If your screen is dimmed, tap the screen to wake up the watch.2 From the watch face, say “OK Google” or press and hold the Power
Button until the apps list appears, then swipe left until you see the Speak now prompt.
3 Say "Set a timer". 4 Swipe through the available durations and start the timer by tapping
the desired duration.• Start or resume the countdown by tapping .• Pause the timer by tapping .
NOTE • Say a duration in your voice command to automatically start the timer for that
duration.
Dismissing the TimerWhen your timer goes off, dismiss it by swiping to the right.
Using the StopwatchMeasure how much time has passed with the Stopwatch app. 1 If your screen is dimmed, tap the screen to wake up the watch.2 From the watch face, say “OK Google” or press and hold the Power
Button until the apps list appears, then swipe left until you see the Speak now prompt.
3 Say "Start stopwatch". 4 Tap to start.
Tasks Using Voice Command 40
Setting an AlarmMultiple alarms can be set on your watch separately from alarms set on your phone. Alarms set on your watch will not transfer to your phone, but alarms activated on your phone will display an alarm card (with vibration and sound, if set) on your watch.1 If your screen is dimmed, tap the screen to wake up the watch.2 From the watch face, say “OK Google” or press and hold the Power
Button until the apps list appears, then swipe left until you see the Speak now prompt.
3 Say "Set an alarm". 4 Swipe up or down to set the desired alarm time.
NOTE • Say the alarm time in your voice command to automatically set the alarm.
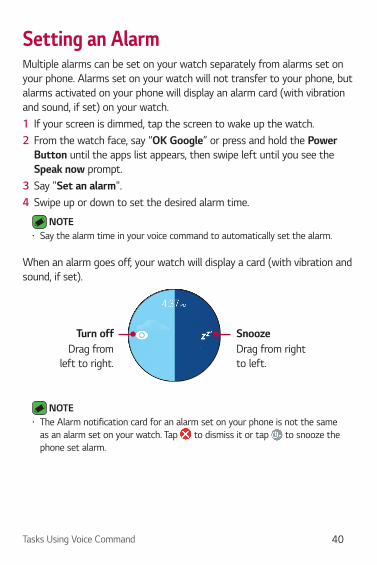
When an alarm goes off, your watch will display a card (with vibration and sound, if set).
SnoozeDrag from right to left.
Turn offDrag from
left to right.
NOTE • The Alarm notification card for an alarm set on your phone is not the same
as an alarm set on your watch. Tap to dismiss it or tap to snooze the phone set alarm.
Tasks Using Voice Command 41
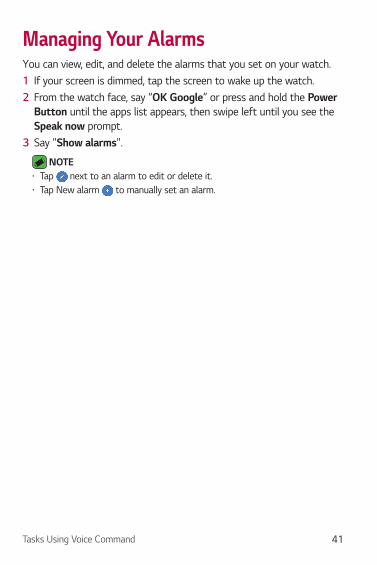
Managing Your AlarmsYou can view, edit, and delete the alarms that you set on your watch.1 If your screen is dimmed, tap the screen to wake up the watch.2 From the watch face, say “OK Google” or press and hold the Power
Button until the apps list appears, then swipe left until you see the Speak now prompt.
3 Say "Show alarms".
NOTE• Tap next to an alarm to edit or delete it. • Tap New alarm to manually set an alarm.

AppsApps

Apps 43
Opening the Apps Installed on your WatchThe apps list shows you all of the applications installed on the watch.Swipe up and down to scroll through the list, and then tap one to use it. The 3 most recently used apps are displayed at the top of the list.
NOTE • Default apps on the device are subject to updates. Support for these apps
may be withdrawn without prior notice. If you have any questions about an app provided with the device, please contact an LG Service Center. For user-installed apps, please contact the relevant service provider.
• Modifying the device’s operating system or installing software from unofficial sources may damage the device and lead to data corruption or loss. Such actions will violate your LG license agreement and void your warranty.
Viewing the Apps List1 If your screen is dimmed, tap the screen to wake up the watch.2 Swipe left on the screen to open the apps list.Your watch comes with LG Health and Google Fit already in your apps list.
The LG Health AppThe LG Health app helps you manage your health and maintain good exercise habits through tracking logs and letting you compete with others.Fasten the watch to your wrist (away from your wrist bone) before using some of its features.1 Press and hold the Power Button until the apps list appears, then tap
LG Health .2 To start using this app, enter your profile information and tap .3 Swipe horizontally to select the desired item to track your activity.
• Tracker: Tap to select an exercise type and intensity. Tap to record your exercise and/or receive coaching.
Apps 44
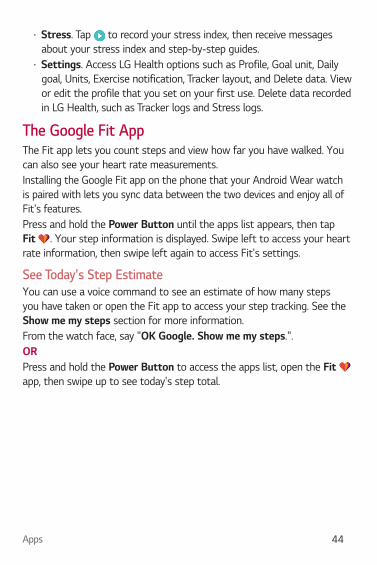
• Stress: Tap to record your stress index, then receive messages about your stress index and step-by-step guides.
• Settings: Access LG Health options such as Profile, Goal unit, Daily goal, Units, Exercise notification, Tracker layout, and Delete data. View or edit the profile that you set on your first use. Delete data recorded in LG Health, such as Tracker logs and Stress logs.
The Google Fit AppThe Fit app lets you count steps and view how far you have walked. You can also see your heart rate measurements.Installing the Google Fit app on the phone that your Android Wear watch is paired with lets you sync data between the two devices and enjoy all of Fit's features.Press and hold the Power Button until the apps list appears, then tap Fit . Your step information is displayed. Swipe left to access your heart rate information, then swipe left again to access Fit's settings.
See Today's Step EstimateYou can use a voice command to see an estimate of how many steps you have taken or open the Fit app to access your step tracking. See the Show me my steps section for more information.From the watch face, say "OK Google. Show me my steps.".ORPress and hold the Power Button to access the apps list, open the Fit app, then swipe up to see today's step total.

Apps 45
Check Your Heart RateYou can use a voice command to check your heart rate or open the Fit app to access heart rate monitoring. See the Show me my heart rate section for more information.1 From the watch face, say “OK Google. Show me my heart rate.".2 Your watch automatically takes your heart rate, then you can swipe up
to see your measurement history.OR1 Press and hold the Power Button to access the apps list, then open
the Fit app and swipe left to the Heart rate screen.2 Swipe up to see your measurement history or tap to take your
heart rate measurement.
Downloading Other AppsYou can see a list of recommended apps in the Play Store app.Open the Android Wear app on your phone to download more apps for your phone and watch to use.
NOTE • The apps on your device, and their functions, may vary according to country,
region or hardware specifications. LG will not be responsible for any performance issues which arise from using applications developed by providers other than LG.
• LG will not be responsible for performance or incompatibility issues which arise from edited registry settings or modified operating system software.
• Any attempt to customize your operating system may lead to the device or its apps not working correctly.
• Software, audio, wallpaper, images, and other media supplied with your device are licensed for limited use. If you extract and use these materials for commercial or other purposes, you may be infringing copyright laws. As a user, you are entirely responsible for the illegal use of media.
• Additional charges may apply for data services, such as messaging, uploading, downloading, auto-syncing and location services. To avoid additional charges, select a data plan suitable to your needs. Contact your service provider for details.

SettingsSettings

Settings 47
Opening the Settings Menu• Press and hold the Power Button until the apps list appears, then tap
Settings .OR• From the watch face, swipe left until the apps list appears, then tap
Settings . NOTE
• Tap a setting to turn it on or off, open a list of choices, or view information.• To back out of a setting without changing it, swipe right to return to the
Settings menu (or exit the Settings menu, depending on the current setting).• Press the Power Button to exit the Settings menu.
Adjusting the Display BrightnessYou can set the level of brightness for your watch's display.
• From the Settings menu, tap Adjust brightness.
Changing Your Watch FaceYou can change the design of your watch face in a few ways: by touching and holding the background of your watch’s screen, through the Android Wear app on your phone, or through the Settings menu on your watch.1 From the Settings menu, tap Change watch face.2 Swipe right and left to browse designs. If you scroll all the way to the
left, you’ll see your recent watch faces.
Changing the Font SizeYou can set the size of the font displayed on your watch's screen.
• From the Settings menu, tap Font size.
Settings 48
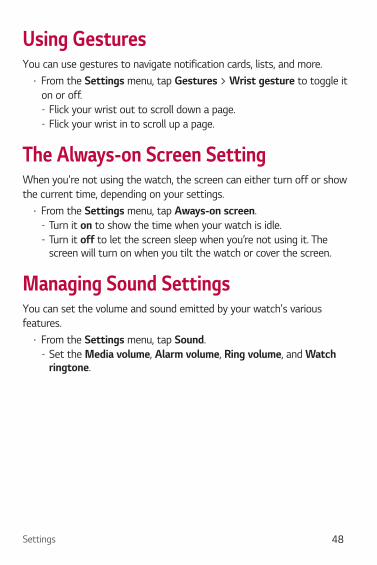
Using GesturesYou can use gestures to navigate notification cards, lists, and more.
• From the Settings menu, tap Gestures > Wrist gesture to toggle it on or off. - Flick your wrist out to scroll down a page. - Flick your wrist in to scroll up a page.
The Always-on Screen SettingWhen you're not using the watch, the screen can either turn off or show the current time, depending on your settings.
• From the Settings menu, tap Aways-on screen: - Turn it on to show the time when your watch is idle. - Turn it off to let the screen sleep when you’re not using it. The screen will turn on when you tilt the watch or cover the screen.
Managing Sound SettingsYou can set the volume and sound emitted by your watch's various features.
• From the Settings menu, tap Sound. - Set the Media volume, Alarm volume, Ring volume, and Watch ringtone.
Settings 49
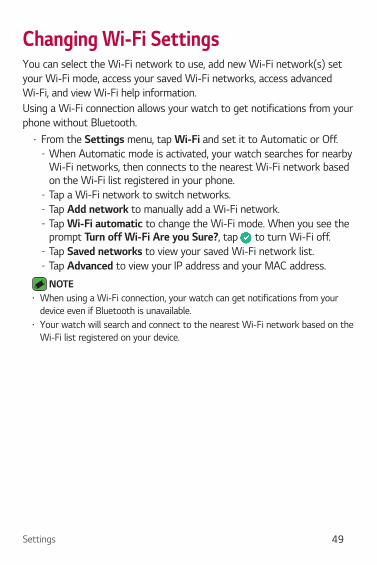
Changing Wi-Fi SettingsYou can select the Wi-Fi network to use, add new Wi-Fi network(s) set your Wi-Fi mode, access your saved Wi-Fi networks, access advanced Wi-Fi, and view Wi-Fi help information.Using a Wi-Fi connection allows your watch to get notifications from your phone without Bluetooth.
• From the Settings menu, tap Wi-Fi and set it to Automatic or Off. - When Automatic mode is activated, your watch searches for nearby Wi-Fi networks, then connects to the nearest Wi-Fi network based on the Wi-Fi list registered in your phone.
- Tap a Wi-Fi network to switch networks. - Tap Add network to manually add a Wi-Fi network. - Tap Wi-Fi automatic to change the Wi-Fi mode. When you see the prompt Turn off Wi-Fi Are you Sure?, tap to turn Wi-Fi off.
- Tap Saved networks to view your saved Wi-Fi network list. - Tap Advanced to view your IP address and your MAC address.
NOTE• When using a Wi-Fi connection, your watch can get notifications from your
device even if Bluetooth is unavailable.• Your watch will search and connect to the nearest Wi-Fi network based on the
Wi-Fi list registered on your device.
Settings 50
Changing Bluetooth SettingsYour watch automatically searches for Bluetooth devices within range. You can pair your watch with a headset using the Bluetooth Devices setting. You can also unpair and disconnect headsets.
• From the Settings menu, tap Bluetooth > Devices. NOTE
• When using Bluetooth to connect to other mobile devices, the devices must be positioned close to each other. If not, it may cause abnormal operation or noise, depending on the use environment.
• In an open space, the Bluetooth communication range usually spans approximately 10m. This range may vary depending on the use environment.
• Do not place obstacles between your product and connected devices. Outgoing/incoming signal can weaken due to user's body, walls, corners or obstacles. Use where there is no obstacle.
• Only Bluetooth devices that support the A2DP and HFP profile are supported.
Changing Network SettingsYou can configure various mobile network settings including cellular connection mode, data usage limits, data roaming, SIM status, emergency alerts, voice mail number, and APNs.
• From the Settings menu, tap Cellular.
Settings 51
Managing Your Location ServicesYou can manage your location services for determining your approximate location. Some apps like Weather and Maps need your location to work.
• From the Settings menu, tap Location. - Tap Location to turn it on or off.
NOTE• When paired with a phone, the watch will use the location of the phone. To
improve location accuracy when paired with a phone, turn on High accuracy in your phone's location settings.
• Turn on the location setting on your watch if you want use the location service when your watch is not paired with a phone.
Turning Airplane Mode On/OffWhen Airplane mode is on, you can use still many of the features on your watch (such as Heart Rate) when you are on an airplane or anywhere else where sending or receiving data is prohibited.
• From the Settings menu, tap Airplane mode to toggle it on or off. NOTE
• Turning on Airplane mode on your watch does not turn it on on the phone. If you want airplane mode on on your phone, you'll need to turn it on separately.
Setting Accessibility OptionsYou can set accessibility settings for magnification gestures, text-to-speech output, audio feedback, and using the Power Button to end calls.
• From the Settings menu, tap Accessibility.

Settings 52
Setting Date & TimeYou can set how your watch syncs and displays the date, time, and time zone.
• From the Settings menu, tap Date & time.
Setting a Screen LockYou can set a pattern to draw with your finger that unlocks the screen.
• From the Settings menu, tap Screen lock. NOTE
• After setting a screen lock pattern, Lock screen now is included in the Settings menu.
Managing PermissionsYou can set control permissions for individual applications.
• From the Settings menu, tap Permissions.
Turning Your Watch Off1 From the Settings menu, tap Power off.2 When prompted with the message Are you sure?, tap .

Settings 53
Getting Information about Your WatchInformation about your watch is shown in this menu.
• From the Settings menu, tap About to view the Model, Device name, Versions (for Google and Android software), Serial number, Build number, Connection, and Battery information. The following options are also available: - System updates: Check to see if the latest software is loaded on your watch.
- Regulatory information: Displays regulatory information. - Legal notices: Instructs you to see your companion device for legal notices.

More informationMore Information

More Information 55
Open Source Software Notice InformationTo obtain the source code under GPL, LGPL, MPL, and other open source licenses, that are contained in this product, please visit http://opensource.lge.com. In addition to the source code, all referred license terms, warranty disclaimers and copyright notices are available for download.LG Electronics will also provide open source code to you on CD-ROM for a charge covering the cost of performing such distribution (such as the cost of media, shipping, and handling) upon email request to [email protected]. This offer is valid for three (3) years from the date on which you purchased the product.
Trademarks• Google™, Google Maps™, Gmail™, YouTube™, Hangouts™ and Play
Store™ are trademarks of Google, Inc.• Bluetooth® is a registered trademark of Bluetooth SIG, Inc. worldwide.• Wi-Fi® and the Wi-Fi logo are registered trademarks of the Wi-Fi
Alliance.• All other trademarks and copyrights are the property of their
respective owners.
Regulatory InformationView the regulatory information which includes your device's FCC ID.1 Press and hold the Power Button until the apps list appears.2 Tap Settings > About > Regulatory Information.
More Information 56
How to Update Your DeviceCheck for the latest available firmware releases, as well as new software functions and improvements.1 Press and hold the Power Button until the apps list appears.2 Tap Settings > About > System updates.

Safety informationSafety Information

Safety Information 58
General Safety & HandlingWhile using your product, be aware of the following safety guidelines.Your environment
• Safe operating temperatures. Use and store your product in temperatures between 0°C/32°F and 40°C/104°F. Exposing your product to extremely low or high temperatures may result in damage, malfunction, or even explosion.
• While driving. When driving a car, driving is your first responsibility. Using a mobile device or accessory for a call or other application while driving may cause distraction. Keep your eyes on the road.
• Around explosives. Do not use in areas where sparks from the product might cause a fire or explosion.
• On airplanes. Observe all rules and instructions for use of electronic devices. Most airlines allow electronic use only between and not during takeoffs and landings. There are three main types of airport security devices: X-ray machines (used on items placed on conveyor belts), magnetic detectors (used on people walking through security checks), and magnetic wands (hand-held devices used on people or individual items). You can pass your product through airport X-ray machines. But do not send it through airport magnetic detectors or expose it to magnetic wands.
• Always follow any special regulations in a given area. Turn your device off in areas where use is forbidden or when it may cause interference or danger.
• Changing the wrist straps to metal straps might cause Bluetooth®/ Wi-Fi connectivity problem.

Safety Information 59
Safety Tips WARNING
• This product contains chemicals known to the State of California to cause cancer and birth defects or reproductive harm. Call (800) 243-0000 for more information. Wash hands after handling.
• The charging terminals contain strong magnets that may interfere with pacemakers, credit cards, watches, and other magnet-sensitive objects. To avoid damaging your product and reduce the risk of fire or electric shock, explosion, or other hazards, observe the following safety precautions:
– Always use with cables, chargers, and other accessories approved by LG. The use of any other types may void any approval or warranty applying to the device and may be dangerous.
– Do not drop, strike, or shake your product. – Do not damage the power cord by bending, twisting, pulling, heating, or placing heavy items on it.
– This product is equipped with a USB cable for connecting to a desktop or notebook computer or to the charger. Be sure your computer is properly grounded before connecting your product to the computer. The power supply cord of a desktop or notebook computer has an equipment-grounding conductor and a grounding plug. The plug must be plugged into an appropriate outlet that is properly installed and grounded in accordance with all local codes and ordinances.
– Do not attempt to repair or modify or remanufacture the product. It is equipped with an internal rechargeable battery, which should be replaced only by LG or an authorized LG repair center.
– Do not open, disassemble, crush, bend or deform, puncture, or shred the product.
– Do not insert foreign objects into the product. – Do not place the product in a microwave oven. – Do not expose the product to fire, explosion, or other hazards.
Safety Information 60
– Like many electronic devices, your product generates heat during normal operation. Extremely prolonged, direct skin contact in the absence of adequate ventilation may result in discomfort or minor burns. Therefore, use care when handling your product during or immediately after operation.
– If you have a problem with using the product, please stop using it and consult with the authorized LG Electronics customer service center.
– Do not immerse or expose the product to water or other liquids.
Heart Rate Information• Pedometer, sleep, exercise, and heart rate are not intended to treat or
diagnose any medical condition, and should be used for leisure, well-being and fitness purposes only.
• Heart rate readings can be affected by measurement conditions and your surroundings. Make sure you are seated and relaxed before reading your heart rate.
• Never look directly at the light of the heart rate sensor as this may damage your eyes.
• The heart rate feature is only intended for measuring your heart rate and must not be used for any other purposes.
Embedded Battery WARNING: Notice for Battery replacement
• For your safety, do not remove the battery from the product. If you need to replace the battery, take it to the nearest authorized LG Electronics service point or dealer for assistance.
• Li-Ion Battery is a hazardous component which can cause injury.• Battery replacement by non-qualified professional can cause damage to your
device.

Safety Information 61
Battery Warnings• Do not disassemble or open crush, bend or deform, puncture or shred. • Do not modify or remanufacture, attempt to insert foreign objects
into the battery, immerse or expose to water or other liquids, expose to fire, explosion or other hazard.
• Make sure that no sharp-edged items, such as animal’s teeth or nails, come into contact with the battery. This could cause a fire.
• Only use the battery for the system for which it is specified.• Only use the watch with an LG charging system that has been
qualified with the system per CTIA Certification Requirements for Battery System Compliance to IEEE1725. Use of an unqualified battery or charger may present a risk of fire, explosion, leakage, or other hazard.
• Do not short circuit a battery or allow metallic conductive objects to contact battery terminals.
• Replace the battery only with another battery that has been qualified with the system per this standard, IEEE-Std-1725. Use of an unqualified battery may present a risk of fire, explosion, leakage or other hazard. Only authorized service providers shall replace battery (If the battery is non-user replaceable).
• Battery usage by children should be supervised. • Avoid dropping the device. If the device is dropped, especially on a
hard surface, and the user suspects damage, take it to a service center for inspection.
• Improper battery use may result in a fire, explosion or other hazard.• Always unplug the charger from the wall socket after the product is
fully charged to save unnecessary power consumption of the charger.• There is risk of explosion if the battery is replaced with an incorrect
type.• To dispose of the battery properly, call 1-800-822-8837 or
visit www.call2recycle.org
Safety Information 62
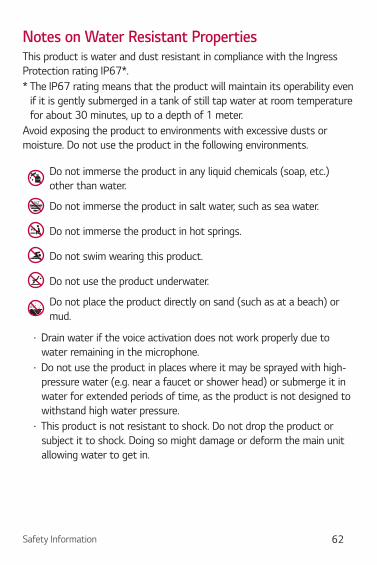
Notes on Water Resistant PropertiesThis product is water and dust resistant in compliance with the Ingress Protection rating IP67*.* The IP67 rating means that the product will maintain its operability even
if it is gently submerged in a tank of still tap water at room temperature for about 30 minutes, up to a depth of 1 meter.
Avoid exposing the product to environments with excessive dusts or moisture. Do not use the product in the following environments.
SALTSOAP
Do not immerse the product in any liquid chemicals (soap, etc.) other than water.
SALTSOAPDo not immerse the product in salt water, such as sea water.SALT
SOAP
Do not immerse the product in hot springs.
SALTSOAP
Do not swim wearing this product.
SALTSOAP
Do not use the product underwater.SALTSOAP
Do not place the product directly on sand (such as at a beach) or mud.
• Drain water if the voice activation does not work properly due to water remaining in the microphone.
• Do not use the product in places where it may be sprayed with high-pressure water (e.g. near a faucet or shower head) or submerge it in water for extended periods of time, as the product is not designed to withstand high water pressure.
• This product is not resistant to shock. Do not drop the product or subject it to shock. Doing so might damage or deform the main unit allowing water to get in.

Safety Information 63
Pacemakers and Other Medical DevicesPersons with pacemakers should:
• ALWAYS keep the product more than six (6) inches from their pacemaker when the product is turned ON.
• Not carry the product in a breast pocket.• Use the wrist opposite the pacemaker to minimize the potential for
RF interference.• Turn the product OFF immediately if there is any indication that
interference is taking place.If you use any other personal medical device, consult your physician or the manufacturer of your medical device to determine if it is adequately shielded from external RF energy.
Exposure to Radio Frequency(RF) EnergyIn August 1996, the U.S. Federal Communications Commission (FCC), with its action in Report and Order FCC 96-326, adopted an updated safety standard for human exposure to Radio Frequency (RF) electromagnetic energy emitted by FCC-regulated transmitters. The design of this product complies with the FCC guidelines and these international standards.
Next-to-Mouth and Wrist-Worn OperationThis device was tested for typical body-worn (wrist) operations with 0 inches (0cm) between the user's body (wrist) and the back of the device.This device was also tested for typical next-to-mouth (face) operations with 0.39 inches (1cm) between the user's mouth (face) and the front of the device.To comply with FCC RF exposure requirements, a minimum separation distance of 0.39 inches (1cm) must be maintained between the user’s mouth (face) and the front of the device.Do not wear your watch on the same arm with other metal accessories such as bracelets.

Safety Information 64
Specific Absorption Rate (SAR) ValuesYour product is a radio transmitter and receiver. It is designed and manufactured not to exceed the emission limits for exposure to Radio Frequency (RF) energy set by the Federal Communications Commission of the U.S. Government. The standards include a substantial safety margin designed to assure the safety of all persons, regardless of age and health.The exposure standard for wireless products employs a unit of measurement known as the Specific Absorption Rate, or SAR. In the United States, the SAR limit for wrist watch used by the public is 1.6 watts/kg (w/kg) averaged over one grams of tissue or 4.0 watts/kg (w/kg) averaged over ten grams of tissue.Tests for SAR are conducted using standard operating positions specified by the FCC with the product transmitting at its highest certified power level in all tested frequency bands.Although SAR is determined at the highest certified power level, the actual SAR level of the product during operation can be well below the maximum value.Because the product is designed to operate at multiple power levels and to use only the power required to reach the network, in general, the closer you are to a wireless base station antenna, the lower the power output.The highest SAR value for device when tested for use next-to-mouth (face) is 0.27 w/kg(1g) and for wrist-worn is 1.41 w/kg(10g).While there may be differences between SAR levels of various devices and at various positions, they all meet the government requirement for safe exposure.The FCC has granted an Equipment Authorization for this model product with all reported SAR levels evaluated as in compliance with the FCC RF emission guidelines.SAR information on this model product is on file with the FCC and can be found under the Display Grant section of http://transition.fcc.gov/oet/ea/fccid/ after searching on FCC ID ZNFW200V.
Safety Information 65
Additional information on Specific Absorption Rates (SAR) can be found on the Cellular Telecommunications Industry Association (CTIA) website at http://www.ctia.org/.* Product meets current FCC Radio Frequency Exposure GuidelinesFCC ID : ZNFW200V
Part 15.19 Statement General RequirementThis device complies with part 15 of FCC rules. Operation is subject to the following two conditions:(1) This device may not cause harmful interference, and(2) This device must accept any interference received, including
interference that may cause undesired operation.
Part 15.21 StatementChanges or Modifications that are not expressly approved by the manufacturer for compliance could void the user’s authority to operate the equipment.
Safety Information 66
US Declarations of Conformity(Part 15.105 Statement)This equipment has been tested and found to comply with the limits for a class B digital device, pursuant to Part 15 of the FCC rules. These limits are designed to provide reasonable protection against harmful interference in a residential installation. This equipment generates, uses, and can radiate radio frequency energy and, if not installed and used in accordance with the instructions, may cause harmful interference with radio communications. However, there is no guarantee that interference will not occur in a particular installation. If this equipment does cause harmful interference or television reception, which can be determined by turning the equipment off and on, you can try to correct the interference by one or more of the following measures:
• Reorient or relocate the receiving antenna.• Increase the separation between the equipment and receiver. • Connect the equipment into an outlet on a circuit different from that
to which the receiver is connected. • Consult the dealer or an experienced radio/TV technician for help.