gsoc 2012 - sajty.elementfx.com
TRANSCRIPT

GSoC 2012 Automatic mesh Lod management system
Ember client uses high quality graphical models, but doesn’t provide low quality versions of them. When
a model is far away from the camera it is not required to render high quality models, since the user sees
it on screen for just few pixels. This makes Ember to require high-end graphics cards. The automatic Lod
(Level of detail) management system is about to solve this problem. It will create from high quality
models multiple low quality models automatically, by reducing vertex count with a progressive mesh
algorithm. This allows for far away rendering to use low quality models, which will increase graphical
performance without configurations.
Next to the automatic LOD management, I want to provide possibility to manually configuring the LOD
for a given model, which will allow fine-tuning for performance critical models.
I will also design and create a GUI for the manual LOD configurations in the model editor to make fine-
tuning an easy task.
Organization: Worldforge
Student: Péter Szücs
Mentor: Erik Ogenvik (Ember lead developer)

Planned schedule
1. Learn cegui and the model editor in ember. (1 week)
2. Design and create a GUI in the model editor for manual Lod configurations. (2 week)
3. Save/load the Lod configurations into the model definition file. (1 week)
4. Implement the manual Lod system, which allows importing Lod levels from blender or
3ds max. (1 week)
5. Implement the automatic Lod generation. (1 week)
6. Research: analyze the Lod configurations and determine the perfectly balanced
parameters for automatic Lod management. (1 week)
7. Implement the automatic Lod management system. (2 week)
Work schedule
1. Learn cegui and the model editor in ember.
2. Design and create a GUI in the model editor for manual Lod configurations.
3. Move GUI from Model Editor to Assets Manager.
4. Create new *.loddef file format.
5. Implement lod definition as Ogre resource and allow serializing it from/to XML.
6. Implement the manual Lod system, which allows importing Lod levels from blender or
3ds max.
7. Implement the automatic Lod generation.
8. Improve Ogre ProgressiveMesh algorithm with better interface, 9x speedup and much
better generated quality.
9. Create benchmarking system for quality and performance benchmarks of generated Lod.
10. Implement support for background threaded Lod generation.
11. Research: analyze the Lod configurations and determine the perfectly balanced
parameters for automatic Lod management.
12. Implement the automatic Lod management system.
13. Improve GUI with real time generation, pixel count Lod strategy and collapse cost based
reduction. (implemented after GSoC)

Creating the GUI Ember uses CEGUI as the main GUI system, which supports its own *.layout format for describing the
hierarchy of widgets in XML. The most challenging part was to choose a way to create the layout. CEGUI
currently doesn’t provide any fully functional layout editor, but has multiple half completed layout
editors. Because of that, most people are writing layouts in XML directly. I don’t like writing GUI in XML,
because it drives me to focus on clean XML instead of clean GUI design. For example if I would write it in
XML, I would likely put less static text fields in my layout design to keep XML clean. I have used
CELayoutEditor, which is the most complete layout editor, but it is very far from complete.
CELayoutEditor tips
Look out when you resize a window if the width or height of a widget gets smaller then 0, it will
crash. (You need to calculate, when converting relative position to absolute position.)
Undo and Redo buttons are not working. Get used to save after every action.
The widgets are moving, when you hold down mouse button instantly, even if it wasn't selected
before. So you need to select widgets carefully. If you move the mouse 1 pixel, while you click on
a widget, it will move the widget.
Fonts are not working and it will use the first font. Change the order of fonts in
EmberLookSkin.scheme file.
It will generate relative positions only! You need to fix them manually in the properties, to scale
well, when somebody resizes the window.
It will not show all properties, because this is an old editor. You need to add some properties in
XML directly.
CELayoutEditor generates some deprecated properties. You need to check ember.log for
warnings and fix them.
After you have created the GUI, you need to reformat the XML to Ember formatting:
Use http://xmlindent.sourceforge.net/ to convert spaces to tabs and some other cleanup.
After that replace " character to ' character.
Replace " >" to ">"
Replace " />" to "/>"
After that cut out the part, what you have modified and don't change the rest.
Coding GUI events The GUI needs to be scripted in lua. Lua is a minimalistic scripting language where you need to provide
most of the API in C++ to make it usefull.
There are tools (luabind, tolua++) to generate the bindings. Ember uses tolua++ for that purpose. It
requires *.pkg files which look the same as a C++ header files and it is generating the binding for that C++
header and you can use c++ objects in lua through that interface.

GUI before GSoC:
GUI after GSoC:

Lod definition I have created an XML file to represent the manual Lod configuration for a mesh. The file name should
look like “<meshname>.loddef”. Normally you don’t need to edit XML directly, because you can use the
GUI to configure it, which will create the loddef for you.
It will look like this for user created Lod levels: <lod>
<automatic enabled="false" />
<manual>
<type>user</type>
<strategy>distance</strategy>
<level distance="1">
<meshName>items/furniture/models/simple_table/simple_table.mesh</meshName>
</level>
</manual>
</lod>
For automatic vertex reduction it should look like this: <lod>
<automatic enabled="false" />
<manual>
<type>automatic</type>
<strategy>pixelcount</strategy>
<level distance="8000000">
<method>constant</method>
<value>50</value>
</level>
<level distance="1000000">
<method>collapsecost</method>
<value>1.5</value>
</level>
<level distance="100000">
<method>proportional</method>
<value>0.9</value>
</level>
</manual>
</lod>

Improving progressive mesh algorithm
Improving the progressive mesh was not in the GSoC specification, but it turned out to be needed,
because Ogre’s implementation doesn’t have satisfied in interface, performance and quality.
Progressive mesh basics A mesh is a group of faces (triangles) creating an object. Each triangle has 2*3 directional edges and 3
vertices. Neighbor triangle is having 2 vertices with same position and they are sharing edges. Each
vertex has edges to neighbor vertices. Each edge is undirectional, but in the algorithm every edge is two
directional edges. Each directional edge has a weight called “collapse cost”. The smallest collapse cost of
all edges of a vertex is the collapse cost of the vertex and that edge is saved as the “collapseTo” edge.
After calculating all collapse costs, the vertex with the smallest collapse cost will be collapsed on the
edge with the smallest collapse cost.
Before collapse After collapse
Collapsing a vertex means that all triangles which contain both vertices (A=source, B=destination) will be
removed and triangles which only contain the source, will be modified to replace source with
destination.
Quality improvements Collapse cost calculation is the key for the output quality and it is the most frequently called function in
the algorithm. On cg_donjon.mesh with 10 488 unique vertices (41 399 vertices) the collapse cost is
calculated 383 329 times and it is doing lot of math there! So one of the reasons why Ogre choose
something may be because performance. The other reason may be the scalability with very small and
very large meshes.
Ogre's implementation is based on Stan Melax's implementation from 1998. That original
implementation has lots of faults. For example the implementation assumes that the mesh is continuous
(each edge is used exactly in 2 triangles), doesn't have seam (doesn't have texture on it) and there aren't
any submeshes (you can’t move source in one submesh to destination in other submesh).
These have been fixed by Ogre, but Ogre has also removed some good things from it.
I have added the good properties back and also fixed even more faults in Ogre's implementation.

1. The collapse cost in Ogre's implementation is between 0 and 1.0 and it can be "never collapse" which
is 99999. This creates issues. In Ogre special cases are set to 1.0 collapse cost:
Edge is on a seam, border or submesh border edge.
Edge moves away and collapses inwards from seam, border or submesh border edge.
Source Vertex is a corner.
So there are quite a lot of 1.0 costs and they don't have any ordering which causes collapse cost clashing
(multiple vertices with same cost). I have improved this by still processing the special cases like normal
edges and then adding 1 to it if it’s a special edge. This makes the 1.0 values to be ordered, but the range
has been increased to a value between 0 and 2. So it will reduce edges with smaller artifact chance first.
2. One thing, what has been removed by Ogre compared to Stan Melax’s implementation is to multiply
the collapse cost by the edge length. This allows removing small details first and keeping big things last.
For example outer walls of a building have bigger cost, then small elements inside the building.
Integrating the size into the algorithm which plays well with Ogre's improvements is not so simple,
because of the magic constants.
As I said special cases have a value of 1.0 (up to 2.0). So what if an edge is not special and has a a collapse
cost of 0.1 and a length of 100 units? collapse cost will be 10.0. I think that Ogre doesn't thought about
increasing the special case from 1.0 to a bigger value and instead they just removed the multiplication
with the edge length to keep special cases last, which has better output then keeping it.
In my implementation "never collapse" is std::numeric_limits<Ogre::Real>::max() and for me choosing
the size for the 1.0 special value was even harder. If I choose a big value, then the float precision will
completely drop the cost detail on small vertex positions, because of floating point precision and it will
end up in collapse cost clashes. If I choose a small value, then edge length will dominate completely the
costs. To handle the scalability issue my choice was to use the mesh's bounding sphere radius, which is
always not too big and not too small. Ogre's interface only knows about vertex data and index data, but
it doesn't know from the mesh or bounding sphere radius, so Ogre's interface couldn't allow this
anyways.
3. Edge selection on collapsing also improves output. Ogre only moves vertices along exact match edges
or produces holes. Mine is also finding alternatives, which may have glitchy texture, but at least it will
not make holes.

4. Mesh level reduction 1: If I specify 95% reduction, Ogre's implementation will reduce each submesh by
95%. However normally some submeshes have more detail and we can remove more from that. Mesh
level reduction will reduce the lowest costs on the whole mesh independent of how much was removed
on which submesh.
5. Mesh level reduction 2: The submesh level reduction always produces microholes on the submesh
borders. This is even affecting very small reduction, but the hole always stays small.
Here are some images on a 50% reduced male, where I marked the reasons for microholes:
micro holes micro holes with wireframe original mesh
As you can see the problem is caused, because a vertex is reduced by one submesh and it isn't reduced
by the other submesh.
If you still don't get it, here is a more in depth explanation.
Let’s say the submeshes are connected in a circle(like on the leg of male mesh), which
may be in the polygon world a pentagon shape. Both submeshes are containing all five
vertices. Let’s say one submesh reduces B, but other keeps it. Then AC edge will be
connected, which is more inside of the circle and you can see inside the model. If both of
the submeshes would reduce B at the same time, then there wouldn't be any microholes. This is the way
how mesh level reduction works. So I have fixed microholes too.
Most of the changes are just few lines, but pointing out the faults and finding a perfect solution takes
much more time and it is very hard too.
Stan Melax's implementation is explained here:
http://dev.gameres.com/program/visual/3d/PolygonReduction.pdf

All meshes in our database are having better output with the improvements, which is the ultimate proof!
Here is the summary with some images showing the improvements.
90% reduced male with improvements 90% reduced male with Ogre’s implementation
95% reduced male with improvements 95% male with Ogre’s implementation
90% reduced donjon with improvements 90% reduced donjon with Ogre’s implementation

Interface improvements First I have improved the interface to allow specifying exact reduction quantities. Ogre’s interface allows
to only set Lod level count, reduction type (vertex count or percentage) and reduction value. So if you set
4 Lod levels, set type to percentage and reduce it by 20%, then 20%, 40%, 60%, 80% vertices will be
removed, which is even in theory inefficient. Let’s say you have 1000 vertices, then 20% = 800 vertices,
40% = 600 vertices, etc. The real difference between 20% and 40% is 1-(600/800)=25% and between 60%
and 80% is 1-(200/400)=50%. So it will reduce too much in far distance or if you specify smaller values
then reduction will be inefficient.
To fix that, I have extended the interface to allow specifying percentage for every Lod level separatedly
since Ogre’s way is not good at all. So if you want, now you can specify 50% 75% 87.5% values. Also
tuning each percentage separately for each mesh will increase efficiency.
Performance improvements The reason why games are using Lod levels for every mesh is to get a performance. Normally it is
generated when adding the model to the game. However if we want to calculate Lod levels at runtime
the performance of generation is also important. For example if you want to keep generated media
outside of media repository or if you want to optimize Lod level for screen resolution or scaling, you will
need to do it at run time.
Here is a list of performance improvements:
1. Architectural improvements: I have completely refactored the data structures to have less
pointer jumps in memory. For example I’m using common vertices everywhere, except where I
need to know exact vertex information.
2. Tuning container size: The algorithm uses unordered_set and vector containers, which will gain
performance if we know the size at the beginning.
3. unordered_set for lookup: I have replaced the std::map with boost::unordered_set to gain
performance.
4. Adding shared vertex buffer once: In Ogre’s implementation everything is done separatedly on
submeshes, which means if all submeshes are using shared vertex buffer, then it will be added
multiple times. With mesh level reduction it is easy to add them once.
5. Vertex buffer cache optimization: For non-shared vertex buffers it will create a single lookup
with the size of the biggest vertex buffer and it will reuse the same memory for all lookups. This
is also not possible with submesh level reduction.
6. Index type optimization: Index size can be 2 or 4 bytes. In Ogre’s implementation this was
handled with 2 pointers and an “if” inside the loop. I have used templates when I have add the
indices and in baking I have used union to make the code cleaner and faster.
7. edge reference counting: I have used reference counted edges, which allows to remove special
case handling in collapsing and also refcount is equal to the triangle count of the edge which is
used in collapse cost calculation, so it will add performance on two locations.
8. VectorSet: To reduce allocations and make memory more compact, I have used a SmallVector
with tuned sizes.

9. multiset as collapse cost heap: Ogre’s implementation looks through the vector to find the
smallest collapse cost in O(n) time. The main problem with determining the smallest cost is that
the neighbor vertices are also updated and a simple heap does not allow changing the value of a
non-top item. The C++ standard states that std::multiset should guarantee O(log n) search time,
which means it needs to be an autobalanced tree(gcc and msvc are using red-black tree).
Autobalanced tree is perfect for a heap and allows to modify the cost of the neighbors (an
unbalanced tree would be inefficient with O(n/2) time). So I have used multiset::begin() as the
top of the heap, which should be O(1) (in msvc11+ it is O(log n) to reduce memory footprint of
the set).
10. Skip duplicate buffers: I have also added an optimization, which will increase performance
ingame too. In Ogre’s implementation if you have multiple Lod levels with same vertex count, it
will be generated, which adds extra swapping and extra memory space.
11. Lot of small optimizations: For example in a set “create if not exist” can be done with a single
search, if you try to insert it even if it exists and check the return value if it succeeded and add
the data afterwards.

All meshes in our database are having better performance depending on the vertex count. Even with
meshes which are having same vertex count the performance will vary, because a better quality means
less holes and less holes means more triangles. So the superior quality means slower performance. Even
with these slowdowns my implementation runs 9x faster on big meshes and 3x faster on very small
meshes.
You can view the full benchmark list here (OgreProgressiveMeshExt is an interface extension for
benchmarking): http://sajty.elementfx.com/progressivemesh/OgreVSGeneratorSpeedTest.html
Here is the benchmark data of the first few meshes:
MeshName OgreProgressiv
eMeshExt
ProgressiveM
eshGenerator
Speed
up
creatures/bear/bear.mesh 0.109405 sec 0.0136848 sec 7.99x
creatures/bluegill/bluegill.mesh 0.0239843 sec 0.00285881 sec 8.39x
creatures/chicken/chicken.mesh 0.0134544 sec 0.00180459 sec 7.46x
creatures/cow/cow.mesh 0.0726322 sec 0.0073922 sec 9.83x
creatures/dog/dog.mesh 0.048132 sec 0.00494903 sec 9.73x
creatures/donkey/donkey.mesh 0.0838824 sec 0.00934316 sec 8.98x
creatures/duck/duck.mesh 0.0359699 sec 0.00487708 sec 7.38x
creatures/flying_bird/flying_bird.mesh 0.0114311 sec 0.00148415 sec 7.7x
creatures/goblin/goblin.mesh 0.265608 sec 0.0253888 sec 10.46x
creatures/goblin/goblin_belt.mesh 0.0388576 sec 0.0142501 sec 2.73x
creatures/horse/horse.mesh 0.0576861 sec 0.00655485 sec 8.8x
creatures/pickerel/pickerel.mesh 0.0300868 sec 0.00317374 sec 9.48x
creatures/rabbit/RabbitHi.mesh 0.148988 sec 0.0161548 sec 9.22x
creatures/tuna/tuna.mesh 0.016687 sec 0.0022553 sec 7.4x
environment/models/boulder/graniteA.mesh 0.00967931 sec 0.00122854 sec 7.88x
environment/models/boulder/graniteB.mesh 0.0121321 sec 0.00130799 sec 9.28x
environment/models/boulder/graniteC.mesh 0.0132681 sec 0.00139437 sec 9.52x
environment/models/boulder/graniteD.mesh 0.0115679 sec 0.00123577 sec 9.36x
environment/models/boulder/moraf_boulders_clusters.
mesh 0.151639 sec 0.01797 sec 8.44x
Background threaded Lod generation Generating Lod levels at runtime can freeze the game for up to 100 milisec. If you load lot of meshes at
the same time it may take even more. To fix that, I have created QueuedProgressiveMeshGenerator,
which will copy index and vertex buffers, then process it on a worker thread, then inject Lods on main
thread again.
QueuedProgressiveMeshGenerator provides a compatible interface to ProgressiveMeshGenerator. So
you just need to replace the class name when instantiating to use the worker thread for generation. You
also need to create an instance of PMWorker and PMInjector though.
There are 3 base classes:
1. QueuedProgressiveMeshGenerator: It will copy vertex and index buffers and then add a task to
the queue for the worker. Runs on main thead.
2. PMWorker: It will process generation tasks one by one then push the generated Lod levels to
PMInjector. Runs on background thread.
3. PMInjector: It will inject the generated Lod levels to the mesh. Runs on main thread.
You can also derive from these classes for your own purposes. For Example in Ember I have created
PMInjectorSignaler, which provides a sigc++ slot for successful injection. This is needed to update the
triangle count on the preview window in the assetsManager/meshes.
Automatic mesh Lod management system This system creates a usable Lod config for any kind of mesh. You don’t need to configure it! This is
enabled by default. Currently it will generate 4 Lod levels. Each Lod level needs two parameters, a Lod
strategy based value and a reduction type value. I have chosen pixel count Lod Strategy and collapse cost
based reduction. This means, I need to specify a pixel count which specifies when the Lod level is
swapped and a cost value which represents the amount of reduction.
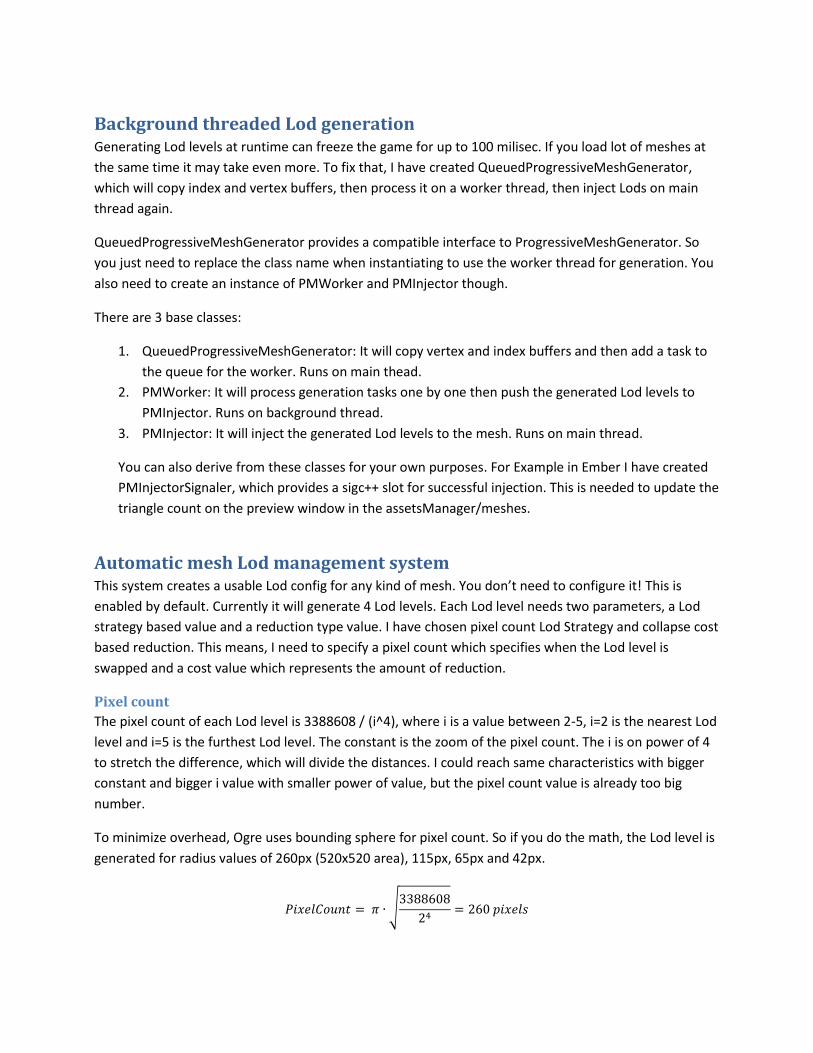
Pixel count
The pixel count of each Lod level is 3388608 / (i^4), where i is a value between 2-5, i=2 is the nearest Lod
level and i=5 is the furthest Lod level. The constant is the zoom of the pixel count. The i is on power of 4
to stretch the difference, which will divide the distances. I could reach same characteristics with bigger
constant and bigger i value with smaller power of value, but the pixel count value is already too big
number.
To minimize overhead, Ogre uses bounding sphere for pixel count. So if you do the math, the Lod level is
generated for radius values of 260px (520x520 area), 115px, 65px and 42px.
√

Collapse cost
The collapse cost is the amount of reduction. It’s a number, which represents the artifact amount.
Reducing a vertex with bigger cost makes the model more deformed, then reducing a smaller cost. The
cost depends on the model size, so very small triangles will cause less artifacts, then big triangles. This
means for a universally balanced reduction, which handles any sized mesh, we need to use bounding
sphere radius as a base value.
The 1/100000*i^5 is the key and they are playing together. After testing, I found out, that radius/32 is an
aggressive reduction with acceptable output and I wanted to use that for furthest away Lod level. Also I
found out, that radius/3125 will produce nearly no artifacts, which I wanted to use for nearest Lod level.
I could achieve this with the above equation. The generated reduction constants are 3125, 411, 97, 32.
Experiments Here are some works, which were not merged:
1. boost::pool: I have tried to use boost::pool to gain performance at the beginning. However
boost::pool is thread safe and it is doing locking on every allocation, which ended up in
performance bottleneck.
2. Custom heap: I have implemented an intrusive binary heap to replace multiset. By default it was
not faster, but creating heap with std::make_heap after startup collapse cost calculation, I got
4% speedup. make_heap is very efficient and builds a heap in O(3*n) time! However clean code
is more important than 4% speedup.
3. Benchmarking system: I have created a benchmarking system to verify performance and quality
improvements. It uses soci library to connect to SQLite database. The results can be viewed in
any kind of SQL Select queries of choice. It was very useful for development, but it was not
merged, because it is not needed for the game itself.