group 5 - angelfire: welcome to angelfire · web viewabbreviated index for relational databases and...
TRANSCRIPT

Group 51.Table of Contents.2. Reference Windows (how to do something)3. Abbreviated Index for Relational Databases and Database Design
Creating a Form Using the Form WizardA 4.2
Changing a Form's AutoFormat A 4.4
Navigating a Form A 4.6
Finding Data Using a Form A 4.7
Previewing and Printing SelectedForm Records A 4.9
Maintaining Table DataUsing a Form A 4.11
Quick Check A 4.12
Creating a Form with a MainForm and a Subform A 4.13
Creating a Report Using theReport WizardA 4.16
Inserting a Picture on a Report A 4.23
Compacting a Database A 4.28
Quick Check A 4.30
Tutorial Assignments A 4.30
Case Problems A 4.31
Creating a Lookup Wizard Field A 5.4
Using a Pattern Match In a Query A 5.8
Using a List-of-Values Match ina Query A 5.10

Using a Non-Matching Value ina Query A 5.11
Using Both the And and OrOperators In the Same Query A 5.12Creating a Parameter Query A 5.14Quick Check A 5.16Creating a Custom Form A 5.16Designing a Custom Form A 5.17The Form Window inDesign View A 5.18Adding Fields to a Form A 5.21Selecting and Moving Controls A 5.22Changing a Label's Caption A 5.24Resizing Controls A 5.26
Using Form Headers andForm Footers A 5.27
Adding a Label to a Form A 5.29
Adding a Picture to a Form A 5.30
Changing the BackgroundColor of a Form Object A 5.32
Quick Check A 5.34
'A
Creating a Multi-page FormUsing Tab Controls A 5.34
Adding a Subform UsingControl Wizards A 5.38
Using a Filter with a Form A 5.42
Using Filter By Form A 5.43
Saving a Filter as a Query A 5.45
Applying a Filter that Was Savedas a Query A 5.46
Quick CheckA 5.47
Tutorial AssignmentsA 5.48
Case Problems A 5.50

Designing a Custom Report A 6.4
Report Window in Design View A 6.5
Adding Fields to a Report A 6.7
Working with Controls A 6.8
Moving and Resizing Controls A 6.9
Changing the Caption Property A 6.11
Aligning Controls A 6.13
Quick Check A 6.3.5
Adding the Date to a Report A 6.16
Adding Page Numbers to a Report A 6.18
Adding a Report Header Section anda Title to a Report A 6.20
Adding Lines to a Report A 6.22
Sorting and Grouping Data in a Report A 6.23
Calculating Group Totals and Overall Totals A 6.26
Hiding Duplicate Values In a Report A 6.29
Quick Check A 6.31
lowT U T @d@@R
cu@@ Integrating Access with Other Programs A 6.32Embedding a Chart in a Report A 6.33
Linking a Word Document In a Report A 6.40
Exporting an Access Table as anExcel Spreadsheet A 6.45
Saving the Worksheet and6.2i@
Exiting Excel A 6.47

Creating a Custom Report A 6.2 Quick Check A 6.47
Opening an Access Object A 1.11Using the Office Assistant A 1.18Defining a Field in a Table A 2.8Specifying a Primary Key for a Table A 2.12Saving a Table Structure A 2.13Deleting a Field from a Table Structure A 2.18Adding a Field Between TwoExisting Fields A 2.19Deleting a Record A 2.25Sorting a Query Datasheet A 3.14Using Filter By Selection A 3.16Using Expression Builder A 3.28Changing a Form's AutoFormat A 4.4Finding Data A 4.7Compacting a Database A 4.28Creating a Parameter Query A 5.14Creating a Form in Design View A 5.18Selecting and Moving Controls A 5.22Changing a Label's Caption A 5.24Resizing a Control A S.26Adding and Removing FormHeader and Form Footer Sections A 5.27Adding a Label to a Form A 5.29Adding a Picture to a Form A 5.31Changing the Background Colorof an Object A S.32Aligning Objects on a Form A 5.36Selecting Records Using Filter By Form A 5.43Saving a Filter as a Query A 5.45Applying a Filter that was Savedas a Query A 5.46Creating a Report in Design View A 6.6Adding Fields to a Report A 6.7Moving and Resizing Controls A 6.10Changing the Caption Propertyfor a Label Box A 6.11Adding the Date to a Report A 6.16Adding Page Numbers to a Report A 6.18Adding and Removing Report Headerand Report Footer Sections A 6.20Adding a Line to a Report A 6.22Sorting and Grouping Data in a Report A 6.24
Calculating Totals in a Report A 6.26Hiding Duplicate Values in a Report A 6.30Embedding a Chart in a Report A 6.33Inserting a Linked Object in a Report A 6.40Exporting an Access Table or Queryto Excel A 6.45Saving Access Objects in an HTML File A 7.4Viewing an HTML file A 7.7Importing an HTML File as an

Access Table A 7.16Creating a Hyperlink Field A 7.21,Entering a Hyperlink Field Value A 7.22Creating a Briefcase Replica of a Database A 8.4Synchronizing the Design Masterand a Replica A 8.8Using the Crosstab Query Wizard A 8.11Using the Find Duplicates Query Wizard A 8.14Using the Find Unmatched Query Wizard A 8.16Creating a Top Values Query A 8.17Creating a Make-Table Query A 8.21Creating an Append Query A 8.24Creating a Delete Query A 8.27Creating an Update Query A 8.29Creating a Self-join A 8.37Viewing an SQL Statement for a Query A 8.40Creating a Macro A 9.5Single-Stepping a Macro A 9.10Creating an Action by Dragging A 9.11Adding a List Box to a Formwith the Control Wizards A 9.25Adding a Command Button toa Form Using Control Wizards A 9.29Copying an Object in the Same Database A 9.32Creating a Macro Group A 9.36Creating a Custom Toolbar froma Macro Group A 10.3Creating a New Standard Module A 10.23Testing a Procedure in theDebug Window A 10.27Adding an Event Procedure A 10.31Adding a New Procedure to aStandard Module A 10.35Setting the Database Startup Options A 10.SS
Relational@ Databases and Database Design,@index
-Iternate keys, RD 5 anomalies, RD 15-16 deletion, RD 16 denormalizatioii, RD 16 insertion, RD 16 normalizing, RD 16, RD 20 update, RD 16 attribute names, RD 4 attributes, RD 4
Boyce-Codd normal form (BCNF), RD 20 bubble diagrams, RD 11, RD 19
candidate keys, RD 5, RD 7 in normal forms, RD 20 cascades option, RD 13 columnsattribute name, RD 4 defined, RD 4domain, RD 4
entities, RD 4 comnion fields, RD 8 coitiposite entities, RD 12 composite keys, RD 6 constraints, RD 13 in normal forms, RD 18 concatenated keys, RD 6
database design, RD 3, RD 16-17 d@itabasesanomalies, RD 15-16dependencies, RD 13-15, RD 18 determinants, RD 13-15 integrity constraints, RD 13 keys, RD 5-7normalization, RD 16-23 relations, ltD 4-5relationships, RD 7-13

data model diagrams, RD 15 data redundancy RD 15-16 deletion anomaly, RD 15 denormalizatioii, RD 16 dependencies, RD 13-15functional, RD 14-15, RD 18 partial, RD 15, 19

transitive, RI) 15 deteriiiiii@ints, RD 13-15 diagrams, entity-relationsliip, RD 11-13 domain integrity constraints, RD 13 domains, RD 4, RD 13
entities, RD 4composite, RD 12 entity integrity, anomalies and, RD 16 entity integrity constraints, RD 13
etitity-relationship diagrams (ERDs@, RD 11-13
t btypes, RD 11C', ty u
fields, common, RD 8 first normal form (lNF), RD 17-18 foreign keys, RD 6, RD 7
constraints, RD 13
in many-to-many relationships, RD 10
in one-to-itiany relationships, RD 9
in one-to-one relationships, RD 8functional dependency, RI) 14-15 in normal forins, RD 18 functional dependency diagrams, RD 15 functionality, RD 14
insertion anomaly, RD 16integrity, referential, RD 13
ijitegritv constraints, RD 13
doi,,ain, RD 13 @.,ity, RD 13
kevs, RD 5-7alternate, RD 5 candidate, RD 5, RD 7, RI) 20 composite, RD 6, RD 13, RD 19 concatenated, RD 6 foreign, RD 6, RD 7, RD 8, RD 9, RD JO, 13 primary, RD 5-7, RD 8, RD 9, RD IO, RD I 1,
RD 11, RD 20-22
m,-tny-to-maiiy relationships (M:N), RD 9-10
nonkey attributes, RD 7 normal forms, RD 17-23 defined, RD 17 first, RD 17-18 second, RD 18-20 third, RD 20-22 normalization, RD 16-22 nullifies option, RI) 13null values, IZI-) 11, RD 13-14
onc-to-iiiany relationships (I:M), IZD 8 one-to-one relationships (1:1), RD 8
partial dependency, RD 15 in normal forms, RD 18 primary keys, RD 5-7changing or deleting, RD 13 constraints, RD 13 in many-to-niaiiy relationships, RD 10 in normal forms, RD 18, RD 20-22 in orie-to-many relationships, RD 9 in one-to-one relationships, RD 8
eduiidancy, dejioriiialization and, RD 22 referential integrity, RD 13 relational database, RD 5 relations, RD 4-5anomalies, RD 15-16 characteristics, RD 4defined, RD 4dependencies, RD 13-15cleterminates, RD 13-15entity-relationship diagrams, RD 11-13 normalizing, RD 17-23
utiflormalized, RD 17 relationships, RD 7-11 entity Subtypes, RD 1 1niaiiy-to-many, RD 9-10one-to-many, RD 8
one-to-one, RD 8 repeating groups, in i)ormat forms, RD 1 7-18 restricted option, RD 13 rows, RD 4
eco,id normal form (2NF), RD 18-21 semantic object modeling, RD 15
tables, characteristics, RD 4 third normal fc)rii) @2NF), RD 20-22 transitive dependency, RD 15 t.ples, RD 4
u,,norn,alized relations, RD 17 update anomaly, RD 16

Group 7OCR 6
MS Access 97 TASK REFERENCECharacter, delete WIN95 33 Press BackspaceCheck box, de-sciect WIN95 21 Click the check box again, or tab to option, press Spacebar
Click the checkbox, or tab to option, press SpacebarCheck box, select WIN95 21
Detailed file list, view WIN95 45 From My Computer, click View, DetailsSW
Disk, copy your WIN95 50 Place disk in drive A:, from My Computer click
Start
Disk, format WIN95 30 Click click press Enter, click File click Format, click Start
Drop-down list, display WIN95 20 Click
File, copy WIN95 47 From My Computer, right-click the file, drag to the new location, press C
File, delete WIN95 49 From My Computer, click the file, press Delete, click Yes
File, move WIN95 48 From My Computer, use the left mouse button to drag the file to the desired
folder or driveFile, open WIN95 37 ClickFile, print WIN95 39 ClickFile, print preview WIN95 39 ClickFile, rename WIN95 49 From My Computer, click the file, click File, click Rename, type new
name,press Enter
File, save WIN95 35 Click NUFolder, create WIN95 46 From My Computer, click File, New, FolderHelp topic, display WIN95 23 From the Help Contents window, click the topic, then click OpenHelp topic, open WIN95 23 From the Help Contents window, click the book, then click Display
Help, start WIN95 21 Click then click Help
Icon, open WIN95 43 Click the icon, then press Enter or double-click the icon
Icons, view large WIN95 45 From My Computer, click View, Large Icons
Insertion point, move WIN95 34 Click the desired location in the document; use arrow keys
List box, scroll WIN95 20 Click 121 or M, or drag the scroll box
Menu option, select WIN95 17 Click the menu option
Menu, open WIN95 17 Click the menu option
If you are using this text a-s part of our Custom Edition Program, you will find entries in the Index and TaskReference that do not apply to your custom tutorials.

click File, Copy Disk,

Program, quit WIN95 10 Click N or Alt+F4
Program, start WIN95 9 Click the Start button, point to Programs, point to the program option, click
the program
Radio button, de-select WIN95 21 Click a different radio button
Radio button, select WIN95 21 Click the radio button
Start menu, display WIN95 9 Ctrl+Esc
Student data disk, create WIN95 41 Click IFM, click Programs, CTI Win95, Windows 95 Brief, Make
Windows 95 Student Disk, press Enter
Text, select WIN95 34 Drag the pointer over the text
Tooltip, display WIN95 19 Position pointer over the tool
Window, change size WIN95 17 Drag MWindow, close WIN95 10 Click or Ctrl+F4
Window, maximize WIN95 17 Click
Window, minimize WIN95 15 Click
Window, move WIN95 17 Drag the title bar
Window, redisplay WIN95 16 Click the taskbar button
Window, restore WIN95 16 Clickad
Window, switch WIN95 12 Click the taskbar button of the program, or Alt+Tab
Windows 95, shut down WIN95 12 Click IMM, click Shut Down, Click Yes
Windows 95, start WIN95 5 Turn on the computer
Access, exit A 1.13 Click on the program window
Access, start A 1.7 Click Start, point to Programs, click Microsoft Access
Action, add by dragging A 9.11 See Reference Window: Creating an Action by Dragging
Action, add to macro A 9.7 In the Macro window, click the Action list arrow, click the action
Aggregate functions, useA 3.31 Display the query in Design view, click n
And operator, enter in A 5.12 Enter selection criteria in the same Criteria row in the design grid
selection criteria

Append query, create A 8.24 See Reference Window: Creating an Append Query
AutoForm, create A 1.16 Click the Forms tab, click New, click an AutoForm Wizard, choose the table
or query for the form, click OK
AutoFormat, change A 4.4 See Reference Window: Changing a Form's AutoFormat
AutoReport, create A 1.21 Click the Reports tab, click New, click an AutoReport Wizard, choose the
table or query for the form, click OK
Briefcase replica, create A 8.4 See Reference Window: Creating a Briefcase Replica of a Database
Calculated field, add to A 3.28 See Reference Window: Using Expression Buildera query
Caption, change for A 5.24 Right-click the label, click Properties, click the Format tab, edit the label in
a label the Caption text box
Chart, edit A 6.35 Double-click the chart object
Chart, embed in a report A 6.33 See Reference Window: Embedding a Chart in a Report
Chart Wizard, activate A 6.34 Click the Reports tab, click New, click Chart Wizard, select the table or
query, click OK
Color, add to a form A 5.32 Select the control, click the Fill/Back Color list arrow, click the color box
control you want
Column, adjust width of A 3.21 Double-click the right border of the column heading
Command button, add toA 9.29 Click S on the toolbox, position the pointer in the form, click the
a form left mouse button
Command button, add to a A 9.29 See Reference Window: Adding a Command Button to a Form Usingform using Control Wizards Control Wizards
Control, move A 5.23 Select the control, click the control's move handle, drag the control to itsnew position
Control, resize A 5.26 Select the control, click and drag a sizing handle, release the mouse button
Crosstab query, create A 8. 11 See Reference Window: Using the Crosstab Query Wizard
If you are using this text as part of our Custom Edition Program, you will find entries in the Index and TaskReference that do not apply to your custom tutorials.
Data, find A 4.7
Data, group in a report A 6.24
Data, sort in a report A 6.24
Database, compact A 4.28

Datasheet view, switch to A 2.14
Date, add to a report A 6.16
Debug window, open A 10.27
Delete query, create A 8.27

Design Master and replica,A 8.8synchronize
Design view, switch to A 2.18
Dialog box, create A 9.32
Duplicate values, hide A 6.30
Event procedure, add A 10.31
Field, add A 2.19
Field, add to a form A 5.21or report
Field, define A 2.8
Field, delete A 2.18
Field, move A 2.19
Filter, save as a query A 5.46
Filter, saved as a query, A 5.46apply
Filter By Form, activate A 5.43
Filter By Form, create A 5.43
Filter By Selection, A 3.16activate
See Reference Window: Finding Data
See Reference Window: Sorting and Grouping Data in a Report
See Reference Window: Sorting and Grouping Data in a Report
See Reference Window: Compacting a Database
Click 0See Reference Window: Adding the Date to a ReportClick on the Visual Basic toolbar
See Reference Window: Creating a Delete Query
See Reference Window: Synchronizing the Design Master and a Replica
Click
Display the form in Design view, open the form's property sheet, set theBorder Style property to Dialog
Right-click the field's text box, click Properties, click the right side of theHide Duplicates text box, click Yes
See Reference Window: Adding an Event Procedure
See Reference Window: Adding a Field Between Two Existing Fields

Drag the field from the field list to the form or report in Design view
See Reference Window: Defining a Field in a Table
Display the table in Design view, right-click the field's row selector, clickDelete Rows
Display the table in Design view, click the field's row selector, drag the fieldwith the pointer
Click 2, enter the query name
See Reference Window: Applying a Filter that Was Saved as a Query
Click Is
See Reference Window: Selecting Records Using Filter By Form
Select the field value, click
Find duplicates query, A 8.14 See Reference Window: Using the Find Duplicates Query Wizardcreate
Find unmatched query, A 8.16 See Reference Window: Using the Find Unmatched Query Wizardcreate
Form, custom, create A 5.18 See Reference Window: Creating a Form in Design View
Form Footer, add A 5.28 Click View, click Form Header/Footer
Form Footer, remove A 5.28 Click and drag the bottom edge of the footer up until the section area
disappears
Form Header, add A 5.28 Click View, click Form Header/Footer
Form Header, remove A 5.28 Click and drag the bottom edge of the header up until the section area
disappears
Form Wizard, activate A 4.2 Click the Forms tab, click New, click Form Wizard, choose the table or
query for the form, click OK
Function, create A 10.24 Enter function statements in the Module window
Group, begin on a toolbar A 1,0.7 With the Customize dialog box open, right-click a toolbar button, then click
Begin a Group
Group totals, calculate A 6.26 See Reference Window: Calculating Totals in a Reportin a report
Hot key, create A 9.29 Place an ampersand (&) to the left of the hot key letter in the object's name
HTML file, import A 7.16 See Reference Window: Importing an HTML File as an Access Table
as a table

HTML file, view A 7.7 Click the Go button on the Web toolbar, click Open, select the file to open,
click the Open button, click OK
Hyperlink, use A 7.24 Click the hyperlink field value
Hyperlink field, create A 7.21 In Design view, type the field name in a blank Field Name text box, press
Tab, click the Data Type list arrow, click Hyperlink

Hyperlink field value, A 7.22 In Datasheet view, click the hyperlink field, click S, enter the name of the
enter file or URL, enter the named location in the file or URL (if any), click OK
join line, delete A 8.22 Click the join line in the Query window, press Delete
Label, add to a form A 5.29 Click 0, click and drag the pointer to create the label box, type the label
in the box
Line, add to a report A 6.23 Click S, click and drag the pointer to create the line
List box, add to a form A 9.25 See Reference Window: Adding a List Box to a Form Using Control Wizards
Macro, create A 9.5 See Reference Window: Creating a Macro
Macro, run from the A 9.7 Click the Macros tab, click the macro, click the Run buttonDatabase window
Macro, run from the A 9.7 Click IN on the Macro Design toolbar; or click Tools, click Run Macro,Macro window select the macro from the list, click OK
Macro, single-step A 9.10 See Reference Window: Single-Stepping a Macro
Macro group, create A 9.36 See Reference Window: Creating a Macro Group
Make-table query, create A 8.21 See Reference Window: Creating a Make-Table Query
Menu bar, attach to a form A 10.18 Display the form in Design view, open the form's property sheet, click the
right side of the Menu Bar text box, click the menu bar
Menu bar, create A 10.12 Create a custom toolbar, right-click the toolbar, click Properties, click the
Type list arrow, click Menu Bar
Menu item, add to a A 10.15 With the Customize dialog box open, click the Commands tab, click the
menu bar New Menu category, drag New Menu to the menu bar, release the mouse button
Module, compile A 10.40 Click Is on the Visual Basic toolbar
Module, create A 10.23 See Reference Window: Creating a New Standard Module
Module, save A 10.27 Click 11 on the Visual Basic toolbar, enter the module name, press Enter
Object, embedded or A 6.35 Double-click the objectlinked, edit
Object, embedded or A 6.43 Click Edit, click 01,E/DDE Links, select the object, click Update Nowlinked, update manually
Object, link in a report A 6.40 Click 0, click and drag the pointer to create a box for the linked object, click
Create from File, specify the file containing the object, click Link, click OK

Objects, align A S.36 Select the objects, right-click a selected object, point to Align, and then click
the alignment you want
Objects, save in an A 7.4 See Reference Window: Saving Access Objects in an HTML FileHTML file
Office Assistant, use to A 1.18 See Reference Window: Using the Office Assistantget Help
Or operator, enter in A 5.12 Enter selection criteria in the Criteria and or rows in the design gridselection criteria
Overall totals, calculate A 6.26 See Reference Window: Calculating Totals in a Reportin a report
Page numbers, add to A 6.1 8 Click the section to contain page numbers, click Insert, click Page Numbers,
a report select formatting options, click OK
Parameter query, create A 5.14
Picture, add to a form A 5.30
Picture, change on a A 9.27command button
Picture, insert on a report A 4.24
Primary key, specify A 2.12
Procedure, create A 10.35
Procedure, test in the A 10.27Debug window
Profile, create A 7.11
Profile, use A 7.14
Publish to the Web A 7.5Wizard, activate
Query, define A 3.3
Query, export as an A 6.45Excel worksheet
Query, run A 3.5
Query results, sort A 3.14
Record, add a A 1.12new one
Record, delete A 2.25
Record, move to first A 1.12
Record, move to last A 1.12

Record, move to next A 1.12
Record, move to previous A 1.12
Record, move to a A 1.12specific one
Records, redisplay A 3.17all after filter
Relationship, define A 3.8between two tables

See Reference Window: Creating a Parameter Query
Click 91, click the left mouse button to place an outline in the form, clickthe name of the picture file, click OK
Open the property sheet for the command button, click the Picture text box,click go, select the picture, click OK
Click Insert on the menu bar, click Picture, select the picture file, click OK
See Reference Window: Specifying a Primary Key for a Table
See Reference Window: Adding a New Procedure to a Standard Module
See Reference Window: Testing a Procedure in the Debug Window
In the final Publish to the Web Wizard dialog box, click the check box tosave a profile, enter a name for the profile
In the first Publish to the Web Wizard dialog box, select the profile to use
Click File, click Save As HTML
Click the Queries tab, click New, click Design View, click OK
Click Tools, point to Office Links, click Analyze It with MS Excel
Click II
See Reference Window: Sorting a Query Datasheet
Click
Right-click the record's row selector, click Delete Record, click Yes
Click In
Click In
Click IN
Click In
Type the record number in the Specific Record box, press Enter
Click
Click
Report, custom, create A 6.6 Click the Reports tab, click New, click Design View, select the table or query
for the report, click OK
Report, preview A 6.14 Click 11
Report Footer, add A 6.20 Click View, click Report Header/Footer
Report Footer, remove A 6.20 Click and drag the bottom edge of the footer up until the section area

disappears

Report Header, add A 6.20 Click View, click Report Header/Footer
Report Header, remove A 6.20 Click and drag the bottom edge of the header up until the section areadisappears
Report Wizard, activate A 4.17 Click the Reports tab, click New, click Report Wizard, choose the table or
query for the report, click OK
Self-join, create A 8.37 See Reference Window: Creating a Self-join
Sort, specify ascending A 3.12 Click
Sort, specify descending A 3.12 Click
Special effect, create A 9.45 Select the object, click the list arrow for E, click the special effect
SQL statement, view A 8.40 See Reference Window: Viewing an SQL Statement for a Query
Startup options, set A 10.55 See Reference Window: Setting the Database Startup Options
Subform/Subreport A 5.38 Make sure E is selected, click 0, click at the upper-left corner for theWizard, activate subform
Submenu, add to a A 10.11 With the Customize dialog box open, click the Commands tab, drag themenu bar button from the Categories list to the menu choice then to the submenu
box,release the mouse button
Switchboard Manager, A 9.41 Click Tools, point to Add-Ins, click Switchboard Manageractivate
Tab control, add to a form A 5.35 Click 2, click at the upper-left corner for the tab control
Table, create A 2.6 Click the Tables tab, click New, click Design View, click OK
Table, export as an A 6.45 Click Tools, point to Office Links, click Analyze It with MS ExcelExcel worksheet
Table, open A 1.11 Click the Tables tab, click the table name, click Open
Table, print A 1.13 Click 0
Table structure, save A 2.13 See Reference Window: Saving a Table Structure
Template, use A 7.10 Select HTML template in the Publish to the Web Wizard dialog box
Toolbar, attach to a form A 10.8 Display the form in Design view, open the form's property sheet, click the
right side of the Toolbar text box, select the toolbar
Toolbar, custom, create A 10.3 See Reference Window: Creating a Custom Toolbar from a Macro Group
from a macro group
Toolbar, customize A 10.6 Right-click the toolbar, click Customize
Toolbar, dock A 10.8 Click the toolbar title bar and drag the toolbar to the top, bottom or side of
the window; release the mouse button when the toolbar changes shape

Toolbar, hide A 10.9 In the Customize dialog box, click the check box for the toolbar to remove
the check mark
Toolbar button, change A 10.5 With the Customize dialog box open, right-click the toolbar button, point to
the image Change Button Image, click the new imageToolbar button, change A 10.5 With the Customize dialog box open, right-click the toolbar
button, selectthe style the style
Toolbar button, create A 10.7 With the Customize dialog box open, click the Commands tab, drag the
button from the Categories list to the toolbar
Toolbar name, change A 10.4 Right-click the toolbar, click Customize, select the toolbar, click Properties,
enter the name in the Toolbar Name text box
ToolTip, change A 10.6 With the Customize dialog box open, right-click the toolbar button, click
Properties, enter the ToolTip in the ToolTip text box
Top values query, create A 8.17 See Reference Window: Creating a Top Values Query
Update query, create A 8.29 See Reference Window: Creating an Update Query
Validation rule, create A 9.19 Display the table in Design view, select the field, enter the rule in the
Validation Rule text box
Validation text, create A 9.19 Display the table in Design view, select the field, enter the tcxt in the
Validation Text text box

Group 6OCR5
Full Index
If you are using this text as part of our Custom Edition Program, You will find entries in the Index and Task Referencethat do not apply to your custom tutorials.
Special Characters
(exclamation point), A 4.8 (number symbol), A 4.8, A 5.8 & (ampersand), A 9.29 (single quotation mark), A 10.26 (parentheses), WIN95 45 (asterisk), A 4.8, A 4.9, A 5.8 (hyphen), A 4.8 ? (question mark), A 4.8, A 5.8, A 10.27, A 10.28
(square brackets), A 4.8 (ba@kslash), WIN95 45 (tilde), WIN95 35(ellipsis), WIN95 18A triangles, WIN95 18
Access, A 1.3, A 5.3, A 8.3 exiting, A 1.13, A 1.22, A 2.27 starting, A 1.7-1.9Access window, A 1.10 action(s), A 9.4 arguments, A 9.6
"Execution," A 9.12Help system, A 9.12-9.14"Import/export," A 9.12
macros. See adding actions to macros; macro(s)
"Miscellaneous," A 9.12'IO bject manipulation," A 9.12 setting arguments by dragging, A 9.15 Action column, Macro window, A 9.5 action queries, A 8.21-8.32
ap end, A 8.21, A 8.24-8.27 dep
ete, A 8.21, A 8,27-8.29 make-table, A 8.21-8.24 update, A 8.21, A 8.29-8.32
Active Desktop, WIN98 9-12Web components on desktop, WIN98 11-12 Web pages as background wallpaper,
WIN98 10-11Active Desktop Gallery, WIN98 11ActiveMovie, WIN98 i@activ@ programs
taskbar buttons, WIN95 6window title, WIN95 14 active window, WIN95 12 adding actions to macros, A 9.7-9.9
dragging, A 9.11-9.12MsgBox action, A 9.14-9.16 adding files to disks, WIN95 41-42 Address toolbar, WIN98 7,
WIN98 13, WIN98 14 AfterUpdate event, A 10.23 aggregate functions, A 3.31-3.33crosstab queries, A 8.9-8.14grouped, A 3.33-3.34aligning
controls in reports, A 6.13-6.15label boxes, A 5.36-5.37 alternate keys, RD 5 ampersand (&), creating 1-iot keys, A 9.29 And
lo ical operator, A 3.24, A 3.25, A 5.13-5.14 anomalies, RD 15-16
deletion, RD 16denormalization, RD 16
insertion, RD 16
normalizing, RD 16, RD 20 update, RD 16

attribute names, RD 4attributes, RD 4 append queries, A 8.21, A 8.24-8.27 applicationsactive. See active programsClose button, WIN95 10
closing, WIN95 10, WIN95 12, WIN95 37 destination, A 6.32 exiting, WIN95 10 extensions, WIN95 35
f iy@de, fl to ram windows, WIN95 9
h , li npk s etween. See hyperlinks tocumen@ in other prog'r'ams
multiple, running at same time. See multitasking sample, Visual Basic, A 10-23 source, A 6.32 starting, WIN95 8-10 switching between, WIN95 12 used to create file, WIN95 45 Windows 3.1, WIN95 29 Windows 9S, WIN95 3, WIN95 29 arguments
actions, A 9.6, A 9.15setting, A 9.15
Visual Basic functions, A 10.24 arrow buttons, WIN95 19 assignment statements, A 10.25entering, A 10.38 asterisk (*), wildcard character, A 4.8, A 4.9, A 5.8 AutoFormat(s), A 4.4-4.6
AutoFormat dialog box, A 4.5AutoForm Wizard, A 1.16-1.17AutoNumber data type, A 2.5
AutoReport: Column@ir Wizard, A 1.21-1.22Auto Resize property, A 9.24 Avg function, A 3.31, A 8.10
background colors, form objects, A 5.32-5.33 background wallpaper, Web pages, WIN98 10-11 backslash (\), root directory, WIN95 45 Backspace key, error correction, WIN95 32 backup copies, WIN95 49-51 bad sectors, WIN95 32Beep action, A 9.7blocks of text, selecting, WIN95 34 books, Help, WIN95 22-23Boolean data type, Visual Basic, A 10.37 Border Style property, A 9.24 bound controls, A 5.19
adding to forms, A 5.21-5.22 adding to reports, A 6.8Bound Object Prame tool, A 5.20 Boyce-Codd normal form (BCNF), RD 20 brackets ([]), wildcard character, A 4@8 Briefcase dialog boxes, A 8.5 browsers, WIN98 4 bubble diagrams, RD 15, RD 19 built-in menu bars, A 10.11 built-in toolbars, A 10.2 buttonscommand. See comi-nand buttons
custom images, A 10.5 desktop, WIN95 6 sizing, WIN95 14 taskbar. See taskbar buttonstoolbars. See toolbar buttons
calculated controls, A 5.19 calculated fields, A 3.28-3.31 adding to queries, A 3.29-3.31 calculations, A 3,28-3.34 '
aggregate functions, A 3 ' 31-3.33 calculated fields, A 3.28-3.31 groups of records, A 3.33-3.34totals, A 6.26-6.27
ca ca
CapAllFirst function, A 10-34-10.42 design, A 10.34-10-35
CapAlf function, A 10-21caption(s), labels, A 5.24-5.26Ca n property, A 9.24P,tbi Ocis,-changing, A 6.11-6-12 cascade deletes option, A 3.8 cascade updates option, A
3.8, RD 13 channei(s), WIN98 12Channel Bar, WIN98 12 characters
filenames, WIN95 29, WIN95 49, WIN95 435 inserting, WIN95 35 charts

deleting legends, A 6.36 embedding in reports. See embedding charts in reportspreviewing, A 6.35 selecting type, A 6.34 sizing, A 6.36, A 6.38
Chart tizard, embedding charts in reports,A 6.33check boxes, WIN95 21Check Box tool, A 5.20
check marks, menu options, WIN95 18 class modules, A 10-22 clicking, WIN95 8-9menu options, WIN95 27 clock, setting, WIN95 6
Close button, applications, WIN95 10 cl Osa p cations. See closing applications fi@e,l,@without saving changes, WIN95 37 forms, A 1.16Form window, A 5.46Office Assistant, A 1.9 reports, A 1.22, A 4.27, A 6.44 Switchboard Manager, A 9.43 windows, WIN95 14Windows 95, WIN95 12-13
closing applications, WIN95 8, WIN95 10,WIN95 12
Access, A 1.13, A 1.22, A 2.27 Excel, A 6.47before saving files, WIN95 37WordPad, WIN95 9, WIN95 37coding, Visual Basic, A 10.20, A 10.46-10.51 Coffee Cup image, A 10.5 collatin pages, WI@@5 40 colors Background, form objects, A 5.32-5.33 colum'n selectors, A 1.11 column widthdatasheets, A 3.22
forms, A 5.42tables, A 5.6
columns
attribute name, RD 4 defined, RD 4domain, RD 4entities, RD 4
Combo Box too], A 5.20command(s)
adding to custom menu bars, A 10.13-10.17 macros. See macro(s)
menus. See menu(s)
toolbar buttons, WIN95 14, WIN95 19 command bars, A 10.2 command buttons
adding to forms, A 9.27-9.31 adding to switchboard, A 9.41-9.43 switchboards, A 9.2, A 9.3
testing, A 9.44Command Button tool, A 5.20Command Button Wizard dialog boxes, A 9.29-9.30
Comment column, Macro window, A 9.5 comments, event procedures, A 10.26-10.27 common fields, A 1.5-1.6, RD 8designing databases, A 2.3compacting databases, A 4.28-4.29, A 9.47
comparison operators, A 3.18-3.19 list_of-values matches, A 5.10-5.11
matching ranges of values, A 3.23-3.24n matches, A 5.8co=g
event rocedures, A 10.32-10.33 Visua@Basic modules, A 10.40 composite entities, RD 12 composite keys, A 2.2-2.3, RD 6constraints, RD 13

in normal forms, RD 18 computer, turning off, WIN95 12-13 concatenated keys, RD 6 conditions, A 3.18. See also selection criteria Contents tab, Help, WIN95 22-23 control(s), A 5.19-5.20bound. See bound controls displaying, A 10.43 forms. See controls in forms moving. See moving controls reports. See controls in reports size, A 4.23tab controls, WIN95 20, WIN95 22-24 windows, WIN95 14-15Control Panel, WIN95 42 controls in forms
attaching functions, A 10.53-10.54 calculated , A 5.19
moving, A 5.22-5.24 selecting, A 5.22-5.24 sizing, A 5.26-5.27 unbond, A 5.19 controls in reports, A 6.8-6.15 adding bound controls, A 6.8 aligning, A 6.13-6.15 moving, A 6.8-6.10 sizin A 6.10-6@ll, A 6.12 Controf 'Wizardsadding command buttons to forms, A 9.29-9.30 adding subforms, A 5.38-5.42
Control Wizards tool, A 5.20 copies, specifying number, WIN95 40 Copy Disk dialog box, WIN95 51
copyingentire floppy disks, WIN95 49-51 files, WIN95 47 objects in same database, A 9.32-9-34 records from another Access database A 2.22-2.24
Count function, A 3.31, A 8.1 0 criteria. See filter(s); logical operators; selection criteriacrosstab queries, A 8.9-8.14
selec t queries compa red, A 8.10-8.11Crosstab Query Wizard, A 8.11-8.14 CStr function, A 10-38Currency data type, A 2.5 Visual Basic, A 10.37 Current event, A 10-43 current record symbol, A 1.12 custom dialog boxes, A 9.3 custom forms, A 5.16-5-33 adding fields, A 5,21-5.22 background color, A 5.32-5.33 captions, A 5.24-5-26 controls. See controls in forms creating in Design view, A 5.18-5-21 designing, A 5.17-5-18
Form Header and Form Footer sections,A 5.27-5.32
labels, A 5.29-5.30 pictures, A 5.30-5.32Customize dialog box, A 10.3-10.4 custom menu bars, A 10.11-10-19 adding commands, A 10.13-10.17 attaching to Switchboard form, A 10.18 docking, A 10.17 setting properties, A 10.17 switchboards, A 9.2, A 9.3 testing, A 10.18-10.19 custom reports, A 6.2-6.15 adding, fields, A 6.7-6.8 contro s. See controls in reports designing, A 6.4-6.5 queries, A 6.4-6.5Report window in Design view, A 6.5-6.8 saving design, A 6.11 custom toolbars, A 10.2-10-11 attaching to forms, A 10.8-10.10 buttons, A 10.7-10.8 command bars, A 10.2 creating from macro groups, A 10.2-10.8 floating, A 10.2 global, A 10.2 icons, A 10.5 switchboards, A 9.2, A 9.3 testing, A 10.10-10.11 titles@ A 1 0.4
databases, A 1.5-1.6, A 2.1-2.27 anomalies, RD 15-16 compacting, A 4.28-4.29, A 9.47 deleting, A 4.29 dependencies, RD 13-15, RD 18 designing, A 2.2-2.3, RD 3, RD 16-17 determinants, RD 13-15 n e@rity constraints, RD 13
t
keys RD 5-7 normalization, RD 16-23 opening, A 1.9-1.10, A 2.6
querying. See queries relations, RD 4-5
relationships, RD 7-13
0 A Index 3T s s
renaming, A 4.29 saving, A 2. . 16-2.17 startup options, A 10.54-10.56 tables. See modifying table structure; table(s); tablestructure
updating. See updating databasesdatabase management systems (DBMSs),
A 1.6-1.7

Database window, A 1.10data loss
backup copies to prevent, WIN95 49-51 formatting disks, WIN95 30
turning off computer, WIN95 12 data model diagrams, RD 15 data organization, A 1.5 data redundancy, A 2.3, RD 15-16 datasheets, A 1.11
adding records to tables, A 2.14-2.16 column wi 'dth, A 3.22 font size, A 3.21 navigating, A 1.12, A 2.26 switching to, A 2.21
Datasheet view, A I .11 data tvt)esassigning to fields,. A 2.4-2.5sort' quer results, A 3.12Vi s u
a Basic, A 10.37 date(s)of file creation or revision, WIN95 45 reports, A 6.16-6.17settin WIN95 6, WIN95 20
Date an@'Time dialog box, WIN95 19-20 Date data type, Visual Basic, A 10-37
Page Header section, Date function, adding to
A 6.16-6.17Date/Time control, WIN95 6Date/Time data type, A 2.5Date/Time list box, WIN95 19-20DBMSS. See database management systems(DBMSS) nt procedures, Debug window, testing eve
A 10.27-10.28Declarations section, modules, A 10.22 default page, switchboards, A 9.40 defining fields,,A [email protected] definitions, technical terms, WIN95 23 Delete key, error correction, WIN95 32-33 delete queries, A 8.21, A 8.27-8.29 deleting
chart legends, A 6.36 database files, A 4.29 fields. See deleting fields files , WIN95 48 folders, WIN95 48 icons, WIN95 48 labels. See deleting labels records. See deleting records replicas, A 8.9 deleting fields forms, A 5.41 table structure, A 2.1 8 deleting labels, A 5.40 list boxes, A 9.27
dele'in t,%records, A 2.25 da ases, A 2.25 forms, A 4.11-4.12 deletion anomaly, RD 15 denormalization, RD 16
dependencies, RD 13-15nctional, RD 14-15, RD 18 partial, RD 15, RD 18transitive, RD 15 design grid, Select Query window, A 3.4 designin
a A I
C p First function, A 10.34-10.35
datab!lses, A 2.2-2.3 event procedures, A 10.30-10.31 tables. See designing tables designing tables, A 2.4-2.6
assi r@ing field data types, A 2.4-2.5 9assigning field sizes, A 2.5-2.6 naming fields and objects, A 2.4 Design Master, A 8.4synchronizing replicas with, A 8.6-8.9Design viewcreating forms, A 5.18-5.21 creating pattern match queries, A 5.8-5.9 inserting graphics in reports, A 4.24 queries, A 6.5 reports, A 4.22Report window, A 6.5-6.8 Select Query window, A 3.3-3.4 sorting iiiuliiple fields, A 3,13-3.16 switching to, A 6.35
Table window, A 2.7 desktop, WIN95 5-6, WIN98 3-8
adding Web components, WIN98 11-12 buttons, WIN95 6
Quick Launch toolbar, WIN98 6-8 returning to, WIN95 11

underlined icon names, WIN98 4-6 Desktop toolbar, WIN98 7 destination program, A 6.32 detail records, A 4.16
sort order, A 4.20Detail section, A 6.2, A 6.3, A 6.4, A 6.6 s zing, A 5.34, A 6.40
Details view, disk contents, WIN95 45 deterininants,.RD 13-15 d' Ms, entity-relationship, RD 11-13 'a ra
diafog boxes, A 9.3-9.4, A 9.22-9.34. See alsospecific dialog boxes
adding command buttons, A 9.27-9.31 adding list boxes, A 9.24-9.27 check boxes, WIN95 20-21 copying, A 9.32-9.34 custom, A 9.3 ellipsis (... ), WIN95 18MsgBox action, A 9.14-9.16 radio (option) buttons, WIN95 21 setting properties, A 9.24 tab.controls, WIN95 21 testing, A 10.51, A 10-54 testing design, A 9.31, A 9.34 use, WIN95 18Digital Versatile Disc (DVD) support, WIN98 15Dim statements, A 10.36adding, A 10.37directoriesfolders, WIN95 45-46 subdirectories, WIN95 45-46
disk(s)adding files, WIN95 41-42 bad sectors, WIN95 32
CO' e@'t ing, WIN95 49-51
de, ing files, WIN95 48-49for atting. See formatting disks
listing files, WIN95 42-45
sending printout to, WIN95 40 S@ ace, WIN95 32 dis drives, selecting, WIN95 36 disk space, WIN98 15 displaying
contro A 10.43 files, WIN95 42-45 forms, A 5.42 functions, with tab controls, WIN95 20,WIN95 22-24
Help topics, WIN95 21, WIN95 22-24 home pages, A 7.27-7-28HTMF, files. See displaying HTML files list box options, WIN95 19-20 printers, WIN95 40 procedures in modules, A 10.40-10.41 query list, A 5.46 reports, close-up, A 4.21-4.22 switchboards, A 9.43-9.44, A 9.47 Tooltips, WIN95 7 windows, WIN95 15 displaying HTML files, A 7.12Internet Explorer, A 7.7-7.10
displaying to6lbars on taskbar, WIN98 6-8 DisplayQuery function, Queries dialog box, A 10.53Doc extension, WIN95 35 docking
menu bars, A 10.17 toolbars, A 10.8DoCmd statements, A 10.49 documents)
linking in reports. See linking Word documents in reports previewing, WIN95 39 printing selected pages, WIN95 39-40 saving, WIN95 36 domain integrity constraints, RD 13 domains, RD 4, RD 13 double-clicking, WIN95 8, WIN98 9Double data t@pe, Visual Basic, A 10.37
down arrow utton, WIN95 19-20 Down Arrow image, A 10.5
drag@ingadding actions to macros, A 9.11-9.12 files, WIN95 47-49scroll box, WIN95 19setting action arguments, A 9.15 windows, WiN95 16-17 drive(s), selecting, WIN95 36 drop-down list boxes, WIN95 19-20 dynamic pages, A 7.3
editing linked docut-nents, A 6.42-6.43 editing mode, A 2.26Edit Switchboard Page dialog box, A 9.41-9.43
ellipsis (... ), menu options, WIN95 18 embedding, A 6.32

charts. See embedding charts in reports embedding charts in reports, A 6.33-6.39enlarging and centering chart in report page,
A 6.38-6.39enlarging chart and deleting legend, A 6.36 saving reports, A 6.39selecting chart type, A 6.34Em ty Recycle Bin option, WIN95 48 enatling toolbars, WIN98 7 enlarging windows, WIN95 15 enter'n . See also inserting
' 9
fields in query des gns, A 5.12-5.13
hyperlink field values, A 7.22-7.24 records in tables, A 5.7-5.8
text in WordPad, WIN95 32-33Enter Parameter Value dialog box, A 5.15 entities, RD 4
@omposite, RD 12entity integrity, A 2.12
anomalies and, RD 16constraints, RD 13 entity-relationship diagrams (ERDs), RD 11-13 entity subtypes, RD 11 error correction, WIN95
32-33 event(s), A 10.20-10.21procedures. See event procedures event-driven languages, A 10.20 event procedures, A 10.20, A 10.21, A 10.26-
10.33 adding, A 10.31-10.32 adding to forms, A 10.43-10.45 calling, A 10.21 coding, A 10.46-10.51 comments, A 10.26-10.27 compiling, A 10.32-10.33 creating, A 10.41-10.42 creating functions in standard modules,
A 10.23-10.27
designing, A 10.30-10.31 displaying, A 10.40-10.41 functions, A 10.21 local (private), A 1 0.22 public, A 10.22 specifying for properties, A 10.51 subprocedures (su -broutines), A 10.21 testing. See testing event procedures event properties, A 10.20 exact matches, A 3.19-3.21Excel
exiting, A 6.47exporting Access tables as spreadsheets,
A 6.45-6.46exclamation point (!), wildcard character, A 4.8 "Execution" actions, A 9.1 2 exiting. See closingExplorer windows, Web view, WIN98 12-14 exporting tables as Excel spreadsheets, A 6.45-6.46
expressions), A 3.28Expression Builder, A 3.28, A 3.29-3.31 Expression Builder dialog box, A 3.30 extensions, filenames, WIN95 35-36 Eye image, A 10.5
false-statement group, A 10.30-10-31 FAT file system, WIN98 15Favorites , folder, WIN98 8, WIN98 9 field(s), A 1.5
adding to forms, A 5.21-5.22 adding to query designs, A 5.12-5.13 adding to reports, A 6.7-6.8 adding to tab controls, A 5.35-5.36 adding to table structure, A 2.19-2.20 assigning data types, A 2.4-2.5 assigning sizes, A 2.5-2.6 calculated. See calculated fields changing to Lookup Wizard fields, A 5.5 common. See common fields defining, A 2.7-2.11 deleting. See deleting fields designing databases, A 2.2 determining properties, A 2.3 grouping, reports, A 6.24-6.25
dex 5
hyperink. see hyperlink fields Lo pk, Wizard, A 5.4-5.8
moving in table structure, A 2.18-2.19 MU]tipfe, sorting in Design view, A 3.13-3.16 naming, A:@4 .r perties. @)ee rield properties
@eloe@ting. See selecti@g fieldstransferring from field'list to design grid, A 3.4 field list, Select Query window, A 3.4 Field list box, A 6.7

Field List button, A 6.6 field properties, A 2.3as@igning, A 2.5-2.6
changing, A 2.20-2.22 field selectors, A 1.1 1 field size property, assigning, A 2.5-2.6 field values, A 1.5 file(s), WIN95 29
adding to disks, WIN95 41-42 closing applications before saving, WIN95 37 closing without saving changes, WIN95 37 copying', \@IN9@ 47 . date ancl time ot creation or revision, WIN95 45 deleted, retrieving, WIN95 48 deleting, WIN95 48 directories, WIN95 45-46FAT file system, WIN98 15HTML, WIN98 10. See Hypertext Markup Language (HTM1.) listing, WIN95 44-45
WIN95 47-48nmaomv I n g'
ing. See fil,names opening, WIN95 39 organizing, WIN95 45-46 printing, WIN95 39-40 saving, WIN95 36, WIN95 37, WIN95 38 size, WIN95 45turning off computer, WIN95 12
typey IgN9@45
veri @n 10ation, WIN95 47-48
File menu, WIN95 31Rename option, WIN95 49 filenames, WIN95 29, WIN95 35-36charac ' ters, WIN95 29, WIN95 35, WIN95 49 extensions, WIN95 35
renaming files, WIN95 49 windows 3.1, WIN95 35 Fill/Back Color button, A 5.33 Fill/Back Color palette, A 5.33 filter(s), A 3@16
Filter By Form, A 5.43-5.45 saved as queries, applying, A 5.46-5.47 saving as @ueries, A 5.45-5-46
Fl ter By Form, A 5.43-5.45Fi ter By Selection, A 3.16-3.17 fil:erin@ data, A 3.16-3-17Fi id command, A 4.7-4.9find duplicates queries, A 8.14-8-16Find D6plicates Query Wizard, A 8.14-8.16 Find in field dialog box, A 4.8 finding
data . See finding data program windows, WIN95 10 words and phrases'in Help, WIN95 21,
WIN95 22-24finding data
forms, A 4.7-4.9Gueries. See queries
Finatab, Help ' WIN95 24, WIN95 26find unmatched queries, A 8.16-8-18
index 6
Find Unmatched Query Wizard, A 8.16-8.18 First function, A 8.10 first normal form (I NF), RD 17-18 F2 key, A 2.26floatiii g toolbars, A 10.2, A 10.8 floppy disks. See disk(s) focus, Help system, A 9.12 folders, WIN95 45-46, WIN95 54-55 creating, WIN95 46
deleting, WIN95 48-49 font sizedatashects, A 3.21
form titles, A 5.30 footers. See Form Header/Form Footer sections foreign keys, A 1.6, RD 6, RD 7
constraints, RD 13 in many-to-many relationships, RD 10 in one-to-many relationships', RD 9 in one-to-one relationships, RD 8 form(s), A 1.16-1.18, A 4.1-4.28adding event procedures, A 10.43-10.45 attaching custom toolbars, A 10.8-10.10 attaching functions to controls, A 10.53-10.54 AutoFormat, A 4.4-4.6 closing, A 1.16controls. See controls in forms creating using AutoForm Wizards, A 1.17 custom. See custom forms deleting fields, A 5.41 dialog boxes. See dialog boxes
displaying, A 5.42filters. See filter(s)finding data, A 4.7-4.9 footers. See Form Header/Form Footer sections Form Wizard. See Form Wizard
raSI-iics, A 4.23-4.28Kea ers. See Form Header/Form Footer sections maintaining table data, A 4.11-4.12 multi-page. See multi-page forms navigating, A 4.6, A 4.16 previewing, A 4.9 printing, A 1.16, A 4.10 properties, A 9.24Report Wizard. See Report Wizard resiziiig, A 9.30-9.31

saving, A 1.16, A 5.25subforms. See subformsswitchboards, A 9.2-9.3testing design, A 9.31toolbox, A 5.20Format dialog box, WIN95 31-32Format list box, A 2.21Format option, WIN95 32Format Painter, formatting Page Number text box, A 6.19Format property, A 2.20-2.21Format Results dialog box, WIN95 42 formatting disks, WIN95 30-32
root directory, WIN95 45 formatting page numbers in reports, A 6.19 Form Header/Form Footer sections, A 5.27-5.32 adding, A 5.28adding labels to forms, A 5.29-5.30 adding pictures to forms, A 5.30-5.32 removing, A 5.28
fo ie'
rm proper'
c@ha@igin A ?.32-9.33, A 9.46 log g' x"
ia b, , , A 9.24setting, A 9.30-9.31specifying event procedures, A 10.51
Form view, switching to, A 5.25 Form window, closing, A 5.46Form Wizard(s), A 1.16-1.17, A 4.3-4.6,
A 4.13-4.16creating forms, A 4.2-4.4, A 4.13-4.15 starting, A 4.2subforms, A 4.16
Form Wizard dialog box, A 4.2, A 4.4 functional dependency, RD 14-15 in normal forms, RD 18 functional dependency diagrams, RD 15 functionality, RD 14 functions
adding to Report dialog box form, A 10.49-10.50aggregate. See aggregate functions attaching to form's controls, A 10.53-10.54 Visual Basic. See Visual Basic functions
toolbars, A 10.2 starting, A 6.35-6.36 cal user interfaces (GUls), WIN95 3, A 9.2 sreports, A 4.23-4.28
switchboards, A 9.3, A 9.45 Graph window, A 6.36 grayed-out menu options, WIN95 18 group(s), macros. See macro groups Group By operator, A 3.33-3.34
Gr Footer section, A 6.2, A 6.3, A 6.4OuSing to report
ad s, A 6.25Group Header section, A 6.2, A 6.3 grouping
data in reports, A 6.23-6.25 records, calculations, A 3.33-3.34 toolbar buttons, A 10.7GUIS. See graphical user interfaces (GUls)
handles, selecting and moving controls, A 5.22 hard disk. See disk(s) hardware, upgrading, WIN98 2 hash mark (#), wildcard character, A 4.8, A 5.8 Help button, adding to toolbars, A 10.7-10.8 help, on-line, WIN98 15
Help system, A 1.18-1.20, WIN95 21-24 books, WIN95 22-23 listing topics, WIN95 22, WIN95 23-24 macros and actions, A 9.12-A 9.14 selecting topics, WIN95 21-24 starting, WIN95 21 status bar, WIN95 14 tab controls, WIN95 22-23 Visual Basic, A 10.22-10.23 Help window, WIN95 22, WIN95 23 hiding
dup Ilcate values in reports, A 6.29-6.30 toolbars, A 10.9-10.10
windows, WIN95 15, WIN95 16
h i @shi g hting
elected icons, WIN95 8
selected objects, WIN95 8 selected text, WIN95 8, WIN95 34 history tables, A 8.21 home pages, displaying, A 7.27-7.28
hot ke A 9.3

Hourg s'
Tass action, A 9.7hovering, WIN98 9
HTML (Hypertext Markup Language), WIN98 10HTML files, WIN98 10
documents in Explorer windows, WIN98 13
hyperliiik(s), A 7.2 to documents in other programs. See hyperlinks to documents in other programs
to Web pages. See hyperlinks to Web pages Hyperlink data type, A 2.5 hyperlink fields
creating, A 7.21-7.22, A 7.25-7.26 entering values, A 7.22-7.24, A 7.26-7.27 hyperlinks to documents in other programs, A 7.21-7.25
creating hyperlink fields, A 7.21-7.22
enteri Id values, A 7.22-7.24. n .24-7.25
"s' ghyperlin s, A 7.25-7.28
addin I A 7.25-7.26
enteri erlinks to HTML files,
A 7.26-7.27Hy.pertext Markup Language (TML), A 7.2-7.20 importing files as Access tables, A 7.16-7.20 savings
Access objects, A 7.3-7.6 temp ates, A 7.10-7.12 upd@tin*.@Web y)ages, A [email protected] viewing tiles using Internet Explorer, A 7.7-7.10 hyphen (-), wildcard character, A 4.8
icons, WIN95 6, WIN95 9, A 9.2 actions on, effects, WIN95 48, WIN95 49 activating, WIN98 4-6, WIN98 9 deleting, WIN95 48 large icon view, WIN95 45 My Computer window, WIN95 42 opening, WIN95 43
1
printers, WIN95 43queries, A 8.14selecting, WIN95 8storage devices, WIN95 42
under-lined names, WIN98 4-6 if statement, A 10.30Image tool, A 5.20'Import/export" actions, A 9.1 2
Import HTML Wizard dialog boxes, A 7.18-7.19impart'nl
T@g, A 6.32files as tables, A 7.16-7.20
Index tab, Help, WIN95 23-27 inner joins, A 8.33-8.34Insert Hyperlink dialog box, A 7.23 inserting. See also enteringbound controls in reports, A 6.8 characters, WIN95 35 dates in reports, A 6.16-6.17 fields in ts, A 6.7-6.8 labels in =s, A 5.29-5.30 lines in reports, A 6.22-6.23, A 6.28-6.29 pictures in forms, A 5.30-5.32 sections

in reports, A 6.20-6.22, A 6.25 tab controls on forms, A 5.35 titles in reports, A 6.20-6.22 insertion anomaly, RD 16 insertion point, WIN95 33
moving, WIN95 34Insert Object dialog box, A 6.41
Insert Picture dialog box, A 4.24, A 5.31Integer data type, Visual Basic, A 10.37 integrating Access with other programs, A 6.32-6.47
embedding charts. See embedding charts inreports
exporting tables as Excel spreadsheets,A 6,45-6.46
9 7
linkiniz Word documents in reports. See linkingWora documents in reports
inte@rity constraints, RD 1 3omain, RD 13
entity, RD 13integrity, referential, RD 13Internet, A 7.2. See also hyperlinks to Web pages;
HypertextInternet communications, WIN98 15Internet Connection Wizard, WIN98 15Internet Explorer, WIN98 15
browsing Web, WIN98 14Internet ic . WIN98 14Markur ML); Web pages;
WorldWide'
Internet g fffML files, A 7.7-7.10
Intranets, A 7.3IsNull function, A 10.31
join(s), A 3.6joining tables, A 8.33-8.41
inner joins, A 8.33-8-34left outer joins, A 8.34-8.35 right outer joins, A 8.35-8.36 self-joins, A 8.36-8-41 join line, Relationships window, A 3.10 join Properties dialog box, A 8.38 )Umping-to Help topics, WIN95 21-22
key(s), RD 5-7alternate, RD 5 candidate, RD 5, RD 7, RD 20 composite, A 2.2-2.3, RD 6, RD 13, RD 19 concatenated, RD 6 foreign, A 1.6, RD 6-10, RD 13 primary. See primary keys sort. See sort keys
keyboard gi@WIN95 6chan g records, A 2.26 copying files, WIN95 47-48 error correction, WIN95 32-33 F2 key, A 2.26shortcut (hot) keys, A 9.3
label(s)

adding to fori-ns, A 5.29-5.30, A 9.25 captions, A 5.24-5.26cl@-anging Cap@ion property, A 6.11-6.12 deleting. See deleting labelsreport titles, A 6.21siting subforms, A 5.40-5.41 label bo"xes, selecting and aligning, A 5.36-5.37 large icon view, disk
contents, WIN95 45 Last function, A 8.1 0I.aunch Internet Explorer Browser button, WIN98 8 Launch Outlook Express button, WIN98 8 layout, reports, A 4.20Left Arrow image, A 10.5 left-handed use of mouse, WIN95 7 left outer joins, A 8.34-8.35Len function, A 10.38Like comparison operator, A 5.8lines, adding to reports, A 6.22-6.23, A 6.28-6.29 Line tool, A 5.20 linking, A 6.32
Word documents in reports. See linking Word documents in reports linking Word documents in reports, A 6.40-6.44 editing document in Word, A 6.42-6.43 resizit@g Detail section, A 6.40
77777updating links manually, A 6.43-6.44 links, underlined icon names resembling, WIN98 4-6Links toolbar, WIN98 7 list boxes, WIN95 19-20
adding to forms, A 9.24-9.27 deleting labels, A 9.27drop-down, WIN95 20moving in, WIN95 19resizing, A 9.27, A 9.34
viewing options, WIN95 19 List Box tool, A 5.20 list-of-values matches, A 5.10-5.11 Load event procedure
Queries dialog box, A 10.52
'R,eports dialog box, A 10.46-10.48lo g a procedures, A 10.22lo i'al operators, A 3.24-3.27
And, A 3.24, A 3.25, A 5.13-5.14Not, A 5.11
Or, A 3.24, A 3.26-3.27, A 5.13-5.14 Lonr dat,c @,tzyape ri Visual Basic, A 10.37 Loo up data type, A 2.5 Lookup Wizard dialog boxes, A 5.5-5.6 Lookup Wizard fields, A 5.4-5.8 loop(s), A 10.38-10.39 loop bodies, A 10.38, A 10.39 loop statements, A 10.38-10.39 lost data. See data loss
macro(s), A 9.4-9.53 adding actions. See adding actions to macros choosing actions, A 9.6 groups. See macro groups Help system, A 9.12-9.14 opening Macro window, A 9.5 running, A 9.7, A 9.16 saving, A 9.16 single-stepping, A 9.9-9.10 macro groups, A 9.36-9.40
creating custom toolbars, A 10.2-10.8 Macro Single Step dialog box, A 9.10 Macro window, opening, A 9.5 main directory, WIN95 45-46 maintaining databases. See updating databases maintaining table data, forms, A 4.11-4.12 Make Tabl@ dialog box, A 8.23 make-table queries, A 8.21-8.24 many-to-many relationships (M:N), RD 9-10 Max function, A 3.31, A 8.10Maximize button, WIN95 15 maximizing windows, WIN95 17 Memo data type, A 2.5 menu(s), WIN95 8, WIN95 17-18 conventions, WIN95 18 tions. See menu options OP
selecting commands, WIN95 17-18 starting applications, WIN95 8-10 submenus, WIN95 18 titles, WIN95 17 menu bars, WIN95 14, WIN95 17, A 10.11 built-in, A 10.11 custom. See custom menu bars switchboards, A 9.2, A 9.3 menu conventions, WIN95 17-18 menu options, WIN95 21 checl" marks, WIN95 18 ellipsis (... ), WIN95 18 grayed-out, WIN95 18 triangles, WIN95 18 methods, A 10.47
Microsofton-line help, WIN98 15

Windows fj'pdate link to Web site,WIN98 8, WIN98 9, WIN98 1.5Microsoft Access. See Access
Microsoft Access window, A 1.8Microsoft Windows 3.l. See Windows 3.1Microsoft Windows 95. See Windows 95Mid function, A 10.38Min function, A 3.31, A 8.10
1 1
Minimize button, WIN95 15, WIN95 16 minimizing windows, WIN95 15 "Miscellaneous" actions, A 9.12 Modal property, A 9.24 modifying -
queries, A 3.28-3.29 records, A 2.26-2.27 table structure. See modifying table structure modifying table structure, A 2.17-2.22 adding fields, A 2.19-2.20
adding records to modified tables, A 2.22
changin -2.22 eleting%field properties, A 2.20
d elds, A 2.18moving fields, A 2.18-2.19saving modified structure, A 2.21
modules, Visual Basic. See Visual Basic modules Module window, adding event procedures, A 10.32 More Controls tool, A 5.20 mouse, WIN95 6-9
clicking. See clicking
double-clicking, WIN95 8 dra in . See dragging
leftlan5ed use, WIN95 7 pointing with, WIN95 7 room to move, WIN95 7 mouse operation, WIN98 9 mouse pointer, WIN95 6, WIN95 11insertion point compared with, WIN95 33 moving, WIN95 7-8 moving. See also navigating; switching controls. See moving controls fields in table structure, A 2.18-2.19 files, WIN95 47-48 graphics in reports, A 4.25 insertion point, WIN95 33 in list boxes, WIN95 23 mouse, room for, WIN95 7 mouse pointer, WIN95 7-8 windows, WIN95 16-17 movln controls
formgs, A 5.22-5.24reports, A 6.8-6.10
MsgBox action, A 9.14-9.16 multi-page forms, A 5.34-5.42adding fields to tab control, A 5.35-5.36 adding subforms, A 5.38-5.42 inserting tab controls, A 5.35 selecting and aligning label boxes, A 5.36-5.37 sizing columns in subforms, A 5.42 sizing Detail section, A 5.34 viewing, A 5.42
multiple selection criteria. See logical operators multitasking, WIN95 3, WIN95 10-12 closigg applications, WIN95 12
switching between applications, WIN95 12 WordPacl and Paint applications, WIN95 10-12 My Briefcase feature, replicas. See replicas My Computer icon, WIN95 42
opening, WIN95 43
My Computer window, WIN95 50opening, WIN95 42, WIN95 43
name(s), files. See filenames namingdat@'base files, A 4.29 fields, A 2.4 objects, A 2.4 tables, A 2.13 navigating
datasheets, A 1.12, A 2.26
forms, A 4.6, A 4.16 navigation buttons, A 1.12Navigation Buttons property, A 9.24navigation mode, A 2.26New Form dialog box, A 1.17New Query dialog box, A 3.3

New Report dialog box, A 4.18New Ta6le dialo@ box, A 2.7 non-matching values, queries, A 5.11-5.12 nonkey attributes, RD 7 nonunique sort keys, A 3.13 normal forms, RD 17-23
defined, RD 17first, RD 17-18second, RD 18-20
third, RD 20-22 normalization, RD 16-22 Not logical operator, A 5.11 nullifies option, RD 13 null value, A 2.12, A 10.30, RD 11, RD 13-14 Number data type, A 2.5 numbering RagFs in reports, A 6.18-6.19 number symbol (#), wildcard character,
A 4.8, A 5.8
object(s), A 6.32copying in same database, A 9.32naming, A 2.4selecting, WIN95 8
Ob ect Linking and Embedding (OLE), A 6.32"0:)ject manipulation" actions, A 9.12Ob,ectNames table, A 9.17-9.22
adding records, A 9.20creating queries, A 9.21-9.22 creating structure, A 9.18-9.19 object-oriented languages, A 10.20 object tabs, A 1.10Office Assistant, A 1.18-1.20 closing, A 1.9OLE. See Object Linking and Embedding (OLE)OLE Object data type, A 2.5on-line Help, WIN98 15one-to-many relationships (1:M), A 3.7, A 3.8-3.10,
RD 8one-to-one relationships (1:1), RD 8 Open button, WIN95 38, WIN95 39 Open dialog box, A 1.9, WIN95 38 OpenForm action, A 9.11 openingbooks in Help, WIN95 22 databases, A 1.9-1.10, A 2.6 files, WIN95 38-39 icons, WIN95 42Macro window, A 9.5tables. See opening tableswindows, WIN95 41, WIN95 42 opening objects, WIN98 9 opening tables, A 1.11
Design view, A 5.4Open Internet Address dialog box, A 7.7OpenModule action, A 9.11
Index 9
OEM=
Open Page image, A 10.5O@enQuery action, A 9.11OpenReport action, A 9.11OpenTaGle action, A 9.1 1
'kb r, WIN95 23 open windows, tas a
operating systems, WIN95 3. See also Windows 3.1; Windows 95 option buttons, WIN95 21Option Button tool, A 5.20 Option Group tool, A 5.20 organizing
data, A 1.5 files, WIN95 47Or logical operator, A 3.24, A 3.26-3.27, A 5.13-5.14orphaned records, A 3.7 outer joins
left, A 8.34-8.35 right, A 8.35-8.36
page(s)collating, WIN95 40
selected, printing, WIN95 40Page Break tool, A 5.20Page Footer section, A 6.2, A 6.3, A 6.6 Pa@e Header section, A 6.2, A 6.3, A 6.6 @dding Date function, A 6.16-6.17
page num bers, A 6.18-6.19 page 'umbering, reports, A 6.18-6.19 Page Numbers dialog box, A 6.18
pa orientation, reports, A 4.20
Pa WIN95 40 Pa

at same time with,
WIN95 10-parameter(s), Visual Basic functions, A 10.24 parameter queries, A 5.14-5.15 parentheses (()), root directory, WIN95 45 partial dependency, RD 15
in normal forms, RD 18 pasting copied records into tables, A 2.24 pattern matches, queries, A 5.8-5.10 Pencil image, A 10.5peripheral device support, WIN98 15
picturesforms, A 5.30-5.32
reports, A 4..23-4.28 planning, user interfaces, A 9.17 pointing method, WIN95 6-8 pound symbol (#), wildcard character, A 4.8, A 5.8 power management, WIN98 15 previewing
charts, A 6.35 documents, WIN95 39 form records, A 4.9 reports, A 4.21, A 4.26, A 6.14-6.15,
A 6.30-6.31, A 6.39, A 6.42PreviewQuery function, Queries dialog box,
A 10.53PreviewReport function, Reports dialog box,
A 10.50primary keys, A 1.6, RD 5-11, RD 18, RD 20-22 advantages of using, A 2.12 changing or deleting, RD 13
constraints, RD 13 designing databases, A 2.2-2.3 in many-to-i-nany relationships, RD 10 in normal forms, RD 18, RD 20-22 in one-to-many relationships, RD 9
in one-to-one relationships, RD 8 sort, A 3.13specifying, A 2.12-2.13 primary tables, A 3.7
Print dialog box, WIN95 39-40printers
icons, WIN95 42t-nodifying setup, WIN95 40 selecting, WIN95 40viewing, WIN95 40
Printers folders, WIN95 42 printingcollating pages, WIN95 40 files, WIN95 39-40forms, A 1.16, A 4.10number of copies, WIN95 40parts of documents, WIN95 40query results, A 1.16reports, A 1.22, A 4.26-4.27, A 6.31, A 6.44 tables, A 1.13, A 2.16, A 2.27
Print Preview, WIN95 39. See also previewing Print range box, WIN95 40PrintRep6rt function, Reports dialog box, A 10.50 private procedures, A 10.22 profiles, A 7.10, A 7.11
saved, creating HTML files, A 7.13-7.15 program(s). See active programs; applications; specifi ' c applications properties
events, A 10.20 fields. See field properties form, dialog boxes. See form properties menu bars, setting, A 10.17 toolbars, A 10.10
Properties button, WIN95 40 public rocedures, A 1 0.22Publis@to the Web Wizard, A 7.3-7.6, A 7.12QBE. See query by example (QBE)
queries, A 1.14-1.16, A 3..1-3.34, A 5.8-5.15 action. See action queries adding calculated fields, A 3.29-3.31 addin@ fields to design, A 5.12-5.13 apply@ng filters saved as, A 5.46-5.47 ca c ulations. See calculations creating,, A 1.15, A 3.10-3.11 crosstah. See crosstab queries custom reports, A 6.4-6.5Design view, A 6.5 displaying list,,A 5.46 exporting results to Excel, A 6.45 filtering data, A 3.16-3.17 find duplicates, A 8.14-8.16 find unmatched, A 8.16-8.18 icons, A 8.14list-of-values matches, A 5.10-5.11 non-matching values, A 5.11-5.12 ObjectNames table, A 9.21-9.22 And and Or operators used together,

A 5.12-5.14parameter, A 5.14-5.15 pattern matches, A 5.8-5.10 printing results, A 1 .16 Query window, A 3.2-3.4 running, A 3.4, A 3.5-3.6, A 3.11 saving, A 3.11 saving filters as, A 5.45-5.46 select, A 3.2selecting fields, A 3.5 selection criteria. See logical operators; selection criteria
sorting results. See sorting data
'ble relationshipstable relationships. See ta
top values, A 8.18-8-20Queries dialog box, A 10.51-10.54 creating, A 9.32-9.34 query by example (QBE), A 3.2
Query window, A 3.2-3.4Or logical operator, A 3.26 Query Wizards, A 1.14-1-15 question mark
testing event procedures, A 10.27, A 10-28 wildcard character, A 4.8, A 5.8Quick Launch toolbar, WIN98 6-8
radio buttons, WIN95 20-21 records, A 1.5adding to tables, A 2.14-2.16, A 2.22, A 9.20 adding using forms, A 4.12 changing, A 2.26-2.27, A 4.11 copying from another Access database,
A 2.22-2.24deleting. See deleting records detail. @ee detail records entering in tables, A 5.7-5.8 filtering, A 3.16-3.17 finding. See finding data; queries forms. See form(s) groups, calculating statistics, A 3.33-3.34 orphaned, A 3.7asting into tables, A 2.24 p
se ecting. See queries record selectors, A 1.11 Record Selectors property, A 9.24 Rectangle tool, A 5.20Recycle Bin
emptying, WIN95 48retrieving files, WIN95 48 redundancy, denormalization and, RD 22 Reference Windows,
A 1.4, WIN95 4 referential integrity, A 3.8, RD 13 related tables, A 3.7 relational databases, A 1.5-1.6, RD 5 relational database management systems,
A 1.6-1.7relations, RD 4-5
anomalies, RD 15-16 characteristics, RD 4 defined, RD 4 dependencies, RD 13-15 determinates, RD 13-15 entity-relationship diagrams, RD 11-13 norn@alizing, RD 17-23 unnormalized, RD 17 relationsh ' s RD 7-11
'p '
entity subtypes, RD 11many-to-many, RD 9-10one-to-many, RD 8one-to-one, RD 8
Relationships dialog box, A 3.9Relationships window, A 3.8, A 3.10 removing. See also deleting; deleting fields; deleting recordsForm Footer sections, A 5.28
Rename option, WIN95 49 renaming files, WIN95 49 repeating groups, in normal forms, RD 17-18 replacing text, WIN95 34 replicas, A 8.4-8.9creating, A 8.4-8.6

deleting, A 8.9nchronizing with Design Master, A 8.6-8.9
rere 1.23
6.16-6.176.28-6.29
A 6.25Auto 1)ort: lumnar Wizard, A 1.21-1.22 close-up display, A 4.21 -4.22 c nR, A 1.22, A 4.27, A 6.44 co rols. See controls in reports custom. See custom reportsDesign view, A 4.22embedding charts. See embedding charts in reports
hid@ng duplicate values, A 6,29-6-30 linking Word documents in. See linking Word documents in reports age numbers, A 6.18-6-19 p
previewing, A 4.26, A 6.14-6.15, A 6.30-6.31, A 6.39, A 6.42 printing, A 1.22, A 4.26-4.27, A 6.31, A 6.44 saving, A 4.27, A 6.31, A 6.39, A 6.44 sections. See sections in reports; specific sections
sorting and grouping data, A 6.23-6.25 titles, A 6.20-6-22Report Footer section, A 6.2, A 6.3
Report Header section, A 6.2, A 6.3, A 6.4 adding to reports, A 6.20-6.22Re re, A 10.46-10-48 PrintReport
creating, A 9.23-9.24
Form view, A 9.26
Re ort window, Design view, A 6.5-6.8
4.16-4.23Re
A 4.19nd page orientation, A 4.20 for report, A 4.17-4.18 20
starting, A 4.17Report Wizard Examples dialog box, A 4.19 Re@ort Wizard Tips dialog box, A 4.19
tresizing. See sizing
Restore button, WIN95 15 restoring windows, WIN95 16 restricted option, RD 13 retrieving, deleted files, WIN95 48 right outer joins, A 8.35-8.36 root directory, WIN95 45 rows, RD 4row selectors, A 1.11 RunMacro action, A 9.11 running
macros, A 9.7, A 9.16 queries , A 3.4, A 3.5 -3.6, A 3.11 running programs, WIN98 9
sample applications, Visual Basic, A 10-23 Save As aialog box, WIN95 36Save button, WIN95 36
Table Datasheet toolbar, A 2.16Save Changes to Document? message,, WIN95 36 saving
Access objects in HTML files, A 7.3-7.6 databases, A 2.16-2.17 filters as queries, A 5.45-5.46 forms, A 1.16, A 5.25 macros, A 9.16
Index
modified table structure, A 2.21 modules, A 10.27 queries, A 3.1 1 report esigns, A 6.11 r ports, A 4.27, A 6.31, A 6.39, A 6.44 table structure, A 2.13 Visual Basic M'Odules, A 10.40 saving files, WIN95 36 scroll boxes, moving, WIN95 19
(2NF), RD 18-21 second normal form
secondary sort keys, A 3.13 sections in reports, A 6.2, A 6.3, A 6.4, A 6.6. See also specific sections sectors, bad, WIN95 32 selecting
actions for i-iiacros, A 9.6commands from menus, WIN95 17-18 controls, A 5.22-5.24

disk drives, WIN95 36 ting fields fields. See selec
Help topics, WIN95 22-24
icons, WIN95 6 . 36-5.37 label boxes, A 5
multiple items with checkboxes, WIN95 21 number of copies to print, WIN95 40
objects, WIN95 8 printers, WIN95 40 records. See queries single items with radio buttons, WIN95 21 sort keys, Design view, A 3.14-3-16 text, WIN95 8, WIN95 34 toolbar buttons, WIN95 19 selecting fields queries ' A 3.5 reports, A 4.17-4.18 tables, A 5.5-5.6 selecting objects, WIN98 9 selection criteria, A 3.18-3.27
comparison op orators to match ranges of values, A 3.23 3.24 exact matches, A 3.19-3-21 multiple. See logical operators
Select Objects tool, A 5.20select queries, A 3.2
crosstab queries compared, A 8,10-8-11
Select Query'wliidow, Design view, A 3.3-3.4
.43SELECT statement , A 8.42, A 8
self-joins, A 8.36-8.41 semantic object modeling, RD 15 SetFocus method, A 10.47 setting clock, WIN95 6 setup, printer, WIN95 40 shortcut keys, A 9.3Shortcut Menu property, A 9.24 Show Desktop button, WIN98 8 Show Table dialog box, A 3.8-3.9
shrinking windows, WIN95 15Shut down the computer option, WIN95 12 shutting down Windows 93, WIN95 12 Simple Query Wizard, A 1.14-1.15 Sim@le Query Wizard dialog box, A 1.14-1-15
single-clicking, WIN98 9Single data type, Visual Basic, A 10-37single quotation mark ('), comments in VisualBasic procedures, A 10.26 Single Step button, A 9.9 single-stepping macros, A 9.9-9.1 0 size
columns in datashects, A 3.22 controls, A 4.23 fields, assigning, A 2.5-2.6
files, WIN95 45fonts in datasheets, A 3.21
sizing
buttons, WIN95 15 charts, A 6.36, A 6.38 controls, A 5.26-5.27
controls in reports, A 6.10-6.1 1, A 6.12 Detail section, A 5.34, A 6.40 forms, A 9.30-9.31
list boxes, A 9.27, A 9.34 subforms, A 5.40-5.41 windows, WIN95 15-17 sizing handfes, WIN95 17
software. See active programs; appl'specific apple .cations ications;software, upgrading, WIN98 2
Sort Ascendina @utton, A 3.12-3.13 Sort Descendi@g button, A 3.12 Sorting and Gr@ul)ing button, A 6.24 Sorting and Grouping dialog box, A 6.25 sor@ing data, A 1. 1 6, A 3.12-3.16 data types, A 3.12
deta,, records, A 4.20
multiple fields in Design view, A 3.13-3.16 reports, A 6.23-6.25
toolbar buttons, A 3.12-3.13 sort keys, A 3.12

no ' nunique, A 3.13 primary, A 3.13
SeFondary, A 3.13 s
electing in Design view, A 3.14-3.16Sorting data in reports, A 6.24-6.25
Sorting multiple fields, A 3.13-3.16unique, A 3.13
sour@e PTogram, A 6.32 speaker Coll, WIN95 6 Specific Record box, A 1.12 specifying primary keys, A 2.12-2.13 speed, WIN98 15 speed,
, @unniiig applications, WIN98 15
spreadsheets, exporting Access tables as, A 6.45-6.46 '
ed
SQL. See Structur Query @a@guage (SQL)
square [)rackets ([I), wildcarct character, A 4.8standard modules. 10.22
ad A 10.34-10.42St cr( , A 10.23-10-27
anc N98 13StandSt e, A 10.5Start 6, WIN95 9
art menu, WIN98 8-9 starting
Access, A 1.7-1.99
applications, WIN 5 8-10Form Wizard, A 4.2Graph, A 6.35-6.36Help, WIN95 21
Report Wizard, A 4.17W'ndows 95, WIN95 5-6
Start menu, starting applications, WIN95 9-10 Startup dia.og box, A 10.55
startup options, A 10-54-10.56testing, A 10.55-10.56statements
SQL, A 8,41-8.43
Visual Basic. See Visual Basic statements; specific statements static 1?ages, A 7.3status @ar, WIN95 14StDev function, A 8.10Storage devices. See also disk(s)
1 . cons, WIN95 42
String data e Visual Basic, A 10.37
t
strings, Vis,,YFB'asic functions, A 10.23

structured Que@y Language (SQL), A 8.41-8@43basic rorm of statements, A 8.42
SELECT statement, 8.42, A 8.43Student Disk
adding files, WIN95 41-42
N95 50-5i
N95 44-46Su N95 45-46
Su ontrol Wizards, A 5.38-5.42 A 5.420-5.41
Ort tool, A 5.2095 18
(subroutines), A 10.213.31, A 6.@6-6-27, A 8.1 0A 7.8, A 9.2-9.3, A 9.35-9.48
a4
command buttons, A 9.41-9.43a! 9 custom menu bars, A I 0. 1 8
perties, A 9.46A 9.40
9.43-9.44, A 9.4745-9.46
macro groups, A 9.36-9.40 modifying, A 9.45
Switchboard M ager, A 9.40-9.47 testing comrnana"
d bu ttons, A 9.44 Switchboard items, A 9.40
Switchboard Macros toolbar, A 10.3 Switchboard Manager, A 9.40-9.47 exit ng, A 9.43
Switchboard Manager dialog box, A 9.41 switching
to datasheets, A 2.21 to Design view, A 6.35 to desktop, WIN95 10 to Form @i@w, A 5.25 @o large icon -
view, WIN95 45 between programs, WIN95 12synchronization, @ 8.4, A 8.6-8.9Synchronize Database dialog box, A 8.8 syntax errors, Visual Basic statements, A 10.32
tab controls, WIN95 20-21creating inulti-page forms. See mult'
forms i-pagePelp, WIN95 22-24
Tab Control tool, A 5.20 table(s), A 1,5, A 2,6-2.16

adding records, A 2.14-2@16, 2.22, A 9.20 characteristics, RD 4
column width, A 5.6
copying records, A 2.22-2.24 creating, A 2.6-2.14
designing. See designing tables designing databases, A 2.2-2.3 entering records, A 5.7-5.8
exporting as Excel spreadsheets, A 6.45-6.46 history, A 8.21
importing HTML files as, A 7.16-7.20 joinipg. See joining tables n 'ng
ctp@A 2.'3
@Tbmi e aines. See ObjectNames table
opening. See opening tables
pasting copied records into, A 2.24 primary, A 3.7
printing, A 1.13, A 2.16, A 2.27 rel ated, A 3.7
relationships. See table relationships selecting fi-elds, A 5.5-5.6 structure. See modifying table structure; table structure
Table Datasheet toolbar, Save button, A 2.16 table relationships, A 3.6-3.11defining, A 3.8-3.11 one-to-many, A 3.7, A 3.8-3.10 referential integrity, A 3.8 table structure
modifying. See modifying table structure ObjectNames table, A 9.18-9.19 saving, A 2.13
Table window, Design view, A 2.7 tags, A 7.2taskbar, WIN95 6
buttons. See taskbar buttons taskbar buttons, WIN95 6, WIN95 7-8 active pro@ram, WIN95 12
open windows, WIN95 15 tasl,bar, displaying toolbars, WIN98 6-8 Task References, WIN95 5 technical terms, definitions, WIN95 23 televisions, running computer through, WIN98 2 templates, HTML, A 7.10-7.12 testing
command buttons, A 9.44 custom menu bars, A 10.18-10.29 custom toolbars, A 10.10-10.11 dialog box design, A 9.34 dialog boxes, A 10.51, A 10.54 event procedures. See testing event procedures form design, A 9.31 startup tions, A 10.55-10.56
0
user interfaces, A 10.56
testing event procedures, A 10.33, A 10.42,A 10.45-10.46
Debug window, A 10.27-10.28 text, WIN95 32-34blocks, WIN95 34
entering in WinPad, WIN95 32-33 error correction, WIN95 32-33 inserting characters, WIN95 45 insertion point, WIN95 33-34 replacing, WIN95 34selecting, WIN95 8, WIN95 34 typing in WordPad, WIN95 32-33 word wrap, WIN95 32 text boxes, A 9.3
sizing, A 5.26-5.27Text Box tool, A 5.20

Text data type, A 2.5third normal form (3NF), RD 20-22 3V2FIoppy (A:) icon, WIN95 31 3.1 Notes, WIN95 5 tilde (-), filenames, WIN95 35 time
of file creation or revision, WIN95 45 setting, WIN95 6 title(s)adding to reports, A 6.20-6.22menus, WIN95 14, WIN95 17windows, WIN95 14 title bar, WIN95 14 Toggle Button tool, A 5.20 toggle switches,
WIN95 18 toolbar(s), WIN95 14, WIN95 19-20. See also specific toolbarsbuift-in, A 10.2 buttons. See toolbar buttons
AC
custom. See custom toolbarscustomizing WIN98 8d ispla@ing on taskbar, WIN98 6-8 dock e A 10.8enabling, WIN98 7floating, A 10.2, A 10.8hidin A 10.9-10-10switchboards, A 9.2, A 9.3Web view, WIN98 13-14toolbar buttons, WIN95 8, WIN95 14, WIN95 19 finding out function, WIN95 19
grouping, A 10.7Quick Launch, WIN98 8selecting, WIN95 19sprtigg data,.A 3.12-3.13 toolbar properties, A 10.10 Toolbar-Pr6perties dialog box, A
10.4 tootbox, forms, A 5.20Toolbox button, A 6.6Tooltips, WIN95 7-8, WIN95 19Top Values property, queries, A 8.18-8.20 top values queries, A 8.18-8.20 totals, reports, calculating, A 6.26-6.27 transitive dependency, RD 15TROUBLE? paragraphs, A 1.4, WIN95 4 true-statement group, A 10.30-10.31 Tune-Up Wizard, WIN98 15 tuples, RD 4turning off computer, WIN95 12-13 tutori@Is, effective use, A 1.4, WIN95 4-5 TV Viewer, WIN98 2, WIN98 15 Type Size drop-down list box, WIN95 20 typing text in WordPad, WIN95 33
UCase function, A 10.26 unbound controls, A 5.19 Unbound Object Frame tool, A 5.20 underlined terms, definitions, WIN95 23 underlining, icon names, WIN98 4-6 unique sort keys, A 3.13Universal Resource Locators (URLs), A 7.2 Universal serial bus (USB) technology, WIN98 15 unnormalized relations, RD 17 up arrow button, WIN95 19 update anomaly, RD 16 update queries, A 8.21, A 8.29-8.32 updatingdata@ases. See updating databases links, manually, A 6.43-6.44 Web pages, A 7.13-7.15 updating databases, A 2.24-2.27 changing records, A 2.26-2.27 deleting records, A 2.24-2.27 A 2.25 upgrading, WIN98 2-3
advantages versus disadvantages, WIN98 3 URLS. See Universal Resource Locators (URI,s) user interfaces, A 9.2-9.4
dialog boxes. See dialog boxes; specific dialog boxesGUls, A 9.2ObjectNames table. See ObjectNai-nes table planning, A 9.17 switchboards, A 9.2-9.3 testing, A 10.56

Validation Rule property value, ObjectNamestable, A 9.19Validation Text property, ObjectNames table,A 9.19
valuesduplicate, hiding in reports, A 6.29-6.30 entering in hyperlink fields, A 7.22-7.24, A 7.26-7.27null, A 10.30
Var function, A 8.10variables, standard modules, A 10.24 Variant data type, Visual Basic, A 10.37 verifying file location, WIN95 47-48 video playback, WIN98 15View Channels button, WIN98 8Visible property, A 10.43
Visual.Basic, A 9.4, A 10.20-10.42 coding, A 10.20, A 10.46-10.51 data types, A 10.37 events, A 10.20-10.21 functions. See Visual Basic functions Help system, A 10.22-10.23 methods, A 10.47 i-nodules. See Visual Basic Modules procedures. See event procedures sample applications, A 10.23 statements. See assignment statements; Visual Basic statements; specific statements Visual Basic functions, A 10.21adding to standard modules, A 10.34-10.42 creating, A 10.24-10.27, A 10.36-10.41 creating in standard modules, A 10.23-10.27 Visual Basic modules, A 10.21-10.22 class, A 10.22compiling, A 10.40 saving, A 10.27, A 10.40 standard. See standard modules viewing procedures, A 10.40-10.41 Visual Basic, A 10.21-10.22
Visual Basic statements, A 1 0.20. See also specific statements
assignment statements. See assignment statementscalling, A 10.21 false-statement group, A 10.30-10.31 loop, A 10.38-10.39 syntax errors, A 10.32true-statemeiit group, A 10.30-10.31
wallpaper, Web pages, WIN98 1 0-1 1Web. See hypcriii-iks to Web pages; Hypertext Markup Language (HTML); Web pages; World Wide Web (WWW)Web browsers, A 7.2Web components, adding to desktop,WIN98 11-12Web pages, A 7.3, WIN98 4. See also fiypertext
Mark -an, a e (HTML)
by ' lpaper, WIN98 10-11up '
backgrou@, waperi.i,ks. Se, hypertinks to Web pages
rn ng to, WIN98 14rctu 'Iti ' g, upd, n A 7.13 -7.15
Web srvr" A 7.2
Web toolbar, A 7.7

Web view, WIN98 12-14toolbars, WIN98 13-14
What's This command, A 1.18w'ldcard characters, A 4.8-4.9, A 5.8windows, WIN95 15-17. See also specificwindows
active, WIN95 12
controls. See coiitrol(s) displaying, WIN95 16 Help, WIN95 21 hiding, WIN95 11 movin , WIN95 16-17 mutpte, at one time, WIN95 10-11 open, WIN95 17 opening, WIN95 42-43 Reference Windows, WIN95 4 restoring, WIN95 15 sizing, WIN95 15-17 Windows 3.1, WIN95 4 deleting icons, WIN95 48 double-clicking, WIN95 8 filcnames, WIN95 35 finding program windows, WIN95 11 switching between programs, WIN95 12 3.1 Notes, WIN95 5 using applications with Windows 95,
WIN95 29Windows 95, WIN95 3
applications, WIN95 3, WIN95 29. See also WordPaddesktop. See desktopshutting down, WIN95 12similarities and differences between Windows 3.1 and. See Windows 3.1 software available for, WIN95 3 startng, WIN95 5-6
Witdo s 3 .1 applications, WIN95 29
Windows 95 Student Disk. See Student DiskWindows 98, Windows 95 compared,WIN98 3-4, WIN98 6-7, WIN98 8, WIN98 9,WIN98 12-13Windows Update link, WIN98 8, WIN98 9, WIN98 15
window title, WIN95 14word(s)
definitions, WIN95 23
searching for, in Help, WIN95 22, WIN95 24 Word, linking documents in reports. See linking Word documents in reports
WordPadclosing, WIN95 10, WIN95 12, WIN95 37 running Paint at same time with, WIN95 10-12 starting, WIN95 9 typing text., WIN95 32-33 word- sing application. See WordPadWord =w, A 6.42word wrap, WIN95 32, WIN95 33 workspace, WIN95 11World Wide Web (WWW), A 7.2-7.3. See also hyperliilks to Web pages; Hypertext Markup Language (HTML); Web pages; Web entries
browsing with Windows Explorer, WIN98 14Active Desktop See Active Desktop
desktop appearance resembling, WIN98 4 WWW See hyperlinks to Web pages; Hypertext Markup Language HTML); Web pages; World Wide Web (WWW)
Yes/No data type, A 2.5
Zoom box, A 3.28

XXXXX
Tutorial 4
Creating Forms and Reports
A 4.2 Session 4.1
A 4.2 Creating a Form Using the Form WizardA 4.4 Changing a Form’s AutoFormatA 4.6 Navigating a FormA 4.7 Finding Data Using a FormA 4.9 Previewing and Printing Selected Form RecordsA 4.11 Maintaining Table Data Using a Form
Session 4.1
A 4.13 Creating a Form with a Main Form and a SubformA 4.16 Creating a Report Using the Report WizardA 4.23 Inserting a Picture on a ReportA 4.28 Compacting a Database
Quick Check A 4.30
A4.2 Tutorial 4 Creating Forms and Reports
Session 4.1
Creating a Form Using the Form Wizard
A form is an object you use to maintain, view, and print records in a database. In Access, you can design your own forms or use Form Wizards to create them for you automatically.
You used the AutoForm Wizard, which creates a form automatically using all the fields in the selected table or query, to create the Customer Data form. To create the form for the Order table, you’ll use the Form Wizard. The Form Wizard allows you to choose some or all of the fields in the selected table or query, choose fields from other tables and queries, and display the chosen fields in any order on the form. You can also choose a style for the form.
To open the Restaurant database and activate the Form Wizard:
1. Open database, e.g., Restaurant2. Click Forms tab3. Click New button4. Click Form Wizard, click list arrow for choosing table or query, click, e.g., Order
to select this table as the source for the form, then click OK button.

To finish creating the form using the Form Wizard:
5. _ Click, e.g., OrderNum in the Available Fields list box (if necessary), and then click the [>] button to move the field to the Selected Fields list box.
A 4.3 TUTORIAL 4: CREATING FORMS AND REPORTS
6. _ Repeat the same process for each desired field in the order you want them to appear.
7. _ Click the Next button to display the second Form Wizard dialog box, in which you select a layout for the form. See Figure 4-2 “Choosing a layout for the form” Form Wizard. What layout would you like for your form? (sample of the selected layout.) (selected layout).
The layout choices are columnar, tabular, datasheet, and justified. A sample of the selected layout appears on the left side of the dialog box.
8. _Click each of the option buttons and review the corresponding sample layout.
The tabular and datasheet layouts display the fields from multiple records at one time, whereas the columnar and justified layouts display the fields from one record at a time. Barbara thinks the columnar layout is the appropriate arrangement for displaying and updating data in the table, so you’‘ choose this layout.
9. _ Click the Columnar option button (if necessary), and then click the Next button. Access displays the third Form Wizard dialog box, in which you choose a style for the form. See Figure 4-3. “Choosing a stylefor the form” Form Wizard What style would you like? (Form Wizard styles): Clouds, Colorful1, colorful2 Dusk, Evergeeen, Flax, International, Pattern, Standard, Stone. (sameple ofthe selected style)
10. _ Click the desired Form Wizard style, called an AutoFormat. You can change it later even after exiting the Form Wizard.
A 4.4 TUTORIAL 4: CREATING FORMS AND REPORTS
11. _ Click Next button12. _ Type in the title for the form, under which it is saved and is printed at top of form13. _ Click radio button of option of displaying form to 1. View or enter information,
or 2. Modify the form’s design.14. _ Click Finish button to complete form.

Changing a Form’s AutoFormat
You can change a form’s appearance by choosing a different AutoFormat for the form. As you learned when you created the Order Data form, an AutoFormat is a predefined style for a form (or report). The AutoFormats available for a form are the ones you see when you select the form’s style using the Form Wizard. To change an AutoFormat, you must switch to Design view.
REFERENCE WINDOW: CHANGING A FORM’S AUTOFORMAT
15. _ Display the form in Design view.16. _ Click the AutoFormat button on the Form Design toolbar to open the AutoFormat
dialog box.17. _ In the Form AutoFormats list box, click the AutoFormat you want for the form,
and then click the OK button
A 4.5 TUTORIAL 4: CREATING FORMS AND REPORTS
To change the AutoFormat for the Order Data form:
18. _ Click the View button for Design view on the Form View toolbar. The form is displayed in Design view. You use Design view to modify an existing form or to create a form from scratch.
19. _ Click the AutoFormat button on the Form Design toolbar. The AutoFormat dialog box opens.
20. _ Click the Options button to display the AutoFormat options. A sample of the selected AutoFormat appears to the right of the Form AutoFormats list box. The options at the bottom of the dialog box allow you to apply the selected AutoFormat or just its font, color, or border.
21. _ To select, e.g., Standard style (AutoFormat), click Standard in the Form AutoFormats list box, and then click the OK button. The AutoFormat dialog box closes, the AutoFormat is applied to the form, and the Form window in Design view becomes the active window.
A 4.6 TUTORIAL 4: CREATING FORMS AND REPORTS
22. _ Click the View button for Form view on the Form Design toolbar. The form is displayed in Form view with the new AutoFormat.
23. _ Click Save button on Form View toolbar to save the modified form.

Navigating a Form
To maintain and view data using a form, you must know how to move from field to field and from record to record. The mouse movement, selection, and placement techniques to navigate a form are the same techniques you’ve used to navigate a table datasheet and the Customer Data form you created in Tutorial 1. Also, the navigation mode and editing mode keystroke techniques are the same as those you used previously for datasheets.
To navigate through the form:
24. _ Press the Tab key to move to the CustomerNum field value, and then press the End key to move to the Paid field. Because the Paid field is a yes/no field, its value is not highlighted; instead, a dashed box appears around the field name to indicate it is the current field.
25. _ Press the Home key to move back to the OrderNum field value. The first record in the Order table still appears in the form.
26. _ Press Ctrl + End to move to the Paid field in Record 104, which is the last record in the table. The record number for the current record appears between the navigation buttons at the bottom of the form.
27. _ Click the Previous Record navigation button [<] to move to the Paid field in record 103.
28. _ Press the up-arrow key twice to move to the InvoiceAmt field value in record 103.29. _ Position the insertion point between the numbers 2 and 6 in the InvoiceAmt field
value to switch to editing mode, press the Home key to move the insertion point to the beginning of the field value, and then press the End key to move the insertion point to the end of the field value.
30. _ Click the First Record navigation button [|<] to move to the InvoiceAmt field value in the first record. The entire field value is highlighted because you have switched from editing mode to navigation mode.
31. _ Click the Next Record navigation button [>] to move to the InvoiceAmt field value in record 2, which is the next record.
A 4.7 TUTORIAL 4: CREATING FORMS AND REPORTS
Finding Data Using a Form
The Find command allows you to search the data in a form and to display only those records you want to view. You choose a field to serve as the basis for the search by making that field the current field; then you enter the value you want Access to match in the Find in field dialog box. You can use the Find command for a form or datasheet, and you can activate the command from the Edit menu or by clicking the toolbar Find button.
REFERENCE WINDOW: FINDING DATA32. _ On a form or datasheet, click anywhere in the field value you want to search.

33. _ Click the Find button on the (Form View) toolbar to open the Find in field dialog box.
34. _ In the Find What text box, type the field value you want to find35. _ Complete the remaining options, as necessary, to specify the type of search you
want Access to perform.36. _ Click the Find First button to have Access begin the search at the beginning of the
table, or click the Find Next button to begin the search at the current record.37. _ Click the Find Next button to continue the search for the next match.38. _ Click the Close button to stop the search operation.
You need to find all records in the Order table for Jean’s Country Restaurant, whose customer number is 407.
To find the records using the Order Data form:
1. Position the insertion point in the CustomerNum field value box. This is the field for which you will find matching values.
2. Click the Find button (binoculars) on the Form View toolbar to ope the Find in field dialog box. Note that the title bar of the dialog box specifies the name of the field that Access will search, in this case, the CustomerNum field.3. If the Find in field covers any part of the form, move the dialog box by dragging its title bar..
A 4.8 TUTORIAL 4: CREATING FORMS AND REPORTS
4. In the Find What text box, type 407 and then click the Find First button. Access displays record 4, which is the first record for CustomerNum 407.5. Click the Find Next button. Access displays record 51, which is the second record for CustomerNum 407.6. Click the Find Next button. Access displays record 88, which is the third record for CustomerNum 407.7. Click the Find Next button. Access displays a dialog box informing you that the search is finished.8. Click the OK button to close the dialog box.
The search value you enter can be an exact value, such as the customer number 407 you just entered, or it can include wildcard characters. A wildcard character is a place-holder you use when you know only part of a value or when you want to start or end with a specific character or match a certain pattern. Figure 4-10 shows the wildcard characters you can use when finding data.
Figure 4-10: Wildcard characters
Wildcard
Purpose Example

Character
1 0 Match any number of characters. It can be used as the first and/or last character in the character string.
th* finds the, that, this, therefore, and so on
2 ? Match any single alphabetic character. a?t finds act, aft, ant, and art
3 [ ] Match any single character within the brackets.
a[fr]t finds aft and art but not act and ant
4 ! Match any character not within brackets. a[!fr]t finds act and ant but not aft and art
5 - Match any one of a range of characters. The range must be in ascending order (a to z, not z to a).
a[d-p]t finds aft and ant but not act and art
6 # Match any single numeric character. #72 finds 072, 172, 272, 372, and so on
A 4.9 TUTORIAL 4: CREATING FORMS AND REPORTS
. . .
Previewing and Printing Selected Form Records
Access prints as many form records as can fit on a printed page. If only part of a form record fits on the bottom of a page, the remainder of the record prints on the next page. Access allows you to print all pages or a range of pages. In addition, you can print the currently selected form record.
Before printing record 82, you’ll preview the form record to see how it will look when printed.
. . . . .
A 4.10 TUTORIAL 4: CREATING FORMS AND REPORTS
. . .
A 4.11 TUTORIAL 4: CREATING FORMS AND REPORTS

Maintaining Table Data Using a Form
Maintaining data using a form is often easier that using a datasheet, because you can concentrate on al the changes required to a single record at a time. You already know how to navigate a form and find specific records. Now you’ll make the changes Barbara requested to the Order table using the Order Data form.
First, you’ll update the record for OrderNum 319.
To change the record using the Order Data form:. . . . .
You have completed the changes for order number 319. Barbara’s next update is to delete the record for order number 392. The customer who placed this order canceled it before the order was filled and processed.
To delete the record using the Order Data form:
1. Click anywhere in the OrderNum field value to make it the current record.2. Click the Find button on the Form View toolbar. The Find in field dialog box opens.3. Type 392 in the Find What text box, click the Find First button, and then click the Close button. The record for order number 392 is now the current record.
To delete the record, you first need to select the entire record by clicking anywhere in the large rectangular area surrounding the record selector.
4. Click the record selector in the top left of the form to select the entire record.
A 4.12 TUTORIAL 4: CREATING FORMS AND REPORTS
5. Click the Delete Record button [>*] on the Form View toolbar. A dialog box opens, asking you to confirm the record deletion.6. Click the Yes button. The dialog box closes and the record for order number 392 is deleted from the table.
Barbara’s final maintenance change is to add a record fr a new order placed by Topview Restaurant.
To add the new record using the Order Data form:
. . . Quick Check 4.36
1. 4.2 Describe the difference between creating a form using the AutoForm Wizard and creating a form using the Form Wizard.

The AutoForm Wizard creates a form automatically using all the fields in the selected table or query; the Form Wizard allows you to choose some or al of the fields in the selected table or query, choose fields from other tables and queries, and display fields in any order on the form.
2. 4.4 What is an AutoFormat, and how do you change one for an existing form?
An AutoFormat is a predefined style for a form (or report). To change a form’s AutoFormat, display the form in Design view, click the AutoFormat button on the Form Design toolbar, click the new AutoFormat in the Form AutoFormats list box, and then click OK.
A 4.13 TUTORIAL 4: CREATING FORMS AND REPORTS
3. 4.6 Which table record is displayed in a form when you press Ctrl _ End?
The last record in the table.
4. 4.7 You can use the Find command to search for data in a form or ^.
datasheet
5. 4.8 Which wildcard character matches any single alphabetic character?
the question mark (?)
6. 4.9 How many form records does Access print by default on a page?
as many form records as can fit on a printed page
7. 4.11 How do you select an entire form record?
Click the record selector in the top left of the form.

XXXXX
Page 13

ESSION In this session you will create a form with a main form and a subform, create a report using the Report Wizard, insert a picture on a report, preview and print a report, and compact a database.
Barbara would like you to create a form so that she can view the data for each customer and all the orders for the customer at the same time. The type of form you need to create will include a main form and a subform.
Creating a Form with a Main Form and a Subform"To create a form based on two tables, you must first define a relationship between the two @tables. In Tutorial 3, you defined a one-to-ma ny relationship between the Customer (pri-'Mary) and Order (related) tables, so you are ready to create the form based on both tables.When you create a form containing data from two tables that have a one-to-many relationship, you actually create a main form for data from the primary table and a subform for data from the,related table. Access uses the defined relationship between the tables to automatically @j oin the tables through the common field th@@i- exists in both.,table's.
-@ rb na-h"er' staff will use the form when contacting e status of
a ara a . customers about th
their order payments. Consequently, the main form will contain the customer number and name, owner name, and phone number; the subform will contain the order number, paid status, invoice amount, and billing date.You'll use the Form Wizard to create the form.
To activate the Form Wizard to create the form:
Page 14
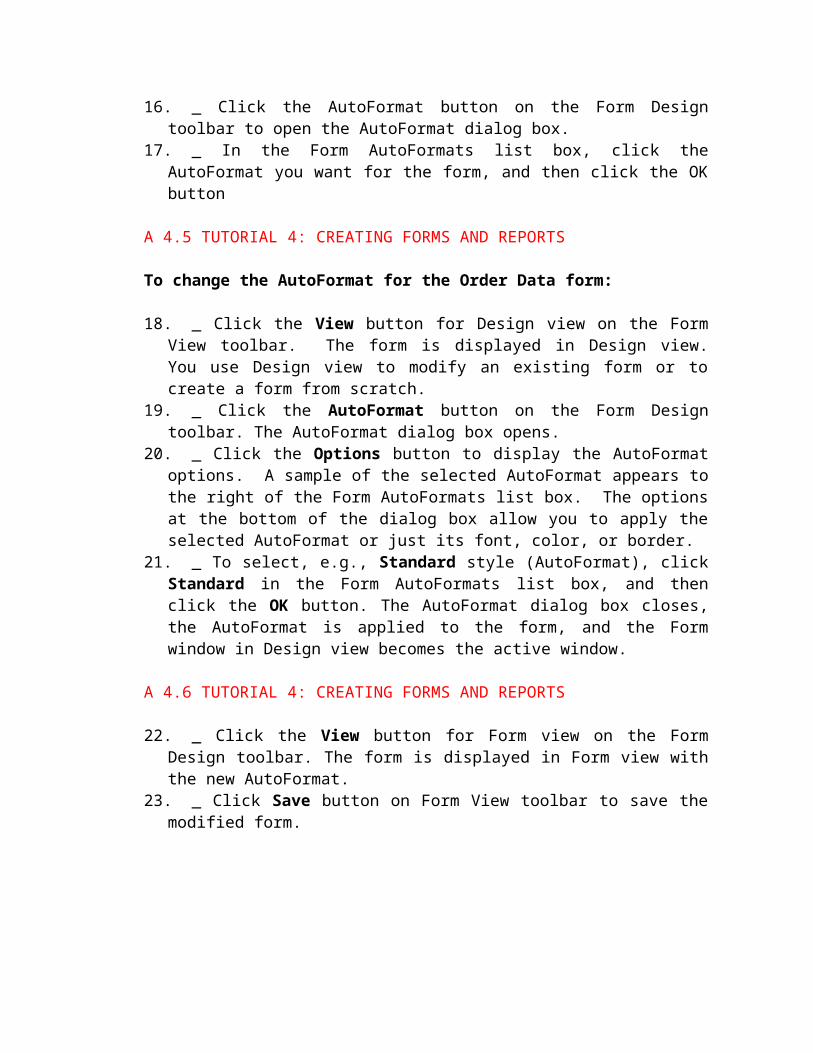
TUTORIAL 4 CREATING FORMS AND REPORTS
Figure 4-16Choosing a
main/subform
F77
format
primary table
related table-----------------------
option for a form Iwith a subfo rm
The default options shown in Figure 4-16 are correct for creating a form withCustomer data in the main form and Order data in the subfbrm.
To flnish creating the form:
Page 15

C R EATI NG FORMS AND REPORTS TUTORIAL 4 4.JL5
2
v4,4
Figure 4-17Completed
formRestaurant
aty Suchecki
main form
1.280.5(.32i@b
327
t.440@50
subformnavigation buttons
Page 16

TUTORIAL 4 CREATING FORMS AND REPORTS
Two sets of navigation buttons appear near the bottom of the form. You use the top set of navigation buttons to select records from the related table in the subform and the bottom set to select records from the primary table in the main form.
You'll use the navigation buttons to view different records.
To navigate to different main form and subform records:
Kim would like a report showing data from both the Customer and Order tables so
that all the pertinent information about restaurant customers and their orders is available in one place.
Creating a Report Using the Report WizardAs you learned in Tutorial 1, a report is a formatted hardcopy of the contents of
one or more tables in a database. In Access, you can create your own reports or use the Report Wizard to create them for you. Like the Form Wizard, the Report Wizard asks you a series of questions and then creates a report based on your answers. Whether you use the Report Wizard or design your own report, you can change the report's design after you create it.
Kim wants you to create a report that includes selected customer data from the Customer table and all the orders from the Order table for each customer. Kim sketched a design of the report she wants (Figure 4-18). Like the Customer Orders form you just created, which includes a main form and a subform, the report will be based on both tables, which are joined in a one-to-many relationship through the common field of CustomerNum. As shown in the sketch in Figure 4-18, the selected customer data from the primary Customer table includes the customer number, name, city, state, owner name, and phone. Below the data for each customer, the report will include the order number,
'd status, invoice amount, and billing date from the related Order table. The set of field pal
values for each order is called a detail record.
Page 17

4 IM74.:L 7
CR EATI NG FORMS AND REPORTS TUTORFAL
Figure 4-18Report sketch Cuot;omero @r7d Ordero
for the
Customers and CuotomerNum X) (X OwnerName x@@x
Orders report Cuctom,-rNime X@@-X Fhore x@@ xje s from
Order table:
cityfields from Customer
ot;gt;e xx related table
table: primary table'OrderNum @!!@id__InvoiceAmt; L3!
------------------ .... ------------- -------------xxx 0 x x detailxxx i I X-Xxxx LI X-X records
(Ke,pe,at noxt, Gurtomergnd orders here)
(Fepeat next cuctortior arid order5 here)
(Pcpc;at nex@ carrier and orders here)
--- --------- ----------------------------------- ------------------------------------------- ------------- ------------------------------------------dite Fiiee Xofx
You'll use the Report Wizard to create the report according to the design inKim's sketch.
To activate the Report Wizard and select the fields to include in the report:
Page 18

3.
4.18 TUTORIAL 4 CREATING FORMS AND REPORTS
Figure 4-19Completed
New ReportALitoRep Columnar
dialog box AutoRep TabularChart WILabel WI;
Page 19

Figure 4-20Choosing agrouped orungrouped
report by Order
grouped bytable
imernum, CustomerName,, OwnerName, Phone
innum, Paid, lnvoiceAffA,
Page 20
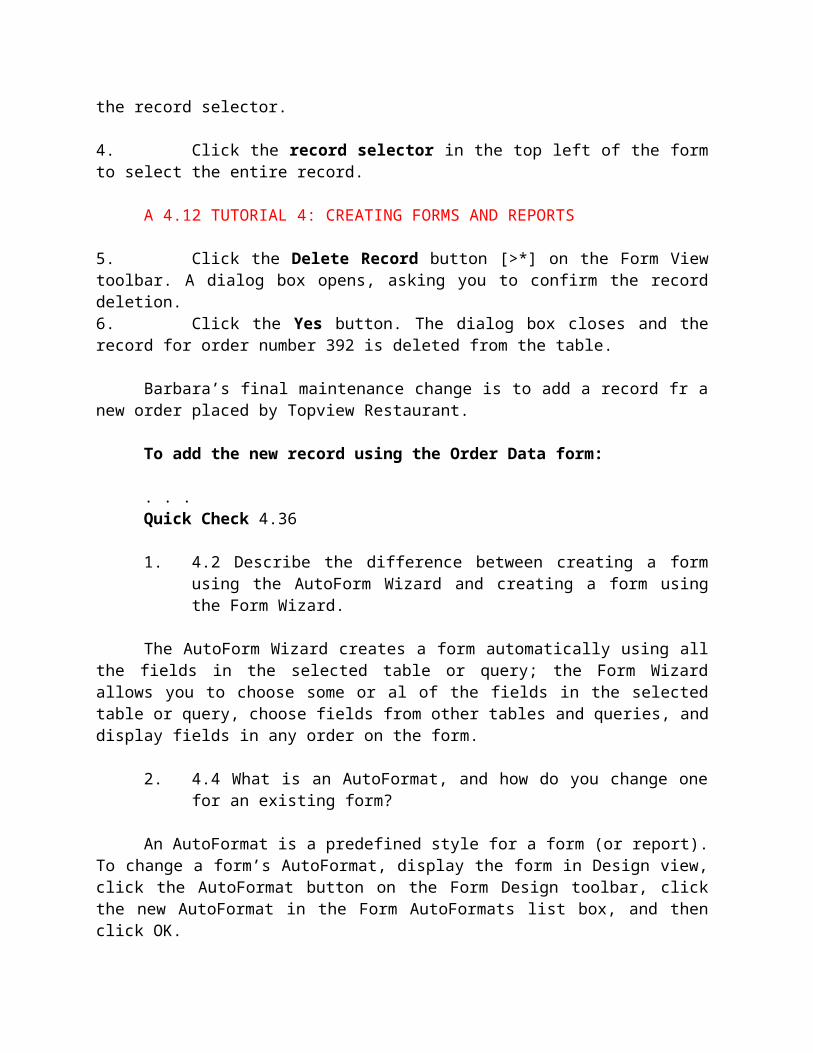
click to displaytips and examples
Page 21

CREATING FORMS AND REPORTS TUTORIAL 4 4=t4
You can display tips and examples for the choices in the Report Wizard dialog box by clicking the M button ("Show me more information").
To display tips about the options in the Report Wizard dialog box:
Figure 4-21Report Wizard
Examplesdialog box
click todisplay examples
click to return toReport Wizard Tips
dialog box Nam
The default options shown on your screen are correct for the report Kim wants, so you can continue responding to the Report Wizard questions.
To finish creating the report using the Report Wizard:
Page 22

TUTORIAL 4 CREATING FORMS AND REPORTS
Figure 4-22Choosing thesort order fordetail records
1 2 3 4
Figure 4-23Choosing thereportlayout
and pageorientation
xxxx xxxx xxxxxxxxx xmxxx
xxxxxxxxxm xxxxx
layout sample xx
xxxxxxxxxxxxxxxxxxxxxxx
xxxx xxxx
xxmxx 99 x
nxxx xxx
xx x9xxxxx xxx
xxxxx xxxxxxxxxx xxxxxxxxxx xxxxx
EM
Page 23
CREATING FORMS AND REPORTS TUTORIAL 4 4=2t
Figure 4-24
Report
displayed in
Print Preview Sim
Zoom list arrow
- - ------ --------
When a report is displayed in Print Preview, you can use the pointer to toggle between a full-page display and a close-up display of the report. Kim asks you to check the report to see if any adjustments need to be made. To do so, you need to view a close-up display of the report.
To view a close-up display of the report and make any necessary corrections:
Page 24

4,22] TUTORIAL 4 CREATING FORMS AND REPORTS
Figure 4-25Close-up viewof the report
Customers and Orders
i,-C-ust-omffN-um 104 OwnerNa"seAP- Ray,%checiaCustomwNa"w Akadows Restaurayd PhoneCity AbnroeState Alff.__2nf4grN m Pa!@!. Invoia-Amt
BUBnSLXwe
202 66 1,280.50 1/15)99
327 ig 1,323.00 211509
382 6d 1,440.50 3/15)99
107 OwnerNapm At. L)ais Rea
4me
Phone 82
Figure 4-26Report
displayed in
Design view mmmrm2....... 3 4 . . . . . . . . . ..
----- -- ------------ -......------------------ -------- -------------- --- -------
stomers an............... .............
i It Plll"14@@k
.............. ......IF
Page 25

C R EAT ING FORMS AND REPORTS TUTORIAL 4 E L4. 2 3@
Figure 4-27Resizing the
Phone text boxcontrol
won=
Icustomers and i.................
di ag this pointer to the right
. ...................
......... ......................
les indicateI is selected
Kim decides that she wants the report to include the Valle Coffee cup logo to the right of the report title, for visual interest. You can add the logo to the report by inserting a picture of the coffee cup.
Inserting a Picture on a ReportIn Access, you can insert a picture or other graphic image on a report or form to enhance the appearance of the report or form. Sources of graphic images include Microsoft Paint, other drawing programs, and scanners. The file containing the picture you need to insert is named ValleCup, and is located in the Tutorial folder on your Student Disk.
Page 26

0:4.2=4 TUTORIAL 4 CREATING FORMS AND REPORTS
To insert the picture on the report:
Figure 4-28Inserting a
picture inDesign view
2 . . .
.....................
Report I and olHeader section
.. .....................
i
Figure 4-29
Insert Picture orial
dialog box
selected picture file
Page 27

C R EAT I NG FORMS AND R EPO RTS TUTORIAL 4 4=25
Figure 4-30 Lomr-Tr@TREWr. r. R err.
Picture
inserted
in report
........ move pic
,ners and ure
inserted picture here
Figure 4-31
Repositioned
picture in
the report
!NM
-------------*Raw
..............
Customers and
Page 28

n 4.26 1 TUTORIAL 4 CREATING FORMS AND REPORTS
Figure 4-32
Print Preview
of report
icture inclui
with picture n the r
The report Is now complete. You'll print a hardcopy of just the first page of the report so that Kim can review the
report layout and the inserted picture.
To print page I of the report:
Page 29

CREATING FORMS AND REPORTS TUTORIAL 4
Figure 4-33
First page
of the Customers and Orders
Customers and
all
Orders rep
repo tle (,waom4!rlvum 104 OwnerName Mr Ray Suchecki
CastomerName MeadowvRestaurani Phone (313) 792-3546
r ---- O',city$Vat, ml
fieldsfromCustomertable Paid lnvokeamt BlUingDate
1,2$0.w lfism1.323.00 2/ISW
-w- i,440.50 VIBM
fields from107 OwnerName tds. L)oris Reaume
Ordertable ('(kitage Crill Phone (616) 643-8821City BooijackState ml
OrderNum Paid lnvo&-eami BfllingDate201 654.00 Iltwgi328 $15.00 2/15M372 015@oo 3/1$M
CustomerNum 122 OKWUName Mt. Shirley WoodruffCust(imerName I?wdhoi,.veI?eviourant Phone (517) 966-8651
City clamState ml
OrderNum Paid tnvoi(.e.4mi Billlnl,,Date203 1,190.00 111510032D i.i2g.00 2115MO30 Li 1,187.50 311WO
Kim approves of the report layout and contents, so you can close and save the report.To close and save the report:
ESSION In this session you will create a form with a main form and a subform, create a report using the Report Wizard, insert a picture on a report, preview and print a report, and compact a database.
Barbara would like you to create a form so that she can view the data for each customer and all the orders for the customer at the same time. The type of form you need to create will include a main form and a subform.
Creating a Form with a Main Form and a Subform
/tt/file_convert/5ae92f707f8b9a36698b4aed/document.docPage 30

"To create a form based on two tables, you must first define a relationship between the two @tables. In Tutorial 3, you defined a one-to-ma ny relationship between the Customer (pri-'Mary) and Order (related) tables, so you are ready to create the form based on both tables.When you create a form containing data from two tables that have a one-to-many relationship, you actually create a main form for data from the primary table and a subform for data from the,related table. Access uses the defined relationship between the tables to automatically @j oin the tables through the common field th@@i- exists in both.,table's.
-@ rb na-h"er' staff will use the form when contacting e status of
a ara a . customers about th
their order payments. Consequently, the main form will contain the customer number and name, owner name, and phone number; the subform will contain the order number, paid status, invoice amount, and billing date.You'll use the Form Wizard to create the form.
To activate the Form Wizard to create the form:
/tt/file_convert/5ae92f707f8b9a36698b4aed/document.docPage 31

TUTORIAL 4 CREATING FORMS AND REPORTS
Figure 4-16Choosing a
main/subform
F77
format
primary table
related table-----------------------
option for a form Iwith a subfo rm
The default options shown in Figure 4-16 are correct for creating a form withCustomer data in the main form and Order data in the subfbrm.
To flnish creating the form:
/tt/file_convert/5ae92f707f8b9a36698b4aed/document.docPage 32

C R EATI NG FORMS AND REPORTS TUTORIAL 4 4.JL5
2
v4,4
Figure 4-17Completed
formRestaurant
aty Suchecki
main form
1.280.5(.32i@b
327
t.440@50
subformnavigation buttons
/tt/file_convert/5ae92f707f8b9a36698b4aed/document.docPage 33

TUTORIAL 4 CREATING FORMS AND REPORTS
Two sets of navigation buttons appear near the bottom of the form. You use the top set of navigation buttons to select records from the related table in the subform and the bottom set to select records from the primary table in the main form.
You'll use the navigation buttons to view different records.
To navigate to different main form and subform records:
Kim would like a report showing data from both the Customer and Order tables so
that all the pertinent information about restaurant customers and their orders is available in one place.
Creating a Report Using the Report WizardAs you learned in Tutorial 1, a report is a formatted hardcopy of the contents of
one or more tables in a database. In Access, you can create your own reports or use the Report Wizard to create them for you. Like the Form Wizard, the Report Wizard asks you a series of questions and then creates a report based on your answers. Whether you use the Report Wizard or design your own report, you can change the report's design after you create it.
Kim wants you to create a report that includes selected customer data from the Customer table and all the orders from the Order table for each customer. Kim sketched a design of the report she wants (Figure 4-18). Like the Customer Orders form you just created, which includes a main form and a subform, the report will be based on both tables, which are joined in a one-to-many relationship through the common field of CustomerNum. As shown in the sketch in Figure 4-18, the selected customer data from the primary Customer table includes the customer number, name, city, state, owner name, and phone. Below the data for each customer, the report will include the order number,
'd status, invoice amount, and billing date from the related Order table. The set of field pal
values for each order is called a detail record.
/tt/file_convert/5ae92f707f8b9a36698b4aed/document.docPage 34

4 IM74.:L 7
CR EATI NG FORMS AND REPORTS TUTORFAL
Figure 4-18Report sketch Cuot;omero @r7d Ordero
for the
Customers and CuotomerNum X) (X OwnerName x@@x
Orders report Cuctom,-rNime X@@-X Fhore x@@ xje s from
Order table:
cityfields from Customer
ot;gt;e xx related table
table: primary table'OrderNum @!!@id__InvoiceAmt; L3!
------------------ .... ------------- -------------xxx 0 x x detailxxx i I X-Xxxx LI X-X records
(Ke,pe,at noxt, Gurtomergnd orders here)
(Fepeat next cuctortior arid order5 here)
(Pcpc;at nex@ carrier and orders here)
--- --------- ----------------------------------- ------------------------------------------- ------------- ------------------------------------------dite Fiiee Xofx
You'll use the Report Wizard to create the report according to the design inKim's sketch.
To activate the Report Wizard and select the fields to include in the report:
/tt/file_convert/5ae92f707f8b9a36698b4aed/document.docPage 35

3.
4.18 TUTORIAL 4 CREATING FORMS AND REPORTS
Figure 4-19Completed
New ReportALitoRep Columnar
dialog box AutoRep TabularChart WILabel WI;
/tt/file_convert/5ae92f707f8b9a36698b4aed/document.docPage 36

Figure 4-20Choosing agrouped orungrouped
report by Order
grouped bytable
imernum, CustomerName,, OwnerName, Phone
innum, Paid, lnvoiceAffA,
/tt/file_convert/5ae92f707f8b9a36698b4aed/document.doc
Page 37

click to displaytips and examples
/tt/file_convert/5ae92f707f8b9a36698b4aed/document.docPage 38

CREATING FORMS AND REPORTS TUTORIAL 4 4=t4
You can display tips and examples for the choices in the Report Wizard dialog box by clicking the M button ("Show me more information").
To display tips about the options in the Report Wizard dialog box:
Figure 4-21Report Wizard
Examplesdialog box
click todisplay examples
click to return toReport Wizard Tips
dialog box Nam
The default options shown on your screen are correct for the report Kim wants, so you can continue responding to the Report Wizard questions.
To finish creating the report using the Report Wizard:
/tt/file_convert/5ae92f707f8b9a36698b4aed/document.docPage 39

TUTORIAL 4 CREATING FORMS AND REPORTS
Figure 4-22Choosing thesort order fordetail records
1 2 3 4
Figure 4-23Choosing thereportlayout
and pageorientation
xxxx xxxx xxxxxxxxx xmxxx
xxxxxxxxxm xxxxx
layout sample xx
xxxxxxxxxxxxxxxxxxxxxxx
xxxx xxxx
xxmxx 99 x
nxxx xxx
xx x9xxxxx xxx
xxxxx xxxxxxxxxx xxxxxxxxxx xxxxx
EM
/tt/file_convert/5ae92f707f8b9a36698b4aed/document.docPage 40

CREATING FORMS AND REPORTS TUTORIAL 4 4=2t
Figure 4-24
Report
displayed in
Print Preview Sim
Zoom list arrow
- - ------ --------
When a report is displayed in Print Preview, you can use the pointer to toggle between a full-page display and a close-up display of the report. Kim asks you to check the report to see if any adjustments need to be made. To do so, you need to view a close-up display of the report.
To view a close-up display of the report and make any necessary corrections:
/tt/file_convert/5ae92f707f8b9a36698b4aed/document.docPage 41

4,22] TUTORIAL 4 CREATING FORMS AND REPORTS
Figure 4-25Close-up viewof the report
Customers and Orders
i,-C-ust-omffN-um 104 OwnerNa"seAP- Ray,%checiaCustomwNa"w Akadows Restaurayd PhoneCity AbnroeState Alff.__2nf4grN m Pa!@!. Invoia-Amt
BUBnSLXwe
202 66 1,280.50 1/15)99
327 ig 1,323.00 211509
382 6d 1,440.50 3/15)99
107 OwnerNapm At. L)ais Rea
4me
Phone 82
Figure 4-26Report
displayed in
Design view mmmrm2....... 3 4 . . . . . . . . . ..
----- -- ------------ -......------------------ -------- -------------- --- -------
stomers an............... .............
i It Plll"14@@k
.............. ......IF
/tt/file_convert/5ae92f707f8b9a36698b4aed/document.docPage 42

C R EAT ING FORMS AND REPORTS TUTORIAL 4 E L4. 2 3@
Figure 4-27Resizing the
Phone text boxcontrol
won=
Icustomers and i.................
di ag this pointer to the right
. ...................
......... ......................
les indicateI is selected
Kim decides that she wants the report to include the Valle Coffee cup logo to the right of the report title, for visual interest. You can add the logo to the report by inserting a picture of the coffee cup.
Inserting a Picture on a ReportIn Access, you can insert a picture or other graphic image on a report or form to enhance the appearance of the report or form. Sources of graphic images include Microsoft Paint, other drawing programs, and scanners. The file containing the picture you need to insert is named ValleCup, and is located in the Tutorial folder on your Student Disk.
/tt/file_convert/5ae92f707f8b9a36698b4aed/document.docPage 43

0:4.2=4 TUTORIAL 4 CREATING FORMS AND REPORTS
To insert the picture on the report:
Figure 4-28Inserting a
picture inDesign view
2 . . .
.....................
Report I and olHeader section
.. .....................
i
Figure 4-29
Insert Picture orial
dialog box
selected picture file
/tt/file_convert/5ae92f707f8b9a36698b4aed/document.docPage 44

C R EAT I NG FORMS AND R EPO RTS TUTORIAL 4 4=25
Figure 4-30 Lomr-Tr@TREWr. r. R err.
Picture
inserted
in report
........ move pic
,ners and ure
inserted picture here
Figure 4-31
Repositioned
picture in
the report
!NM
-------------*Raw
..............
Customers and
/tt/file_convert/5ae92f707f8b9a36698b4aed/document.docPage 45

n 4.26 1 TUTORIAL 4 CREATING FORMS AND REPORTS
Figure 4-32
Print Preview
of report
icture inclui
with picture n the r
The report Is now complete. You'll print a hardcopy of just the first page of the report so that Kim can review the
report layout and the inserted picture.
To print page I of the report:
/tt/file_convert/5ae92f707f8b9a36698b4aed/document.docPage 46

CREATING FORMS AND REPORTS TUTORIAL 4
Figure 4-33
First page
of the Customers and Orders
Customers and
all
Orders rep
repo tle (,waom4!rlvum 104 OwnerName Mr Ray Suchecki
CastomerName MeadowvRestaurani Phone (313) 792-3546
r ---- O',city$Vat, ml
fieldsfromCustomertable Paid lnvokeamt BlUingDate
1,2$0.w lfism1.323.00 2/ISW
-w- i,440.50 VIBM
fields from107 OwnerName tds. L)oris Reaume
Ordertable ('(kitage Crill Phone (616) 643-8821City BooijackState ml
OrderNum Paid lnvo&-eami BfllingDate201 654.00 Iltwgi328 $15.00 2/15M372 015@oo 3/1$M
CustomerNum 122 OKWUName Mt. Shirley WoodruffCust(imerName I?wdhoi,.veI?eviourant Phone (517) 966-8651
City clamState ml
OrderNum Paid tnvoi(.e.4mi Billlnl,,Date203 1,190.00 111510032D i.i2g.00 2115MO30 Li 1,187.50 311WO
Kim approves of the report layout and contents, so you can close and save the report.To close and save the report:
/tt/file_convert/5ae92f707f8b9a36698b4aed/document.docPage 47

XXXXIM 5.4 TUTORIAL 5 CREATING MORE ADVANCED QUERIES AND CUSTOM FORMS
I 0 N In this session you will change the CustomerNum field in the Order table to a Lookup Wizard field. You will also create a pattern match query, a list-of-values query, and a query selecting non-matching values. Finally, you will construct complex selection criteria using And with Or, and you'll create a parameter query.
t;reating a Lookup Wizard FieldThe Order table in the Restaurant database contains information about orders placed by Valle Coffee's customers. Barbara wants to make it easier for her staff members to enter data in the table. In particular, it would be easier for them if they did not have to remember the correct customer number of the customer who placed the order. So, Barbara wants to change the CustomerNum field in the Order table to a Lookup Wizard field. A Lookup Wizard field
-3 allows the user to select a value from a list of possible values. For the CustomerNum field,
the user will be able to select from the list of custolmer names in the Customer table rather than having to remember the correct customer number. The CustomerNum field in the Order table will store the customer number, but the customer name will appear in Datasheet view. This makes it easier for the user and guarantees that the customer number entered is valid.
Barbara asks you to change the CustomerNum field in the Order table to a Lookup Wizard field. You begin by opening the Order table in Design view.To open the Order table in Design view:
1. Make sure you have created your copy of the Access Student Disk, and then place your Student Disk in the appropriate disk drive.
T R 0 U B L E ? If you don't have a Student Disk@ you need to get one before you can proceed. Your instructor will either give you one or ask you to make your own. (See your instructor for informations In either case, be sure you have made a copy of your Student Disk before you begin; in this way, the original Student Disk files will be available on the copied disk in case you need to start over because of an error or problem.2. Start Access and open the Restaurant database located
in the Tutorial folder on your Student Disk. The Restaurant database is displayed in the Access window.
3. Click the Tables tab (if necessary), click Order, and then click the Design button to display the Order table in Design view. See Figure 5-1.
/tt/file_convert/5ae92f707f8b9a36698b4aed/document.doc Page 4

Figure 5-1Order table in Field 1;@@ @@ D6ta@TYP@K@ "'I
Design view Text primary keyCustomerNum Text foreign key
Yes/NoPaidInvoiceAmt currencyB@illingDate DatelTime
------
3
No Dupl!c
Now you can change the data type of the CustomerNum field to Lookup Wizard.
/tt/file_convert/5ae92f707f8b9a36698b4aed/document.doc Page 5

C R EATING MORE A DVANC ED QU ER I ES AND C U STO M FORMS TUTORIAL 5
To change the CustomerNum field to a Lookup Wizard field:
1. Click the Data Type text box for the CustomerNum field, click the Data Type list arrow; and then click Lookup Wizard@ Access@displays the first Lookup Wizard dialog box. See Figure 5-2.
Figure 5-2First Lookup
Wizard dialogbox
make sure this option Iis selected
This dialog box allows you to specify a list of values that are allowed for the CustomerNum value in a record in the Order table. You can specify a table or query from which the, value is selected or you can enter a new list of values. You want the CustomerNum value to come from the Customer table.
2. Make sure the option for looking up the values in a table or query is selected@ and then click the Next button to display the@ next Lookup Wizard dialog box.
3. Make sure Customer is selected@ and then click the Next button. See Figure 5-3@
Figure 5-3Selecting the
Customer tablefields
select these two
fields Custome NameStreetc ty
click to select S@ate
highlighted field OwnerName
This dialog box allows you to select the necessary fields from the Customer table. You need to select the CustomerNum field because it is the common field that !'in ,the Customer and Order tables. You also must select the Custom rname field because
/tt/file_convert/5ae92f707f8b9a36698b4aed/document.doc Page 6

Barbara wants the user to, be able to select from a list of customer names when entering a ne w order record@4. Click theTUTORIAL 5 CREATING MORE ADVANCED QUERIES AND CUSTOM FORMS
button to select the Cust6merNum@ field from the Customer tableto be @include d in the lookup column. Click the button to select the CustomerName field, and then click the Next button. See Figure 5-4.
Figure 5-4Adjusting thewidth of the
lookup column
CotqLAqq.Biyef Reste
In this dialog box you can adjust the Width of the Cust6merName column. This column will appear when a user enters a CustomerNum for the order in the Order table. The user can select a CustomerName and Access will enter the correct CustomerNum. The selected "Hide key column" option means that the list of CustomerNum values will not appear in the datasheet.
S. Place the pointer on the right edge of the CustomerName field column heading. When the pointer changes to + @ double-click to resize the column to fit the data@ and then click the Next button.
In this dialog box you can specify the caption that will appear for the field in Datasheet view. The default value is the field name, CustomerNum. Because the field will show customer names in Datasheet view, you will change the caption to CustomerName.
6. Type CustomerName in the text box; and then click the Finish button@
TO create the Lookup Wizard field, Access must save the table design and create the necessary relationship so,that Access can enter the correct CustomerNum value When the user selects a customer name, Access displays a dialog box asking you to confirm saving the table.
7. click the Yes button. Access creates the Lookup Wizard field and returns to the Order table in Design view. See Figure 5-5.
Figure 5-5 44
Lookup Wizard
field defined OrderNum Text primary keyCustomerNum IN @@ foreign key
7 Paid YesiNo
InyolcoAmt CurrencyBillingDate Date/Time
/tt/file_convert/5ae92f707f8b9a36698b4aed/document.doc Page 7

new caption
/tt/file_convert/5ae92f707f8b9a36698b4aed/document.doc Page 8

@p?plicates OK)C R EATI NG MO RE ADVAN C ED Q U ER I ES AND C U STOM FORMS TUTORIAL 5
this field@d@ value @, to
ha s to the
Barbara asks you to enter a new record in the Order table (Figure 5-6). To do so youneed to switch to Datasheet view.
Figure 5-6 Or@erNum CuctormerName F,9 I i lnvoicearnt [5illinepiteThe new Order
table record 401 Foi@houoe Pc!5taurgrit No 1,100.00 5/lE5/99To enter the new order record:
on: the Table Desian toolbar to disl-e ihat'the customer names instead@c second@coiumn; as specified by the;
he complete field values,YOU isDIav t
2. Piac rname column heading@ Whenthe pointer cl anges to+ resi @the column to fit the data.
3 0 ar, Access displ@ay@@
4. rr move to@the@:%fi ess@dispiays@@@a
listarrow at the@@ OM(
ist of ername field Value from
Figure 5-7List of
CustomerName iLjB4 Sandy Lookout Restaurant @1,178.00i386 Florentine Restaurants 1,64b.0
field values386 Four Star Steakhouse 1,407.00@
387Brandywine Restaurant
388 Bay Pointe Restaurant 1,066 00@38@ 1 Best Bet Restaurant 1 724.00@
903 00@390
Meadows Restauran91 Cottage Grill 00,
393 Roadhouse Restaurant 1,227.00@Lookup Wizard 1 394
- --------- Bridge Inn l,lp5,oo@1 Grand River Restaura
1,@4list box 9 nt
398 Sandy Lookout Restaurantlbunker Hill GrillFlorentine Restaurant
box %

5.8 TUTORIAL 5 CREATING MORE ADVANCED QUERIES AND CUSTOM FORMS
7@. R,-f.,@t. Figure for @th e new order record@c @e the O@de table.
S. Click the Close to o9. Ciick the@ Yeis b an t, save changes.
You are now ready to create the queries that Barbara and Kim have requested. You areI already familiar with queries that use an exact match or a
range of values (using the > comparison operator) to select records. Access provides many other operators for creating select queries. These operators allow you to create more complicated queries that are difficult or impossible to create with exact match or range of values selection criteria.
Barbara and Kim have created a list of questions they want to answer using the Restaurant database:
• What customers are located in the 313 area code?
• What is the customer information for customers 123, 135, and 202?
• What is the custoi-ner information for all customers except customers 123, 135, and 202?
• What are the customer numbers, customer names, order numbers, and invoice amounts for unpaid invoices for customers in Indiana or Ohio?
• What are the customer names, amounts overdue, and potential late charges for customers with overdue January invoices in a particular state? For this query, the user speci 'fies the state.
You will create the necessary queries to answer these questions. To do so you'll use the Query window in Design view.
Using a Pattern Match in a QueryKim wants to view the records for all customers in the 313 area code. She will be travel-ling in that area next week and wants to contact those customers. To answer Kim's ques-tion you can cre ate a query that uses a pattern match. A [email protected] selects recor s t athave a value for the selected field matching the pattern of the simple condition value, in
this c ith 313 area codes. You do this usin parison ase, to select customers w g the Lik6- com
operator.The Like comparison operator selects records by matching field values to a specific pattern that includes one or
more wildcard characters-asterisk (@'), question mark (?), and number symbol The asterisk represents any string of characters, the question mark
single 1 ing represents any character, and the number symbol represents any single digit. Us'
a pattern match is similar to using an exact match, except that a pattern match includes wildcard characters.To create the query, you must first place the Customer table field list in the Query window in Design view.
To create the pattern match query in Design view:
J.. Click the Querlei@tab in the Database window, and then click the NeW button.box S
2.@ W in the li! lick the OK button.he Show Ta y window.
3, n the Tabli and then click the

l n. cess places the CL I tztl id I s in the Query window.

C R EAT ING MORE ADVAN C ED Q U ER I ES AND C U STO M FORMS TUTORIAL 5 5.9 J4. D itle bar of the @ht ail the fieldsi@Qllck
ai en@ release the@"
n, n the design grid, in e 5-8.Figure 5-8Adding the
fields for thequery
all Customer tablefields in the design
gr i d
CustomerName StreetCustomer Customer Customer Customer
You will now enter the pattern match condition Like "(313)"" for the Phone field. Access will select records that have a Phone field value containing (313) in positions one through five. The asterisk (") wildcard character specifies that any characters can appear in the remaining positions of the field value.To select records that match the specified pattern:
I
J. Scroll the design grid until the Phone field is visible.2. Criteria text box; and then type Like "(31.3)-". See Figure 5-9.,
6m!t:thb oi@@rator@Li@e, Access Will automatically add it when
Figure 5-9Record
selection basedon matching aspecific pattern
OwnerNameCustomer Customer Customer
pattern match I
selection criterion
3.@ Cli6k@'@thb Run:@b@ft'on indow until the@
Pho @isibl6@ @ri ur records withthe' in
Figure 5-10Customer le
records for area Pond Hill Road 'Monroe 48161 'Mr@ Ray Suchecki 1(313) 792-3546
LE 37 queL!@@Highwy 'L ... te 49063 Mr. John Rohrsj(@13)729-5364
code 313 2090 Canyonside VVOY i Romulus 48174 Ms. Nancy talls (313) 888-7778
35qg Garfield Ayenue Romulus 48174 r t nnon Petree (313) 461-8899

:1@O TUTORIAL 5 CREATING MORE ADVANCED QUERIES AND CUSTOM FORMS
N S
4. e Q
b
S. Tvi)e 313 Are r I ess@
Access@saves ur de I Di I.
Next, Kim asks you to create a query that will display the customer information for customers
123, 135, and 202. She wants to assign these customers to a particular salesperson, and she
would like a printout of the customer data to give to the salesperson. To produce the results
Kim wants, you'll create a query using a list-of-values match.
Using a List-of-Values Match in a QueryA list-of-values match selects records whose value for the selected field matches one of
two or more simple,condition values.: You could accomplish this by including several Or con-ditions in the design grid, but Access also provides the In comparison operator that works as a shorthand. The In comparison operator allows you to define a condition with two or more values. If a record's field value matches at least one value from the list of values, Access selects that record for inclusion in the query results.
To display the information Kim requested, you want records selected if the CustomerNum field value is equal to 123, 135, or 202. These are the values you will use with the In com -parison operator.
To create the query using a list-of-values match:
1.@ Click the View Datasheet@t66!bar to dis-
play the@@Query
First:y6u need7
2. condi-re ndi
te pa sose
all
3. S desil umn, click thect ernum "2102")@ See
Figure 5-11Record
selection basedon matching
field values toa list of values
CustomarNumCustomer stonier Customer Customer

In @"l 23","l 3@'@@"20@"I
list-of-values selection 77criterion

CREATING MORE ADVANCED QUERIES AND CUSTOM FORMS TUTORIAL 5 5.
4. Click the@ Run button M on the Query Design toolbar Access runs the query and displays the results, which show the three records with 123, :135, or 202 in the CustbmerNum field.
Now you can print the query results for Kim@ Also, because Kim won't need to display this information again, you don't have to save this query.
S. Click th@Printl)button * on the Query Datasheet toolbar. Access prints the
ue '-g its-@
q ry re uKim wants to assign the remaining customers to other salespersons in her
group. She needs a list of all the customers except customers 123, 135, and 202 to help her plan the assignments. You can create this query by modifying the previous one to include a nonmatching value.
Using a Non-Matching Value in a QueryA non-matching value selects records whose value for the selected held does not match the simple condition value.@ You create the selection criterion using the Not logical operator, The Not lo I goal 606r'ator negates a criterion. For example, if you enter Not = "MI" in the Criteria text box for the State field in the Customer table, the query results will show the records for which the State field value is not MI; that is, all customers not located in Michigan.
To create Kim's query, you will combine the Not operator with the In operator to select customer records whose CustomerNum field value is not in the list (" 123 'l," 135","202").
To create the query using a non-matching value:
1. Click the View button for Design view R on the Query Datasheet toolbar to switch back to Design view.
2. If necessary, position the insertion point immediately to the left of the word "In" in the Criteria text box for the CustomerNum field.
3. Type Not and then press the spadebar. Access will select a record only if the CustomerNum field value is not in the list ("I 23","135-1"202"). See Figure 5-1 2.
Figure 5-3.2Record
selectionbased on not
matching a list CustomarNaff@-Street
of values City
tu=@ um CustometNam,, StreetCustomer
customer Customer

.Lo n l@2 I","I 15@2,negation operator
with list-of-valuesselection criterion

ffj 5.12 TUTORIAL 5 C R EATING MO RE ADVAN C ED Q U E Ri ES AND C U STO M FORMS4. Click the Run button ffl on the Query Design toolbar. Access runs the query and
7displays only those records with a Cust6merNum field value that is not 123; 135, or 202. A total of 35 records are included in the query results. See Figure 5-13.,
Figure 5-13
Results of
query using K4eadows Restaurart Pond Hill Road Morroe @Mi40@1@
107 Cottage Grul 82 Mix Boosek ml4961
non-matching 122 Roadhouse Restaurant 8408 E, Fletcher Road Clare ml48@@@
128 Grand River Restourard 37 Queue Highway Lecota
values ml 49
@@1129 Sandy Lookout Restaurant 95 North Say Boulevard Jenison ml 49
131 Bunker Hill Grill 15365 Old Bedford Trail Eagle Point ml @49
customers 123, 135, 133 Florentine Restourarde 2874 Western Avenue Drenthe ml 49
and 202 not selected 136 Cleo's Dowrtown Restaurant 4090 Division Street WV Borcuio@MI 49
163 BeFTtham's Riyerfrc)rTt Restaurant 1 366 3bth StreetRoscommon
ml 48
165 Sullivan's Restourard & Lounge 1935 Snow Street SE
Saugatuck ml 49@
201 Wagon Train Restourard 5480 Alpine Lane Selkirk ml 48
203 MouMain Lake Rostouraryt 701 Ba ley Street Grand Rapidsml@49
'9
1322 Alto Courdry Inn 1 1 4 Lexington Parkway Alto Ml 49
Best Bet Restaurard 56 Four Mile Road Grand RapidsMI@49
Jean s Courdry Restaurard 44 Tower Lane Maftawan ml 49
S. Click thq@PI:-@uttbn 14 on the Query Datasheet toolbar to print the query results.Now you can close the query without saving it, because Kim will not need to run this query again.
6. Click the Close button 2]on the Query window to close it, and then click the No button when Access asks if you want to save the query,
You are now ready to create the query to answer Barbara's question about unpaid invoices in Indiana or Ohio.
Using Both the And and Or Operators in the Same QueryBarbara wants to see the customer numbers, customer names, order numbers, and invoice amounts for unpaid invoices for customers in Indiana or Ohio. To create this query, you need to use both the And and Or logical operators to create two compound conditions. That is, you will create conditions that select records for customers located in Indiana and who have unpaid invoices or customers located in Ohio and who have unpaid invoices. Because you want the customer names shown with the invoice information in the query results, you will use fields from both the Customer and Order tables.To add the fields to the query design:
I.. From the Queries tab of the Database window, click the New button. Access opens the New Query dialog box,2. Click Design View (if necessary), and then click the OK button. The Show Table dialog box opens on top of the
Query window in Design view.3. Double-click Customer to add the Customer table to the Query @window@4. Double-click Order to add the Order table to the Query window, and then click the Close button to close the Show
Table dialog box.
5. Double-click CustomerNum, double-click CustomerName; and then double-click State in the Customer field list to add these fields to the design grid@
6. Double-click OrderNum, double-click Paid, and then double-click lnvoiceamt in the Order field list to add these fields to the design grid.

GREAT ING M ORE ADVANCED Q U ER I ES AND C U STO M FORMS TUTORIAL 5
You've selected all the fields to include in the query. Now you're ready to add the selection criteria, which will include both the And and Or logical operators.To specify the criteria using the And logical operator with the Or logical operator:
:L. Click the @State Criteria text box, and then type --"IN".Kim wants to view data for customers in Indiana or Ohio, so you need to enter the Or condition for the State field.2. Press the @ key and then type ="OH".
Now, for each of the existing conditions, you need to enter the And condition that selects only those records for customers who have not paid their invoices.3. Scroll right to display the Paid field, click the Paid Criteria text box, and then type
=No@4. Press the $ key and then type =No@When yov save this query, You'll specify a name that indicates the da I ta is for unpaid' invoices. Therefore, you don't have to display the Paid field values in the query results.S. Click the Show check box for the Paid field to remove the check mark.
The query definition is now complete@ See Figure 5-14.Figure 5-J.4
And and Or-Mg gill iM
conditions inthe design grid CustomerNa
StreetCity Paid
one-to-many State InvoiceAmtrelationship
cu;tomername State OFderNum Paid
iny-Customer Customer Oider der@@-yr@
first And conditionH" ------------- )--No
or row for Or second And
condition condition6. Click the Run button on the Query Design toolbar. Access runs the query and
displays the results. See Figure 5-15.
Figure 5-15Results of
query using South Bend Brewing Comp i IN 323 1,966.00And with Or 624 South Bend Brewing Comp IN 365 2.030.00
626 Maxwell's Restaurant IN 221 1,607.00625 Maxwell's Restaurant IN 358 1,607.00750 Grain Sin Inn IN 339 1,190.00
Indiana customers I H750 Grain Bin Inn IN 394 1,1 Ohio customer
selected @@@1779 Gateway Loun OH77@1796 Embers Resta 5 selected
798 Embers Resta 5 971.00@798 Embers Resta 918.00

TUTORIAL 5 CREATING MORE ADVANCED QUERIES AND CUSTOM FORMS
The query results show tha or Ohio that haveunpaid, invoices. Because he Paid field; it
doesnot appear in the query re e query with@ a name
indicat-ing that the'query selects
7. Click the Save button 9 on@ the Query Data@he@ et t6o:lb ar, type IN and@OH Unpaid Invoices in@the Query Name text
- @@ : @ @ box, and then press the Enter key tosave th 6;ou6ry.
8. Click the close button on t e@ Query window.
Creating a Parameter QueryBarbara's final query asks for the customer name, amount overdue, and late charge for customers with overdue January invoices in a particular state. For this query, she wants to be able to specify the state, such as MI (Michigan), IN (Indiana), or OH (Ohio).
To create this query, you will modify the existing Unpaid With Late Charge query. You could create a simple condition using an exact match for the State field, which you would need to change in Design view every time you run the query. Instead, you will create a parameter query. A parameter query is a query that prompts you for information when the query runs. In this case, you want to create a query that prompts you for the state of the customers to select from the table. You enter the prompt in the Criteria text box for the State field.
When Access runs the query, it will display a dialog box and prompt you to enter the state. Access then creates the query results just as if you had changed the criteria in Design view.
Now you can open the Unpaid With Late Charge query in Design view and change its design to create the parameter query.
To create the parameter query based on an existing query:
1. From the Q ow, click Unpaid With Late Charge@
and then cl ign@ view@Now, you nE nd@ enter a
prompt inthe Criteria
2. Scroll the design grid to th, ri ht to display I co@umn@3. Double-click State in the Customer field !IE Id in the next
availableColumn
Next yO the,pai this case, Kim wantsthe que the sta t cu Omer information they
Want to ee the pr( pt in Criteria text box for the
State field. The:text of the 1 onmust be enclosed within

brackets.

C R E A T I N G M 0 R E A D V A N C E D Q U E R I E S A N D C U S T 0 M F 0 R M S TUTORIAL 54. Scroll @right to @disoi&y@@th @ciick@th6@ll
type [Enter, the state']. -16.
Figure 5-16Specifying theprompt for the
parameter CustomerNarn Ord~
Street CustomerNuquery
City Pald
Invoi samt I LateChafge: [Invoic I Paidspecifies unpaid Orderc IO rdet Custc
invoicesprompt
S. Click the Run button 6n:thp@Query:Design toolbar. Access runs@the query and@displays @@di@log Pox prompting you for the nam@e: of the
stat@.@@@@@Fi@ure 5-17@
Figure 5-17Enter
Parameter enter value here@:@Value dialog ...
boxThe text vou'si3ecified in the Criteria'text box of the,@State:field@aoDears above a
text bo in which you@ rhu@t type a @Stat@-fiejd@@olue'@' You must@enter the value exactly S @it aodears in the table,
6. To see aid invoices for customers in lndi@ henclick tt splays cus @w I hohave u (in@this cust re
5-:18,Figure 5-3.8
Results of thendiana
1,607.00 32,14,parameter 1 @l 5/99 Maxwell's RestaurarTt
customers235 1 tl 5/99 Embers Restaurart 1 @004,[email protected])6@l selected
query
Barbara nlans @6n running this query frequently to monitor@the payment activitv. of the restaurant customers, so she asks you to save it with a new name (to keep the@o@iginal query intact).
> 7. Click File on the menu bar, and then click Save As/Export@ The Save As dialog box opens.
S. Position the insertion point immediately to the right of the @e- in Charge, press the spacebar, tvde Parameter, and then press the Enter key,
9. Click the Close button
on the Query w@indow.

XXXXTUTORIAL 5 C R EAT ING MO RE ADVANCED Q U ER I ES AND C U STO M FORMS
Et What is a Lookup Wizard field?
What comparison operator is used to select records based on a specific pattern?
7-7 What is the purpose of the asterisk (@") in a pattern match query?
When do you use the In comparison operator?
How do you negate a selection criterion?
When do you use a parameter query?
The Lookup Wizard field you specified and the queries you created will make the Restaurant database easier to use. In the next session, you will create a custom form for the database, which will help Valle Coffee's employees enter and maintain data more easily.
In this session, you will create a custom form for customer information. You will work in Design view to add form controls, create a form header with a title and a graphic image, and add color to the background of the form.
Creating a Custom Form
Barbara has been using the Customer Orders form to enter and view information about Valle-Cof@ee's customers and their orders. She likes having all the information on a single form, but she would like to have the fields rearranged and a graphic image added to the form. To make the form easier to read, she wants to have the customer and order information on separate pages, like the tabs in a dialog box. She asks you to create a new form to display the information in this way. Because this form is significantly different from the Customer Orders form, you will create a new custom form.To create a custom form, you can modify an existing form or design and create a form from scratch. In either case, you create a custom form working in the Form window in Design view. A custom form can be designed to match a paper form, to display some fields
'de by side and others top to bottom, to highlight certain sections with color, or to addsi I I
special buttons and list boxes. A multi-page form displays the form on more than one page
on a single screen. Each page is labeled with a tab like the tabs in the Database window.By clicking a tab, you can display the information on that page.

CREATING MORE ADVANCED QUERIES AND CUSTOM FORMS TUTU I @k L
form you want to create is a simple or complex form, it is alwaysWhether the custombest to plan the form's content and appearance first. Figure 5-19 shows Barbara's design for the custom form that she wants you to create.
Figure 5-19Barbara's -(Title) (ValleCup graphic image)design for themulti-pagecustom formtitle label Customer No.: XXX Customer Name: XXXXXXXXXXXXXXXXXXXXXXXXX
picture created byCustOmerlnflIrMIt ondrawing application----------------
softwa re Street: XXXXXXXXXXXXX OwnerName: XXXXXXXXXXXXXXXXXXXX
City: xxxxxxxxxxx Phone: (XXX) xxx-xxxxState: xx FirstContact: XX/XX/XX
first page ZipCode: XXXXX
ofform
(Title) (ValleCup graphic image)
Customer No.: XXX Customer Name: XXXXXXXXXXXXXXXXXXXXXXXXX
Orders
OrderNum Paid InvoiceAmt BillingDatesecond page
of form xxx x xxxxxxxx XX/XX/XXxxx x xxxxxxxx XX/XX/XXxxx x xxxxxxxx XX/XX/XX
Notice that the top of the form displays a title and graphic image. Below these are the CustomerNum and CustomerName fields. Also, notice that Barbara's form contains two pages. The first page, labeled "Customer Information," displays the address and contact information for the customer. The second page, labeled "Orders," displays order information for the customer. Each field value from the Customer table will appear in a text box and will be preceded by a label. The label will be the value of the field's Caption property (if any) or the field name. The locations and lengths of each field value are indicated by a series of Xs in Barbara's form design. For example, the three Xs that follow the CustomerNum field label indicate that the field value will be three characters long. The Order table fields appear in a subform on the second page.

5.18 I TUTORIAL 5 CREATING MORE ADVANCED QUERIES AND CUSTOM FORMS
With the design for the custom form in place, you are ready to create it. You could use an AutoForm Wizard or the Form Wizard to create a basic form and then customize it in Design view. However, you would need to make many modifications to a basic form to create the form Barbara wants, so you will design the entire form directly in Design view.
You use the,.Form window in Design view to create and modify forms. To create Barbara's custom form, you'll create a blank form based on the Customer table and then add the Order table fields in a subform.To create a blank form In Design view:
1. @ If you took a break after the @ previous session@ make sure that Access is running and the:Restaurant database from the Tutorial folder on your Student Disk is open.
2. Click the Forms tab to disi)lav'the Forms list in the Database window, and thenclick on. The New, Form dialog box op@ehs.
3. Click (if necessary), click the list arrow for choosing a table orquery; click Customei@ and then click the OK button@ Access displays the Formwindow in Design vie W.
C R EAT ING MO RE AD VAN C ED Q U ER I ES AND C U @; .-O VI
imize the window. See,4. Click the Ma,xlmlze button on the Form window, to max
Figure 5-20.Field
Figure 5-20 ListForm window in button
Cu5tomerNumDesign view customernamt
5treat field listCty
View button . . . . . . StateToolbox
buttonrulers
Detail sectiontoolbox
gridot appear, click View on the menu
TROUBLE? If the rulers, grid, or toolbox do n missior Tool@ox to display the ng components If
bar, and then click Ruler, Grid@the grid is still invisible, see your instructor or technical support erson for
Toolbis not positions a In Figure 5-20, click the ox
assistance. if the t6olbox ,window's title bar and then drag it to the position shown.
ns the tools necessary to create a custom form.indow in Des' n vew contal
The Form w ig Iu create the f6irii by pl@i@i g objects on the blank form in the window. Each objectYO
such as a text box, list box, rectangle, or command button-that you place on a form iscalled a'dontroi Th ere are three kinds of controls that you can place on a form: s A bound control i@ link d@' or
bound, to a field'i@n the underlying table or query. You s-d- I -bl' fi Id values.
use a bound control to isp ay ta e eo An unbound control is not linked to a field in the underlying table or query. You use an unbound control to
display text, such as a form title or instructions, or to dis-lay graphics and pictures from other software programs. An unbound control p
that displays text is called a label.m A calculated control displays a value calculated from data from one or more fields.To create a bound control, you use the Field List button on the Form Design toolbar to @is@@idy @ lisi'of fields
available from the underlying table or query. Then you drag fields from the field list box to the Form window and place the bound controls where you wantthem to appear on the form.

TUTORIAL 5 CREATING MORE ADVANCED QUERIES AND CUSTOM FORMS
To place other controls on a form, you use the tools on the toolbox. The toolbox is a specialized toolbar containing buttons that represent the tools you use to place controls on a form or a report. ScreenTips are available for each tool. If you want to show or hide the toolbox, click the Toolbox button on the Form Design toolbar. The tools available on the toolbox are described in Figure 5-21.
Figure 5-21Summary of
tools availablesize and @@@it r6
in the toolboxfor a form or
report Control Wizards Activate Control Wizards for certain other Notoolbox tools
Text Box Display a label attached to a text box that Nocontains a bound control or a calculated control
Toggle Button Display a toggle button control bound to a YesYes/No field
Option pel
Check Box Display a check box control bound to a YesYes/No field
List Box Display a control that contains a scroilableYes
list of valuesn
Image Display a graphic image YesFool Unbound Object Disp@ay@a frame
@OLE object,'su@spreadsheet
Bound Object Display a frame for enclosing an bound OLE YesFrame object stored in an Access database table
@pabegi @@cr@en on
on a rt@
Tab Control Display a tab control with multiple pages No77-@@
S6bform/ ta,Displ@rdo from', h
@sub@eport@Line Display a line NoRectangle Disi3lav a rectangl@@
More Controls Display a list of all available controls NoC R EAT ING MO RE AD VAN C ED Q U ER I ES AN L) GU ti
The Form window in Design view also contains a Detail section, which appears as a light gray rectangle, in which you place the fields, labels, and values for your form.You can change the size of the Detail section size by dragging its edges. The grid consists of the
dots that appear in the Detail section to help you position controls precisely on a form.The rulers at the top and at the left edge of the Detail section define the horizontal and
vertical dimensions of the form and serve as a guide to the placement of controls on the form.
Your first task is to add bound controls to the Detail section for the CustomerNum and CustomerName fields from the Customer table.
When you add a bound control to a form, Access adds a field-value text box and, to its left, a label. The text box displays the,,field values from the table or query, and the label identifies the values. To create ' a bound control, you display the field list by clicking the Field List button. Then you sele@ct@one or more fields from the field list box and drag them to the form. You select a single field by clicking the field. You select two or more

fields by holding down the Ctrl key and clicking each field; and you select all fields by double-
clicking the field list title bar.You will add bound controls to the Detail section for two of the fields in the field list.Because you will not need the toolbox for a while, you can close it.
To add bound controls for the CustomerNum and CustomerName fields:
1. Click the Close buttonZ on the toolbbx to close it.
2. If necessary, click the Field List button [@] on the Form Design toolbar to display the field list.
3. Click CustomerNum in the field list, press and hold the Ctri key, and then click CustomerName in the field list. Both fields are selected.
4. click the highlighted fields and then drag them to the form's Detail section. Release the mouse button when the pointer dW is positioned at the 1-inch mark on the horizontal ruler and just below the top of the Detail section, Access adds two bound controls-one for the CustomerNum field and one for the
CustomerName field-in the Detail section of the form. See Figure 5-22.
Figure 5-22Adding textboxes andattached labels field listas boundcontrols to the
form ......... two text boxes are
two attached labels d controls linked
e table field values
position the Ipointer here
@V U.? E ADVANC ED Q U C RIES A t4 D C US TOM FORMS
TROUBLE? Your controls do not have to be in the exact same position as the
controls in Figure 5-22i However, they should be in approximately the same posi-tion@ If you did not DOsition the bound controls pr
r@l operly in the Detail section,click the Undo button n on the Form Designt oo@bar t '
0 delete the text boxesand labels from the Detail sectio
co I ntrols. n@ Then repeat Steps 3 and 4 to add the bound
4. Click the Close button on the field list to close it.
Working on a form in Design view might seem awkward at first. With practice you wille wit

become comfort'ab] I h creating a custom form. Remember that you can always click
the Undo button immediately after you make an error or undesired form adjustment.Comparing the form's Detail section with Barbara's design, notice that you need to
arrange the text boxes so that they appear next to each other. To do so you must select and move the controls.
Selecting and Moving ControlsTwo text boxes now appear in the form's Detail section, one below the other. Each text box is a bound control.,Iinked to a field in the underlying table and has a label box attached to its left. This means that if you move the text box, the label will move with it. Each text box and each label is an object on the form and appears with square boxes on the corners and edges. These boxes are called handles. Handles appear around an object when it is selected and they allow you to move or resize the control.@@@@SELECTING Co@T OLS@C@@k @ th@@l@@once,@pres@@@@Handies@a a rou d alm @To@ move a single@@ se@ecte ove@
handle @ah dr@g@ i@'to@ it@:@nE
group of, selecte clic d coh-'
not c dle) and:group,
tion.,,Conti osi
TO move a single bound control, you must first select just that control. All the controls on your form are currently selected and will move together if you move any one of them. You first need to deselect all of the bound controls and then select the CustomerName control to move it to the right of the CustomerNum control. The CustomerName control consists of the CustomerName field-value text box and the corresponding label to its left.

C R EATI NG MO RE ADVANCED Q U ER I ES AND C U STO M FORMS TUTORIAL 5
To select the CustomerName bound control:
ctio n to ed controls,,
b tor pper-left
b es appe, e fieli e F!gL re 5-23.
Figure 5-23Selecting a
single boundcontrol
I . . . 2 3 4
label boxes
move handles
sizing handlesYou can in ove a field -value text box and its attached label box together. To move
them, place the pointer anywhere on the border of the field-value text box, but not on a move handle or a sizing handle. When the pointer changes to -4, you can drag the field-value text box and its attached label box to the new location. As you move the boxes, their out-line moves to show you the changing position.
You can also move either the field-value text box or its label box individually. If you want to move the field-value text box but not its label box, for example, place the pointer on the text box's move handle. When the pointer changes to drag the field-value text box to the new location. You use the label box's move handle in a similar way to move just thelabel box.
To arrange the text boxes to match Barbara's design, you must move the CustomerName control up and to the right.
To move the CustomerName control:the @r)6!nt6r:on,thecustomerName control; but not on a move h6ndle or a
:wh@en up andn butli to guide
one : you6 tol
Figure 5-24 aligiMoving theCustomerNamecontrolI . . . 2 . . . 4 . . . . . . .

[_I" I A. 24 TUTORIAL 5 CREATING MORE ADVANCED QUERIES AND CUSTOM FORMSAk
@TROUB,LE? Your control does not have to be in the exact same Position as the control in Fig @ure 5-24i However, @it
should be in approximately the same position,
and it should be aligned 'with the CustomerNum control@ If you did not place the control correctly, click the Undo button on the Form, Design toolbar, and then
repeat Step 1.
According to Barbara's design, the labels for the two controls should be "Customer No.:" and "Customer Name:" (respectively). To
modify the text of the labels, you need to change each label's caption.
Changing a Label's CaptionThe text in a label is defined by the field name or by the field's Caption property. By default, a label displays the field name as it exists in the underlying table- or query. If you want the label to display diffe@6rit text, you need to change the label's Caption property value.
BEL'SI,CA
n p buttc
perties
k the For I display the rmat pageC
heet.@@x E or
CL
a
to close.@it..,
You need to change the Caption property of the two labels on your form to "Customer No.:" and "Customer Name:" (respectively).
To change the Caption property value for the two labels:
1. Click the CustomerNum label box to select it.
2r Click the right mouse button to display the shortcut menu, and then click Properties. The property sheet for the CustomerNum label opens.
3. if necessary. Click the property sheet title bar and drag the property sheet down until the CustomerNUm and CustomerName label boxes are visible.
4. If necessary, click the Format tab to display the Format page of the property sheet.
5. Position the insertion point between the "r" and the '@N" in CustomerNum, and then press the spacebar.
TUTORIAL 5CREATING MORE ADVANCED QUERIES AND CUSTOM FORMS a _1.25
6. Position the insertion point between the @,m@, in Num and the colon following it,:
pre s the Backspace Ke. and then type o. (including the p i
s v twice, er od). The value should now be Customer No.6@. See Figure 5-25.
Figure 5-25Changing the
Caption
77property for Caption value the label
0.7708"
property sheetp@re@nt
Hairline
perty values on your screen might be different from
uc@ th as e i eft and Top margin values@ if your consiiions from those in @th6 figure.
7. C ick the CustomerName label box to select it, The property sheet now displays the properties for the CustomerName label, and the CustomerNum label in the Detail section now displays Customer No.:.
S. Position the insertion point between the "r" and 'IN" in CustomerName, and then press the spacebar. The label should now be Customer Name'.
9. Click the Close button A on the property sheet to close it@
When you create a form, you should periodically check your progress by displaying the form in Form view. You might see adjustments you want to make on your form in Design view. Next, you'll save the current form design and then view the form in Form view.
To save the form and switch to Form view:
JL. Click the Save button Nfl on the Form Design toolbar The Save As dialog box :Opens.@
2. Type Customer Information Multi-pagei and then press the Enter key, Accesssaves the form design.
3. Click the View button for Form view
on the Form Design toolbar. Access closes the Form
wind6w@in Design view and displays the form in Form view. See Figure 5-26
Figure 5-26 Ml
Form window in

Form view
record displayed in
custom form
26 5
ik TUTORIAL C R E AT I N G M 0 R E A D VA N C E D Q U E R I E S A N D C U S T 0 M F 0 R M S
Access displays the CustomerNum and CustomerName field values for the first record in the Customer table (Meadows Restaurant). You can use the navigation buttons to view other records from the table in the form.
The form displayed in Form view reveals some adjustments you need to make to the form design. The CustomerNum field-value text box is too large for the field value, and the CustomerName field-value text box is too small for the field value. So you will resize both of the text boxes.
Resizing Controls
A selected object displays seven sizing handles, one on each side of the object and oi-ie at each corner except the upper-left corner. The upper-left corner displays the move handle. Positioning the pointer over a sizing handle changes the pointer to a two-headed arrow; the direction in which the arrows are pointing indicates the direction in which you can resize the selected object. When you drag a sizing handle, you resize the control. Thin lines appear, which guide you as you resize the control.
You'll begin by resizing the CustomerNum text box, which is much larger than necessary to display the three-digit customer number. Then you'll resize the CustomerName text box to make it large enough to display the complete customer name.
To resize the two text boxes:
1. Click the View button for Design view on the Form View toolbar to return to the Form window in Design view.
2.. Click the CustomerNum text box@to select it.
3. Place the pointer on the middle right handle.@ When the Dclick and d@ag the right border horizontally to@the le Unti approxi,mately the size of the text box shown in Figure 5-27@
TROUBLE? If you c6ange the verticai size of the box b@ lick the Undo button El on the Form Design toolbar@and then rep( a @St p@8,
Now you will move the: CustomerN,am@, control to its correct Positions: n'd then: resize the CustomerName text box@

4. @c er0 a\A cl
iz

C R EATI NG MO RE A DVAN C ED Q U ER I ES AND CUSTOM FORMS TUTORIAL 5
2@7
S. Place the pointer on the:middle 'right handed of the@c6ntroi@ When the pointer, changes to +-+, click and drag the right border horizontally to the right u ntil the right edge of the text box is at the 4%-inch mark on the horizontal ruler. Release the mouse button. See Figure 5-27.
Figure 5-27CustomerNum
and
CustomerName 5eriftext boxes
3 . . . 4moved andresized
um textCustomerN CustomerNalbox resized
text box movand resized
6. Click the View button for Form view on the Form Design toolbar to view the controls on the form. Notice that the text boxes are now the appropriate size for
displayingthefieldvalues.
Now you will add the title and picture to the top of the form.
Using Form Headers and Form FootersThe Form Header and Form Footer sections allow you to add titles, instructions, com-mand buttons, and other information to the top and bottom of your form, respectively. Controls placed in the Form Header or Form Footer sections remain on the screen when-ever the form is displayed; they do not change when the contents of the Detail section change. To add either a header or footer to your form, you must first add both the Form Header and Form Footer sections as a pair to the Form window in Design view. If your form needs one of these sections but not the other, you can remove a section by setting its height to zero, which is the method you would use to remove any section on a form.
ADDING AN q RE FORM@HEADE@R TERSECTIONS
Displav the form in Desigm Click View on the menu be Form Header/Footerto @add a c @"r section to theform.n To,'remo er anddrag the th or readisappears@
IJI?IAL 5 CREATING MORE ADVANCED QUERIES AND CUSTOM FORMS
According to Barbara's design, your form must include a Form Header

section that will
contain the form title and a picture of the Valle Coffee cup logo. You need to add this section to your form.
To add Form Header and Form Footer sections to the form:
1. Click the View button for Design view M on the Form View toolbar to switch to Design view@
2. Click View on the menu bar, and then click Form Header/Footer.
Access inserts Form Header section above the Detail section and a Form
Footer section below
the Detail section. See Figure 5-28.
Figure 5-28Adding theForm Header
and FormFooter sections
Form Header section
Form Footersection
You do not need a Form Footer section in this form, so you'll remove it by making its height zero.
To remove the Form Footer section:
1. Place the pbi.Qter at the bottom edge of the Form Footer section. When the pointer changes to -17, click and drag the bottom edge of the section up until it disappears. Even though the words Form Footer remain, the area defining the section is set to zero, and the section will not appear in the form.
You can now add the title to the Form Header section with the Label tool on the toolbox,
6 L ,_ 5.29
CREATING MORE ADVANCED QUERIES AND CUSTOM FORMS TUTORIAL a
The form design shows a title at the top of the form. You can add a title or other text to a form by using the Label tool on the toolbox.

n,on'th
toE Place thi @pointer at the posi
the@ laclick left mouse button.
where e label will appear.Type the@text@for the label in
s Click anywhere outside of th(
You'll begin by placing a label box for the title in the Form Header section.
To place a label on the form:
1. Click the Toolbox button 91 on the Form Design toolbar to display the toolbox.
2. Click the Label tool N on the toolbox.
3. Move the pointer to the Form Header section. The pointer changes to A.
4. Place the pointer in@ the upper-left corner of the Form Header section. This will be the upper-left corner of the label.
S.@ Click the left mouse button. Access inserts a small label box in the Form He6der@
section and places the insertion point in the label box.
6. Type Valle Coffee Customer Information in the label box, and then cl@ck any-@ where
outside of the label box to deselect the label box and enter the text, See Figure 5-29.
Figure 5-29 Label placed in the Form Header section5-
label addedCustc met ame
Barbara wants the title to be prominent on the form, so you will change the format of the text in the label to Increase
its font size and change the font weight to bold. You do this by using the buttons on the Formatting toolbar.FORMS

TUTORIAL 5 CREATING MORE AL-)VANCED QUERIES AND CUSTOM
To change the font size and weight for the title:1. Click the title label control to select it@
2. Click the Font @ize list arrow on the Formatting toolbar, and then click 14,3. Click the Bold button on the Formatting toolbar. See Figure 5-30.
Figure 5-30 .......Setting the Boldproperties for buttonthe title label Sans 5erJfcontrol. . . . . . . click tolabel font size and I select
fontweight changed
size
The label control now displays the title in 14-point boid. Howeveri the label, con-tr6l is not large'enough to display the entire@ title, You need to resize the label control so that it is large enough to display all the text@
4. Click Format on the menu bar, point to Size@ and then click @TO Fit. The label con-
troi is resized to display the entire title. The Form Header automatically increases in size to accommodate the@ new label size. See Figure 5-31.
Flgure 5-31Title label
control resizedto fit
title resized position
for picture
Image button
Barbara also wants the Valle Coffee logo, which is a picture of a coffee cup, to appear at the top of the form. You will now add the picture to the Form Header section.
IL, Tf r@ nTf-IEI;ERMLZJL@ l@l I
Access has the ability to use files and data created by other software programs. To enhance the appearance of a form or report, for example, you can include a picture or other graphic image on the form or report. To do so you use the Image tool on the toolbox.

CREATING MORE ADVANCED QUERIES AND CUSTOM FORMS TUTORIAL 5 5=3 IL
In this case, the Valle Coffee logo was created in a drawing program and saved in a file named ValleCup. Now you'll add this picture to the top right of the form.
To place the picture on the form:
I Cl ilk: th@ lm@@@@ooi
2.,@move the pointer to
3. Using the ruler as a 0Header section n el
(See Figure 5-3 position.):picture.
4.@'6iick the left m place@@ @(utli-n;i@eand opens the lr rt Picture d box.
Figure 5-32Insert Picturedialog boxgcup
kVall.C,,pplace this picturein form
Files
S.: Make sure @Tutor the@L06k clickpicture file, 'and e@OK butt6i
Access closes the insert P@Heaaer section automati4cal
No@ view@@th @e: form with theA IV L) CUSTOM FOR
W theFigure 5.33
Viewing theform with the
new header
Form Header sectionDetail sectionBarbara views the form and confirms that the title and picture are correctly Placed, formatted, and s,'zed. However, she would like the backgro@ und color of the form to be dark gray to match tile background color Of the Picture, sobetter with the form. that the Picture will blend in
Changing lle 13ackground Color of a FormObject

YOU can change the background color of a form or of a specific section or object on the form by us,Ing tools available in Design view.
You need t? change the background color of the Form Header section and the Detailsection of the lorm to match the background color of t
ture to blend - he Picture. This will cause the picin with the form.

C R EATI NG MO RE ADVA NC ED QU ER I ES AND C U STO M FORMS TUTORIAL 5
To change the background color of the Detail and Form Header sections:
Figure 5-34 EmmmmChanging the
4mbackground
color of theform sections
Fill/Back Colorbutton
Fill/Back Colorpalette
4. clic
gravel
5
6 b 'ar.'
n in ForA 5:'S@ t( bar to
m ow the@5
Figure 5-35Form with new
backgroundcolor
medium graybackground color ?.u@@@Restaurant
applied

XXXXXQUERIES AND CUSTOM FORI
QA5.34e,
Whati'thediffer'ncebetweenaboundcontrolandanunboundcontrol?How do you move a control and its label together?
How do you change a label "name.?
How do you resize a control?What is the Form Header section?How do You insert a p'
icture, created using another software program, in a form?You are now ready to add the two pages to the form to display the customer address an contact information on one page and the order information on another.
In this session, you will create a multi-page form and use Control Wizards to add a subform. You will also use the custom form to filter the data and save the filter as a query.
Creating a Multi-pac6fqm,- Form Using Tab ControlsYou can create a multi-page form in two ways: by inserting a page break control in the form or by using a tab control. If you insert a page break control in a form, the user can move between pages using the Page Up and Pag
e Down keys on the keyboard. If you use a tab control, the control appears with tabs at the top, one tab for each page. The user can switch between pages by clicking the tabs.
Barbara wants to include a tab control with two pages on the Valle Coffee Customer Information form. The first page of the tab control will contain customer information, such as the customer name, address' and other fields from the Customer table. The second page of the tab control will contain a subform with order information for that customer.First you will resize the Detail section of the form to make room for the tab control.
To resize the Detail section:Now you can place the tab control on the form.

CREATING MORE ADVANCED QUERIES AND CUSTOM FORMS TUTORIAL 5
To place the tab control on the form:
i. Click the Tab Control to6i@ on
2.@ Place the pointer at the left edgebelow the top of the betaii sectio
on, approximately 'kinch@@e left mouse button.@ (Referto Figure 5-36 for:the correct position for the tab control.) Access places @a tab control in the betaii@secti6n.@Now you will resize the tab control so that it is large enough to display the remaining fields for, the form,
3.middle handle @of the tab control, and then dr@g it:to the right until it is three grid dots from the@ right edge of the form.: Release the mousL-'bbtton. See Figure 5-36.
Figure 5-36Tab control
placed in theDetail section
ans Ser@,TabCtl4
and resized2.............. 3 4 . . .
tab for second page Iof tab control
tab for first page of I C stom' CustomerNameU
tab controlScroll @down the Form window Until the tab'c6ntr6i is completely visible, click the righttab control in form
Tabtcontrol@
200sizing handles
different page numberTROUBLE? The page@ tabs on Your screen might show S in
the labels, depending on how you'completed the previous steps@ This will hot affect the@form. Just continue with the tutorial.
The top of the tab control displays two tabs. Each tab indicates a separate page on the form. On the first page, you will place the controls for the fields from the Customer table. On the second page, you will place a subform displaying the fields from the Order table for that customer. The user can move between the two pages by clicking the tabs.To add the fields to the tab control:
1. Click the Field List button oh the Form Design toolbar to display the field list.2.; Click the Street field in the field list, scroll tolthe end of the field listo press and hold the@@ Shift key,@ and then click the FirstContact field. All the fields in the list except CustomerNum and Cust6merName, should be selected3. Drag the selected fields to the tab control and release@ the mouse button when the pointer is@
approximately at the :L-Inch mark on the horizontal ruler.

QA5.36 1) UHLATING MORE ADVANCED QUERIES AND CUSTOM FORMS
4. Click the Close button Z on the field ii
st to close it.
S. Click a, blank area of the tab control to deselect the text boxes and their labels.'
Now you need to move and resize the text boxes to @match Barbara's form design@
6.: Click the@Street text box to select l@t; and then place the Pointpr on its move
handle in the upper-I left co r. When t i he ' pointer changes to * , click and drag the Street text box to the 1( to the Y,-inch mark (approximately) on the horizontal ruler. Refer to Figure 5-37
help you position the text box.
71. Place the pointer on the middle right handle of the Street text box.: When the pointer changes to 4-+, click and drag the right border to the right until the text
box is approximately the size of the text box shown in Figure 5-37.
8. Move and resize the text boxes for the remaining fields@ Use Figure 5-37 as a guide for positioning and sizing the @text boxes.
Figure 5-37Customer fields @morname
placed in thetab control
bound controls addedto the first page of
the tab control

TROUBLE? Your controls do
controls in Figure 5-37. How
e position as theately the same posi-

t!6h. if you did not place the controls correctly, move and resize them now.
Notice that the label boxes on the form are left-justified; that is, they are aligned on theirleft edges. Barbara thinks that the form will look better if these labels are right-justified, or
aligned on their right edges. To align them, you will select all of the labels and use the shortcut menu.
Point: to@ click
To select and align all the label boxes on the right:
1. Click the Street label box to select it@
2. Press and hold the Shift key while you click' each of the remaining label boxes ,below the Street label so that all four are selected, and then release the Shift key-

C R EATI NG M ORE A DVANC ED Q U ER I ES AND C U STO M FORMS TUTORIAL 5
play the sho@tc
3. Righi@lick:@an 6ne@ of the selected label boxes to dis ut @@nu@
@y
4. Point to @4lign, and then click Rii!ht.' Acc"s aligns the label boxes on their@ right@@dg0s@@See. Figure 5-38,e
Figure 5-38 9 WbiW,,,Aligning the mornamelabelboxes
amelabel boxes
right-aligned act
qmiclosottaccats
TRO BLE?@ if the text boxes were realigned as well@ click the Undo button
on the Form Design@toOlbar, and then rei3eat Steps I through 4@
5. Sele( the three label boxes on the right (OwnerName; Phone, and FiestContact), and t en repeat Steps 3 and
4 to right-align them.
6. Click the View button for Form view on the Form Design toolbar to lew thev
form. See Figure 5-39.
Figure 5-39
First record inForm view
page tabs
r. Ray Such
controls moved and 3) 792-354
realigned 2/28/91
Mictosoft Accest

You are now ready to add the Order table fields as a subform on the second page of
the form.
TUTORIAL 5 CREATING MORE ADVANCED QUERIES AND CUSTOM FORMS
You use the Subform/Subreport tool on the toolbox to add a subform to a form. If you want help in defining the subform, you can first select one of the Access Control Wizards. A Control Wizard asks you a series of questions and then creates a control on a form or report based on your answers. Access offers Control Wizards for the Combo Box, List Box, Option Group, Command Button, and Subform/Subreport tools, among others.You will use the Subform/Subreport Wizard to add the subform for the Order table records. This subform will appear on the second page of the form.
To add the subform to the form:
i. Click the View button for Design View on the Form View toolbar to switch to
"2,
Design view@
L2. Make sure the Control Wizards tool oh the toblbox@ is selected.3. Click the tab for the second page (the tab on the right)
@to select that page.4. Click the Subform/Subreport tool on the @toolbox.
S. Place the pointer near the upper-left corner of the tab control@ ;and then click the left mouse button@ Access places @a subfo@m control in the tab control and dis-plays the first Subform/Subreport Wizard dialog box.
This dialog box allows you to create a, new subform based on a table or quer@y, or use an existing subform. You will use the Qrder table as the basis for a new subform.
6. Make sure the Table/Query option button is seiectedi and:then@ click the Next button. Access displays the next Subform/subreport Wizard dialog box. See: Figure 5-40.
Figure 5-40Selecting the
table and fieldsfor the subform
click to display list of Itables and queries I-
CustomerNameStreetcityStateZipCodeOwne,Name

Phone
This dialog box allows you to select the table or query on which the su rm isbased and to select the fields from that table or query.
CREATING MORE CUSTOM FORMS TUTORIALADVANCED QUERIES AND
Figure 5-41Selecting the VA
linking field
make sure this option Iis selected
make sure this linkis selected
forSee@l
Figure 5-42Viewing the
form with thetab control
click to displaysecond page
13) 79
first page of 2/2tab control
TUTORIAL 5 CREATING MORE ADVANCED QUERIES AND CUSTOM FORMS
tab, on, the ri ht to di@@ia@@t@e@ot
Figure 5-43Viewing the
subform on thetab control

second page oftab control
Order records forMeadows Restaurant
in subform
After viewing the form, Barbara identifies several modifications she'd like you to make. The subform is not properly sized and the field values in the subform are not displayed completely. She wants you to res'ze the subform and the field values so that the entire field values are visible. She also wants you to delete the CustomerNum field from the subform, because the labels at the top of the form already provide both the customer number and the customer name. Finally, she asks you to delete the Customer Informat'on Subform label and edit the labels for the tabs in the tab control so that they indicate the contents of each page.
You can resize the subform, edit the labels, and delete the CustomerNum field from the subform in Design view. Then you can resize the Order columns 'n Form view. You will begin by resizing the subform, deleting its labels, and editing the labels for the tabs.To resize the subform, delete Its label, and edit the labels for the tabs:
2@ Scroi click thesubf,( e of the@@subfc o the sub-form the@on@the,
m sizing bform.
;pointer.chan cl :the, e,d j@e down I tMark oh the er.
IAL 5 4:1]C R E AT I N G M 0 R E A D VA N C E I Q I E I I I S AID CUSTOM FORMS T U T 0 R
4. Right-cli@k i@e@ @abei@@-i@r the @ubfort control, and then shortcutmenu. See Figyr6@
Figure 5-44Subform Cu $10MOr N. . ameresized andlabel deleted
label deletedu :ion Subform
2
subform resized
Now you @can chanae the labei@ @@n th@ iabs@ i@: @ 7
@Caption property for each tab.@
5.:@Right-click the @@@bform page tab

Properties menu
6. Click the Fi en typ See
Figure 5-45Setting the te@ CaCaption prope
rtyproperty valuefor the pagetabs
7. Click the page tab on the Iclick th cai)tion text@box; acustomer Information
Click: the Close button on the property she,et. to close, it,@
Next you'll delete the CustomerNum field from the subform. To do so, you need to open the subform in Design view.
To delete the CustomerNum field from the subform:
1. Click the Orders tab
2.'boubie'-cllck:ti@@@ subfc
3. Rston
4@. RStOM4 en
5. c uttonFornendow ir e sub rm,a Yes @ut saveran
T U T 0 R I A L@ 5 -, C R E AT I N G - M@ 0 R E A D IA N C E D Q U E R I E S A N D C U S TO M FO R M S
Now you can view the form and resize the columns in the Orders subform.
To view the form and resize the columns In the Orders subform:
Figure 5-46

Order fieldsafter resizing
resized fields
can: s6
e Save
Kim has a new request. She wants to see information for all of the new customers in Indiana or Ohio. She defines a new customer as one whose first contact date was in 1996 or later. She'd like to view this information using the Customer Information Multi-page form. To produce the results she wants, you need to use a filter with the form.
Using a Filter with a FormRecall that a filter is a set of criteria that describes the records you want to see in a datasheet
or a form and their sequence. A filter is like a query, but it applies only to the current datasheet or form. If you want to use a filter at another time, you can save the filter as a query.
Access provides three filter tools that allow you to specify and apply filters: Filter By Selection, Filter By Form, and Advanced Filter/Sort. With Filter By Selection and Filter By Form, you specify the record selection criteria directly in the form. Filter By Selection finds records that match a particular field value. Filter By Form finds records that match multiple selection criteria using the same Access logical and comparison operators that you use in queries. After at) lying a filter by selection or by form, you can rearrange the . p
records using the Sort Ascending or Sort Descending toolbar buttons, if necessary.
CREATING MORE ADVANCED QUERIES AND CUSTOM FORMS T U T 0 R I AL 5 r-IT S. 4 3]
Advance Filter/Sort allows you to specify multiple selection criteria and to specify a sort order for the selected records in the Advanced Filter/Sort window, in the same way you speci 'fy record selection criteria and sort orders for a query in Design view.
To produce the results Kim wants, you'll use Filter By Form.
KFT-TTR-XZM :i2riTru7ll
Because the Customer Information Multi-page form already shows all of the customer information, you can use Filter By Form to display information for only the new customers in Indiana or Ohio.
I G@@RE@@RDS@US

The multiple selection criteria you will enter are: Indiana and first contact after 12/31/95 or Ohio and first contact after 12/31/95.
To select the records using Filter By Form:
1. Click the Filter By Form button on the Form View toolbar. Access displays a blank form,@See Figure 5-47.
Figure 5-47Blank form forFilter By Form
Clear Grid button
enterselection criteriafor first And condition
on blank form
Or tabCREATING MORE ADIANCED QUERIES AND CUSTO M FORMS
In this blank form@ You specify multiple seiecti
tering conditions in
the text boxes for the@fields in a record. if youmore than one
field@ you creat 'Of an And conc it select any record
that matches@ a
for the first par n
and then click I pru@@ent(
the second par n@c nthis new
Access selects any record that a es all:th i ria@gn the ook fci fo rt or all the criteria on the Or form.
2. Click the State text box@ click the list arrow, and then click IN.
3. @Click the FirstContact text b6@@: and then type The number signs@indicate ci date.
You have now s.pecifor the condition
you need,@to display
4. Click the@ Or tab to box for the FirstCor "Or," is now availat
if You gmit@ihet, Access adds the

yPerator (And) and r12/3.1/95. To@@a a,
form. The inserti6 pointthe I textfield. I o that @a third tab, wi ch is abe@edcase you n d to pecify another Or condition.
S. Click the State text box@ click the ij arroi and then, click ON.
6. Click the FirstContact text box@ and then tvi Tttains the equivalent of the second And@conc fterFigure 5-48@
Figure 5-48CompletedFilter By Form
Apply Filter button
second And conditionentered on Or tab
A L 5
CREATING MORE ADVANCED QUCRICS AND CUSTOM FORMS T U T 0 R I
and the Filter
Combined with the Look ow have the Or condition,@By Form conditions are:
7. Click the Apply Flit6r@ bL FiltE Access applies the fi
ter and displays t;he,firs tche cri@eia@:(i@e @Gateway
LOU n Ohio, first cor ct or the screen shows that
2 rE s were@s6iectec Se gi
Figure 5-49First recordthat matchesthe selectioncriteria
Remove Filter button
ay Boule
indicates filter iapplied

8. Click the Next Record button
to display the second selected record (theFmbers Restaurant in Indiana, first contacted bn:3/2/97)@
Now that you have defined the filter, you can save it as a query, so that Kim can easily view this information again in the future.
:Si I
By saving a filter as a query, you can reuse the filter in the future by opening the saved query.
SAVING@A@FILTE@[email protected]
97I Crea
CI!6 thE
s@@ As
@TYp@ 'the e Enter key: (or
ci@k the C
You'll save the filter you just created as a query named "New Customers in Indiana
and Ohio."
TUTORIAL 5 CREATING MORE ADVANCED QUERIES AND CUSTOM FORMS
To save the filter as a query:
i. Click the Filter By Form button A on the Form, View toolbar. Access displa sthe form with the selection criteria.
2. Click the Savii As Query button' on the Filter/Sort toolbar. The Save AQuery dialog box opens@
3. Type New Customers In Indiana @@io @@@@the Querv Name enpress the Enter key. Access saves the filter as a query and c box@
Now you can clear the selection ;criteria@ @close the filter wind,Form view.
4. Click the Clear Grid button rt tooiba@ Access removes the
selection @criteria from the form
S. Click the Close button to c ndow and retUrn@to@Fori@view, he@
filter is still in@ effect t o@ remove it.@
6. Click@the Remove Fi tl Form View tooibar.@@The bottom of the
screen@ show@'tfiat @t] a, co@s"

Next, to check that the filter was saved as a query, you'll close the Form window and view the list of queries on the Queries tab.
To close the Form window and view the query list:
1. Click the Close button 0 on the Form View toolbar@
Ciick@ the Queries tab to display the Oueries list box@ The query "New Customers in Indiana and Ohio" is now listed@
The next time Kim wants to view the records selected by this query, she can apply the query to the form. If she simply runs the query, she will see the selected records, but they will not be shown in the Customer Information Multi-page form. Instead, she can open the form and apply the saved query to select the records she wants to view in the form.
LEUPIET-14
To see how to apply a query as a filter to a form, you will open the Customer Information Multi-page form and apply the New Customers in Indiana and Ohio query as a filter.
APCREATING MORE ADVANCED QUERIES AND CUSTOM FORMS TUTORIAL 5 5.47
To apply the filter that you saved as a query:
Figure 5-50Applicable
Filter dialogCustomer List
box 313 Area CodeNow Customers in Indian
r77click to select filter
saved as query
Schack'
ou would use a Control Wizard to add a tab control to a form.Describe how y
How do you right-align a group of labels?
How do you open a subform in Design view to edit it?
What is the purpose of Filter By Form?
How do you reuse a filter in the future?

What is the difference between opening a query and applying a query to a form?
The new queries and forms that you created will make it much easier for Leonard,Barbara, and Kim to enter, retrieve, and view information in the Restaurant database,