go to biosmedical.com for a free log book
TRANSCRIPT
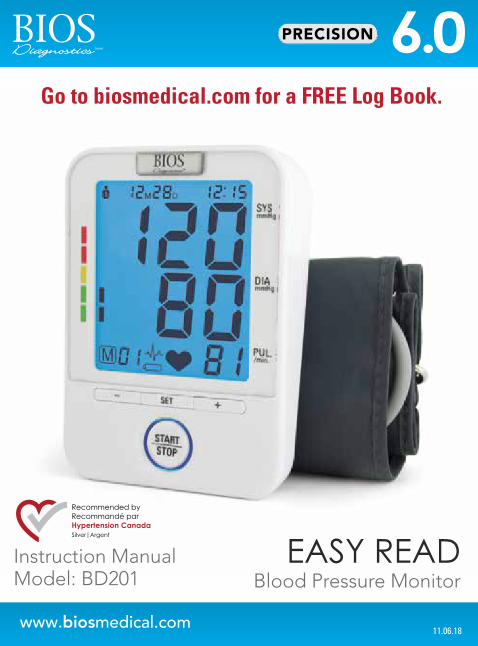
EASY READBlood Pressure Monitor
Instruction ManualModel: BD201
www.biosmedical.com
Go to biosmedical.com for a FREE Log Book.
11.06.18

Trusted by Canadians for 3 GenerationsAt BIOS Diagnostics™, we are proud of our legacy in blood pressure monitoring in Canada. From the early 1930’s to 1987 we manufactured “Tycos” brand professional blood pressure equipment for doctors and hospitals in Canada.
In the 1970’s we pioneered the first blood pressure devices for monitoring at home, and in the 1980’s we introduced digital technology in Canada. We haven’t been counting, but we know that millions of our home-use monitors have been used by Canadians in the last 30 years.
All BIOS Diagnostics™ devices are developed in collaboration with physicians and clinically tested to prove their measurement accuracy. For more information on clinical tests and other BIOS medical products, visit our website at www.biosmedical.com.
If you have questions about this device or blood pressure monitoring at home, email us at [email protected] or call the BIOS Medical Hotline 1-866-536-2289
Mark Beaton accepts the 2017 Hypertension Canada Certificate of Excellence from Angelique Berg, CEO of Hypertension Canada
Easy Read Blood Pressure MonitorInstruction Manual
Table of Contents
1. Introduction
1.1 Features1.2 Important Information
1.2A Safety Information1.2B Care of the Device1.2C Comparing Readings to other Blood Pressure Devices1.2D Calibration
1.3 What Do Your Numbers Mean?1.4 Normal Blood Pressure Values1.5 Common Blood Pressure Questions and Answers
2. Getting Started
2.1 About the BD2012.2 About the LCD Screen2.3 Inserting the Batteries2.4 Using the AC/DC Power Adapter
3. Using the Device
3.1 Select the User3.2 Setting Time, Date and Year3.3 Obtaining Accurate Measurements
3.3A Tips on taking Accurate Measurements 3.3B Common Sources of Error3.3C Fitting the Wide Range Cuff
3.4 Measuring Your Blood Pressure3.5 Discontinuing a Measurement3.6 Memory Recall3.7 Recall the Memory With the Power Off3.8 Clear Measurements from Memory3.9 Blood Pressure Assessment Indicator
4. Error Messages / Malfunctions
5. Care and Maintenance
6. 7 Year Warranty
7. Technical Specifications
1. IntroductionThank you for purchasing the BIOS Diagnostics™ Easy Read Blood Pressure Monitor. Designed for convenient and easy operation, this device provides a simple, yet accurate method to measure your blood pressure.
Your blood pressure is an important parameter that can be used to monitor your health. This device enables you to monitor your blood pressure regularly, and maintain a record of your blood pressure measurements. You can then use this record to assist your physician in diagnosing and maintaining a healthy blood pressure level.
1.1 FeaturesThe BD201 uses oscillometric technology to measure the arterial blood pressure and pulse rate. The cuff is wrapped around the arm and automatically inflated by the air pump. The sensor in the device senses weak fluctuation of the pressure in the cuff produced by extension and contraction of the artery of the arm in response to each heartbeat. The amplitude of the pressure waves is measured, converted in millimeters of the mercury column, and is shown on the display.
• Memory Features 2 users, 90 blood pressure readings each with time and date.• BP Assessment Indicator displays the range between which your blood pressure values lie, according to
Hypertension Canada.• Detects Irregular Heartbeat• BIOS Averaging - averages last 3 readings• Time and Date
This device is easy to use and has been proven in clinical studies to provide excellent accuracy. Before using the BD201, read this instruction manual carefully and keep it in a safe place.
The blood pressure monitor meets the accuracy requirements of Hypertension Canada and has been tested for clinical accuracy.
1.2 Important InformationRefer to the following sections to learn about important safety instructions and how to take care of the BIOS Diagnostics™ Easy Read Blood Pressure Monitor.
1.2A Safety Information• Self-measurement means control, not diagnosis or treatment. Your values must always be discussed with your
doctor or a physician who is familiar with your family history.• If you are undergoing medical treatment and receiving medication, consult your doctor to determine the most
appropriate time to measure your blood pressure. Never alter the dosages of any medication without direction from your doctor.
• Your blood pressure depends on several factors, such as age, gender, weight and physical condition. It also depends on the environment and your state of mind at the time of measurement. In general, your blood pressure is lower when you are asleep and higher when you are active. Your blood pressure may be higher when recorded at a hospital or a clinic and may be lower when measured in the relaxing comfort of your home. Due to these variations, we recommend that you record your blood pressure regularly at home as well as at your doctor’s clinic.
• Try to record your blood pressure regularly at the same time of the day and under the same conditions. This will help your physician detect any extreme variations in your blood pressure and thus treat you accordingly.
• Morning Hypertension (>135 / 85 mmHg): Recently, several studies have identified elevated cardiovascular risks (heart failure, stroke, angina) associated with “morning hypertension”. There is a typical rise in blood pressure during the physiological changes from sleep to arising for the day.
• The ideal time to measure your blood pressure is in the morning just after you wake up, before breakfast and any physical activity, and in the absence of the urge to urinate. If this is not possible, try to take the measurements

later in the morning, before you start any physical activity. Relax for a few minutes before you record your blood pressure.
• Your blood pressure increases or decreases under the following circumstances:
Blood pressure is higher than normal:— When you are excited, nervous, or tense— While taking a bath— During and after exercise or strenuous physical activity— When it is cold— Within one hour after meals— After drinking tea, coffee, or other caffeinated drinks— After smoking tobacco— When your bladder is full
Blood pressure is lower than normal:— After consuming alcohol— After taking a bath
• The pulse display is not suitable for checking the frequency of heart pacemakers.• If you have been diagnosed with a severe arrhythmia or irregular heartbeat, vascular constriction, liver disorders,
or diabetes, have a cardiac pacemaker, or are pregnant, measurements made with this instrument should only be evaluated after consultation with your doctor.
• Take care while handling the batteries in the device. Incorrect usage may cause battery fluid leakage. To prevent such accidents, refer to the following instructions: — Insert batteries with the correct polarity. — Turn off power after use. Remove and store the batteries if you are not planning to use the device for an
extended period of time. — Do not mix different types, brands, or size of batteries. This may cause damage to the product. — Do not mix old and new batteries. — Remove batteries and dispose of them according to the proper regulations in your area. — Do not disassemble batteries or expose them to heat or fire. — Do not short-circuit the batteries. — Do not use rechargeable batteries.
1.2B Care of the DeviceFor prolonged life of your blood pressure monitor, note the following instructions:
• Do not drop or bang the unit. Prevent sudden jerks, jars, or shocks to the device to prevent damage.• Do not insert any foreign objects in any device openings or vents.• Do not disassemble the unit.• If the unit has been stored at very low or freezing temperatures, allow to reach room temperature before using it.• Do not store the unit in direct sunlight, high humidity, or in places with a lot of dust.• Clean the device with a soft dry cloth. Do not use gasoline, thinner or similar solvents. Carefully remove spots on
the cuff with a damp cloth and soap. Do not wash the cuff.• Do not use the device if you think it is damaged or if anything appears unusual.• Ensure that children do not use this device unsupervised;some parts are small enough to be swallowed. • Using the unit in the immediate vicinity of mobile phones, microwave appliances or other devices with strong
electromagnetic fields may result in impaired functioning.• Do not use this device close to strong electromagnetic fields, such as mobile telephones or radio installations.
Keep a distance from such devices when using this unit.

1.2C Comparing Readings to Other Blood Pressure DevicesMany questions arise when two blood pressure devices are compared in an effort to check accuracy. An accurate comparison requires repeatable measurements under the same conditions, and significant time is required to reduce naturally occurring blood pressure variability during the test. For proper comparisons, the subject should be seated comfortably with feet flat on the floor, and have rested for 5 minutes before the first reading to allow blood pressure levels to stabilize. The patients back, elbow and forearm should be supported, and the middle of the cuff should be at the level of the right atrium. There should be no talking or moving during the measurement and if comparing to an aneroid gauge or mercury column, observers should avoid parallax and be careful not to round measurements.
The most accurate way to compare devices is to take two readings at the same time. However most people and doctor’s offices do not have the equipment necessary to measure blood pressure from two devices simultaneously. To take sequential measurements properly requires a pair of initial measurements to determine the subjects blood pressure level: first with the reference equipment, followed by 60 seconds, then with the monitor-under-test. The actual accuracy test requires three pairs of measurements with 60 seconds between measurements. These measurements are averaged and a comparison can be made. Since most people tend to relax and their blood pressure falls with subsequent measurements, following this protocol reduces these natural changes in Blood Pressure levels. The standard technical error of both consumer and professional devices is normally ±3 mmHg, so a discrepancy of 6 mmHg is acceptable even when the devices are working within their specifications.
Any comparisons without following the procedures described above will not yield reliable results. In addition, to do an accuracy test properly the reference device must also be tested to a known reference to confirm its accuracy, prior to being used as the reference for comparisons.
1.2D CalibrationDigital blood pressure monitors do not require recalibration. If the unit turns on and does not display an error code, the product is working properly. In extremely rare cases, the cuff may have developed a pin-hole leak, or the gasket where the cuff connector enters the monitor may not have a proper seal; both of these leaking air issues will potentially cause errors in accuracy, but otherwise the product will work accurately without drifting out of calibration.
1.3 What do your Numbers Mean?Blood pressure is the pressure in your blood vessels while blood circulates throughout your body. High blood pressure or “Hypertension” is the pressure at which ones normal average blood pressure is considered too high and other health risks including: heart attack, stroke, dementia, kidney failure, heart disease and erectile dysfunction may occur. It is expressed as two numbers: systolic/diastolic 120 mmHg/ 80 mmHg (mmHg= millimeters of mercury). “Systolic” numbers refer to the pressure on the walls of your arteries while the heart is contracting and pushing blood. “Diastolic” pressure is the lower number when the heart is at rest and relaxed. A simple way to understand this is to picture a garden hose. When the tap is turned on, the immediate pressure on the walls of the hose is the “systolic” number, and when the tap is turned off it is the “diastolic” number.
There are many different causes of high blood pressure. We differentiate between common primary (essential) hypertension, and secondary hypertension. The latter group can be ascribed to specific organic malfunctions. Please consult your doctor for information about the possible origins of your own increased blood pressure values.
1.4 Normal Blood Pressure ValuesBlood pressure is too high when measuring at home and you have rested, the diastolic pressure is above 85 mmHg or the systolic blood pressure is over 135 mmHg. If you obtain readings in this range, consult your doctor immediately. High blood pressure values over time can damage blood vessels, vital organs such as the kidney, and your heart.With blood pressure values that are too low (i.e., systolic values under 105 mmHg or diastolic values under 60 mmHg), consult with your doctor.

Systolic Diastolic Comment
Below 120 Less than 80 This range is considered “Normal” and ideal.
120 - 139 80 – 89 This range is considered “Pre-hypertension”: Discuss with your health care professional. Lifestyle modifications maybe required to avoid advancing into Hypertension.
140 – 159 90 - 99 This is in the hypertension range. Discuss with your health care professional. Medication(s) and lifestyle modifications are typical treatments.
160 and higher 100 + Discuss with your medical professional, medication(s) and lifestyle modifications
are necessary to control your hypertension.
Adopted From: Understanding and Managing your blood pressure; Hypertension Canada.
Note: A diagnosis of high blood pressure must be confirmed with a medical professional. A doctor should evaluate any unusual blood pressure readings. Additionally, lower targets may be appropriate for some populations such as African-Americans, the elderly, or patients with underlying issues such as diabetes mellitus or chronic kidney disease.Important for Canadians:* Hypertension measured at home ≥ 135/85* Hypertension measured at a physician’s office ≥ 140/90* Hypertension measured at a physician’s office for a diabetic patient ≥ 130/80
For further information, see our website www.biosmedical.com.
1.5 Common Blood Pressure Questions and Answersa) Why is my blood pressure reading always different?
Your blood pressure changes constantly. It is quite normal for blood pressure to fluctuate significantly (50 mmHg to 60 mmHg) throughout the day. Blood pressure is normally lowest at night, but increases during waking hours when the stress and activities of everyday life are highest.
b) Why is the doctor’s reading different from the reading taken at home?
Your blood pressure can vary due to the environment (temperature, nervous condition). When measuring blood pressure at the doctor’s office, it is possible for blood pressure to increase due to anxiety and tension, this is known as “White Coat Hypertension”.
c) Why should I monitor blood pressure at home?
One or two readings will not provide a true indication of your normal blood pressure. It is important to take regular, daily measurements and to keep records over a period of time. This information can be used to assist your physician in diagnosing and preventing potential health problems.
mmHg
AM Time PM
40
50
60
70
80
90
100
110
120
130
140
150
160
170
8.00 10.00 12.00
Typical 24 - Hours Rhythm
14.00 16.00 18.00 20.00 22.00 24.00 2.00 4.00 6.00 8.00
systolic blood pressure
diastolic blood pressure

2. Getting Started2.1 About the BD201This section describes the various components of the Easy Read Blood Pressure Monitor.
Wide Range Cuff
Cuff Connector
Setting Button
Air Socket For Cuff
Connector
Memory Down
Button Memory Up Button
Start/Stop Button
AC/DC Socket
Upper arm cuff:
Wide range cuff for arm circumference 24-43 cm or 9.4” - 17”.
Cuff connection: Insert the cuff connector into the opening provided on the left side of the monitor as shown in the diagram.
2.2 About the LCD ScreenThe LCD screen displays the systolic and diastolic blood pressure measurements along with your heart rate. It alsodisplays previously recorded measurements and the date and time, when the appropriate button is pressed.
Year / Month / Date / TimeUser
Blood Pressure Classification
Memory Symbol
Memory Times
Systolic Blood Pressure
Diastolic Blood Pressure
Pulse
Heartbeat RythymLow Battery
Irregular Heartbeat

2.3 Inserting the BatteriesFollow these steps to insert four “AA” batteries in the device.
1. Open the battery compartment cover in the direction shown.
2. Insert four “AA” batteries with the correct polarity as indicated.
3. Replace the battery compartment cover.
Attention!
• After the battery warning appears, the device is blocked until the batteries have been replaced.• Please use “AA” Long-Life or Alkaline 1.5V batteries.• If the blood pressure monitor is left unused for long periods, please remove the batteries from the device.• Do not mix old and new batteries. Do not mix alkaline, standard (carbon-zinc) or rechargeable batteries.
2.4 Using the AC/DC Power AdapterYou may also operate this monitor using the included AC/DC adapter. Use only the included adapter to avoid damaging the unit.
1. Ensure that the AC/DC adapter and cable are not damaged.2. Plug the adapter cable into the AC/DC adapter port on the top of the
blood pressure monitor.3. Plug the adapter into your electrical outlet. When the adapter is
connected, no battery current is consumed.
3. Using the DeviceThis section describes how to get the maximum benefit from your BD201 blood pressure monitor. Follow the instructions carefully to get an accurate measurement of your blood pressure and pulse rate.
NOTE: Setting the user, year, month, date and time is one sequential process.
3.1 Select the User1. Start with the power off, but with batteries or adapter inserted.2. Press the SET button 1 time, the user will appear in the upper left corner.
Use the “+” or “-” button to choose user or
3.2 Setting the Time, Date and Year1. Immediately after selecting the user, press the SET button, the YEAR will flash. Use the “+” or “-”
button to choose the year and press SET to store in the memory.2. Repeat the same process to set the MONTH by using the “+” or “-” button. Press the SET button to
store it in the memory.
LR6(AA)
1.5Vx4

3. The same process is repeated to set the DATE. The date will flash and can be changed with the “+” or “-” button. Afterwards, HOURS will begin to flash.
4. TIME; hours, and then minutes can be set following the same procedure by using the “+” or “-” buttons. Finish the process by pressing the SET button and the USER, YEAR, MONTH, DATE, HOUR and MINUTES will all be stored in the products memory.
NOTE: In order to change any setting you must repeat the process and confirm each setting by pushing the SET button.
3.3 Obtaining Accurate MeasurementsYour blood pressure can vary based on numerous factors, physiological conditions, and your surroundings. Follow these guidelines to obtain accurate and error-free measurements of your blood pressure and pulse rate.
3.3A Tips on Taking Accurate MeasurementsIn the morning before breakfast, 2 hours after dinner, before taking medication.
Avoid coffee and smoking within the hour, and no exercise 30 minutes before measuring.
Do not speak while taking the measurement.
Sit with legs uncrossed so as not to restrict blood flow.
Empty bladder (if necessary).
Rest quietly for 5 minutes. Remain calm and quiet while the measurement is in process.
Take measurements on the non dominant arm.
Sit with back supported and measurement arm resting on a table. Sit with feet flat on the floor.
Ensure that the cuff is level with the heart while the arm is supported on the table.
3.3B Common Sources of ErrorAll efforts by the patient to support the arm can increase the blood pressure. Make sure you are in a comfortable, relaxed position and do not activate any of the muscles in the measurement arm during the measurement. Use a cushion for support if necessary.
ATTENTION!
Comparable blood pressure measurements always require the same conditions with a peaceful and calm environment. Ensure that you take measurements under the same conditions to obtain an accurate estimate of blood pressure variation patterns.
• If the arm artery lies considerably lower or higher than the heart, an erroneous value of blood pressure is measured. Each 15 cm difference in height results in a measurement error of 10 mmHg.
• A loose cuff causes false measurement values.• With repeated measurements, blood accumulates in the arm, which can lead to false results. Consecutive blood
pressure measurements should be repeated after at least a 15 second pause or after the arm has been held up in order to allow the accumulated blood to flow away.
H M

3.3C Fitting the Wide Range Cuffa) Put the end of the cuff (with fastener) through the metal ring, making
the cuff a cylinder. (Ignore this step if your cuff is already set up.) Proper assembly allows the Velcro® to match up properly. Measure on your non-dominant arm, unless there is a >10 mmHg difference with the other arm, in which case use the arm with the higher pressure.
b) Place the cuff around your bare arm. Make sure the bottom edge of the cuff is about 1” (2-3 cm) above the elbow joint. Adjust the cuff so that the rubber tubing under the cuff lies over the brachial artery, which runs on the inside of the arm (see Fig. B). The red material should be over the brachial artery.
c) Pull the cuff and tighten it by attaching the Velcro® fastener.
d) The cuff should fit snugly around the bare arm, but not too tight. You should be able to fit two fingers under the cuff. If the cuff is the wrong size, the device will not measure your blood pressure accurately. Contact the store, or BIOS Medical for other sized cuffs.
e) Place the arm on the table (palm facing upwards) so that the cuff is at the same level as the heart. Make sure there is no kink in the hose.
f) You can adjust the level of your arm by putting a cushion under your arm. Ideally the cuff should be at heart level.
g) Remain seated in a comfortable room temperature for at least 5 minutes, then start the measurement.
h) For those who cannot put the cuff on the left arm, put it on the right arm as shown.
a)
e)
f)
d)
b)
c)
h)
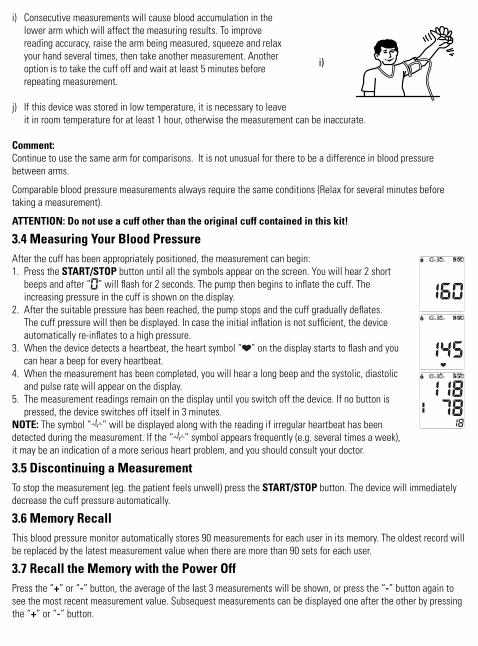
i) Consecutive measurements will cause blood accumulation in the lower arm which will affect the measuring results. To improve reading accuracy, raise the arm being measured, squeeze and relax your hand several times, then take another measurement. Another option is to take the cuff off and wait at least 5 minutes before repeating measurement.
j) If this device was stored in low temperature, it is necessary to leave it in room temperature for at least 1 hour, otherwise the measurement can be inaccurate.
Comment:Continue to use the same arm for comparisons. It is not unusual for there to be a difference in blood pressure between arms.
Comparable blood pressure measurements always require the same conditions (Relax for several minutes before taking a measurement).
ATTENTION: Do not use a cuff other than the original cuff contained in this kit!
3.4 Measuring Your Blood PressureAfter the cuff has been appropriately positioned, the measurement can begin:1. Press the START/STOP button until all the symbols appear on the screen. You will hear 2 short
beeps and after “ ” will flash for 2 seconds. The pump then begins to inflate the cuff. The increasing pressure in the cuff is shown on the display.
2. After the suitable pressure has been reached, the pump stops and the cuff gradually deflates. The cuff pressure will then be displayed. In case the initial inflation is not sufficient, the device automatically re-inflates to a high pressure.
3. When the device detects a heartbeat, the heart symbol “ ” on the display starts to flash and you can hear a beep for every heartbeat.
4. When the measurement has been completed, you will hear a long beep and the systolic, diastolic and pulse rate will appear on the display.
5. The measurement readings remain on the display until you switch off the device. If no button is pressed, the device switches off itself in 3 minutes.
NOTE: The symbol “ ” will be displayed along with the reading if irregular heartbeat has been detected during the measurement. If the “ ” symbol appears frequently (e.g. several times a week), it may be an indication of a more serious heart problem, and you should consult your doctor.
3.5 Discontinuing a MeasurementTo stop the measurement (eg. the patient feels unwell) press the START/STOP button. The device will immediately decrease the cuff pressure automatically.
3.6 Memory RecallThis blood pressure monitor automatically stores 90 measurements for each user in its memory. The oldest record will be replaced by the latest measurement value when there are more than 90 sets for each user.
3.7 Recall the Memory with the Power OffPress the “+” or “-” button, the average of the last 3 measurements will be shown, or press the “-” button again to see the most recent measurement value. Subsequest measurements can be displayed one after the other by pressing the “+” or “-” button.
i)

3.8 Clear Measurements From MemoryIf you are sure that you want to permanently remove all stored memories, press the SET button 7 times until “ ” appears when the power is off. Press the START/STOP button until “ ” flashes 3 times to clear the memory. After this, press either the “+” or “-” button, the symbols “ ” and “ ” will appear on the screen. This means that the memory has successfully cleared.
3.9 Blood Pressure Assessment IndicatorThe bars on the left hand side of the display show you the range within which the indicated blood pressure values lies. Depending on the height of the bar, the readout value is either within the normal (green), borderline (yellow) or danger (red) range.
The classification is based on standards adopted by Hypertension Canada.
The indicator bar rises according to your measurement.
• If your measurement has only one or two bars, your measurement is in the green zone, or “Normal”.
• If your measurement has three bars, it is in the yellow zone, or “High Normal”, in the pre-hypertensive range.
• If your measurement has four bars, it is in the red zone “High Blood Pressure with Self / Home Monitoring”.
• If your measurement has five bars, it is in the red zone or “Moderate to Severe Hypertension”.
4. Error Messages / MalfunctionsIf an error occurs during a measurement the LCD displays the corresponding error code.
Error Possible Cause Remedy
Weak signal or a sudden change in pressureEnsure that the cuff is worn correctly and measure again. Avoid movement or talking when the cuff is being inflated.
External disturbance (eg. if there is a cell phone near by)
Electromagnetic interferance can cause odd behaviour in the monitor. Move away from the source.
Appears when there is an error during the inflation process
Make sure the cuff is wraped around the arm properly and that the air plug is properly connected to the unit.
SYS 145135-145
9585-9581-8470-80
70
121-134110-120
110
(mmHg) DIA Red Red
Yellow
Green
Green
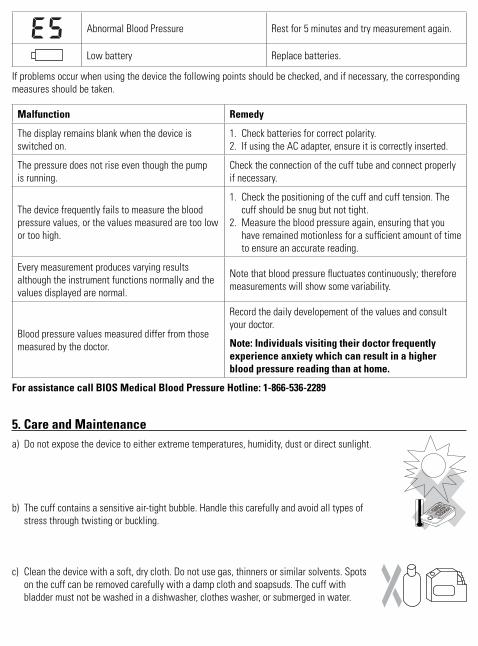
Abnormal Blood Pressure Rest for 5 minutes and try measurement again.
Low battery Replace batteries.
If problems occur when using the device the following points should be checked, and if necessary, the corresponding measures should be taken.
Malfunction Remedy
The display remains blank when the device is switched on.
1. Check batteries for correct polarity.2. If using the AC adapter, ensure it is correctly inserted.
The pressure does not rise even though the pump is running.
Check the connection of the cuff tube and connect properly if necessary.
The device frequently fails to measure the blood pressure values, or the values measured are too low or too high.
1. Check the positioning of the cuff and cuff tension. The cuff should be snug but not tight.
2. Measure the blood pressure again, ensuring that you have remained motionless for a sufficient amount of time to ensure an accurate reading.
Every measurement produces varying results although the instrument functions normally and the values displayed are normal.
Note that blood pressure fluctuates continuously; therefore measurements will show some variability.
Blood pressure values measured differ from those measured by the doctor.
Record the daily developement of the values and consult your doctor.
Note: Individuals visiting their doctor frequently experience anxiety which can result in a higher blood pressure reading than at home.
For assistance call BIOS Medical Blood Pressure Hotline: 1-866-536-2289
5. Care and Maintenancea) Do not expose the device to either extreme temperatures, humidity, dust or direct sunlight.
b) The cuff contains a sensitive air-tight bubble. Handle this carefully and avoid all types of stress through twisting or buckling.
c) Clean the device with a soft, dry cloth. Do not use gas, thinners or similar solvents. Spots on the cuff can be removed carefully with a damp cloth and soapsuds. The cuff with bladder must not be washed in a dishwasher, clothes washer, or submerged in water.
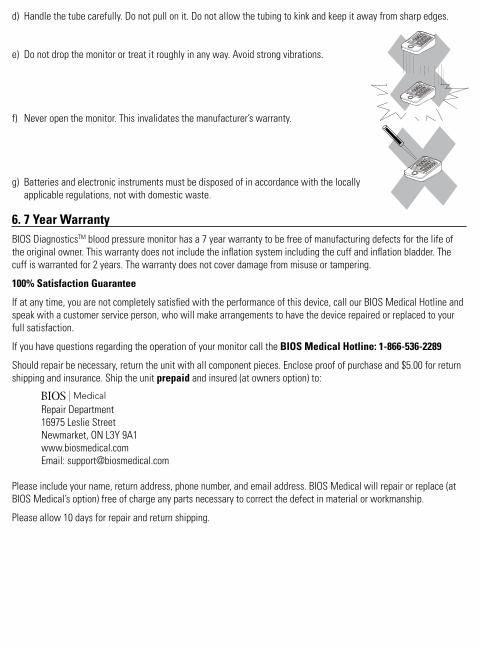
d) Handle the tube carefully. Do not pull on it. Do not allow the tubing to kink and keep it away from sharp edges.
e) Do not drop the monitor or treat it roughly in any way. Avoid strong vibrations.
f) Never open the monitor. This invalidates the manufacturer’s warranty.
g) Batteries and electronic instruments must be disposed of in accordance with the locally applicable regulations, not with domestic waste.
6. 7 Year WarrantyBIOS DiagnosticsTM blood pressure monitor has a 7 year warranty to be free of manufacturing defects for the life of the original owner. This warranty does not include the inflation system including the cuff and inflation bladder. The cuff is warranted for 2 years. The warranty does not cover damage from misuse or tampering.
100% Satisfaction Guarantee
If at any time, you are not completely satisfied with the performance of this device, call our BIOS Medical Hotline and speak with a customer service person, who will make arrangements to have the device repaired or replaced to your full satisfaction.
If you have questions regarding the operation of your monitor call the BIOS Medical Hotline: 1-866-536-2289
Should repair be necessary, return the unit with all component pieces. Enclose proof of purchase and $5.00 for return shipping and insurance. Ship the unit prepaid and insured (at owners option) to:
Repair Department 16975 Leslie Street Newmarket, ON L3Y 9A1 www.biosmedical.com Email: [email protected]
Please include your name, return address, phone number, and email address. BIOS Medical will repair or replace (at BIOS Medical’s option) free of charge any parts necessary to correct the defect in material or workmanship.
Please allow 10 days for repair and return shipping.

7. Technical SpecificationsOperating temperature: 5 to 40°C / 41 to 104°F
Storage temperature: -20 to 55°C / -4 to 131°F
Weight: 302 g (not including batteries)
Dimensions: 139 x 100 x 46 mm
Measuring procedure: Oscillometric during deflation
Measurement range: 40 – 299 mmHg
Pulse 40 – 199 beats per minute
Resolution: 1 mmHg
Static accuracy: pressure within ± 3 mmHg
Pulse accuracy: ± 5 % of the reading
Voltage source: 4 x 6 V Batteries; size AA AC adapter
Read the instruction manual carefully before using this device, especially the safety instructions, and keep the instruction manual for future use.
Type BF applied part
Batteries and electronic devices must be disposed of in accordance with the locally applicable regulations, not with domestic waste.
Manufactured by:
16975 Leslie Street Newmarket, ON L3Y 9A1 www.biosmedical.com Email: [email protected]