getting started with virtuozzo for linux
TRANSCRIPT

SWsoft
Getting Started With Virtuozzo for Linux
Version 4.0
(c) 1999-2007
2
Contents
Introduction 3 About This Guide .........................................................................................................................................3 Other Available Resources ...........................................................................................................................4 Virtuozzo Notions.........................................................................................................................................5 Installation Requirements .............................................................................................................................5
Installation in a Nutshell 7
Virtuozzo Installation 8 Obtaining Virtuozzo License ........................................................................................................................8 Installing and Configuring Host Operating System on Hardware Node.......................................................8 Obtaining Virtuozzo Distribution .................................................................................................................9 Installing Virtuozzo Software.......................................................................................................................9 Installing OS Templates..............................................................................................................................12
VE Management 13 Creating New Virtual Environment ............................................................................................................14 Configuring Virtual Environment...............................................................................................................14
Setting Network Parameters ............................................................................................................15 Setting root Password for VE ..........................................................................................................15
Starting, Stopping, Restarting, and Querying Status of Virtual Environment ............................................16 Listing VEs .................................................................................................................................................17 Deleting VE ................................................................................................................................................17 Running Commands in Virtual Environments............................................................................................18 Managing Applications...............................................................................................................................18
Installing and Listing Application Templates on Hardware Node...................................................19 Adding Application to VE...............................................................................................................20 Removing Application From VE.....................................................................................................21
Using Virtuozzo Tools 22 Installing VZMC.........................................................................................................................................22 Setting VZCC/VZPP to Work ....................................................................................................................24
3
In This Chapter About This Guide.................................................................................................................. 3 Other Available Resources.................................................................................................... 4 Virtuozzo Notions ................................................................................................................. 5 Installation Requirements...................................................................................................... 5
About This Guide The Getting Started With Virtuozzo 4.0 for Linux guide will help you install and run SWsoft Virtuozzo 4.0 on your server. You will also learn the basics of working with Virtual Environments (VEs) - how to create a VE, start/stop it, install additional software in it, and the like.
The guide is organized in the following way:
Chapter 1, Introduction, provides an overview of available information sources shipped with Virtuozzo 4.0, introduces the main Virtuozzo notions, and enumerates the requirements to be fulfilled to successfully install Virtuozzo on your server.
Chapter 2, Installation in a Nutshell, is a quick reference list sketching out the steps required to successfully install Virtuozzo 4.0.
Chapter 3, Virtuozzo Installation, furnishes you with detailed information on how to install Virtuozzo on your server including the installation and configuration of both the Host operating system and Virtuozzo software itself.
Chapter 4, VE Management, familiarizes you with the way to perform the main operations on your Virtual Environments: create new VEs, start/stop them, manage applications inside your VEs, etc.
Chapter 5, Using Virtuozzo Tools, contains brief instructions on how to install Virtuozzo Management Console and to log in to Virtuozzo Control Center - tools to efficiently manage your Hardware Nodes and Virtual Environments residing on them.
C H A P T E R 1
Introduction
Introduction 4
Other Available Resources In addition to this guide, there are a number of other resources shipped with Virtuozzo which can help you use the product more effectively. These resources include:
Manuals: Virtuozzo for Linux Installation Guide. This guide provides exhaustive information on the
process of installing, configuring, and deploying your Virtuozzo system. As distinct from the given guide, it contains a more detailed description of all the operations needed to install and set Virtuozzo 4.0 to work including planning the structure of your Virtuozzo network, performing the Virtuozzo unattended installation, etc. Besides, it does not include the description of any VE-related operations.
Virtuozzo for Linux User's Guide. This guide provides comprehensive information on Virtuozzo 4.0 covering the necessary theoretical conceptions as well as all practical aspects of working with Virtuozzo. However, it does not deal with the process of installing and configuring your Virtuozzo system.
Virtuozzo for Linux Reference Guide. This guide is a complete reference on all Virtuozzo configuration files and Hardware Node command-line utilities.
Help systems: VZMC Help. This help system provides detailed information on Virtuozzo Management
Console (VZMC) - a graphical user interface tool for managing Virtuozzo Hardware Nodes and their Virtual Environments.
VZCC Online Help. This help system shows you how to work with Virtuozzo Control Center (VZCC) - a tool providing you with the ability to manage Virtuozzo Hardware Nodes and their Virtual Environments with the help of a standard Web browser on any platform.
VZPP Online Help. This help system deals with Virtuozzo Power Panels (VZPP) - a means for administering individual Virtual Environments thru a common Web browser on any platform.
Introduction 5
Virtuozzo Notions In order to avoid any misunderstandings while following the instructions in the guide, please become acquainted with the main Virtuozzo definitions:
Virtuozzo is a complete server automation and virtualization solution allowing you to create multiple isolated Virtual Environments on a single physical server to share hardware, licenses, and management effort with maximum efficiency.
Virtual Environment (or VE ) is a virtual private server, which is functionally identical to an isolated standalone computer, with its own IP addresses, processes, files, its own users database, its own configuration files, its own applications, system libraries, and so on. Virtual Environments share one Hardware Node and one OS kernel. However, they are isolated from each other. Virtual Environment is a kind of ‘sandbox’ for processes and users.
Hardware Node (Node, HN, VE 0) is a server where Virtuozzo is installed for hosting Virtual Environments.
Host Operating System (or Host OS) is an operating system installed on the Hardware Node. Virtuozzo license is a special license that you should install on the Hardware Node to be
able to start using Virtuozzo and its tools (VZMC, VZCC, and VZPP). Every Hardware Node shall have its own Virtuozzo license.
Virtuozzo template is a set of program files that make up a complete OS or application and that are installed on the Host operating system in such a way as to be usable by any VE on the Hardware Node and to allow VEs to efficiently share OS and application resources.
Virtuozzo Management Console (or VZMC) is a Virtuozzo management and monitoring tool with graphical user interface. VZMC is cross–platform and runs on both Microsoft Windows and Linux workstations.
Virtuozzo Control Center (or VZCC) is a tool designed for managing Hardware Nodes and all VEs residing on them with the help of a standard Web browser on any platform.
Installation Requirements Before starting to install Virtuozzo 4.0 on your server, please make sure that the following requirements are fulfilled in respect of your system:
Virtuozzo can be installed on the Hardware Node running one of the following Linux distributions with the 2.6 kernel: Red Hat Enterprise Linux 4;
Red Hat Enterprise Linux 5;
CentOS 4;
CentOS 5;
Fedora Core 4 (except for the 64-bit version of Virtuozzo for IA-64-bit processors);
Fedora Core 5 (except for the 64-bit version of Virtuozzo for IA-64-bit processors);
Fedora Core 6 (except for the 64-bit version of Virtuozzo for IA-64-bit processors);

Introduction 6
Suse Linux Enterprise Server 10. The network requirements:
Local Area Network (LAN) for the Hardware Node;
Internet connection for the Hardware Node;
Valid IP address for the Hardware Node as well as other IP parameters (default gateway, network mask, DNS configuration);
One or several spare IP addresses for your Virtual Environments. You can assign either public or private IP addresses to your VEs; however, in the latter case you will have to configure routing to these VEs via the IP address of the Hardware Node to make them accessible from external networks.
7
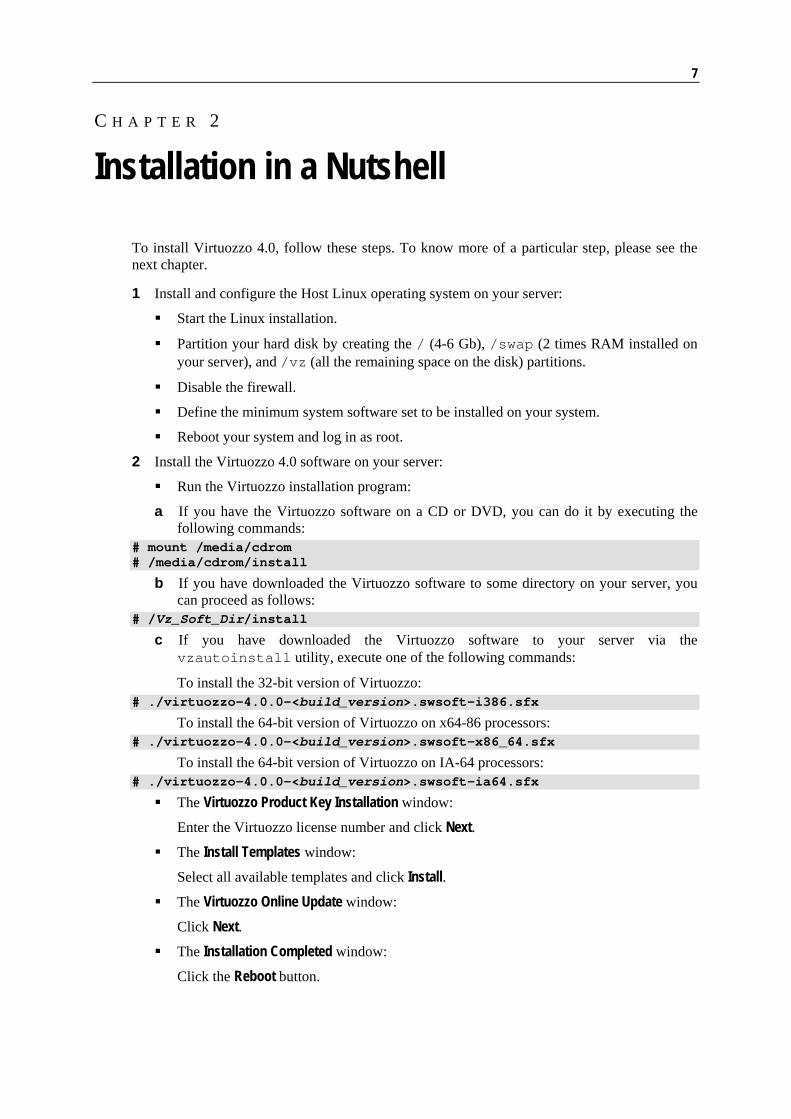
To install Virtuozzo 4.0, follow these steps. To know more of a particular step, please see the next chapter.
1 Install and configure the Host Linux operating system on your server:
Start the Linux installation.
Partition your hard disk by creating the / (4-6 Gb), /swap (2 times RAM installed on your server), and /vz (all the remaining space on the disk) partitions.
Disable the firewall.
Define the minimum system software set to be installed on your system.
Reboot your system and log in as root.
2 Install the Virtuozzo 4.0 software on your server:
Run the Virtuozzo installation program:
a If you have the Virtuozzo software on a CD or DVD, you can do it by executing the following commands:
# mount /media/cdrom # /media/cdrom/install
b If you have downloaded the Virtuozzo software to some directory on your server, you can proceed as follows:
# /Vz_Soft_Dir/install
c If you have downloaded the Virtuozzo software to your server via the vzautoinstall utility, execute one of the following commands:
To install the 32-bit version of Virtuozzo: # ./virtuozzo-4.0.0-<build_version>.swsoft-i386.sfx
To install the 64-bit version of Virtuozzo on x64-86 processors: # ./virtuozzo-4.0.0-<build_version>.swsoft-x86_64.sfx
To install the 64-bit version of Virtuozzo on IA-64 processors: # ./virtuozzo-4.0.0-<build_version>.swsoft-ia64.sfx
The Virtuozzo Product Key Installation window:
Enter the Virtuozzo license number and click Next. The Install Templates window:
Select all available templates and click Install. The Virtuozzo Online Update window:
Click Next. The Installation Completed window:
Click the Reboot button.
C H A P T E R 2
Installation in a Nutshell

8
The current chapter provides exhaustive information on the process of installing, configuring, and deploying your Virtuozzo system including the pre-requisites and the stages you shall pass.
In This Chapter Obtaining Virtuozzo License ................................................................................................ 8 Installing and Configuring Host Operating System on Hardware Node............................... 8 Obtaining Virtuozzo Distribution ......................................................................................... 9 Installing Virtuozzo Software ............................................................................................... 9 Installing OS Templates........................................................................................................ 12
Obtaining Virtuozzo License Before installing Virtuozzo on your server, you should obtain a special license needed to start using the Virtuozzo 4.0 software on your Hardware Node. You can use one of the following ways to obtain a Virtuozzo license:
fill up a special registration form on the SWsoft web site (available at http://www.swsoft.com/en/products/virtuozzo/linux_eval) and get a free evaluation license;
contact an SWsoft sales representative or send a license request to [email protected].
You will have to enter the obtained Virtuozzo license number during the Virtuozzo installation on your server.
Installing and Configuring Host Operating System on Hardware Node
Please follow these recommendations when installing the Host OS on your Hardware Node:
Proceed in accordance with your Linux Installation Guide till the Disk Partitioning Setup window is displayed. In this window select the Manual partition check box and, on the next screen, create the following partitions on the Hardware Node:
Partition Description Typical size / The root partition containing all Host operating system and
Virtuozzo software files. 4 -6 Gb
swap The paging partition for the Linux operating system. 2 times RAM
C H A P T E R 3
Virtuozzo Installation
Virtuozzo Installation 9
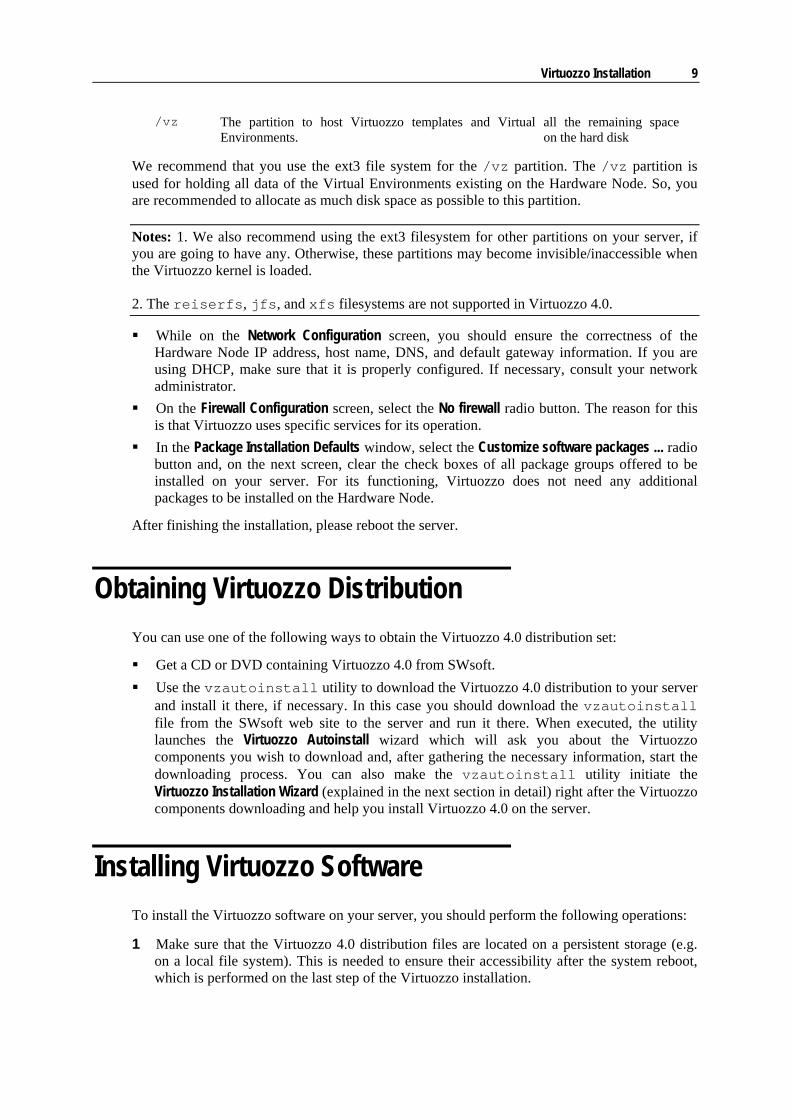
/vz The partition to host Virtuozzo templates and Virtual Environments.
all the remaining space on the hard disk
We recommend that you use the ext3 file system for the /vz partition. The /vz partition is used for holding all data of the Virtual Environments existing on the Hardware Node. So, you are recommended to allocate as much disk space as possible to this partition.
Notes: 1. We also recommend using the ext3 filesystem for other partitions on your server, if you are going to have any. Otherwise, these partitions may become invisible/inaccessible when the Virtuozzo kernel is loaded.
2. The reiserfs, jfs, and xfs filesystems are not supported in Virtuozzo 4.0.
While on the Network Configuration screen, you should ensure the correctness of the Hardware Node IP address, host name, DNS, and default gateway information. If you are using DHCP, make sure that it is properly configured. If necessary, consult your network administrator.
On the Firewall Configuration screen, select the No firewall radio button. The reason for this is that Virtuozzo uses specific services for its operation.
In the Package Installation Defaults window, select the Customize software packages ... radio button and, on the next screen, clear the check boxes of all package groups offered to be installed on your server. For its functioning, Virtuozzo does not need any additional packages to be installed on the Hardware Node.
After finishing the installation, please reboot the server.
Obtaining Virtuozzo Distribution You can use one of the following ways to obtain the Virtuozzo 4.0 distribution set:
Get a CD or DVD containing Virtuozzo 4.0 from SWsoft. Use the vzautoinstall utility to download the Virtuozzo 4.0 distribution to your server
and install it there, if necessary. In this case you should download the vzautoinstall file from the SWsoft web site to the server and run it there. When executed, the utility launches the Virtuozzo Autoinstall wizard which will ask you about the Virtuozzo components you wish to download and, after gathering the necessary information, start the downloading process. You can also make the vzautoinstall utility initiate the Virtuozzo Installation Wizard (explained in the next section in detail) right after the Virtuozzo components downloading and help you install Virtuozzo 4.0 on the server.
Installing Virtuozzo Software To install the Virtuozzo software on your server, you should perform the following operations:
1 Make sure that the Virtuozzo 4.0 distribution files are located on a persistent storage (e.g. on a local file system). This is needed to ensure their accessibility after the system reboot, which is performed on the last step of the Virtuozzo installation.
Virtuozzo Installation 10
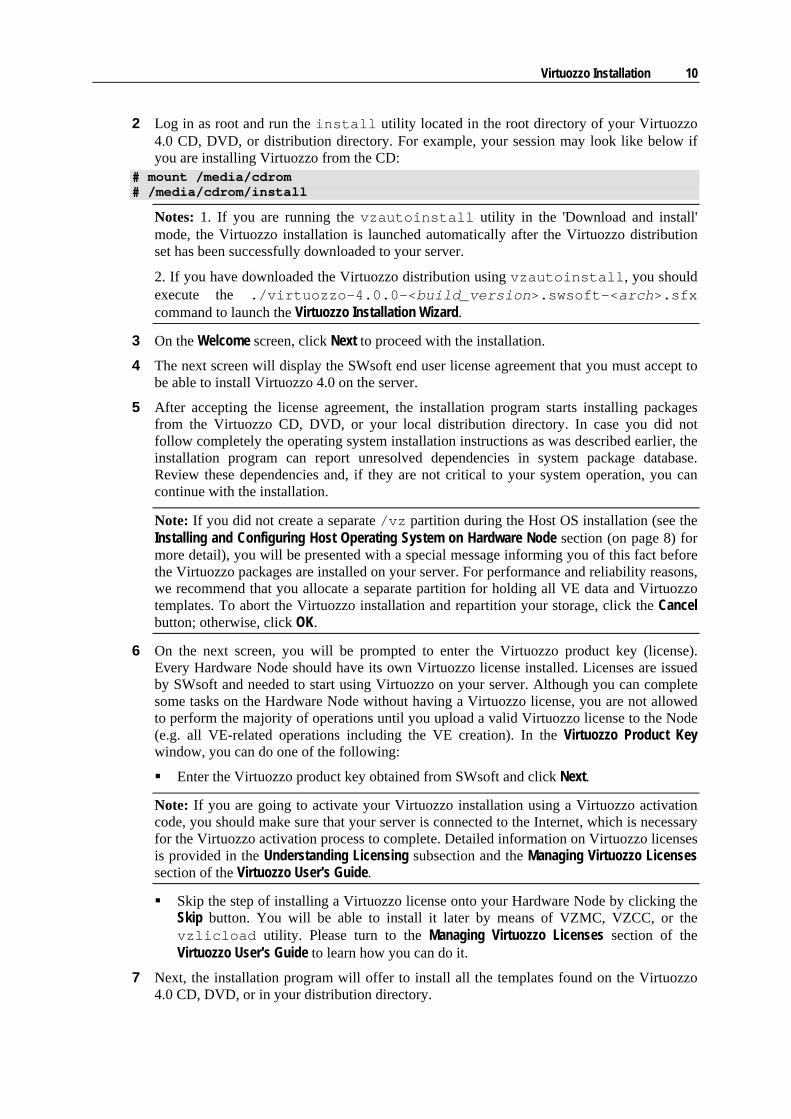
2 Log in as root and run the install utility located in the root directory of your Virtuozzo 4.0 CD, DVD, or distribution directory. For example, your session may look like below if you are installing Virtuozzo from the CD:
# mount /media/cdrom # /media/cdrom/install
Notes: 1. If you are running the vzautoinstall utility in the 'Download and install' mode, the Virtuozzo installation is launched automatically after the Virtuozzo distribution set has been successfully downloaded to your server.
2. If you have downloaded the Virtuozzo distribution using vzautoinstall, you should execute the ./virtuozzo-4.0.0-<build_version>.swsoft-<arch>.sfx command to launch the Virtuozzo Installation Wizard.
3 On the Welcome screen, click Next to proceed with the installation.
4 The next screen will display the SWsoft end user license agreement that you must accept to be able to install Virtuozzo 4.0 on the server.
5 After accepting the license agreement, the installation program starts installing packages from the Virtuozzo CD, DVD, or your local distribution directory. In case you did not follow completely the operating system installation instructions as was described earlier, the installation program can report unresolved dependencies in system package database. Review these dependencies and, if they are not critical to your system operation, you can continue with the installation.
Note: If you did not create a separate /vz partition during the Host OS installation (see the Installing and Configuring Host Operating System on Hardware Node section (on page 8) for more detail), you will be presented with a special message informing you of this fact before the Virtuozzo packages are installed on your server. For performance and reliability reasons, we recommend that you allocate a separate partition for holding all VE data and Virtuozzo templates. To abort the Virtuozzo installation and repartition your storage, click the Cancel button; otherwise, click OK.
6 On the next screen, you will be prompted to enter the Virtuozzo product key (license). Every Hardware Node should have its own Virtuozzo license installed. Licenses are issued by SWsoft and needed to start using Virtuozzo on your server. Although you can complete some tasks on the Hardware Node without having a Virtuozzo license, you are not allowed to perform the majority of operations until you upload a valid Virtuozzo license to the Node (e.g. all VE-related operations including the VE creation). In the Virtuozzo Product Key window, you can do one of the following:
Enter the Virtuozzo product key obtained from SWsoft and click Next.
Note: If you are going to activate your Virtuozzo installation using a Virtuozzo activation code, you should make sure that your server is connected to the Internet, which is necessary for the Virtuozzo activation process to complete. Detailed information on Virtuozzo licenses is provided in the Understanding Licensing subsection and the Managing Virtuozzo Licenses section of the Virtuozzo User's Guide.
Skip the step of installing a Virtuozzo license onto your Hardware Node by clicking the Skip button. You will be able to install it later by means of VZMC, VZCC, or the vzlicload utility. Please turn to the Managing Virtuozzo Licenses section of the Virtuozzo User's Guide to learn how you can do it.
7 Next, the installation program will offer to install all the templates found on the Virtuozzo 4.0 CD, DVD, or in your distribution directory.

Virtuozzo Installation 11
Note: The Install Templates screen is skipped if you are installing Virtuozzo 4.0 using the vzautoinstall utility. In this case vzautoinstall will install the OS and application templates specified by you on the Select Virtuozzo Components screen of the Virtuozzo Autoinstall wizard.
Please keep in mind that before you can start using the installed EZ templates on your Hardware Node (e.g. as the basis for the VE creation), you may need to set up a package repository for them. So, you have to build a special repository for all commercial versions of the Linux distributions (e.g. Red Hat Linux Enterprise 4 and 5). Detailed information on how to manage package repositories is provided in the Setting Up Repository for EZ Template section of the Virtuozzo Templates Management Guide.
8 On the last step, you will be offered to check for available Virtuozzo updates. We recommend that you check for available updates right during the Virtuozzo installation, which will allow you to keep the Virtuozzo software at the most recent version (i.e. to have the latest Virtuozzo core, utilities, and templates installed). To this effect, leave the Launch Virtuozzo software update wizard check box selected. In this case the Virtuozzo Up-To-Date wizard will be automatically launched after clicking either the Exit or Reboot button; follow the instructions of the wizard to check for available updates, if any, and install them on your Node. If you do not wish to update your Virtuozzo installation for some reason or other, clear the check box; you will be able to update the Virtuozzo software later by means of the vzup2date utility or VZMC. Detailed information on how you can do it is provided in the Virtuozzo Reference Guide and the Keeping Your Virtuozzo System Up-to-Date chapter of the Virtuozzo User's Guide.
Note: The Virtuozzo Online Update screen is skipped if you are running the vzautoinstall utility in the 'Download and install' mode.
9 Finally, the installation program will greet you with a success window. In the Congratulations! window, you can do the following:
Click Exit to do a manual check of the Hardware Node before booting to the Virtuozzo kernel. Otherwise, click Reboot to reboot the Hardware Node.
Get informed of your further steps to start working with Virtuozzo 4.0 after the Hardware Node reboot:
a Log in to the Hardware Node thru VZCC using the specified URL (http://Hardware_Node_IP_Address:4643) and the system administrative credentials (i.e. the root username and the password you specified for this user when installing the Host OS on your server).
b Log in to the Hardware Node thru SSH (Secure Shell) and run the man virtuozzo command to get primary information on the main Virtuozzo commands.

Virtuozzo Installation 12
Installing OS Templates Operating system templates are used to create new Virtual Environments with a pre-installed operating system. Therefore, you are bound to install at least one OS template from your Virtuozzo CD, DVD, or Virtuozzo distribution directory before creating VEs. You can use the following command to install an OS template on your Hardware Node: # vzpkg install template redhat-el5-x86-tmpl-4.0.0-1.swsoft.noarch.rpm Preparing... ############################### [100%] 1:redhat-as4-x86-tmpl ############################### [100%]
You can check that the redhat-el5-x86 EZ template has been successfully installed on the Node by issuing the following command: # vzpkg list redhat-el5-x86 2007-05-12 12:57:57
However, before you can start using the installed OS template for the VE creation, you should cache it with the vzpkg create cache command: # vzpkg create cache redhat-el5-x86 ... Complete! Packing cache file redhat-el5-x86.tar.gz ... Cache file redhat-el5-x86.tar.gz [14M] created.
Notes: 1. To be able to cache your OS EZ templates, you may need to set up a package repository for them. So, you have to build a special repository for all commercial versions of the Linux distributions (e.g. Red Hat Linux Enterprise 4). Detailed information on how to manage package repositories is provided in the Setting Up Repository for EZ Template section of the Virtuozzo Templates Management Guide.
2. Detailed information on how to manage standard OS templates and OS EZ templates is provided in the Virtuozzo Templates Management Guide shipped with Virtuozzo 4.0.

13
This chapter outlines the major day-to-day operations that you are likely to perform with Virtual Environments on your Virtuozzo system.
In This Chapter Creating New Virtual Environment ...................................................................................... 14 Configuring Virtual Environment ......................................................................................... 14 Starting, Stopping, Restarting, and Querying Status of Virtual Environment ...................... 16 Listing VEs ........................................................................................................................... 17 Deleting VE........................................................................................................................... 17 Running Commands in Virtual Environments ...................................................................... 18 Managing Applications ......................................................................................................... 18
C H A P T E R 4
VE Management

VE Management 14
Creating New Virtual Environment A new Virtual Environment can be created by means of the vzctl create command. This command requires that the following arguments be specified:
A VE ID - a numeric ID associated with a VE. The VE ID should be an integer greater than 100 and unique for a given Hardware Node.
The name of the OS template to base your VE on. We assume that you have successfully installed at least one OS template on the Hardware Node. If there are no OS templates installed on your Node, please turn to the Installing OS Templates section first (on page 12).
The name of the sample configuration file that will be used for setting all the VE resource control parameters. The sample configuration files are residing in the /etc/vz/conf directory on the Node and have names with the following mask: ve-<configname>.conf-sample. The most commonly used sample is the ve-basic.conf-sample file; this sample file has resource control parameters suitable for most Virtual Environments.
Thus, for example, you can create a new VE by executing the following command: # vzctl create 101 --ostemplate fedora-core-6-x86 -–config basic Creating VE private area (fedora-core-6-x86) ... VE private area was created
In this case Virtuozzo will create a Virtual Environment with ID 101, the Fedora Core 6 OS installed inside, and the configuration parameters taken from the ve-basic.conf-sample sample configuration file.
In principle, now you are ready to start your newly created Virtual Environment. However, typically you need to set its network IP address, hostname, DNS server address and root password before starting the Virtual Environment for the first time. Please see the next section for information on how to perform these tasks.
Configuring Virtual Environment Configuring a Virtual Environment consists of the following main tasks:
setting Virtual Environment network parameters and setting Virtual Environment user passwords.
For all these tasks, the vzctl set command is used.
VE Management 15
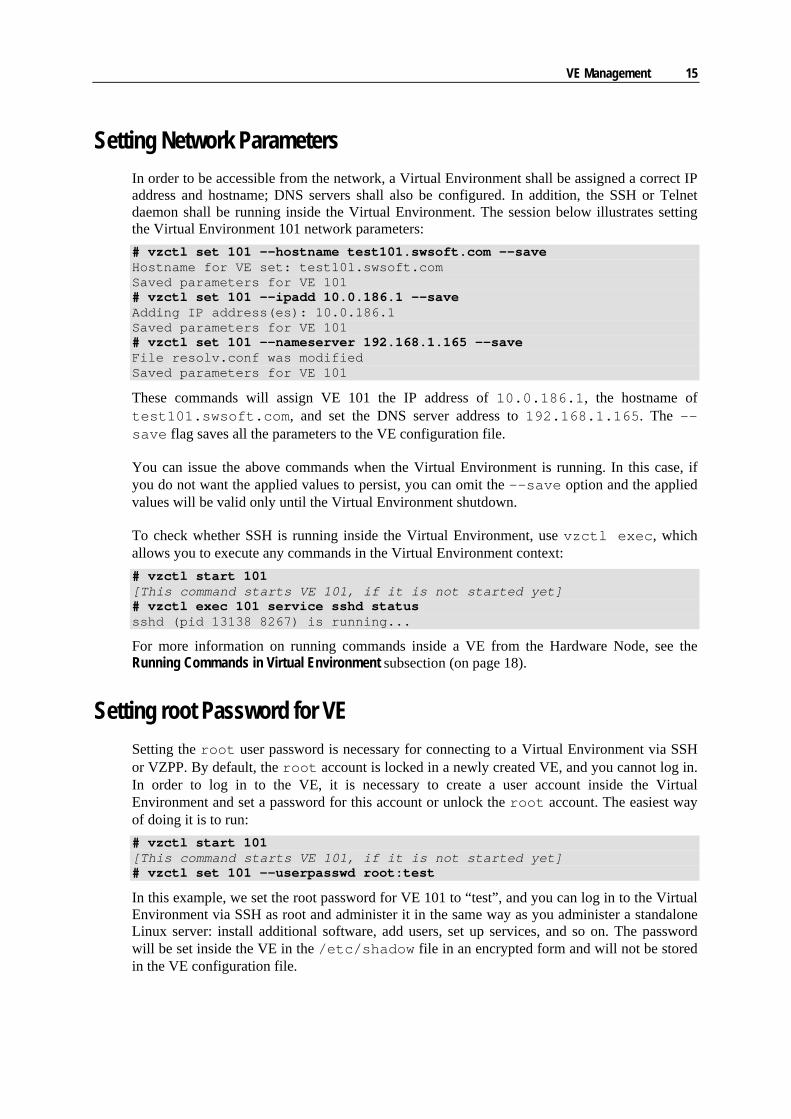
Setting Network Parameters In order to be accessible from the network, a Virtual Environment shall be assigned a correct IP address and hostname; DNS servers shall also be configured. In addition, the SSH or Telnet daemon shall be running inside the Virtual Environment. The session below illustrates setting the Virtual Environment 101 network parameters: # vzctl set 101 --hostname test101.swsoft.com --save Hostname for VE set: test101.swsoft.com Saved parameters for VE 101 # vzctl set 101 --ipadd 10.0.186.1 --save Adding IP address(es): 10.0.186.1 Saved parameters for VE 101 # vzctl set 101 --nameserver 192.168.1.165 --save File resolv.conf was modified Saved parameters for VE 101
These commands will assign VE 101 the IP address of 10.0.186.1, the hostname of test101.swsoft.com, and set the DNS server address to 192.168.1.165. The –-save flag saves all the parameters to the VE configuration file.
You can issue the above commands when the Virtual Environment is running. In this case, if you do not want the applied values to persist, you can omit the –-save option and the applied values will be valid only until the Virtual Environment shutdown.
To check whether SSH is running inside the Virtual Environment, use vzctl exec, which allows you to execute any commands in the Virtual Environment context: # vzctl start 101 [This command starts VE 101, if it is not started yet] # vzctl exec 101 service sshd status sshd (pid 13138 8267) is running...
For more information on running commands inside a VE from the Hardware Node, see the Running Commands in Virtual Environment subsection (on page 18).
Setting root Password for VE Setting the root user password is necessary for connecting to a Virtual Environment via SSH or VZPP. By default, the root account is locked in a newly created VE, and you cannot log in. In order to log in to the VE, it is necessary to create a user account inside the Virtual Environment and set a password for this account or unlock the root account. The easiest way of doing it is to run: # vzctl start 101 [This command starts VE 101, if it is not started yet] # vzctl set 101 --userpasswd root:test
In this example, we set the root password for VE 101 to “test”, and you can log in to the Virtual Environment via SSH as root and administer it in the same way as you administer a standalone Linux server: install additional software, add users, set up services, and so on. The password will be set inside the VE in the /etc/shadow file in an encrypted form and will not be stored in the VE configuration file.

VE Management 16
Starting, Stopping, Restarting, and Querying Status of Virtual Environment
When a Virtual Environment is created, it may be started up and shut down like an ordinary computer. To start a Virtual Environment, use the following command: # vzctl start 101 Starting VE ... Setup slm memory limit Setup slm subgroup (default) Setting devperms 20002 dev 0x7d00 Adding port redirection to VE(1): 4643 8443 Adding IP address(es) to pool: Adding IP address(es): 10.14.14.101 Hostname for VE set: localhost.localdomain VE start in progress...
To simultaneously start all VEs on the Hardware Node that are currently not running, execute the following script: # for veid in `vzlist -SHo veid`; do vzctl start $veid; done Starting VE 101... ... Starting VE 102... ...
To check the status of a VE, use the vzctl status command: # vzctl status 101 VEID 101 exists mounted running
In our case, vzctl reports that VE 101 exists, is mounted and running. Alternatively, you can make use of the vzlist utility: # vzlist 101 VEID NPROC STATUS IP_ADDR HOSTNAME 101 20 running 10.0.186.101 test.swsoft.com
The following command is used to stop a Virtual Environment: # vzctl stop 101 Stopping VE ... VE was stopped VE is unmounted # vzctl status 101 VEID 101 exists unmounted down
To restart a Virtual Environment, you may as well use the vzctl restart command: # vzctl restart 101 Stopping VE ... VE was stopped VE is unmounted Starting VE ... ... VE start in progress...
VE Management 17
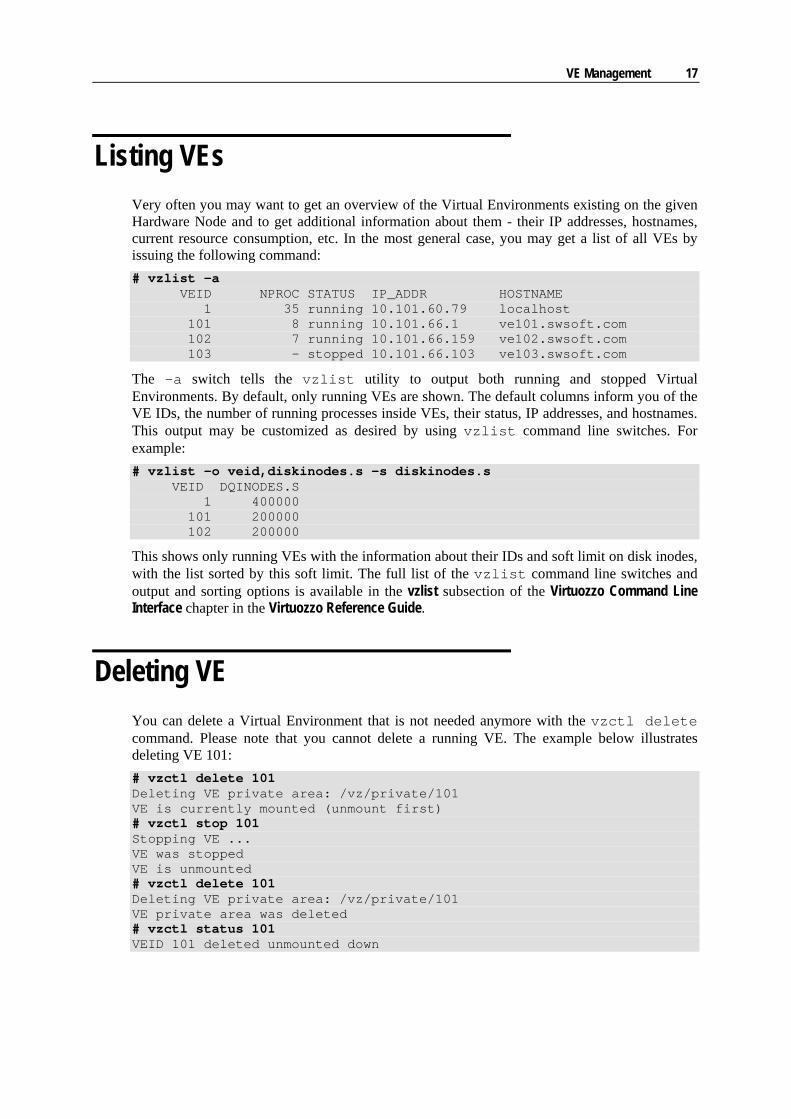
Listing VEs Very often you may want to get an overview of the Virtual Environments existing on the given Hardware Node and to get additional information about them - their IP addresses, hostnames, current resource consumption, etc. In the most general case, you may get a list of all VEs by issuing the following command: # vzlist -a VEID NPROC STATUS IP_ADDR HOSTNAME 1 35 running 10.101.60.79 localhost 101 8 running 10.101.66.1 ve101.swsoft.com 102 7 running 10.101.66.159 ve102.swsoft.com 103 - stopped 10.101.66.103 ve103.swsoft.com
The -a switch tells the vzlist utility to output both running and stopped Virtual Environments. By default, only running VEs are shown. The default columns inform you of the VE IDs, the number of running processes inside VEs, their status, IP addresses, and hostnames. This output may be customized as desired by using vzlist command line switches. For example: # vzlist -o veid,diskinodes.s -s diskinodes.s VEID DQINODES.S 1 400000 101 200000 102 200000
This shows only running VEs with the information about their IDs and soft limit on disk inodes, with the list sorted by this soft limit. The full list of the vzlist command line switches and output and sorting options is available in the vzlist subsection of the Virtuozzo Command Line Interface chapter in the Virtuozzo Reference Guide.
Deleting VE You can delete a Virtual Environment that is not needed anymore with the vzctl delete command. Please note that you cannot delete a running VE. The example below illustrates deleting VE 101: # vzctl delete 101 Deleting VE private area: /vz/private/101 VE is currently mounted (unmount first) # vzctl stop 101 Stopping VE ... VE was stopped VE is unmounted # vzctl delete 101 Deleting VE private area: /vz/private/101 VE private area was deleted # vzctl status 101 VEID 101 deleted unmounted down
VE Management 18
Running Commands in Virtual Environments
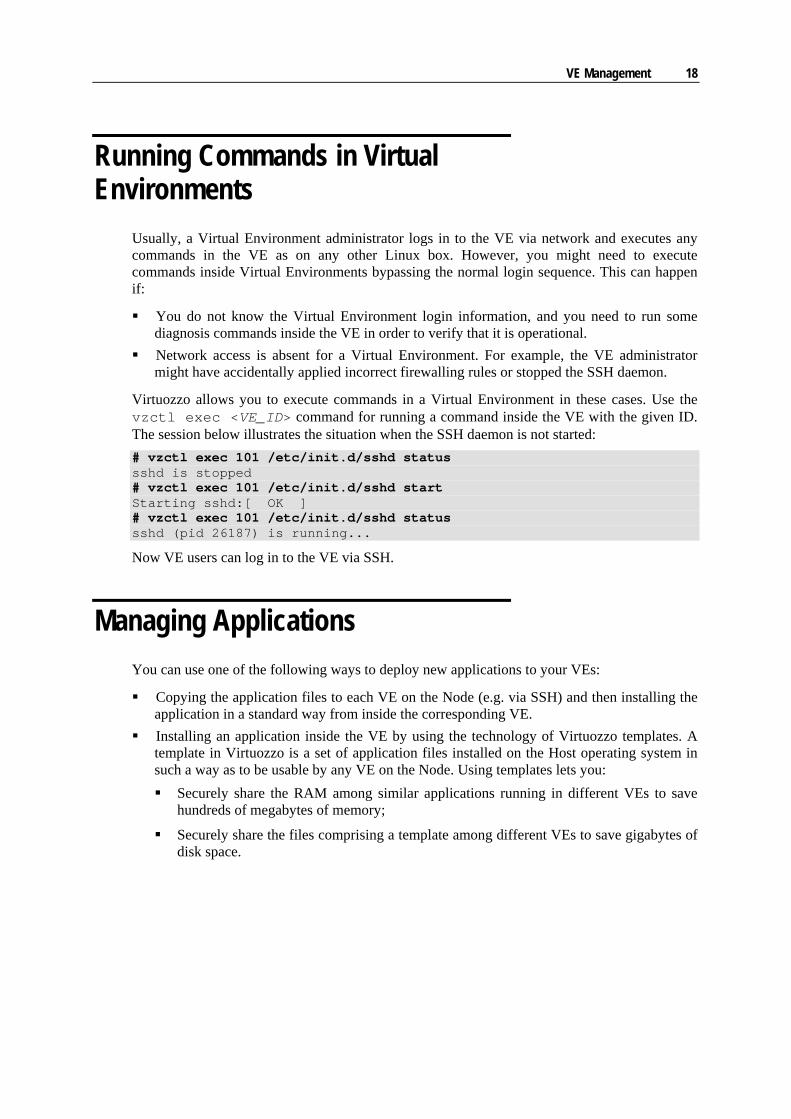
Usually, a Virtual Environment administrator logs in to the VE via network and executes any commands in the VE as on any other Linux box. However, you might need to execute commands inside Virtual Environments bypassing the normal login sequence. This can happen if:
You do not know the Virtual Environment login information, and you need to run some diagnosis commands inside the VE in order to verify that it is operational.
Network access is absent for a Virtual Environment. For example, the VE administrator might have accidentally applied incorrect firewalling rules or stopped the SSH daemon.
Virtuozzo allows you to execute commands in a Virtual Environment in these cases. Use the vzctl exec <VE_ID> command for running a command inside the VE with the given ID. The session below illustrates the situation when the SSH daemon is not started: # vzctl exec 101 /etc/init.d/sshd status sshd is stopped # vzctl exec 101 /etc/init.d/sshd start Starting sshd:[ OK ] # vzctl exec 101 /etc/init.d/sshd status sshd (pid 26187) is running...
Now VE users can log in to the VE via SSH.
Managing Applications You can use one of the following ways to deploy new applications to your VEs:
Copying the application files to each VE on the Node (e.g. via SSH) and then installing the application in a standard way from inside the corresponding VE.
Installing an application inside the VE by using the technology of Virtuozzo templates. A template in Virtuozzo is a set of application files installed on the Host operating system in such a way as to be usable by any VE on the Node. Using templates lets you: Securely share the RAM among similar applications running in different VEs to save
hundreds of megabytes of memory;
Securely share the files comprising a template among different VEs to save gigabytes of disk space.
VE Management 19
All application templates are issued in the form of RPM packages and should be installed on the Hardware Node before you can start deploying them to your VEs. A great number of already created application templates are shipped by SWsoft with Virtuozzo (e.g. the templates for most important applications such as MySQL, PHP, and Perl). In addition, you can create your own application templates and pack them as RPMs; detailed information on how you can do it is given in the Virtuozzo Templates Management Guide.
The following subsections provide information on the main operations you can perform with application templates.
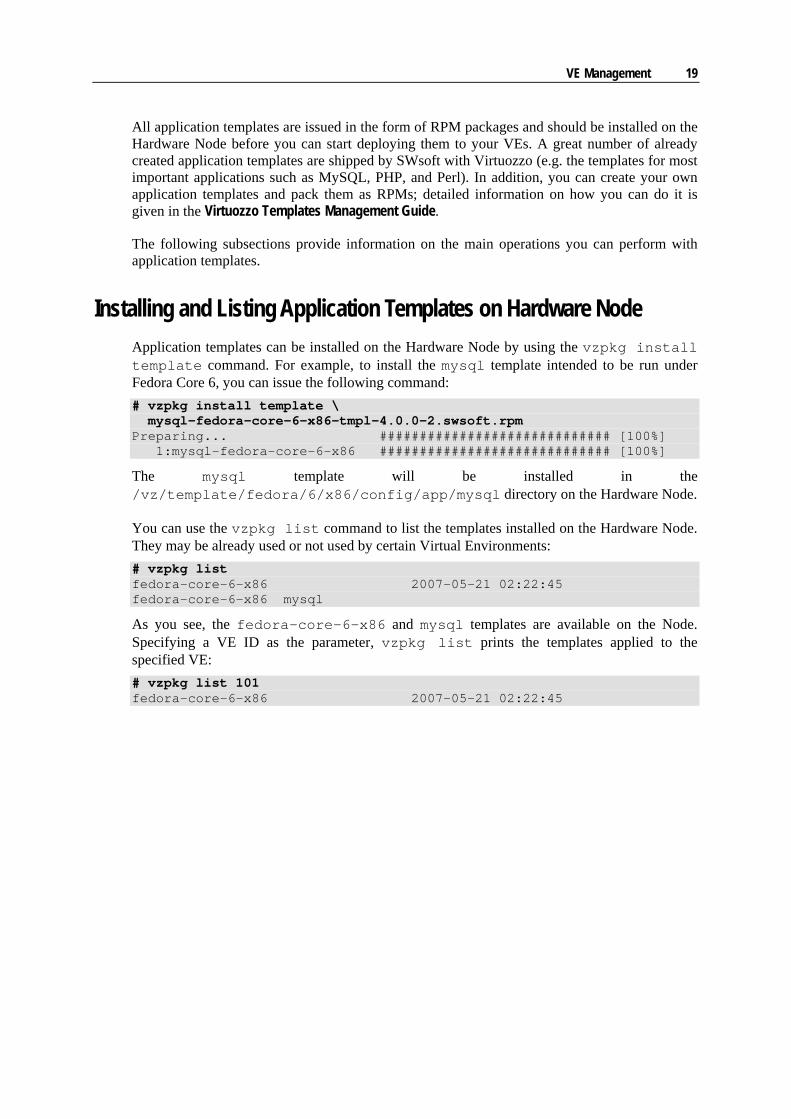
Installing and Listing Application Templates on Hardware Node Application templates can be installed on the Hardware Node by using the vzpkg install template command. For example, to install the mysql template intended to be run under Fedora Core 6, you can issue the following command: # vzpkg install template \ mysql-fedora-core-6-x86-tmpl-4.0.0-2.swsoft.rpm Preparing... ############################# [100%] 1:mysql-fedora-core-6-x86 ############################# [100%]
The mysql template will be installed in the /vz/template/fedora/6/x86/config/app/mysql directory on the Hardware Node.
You can use the vzpkg list command to list the templates installed on the Hardware Node. They may be already used or not used by certain Virtual Environments: # vzpkg list fedora-core-6-x86 2007-05-21 02:22:45 fedora-core-6-x86 mysql
As you see, the fedora-core-6-x86 and mysql templates are available on the Node. Specifying a VE ID as the parameter, vzpkg list prints the templates applied to the specified VE: # vzpkg list 101 fedora-core-6-x86 2007-05-21 02:22:45
VE Management 20
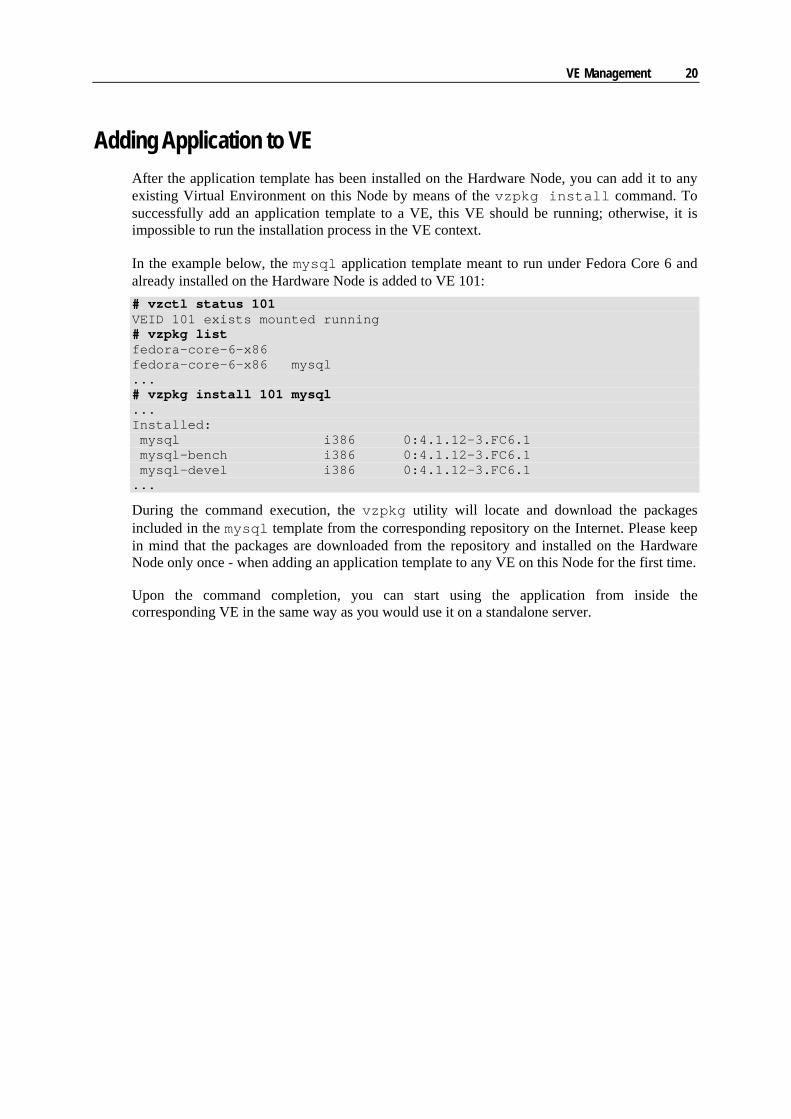
Adding Application to VE After the application template has been installed on the Hardware Node, you can add it to any existing Virtual Environment on this Node by means of the vzpkg install command. To successfully add an application template to a VE, this VE should be running; otherwise, it is impossible to run the installation process in the VE context.
In the example below, the mysql application template meant to run under Fedora Core 6 and already installed on the Hardware Node is added to VE 101: # vzctl status 101 VEID 101 exists mounted running # vzpkg list fedora-core-6-x86 fedora-core-6-x86 mysql ... # vzpkg install 101 mysql ... Installed: mysql i386 0:4.1.12-3.FC6.1 mysql-bench i386 0:4.1.12-3.FC6.1 mysql-devel i386 0:4.1.12-3.FC6.1 ...
During the command execution, the vzpkg utility will locate and download the packages included in the mysql template from the corresponding repository on the Internet. Please keep in mind that the packages are downloaded from the repository and installed on the Hardware Node only once - when adding an application template to any VE on this Node for the first time.
Upon the command completion, you can start using the application from inside the corresponding VE in the same way as you would use it on a standalone server.
VE Management 21
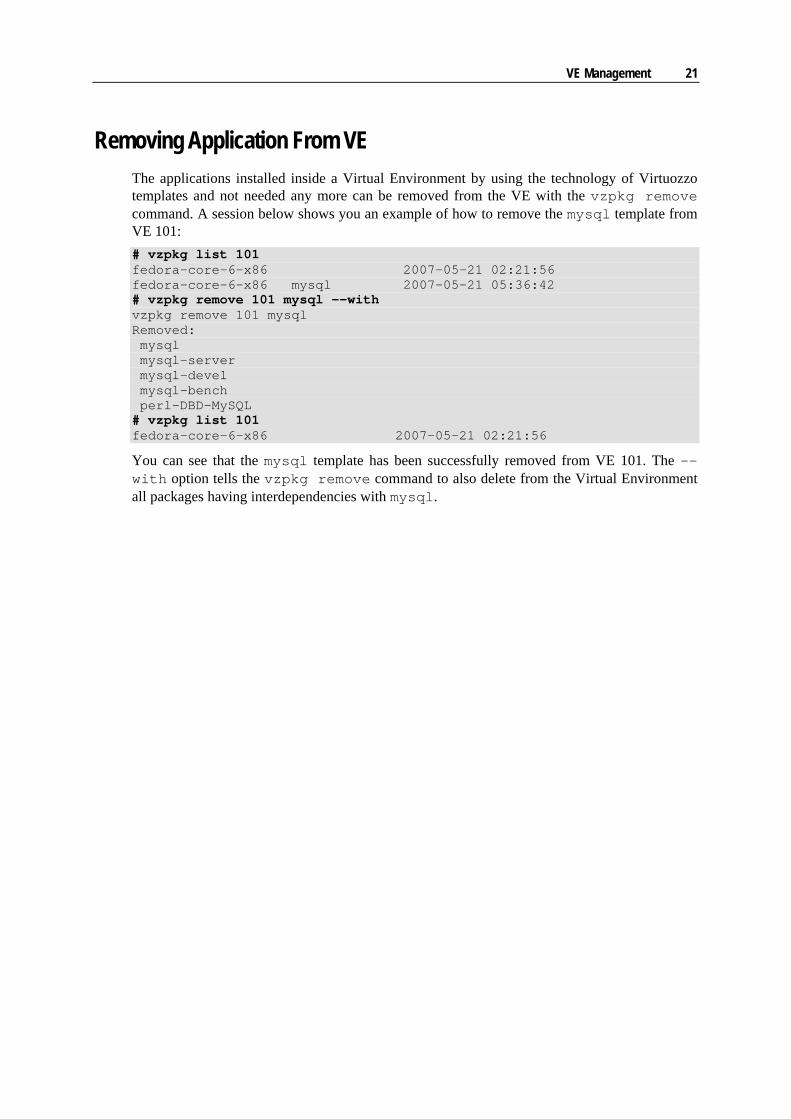
Removing Application From VE The applications installed inside a Virtual Environment by using the technology of Virtuozzo templates and not needed any more can be removed from the VE with the vzpkg remove command. A session below shows you an example of how to remove the mysql template from VE 101: # vzpkg list 101 fedora-core-6-x86 2007-05-21 02:21:56 fedora-core-6-x86 mysql 2007-05-21 05:36:42 # vzpkg remove 101 mysql --with vzpkg remove 101 mysql Removed: mysql mysql-server mysql-devel mysql-bench perl-DBD-MySQL # vzpkg list 101 fedora-core-6-x86 2007-05-21 02:21:56
You can see that the mysql template has been successfully removed from VE 101. The --with option tells the vzpkg remove command to also delete from the Virtual Environment all packages having interdependencies with mysql.
22
Along with the command line utilities, you can make use of the following tools intended for managing your servers running Virtuozzo:
Virtuozzo Management Console (VZMC) - a remote management tool for Virtuozzo with graphical user interface. VZMC is designed for Hardware Node administrators having access to all the VEs on a particular Node. It allows the administrator to control multiple Hardware Nodes, to manage all sorts of Virtual Environments, and to monitor the system.
Virtuozzo Control Center (VZCC) designed for Hardware Node administrators and providing you with the ability to manage a particular Hardware Node and all Virtual Environments residing on it with the help of a standard Web browser on any platform.
The following sections provide information on how to prepare these Virtuozzo tools for working in Virtuozzo-based systems.
In This Chapter Installing VZMC ................................................................................................................... 22 Setting VZCC/VZPP to Work............................................................................................... 24
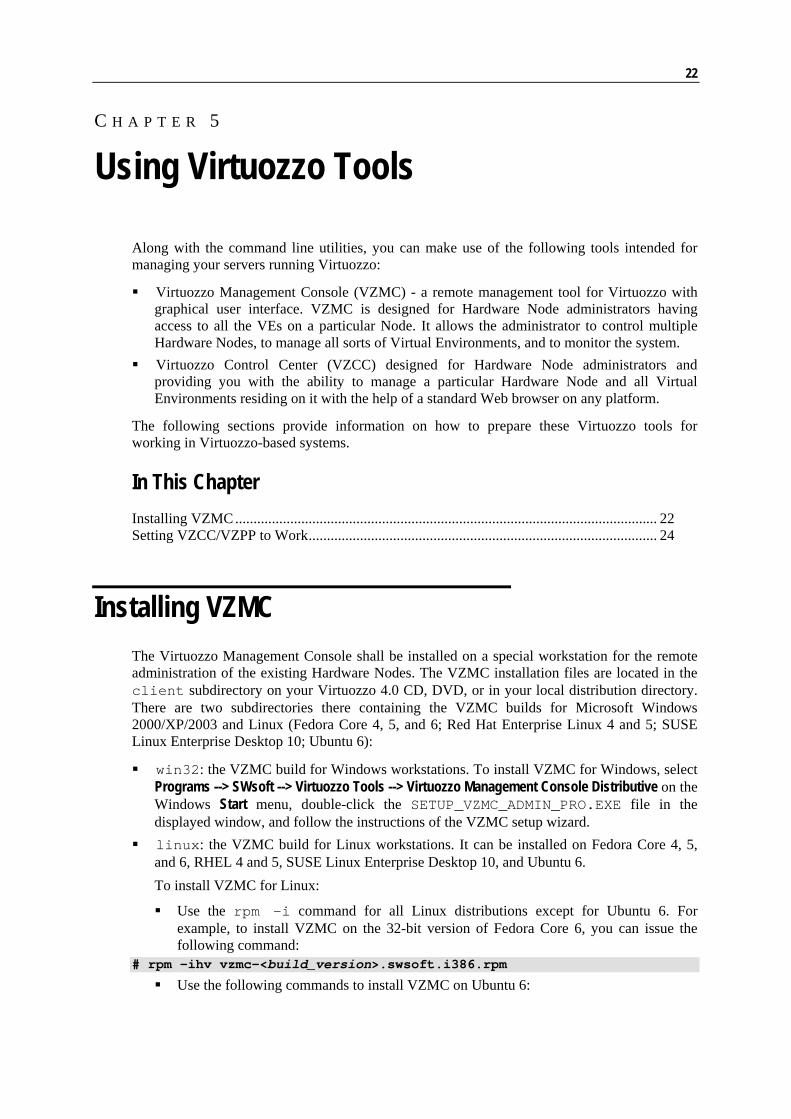
Installing VZMC The Virtuozzo Management Console shall be installed on a special workstation for the remote administration of the existing Hardware Nodes. The VZMC installation files are located in the client subdirectory on your Virtuozzo 4.0 CD, DVD, or in your local distribution directory. There are two subdirectories there containing the VZMC builds for Microsoft Windows 2000/XP/2003 and Linux (Fedora Core 4, 5, and 6; Red Hat Enterprise Linux 4 and 5; SUSE Linux Enterprise Desktop 10; Ubuntu 6):
win32: the VZMC build for Windows workstations. To install VZMC for Windows, select Programs --> SWsoft --> Virtuozzo Tools --> Virtuozzo Management Console Distributive on the Windows Start menu, double-click the SETUP_VZMC_ADMIN_PRO.EXE file in the displayed window, and follow the instructions of the VZMC setup wizard.
linux: the VZMC build for Linux workstations. It can be installed on Fedora Core 4, 5, and 6, RHEL 4 and 5, SUSE Linux Enterprise Desktop 10, and Ubuntu 6. To install VZMC for Linux:
Use the rpm -i command for all Linux distributions except for Ubuntu 6. For example, to install VZMC on the 32-bit version of Fedora Core 6, you can issue the following command:
# rpm -ihv vzmc-<build_version>.swsoft.i386.rpm
Use the following commands to install VZMC on Ubuntu 6:
C H A P T E R 5
Using Virtuozzo Tools
Using Virtuozzo Tools 23
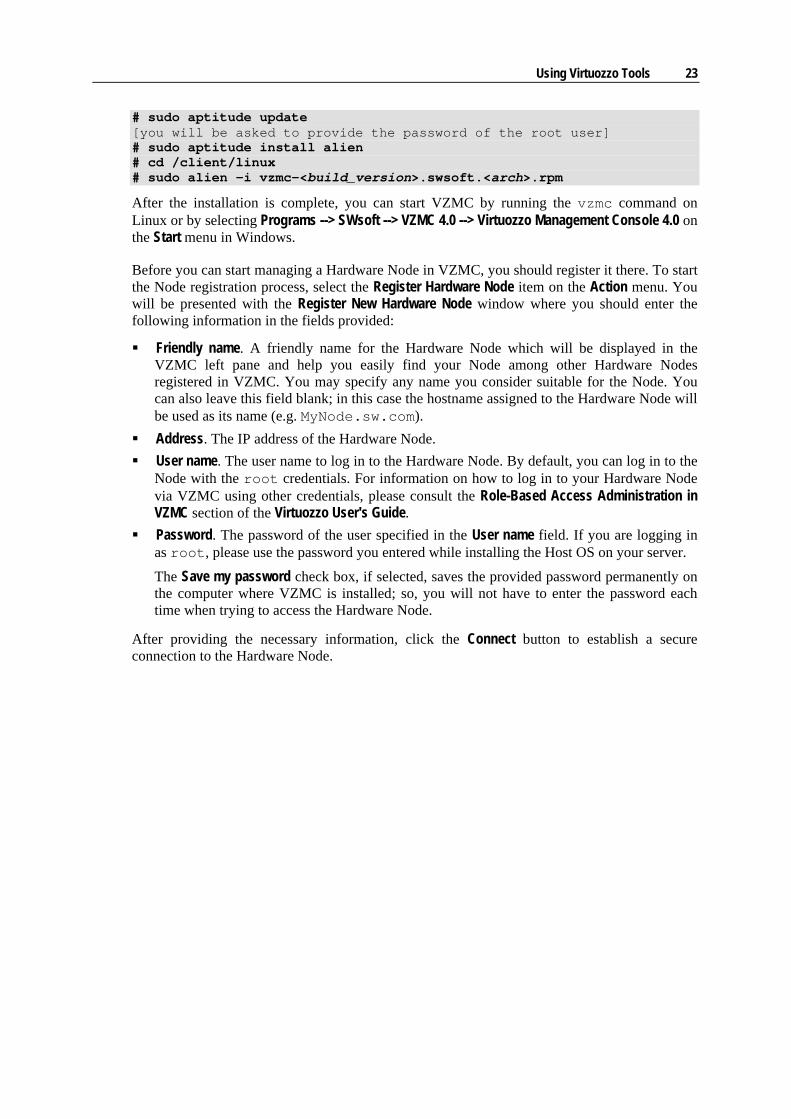
# sudo aptitude update [you will be asked to provide the password of the root user] # sudo aptitude install alien # cd /client/linux # sudo alien -i vzmc-<build_version>.swsoft.<arch>.rpm
After the installation is complete, you can start VZMC by running the vzmc command on Linux or by selecting Programs --> SWsoft --> VZMC 4.0 --> Virtuozzo Management Console 4.0 on the Start menu in Windows.
Before you can start managing a Hardware Node in VZMC, you should register it there. To start the Node registration process, select the Register Hardware Node item on the Action menu. You will be presented with the Register New Hardware Node window where you should enter the following information in the fields provided:
Friendly name. A friendly name for the Hardware Node which will be displayed in the VZMC left pane and help you easily find your Node among other Hardware Nodes registered in VZMC. You may specify any name you consider suitable for the Node. You can also leave this field blank; in this case the hostname assigned to the Hardware Node will be used as its name (e.g. MyNode.sw.com).
Address. The IP address of the Hardware Node. User name. The user name to log in to the Hardware Node. By default, you can log in to the
Node with the root credentials. For information on how to log in to your Hardware Node via VZMC using other credentials, please consult the Role-Based Access Administration in VZMC section of the Virtuozzo User's Guide.
Password. The password of the user specified in the User name field. If you are logging in as root, please use the password you entered while installing the Host OS on your server.
The Save my password check box, if selected, saves the provided password permanently on the computer where VZMC is installed; so, you will not have to enter the password each time when trying to access the Hardware Node.
After providing the necessary information, click the Connect button to establish a secure connection to the Hardware Node.
Using Virtuozzo Tools 24
Setting VZCC/VZPP to Work Along with VZMC, you can make use of Virtuozzo Control Center (VZCC) intended for managing your servers running Virtuozzo. This tool is designed for Hardware Node administrators and provides you with the ability to manage multiple Hardware Nodes and all Virtual Environments residing on them with the help of a standard Web browser on any platform.
To log in to VZCC, launch a VZCC-compatible Web browser. A list of Web browsers currently supported by Virtuozzo is given below:
Internet Explorer 6.0 and above; Mozilla 1.7 and above; Firefox 1.0 and above; Opera 8.0 and above.
Chances are that you will also be able to use other browsers, but Virtuozzo has not been extensively tested with them.
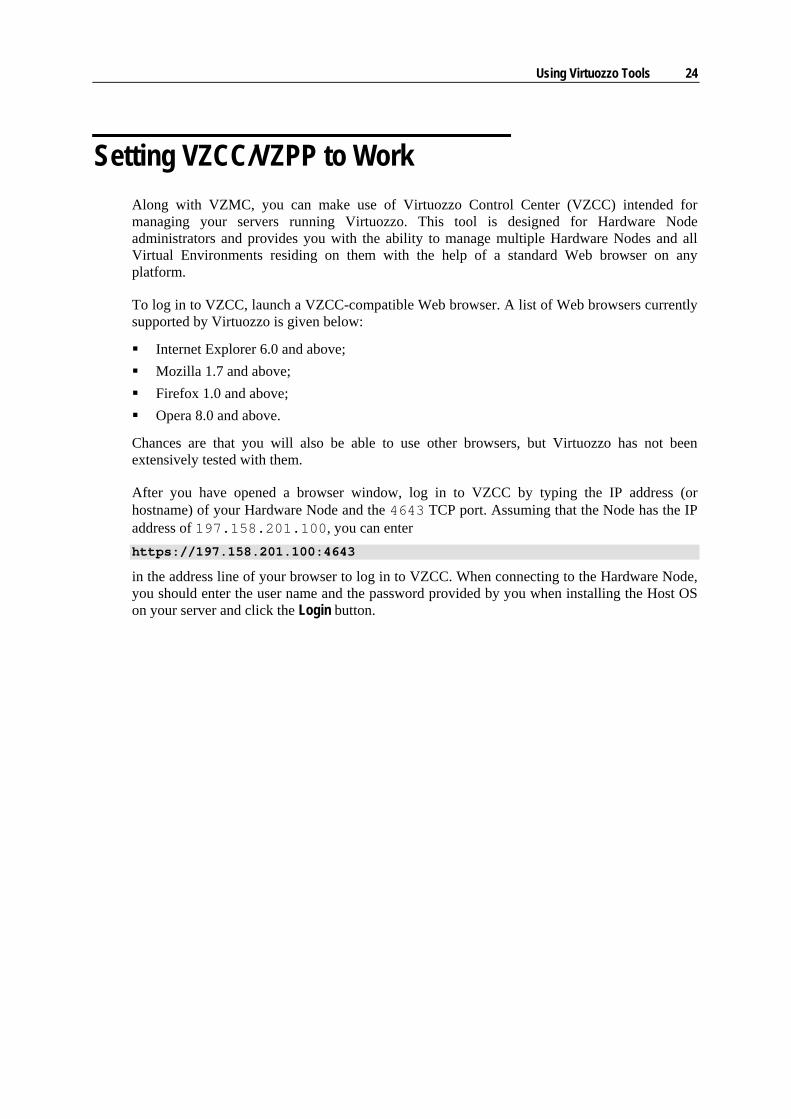
After you have opened a browser window, log in to VZCC by typing the IP address (or hostname) of your Hardware Node and the 4643 TCP port. Assuming that the Node has the IP address of 197.158.201.100, you can enter https://197.158.201.100:4643
in the address line of your browser to log in to VZCC. When connecting to the Hardware Node, you should enter the user name and the password provided by you when installing the Host OS on your server and click the Login button.