gauhati university semester examination registration process university... · gauhati university...
TRANSCRIPT
Gauhati University
Semester Examination Registration Process
(Through college)
User Manual
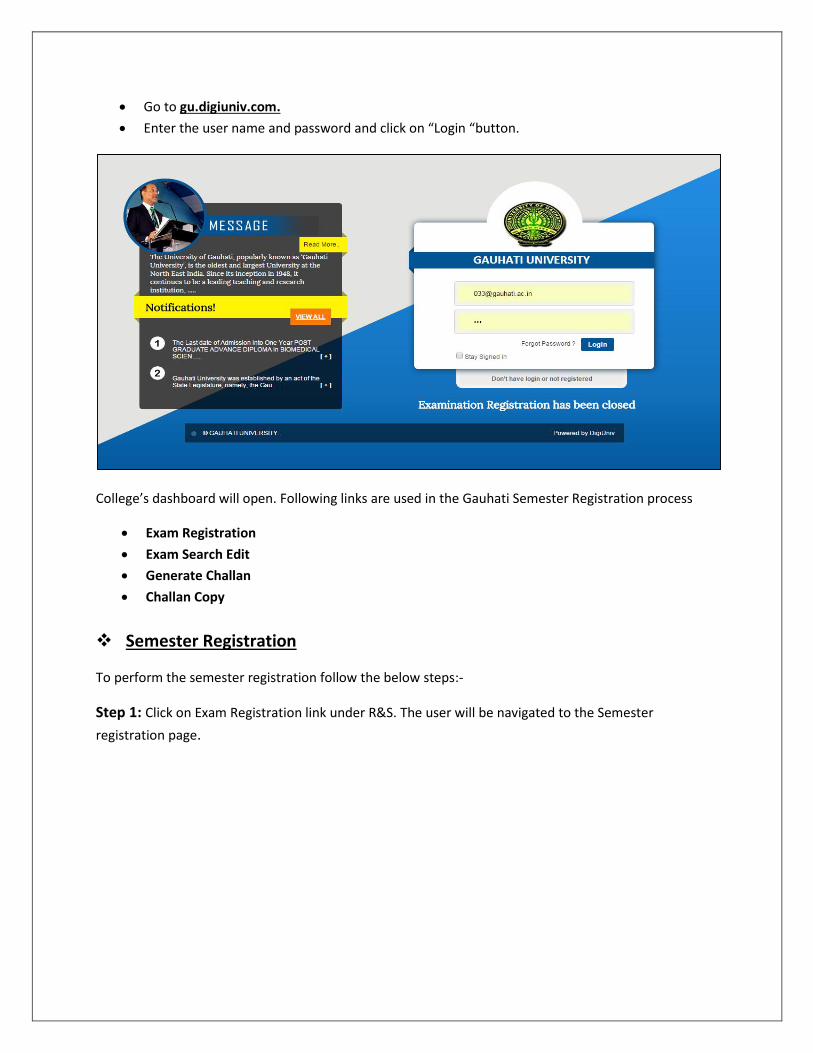
Go to gu.digiuniv.com.
Enter the user name and password and click on “Login “button.
College’s dashboard will open. Following links are used in the Gauhati Semester Registration process
Exam Registration
Exam Search Edit
Generate Challan
Challan Copy
Semester Registration
To perform the semester registration follow the below steps:-
Step 1: Click on Exam Registration link under R&S. The user will be navigated to the Semester
registration page.
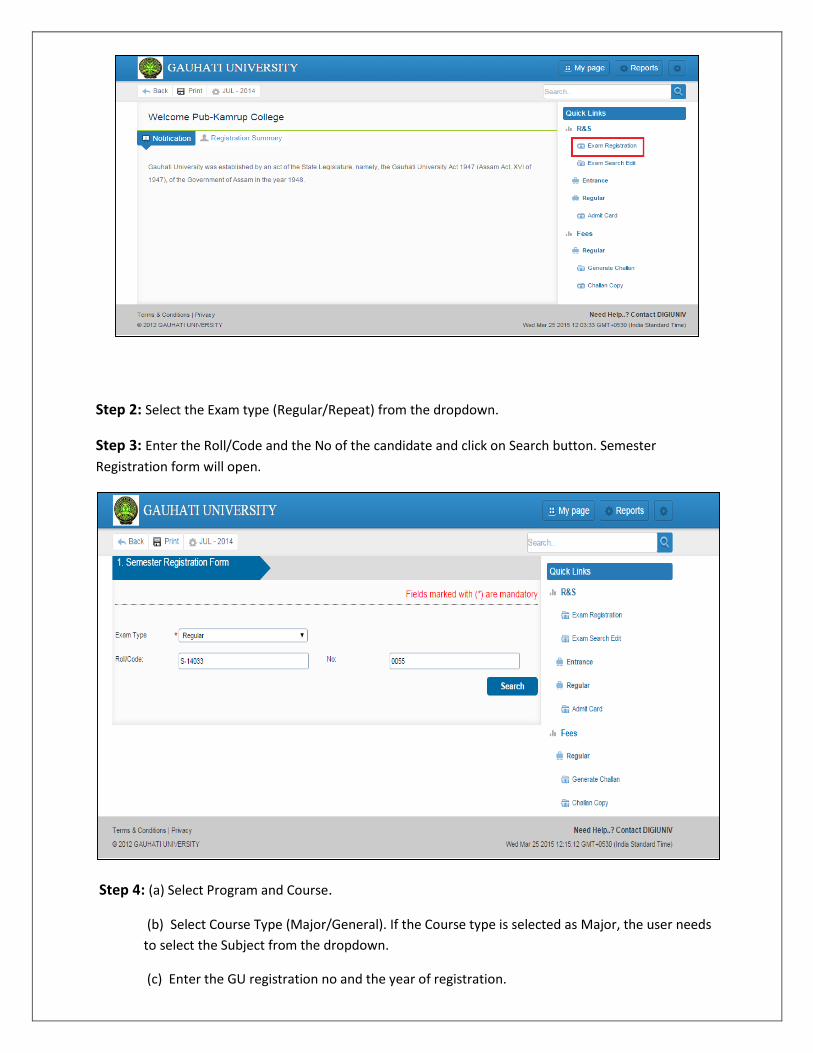
Step 2: Select the Exam type (Regular/Repeat) from the dropdown.
Step 3: Enter the Roll/Code and the No of the candidate and click on Search button. Semester
Registration form will open.
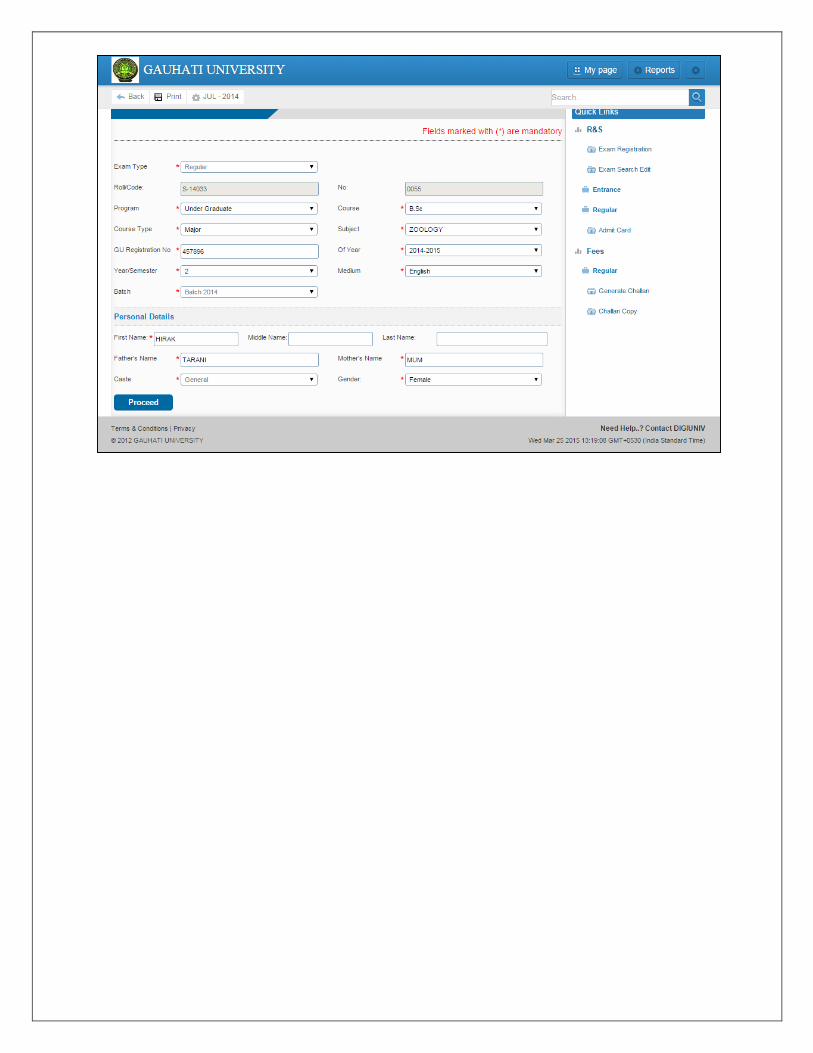
Step 4: (a) Select Program and Course.
(b) Select Course Type (Major/General). If the Course type is selected as Major, the user needs
to select the Subject from the dropdown.
(c) Enter the GU registration no and the year of registration.
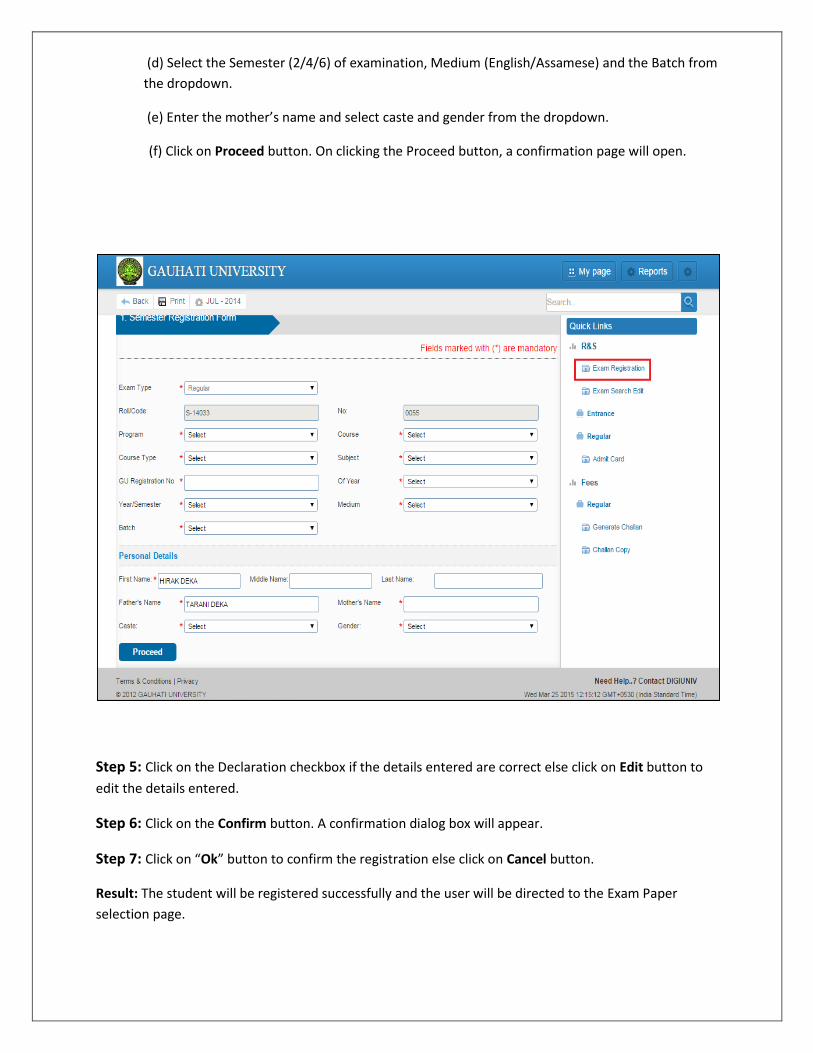
(d) Select the Semester (2/4/6) of examination, Medium (English/Assamese) and the Batch from
the dropdown.
(e) Enter the mother’s name and select caste and gender from the dropdown.
(f) Click on Proceed button. On clicking the Proceed button, a confirmation page will open.
Step 5: Click on the Declaration checkbox if the details entered are correct else click on Edit button to
edit the details entered.
Step 6: Click on the Confirm button. A confirmation dialog box will appear.
Step 7: Click on “Ok” button to confirm the registration else click on Cancel button.
Result: The student will be registered successfully and the user will be directed to the Exam Paper
selection page.
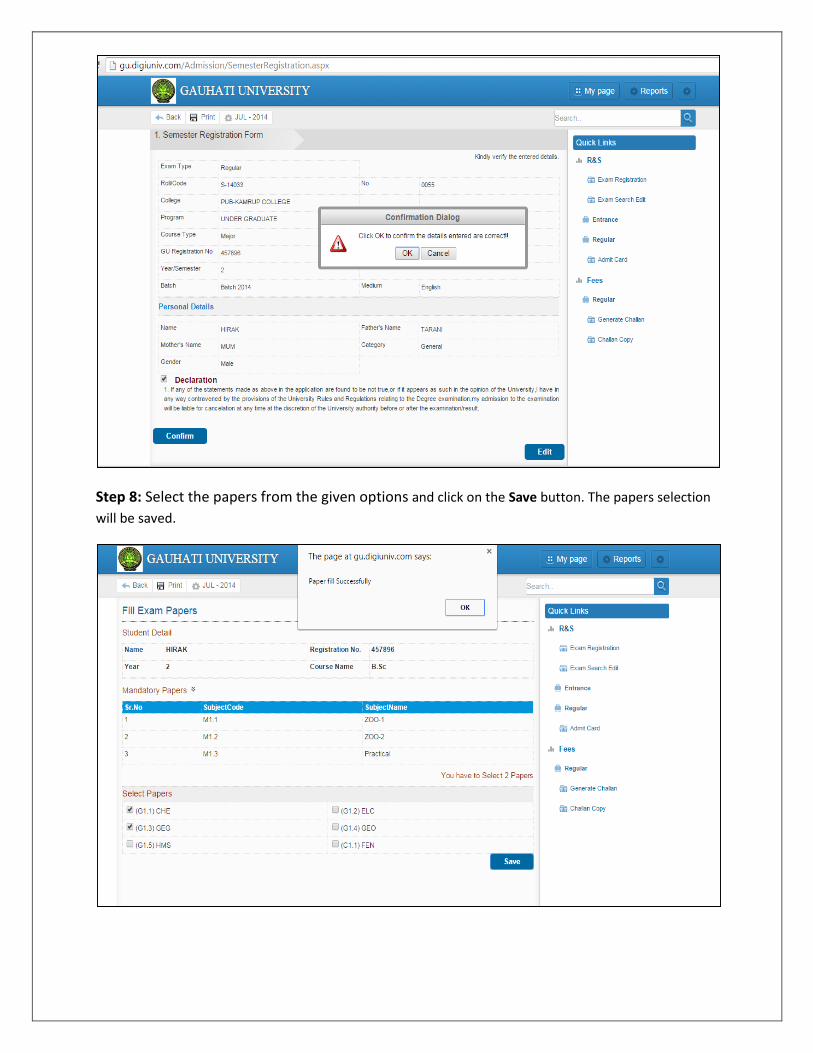
Step 8: Select the papers from the given options and click on the Save button. The papers selection
will be saved.
Step 9: Before proceeding for challan generation, the college needs to fill the affiliation details.
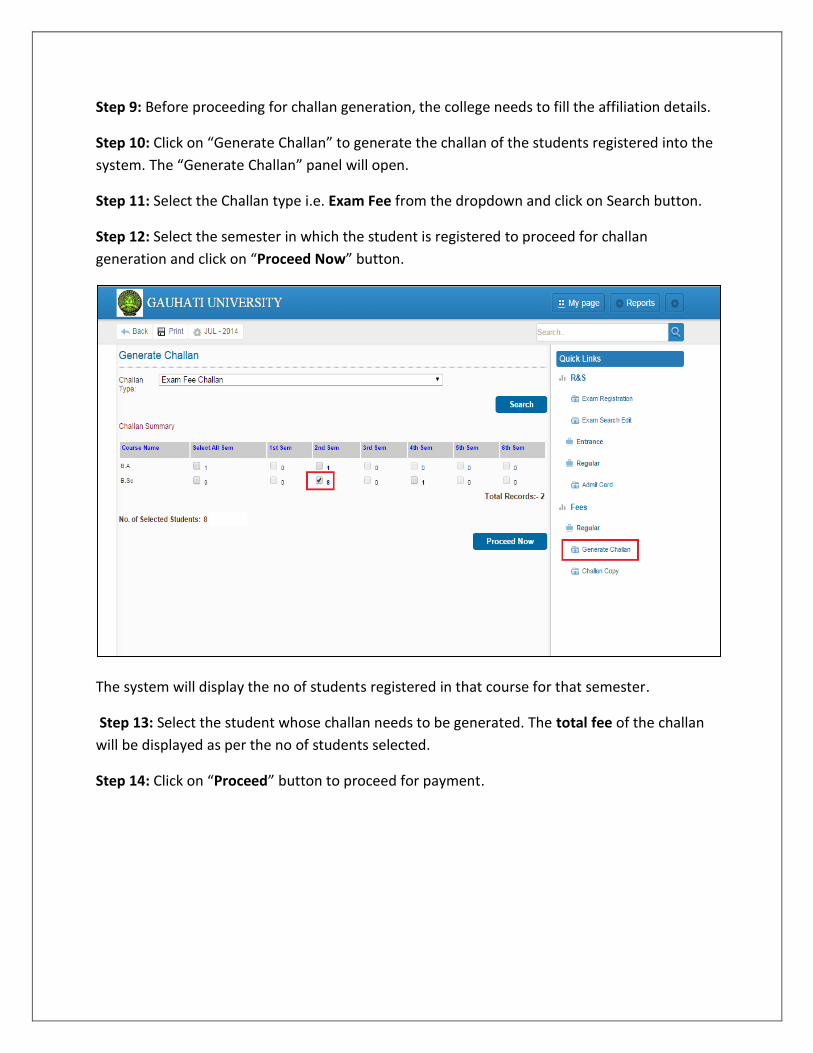
Step 10: Click on “Generate Challan” to generate the challan of the students registered into the
system. The “Generate Challan” panel will open.
Step 11: Select the Challan type i.e. Exam Fee from the dropdown and click on Search button.
Step 12: Select the semester in which the student is registered to proceed for challan
generation and click on “Proceed Now” button.
The system will display the no of students registered in that course for that semester.
Step 13: Select the student whose challan needs to be generated. The total fee of the challan
will be displayed as per the no of students selected.
Step 14: Click on “Proceed” button to proceed for payment.
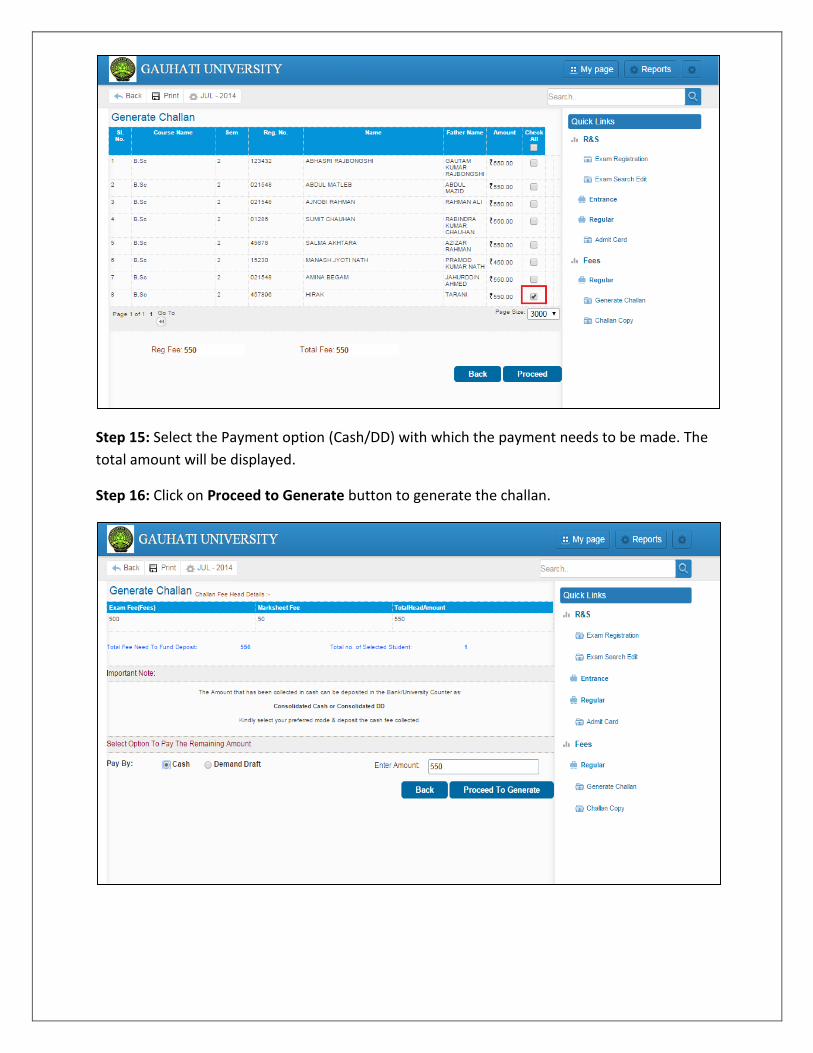
Step 15: Select the Payment option (Cash/DD) with which the payment needs to be made. The
total amount will be displayed.
Step 16: Click on Proceed to Generate button to generate the challan.
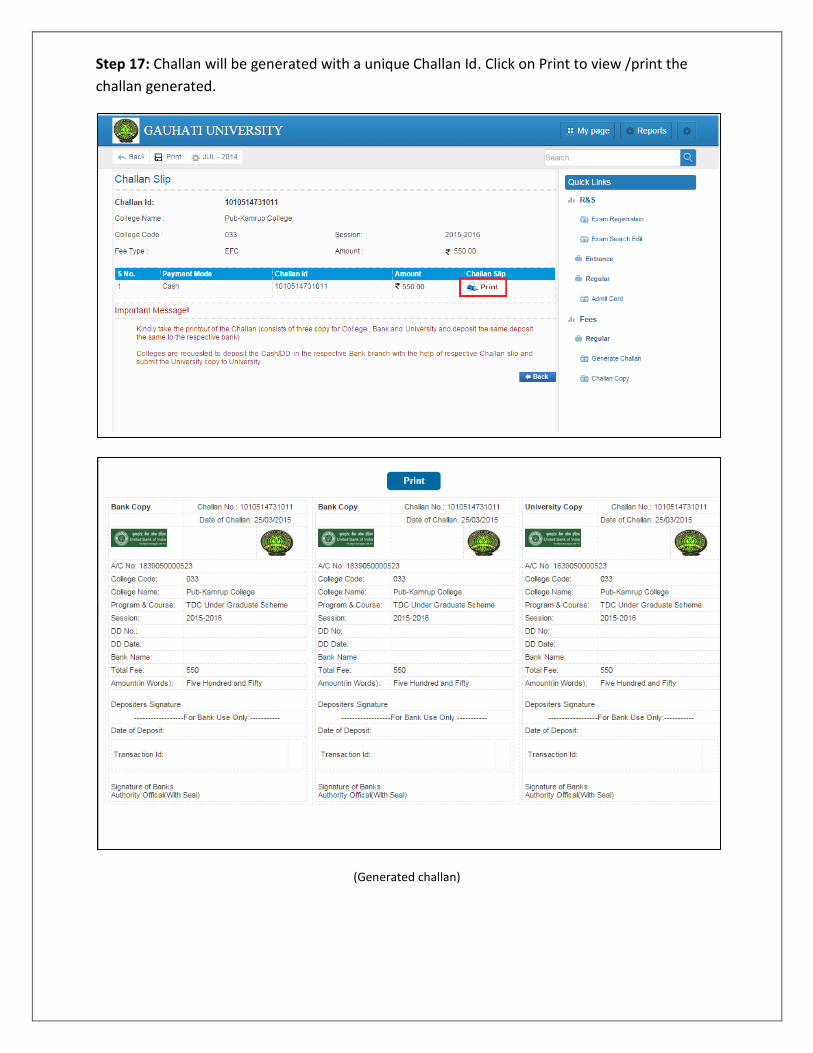
Step 17: Challan will be generated with a unique Challan Id. Click on Print to view /print the
challan generated.
(Generated challan)
View/Print the Challan Copy
To view/print a copy of the challan generated, perform the following activities:-
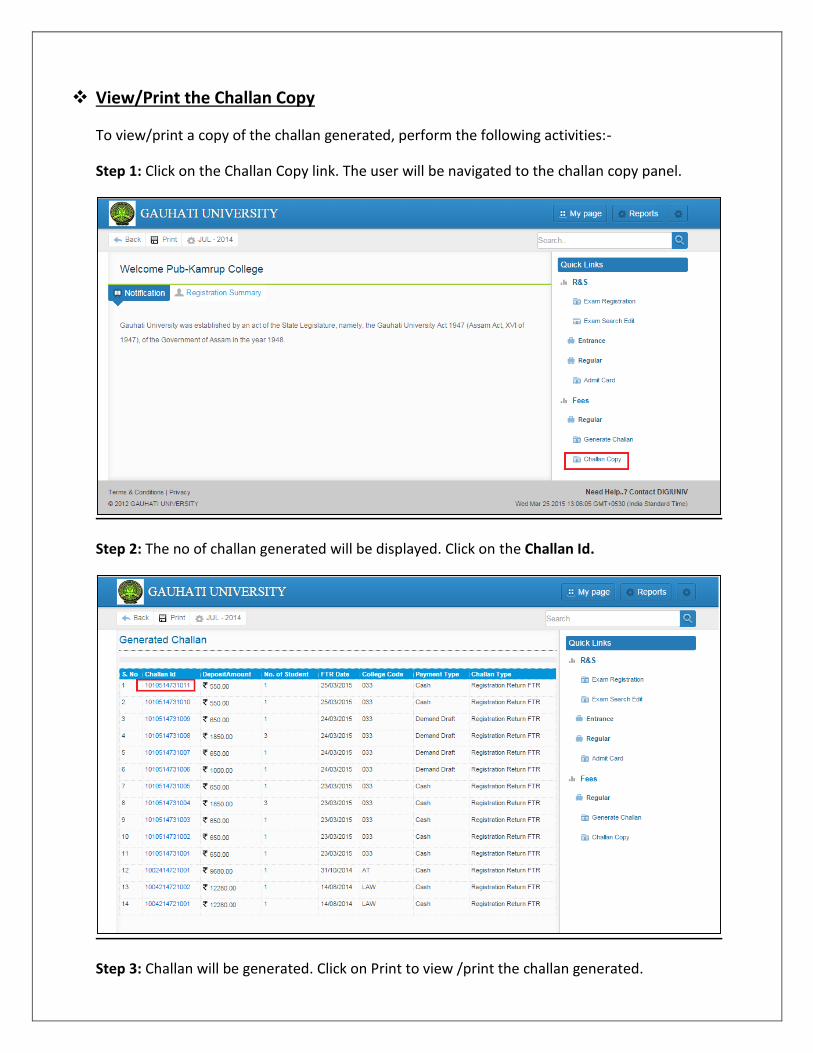
Step 1: Click on the Challan Copy link. The user will be navigated to the challan copy panel.
Step 2: The no of challan generated will be displayed. Click on the Challan Id.
Step 3: Challan will be generated. Click on Print to view /print the challan generated.
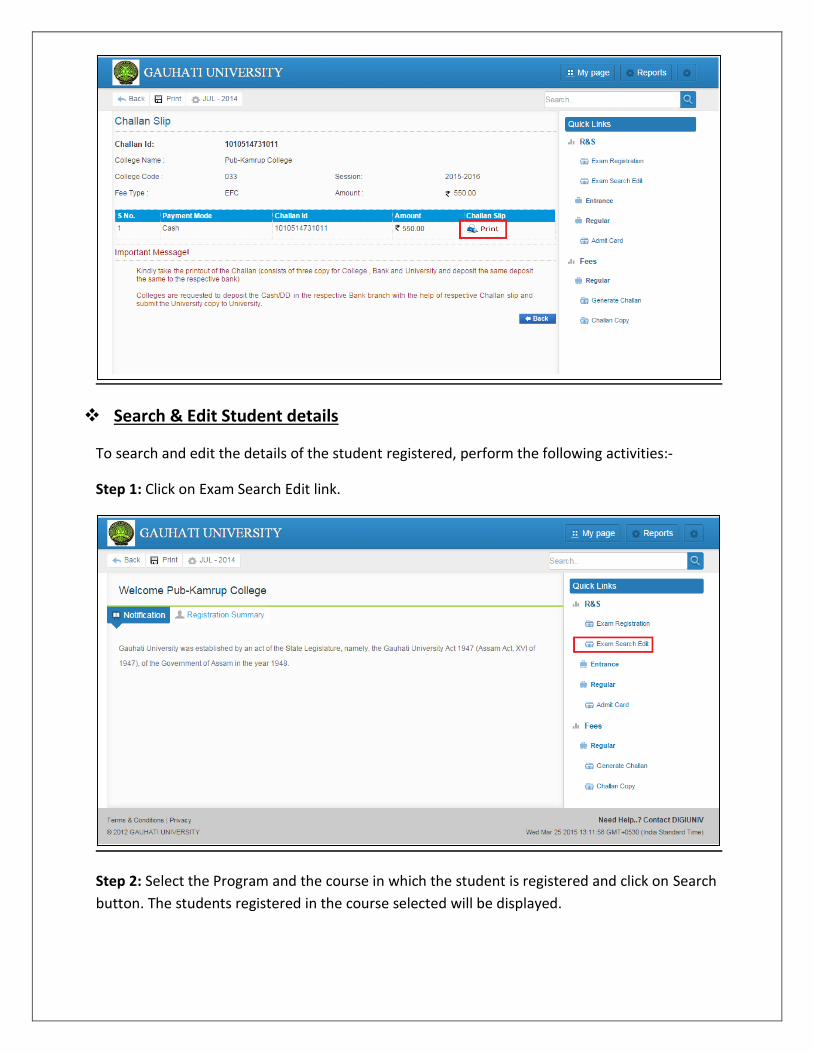
Search & Edit Student details
To search and edit the details of the student registered, perform the following activities:-
Step 1: Click on Exam Search Edit link.
Step 2: Select the Program and the course in which the student is registered and click on Search
button. The students registered in the course selected will be displayed.
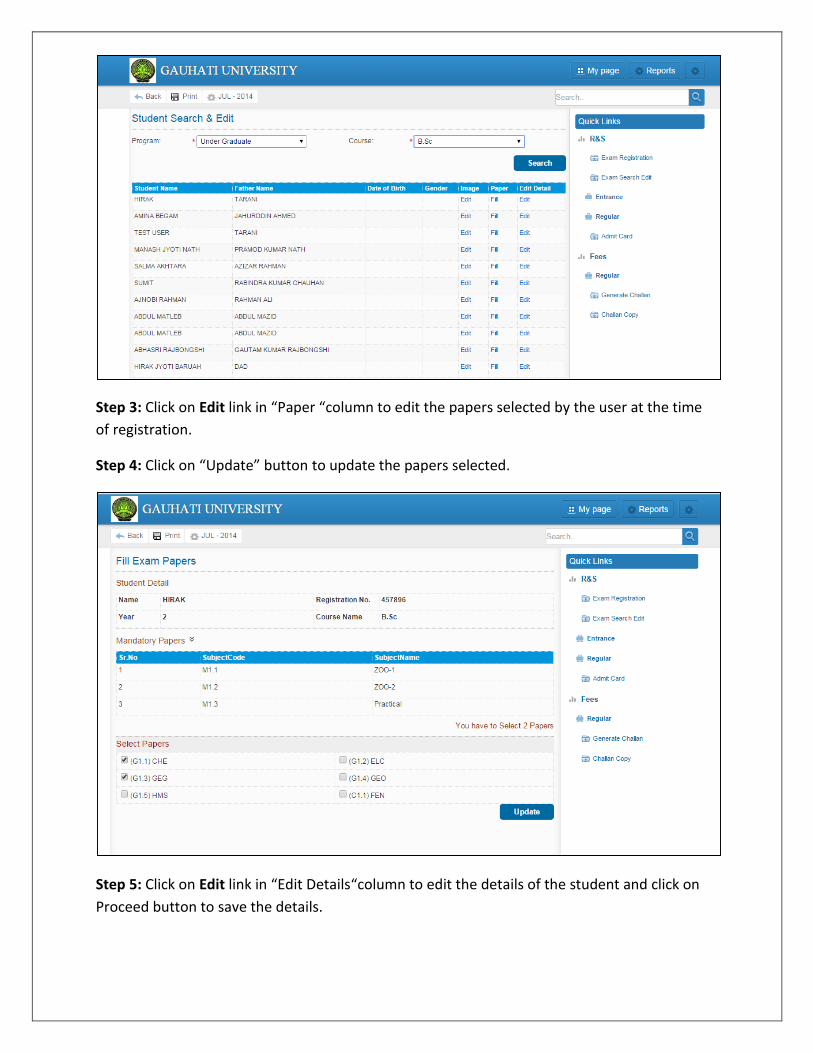
Step 3: Click on Edit link in “Paper “column to edit the papers selected by the user at the time
of registration.
Step 4: Click on “Update” button to update the papers selected.
Step 5: Click on Edit link in “Edit Details“column to edit the details of the student and click on
Proceed button to save the details.