free x · the included usb dongle allows you to connect your freex to a computer to test the...
TRANSCRIPT
[1]
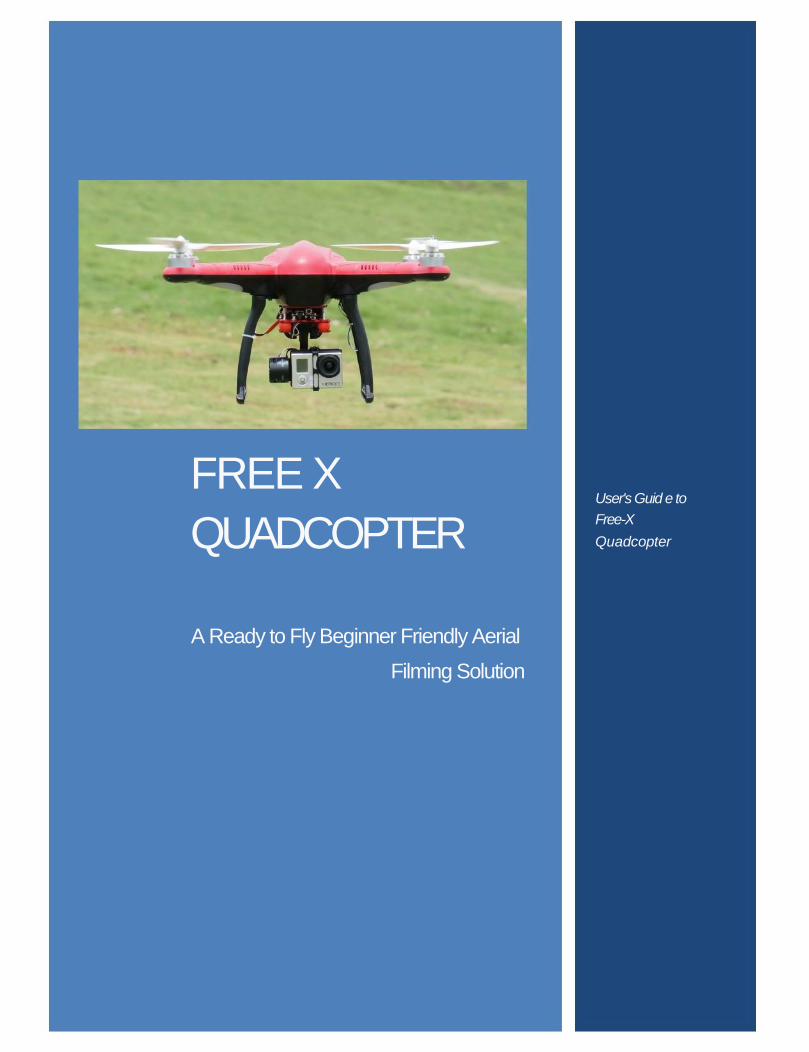
FREE X
User's Guid e to
QUADCOPTER
A Ready to Fly Beginner Friendly Aerial
Filming Solution
Free-X
Quadcopter

[2]
Wa r n i ng This product is not a toy; it's a state of the art, well-engineered combination of high quality electronics, aerodynamics, and
other high-frequency transmission equipment that requires proper assembly, carefully carried out preflight setup and proper procedures to fly.
Kindly Test the product and follow the given and well laid preflight setup instructions in this user manual, in order to avoid
accidents, crashes, damage or injuries. Users must pay attention to safety rules before operating this quadcopter.
Improper operation may cause serious personal injury or damage to properties and or injuries to others. Seller and or
manufacturers will not take any responsibility for any such cases.
Never use this product in close proximity to any person, property or built up area and never use indoors. Beginners in particular
should only use in a large open area keeping the quadcopter at a safe distance from anything it may damage should the
operator become disorientated and loose control. Disclaimer 1. FreeX Group, the importers and the retailers of the FreeX quadcopter assume no liability for damage(s) or injuries
incurred directly or indirectly from the use of this product. 2. The user is responsible for abiding with the law and not behaving contrary to public order or public safety by using this product.
3. FreeX Group, the importers and the retailers of the FreeX quadcopter accepts no liability for damage(s) or injuries directly
or indirectly from the use of this product in the following, but not limited to, conditions:
(1) Damage(s) or injuries incurred when users are drunk, taking drugs, drug anesthesia, dizziness, fatigue, nausea
and any other conditions no matter physically or mentally that could impair their ability.
(2) Damage(s) or injuries caused by intentional operation or accident.
(3) Any mental damage compensation caused by intentional operation or accident.
(4) Failure to follow the guidance of the manual to assemble or operate the product properly
(5) Malfunctions caused by refit or replacement with non FreeX accessories and parts.
(6) Damage(s) or injuries caused by using third party products or fake Free-X products.
(7) Damage(s) or injuries caused by misuse or user being inexperience / beginners / starters
(8) Damage(s) or injuries caused by mechanical failure due to wear and tear or GPS signal loss.
(9) Damage(s) or injuries caused by continued flying after low voltage protection alarm is triggered.
(10) Damage(s) or injuries caused by flying the aircraft in abnormal conditions (such as where water, oil, soil, sand
and other unknown material can get into the aircraft components or if the assembly is not completed properly,
preflight setup steps are not taken properly).
(11) Damage(s) or injuries caused by flying in the following situations: Using the aircraft in a magnetic interference
area, radio interference area or government regulated no-fly zones, in bad light, when the pilot has blocked,
fuzzy or poor eyesight or in any other conditions not suitable for operating.
(12) Damage(s) or injuries caused by using in bad weather, including rain, wind (more than a moderate breeze),
snow, hail, lightning, tornado, hurricane etc.
(13) Damage(s) or injuries caused when the aircraft is in the following situations: collision, fire, explosion, flood,
tsunami, subsidence, ice trapped, avalanche, debris flow, landslide, earthquake, etc.
(14) Damage(s) or injuries caused by infringement such as litigation caused by any data, audio or video material
recorded by the use of aircraft.
(15) Damage(s) or injuries caused by the misuse of the battery, protection circuit, RC model and battery chargers.
(16) Other losses that are not covered by the scope of FreeX group liability.
4. This product is suitable 14 years of age and older only.
5. Please contact your local dealers and or seller you purchased FreeX from, in case you need Service, warranty
or technical support.

[3]
Starter's Guide
This is a starter's guide. We highly recommend reading this user manual thoroughly and also watching our instructional
videos on our site pages or Youtube channels.
Do not attempt to fly the FreeX right out of the box. Please pay attention and follow the preflight setup instructions in
proper order and make sure to carry out each step properly.
Warning!
Failure to carry out proper preflight setup may result in injuries, damage to property or people for which we assume no
responsibility. Kindly read our Warning and Disclaimer section above. Battery Charging:
Please make sure to fully charge the battery before use or before each flight using only a Li-Po balance charger. You
must double check that the batteries are fully charged before flight. Connect the charger to the mains power unit and all three
lights should turn green. Connect the battery to the charger and the lights should turn red to indicate the cells are charging.
As each cell becomes fully charged the corresponding light will turn green until all three lights turn green to indicate the
battery is fully charged.
Propellers Installation
Do NOT install the propellers until you want to actually fly the
FreeX. During setup they should be off. When connecting the
propellers ensure that the correct propeller is installed on each
arm as they are not all the same.
USB Dongle Installation and Firmware Update The included USB dongle allows you to connect your FreeX to a computer to test the compass, fine tune the settings and also update the FreeX firmware to the latest version. You must first install the USB driver on the computer so that it can communicate with your FreeX. USB Driver
1 : The driver file is located on the included CD or can be downloaded from:
http://www.freexgroup.com/downloads.php First connect the USB dongle to your Quadcopter
and then to your computer.
2 : Open the drivers folder “cp2102 driver” and run “CP210xVCPInstaller.exe”. IMPORTANT – You must run the software as an administrator or else it will not work. On Windows 7 right click on the file and select run as administrator. The file name may change slightly as new versions are released.

[4]
Note: If you cannot get the USB driver to work please ensure that you ran the software as an administrator, this is the most
common cause for problems. Also please check the PC Device Manager, and COM port settings. Choose the right COM port.
To do this right click on My Computer Icon on your computer and Click Properties from drop down menu. A window will pop
up. Now Click Hardware tab and click on device manager. Click the small + icon next to Ports (COM and LPT) and you
should be able to see your Quadcopter CPL Device and its associated COM Port. Note it down. This is the port you need to
select in the firmware update software and assist program.
Firmware Upgrade Procedure
The software installed in the FreeX will be updated from time to time. The FreeX will function without updating the firmware but for
optimum performance it is advisable to update your firmware to the latest version.
1. With the battery unplugged connect the FreeX to your USB Dongle. Press and hold the button on
USB dongle and connect the battery to Quadcopter. Wait a moment and then release the
button.
2. Now insert the USB Dongle to your computer USB Port
3. Open the latest firmware upgrade program, available from
http://www.freexgroup.com/downloads.php. Select the correct COM Port. Check with
your device manager to find out the correct port used by the USB dongle.
4. Click on "Open Firmware File" and locate the firmware upgrade file from your computer.
IMPORTANT – Ensure the file name contains only standard letters (a-z) and numbers (0-
9). If the file name contains any other characters please rename the file before selecting it.
5. Click "Connect" to start updating. The progress bar will show the progress of the
update. When it reaches 100% the upload is complete. After the upload is complete
disconnect the USB dongle and then disconnect the power from quadcopter to turn it off.
The FreeX Assist Program for Parameter Adjustment For most users adjusting the parameters is not needed and should be avoided. It is for advanced users who wish to fine tune the settings. The
assist program can still be used to test the FreeX is working correctly.
1. Download and install the FreeX assist program. You can download them from the enclosed CD or from the FreeX site here:
http://www.freexgroup.com/downloads.php
2. Install AA batteries into the Transmitter and turn it on. Within 5 seconds connect the battery to the QuadCopter and wait
for auto binding. Once done, connect the supplied USB dongle to the FreeX and then connect to the computer.
[5]
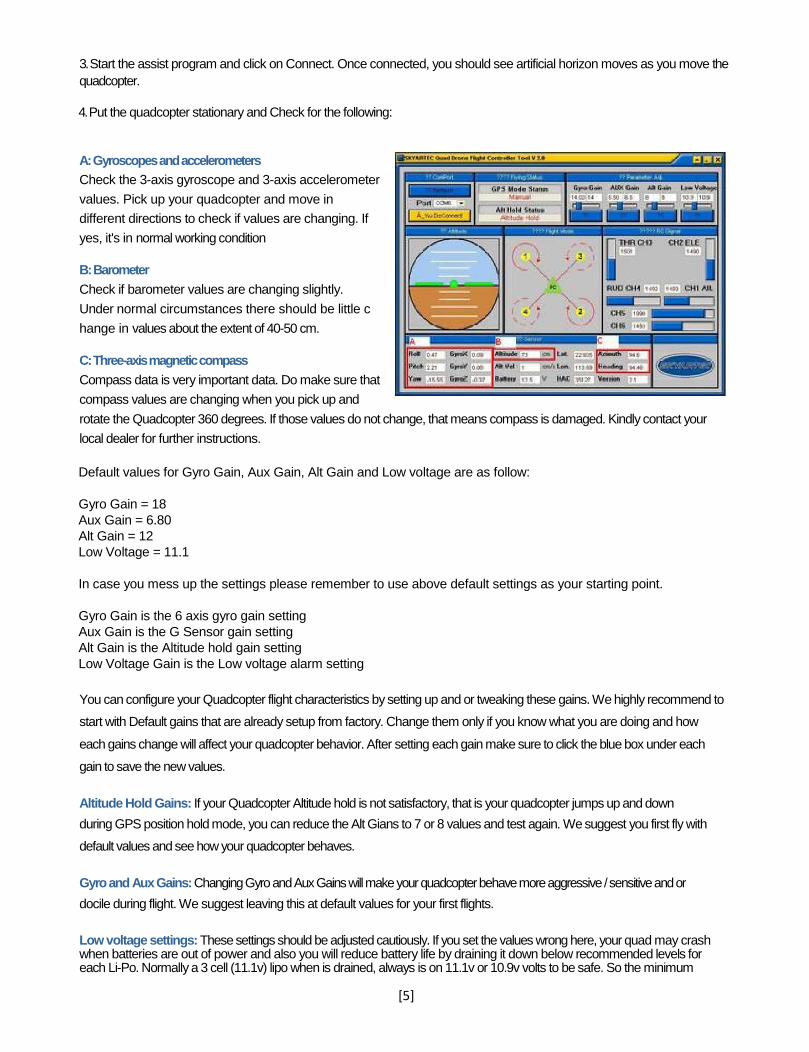
3. Start the assist program and click on Connect. Once connected, you should see artificial horizon moves as you move the
quadcopter.
4. Put the quadcopter stationary and Check for the following:
A: Gyroscopes and accelerometers
Check the 3-axis gyroscope and 3-axis accelerometer
values. Pick up your quadcopter and move in
different directions to check if values are changing. If
yes, it's in normal working condition
B: Barometer
Check if barometer values are changing slightly.
Under normal circumstances there should be little c
hange in values about the extent of 40-50 cm.
C: Three-axis magnetic compass
Compass data is very important data. Do make sure that
compass values are changing when you pick up and
rotate the Quadcopter 360 degrees. If those values do not change, that means compass is damaged. Kindly contact your
local dealer for further instructions.
Default values for Gyro Gain, Aux Gain, Alt Gain and Low voltage are as follow:
Gyro Gain = 18
Aux Gain = 6.80
Alt Gain = 12
Low Voltage = 11.1
In case you mess up the settings please remember to use above default settings as your starting point.
Gyro Gain is the 6 axis gyro gain setting
Aux Gain is the G Sensor gain setting
Alt Gain is the Altitude hold gain setting
Low Voltage Gain is the Low voltage alarm setting
You can configure your Quadcopter flight characteristics by setting up and or tweaking these gains. We highly recommend to
start with Default gains that are already setup from factory. Change them only if you know what you are doing and how
each gains change will affect your quadcopter behavior. After setting each gain make sure to click the blue box under each
gain to save the new values.
Altitude Hold Gains: If your Quadcopter Altitude hold is not satisfactory, that is your quadcopter jumps up and down
during GPS position hold mode, you can reduce the Alt Gians to 7 or 8 values and test again. We suggest you first fly with
default values and see how your quadcopter behaves.
Gyro and Aux Gains: Changing Gyro and Aux Gains will make your quadcopter behave more aggressive / sensitive and or
docile during flight. We suggest leaving this at default values for your first flights.
Low voltage settings: These settings should be adjusted cautiously. If you set the values wrong here, your quad may crash when batteries are out of power and also you will reduce battery life by draining it down below recommended levels for each Li-Po. Normally a 3 cell (11.1v) lipo when is drained, always is on 11.1v or 10.9v volts to be safe. So the minimum
[6]
value you should set for 3 cell (11.1v) lipo is 10.9 if you want to completely drain your battery during flight. We highly recommended to keep the value to 11.1v in order to make sure your quadcopter will not crash once the low voltage warning kicks in and also your battery will have a better life cycle.
Warning! Setting up wrong gains and or playing with gains without knowledge might result in abnormal behavior and
cause crashes, damages and or injuries for which your retailer, dealer and factory will not be responsible. Please read our
Disclaimer section carefully.
When you have finished using the assist software, before disconnecting the power, make sure to click on the Disconnect
button, then disconnect the USB Dongle from the computer and disconnect the power from Quad, the power off the radio. Outdoor flight calibration
Before flight you must calibrate the compass properly. This is a very important step. Not following or properly calibrating
the compass will result in bad GPS position or no GPS position hold and or abrupt flight behavior when flying in Attitude
and GPS position hold flight mode. Do this procedure before each flight.
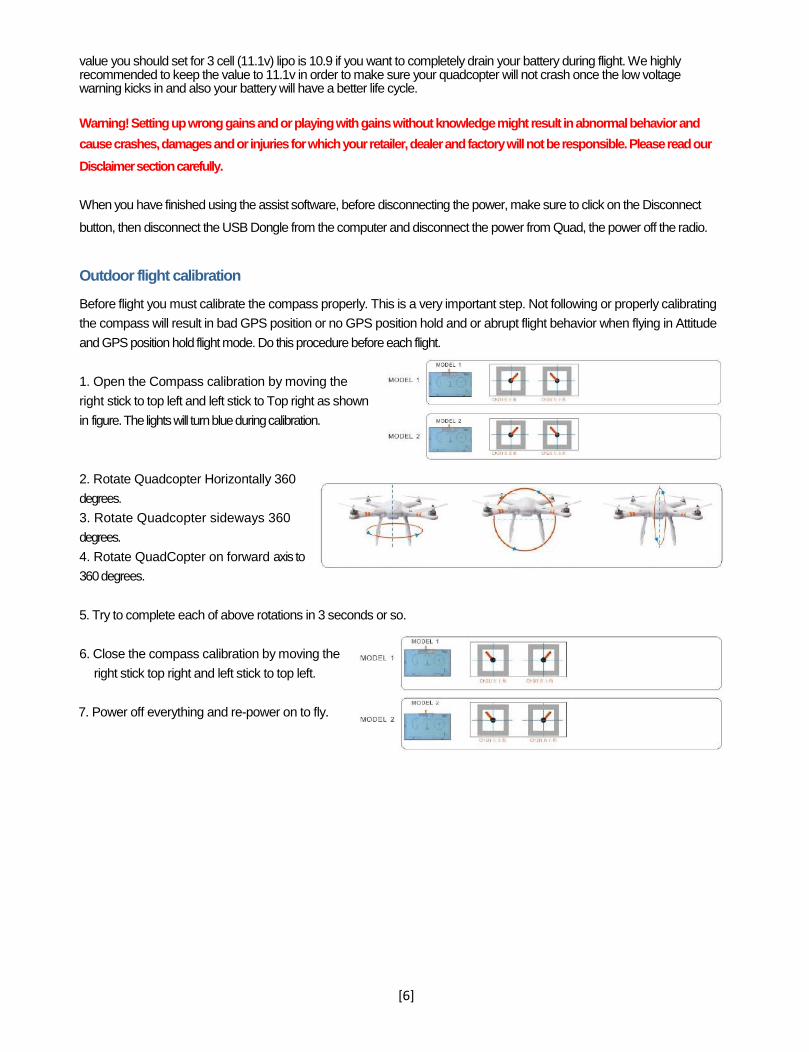
1. Open the Compass calibration by moving the
right stick to top left and left stick to Top right as shown
in figure. The lights will turn blue during calibration.
2. Rotate Quadcopter Horizontally 360
degrees.
3. Rotate Quadcopter sideways 360
degrees.
4. Rotate QuadCopter on forward axis to
360 degrees.
5. Try to complete each of above rotations in 3 seconds or so.
6. Close the compass calibration by moving the
right stick top right and left stick to top left.
7. Power off everything and re-power on to fly.

[7]
Outdoor GPS signal check
OFM SkyView has two lights on the rear. The right side green light will show if you have GPS signals locked or not. If the
right side Green light is solid, you have GPS signals but not all satellites are locked. Wait until green light is blinking. Now
you are ready to fly as all satellites are locked.
Flight Check
During flight check if the quadcopter has solid GPS position hold when Quad is hovering and both radio sticks are centered
but the Quadcopter drifts slowly and or drifts / moves slowly in circles, land and do the compass calibration again.
FreeX offers solid GPS position hold and attitude hold mode using sophisticated Compass and UAV grade GPS
technology. Do not use GPS positions hold if you are flying in areas with lots of other signals interference, high voltage
electric towers and electric lines etc.
Gyro Initialization
1. Connect the USB Dongle to the quadcopter.
2. Power on everything
3. Make sure Quadcopter is perfectly horizontal on a flat surface
4. Press and hold the button on USB Dongle for few seconds.
5. Power off everything
6. Re-power everything and fly.
Motor Arm and Disarm
FreeX has spring loaded centered throttle stick
and FreeX controls the Attitude and Position
hold based on throttle position. In order to
protect accidental start and injuries from
propellers and motors, OFM SkyView has
motor arm and disarm protection.
1. For mode 2 Radios (Throttle on the left) to start flying you need to move the throttle stick to down/right and hold.
Motors will start and your Quadcopter will take off automatically. To stop motors land and move throttle stick to down
and left. Hold and motors will turn off. Warning! Do not disarm motors during flight. Motors will stop and the
quadcopter will crash causing injuries or damages. We do not take any responsibility for such incidents or offer
compensations for injuries, damages etc.
2. For Mode 1 Radios (Throttle on the right) To start flying you need to move the left stick to right and right stick to down
at the same time. To stop motors, move left stick to left and right stick down at the same time. Warning! Do not disarm
motors during flight. Motors will stop and quadcopter will crash causing injuries or damages. We do not take any
responsibility for such incidents or offer compensations for injuries, damages etc.

[8]
Radio Transmitter
Radio Switches and buttons
A1 - Antenna
A2 - Failsafe Hover or Auto Return to home Selectable
A3 - IOC (intelligent Orientation Control)
A4 - Up Attitude Flight mode, Middle GPS Position hold, Down Auto Return to home
S1 - Brushless gimbal Tilt control
S2 - Throttle and rudder (Mode 2 Radio)
S3 - Aileron and Elevator (Mode 2 Radio)
S2 - Rudder and Elevator (Mode 1 Radio)
S3 - Throttle and Aileron (Mode 1 Radio)
S4 - Power On OFF Switch
C1 - "MENU" button
C2 - "+" key Increase values
C4 - "-" key decrease values
C3 - "EXIT" key
Startup and Auto Binding:
1.
2.
3.
4.
5.
6.
Your quad will auto bind to nearby FreeX radio within 30 seconds of powering up.
Turn on the Radio first.
Connect the main power battery to your quadcopter within 30 seconds.
You will hear a few beeps like "beep beep beep beep" tones.
After that four arm lights will be flashing successively.
If binding is not successful, LED lights under arms will be off and Red Light will be on Solid. In this case please repeat
the above procedure before attempting to fly

[9]
Radio Mode 1 and Mode 2 Switching:
FreeX radio supports easy switching between Mode 1 (throttle on the right hand) and Mode 2 (Throttle on the left hand)
To Change radio modes follow the steps given below:
Press and hold the menu button and power on the radio.
Press + or - button to change the number to 1 or 2 as per your Mode 1 and 2 selection as shown in picture.
Press "EXIT" key to save and exit.
Power off the radio and Power on again. Repeat the procedure if you want to
switch the modes again.
Intelligent Orientation control:
IOC switch is used to turn on the carefree flight mode. Once turned on (down position),
regardless of which way the quadcopter is pointing, your controls will stay the same
as per your orientation at the time you switch on the IOC. This means, regardless of
where the quadcopter forward section is pointing, pushing forward (using elevator
channel stick) Quad will always go forward, pushing backward (using elevator
channel stick) Quad will always go backward, pushing left (using Aileron channel
stick) Quad will always go right, pushing right (using Aileron channel stick) Quad will
always go right.
With IOC turned off the quad will act more like a helicopter where to go in a certain direction you must rotate to point in that
direction and then push forward. With IOC turned on rotation is no longer needed to control the direction of the helicopter
but can still be used to control the recording direction of an attached camera.
GPS Position Hold:
When the right Green LED is flashing (meaning you have all satellites locked) you can flip the flight
mode switch to GPS (center position) and quadcopter will hold its position once all sticks are centered.
Auto Return to home:
While flying flip the flight mode switch to all the way down (RTH) and your quadcopter will return to
home and land. Only available when all satellites are locked and GPS is normal working conditions. FreeX
will give you full control even during Return to home phase. You can easily make changes to RTH
course, as soon as you leave the sticks; QuadCopter will resume Return to home path and will land.
RTH is also useful for beginners who start to panic, if you feel you are loosing control flip the switch to
land.

[10]
Setting up the Timer on Radio:
You can set countdown timers on your radio to assist you fly for a set period
of time. For instance if you want to fly for 15 minutes, you can set 15 minutes
countdown timer on your radio. Once timer reaching to 0, Radio will give
you audible warnings and you can stop flying (Return to home and
Land)
This is a very helping feature and you should form a habit to use it. For instance, if a single fully charged battery gives you a
solid 16 minutes of flight time before quadcopter shows you low voltage warning, you can set your radio timer to 14
minutes. This way you can get audible warnings (Beeps) from Radio and know that it's time to return to home and its 2
minutes earlier before the Low Voltage warning will kick in. To Set the Timer Follow these steps
1. Press the "+" button on your radio once.
2. Press and Hold the Exit Button, now using "+" and "-" buttons
you can change the timer values to what you like. Default is 10
minutes.
3. Press "-" button once or twice to save and exit.
4. Once you have set the value you desire. Press "+" once and you can see a small hyphen left to the timer number starts
to move in circle. That means the timer has started. Now you can start flying and follow the alarm once timer is ending to
return to home and land.
D/R The Dual Rates (Quadcopter Behavior Sensitivity)
Dual rates are used to make your quadcopter behave very agile and sensitive to sticks movement and or docile on stick
movements. Use Dual Rates feature to set your channel 1, 2 or 4 to different values. By default your quadcopter dual rates
are set to 100% value. If you want to make your quadcopter docile and easy to control, set the Channel 1, and 2 dual rates to
low like 60% or 70% as per your flight style.
To Set Dual Rates follow the steps below.
Press the Menu Button once and you will see a small DR icon Blinking.
Press Menu again to move the slider to Channel 1, 2 or 4 and use "+" or "- "
buttons to change values to your desired values. Normally 65% is a good value for
beginners. It makes Quadcopter very docile and easy to control.
Press the exit button to exit and save

[11]
Pre-flight Check
1. Make sure the compass is properly calibrated. If Compass is not properly calibrated, Quadcopter will fly in slow circles
(Toilet bowl movement) and or will drift in different directions.
2.Check and make sure propellers are mounted as per right CW and CCW spinning directions. You can match the
propeller and arms rotation signs that are embossed on propellers and Quadcopter arms too.
3. Check the motors are spinning smooth. Make sure there is no play and or they are not lose on each arm
4. Use only 3S (11.1v) lithium Polymer battery. Do not use a higher voltage battery (like 4S 14.8v)
5. Use supplied 9inch Propellers only. Using aftermarket parts and or propellers is not recommended.
6. Aircraft takeoff gross weight is not over its limits
7. Ensure that the remote control , batteries and all components have adequate power supply .
8. Do not go near or in contact with the high-speed rotation of the propeller, try to keep a safe distance from the aircraft
during flight in case of loss of control. The rotors spin very quickly and will cause injury and damage if they come into
contact with anything.
9. If the lights on arms are continuously flashing during the flight, this indicates low voltage. Please land asap and replace
With fully charged batteries or re-charge.
Where to Fly (Flight Safety Tips)
1. Make sure to find a clear open area to fly. The area should not have magnetic interference. Do not use other devices
that cause magnetic interference like Mobile phones, other transmission equipment, speakers, cameras with lots of noise
and interference etc. Some Buildings, bridges and or stadium areas have a lot of steel and metal used in their
constructions, this all can affect transmission.
2. Do not fly in bad weather. Though FreeX uses waterproof motors and ESCs we still suggest not flying during rain,
foggy days or extreme humid days.
3. FreeX can handle a decent amount of winds from 5mph to 15mph but still we suggest not flying during very windy
and gusty days.
4. When flying, keep away from high power lines, power poles, road lamp posts, transmission towers, and high voltage
lines. In addition keep clear from people, water and trees and property.
5. Make sure to fly in area where there aren't any WIFI devices in use, other electronic devices, cellphone towers, high
power radio communication buildings and tower and or mobile communication stations.
6. Do not use GoPro’s WIFI feature when flying with GoPro.
7. FreeX Quadcopter will not function properly in Arctic circle / area and or north pole
8. Make sure not to land too hard. Always control and learn to do mild landings.
[12]
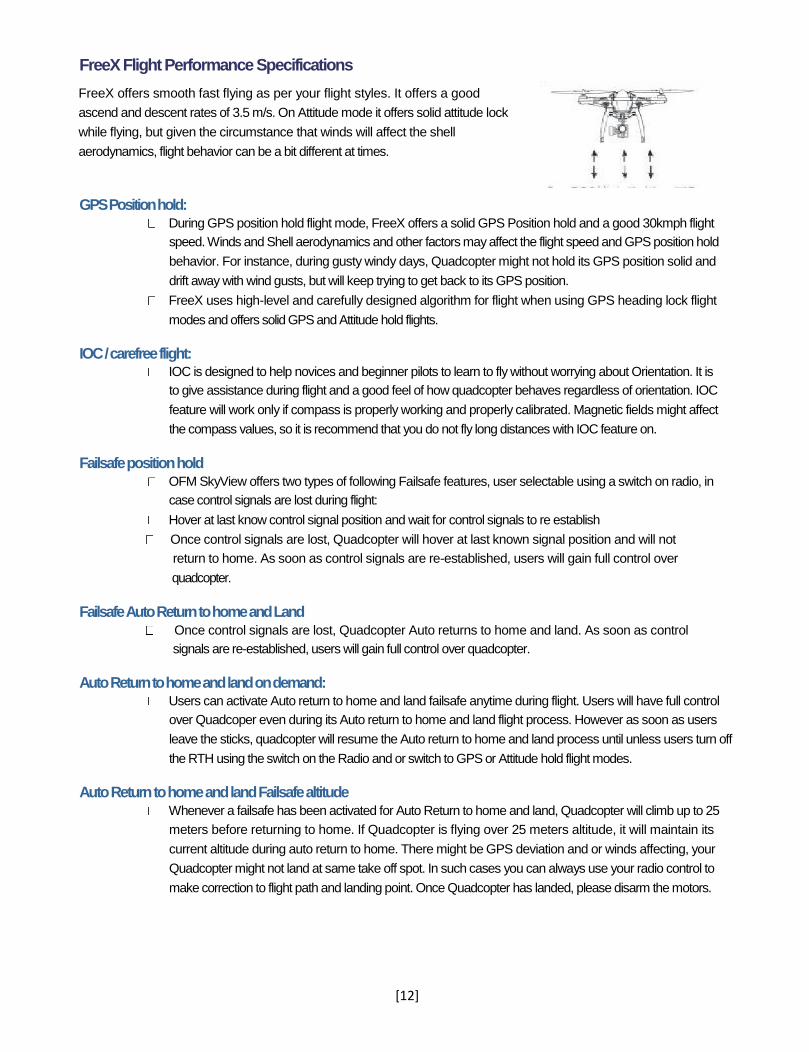
FreeX Flight Performance Specifications
FreeX offers smooth fast flying as per your flight styles. It offers a good
ascend and descent rates of 3.5 m/s. On Attitude mode it offers solid attitude lock
while flying, but given the circumstance that winds will affect the shell
aerodynamics, flight behavior can be a bit different at times.
GPS Position hold: During GPS position hold flight mode, FreeX offers a solid GPS Position hold and a good 30kmph flight
speed. Winds and Shell aerodynamics and other factors may affect the flight speed and GPS position hold
behavior. For instance, during gusty windy days, Quadcopter might not hold its GPS position solid and
drift away with wind gusts, but will keep trying to get back to its GPS position.
FreeX uses high-level and carefully designed algorithm for flight when using GPS heading lock flight
modes and offers solid GPS and Attitude hold flights.
IOC / carefree flight:
IOC is designed to help novices and beginner pilots to learn to fly without worrying about Orientation. It is
to give assistance during flight and a good feel of how quadcopter behaves regardless of orientation. IOC
feature will work only if compass is properly working and properly calibrated. Magnetic fields might affect
the compass values, so it is recommend that you do not fly long distances with IOC feature on.
Failsafe position hold
OFM SkyView offers two types of following Failsafe features, user selectable using a switch on radio, in
case control signals are lost during flight:
Hover at last know control signal position and wait for control signals to re establish
Once control signals are lost, Quadcopter will hover at last known signal position and will not
return to home. As soon as control signals are re-established, users will gain full control over
quadcopter.
Failsafe Auto Return to home and Land
Once control signals are lost, Quadcopter Auto returns to home and land. As soon as control
signals are re-established, users will gain full control over quadcopter.
Auto Return to home and land on demand:
Users can activate Auto return to home and land failsafe anytime during flight. Users will have full control
over Quadcoper even during its Auto return to home and land flight process. However as soon as users
leave the sticks, quadcopter will resume the Auto return to home and land process until unless users turn off
the RTH using the switch on the Radio and or switch to GPS or Attitude hold flight modes.
Auto Return to home and land Failsafe altitude
Whenever a failsafe has been activated for Auto Return to home and land, Quadcopter will climb up to 25
meters before returning to home. If Quadcopter is flying over 25 meters altitude, it will maintain its
current altitude during auto return to home. There might be GPS deviation and or winds affecting, your
Quadcopter might not land at same take off spot. In such cases you can always use your radio control to
make correction to flight path and landing point. Once Quadcopter has landed, please disarm the motors.
[13]
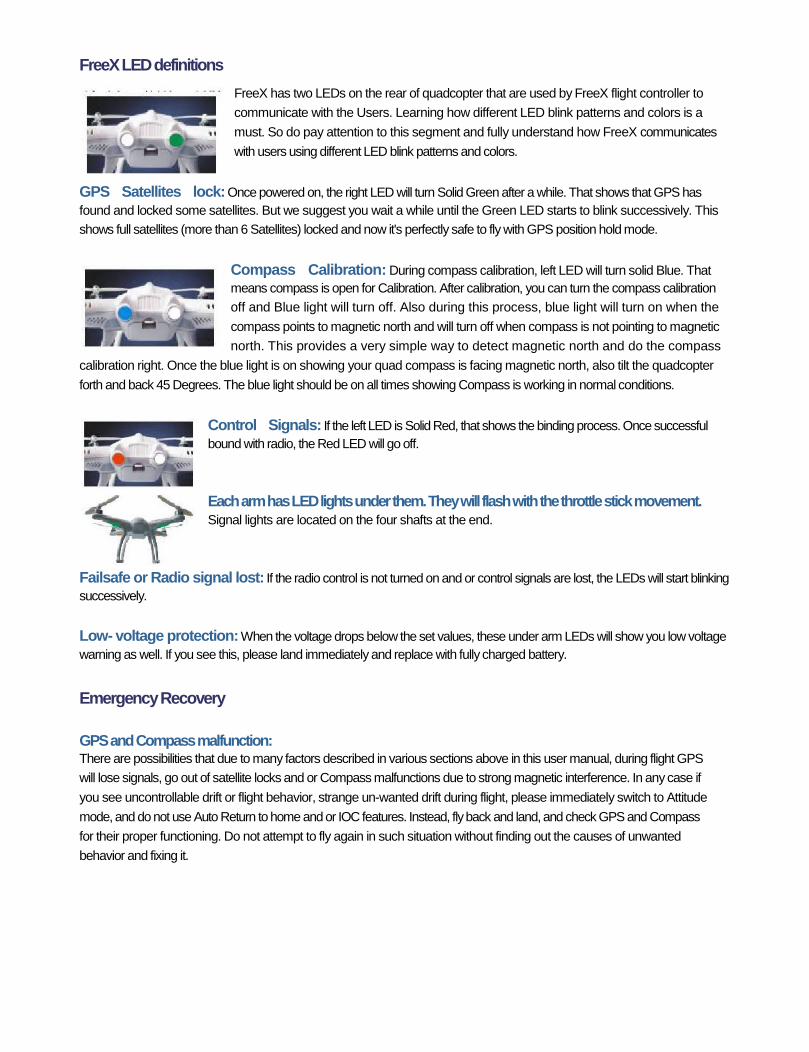
FreeX LED definitions
FreeX has two LEDs on the rear of quadcopter that are used by FreeX flight controller to
communicate with the Users. Learning how different LED blink patterns and colors is a
must. So do pay attention to this segment and fully understand how FreeX communicates
with users using different LED blink patterns and colors.
GPS Satellites lock: Once powered on, the right LED will turn Solid Green after a while. That shows that GPS has
found and locked some satellites. But we suggest you wait a while until the Green LED starts to blink successively. This
shows full satellites (more than 6 Satellites) locked and now it's perfectly safe to fly with GPS position hold mode.
Compass Calibration: During compass calibration, left LED will turn solid Blue. That
means compass is open for Calibration. After calibration, you can turn the compass calibration
off and Blue light will turn off. Also during this process, blue light will turn on when the
compass points to magnetic north and will turn off when compass is not pointing to magnetic
north. This provides a very simple way to detect magnetic north and do the compass
calibration right. Once the blue light is on showing your quad compass is facing magnetic north, also tilt the quadcopter
forth and back 45 Degrees. The blue light should be on all times showing Compass is working in normal conditions.
Control Signals: If the left LED is Solid Red, that shows the binding process. Once successful
bound with radio, the Red LED will go off.
Each arm has LED lights under them. They will flash with the throttle stick movement. Signal lights are located on the four shafts at the end.
Failsafe or Radio signal lost: If the radio control is not turned on and or control signals are lost, the LEDs will start blinking
successively.
Low- voltage protection: When the voltage drops below the set values, these under arm LEDs will show you low voltage
warning as well. If you see this, please land immediately and replace with fully charged battery.
Emergency Recovery
GPS and Compass malfunction: There are possibilities that due to many factors described in various sections above in this user manual, during flight GPS
will lose signals, go out of satellite locks and or Compass malfunctions due to strong magnetic interference. In any case if
you see uncontrollable drift or flight behavior, strange un-wanted drift during flight, please immediately switch to Attitude
mode, and do not use Auto Return to home and or IOC features. Instead, fly back and land, and check GPS and Compass
for their proper functioning. Do not attempt to fly again in such situation without finding out the causes of unwanted
behavior and fixing it.

[14]
Disorientation:
During flight if you get disorientated, do not panic. But leave the sticks to center and switch to GPS position hold mode.
Quad will hold its position. Try to figure out if Quadcopter is facing away for facing to you, you can use Channel 4 (rudder) to
yaw and see if you can figure out quadcopter rear or nose. It will be easier for you to fly it back if you re-establish
orientation.
Normally it is easier to find qudcopter rear, due to rear LEDs on the Quadcopter. In case you are too far, and can't
designate rear from front, then simply switch on IOC and now you can easily use Elevator and Aileron channels and bring
the quadcopter back to you. Once you re-establish your orientation you can turn IOC off and start flying in normal mode.
The easiest way in such situation when you lost orientation due to quadcopter flying two far for your eyesight, is to
activate the Auto return to home feature.
Altitude control malfunction
In case Quadcopter shows erratic behavior and bad altitude hold, jumps up and down itself, please land immediately and
check the gains settings using assist program for FreeX.
Help us offer you better after sales service, technical support and warranty by doing the following:
1. When you receive your Quadcopter please make a clear video of the following:
2. Unboxing your quad and showing what came in box. This will help us to know if something was missing from
factory during packaging.
3. How you setup your quad and follow the preflight setup. This will help us to find out if anything was faulty from
factory side and or it was customer fault, and or if customer made a mistake during preflight setup
4. Your very first flight showing everything you do on the field from beginning to your flight. This will help us to get
more feedback from users, find out if there was a factory fault or Customers fault, and also will prove in case of
crashes, if it was a faulty component and or Customers' fault.
Above and more clear videos from customers will help us get more feedback on how each customer is using his/her
Quadcopter and will help us to decide and offer better customer support, technical support and after sales service,
following our support policies.
We wish you all the best and hope you will enjoy your FreeX Quadcopter for a long time. Remember practice makes perfect so start with short simple flights from a very safe distance while learning. If you have any questions and needs assistance please feel free to drop an email to your dealer that you purchased your
FreeX from. If you crash and a part is broken please visit your local dealer or favorite web store to purchase replacement parts.