ford super duty 4x4 mag hytec rear diff cover install rear diff
TRANSCRIPT

Ford Super Duty 4x4
Mag Hytec Rear Diff Cover Install
&
Rear Diff Gear Oil Change
2004 F250 4x4 XLT Sport Crew Cab
Back to 2004 F250 Main Page
While I was installing my gauges, I installed a sending unit to monitor the rear differential temperature. I got a Mag Hytec
cover for Christmas (2008) that has the 1/8 NPT port already in place for the sending unit. Anyhow, when I installed the
new cover, I changed the gear oil in the rear end.
TOOLS & PARTS I USED
- Mag-Hytec Ford 10.5 rear differential cover
- Redline #57914 75W140 gear oil, 6 quarts
- 1/2" socket & ratchet (cover bolt removal)
- Flat screwdriver
- Torque wrench
- Drain pan
- Several rags
- Plastic putty paddle
- Small funnel - Lacquer thinner
- 1/4" allen wrench (new cover bolt install)
PROCEDURE
Here's a few pics of the Mag Hytec cover. Its a very impressive cover, complete with additional oil capacity, a magnetic
dipstick, a drain plug, a 1/8 NPT port (for a temperature sending unit), and an o-ring to seal to the rear diff case.


Here's a shot of the dipstick (left) and temperature sender port.

Here's a pic of the drain plug on the bottom.

Dipstick removed

Drain plug removed

Here's the stainless hardware that's included with the cover. They also include the two sizes of allen wrenches needed for
the installation of the bolts and to service the drain plug/diptstick/sender port. For some reason my kit had one extra bolt
and three extra washers.

Now on to the actual installation.....
A piece of info, that would've been more useful to learn up front, is that if the spare tire is removed, I can actually sit under
there and work on the diff cover with ease. I didn't figure this out until it was time to refill the oil but it was still very
helpful.
I started by removing the original differential cover by removing the 12 bolts with a 1/2" socket. I placed a drain pan and
bucket under the rear end to catch the old oil.


I took a few minutes to inspect the gears for any abnormal wear.
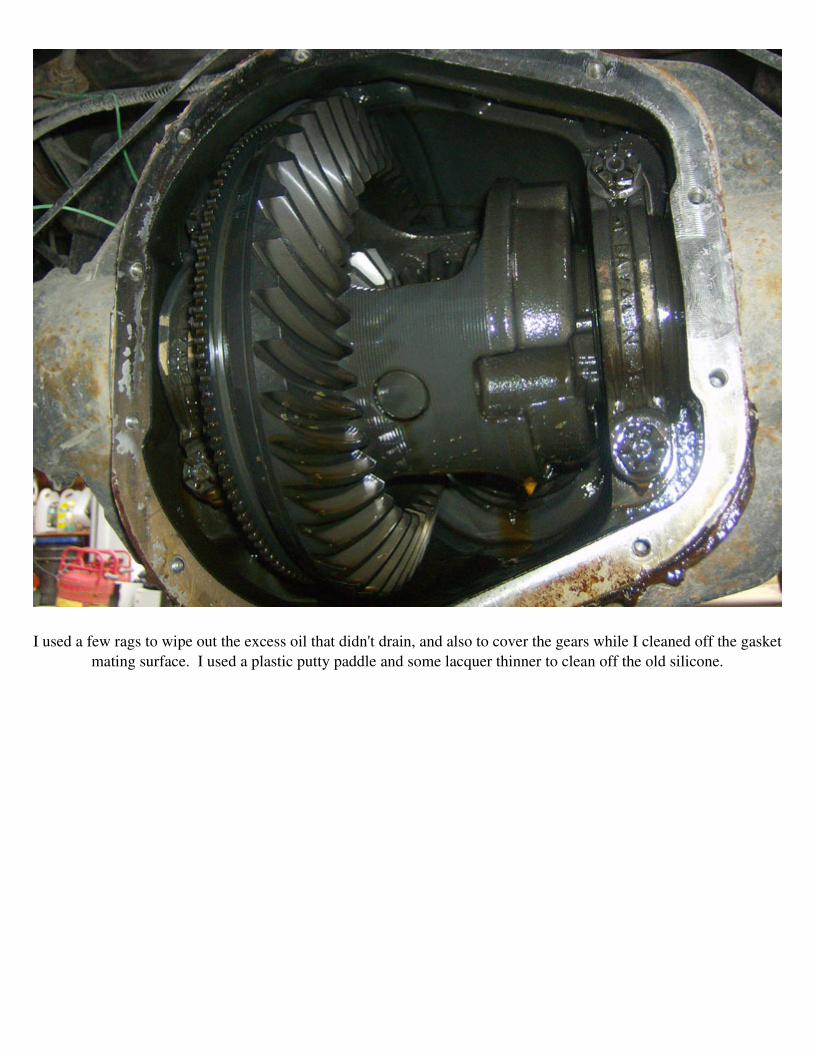
I used a few rags to wipe out the excess oil that didn't drain, and also to cover the gears while I cleaned off the gasket
mating surface. I used a plastic putty paddle and some lacquer thinner to clean off the old silicone.

Next step was to install the new diff cover. Silicone sealer is not required for this cover because it uses an O-ring to seal to
the diff case. Set the cover in place and install the 12 new socket head cap screws and washers (provided with the
cover) finger tight. Then I tightened them to 16 ft-lbs in a "cross tight pattern" (per the instructions).
Next, since my truck has a limited slip differential, I used Red Line 75W140, which already has the friction modifier in it.

The hole for the dipstick is on the top and this made for a convenient place to use a small funnel to just pour the oil in! I
ended up adding six quarts of gear oil to top it off.
The last step is to check the level and reinstall the dipstick.

Questions or Comments? Email [email protected]