for about $150showed examples of paint jobs that were literally rolled on with a roller and foam...
TRANSCRIPT
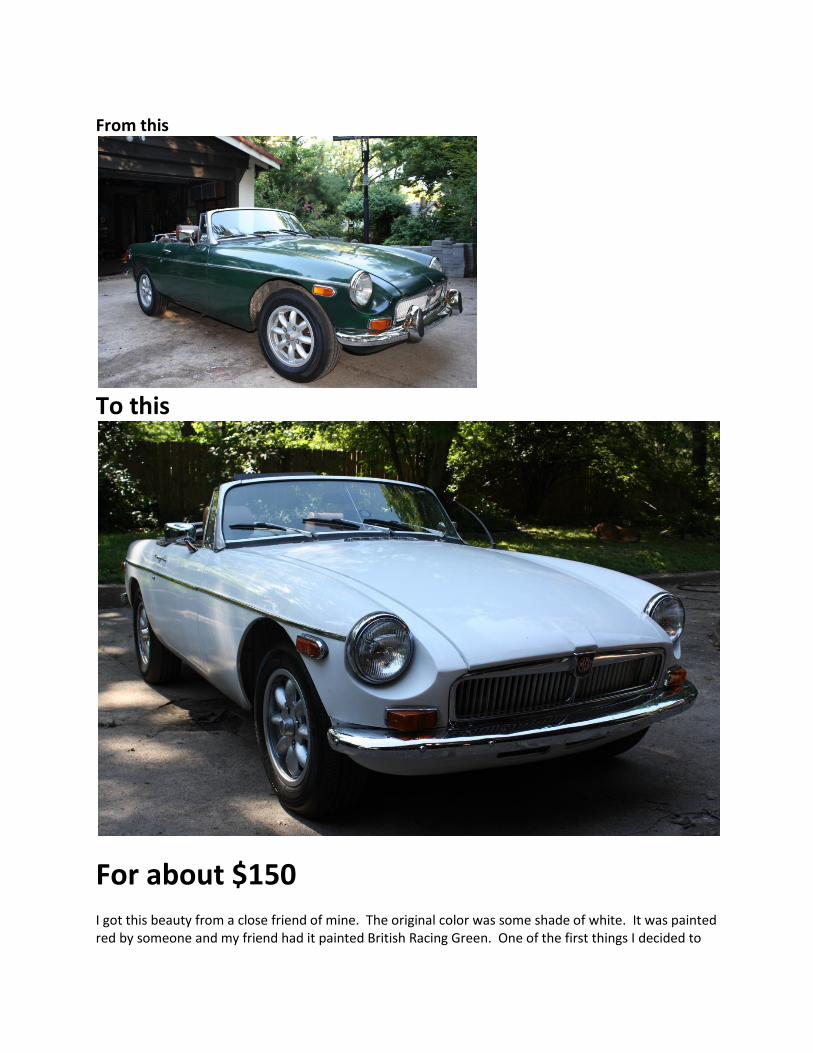
From this
To this
For about $150 I got this beauty from a close friend of mine. The original color was some shade of white. It was painted red by someone and my friend had it painted British Racing Green. One of the first things I decided to

do when I got it home was investigate into a paint job. Not because I didn’t like the color. But because when the chrome bumper conversion was done, the paint was not matched up and you could see a different color green on the front and rear. I took it to a local MG/British car specialist and was quoted $10,000. He stated, “you can do it cheap or you can do it right, but you can’t do it cheap and right.” His work is unbelievable! However, that was more than 4X what I paid for the car and it just wasn’t going to happen – even if I had the money. I later looked into Maaco but they had very mixed reviews. I was coming to the conclusion that I was probably going to do a home job. While investigating I saw several postings about “painting your car for under $50.” This led me to a website called Rolled-on.com. It showed examples of paint jobs that were literally rolled on with a roller and foam brushes. The results people were getting were outstanding! Rivaling many sprayed on jobs. This method of painting has been used for years, I believe it’s called “coach painting.” After doing a great deal of reading up on the subject, I was hooked. I jumped right in and got started. Materials used:
2 quarts of Rustoleum “Topside” paint. Topside/boat paint offers UV protection, unlike regular Rustoleum. (<$15/each on Amazon). Another popular option is Brightside. It is more expensive, a little over double the price of Rustoleum, but supposedly provides a better gloss.
Penetrol, made by Flood, found in the paint department
Paint thinner/mineral spirits
3-5 cans of Rustoleum spray paint in the same color
A rust converter
Primer
10 -15+ high density rollers
5-10 foam brushes of various sizes
Sand paper – 400/600 for rotary sander; sheets of 600, 800, 1000, 1200, 1500 and 2000 wet/dry paper. (Walmart had the cheapest prices by far on 3M wet/dry sand paper, in the automotive department)
Tack cloth
Wire brush for 4.5” grinder
Spray cans of degreaser. I recommend Gunk Heavy Duty Gel.
Body putty kit, if necessary
McGuires Ultimate Rubbing Compound
Your favorite wax
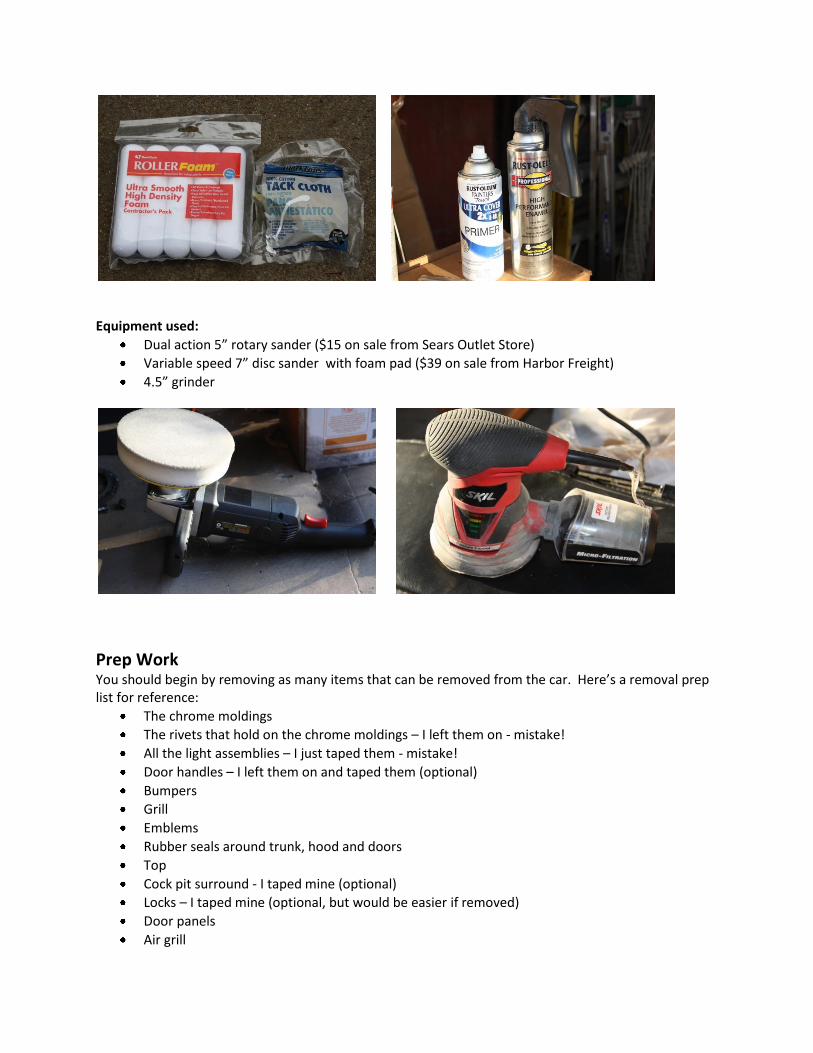
Equipment used:
Dual action 5” rotary sander ($15 on sale from Sears Outlet Store)
Variable speed 7” disc sander with foam pad ($39 on sale from Harbor Freight)
4.5” grinder
Prep Work You should begin by removing as many items that can be removed from the car. Here’s a removal prep list for reference:
The chrome moldings
The rivets that hold on the chrome moldings – I left them on - mistake!
All the light assemblies – I just taped them - mistake!
Door handles – I left them on and taped them (optional)
Bumpers
Grill
Emblems
Rubber seals around trunk, hood and doors
Top
Cock pit surround - I taped mine (optional)
Locks – I taped mine (optional, but would be easier if removed)
Door panels
Air grill

Next, go over the paint with the DA sander using 400/600 grit paper to see what your working with underneath. Pay special attention to bubbles in the paint. If you find rust, go over it with a wire brush attached to the grinder to get down to bare metal. Once down to bare metal, do any body work repair work needed. The prep work is the most important part of any paint job, take your time and do a good job here.
What was underneath the bubbles After using the wire brush
Repair completed

Mixing the Paint
You’ll need to do some testing on some scrap metal to come up with the right ratio of paint and additives. Some use a simple 1:1 ratio of paint and mineral spirits. I did 2 parts paint, 1 part mineral spirits and 1 part Penetrol (but recommend using a hardener). I bought an empty 1 gallon paint
container from Home Depot and made the mistake of mixing all my paint at once. DO NOT MIX ALL YOUR PAINT AT ONCE! The paint will evaporate over the course of the paint job. So instead, mix only what you’ll be working with at each session. I do have to say that I did this paint job over a 2 month period. It was winter time (an unusually warm winter though) and it took longer than it would usually take. If the weather was warmer and drier, it could probably be completed in 2 weeks. It is recommended that you do just a panel or two at a time. However, I did about half the car. It’s up to you. Once you have your correct ratio, you’re ready to begin painting the car. But before starting, go over the car with the tack cloth to remove all dust.
Painting
**DO NOT PREMIX THE PAINT**

The paint should be pretty thin no matter what your ratio. It will be like painting with the consistency of milk. You’ll lay on one coat and let it dry. When you first roll it on it’s normal to see a lot of bubbles,
don’t freak out. You’ll see lots of bubbles each time you apply a coat
The bubble should quickly disappear. If they don’t, then you may need to use heat, like from a blow dryer, to remove the few that did not go away. You should probably take another look at your ratio as well. Let the first coat dry and then put on another coat. After the second coat
After the second coat, before wet sanding

you’ll wet sand it with the 600 grit paper until all fish eye/orange peel is gone. If there is a lot of fish eye/orange peel, again, you’ll want to take a look at your ratio. Repeat with two more coats
After the fourth coat
and wet sand with the 800. Repeat with two more coats
After the 6th coat, before wet sanding

and wet sand with 1000. Repeat with two more coats
After the 8th coat, before wet sanding
and wet sand with 1200. Repeat with two more coat
After the 10th coat, before wet sanding

and wet sand with 1500. You can repeat with two more coats, but I did not,
and wet sand with the 2000. Wet sanded after final coat
Instead, I just went over the 1500 layer with 2000. I did not wet sand behind the bumper areas on the valance. You can put on as many coats as you like. I put on 10, but some do as many as 15, or as little as 8. After the final wet sand, go over the car with cutting compound using the multi speed sander with a
foam polishing pad to bring out the shine. Putting on the compound.
Final results before waxing

Allow the exterior of the car to dry for about a month then polish with your favorite car polish. With the door panel and rubber seals removed, you can tape off and spray paint the door jams, under the hood (bonnet), and the trunk, as well as any other areas you’d like to paint (ie. the whole trunk (boot) area, the engine bay (if you have your engine out of course), interior of the car, wheel wells, behind the grill, etc.)

Lastly, put everything back on/in.
What I would do differently This list is in no particular order.
Remove all that can be removed – lights, trim holders/rivets, studs that hold top on, wipers, everything you can! The paint is very thin. When you hit objects with the roller/brushes the paint runs. Be sure to check for runs. After you’ve checked, check again. And then check again.
A run is hard to correct and just adds unnecessary time and energy to the job.
Wear gloves
Cover wheels up
Cover all glass and rubber seals well/completely
Tape, and then re-tape between various coats, so it doesn’t stick so badly and won’t be so hard to remove when done.
Use hardener in the paint mixture.
Work in smaller sections, not half the car at a time.
Put on one more coat between wet sanding with the 1500 and 2000
TIP - Put a piece of lawn trimmer line underneath the windshield rubber seal to separate it from the body.
Paint the wheel wells black – easily corrected though. The white shows too much dirt, and quickly.
Fixing drips created from hitting the tape

In Conclusion My job is nowhere near perfect. But I’ve been told that “it’s better than a Maaco job”. People find it very hard to believe I did it in my garage at home. And when I tell them the method I used, mouths drop. With what I know now, if/when I do it again, it will look better than most professionally sprayed cars. Are you ready to try it yourself? Just be prepared for some hard work. Take your time and be patient. The results are worth the work. The savings and self recognition outweigh it all.
A year and a half later