florida palm trees · nothing else gives a landscape that “tropical” feel quite like ... the...
TRANSCRIPT

2
www.florida-palm-trees.com |
Florida Palm Trees www.florida-palm-trees.com
Table of Contents
How to Choose a Palm Tree 3
How to Transplant Palm Tree from a Container into the Ground 5
How to Transplant Palm Tree from One Location to Another 7
Top 10 Palm Tree Transplanting Mistakes 10
5 Important Palm Tree Watering Q&A 11
How to Prevent Palm Tree Nutritional Deficiency 14
Top 10 Palm Tree Care Mistakes 15

3
www.florida-palm-trees.com |
Florida Palm Trees www.florida-palm-trees.com
How to Choose a Palm Tree
Nothing else gives a landscape that “tropical” feel quite like palm trees. Florida Palm Trees like warm climate and a lot of sunshine. There are a lot of challenges to maintain a healthy and prosperous palm tree. It’s important for the homeowner to understand all these challenges and obtain the tools necessary to overcome them. When choosing a palm tree for your property, consider five factors: Soil, size, temperature, sunlight, and water.
Right Soil for Palm Trees
Soil is the most important factor for healthy palm tree growth. When buying a palm tree, ask how much nutrients and water the palm tree needs to receive. This will determine what type of soil this palm tree will grow in the best. Fertilization is another important component of palm tree care.
Different types of Palm Trees require specially formulated fertilizers that answer to very specific conditions. If your soil is not very nutrient, it can be strengthened with organic or inorganic fertilizers. When you buy a fertilizer, make sure it is high quality and has slow release formula. Avoid buying cheap fertilizers because they will wash away after few rains.
One of the products that I personally love is Jobe’s Palm Fertilizer. This product is great, because it promotes root development and the long-term vitality of all types of palms. It won’t burn the roots and has all the nutrients your palm trees need. More info about Palm Tree Fertilization.
Palm Tree Size
Size is very important. That little palm tree, that you bought, can get big very quickly. Palm trees can reach a height of 50 feet or more. It can overpower the rest of your property and interfere with the power lines if planted nearby.
Best Temperature for Palm Trees
Palm trees are usually found in the tropics, coastal regions, deserts and generally warmer areas. Tropical zones are distinguished as areas that experience high temperatures, humidity and rainfall. Tropical conditions are favorable for a larger number of palm tree types.

4
www.florida-palm-trees.com |
Florida Palm Trees www.florida-palm-trees.com
Since most of the palm trees like warm weather, even short period of frost can weaken a palm tree. Cold weather may leave it vulnerable to insects and disease or it can result in immediate death or sustained performance. I just posted a new article on How to Care for a Cold-Damaged Palm Tree.
A few palm species, such as the Queen palm or the Canary Island date palm, are considered “cold hardy”. Most Cold Hardy Palms can sustain a temperatures no lower than 20 degrees. This means, that the areas that can grow palms are still quite limited. There are few very cold hardy palms, like Windmill and Needle Palms, that can tolerate temperatures lower than 10F. If you leave in a cold climate and still want to have a beautiful palm tree in your garden, check your climate zone first, you might be able to find cold-hardy palm tree that will grow in your area.
Sunlight
It’s important how much sunlight your palm tree will be getting during daytime. You need to know, that not all varieties of palm tree are equally sun tolerant. You’ll be surprised, but some varieties prefer shady conditions to full sun exposure for the whole day.
Watering Palm Trees
We always associate palm trees with desert conditions, but in the wild, they are only found near abundant and continuous supplies of water. If you are thinking about planting a palm tree on your property, make sure your palm is receiving enough water. Be prepared to water a newly transplanted palm tree frequently while it is adapting to the new environment.
As you see, the needs of palm trees vary by species. You must consider the needs of the different types before you plant it to be sure you can meet its requirements and allow it to grow to its full potential.
I’ve just have found a very good book for beginners called All About Palms. It has 200 different species with a lot of beautiful photos, step-by-step planting, growing and care instructions for palm trees. This book is perfect for an average homeowner who loves palm trees.

5
www.florida-palm-trees.com |
Florida Palm Trees www.florida-palm-trees.com
How to Transplant Palm Tree from a Container into the Ground After growing in a container for a few years, palm trees should be transplant into the ground. Early spring would be the best time for transplanting due to a rapid root growth during warm months. Try to do it later in the day when it is not too hot.
Be ready for the palm tree to undergo what is known as “transplant shock”. It happens because roots get exposed to air, light and new soil. To minimize the shock, acclimatize your palm by placing it in the new location a week prior to transplanting. That way by the time you are ready to do transplanting it will be used to the new light levels and temperatures of that area.
Step 1. Select a location. Start by selecting a new location in the yard. The best way to in-vision the palm tree in its new location is to place it there while it is in the container. Think about the amount of light it will be receiving in that area. While some palms need full sun, some palms prefer partial sun or shade.
Step 2. Start by digging a hole. The hole should be twice the diameter of the container.
Step 3. Think about the soil. Check to see what type of soil you have in your garden. Since palms like good drainage, adding sand can help a lot. Some palm enthusiasts like to supplement the native soil with some organic soil, while others use only the native soil. I agree that the palm roots will eventually have to get used to the soil of your garden even if you apply the organic soil mix when planting. But, I also think that mixing them together will minimize the transplant shock. If you have a clay soil, use a three parts of native soil, one part of organic soil mix and one part of sand. If you have a sandy soil, use three parts of native soil with one part of an organic soil mix.
Step 4. Removing palm tree from a container. If you have a small palm, about 5 gallon, flip it upside down and tap the bottom of the pot. The palm should slide out. If

6
www.florida-palm-trees.com |
Florida Palm Trees www.florida-palm-trees.com
you have a larger palm, carefully place it on its side and gently slide the root ball out the pot. If it is in a plastic container, cut it with scissors first. It is important not to damage the root ball. After growing in the pot for some time, the roots of the palm wrap around the inside of the container. There is no need to trim the them. Try to plant your palm as soon as possible.
Step 5. Planting the palm. Palm tree should be planted to the same depth at which they were previously growing. Planting it too deep may result in a root rot development due to nutrient deficiencies and water stress. Some palms might suffer from it for many years and can die at any time. Place some soil mix into the hole and water it. You don’t need to remove soil around the root ball. Leaving the old soil around the roots will decrease the transplant shock.
Place the palm in the center of the hole. Then backfill the hole with a soil mix making sure there is no air pockets. If you don’t pack the soil properly, the root ball can sink into the hole over time resulting in a palm being too deep in the ground.
Step 6. Soil barrier. Build a soil barrier outside of the hole to form a dam that will retain water. Now, you are ready to drench the palm with water. The goal is to make sure there is enough moister around the roots to avoid root hardening.
Step 7. Watering the palm. Deep watering works the best. Leave a water hose near the base of the palm with slow running water for 20 min. This will guarantee the soil had time to absorb all the water. You should water new planted palm every two days for the first two weeks. Then slowly get to the regular watering schedule.
Step 8. Fertilizing a palm. I see that a lot of web sites recommend fertilizing the palm right after planting. Do NOT apply any fertilizer. Give your palm enough time to get used to the new place. Apply a slow release fertilizer after you see a new growth. That would be about two months after planting. Fertilizing the palm after planting will create more unnecessary stress adding to the transplant shock.
Step 9. Provide Support. Tall palm trees should be provided with some support to avoid toppling over. Use 3-4 wooden blocks and adjustable straps to support the palm. Don’t nail supporting blocks directly into the trunk. The support should be left for one year.

7
www.florida-palm-trees.com |
Florida Palm Trees www.florida-palm-trees.com
How to Transplant Palm Tree from Once Location to Another Whether you are trying to move a palm tree from one location to another one in your garden or getting a field grown palm tree from a nursery, the planting steps would be the same.
Understanding how palm roots grow and respond to being cut will help you avoid damaging them and increase palms survival rate. Palm trees don’t have woody roots like broadleaf trees. They have a lot of small roots, tightly packed together, growing from the base of the trunk, similar to grass roots. Unlike broadleaf trees, palm roots don’t increase in diameter and remaining the same size as they first emerged from the base of the palm.
Research showed that different palm species respond differently to root cutting. Roots of some palms like Sabal palmetto will die back after being cut and will be replaced by the new roots. So, it really doesn’t matter how close to the palm base you cut them. In some palms like coconut palm, half of the cut roots will survival no matter how close you cut it. It will produce very few new roots after transplanting.
However, most palm species depend on the existing root survival. If you are not sure how sensitive a particular palm species is to root cutting, leave enough distance from the trunk. I would recommend leaving at least 3 feet. Since rootball is three-dimensional, you will also need to dig 3 feet down.
Transplant Shock
It is a little more traumatizing for the palm being transplanted from one location to another than from the pot into the ground, since when you are moving the palm from the pot, you can just slide it out and put it into the ground without damaging the roots. Be prepared for your palm to undergo so called “transplant shock”. Transplant shock happens when palm tree experiences number of stresses after being recently transplanted. Those stress include new soil, new sunlight levels, new temperatures.
Step 1. Leaf Removal. To reduce amount of water stress in transplanted palms, a lot of nurseries remove ½ to ⅔ of the old palm leaves. I’ve also seen some people removing

8
www.florida-palm-trees.com |
Florida Palm Trees www.florida-palm-trees.com
all of the leaves. From my personal experience and by looking at the recent research, leaving some leaves on the palm will significantly improve the growth and survival rate. If you’ve visited Florida during spring months, you’ve probably seen a lot of just planted palms all looking like a rooster.
Step 2. Get the soil moist. Since palms lose some of the roots, they are often stressed by lack of sufficient water. So, prior to digging, get the soil moist around the palm. If the palm is small, it can be dug out by hand or with mechanical tree spades. If the palm is over 30 gallon, you will need a tractor or a crane depending on the size supporting and lifting the palm.
Step 3. Tying up the fronds. Before lifting the palm with a crane, tie the fronds together to prevent leaf damage. Also, slender palms can easily snap. To avoid that, attach 2 splits to the trunk on opposite sides and the leaf bundle.
Step 4. Lifting the palm. Since the bark can be easily damaged and damaged areas leave the tree vulnerable to insects and fungus, never attach chain, ropes or cables directly to the trunk. Wrap a nylon slings around the trunk and then attach it to the crane.
Step 5. Palm Transporting. To transport a larger palm tree you will need some heavy equipment. If transported by a pick-up truck make sure to wrap the entire palm with a

9
www.florida-palm-trees.com |
Florida Palm Trees www.florida-palm-trees.com
damp tarp. This will not only protect from damaging roots, bark, and fronds, but will also help to prevent roots from drying out from the wind during the trip.
Step 6. Planting the palm. Try to plant it as soon as possible. If you can’t, place it in a shady spot and keep the roots moist. Dig a hole twice the diameter for the root ball. Since palms require a good drainage, add some sand to the soil mix. I like to use three parts of native soil with one part of organic soil mix and one part of sand.
The palm should be planted on the same depth at which it was growing before. Planting it too deep may result in water stress and nutrient deficiencies. Planting the palm too high is also a not a good idea. Since roots of the palm have not established yet, wind can actually blow it over. Saturate the soil with water before planting. Center the tree in a hole, then backfile the soil making sure there are not air pockets.
Step 7. Soil barrier. After you are done backfilling, create a soil barrier on the perimeter of the tree to retain the water.
Step 8. Watering. Leave a water hose with slowly dripping water for 20 min to make sure soil around the root ball is moist. It takes time for the soil to absorb water.
Step 9. Untying the leaves. There are a lot of arguments about this one. Recent research shows that keeping the leaves tied up will not improve the growth, but might provide a favorable environment for plant diseases. I would strongly recommend untying the palm fronds right after planting.
Step 10. Creating support. Tall tree should be supported by timbers. Never nail anything directly into the trunk. Attach short lengths of lumber to the trunk and nail four or five support timbers into these pieces. Leave the support for 1 year.
Step 11. Adding mulch. Add about 3″ layer of pine straw, compost, or pulverized bark around the tree.
Step 12. Fertilization. Do NOT fertilize the palm until you see new growth. I see a lot of articles on Internet recommending to apply a fertilizer right after transplanting the palm. Until the palm grows a new root system there is really no need to fertilize it. In about two months apply slow release fertilizer.
After transplanting, it will take your palm some time to develop a new root system. During this time, it will be suffering from water stress. That is why you should establish a frequent watering schedule. Water the palm every 2 days for 2-3 weeks. After, you can go to the regular schedule. Be prepared for your palm to experience a “transplant
10
www.florida-palm-trees.com |
Florida Palm Trees www.florida-palm-trees.com
shock”. There is little you can do. The palm needs to get used to the new place and grow new roots. It might take up to 4 months for the palm to get acclimatize. Be patient.
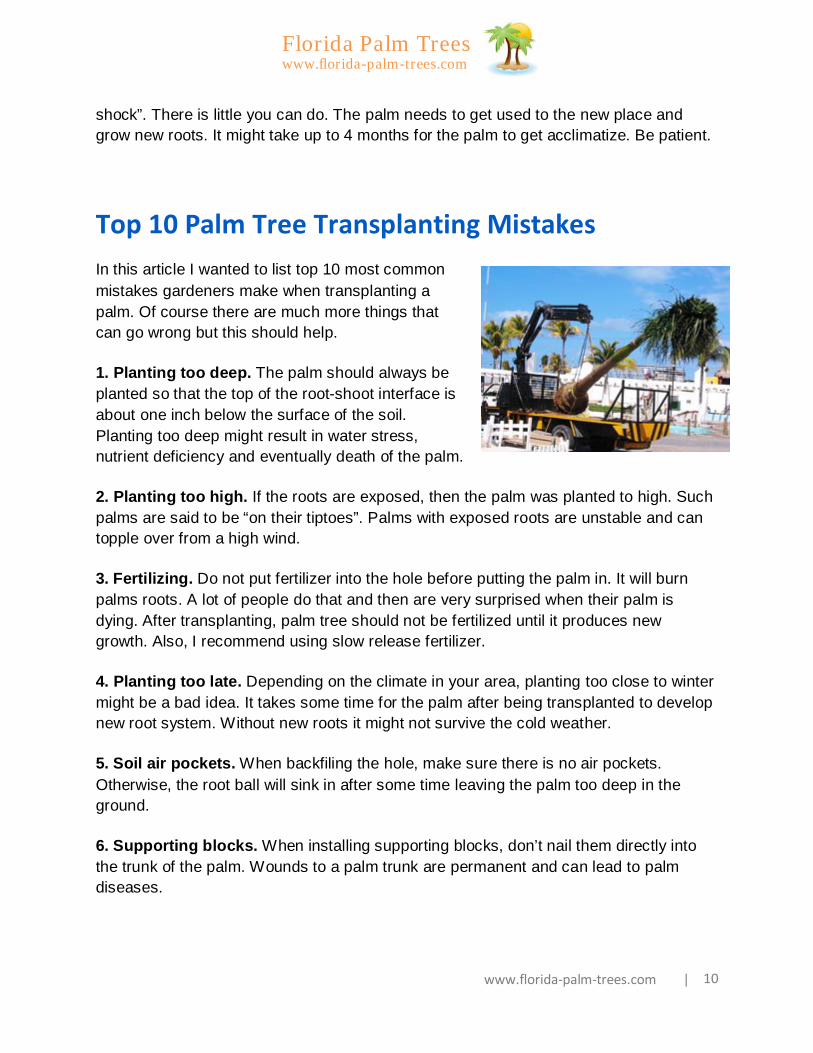
Top 10 Palm Tree Transplanting Mistakes In this article I wanted to list top 10 most common mistakes gardeners make when transplanting a palm. Of course there are much more things that can go wrong but this should help.
1. Planting too deep. The palm should always be planted so that the top of the root-shoot interface is about one inch below the surface of the soil. Planting too deep might result in water stress, nutrient deficiency and eventually death of the palm.
2. Planting too high. If the roots are exposed, then the palm was planted to high. Such palms are said to be “on their tiptoes”. Palms with exposed roots are unstable and can topple over from a high wind.
3. Fertilizing. Do not put fertilizer into the hole before putting the palm in. It will burn palms roots. A lot of people do that and then are very surprised when their palm is dying. After transplanting, palm tree should not be fertilized until it produces new growth. Also, I recommend using slow release fertilizer.
4. Planting too late. Depending on the climate in your area, planting too close to winter might be a bad idea. It takes some time for the palm after being transplanted to develop new root system. Without new roots it might not survive the cold weather.
5. Soil air pockets. When backfiling the hole, make sure there is no air pockets. Otherwise, the root ball will sink in after some time leaving the palm too deep in the ground.
6. Supporting blocks. When installing supporting blocks, don’t nail them directly into the trunk of the palm. Wounds to a palm trunk are permanent and can lead to palm diseases.

11
www.florida-palm-trees.com |
Florida Palm Trees www.florida-palm-trees.com
7. Root pruning. Unlike broadleaf trees, palm trees roots don’t need to be pruned. A lot of palms depend on the old roots until the new root system is developed. Pruning the roots, will leave the palm without any mechanism to get water.
8. Leaf Removal. Nurseries remove some of the old palm fronds to help the palm with water stress after transplanting. Don’t remove all of the palm fronds as this will get the palm into a shock. You should remove no more than ¾ of fronds. Removal of the middle leaves might even kill the palm.
9. Keeping the leaves tied up. Most nurseries tie up the leaves before transporting a palm. You should untie them after the palm is in the ground. Leaving them tied up will not improve the growth, but might provide a favorable environment for palm diseases.
10. Not planting the palm right away. Leaving the palm just laying there with the exposed roots is the worst thing you can do. If you can’t plant the palm right away, wrap the root ball in a damp tarp and spray it with a hose as often as necessary to keep the rootball moist.
5 Important Palm Tree Watering Q&A Watering Palm Trees the right way is very important. Most of the Palm Trees like moist and well drained soil. But, it is easier said than done. A lot of palm tree enthusiasts over water their palms or don’t provide enough water, because they don’t know how to check for soil moist level. They have no idea how much water their palm needs and how often to water it.
1. How much water does my palm tree need?
Here is a rule you should use when watering your Palm Trees. If it’s a 10 gallon container palm tree, then use 10 gallons of water. If it’s a 25 gallon container, then use 25 gallons of water. During hot weather use a little bit more, during cold weather a little less. You should understand, that it depends on the palm tree type and on the type of soil. Always check the soil to make sure it’s moist and adjust your water amount if needed.
2. How often should I water my new planted palm tree?
12
www.florida-palm-trees.com |
Florida Palm Trees www.florida-palm-trees.com
You should water your new planted palm tree every day for the first week, every other day for the second week and then switch to 3 times a week. Palm tree soil should be always moist.
Established Palm Tree needs watering 2-3 times a week. Adjust your watering depending on the season. Palm Trees grow more during warm months and slow down during cold months. Watering once a week in the winter should be enough.
3. What it the best time for watering my Palm Tree?
You should water your Palm tree early in the morning or late in the evening when it’s not too hot. Why? Because if you water your palm tree in the middle of the hot summer day, when the temperature is around 100F, and get the water on the palm tree frond it will fry the leaves.
When you going tanning, you put oil all over your body to maximize the result. The water on the leaves works the same way oil works on your skin. That’s why, watering your palm in the middle on the hot day can result in leaf burn.
Mist or hose your palm to clean up all the dust on the leaves, but do it in the cooler time of the day. After you figure out how long to water and how much water your Palm tree needs, it’s is a great idea to get a sprinkler system with a timer. Timer is a very useful thing that will prevent a flooding around the house in case you forget to turn off the sprinkler system.
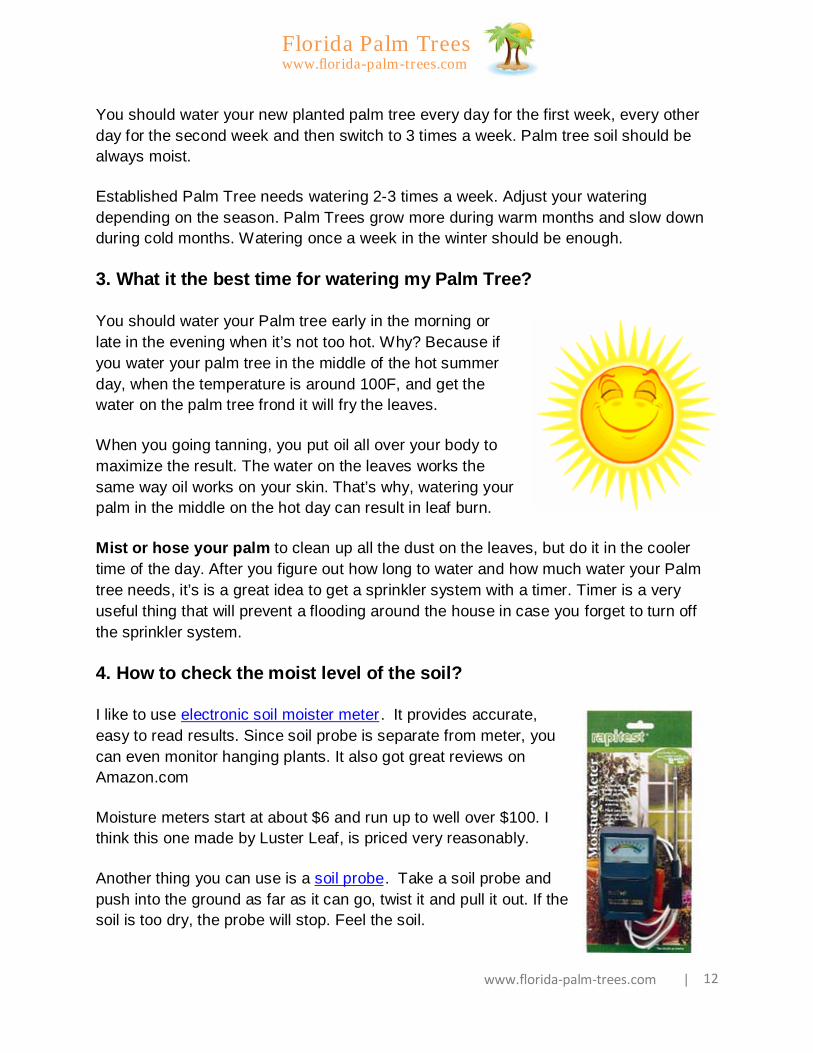
4. How to check the moist level of the soil?
I like to use electronic soil moister meter. It provides accurate, easy to read results. Since soil probe is separate from meter, you can even monitor hanging plants. It also got great reviews on Amazon.com
Moisture meters start at about $6 and run up to well over $100. I think this one made by Luster Leaf, is priced very reasonably.
Another thing you can use is a soil probe. Take a soil probe and push into the ground as far as it can go, twist it and pull it out. If the soil is too dry, the probe will stop. Feel the soil.

13
www.florida-palm-trees.com |
Florida Palm Trees www.florida-palm-trees.com
If it’s moist, you don’t need to water more. Check to see how far the root extends. You don’t need to water deeper than that, because roots cannot get to the water below the root depth.
Check to see how long the soil stays moist after you water. If the soil is wet do NOT water your palm. It is very easy to over water. For the best result DEEP water your palms.
5. What is deep watering?
Let’s say you have 20 gallon Palm tree that needs 20 gallons of water. You can water your palm two ways. One way is to take all 20 gallons of water and dump it around your palm tree in 2 minutes. The water will simply runoff and palm tree roots will not get enough.
It takes time for the soil to absorb water. Another way to water your palm tree is to slow drip 20 gallons of water over the course of 1 hour. If you have a sprinkler system with a timer, that is what I would highly recommend, water your palm tree for 30 min, turn the water off, let it soak into the ground for 30 min, then resume watering for the remaining 30 min.
This should not only water the top of the soil but also get few inches deep into the ground. It all depends on the soil
type. Check with the soil probe.
Note: You don’t need to water your palm when it’s raining, in case you didn’t know. Turn off your sprinkler system when it’s raining.
I hope you find this palm tree watering article useful. If you have comments or questions let me know by using a comment box below.

14
www.florida-palm-trees.com |
Florida Palm Trees www.florida-palm-trees.com
How to Prevent Palm Tree Nutritional Deficiency Palm trees nutritional deficiencies are easily prevented by following a yearly fertilization program. Mature palms in the landscape should be fertilized with a complete granular fertilizer formulated for palms. 3 to 4 applications of a palm fertilizer are recommended to provide a constant supply of nutrients during the growing season. Be sure to only fertilize during the growing season (end of March through end of October).
Newly planted palms should not be fertilized until after they put out a new spear, I would say about 2 month after planting. Providing your palm tree with a quality fertilizer or plant food “supplements” is important, so it can maintain its good “health.” Some places like South Florida has very little nutrient in the soil which is very important for palm tree growth.
You will usually want to use a fertilizer that has nitrogen, phosphate, and potash. I recommend not to buy cheap fertilizer because they simply don’t work. It’s better to use fertilizer that has continues release formula that feeds your palm tree for few months rather than using a cheap fertilizer that will wash away after 2-3 rains.
Jobe’s Palm Fertilizer
One of the products that I personally love is Jobe’s Palm Fertilizer. This product promotes root development and the long-term vitality of all types of palms. Jobe’s Fertilizer Spikes have a slow release formula that is design to effectively fertilize your palms while protecting them from the common deficiencies of Manganese, Magnesium, Potassium and Iron.
When placed underground near the feeder roots of your palm, the spikes release their nutrients where the tree can best use them. Special binders ensure that the fertilizer dissolves slowly and safely and feeds your tree for up to 6 months.
This is one of the best palm tree fertilizers on today’s market. It is fast, efficient, long lasting method of fertilizing palm trees and has all the nutrients your palm trees need. To avoid nutrient deficiencies, apply Jobe’s Palm Fertilizer spikes twice a year. It can take six months or more for a palm to recover from nutritional deficiencies.
Here is Jobe’s Outdoor Palm Fertilizer and Jobe’s Indoor Palm Fertilizer.
15
www.florida-palm-trees.com |
Florida Palm Trees www.florida-palm-trees.com
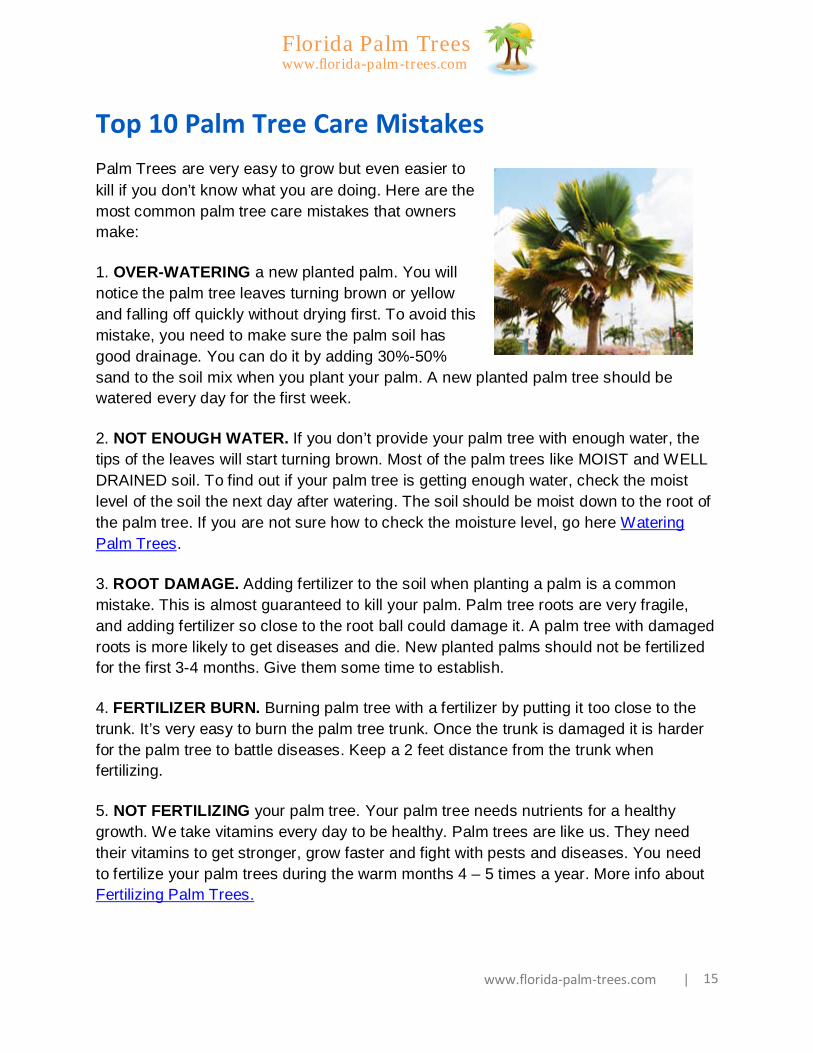
Top 10 Palm Tree Care Mistakes Palm Trees are very easy to grow but even easier to kill if you don’t know what you are doing. Here are the most common palm tree care mistakes that owners make:
1. OVER-WATERING a new planted palm. You will notice the palm tree leaves turning brown or yellow and falling off quickly without drying first. To avoid this mistake, you need to make sure the palm soil has good drainage. You can do it by adding 30%-50% sand to the soil mix when you plant your palm. A new planted palm tree should be watered every day for the first week.
2. NOT ENOUGH WATER. If you don’t provide your palm tree with enough water, the tips of the leaves will start turning brown. Most of the palm trees like MOIST and WELL DRAINED soil. To find out if your palm tree is getting enough water, check the moist level of the soil the next day after watering. The soil should be moist down to the root of the palm tree. If you are not sure how to check the moisture level, go here Watering Palm Trees.
3. ROOT DAMAGE. Adding fertilizer to the soil when planting a palm is a common mistake. This is almost guaranteed to kill your palm. Palm tree roots are very fragile, and adding fertilizer so close to the root ball could damage it. A palm tree with damaged roots is more likely to get diseases and die. New planted palms should not be fertilized for the first 3-4 months. Give them some time to establish.
4. FERTILIZER BURN. Burning palm tree with a fertilizer by putting it too close to the trunk. It’s very easy to burn the palm tree trunk. Once the trunk is damaged it is harder for the palm tree to battle diseases. Keep a 2 feet distance from the trunk when fertilizing.
5. NOT FERTILIZING your palm tree. Your palm tree needs nutrients for a healthy growth. We take vitamins every day to be healthy. Palm trees are like us. They need their vitamins to get stronger, grow faster and fight with pests and diseases. You need to fertilize your palm trees during the warm months 4 – 5 times a year. More info about Fertilizing Palm Trees.

16
www.florida-palm-trees.com |
Florida Palm Trees www.florida-palm-trees.com
6. BAD SOIL. Not providing a palm tree with good soil. Good soil will allow the palm tree root to develop properly, keep the moist so your palm gets enough water and provide good drainage. I always get asked – what is the best soil? Canadian peat moss. Cheap soil = poor results. No one asks me what is the absolutely worst soil you can buy, but I’ll tell you anyway – It is soil mixed with fertilizer.
Every gardener I know said it killed everything in their garden. These days it’s hard to find good soil, because every soil has fertilizer added. I personally use Premier Pro-Mix because it provides a superior growing environment for palms by increasing drainage and oxygen.
7. WRONG CLIMATE. Planting a palm tree in a climate that is too cold, too hot or too dry. Many gardeners buy palms without checking if they can grow in their climate zone. Tropical palm trees that like warm and humid weather don’t do well in the desert, with dry winds in the summer and cold temperatures in the winter.
Just get a different palm tree. There are so many cold hardy palms that can tolerate drought and cold weather. All you need to do, is to check which palms grow in your weather conditions. You can check it by going to Hardiness Zone Map.
8. SUNBURN. Planting a very young palm tree in the full sun without providing a cover. The palm leaves will start turning yellow and might look colorless in some areas. If you don’t cover your palm, the leaves will begin to dry and turn brown. If your palm tree is from a greenhouse or shade-grown environment, it is NOT USED to full sun. You need to acclimatize it first. For acclimatizing instructions check this article Planting Palm Trees.
9. OVER-PRUNING. I keep seeing articles online that tell people to cut brown part of the leaf because it will save the palm tree from wasting nutrients on the dying leaf. Makes sense right? Wrong. Palm trees need dying leaves for nutrients, and when you cut them off, your palm tree doesn’t like it. Palms move nutrients from the older fronds to the new growth. Palm fronds should be cut when they are as close as possible to the trunk. Do NOT remove any fronds that grow at 45 degree angle or greater.
10. HURRICANE PRUNING. It is not unusual during hurricane season in Florida to get a knock on the door by a team of palm tree professionals, offering to prune your palms. They might say that removing extra weight from your palm tree will save it during
If your palm tree looks like a rooster tail, you over-pruned it.

17
www.florida-palm-trees.com |
Florida Palm Trees www.florida-palm-trees.com
hurricane. Makes sense, right? Wrong. Your palm trees need all the leaves they can get to protect the new growing fronds from wind.
I think this covers the most common mistakes. I hope you find this article useful. Let me know if you would like to share your experience or have good tips to add to Palm Care Mistakes.