fitting koni fsd 2100-4069findershop.koni.com/files/pdf/2100-4069-manual.pdf · 1/8 fitting koni...
TRANSCRIPT

1/8
Fitting KONI FSD 2100-4069 to Land Rover Discovery 3 & 4 (LR3 & LR4) with factory air suspension
PLEASE READ CAREFULLY AND COMPLETELY IN ADVANCE CONTENT: 1. Removing the original shock absorber / air bag struts from the car 1/8 2. Separating shock absorber and air bag 2/8 3. Assemble shock absorber / air bag struts 6/8 4. Mounting the KONI shock absorber / air bag struts on the car 8/8 1. Removing the original shock absorber / air bag struts from the car Set the height control to the lowest position Front Step 1 Remove the front wheels Step 2 Remove the plastic inner arch [pic 1] Step 3 Loosen bottom eye attachment bolt Step 4 Loosen the nuts (3 pieces) on top of the strut [pic 2] Step 5 Take the air hose (green) out of the clamp [pic 3] Step 6 Pull down the strut Step 7 Disconnect air hose
[pic 1] [pic 2]
[pic 3]

2/8
Rear Step 1 Remove the rear wheels [pic 4] Step 2 Remove the spare tyre [pic 5] Step 3 Loosen bottom eye attachment bolt Step 4 Loosen the nuts on top (2 pieces) and inside (1 piece) of the strut [pic 6] Step 5 Take the air hose (green), with clamp, from the chassis [pic 7] Step 6 Pull down the strut Step 7 Disconnect air hose [pic 4] [pic 5]
[pic 6] [pic 7]

3/8
2. Separating shock absorber and air bag Front & Rear Step 1 Place strut in vice (bottom down) [pic 8] Step 2 Loosen central nut (top) [pic 9] Step 3 Remove all plastic and rubber O-rings [pic 10]
[pic 8]
[pic 9] [pic 10]
4/8
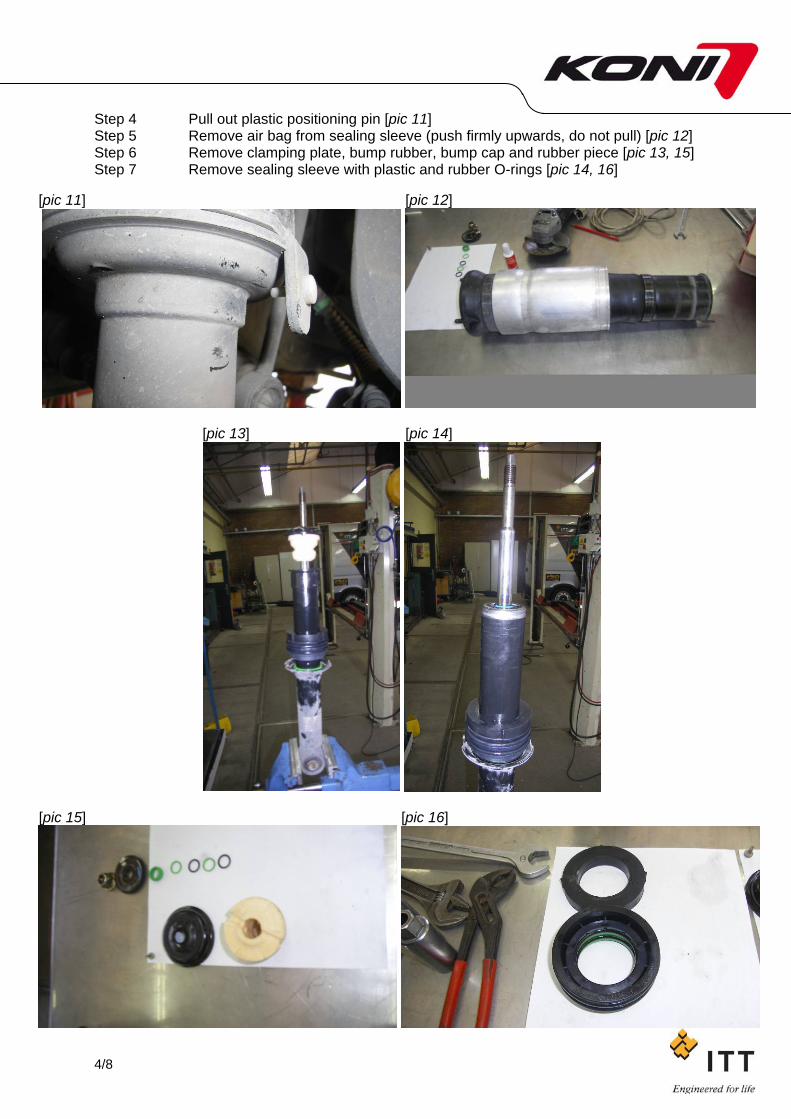
Step 4 Pull out plastic positioning pin [pic 11] Step 5 Remove air bag from sealing sleeve (push firmly upwards, do not pull) [pic 12] Step 6 Remove clamping plate, bump rubber, bump cap and rubber piece [pic 13, 15] Step 7 Remove sealing sleeve with plastic and rubber O-rings [pic 14, 16]
[pic 11] [pic 12]
[pic 13] [pic 14]
[pic 15] [pic 16]
5/8
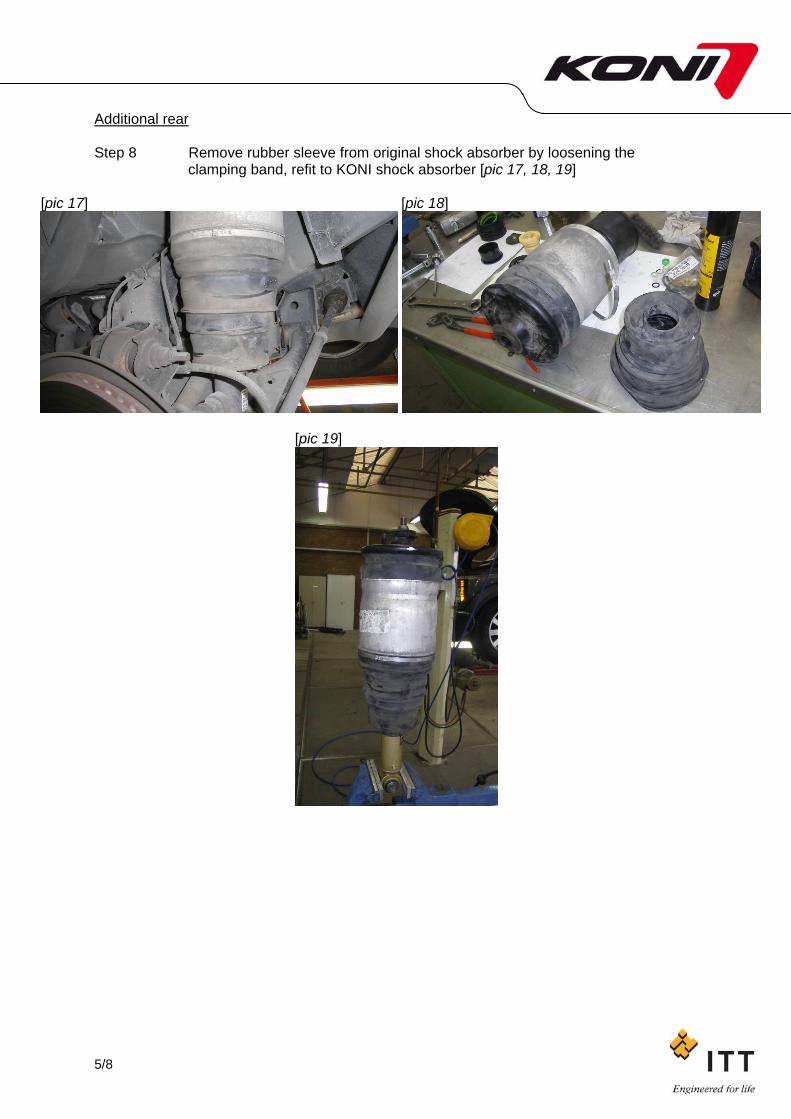
Additional rear Step 8 Remove rubber sleeve from original shock absorber by loosening the
clamping band, refit to KONI shock absorber [pic 17, 18, 19]
[pic 17] [pic 18]
[pic 19]

6/8
3. Reassemble shock absorber / air bag struts Mounting order plastic and rubber rings (front and rear) Bottom [pic 20], top [pic 21]
[pic 20] [pic 21]
Inspect the rings and seals before reusing them. If needed, spare sets can be supplied by the Land Rover dealership. [pic 22] [pic 22]
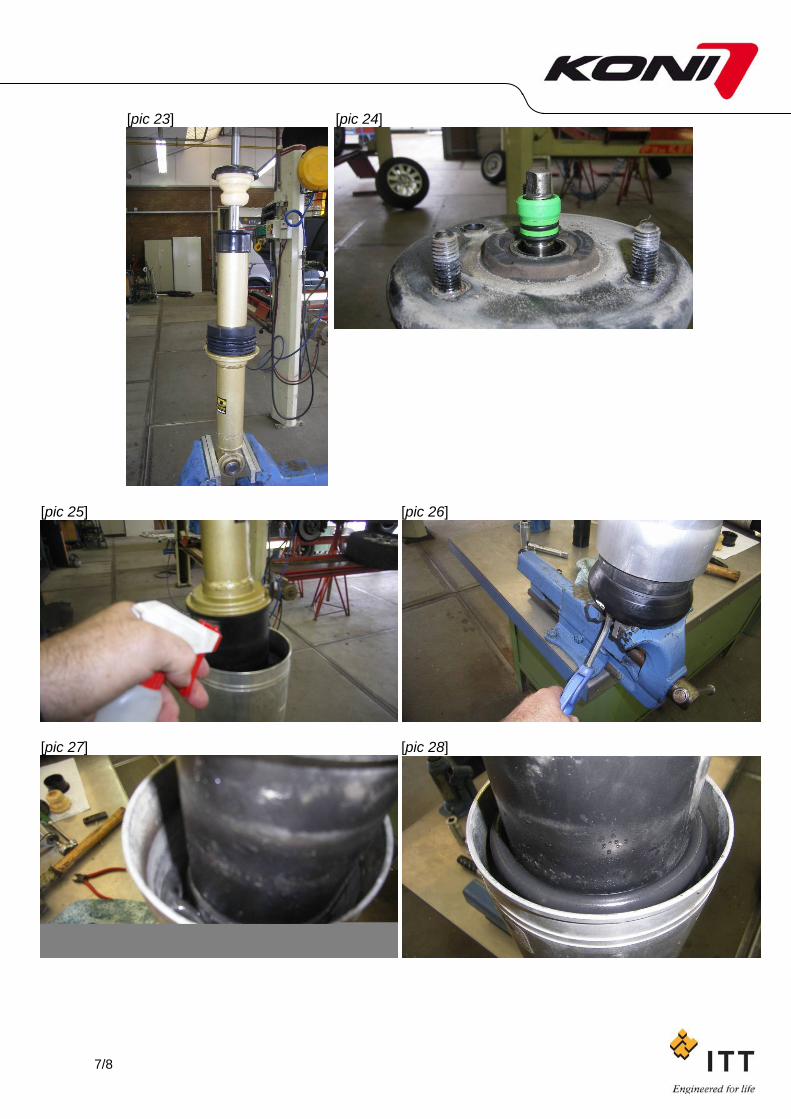
Front & Rear Step 1 Place KONI shock absorber in vice (bottom down) [pic 23] Step 2 Grease the plastic and rubber O-rings with synthetic lubricating grease (e.g.
Klüber Polylub GLY801) Step 3 Place the lower O-rings on the shock absorber in the correct row order (as
mentioned above) Step 4 Push the sealing sleeve firmly onto the O-rings Step 5 Mount the rubber piece, bump cap, bump rubber and clamping plate Step 6 Mount the air bag by pushing it over the sealing sleeve at the bottom Step 7 Push the air bag down and put the top O-rings one by one in place [pic 24] Step 8 Fit and tighten central nut Step 9 Remove the strut from the vice, turn it upside down, place it in the vice again Step 10 Wet the air bag (e.g. soapy water) [pic 25] Step 11 Inflate the bag with compressed air to its original shape [pic 26, 27, 28]
7/8
[pic 23] [pic 24]
[pic 25] [pic 26]
[pic 27] [pic 28]

8/8
4. Mounting the KONI shock absorber / air bag struts to the car See “1. Removing the original shock absorber / air bag struts from the car” Follow steps in reversed order. This manual can only be used as a guideline, always follow official Land Rover instructions and applicable directions. Any claims whatsoever derived from this manual cannot be accepted. Exact procedure may differ per vehicle, based on equipment, model year and/or changes made by Land Rover. Subject to change without notice. All rights reserved.