filemaker pro 5.5 getting started in ... - create custom apps · pdf fileusing filemaker pro...
TRANSCRIPT

© 2001 FileMaker, Inc. All rights reserved. FileMaker is a trademark of FileMaker, Inc., registered in the U.S. and other countries. All other trademarks are the property of their respective owners. Mention of third party products and companies is for informational purposes only and does not constitute an endorsement or recommendation.
FileMaker
Pro
5.5
Getting Started withFileMaker Pro in Mac OS X


Contents
Getting started with FileMaker Pro in Mac OS X
Installing FileMaker Pro 1System requirements 1Easy installation 2Custom installation 3Where files are stored on your hard disk 5Adjusting the FileMaker Pro cache 8
Using FileMaker Pro 5.5 in Mac OS X 9Menu location changes 9Keyboard command changes 10Design and functionality changes 11Status function changes 11Features not supported in FileMaker Pro 5.5 for Mac OS X 11Features with different requirements 12
Enabling the FileMaker Pro Web Companion in Mac OS X 12Configuring the Web Companion for use with ports 1024 and higher 14Accessing databases that are published to the Web 16
Using FileMaker Pro 5.5 Help in Mac OS X 16


Getting started with
FileMaker Pro in Mac OS X
This document gives you information on installing and using FileMaker Pro 5.5 in Mac OS X. For new feature information and instructions on installing FileMaker Pro 5.5 on other platforms, see the FileMaker Pro 5.5 Getting Started Guide.
Important The FileMaker Pro 5.5 for Mac OS X application is intended for use with Mac OS X only. It will not run under Mac OS 9.x or earlier.
Installing FileMaker ProBefore you begin the installation process, quit other open programs and save your work. You must use the installation program to install FileMaker Pro in Mac OS X—you can’t install the application by dragging files to your hard disk.
System requirements1 Apple PowerMac G3 or higher (standard configurations, CPU upgrade cards are not supported)
1 128 MB of RAM
Note These RAM requirements are necessary to install Mac OS X. Because Mac OS X dynamically allocates RAM to open applications as needed, the amount of RAM actually used by FileMaker Pro is automatically assigned by the system.
1 a hard disk with at least 1.5 GB of free space (for Mac OS X installation); 35 MB needed for FileMaker Pro installation
1 monitor with a minimum of 800 x 600 resolution at 16 bit color; monitor with 1024 x 768 or higher resolution recommended
1 a CD or DVD drive
1 Mac OS X (official software release; the Mac OS X “Public Beta” release is not supported)
To start the FileMaker Pro Installer:
1. Insert the CD into your CD or DVD drive.
You see the disc’s window on your screen. If you see only the disc icon, double-click the icon to open its window.
2. Double-click the file named Start Here Mac OS X.
You see the software license agreement.
3. Click Accept if you accept the terms of the license agreement.

2
Getting started with FileMaker Pro in Mac OS X
You see the FileMaker Pro Installer dialog.
4. Follow the steps described in one of the following sections:
1 If you want to install all the available files, continue with “Easy installation.”
1 If you want to install a subset of the FileMaker Pro files, skip to “Custom installation” on page 3.
Easy installationFollow these steps to install the complete FileMaker Pro package on your hard disk.
To install FileMaker Pro on your hard disk:
1. If you have not done so already, start the Installer.
You see the FileMaker Pro 5.5 Installer dialog.
2. Specify the installation location, or use the default location.
1 If you want to install FileMaker Pro in a folder other than the default, choose Select Folder from the bottom of the Install Location pop-up menu and select the desired folder.
1 If you’re logged in with an administrator password and you install FileMaker Pro into the default Applications folder, users who log in with a non-administrator password will not be able to access the FileMaker Pro template or tutorial files. If non-administrator users need to access these files, perform a Custom Install and install these files into the User’s Application folder.
1 If you choose a disk or volume that doesn’t have enough free disk space or is locked, the Install button is dimmed and the dialog tells you why you can’t install onto that disk. If the selected disk doesn’t have enough space for the files you select, you can switch to the Finder software, and delete existing files to make more room on the disk. You can also choose not to install some files (like the tutorial or template files) by selecting Custom Install from the pop-up menu. For more information, see the next section.
Choose Easy Install

Getting started with FileMaker Pro in Mac OS X
3
Note For late-breaking information about FileMaker Pro, browse the contents of the CD and view the Read Me.txt file or visit www.filemaker.com.
3. Click Install.
You see the personalization dialog.
4. In the Name box, type your name and press the Tab key.
5. Type your company name, if applicable, and press Tab.
If you don’t have a company name, you can put other information (for example, your address) in the box or leave it blank.
6. Type your FileMaker Pro installation code.
The installation code is a seventeen-digit number located on a multi-part label on a separate paper sheet within the box.
Important You must enter the installation code during installation or the software will not install.
Check your typing carefully. After you click OK, you can’t change the name, company, or installation code unless you reinstall FileMaker Pro.
7. Click OK.
The Installer begins copying files. After all the files are installed, a dialog shows your registration options. A final dialog tells you the installation on your hard disk was successful.
8. Click Quit to leave the Installer.
Custom installationTo install a subset of FileMaker Pro files on your hard disk:
1. If you have not already done so, start the Installer, as described on page 1.
Type yourname here
Type yourinstallationcode here

4
Getting started with FileMaker Pro in Mac OS X
You see the FileMaker Pro Installer dialog.
2. Choose Custom Install from the pop-up menu.
The dialog lists the components you can install.
3. Select the components you want to install by selecting the checkboxes.
4. Specify the installation location, or use the default location.
1 If you want to install FileMaker Pro or the specified files in a folder other than the default, choose Select Folder from the Install Location pop-up menu and select the desired folder.
1 If you choose a disk or volume that doesn’t have enough free disk space or is locked, the Install button is dimmed and the dialog tells you why you can’t install onto that disk. If the selected disk doesn’t have enough space for the files you select, you can switch to the Finder software, and delete existing files to make more room on the disk. You can also choose not to install some files (like the tutorial or template files) by deselecting those files in the scrolling list.
5. Click Install.
If you’ve selected the application, you see the Personalize dialog.
6. In the Name box, type your name and press the Tab key.
7. Type your company name, if applicable, and press Tab.
If you don’t have a company name, you can put other information (for example, your address) in the box or leave it blank.
8. Type your FileMaker Pro installation code.
Items you can install
Click here for information about the selected component
Total amount of disk space required for the selected component
Choose Custom Install

Getting started with FileMaker Pro in Mac OS X
5
The installation code is a seventeen-digit number located on a multi-part label on a separate paper sheet within the box.
Important You must enter the installation code during installation or the software will not install.
Check your typing carefully. After you click OK, you can’t change the name, company, or installation code unless you reinstall FileMaker Pro.
9. Click OK.
The Installer begins copying files. After the selected files are installed, a dialog shows your registration options. A final dialog tells you the installation on your hard disk was successful.
10.Click Quit to leave the Installer.
Where files are stored on your hard diskThe following table shows the files and folders you can install, and the preferred location for them on your hard disk. If you install onto the current system disk, the FileMaker Pro Installer places all the files you need in their preferred locations.
Because FileMaker Pro 5.5 for Mac OS X uses the Mac OS X Application Package feature, some FileMaker Pro files and folders that were previously visible to you are now stored in the FileMaker Pro 5.5 package. This means that the application folder with the application and all auxiliary files appears as a single icon, which can be started as if it is the actual application.
FileMaker Pro 5.5 Folder File or folder Description
FileMaker Pro The FileMaker Pro 5.5 application package
Read Me.txt Late-breaking news about FileMaker Pro
FileMaker on the Web An HTML file that points the web browser software to the FileMaker, Inc. web site (Internet connection and web browser software required)
FileMaker Registration An application for registering FileMaker Pro via the internet, fax, or mail
FileMaker Extensions Auto Update X Plug-in that allows FileMaker Pro 5.5 to download plug-in updates from FileMaker Server 5.5
claddon.clr An additional dictionary that contains computer terminology
DBF DBF import filter
Excel Microsoft Excel import filter
Language Modules Language Module folder for Web Companion
Local Data Access Companion
Companion plug-in that enables local ODBC access to FileMaker Pro

6
Getting started with FileMaker Pro in Mac OS X
Remote Data Access Companion
Companion plug-in that enables remote ODBC access to FileMaker Pro
TCP/IP OT Network Module that supports the TCP/IP network
UKENGLSH.MPR UK Spelling dictionary
USENGLSH.MPR US Spelling dictionary
USER.UPR Spelling dictionary containing words added by the user
Web Companion The FileMaker Web Companion plug-in that enables web publishing from FileMaker Pro
Web Companion Enabler A component necessary for Web Companion port configuration in Mac OS X
FileMaker and Apple Events
Apple Events Reference Apple events reference database
Syntax Examples Syntax Examples folder
Sample Applications Sample Applications folder
FileMaker Tutorial Tutorial ReadMe.txt Text document containing information about the tutorial
Sample Files Folder containing sample files to use with the FileMaker Pro tutorial
Working Files Folder containing lesson files to use with the FileMaker Pro tutorial
Web default.htm HTML document with information about web publishing with FileMaker Pro 5.5
Web Security Databases Folder containing the FileMaker Pro databases required to use Web Security Database safeguards
Security Folder containing the HTML files required to use Web Security Database safeguards
WebSecurity.pdf An Adobe Acrobat document containing information about data security on the Web
FMI Go_FileMaker.html HTML file that points web browser software to the FileMaker, Inc. web site (Internet connection and web browser software required)
FMI Logo.gif FileMaker, Inc. logo
FileMaker Pro 5.5 Folder File or folder Description

Getting started with FileMaker Pro in Mac OS X
7
FileMaker Pro package contentsTo view the contents of the FileMaker Pro package, Control-click the FileMaker Pro application icon, and choose Show package contents.
Contents folder File or folder Description
Info-macos.plist Info about the package for the operating system
PkgInfo Info about the package for the operating system
MacOS FileMaker Pro FileMaker Pro application
FMPHelp Contexts Context mapping for FileMaker Pro Help
MacOS/Themes Aqua.fth FileMaker Pro layout theme
Blue_gold.fth FileMaker Pro layout theme
Brick.fth FileMaker Pro layout theme
Citrus.fth FileMaker Pro layout theme
Fern_green.fth FileMaker Pro layout theme
Hc_Black.fth FileMaker Pro layout theme
Hc_pumpkin.fth FileMaker Pro layout theme
Hc_White.fth FileMaker Pro layout theme
Lavender.fth FileMaker Pro layout theme
Ocean_blue.fth FileMaker Pro layout theme
Softgray.fth FileMaker Pro layout theme
Teal.fth FileMaker Pro layout theme
Wheat.fth FileMaker Pro layout theme
Windows_standard.fth FileMaker Pro layout theme
MacOS/Labels LabelsUS.flb FileMaker Pro labels module
LabelsAus.flb FileMaker Pro labels module
LabelsUK.flb FileMaker Pro labels module
MacOS/FileMaker Templates
Template Information.fp5 Database containing descriptions of the template folder contents
Templates Folder containing predesigned templates that help you use FileMaker Pro right away
Tips from Tech Support Folder containing database of common scripted tasks and calculations

8 Getting started with FileMaker Pro in Mac OS X
User folder(s)Mac OS X maintains separate preferences for each user account. FileMaker Pro maintains the following preferences for each user.
Adjusting the FileMaker Pro cacheFileMaker Pro holds portions of your database in memory as you work. Depending on your computer’s memory configuration, you might want to adjust the cache size to improve performance.
You may want to increase the cache size if you plan to:
1 work on a large database file
1 work on several database files at once
1 host database files
1 use a database file that contains many graphics
1 insert a large graphic into a database file
System Folder File or folder Description
Resources FileMaker Help Folder containing FileMaker Pro Help system
FMApp.icns Icon info for system
FMDict.icns Icon info for system
FMDoc.icns Icon info for system
FMLabels.icns Icon info for system
FMLang.icns Icon info for system
FMNet.icns Icon info for system
FMplug.icns Icon info for system
FMPref.icns Icon info for system
FMTemp.icns Icon info for system
FMTheme.icns Icon info for system
FMTrans.icns Icon info for system
User folder/Library/Preferences/ File or folder Description
FileMaker Preferences FileMaker Pro 5.5 Prefs FileMaker Pro preferences file
FileMaker Hosts FileMaker Pro Hosts file
FileMaker Pro 5.5 Web Prefs FileMaker Pro Web preferences file

Getting started with FileMaker Pro in Mac OS X 9
Consider decreasing the cache size if you plan to run several applications at the same time and you have a limited amount of memory (RAM) installed.
To change the cache size that FileMaker Pro uses:
1. In FileMaker Pro, choose the FileMaker Pro application menu > Preferences > Application.
2. Click the Memory tab.
3. Type a number in the Attempt cache size of box.
4. Click OK.
The next time you start FileMaker Pro, the new cache size is used.
Using FileMaker Pro 5.5 in Mac OS XFileMaker Pro 5.5 introduces native support for Mac OS X. Database files that are shared peer-to-peer from Mac OS X work as they normally do with all other supported platforms. However, you will find that some FileMaker Pro features operate differently under Mac OS X, as explained below.
Menu location changesIn Mac OS X, the About FileMaker Pro, Preferences, and Quit FileMaker Pro menu items are located under the FileMaker Pro application menu.

10 Getting started with FileMaker Pro in Mac OS X
Keyboard command changesBecause Mac OS X reserves the keystrokes Command-M (Minimize) and Command-H (Hide), the keystrokes for the following FileMaker Pro commands have been changed for Mac OS X:
Note The above changes apply only to FileMaker Pro 5.5 in Mac OS X.
Switching between records, layout, and requestsTo switch between records, layouts, and requests in Mac OS X, use Control-↑ and Control-↓ .
FileMaker Pro has previously used Command-Tab and Shift-Command-Tab to move to the next (or previous) record, layout, or request in Browse, Layout, and Find modes. Both Mac OS 9.x and Mac OS X use Command-Tab and Shift-Command-Tab for switching between open applications. In Mac OS 9.x and earlier, you can change the configuration of Application Switcher to use different keyboard commands, making the Command-Tab and Shift-Command-Tab keystrokes available for FileMaker Pro to use. (For a description of how to make this change, see the Mac OS 9 Help topic, “Switching between open programs.”) However, in Mac OS X, you can’t change or disable these keyboard commands. Command-Tab and Shift-Command-Tab are not available as shortcuts in FileMaker Pro 5.5 in Mac OS X.
Command Old keystrokes New keystrokes
Print One Command-Option-T Command-Option-P
Lock Command-H Command-Option-H
Unlock Command-Shift-H Command-Option-Shift-H
Paste Merge Field Command-M Command-Option-M
Omit Record Command-M Command-T
Omit Multiple Command-Shift-M Command-Shift-T
Omit Checkbox (Find Mode) Command-M Command-T

Getting started with FileMaker Pro in Mac OS X 11
Design and functionality changesThere are new layout themes for using with the Aqua interface. (These themes are also available when you’re running FileMaker Pro under Mac OS 9.x and earlier or in Windows.)
Status function changesThe following status functions have been changed for Mac OS X:
1 Status(CurrentPrinterName) is not supported. This function returns <unknown> under Mac OS X.
1 Status(CurrentPlatform) returns -1 under Mac OS X. In Mac OS 9.x and earlier, this function returns +1. Use ABS(Status(CurrentPlatform)) = 1 to check for any Macintosh operating system.
Features not supported in FileMaker Pro 5.5 for Mac OS X1 ODBC import
1 Execute SQL script step
1 Dial Phone script step
1 Toolbars
1 The AppleTalk network protocol for sharing files on Mac OS X
1 The Send Mail script step with the Mac OS X Mail application

12 Getting started with FileMaker Pro in Mac OS X
The Send Mail script step is supported using the following applications, which run in the Classic Mac environment:
1 Microsoft Outlook Express 5.0v2
1 Microsoft Entourage 2001
1 Eudora 5
Features with different requirements1 Mac OS X requires QuickTime 5.0 or higher.
1 Plug-ins used with FileMaker Pro 5.5 for Windows and Mac OS 9.x (and earlier) aren’t compatible with FileMaker Pro for Mac OS X. You must use plug-ins specifically updated for Mac OS X. Conversely, plug-ins and filters written for FileMaker Pro 5.5 running under Mac OS X are not compatible with FileMaker Pro 5.5 running under other operating systems.
Enabling the FileMaker Pro Web Companion in Mac OS XFileMaker Pro uses the FileMaker Pro Web Companion plug-in to serve databases over the Web.
To enable the Web Companion in Mac OS X:
1. Choose the FileMaker Pro application menu > Preferences > Application.
2. In the Application Preferences dialog, click the Plug-Ins tab.
3. Select the Web Companion checkbox.

Getting started with FileMaker Pro in Mac OS X 13
After you enable the Web Companion, you must specify which port, or virtual connection, the Web Companion will use to publish data.
The first time you enable the Web Companion (or if you have previously enabled the Web Companion and are reinstalling FileMaker Pro), FileMaker Pro requests permission to make a one-time change to your computer’s setting to facilitate web publishing on ports below 1024.
The standard port for web publishing is port number 80 (ports are numbered between 1 and 65535), and most web servers and browsers use this port as the default. Port 80 is also the default port for the FileMaker Pro Web Companion. For security reasons, Mac OS X restricts access to ports below 1024. To configure the FileMaker Pro Web Companion to use ports below 1024 while maintaining the Mac OS X access restrictions on these ports, it is necessary to make a one-time change to the file permissions of the Web Companion Enabler to give it the authority to open privileged ports (ports 1-1023). To make this change, you will need an administrator password, such as the password created when you first set up Mac OS X.
Note If you use a port other than port number 80 for FileMaker Pro web publishing, your users will need to append a colon (“:”) and the number of the port to their URLs to access your web hosted databases. For more information, see “Accessing databases that are published to the Web” on page 16 of this guide, and the FileMaker Pro Help topic, “Specifying a port number for web publishing.”
4. If have an administrator password and want to configure the Web Companion to use standard settings for web publishing (recommended), click Continue.
If you do not have an administrator password, or do not want to enable the Web Companion at this time, click Cancel. The Web Companion will not be enabled, and your system settings will remain unchanged.
If you do not have an administrator password, or want to configure the Web Companion to use port 1024 or higher, click Advanced. Your system settings will remain unchanged. See the section “Configuring the Web Companion for use with ports 1024 and higher” for further instructions.

14 Getting started with FileMaker Pro in Mac OS X
5. Enter an administrator name and password in the Authenticate dialog, and click OK.
The administrator name and password you enter can be the same as the name and password used when Mac OS X was installed, or if you have administrator privileges but do not know an administrator password, you can create a new user and password with administrator privileges. For more information on creating an account with administrator privileges, see the Mac OS X Help topics, “Working as an administrator,” and “Changing your password.”
You are finished. The Web Companion is configured to use port 80.
Configuring the Web Companion for use with ports 1024 and higherYou do not need an administrator password to configure the FileMaker Pro Web Companion to use ports 1024 and higher. Unlike ports below 1024, the FileMaker Pro Web Companion can use ports 1024 and above without altering your system’s settings.
Note If you have previously enabled the Web Companion to use ports below 1024 as described above, your system is already configured to allow the Web Companion to use any port. Make port changes directly in the Web Companion Configuration dialog.
To configure the FileMaker Pro Web Companion to use only ports 1024 and above:
1. Choose the FileMaker Pro application menu > Preferences > Application.
2. In the Application Preferences dialog, click the Plug-Ins tab.
3. Select the Web Companion checkbox.
You see the following dialog.

Getting started with FileMaker Pro in Mac OS X 15
4. Click Advanced.
5. Click Change Port.
You see the Web Companion Configuration dialog.
Note If you click Enter Password in the above dialog, you are brought to the Authenticate dialog and asked to enter an administrator password to enable the use of ports below number 1024, as described in the previous section.
6. Enter a port number between 1024 and 65535 in the TCP/IP Port Number box.
7. Click OK to save your changes.
You are finished. The Web Companion is now configured to use the port you have specified.
Enter the TCP/IP port number here
16 Getting started with FileMaker Pro in Mac OS X
Accessing databases that are published to the WebWhen you publish a database to the Web, your users access that database by entering the host machine’s URL in their web browser. If the FileMaker Pro Web Companion is configured to use port number 80, the default port, the URL your users will enter will look like this:
http://12.34.56.78/
The number “12.34.56.78” is an example; in its place, your users would enter the actual URL of your host machine.
If the FileMaker Pro Web Companion is configured to use a port number other than the default, the URL your users will enter will look like this:
http://12.34.56.78:1024
Again, the number “12.34.56.78:1024” is an example; your users would enter the actual URL of the host machine, followed by a colon (“:”) and the port number specified in the FileMaker Pro Web Companion Configuration dialog.
For more information on accessing FileMaker Pro databases on the Web, see chapter 14 of the User’s Guide, “Publishing databases on the Web.”
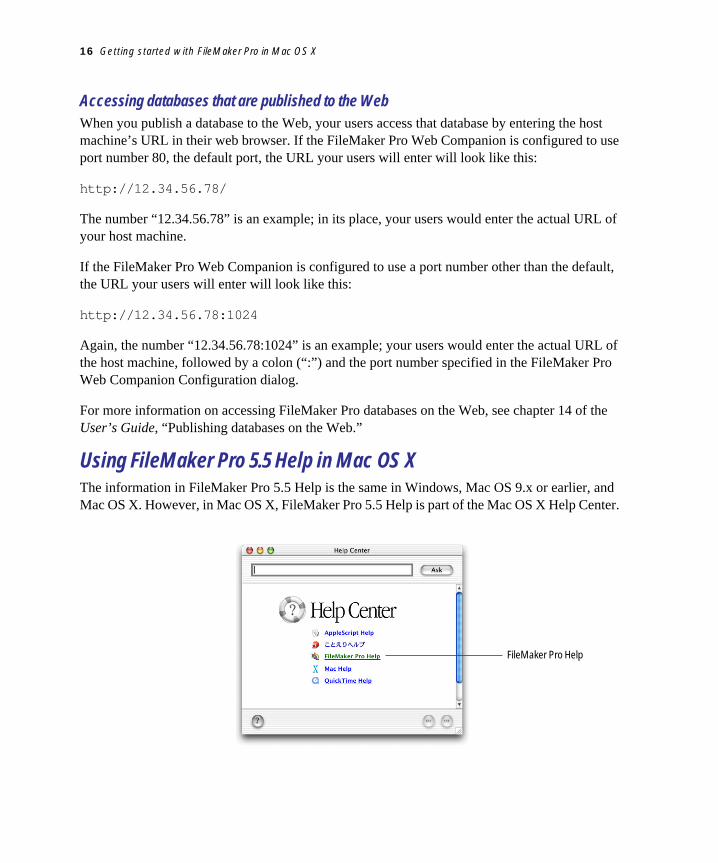
Using FileMaker Pro 5.5 Help in Mac OS XThe information in FileMaker Pro 5.5 Help is the same in Windows, Mac OS 9.x or earlier, and Mac OS X. However, in Mac OS X, FileMaker Pro 5.5 Help is part of the Mac OS X Help Center.
FileMaker Pro Help

Getting started with FileMaker Pro in Mac OS X 17
To use FileMaker Pro 5.5 Help, choose it from the Help Center or from the Help menu in FileMaker Pro.
Choose an item from the table of contents or enter text you’d like to search for in the Ask box.