faculty/staff websites & bios | web services | how we can ...faculty.uml.edu › bkim › 22.201...
TRANSCRIPT
To: Professors Kim and SullivanFrom: My NameDate: 22 October 2012Re: MATLAB CAD Project Report_____________________________________________________________________
Introduction
Brief introduction on your program should be here. The title is formatted using the Format > Paragraph command with the After option set to 6. Text is Times Roman or Arial font and is 12 pt. No figures or references should be included or cited in the Introduction.
Program Structure and Capability
Present how your program is structured. Also, present the program’s capability with some examples. More details will be better to judge the quality of the program
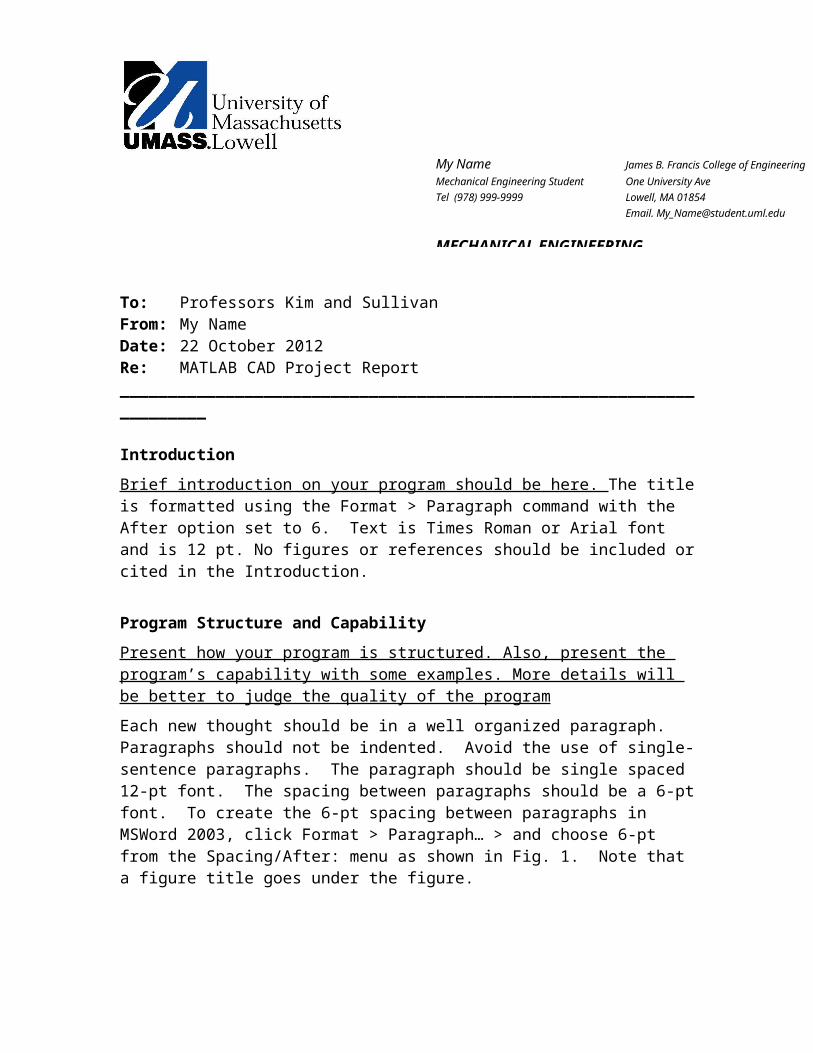
Each new thought should be in a well organized paragraph. Paragraphs should not be indented. Avoid the use of single-sentence paragraphs. The paragraph should be single spaced 12-pt font. The spacing between paragraphs should be a 6-pt font. To create the 6-pt spacing between paragraphs in MSWord 2003, click Format > Paragraph… > and choose 6-pt from the Spacing/After: menu as shown in Fig. 1. Note that a figure title goes under the figure.
Fig. 1 How to format line spacing after a paragraph
Notice how “6-pt” is hyphenated in the previous paragraph. This hyphenation denotes a compound modifier. The number 6 describes the point size of the font—not how many fonts to be used. Notice the long hyphen in the previous sentence. The long hyphen is
My Name James B. Francis College of EngineeringMechanical Engineering Student One University AveTel (978) 999-9999 Lowell, MA 01854
Email. [email protected]
MECHANICAL ENGINEERING
used to set off a fragment from the rest of the sentence and is created by typing “--”. MS Word automatically will change the “--” to a long hyphen.
A list of numbers is best reported in a table—not buried in a sentence within a paragraph. Table 1 is an example of the link lengths used for a fourbar linkage. Notice that the entries in Table 1 are centered top to bottom in the cells and the table is “fit” to the cell entries. The entries may be left, right or center justified per the discretion of the author of the report. Table titles are always above the table and should be centered. There is a 6-pt space after the title to the top of the table. The entire table should be on one page, and the table should not appear on a page before it is referenced in the text. Any table or figure in the report should be discussed in the report. Otherwise why is the table or figure necessary to the report?
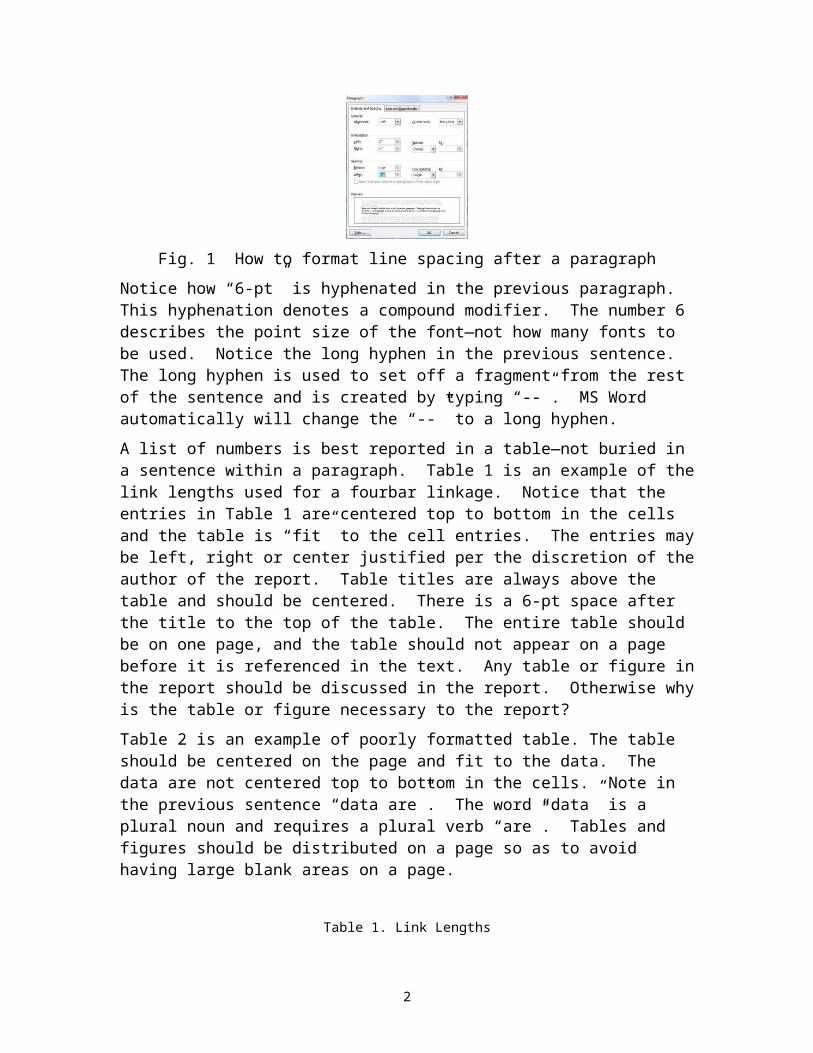
Table 2 is an example of poorly formatted table. The table should be centered on the page and fit to the data. The data are not centered top to bottom in the cells. Note in the previous sentence “data are”. The word “data” is a plural noun and requires a plural verb “are”. Tables and figures should be distributed on a page so as to avoid having large blank areas on a page.
Table 1. Link Lengths
Link Length(inches)
Crank 2Coupler 5.5Output Rocker 6Ground Link (Base Plate) 5
Table 2:. Link LengthsLink Length
(inches)Crank 2
Coupler 5.5Output Rocker 6
Ground Link (Base Plate) 5
Fig. 2 is an example of how a plot should be included as a figure in the report. No figure should appear on a page before it is referenced in the report. The axes should be clearly labeled to describe the respective variable on each axis. The tic marks should be labeled, and the labels should be formatted to a reasonable number of significant figures. The numbers should be “nice” numbers. However, in Fig. 2, all tic marks should be formatted to one decimal place, e.g. 1.0 not 1 on the x axis.
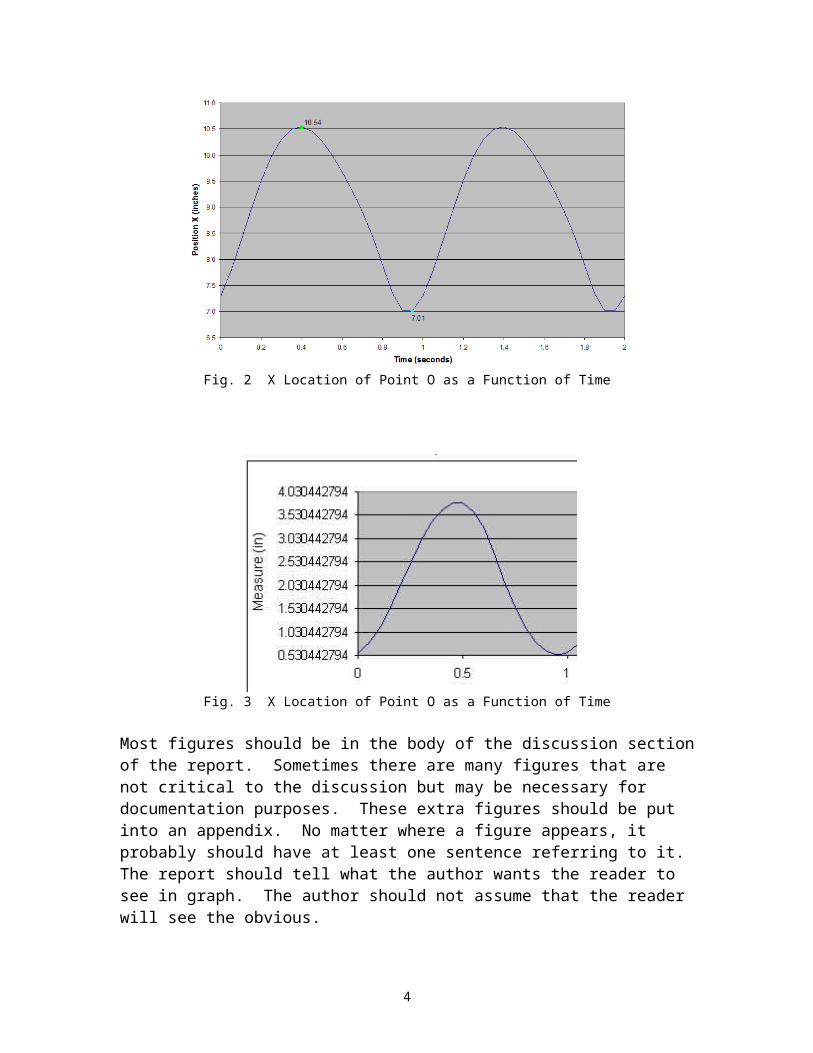
Fig. 3 shows an example of a bad plot. Scales on graphs should be 0.0, 0.5, 1.0, 1.5... on the x axis and 0.5, 1.0, 1.5, 2.0...4.5 on the y axis. You cannot read a graph to nine decimal places, so do not label to such precision. All tic labels should be the same format—not 1, 1.5, 2, 2.5... . Rather the axes should be 1.0, 1.5, 2.0, 2.5... . Do not use unusual scales, e.g. 1.37, 1.87, 2.37... . Fit axes to the graph—do not have wasted white space with a curve plotted in one corner of a big graph.
2
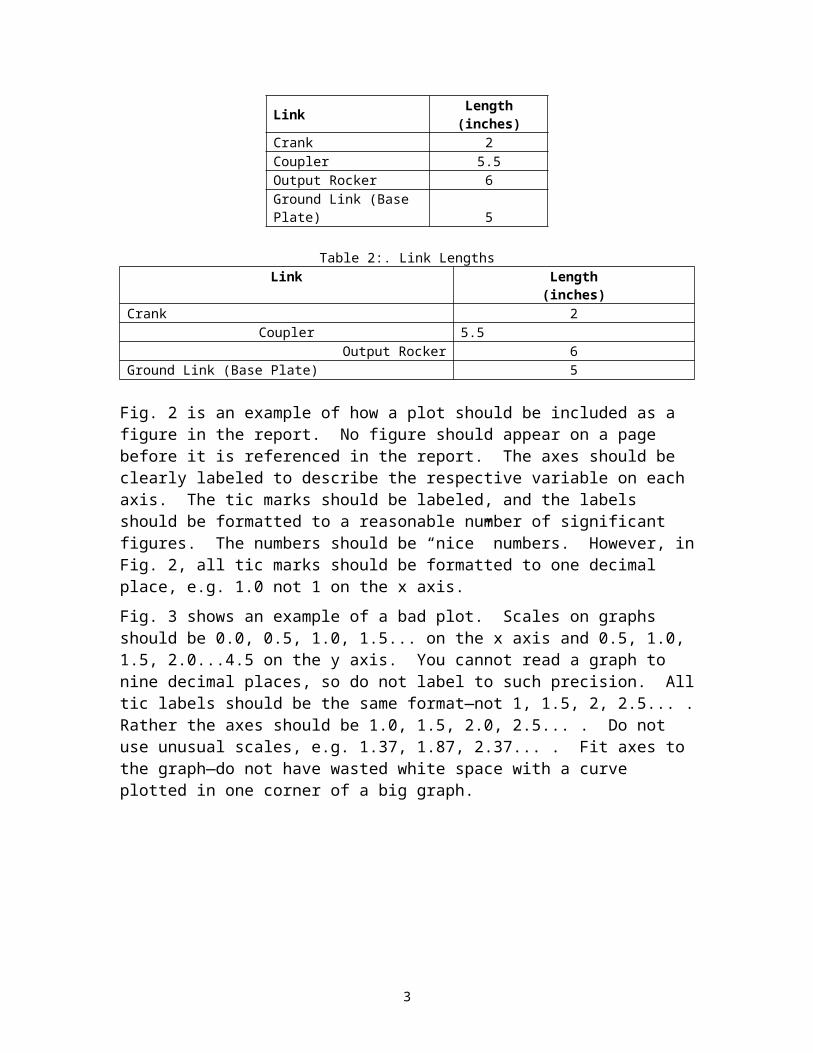
Fig. 2 X Location of Point O as a Function of Time
Fig. 3 X Location of Point O as a Function of Time
Most figures should be in the body of the discussion section of the report. Sometimes there are many figures that are not critical to the discussion but may be necessary for documentation purposes. These extra figures should be put into an appendix. No matter where a figure appears, it probably should have at least one sentence referring to it. The report should tell what the author wants the reader to see in graph. The author should not assume that the reader will see the obvious.
All references should be cited in a References section of the memo. For this report, examples of references for a journal paper, web page, memo and book are given as 1
3
through 4, respectively. Web site references should be as specific as possible to get the reader to the specific web page being referenced. For example, http://m-5.eng.uml.edu is insufficient to get to this example memo. The full web address is http://m-5.eng.uml.edu/22.321/Fall2008/Labs/Example_Lab_Report_Format.pdf .
Program Test Results and Source Code
Present the three required tasks here. Snapshots of the GUI showing the drawing and calculated result should be presented. However, the snapshots can be placed in Appendix if you prefer and the snapshots can be referred from here. Please copy your source code in Appendix.
Conclusion
The conclusion section should restate two or three important points of the report, and should not include any new information that was not already presented in the Discussion section of the report. Please include what you have learned from the CAD project.
References
1. Fleisig, G.S., Zheng, N., Stodden, D.F. and Andrews, J.R. (2002). “Relationship between bat mass properties and bat velocity”. Journal of Sports Engineering 5.
2. “Science of Baseball Activity: Minimizing Handle Force” (2004).http://www.exploratorium.edu/baseball/handle_forces.html. Date last checked 01-Sep-2008.
3. Sherwood, James A., (28-Sep-2006). “Semester Design Project”. Memo.
4. Lerner, L.S. (1996). Physics for Scientists and Engineers. Jones and Bartlett Publishers Inc., Boston. pp. 308-309.
4
Appendix A: How to Format Appendix PagesBy Sarah Tremblay Oct. 2006
MS Word 2003 To format the page numbers in an Appendix A-1, A-2, etc. in the same MS Word 2003 document as the main report, first format the page numbers (and rest of the footer, if necessary) as you would in your final document.
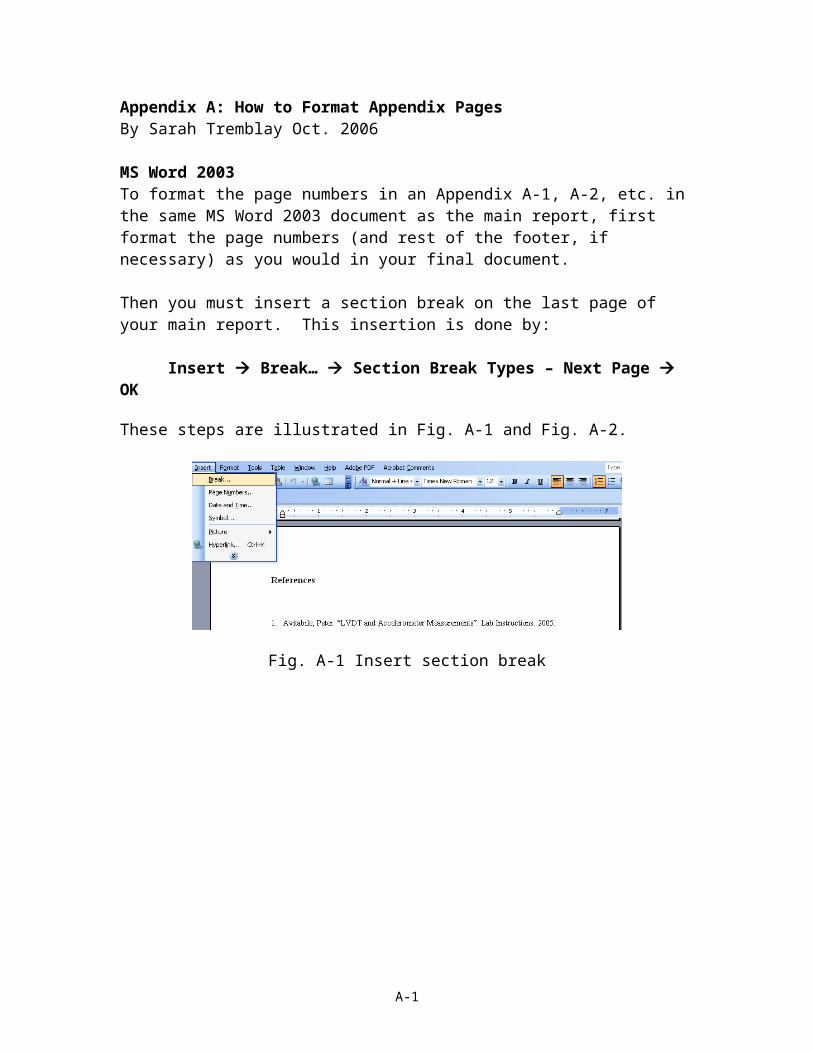
Then you must insert a section break on the last page of your main report. This insertion is done by:
Insert Break… Section Break Types – Next Page OK
These steps are illustrated in Fig. A-1 and Fig. A-2.
Fig. A-1 Insert section break
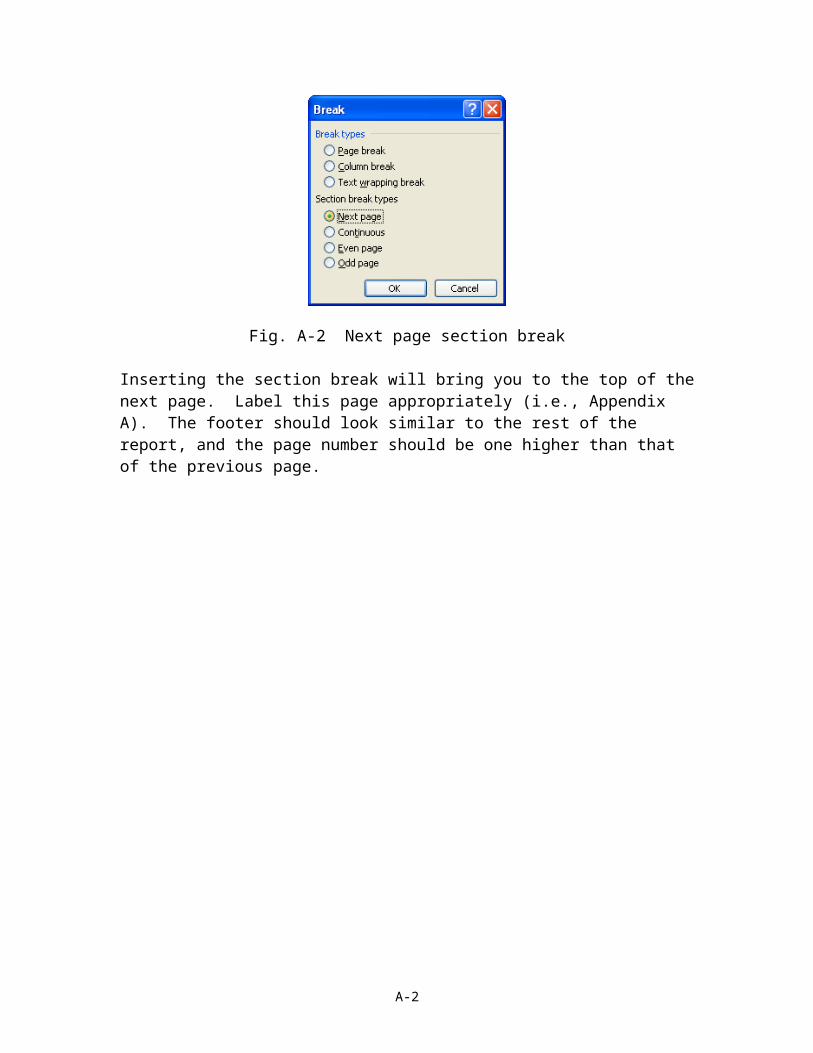
Fig. A-2 Next page section break
Inserting the section break will bring you to the top of the next page. Label this page appropriately (i.e., Appendix A). The footer should look similar to the rest of the report, and the page number should be one higher than that of the previous page.
A-1

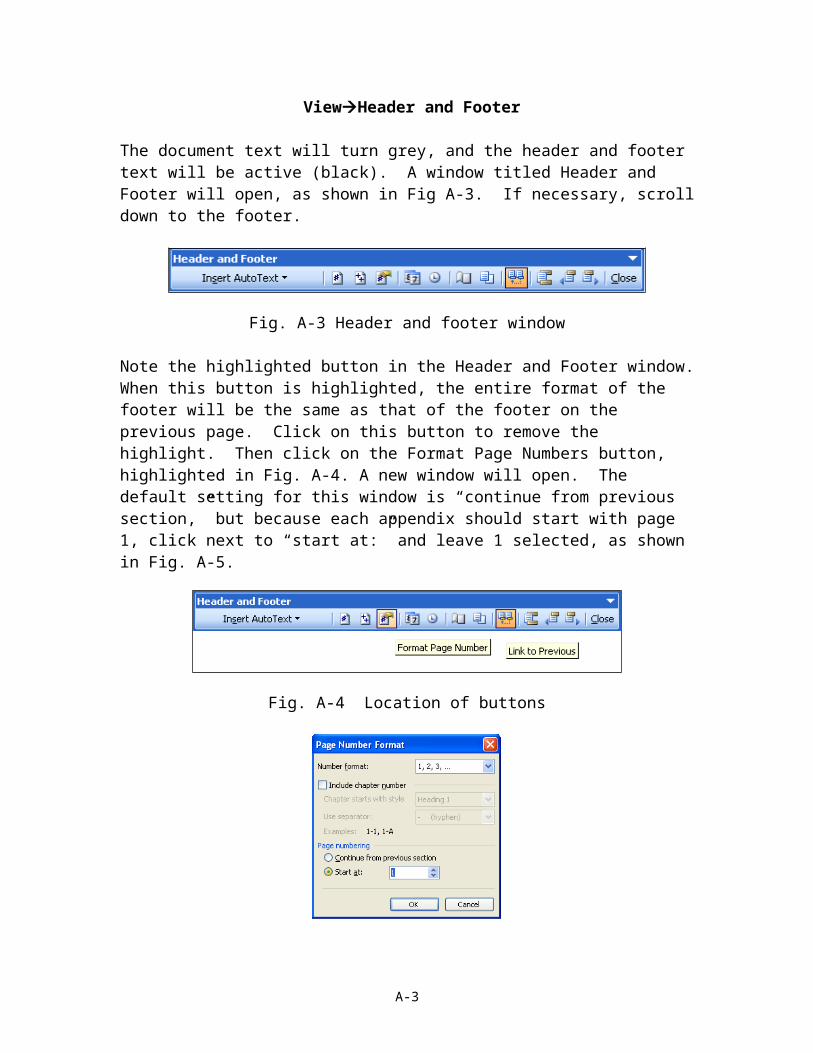
ViewHeader and Footer
The document text will turn grey, and the header and footer text will be active (black). A window titled Header and Footer will open, as shown in Fig A-3. If necessary, scroll down to the footer.
Fig. A-3 Header and footer window
Note the highlighted button in the Header and Footer window. When this button is highlighted, the entire format of the footer will be the same as that of the footer on the previous page. Click on this button to remove the highlight. Then click on the Format Page Numbers button, highlighted in Fig. A-4. A new window will open. The default setting for this window is “continue from previous section,” but because each appendix should start with page 1, click next to “start at:” and leave 1 selected, as shown in Fig. A-5.
Fig. A-4 Location of buttons
Fig. A-5 Restart page numbering
The last step is to put the appropriate letter in front of the page number. This step is done by typing “A-” before the page number in the footer. Close the Header and Footer window.
This process can be used whenever a new section must be started.
A-2
MS Word 2007 To format the page numbers in an Appendix A-1, A-2, etc. in the same MS Word 2007 document as the main report, first format the page numbers (and rest of the footer, if necessary) as you would in your final document.
Then you must insert a section break on the last page of your main report. This insertion is done by going to the Page Layout tab and selecting Breaks > Next Page. These steps are illustrated in Fig. A-6.
Fig. A-6 Insert a section break
Inserting the section break will bring you to the top of the next page. Label this page appropriately (i.e., Appendix A). The footer should look similar to the rest of the report, and the page number should be one higher than that of the previous page.
A-3
To view the footer, select Footer on the Insert tab and click Edit Footer as shown in Fig. A-7.
A-7. Editing the footer
If necessary, scroll down to the footer. Note the highlighted button “Link to Previous” in the Navigation window as shown in Fig. A-8. When this button is highlighted, the entire format of the footer will be the same as that of the footer on the previous page. Click on this button to remove the highlight.
Fig. A-8 Unlinking the page numbering
The last step is to put the appropriate letter in front of the page number. This step is done by typing “A-” before the page number in the footer. Close the Header and Footer window by double clicking in the Footer window or hitting the Esc key.
A-4
Appendix B: Engineering Drawings of Each Link
B-1

B-2

C-1