envi classic orthorectification module - exelis visual information
TRANSCRIPT

ENVI Classic Tutorial: TheENVI OrthorectificationModule
OrthorectificationModule 2Files Used in This Tutorial 2Background 2The ENVI Classic OrthorectificationModuleWorkflow 3Installing the ENVI Classic OrthorectificationModule 4
Selecting Input Images and DEMs 5Loading the Images and DEM into ENVI Classic 5Loading the Images and DEM into the ENVI Classic OrthorectificationWizard 7
Working with Ground Control Points 9Restoring GCPs 9Adding New GCPs 11Evaluating Residual Errors 12
Ordering Images and Defining Cutlines 15Working with Tie Points 17Defining Output Parameters 20
Optional Step 20
Page 1 of 22© 2014 Exelis Visual Information Solutions, Inc. All Rights Reserved. This information is not subject to the controlsof the International Traffic in Arms Regulations (ITAR) or the Export Administration Regulations (EAR). However,this information may be restricted from transfer to various embargoed countries under U.S. laws and regulations.

Orthorectification ModuleThis tutorial demonstrates how to create an orthorectified mosaic from two QuickBird multispectralimages and a DEM of Phoenix, Arizona, USA. You will learn how to properly open the images andDEM in ENVI® Classic, restore a ground control point (GCP) file, add new GCPs, add tie points, anddefine the parameters of the orthorectified product.
You must have an ENVI Classic Orthorectification Module license to run this tutorial.
Files Used in This TutorialDownload data files from the Exelis website.
File Description005606990010_01_P008_MUL\05JUL*.TIF QuickBird Level-1 multispectral imagery for
Phoenix, AZ from 11 July 2005005606990010_01_P011_MUL\05OCT*.TIF QuickBird Level-1 multispectral imagery for
Phoenix, AZ from 09 October 2005phoenix_DEM_subset.tif DEM subset of Phoenix, AZ, in GeoTIFF formatphoenixGCPs.pts Ground control points (GCPs) for the 05JUL*
QuickBird image (in the 005606990010_01_P008_MUL directory)
Note: It is highly recommended that you save a copy of the entire rigorous_ortho directory toyour local drive, to speed up performance and to simplify editing the GCP file (see "Restoring GCPs"on page 9).
QuickBird files are courtesy of DigitalGlobe and may not be reproduced without explicit permissionfrom DigitalGlobe.
BackgroundAn orthorectified image (or orthophoto) is one where each pixel represents a true ground location and allgeometric, terrain, and sensor distortions have been removed to within a specified accuracy. Scale isconstant throughout the orthophoto, regardless of elevation, thus providing accurate measurements ofdistance and direction. Geospatial professionals can easily combine orthophotos with other spatial datain a geographic information system (GIS) for city planning, resource management, and other relatedfields.
ENVI Classic's existing orthorectification tools (accessed throughMap > Orthorectification in theENVI Classic main menu bar) allow you to orthorectify images using rational polynomial coefficients(RPCs), elevation and geoid information, and optional ground control points (GCPs). However, RPCsand elevation information do not provide enough details to build a rigorous model representing the path oflight rays from a ground object to the sensor.
Page 2 of 22© 2014 Exelis Visual Information Solutions, Inc. All Rights Reserved. This information is not subject to the controlsof the International Traffic in Arms Regulations (ITAR) or the Export Administration Regulations (EAR). However,this information may be restricted from transfer to various embargoed countries under U.S. laws and regulations.

The ENVI Classic Orthorectification Module allows you to build highly accurate orthorectified imagesby rigorously modeling the object-to-image transformation. The details of this transformation are mostlytransparent to the user, which means you can quickly create orthorectified images without definingdetailed model parameters.
With the ENVI Classic Orthorectification Layout Manager, you can easily see the spatial coverage ofimages, DEMs, GCPs, and tie points, along with residual error vectors for each GCP. You can adjustyour GCPs and tie points to improve the overall residual error for the orthorectified output. ENVIClassic uses the latest innovative research methods to perform color balancing and mosaicking in theoutput product.
The ENVI Classic Orthorectification Module is a joint collaboration between Exelis VIS andSpacemetric AB of Stockholm, Sweden. Spacemetric designed the underlying block-adjustment model,which provides a precision orthorectification solution for various sensors. For more technical informationon Spacemetric’s orthorectification models, see their website at http://www.spacemetric.se/technology.
The ENVI Classic Orthorectification Module WorkflowThe figure below shows a typical orthorectification workflow. The only required steps in the ENVIClassic Orthorectification Module workflow are (1) select input images and DEMs, (2) build anadjustment model, (3) select output parameters, and (4) rectify the input image(s) to produce the outputimage. However, you will achieve the most accurate results by incorporating optional ground controlpoints (GCPs) and tie points into the model, while iteratively reviewing the overall model error andediting points as needed to reduce the error. You can also optionally create and edit cutlines and setsome basic parameters for the final output.
The shaded boxes represent workflow steps that have an associated wizard dialog to guide you throughthe process.
Page 3 of 22© 2014 Exelis Visual Information Solutions, Inc. All Rights Reserved. This information is not subject to the controlsof the International Traffic in Arms Regulations (ITAR) or the Export Administration Regulations (EAR). However,this information may be restricted from transfer to various embargoed countries under U.S. laws and regulations.

Installing the ENVI Classic Orthorectification ModuleThe ENVI Classic Orthorectification Module requires a separate installer from the ENVI Classicinstaller. When you purchase a license for the ENVI Classic Orthorectification Module, you will haveaccess to an installer for your Windows or Linux platform. If you do not have an ENVI ClassicOrthorectification Module license, contact Exelis VIS or your ENVI Classic distributor.
The ENVI Classic Orthorectification Module is only supported on Windows 32-bit and 64-bit platforms.
Page 4 of 22© 2014 Exelis Visual Information Solutions, Inc. All Rights Reserved. This information is not subject to the controlsof the International Traffic in Arms Regulations (ITAR) or the Export Administration Regulations (EAR). However,this information may be restricted from transfer to various embargoed countries under U.S. laws and regulations.
Selecting Input Images and DEMsThe ENVI Classic Orthorectification Module requires input images to be in their native format anddirectory structure, exactly as they are delivered by the data provider. The imagery must include allassociated metadata and ephemeris data. For more detailed information, see the ENVI Classic Help.
You must first open the image files using ENVI Classic’s File > Open External File menu option,before loading the images into the Orthorectification Wizard. Use the following steps to open twoQuickBird images for input. Both are in a Geographic Lat/Lon projection with a WGS-84 datum.
Note: It is highly recommended that you save a copy of the entire rigorous_ortho directory toyour local drive, in order to speed up performance.
Loading the Images and DEM into ENVI Classic1. From the ENVI Classic main menu bar, select File > Open External File > QuickBird >
GeoTIFF. The Enter TIFF/GeoTIFF Filenames dialog appears.
2. Navigate to rigorous_ortho/005606990010_01_P008_MUL, and open05JUL11182931-M1BS-005606990010_01_P008.TIF. The file appears in theAvailable Bands List. This is a multispectral image of Phoenix, Arizona, captured on 11 July2005.
Note: This file will be referred to as the 05JUL* image throughout the rest of the tutorial.
3. From the ENVI Classic main menu bar, select File > Open External File > QuickBird >GeoTIFF. The Enter TIFF/GeoTIFF Filenames dialog appears.
4. Navigate to rigorous_ortho/005606990010_01_P011_MUL, and open05OCT09183407-M1BS-005606990010_01_P011.TIF. The file appears in theAvailable Bands List. This is a multispectral image of Phoenix, Arizona, captured on 09 October2005.
Note: This file will be referred to as the 05OCT* image throughout the rest of the tutorial.
Next, you will open a DEM into ENVI Classic. You do not need to use the File > Open ExternalFile menu option for DEMs, when using the ENVI Classic Orthorectification Module.
5. From the ENVI Classic main menu bar, select File > Open Image File. The Enter DataFilenames dialog appears. Navigate to rigorous_ortho, and select the file phoenix_DEM_subset.tif. Click Open. This is a subset of a U.S. Geological Survey DEM from thePhoenix area. It is in a Geographic Lat/Lon projection with a WGS-84 datum.
6. From the ENVI Classic main menu bar, selectMap > Rigorous Orthorectification. The ENVIClassic Orthorectification Layout Manager (hereafter referred to as the Layout Manager) andENVI Classic Orthorectification Wizard (hereafter referred to as the Wizard) appear.
Page 5 of 22© 2014 Exelis Visual Information Solutions, Inc. All Rights Reserved. This information is not subject to the controlsof the International Traffic in Arms Regulations (ITAR) or the Export Administration Regulations (EAR). However,this information may be restricted from transfer to various embargoed countries under U.S. laws and regulations.

Page 6 of 22© 2014 Exelis Visual Information Solutions, Inc. All Rights Reserved. This information is not subject to the controlsof the International Traffic in Arms Regulations (ITAR) or the Export Administration Regulations (EAR). However,this information may be restricted from transfer to various embargoed countries under U.S. laws and regulations.
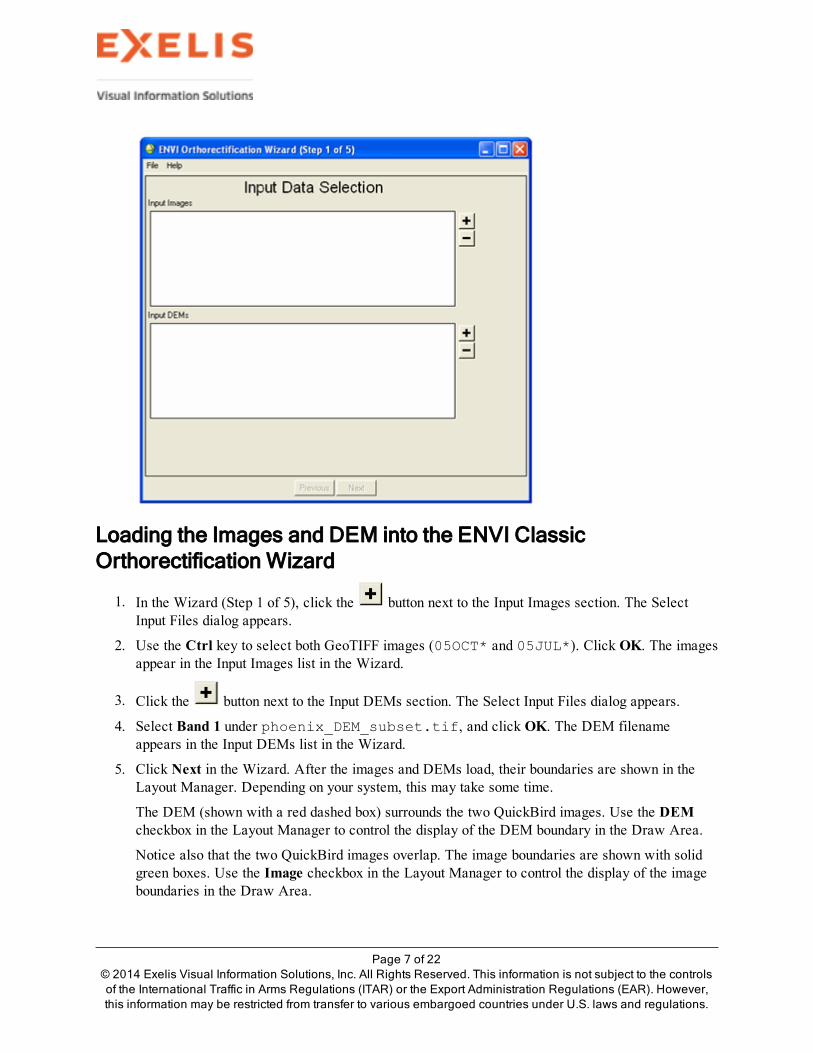
Loading the Images and DEM into the ENVI ClassicOrthorectification Wizard
1. In the Wizard (Step 1 of 5), click the button next to the Input Images section. The SelectInput Files dialog appears.
2. Use the Ctrl key to select both GeoTIFF images (05OCT* and 05JUL*). Click OK. The imagesappear in the Input Images list in the Wizard.
3. Click the button next to the Input DEMs section. The Select Input Files dialog appears.
4. Select Band 1 under phoenix_DEM_subset.tif, and click OK. The DEM filenameappears in the Input DEMs list in the Wizard.
5. Click Next in the Wizard. After the images and DEMs load, their boundaries are shown in theLayout Manager. Depending on your system, this may take some time.
The DEM (shown with a red dashed box) surrounds the two QuickBird images. Use the DEMcheckbox in the Layout Manager to control the display of the DEM boundary in the Draw Area.
Notice also that the two QuickBird images overlap. The image boundaries are shown with solidgreen boxes. Use the Image checkbox in the Layout Manager to control the display of the imageboundaries in the Draw Area.
Page 7 of 22© 2014 Exelis Visual Information Solutions, Inc. All Rights Reserved. This information is not subject to the controlsof the International Traffic in Arms Regulations (ITAR) or the Export Administration Regulations (EAR). However,this information may be restricted from transfer to various embargoed countries under U.S. laws and regulations.

The yellow dashed box represents the default output area for the orthorectified product, which iscurrently selected to be the image boundaries. Use the Output Area checkbox in the LayoutManager to control the display of the output area in the Draw Area.
The names of the input images and DEM appear, respectively, under the Images and DEMs tabsof the Layout Manager:
Page 8 of 22© 2014 Exelis Visual Information Solutions, Inc. All Rights Reserved. This information is not subject to the controlsof the International Traffic in Arms Regulations (ITAR) or the Export Administration Regulations (EAR). However,this information may be restricted from transfer to various embargoed countries under U.S. laws and regulations.

Working with Ground Control PointsAfter you loaded the QuickBird images and DEM into the Wizard and clicked Next, the Wizardproceeded to the GCP Selection panel (Step 2 of 5), and a display group opened for the 05OCT* image.In the GCP Selection step, you will associate image pixels to points on the ground whose locations areknown through a horizontal coordinate system and vertical datum. These points are called ground controlpoints (GCPs).
The controls in this step of the wizard allow you to optionally restore GCP files, to add new GCPs, andto edit existing GCPs. Although selecting GCPs is an optional step in the overall workflow, you willachieve the most accurate orthorectified results by using GCPs and iteratively reviewing the overallRMS error.
Restoring GCPsFor this tutorial, you will restore a set of GCPs that lie within the 05JUL* QuickBird image boundary(the left image as shown in the Layout Manager). DigitalGlobe, who provided the QuickBird images,
Page 9 of 22© 2014 Exelis Visual Information Solutions, Inc. All Rights Reserved. This information is not subject to the controlsof the International Traffic in Arms Regulations (ITAR) or the Export Administration Regulations (EAR). However,this information may be restricted from transfer to various embargoed countries under U.S. laws and regulations.
also produced a set of GCPs for the entire Phoenix area, in Microsoft Excel format. However, the ENVIClassic Orthorectification Module requires GCPs to be in a “Rigorous Orthorectification GCP” format.For more information, see the ENVI Classic Help.
The GCP file you are about to restore (phoenixGCPs.pts) was created by identifying those GCPsthat fell within the 05JUL* QuickBird image boundary, then entering them one-by-one into the ENVIClassic Orthorectification Wizard using map coordinates provided by DigitalGlobe. The GCPs werealready in a Geographic Lat/Lon projection with WGS-84 datum (the same projection as the QuickBirdimages and DEM). The GCP file was then saved to ENVI Classic format, using the Save GCPs buttonin the Wizard.
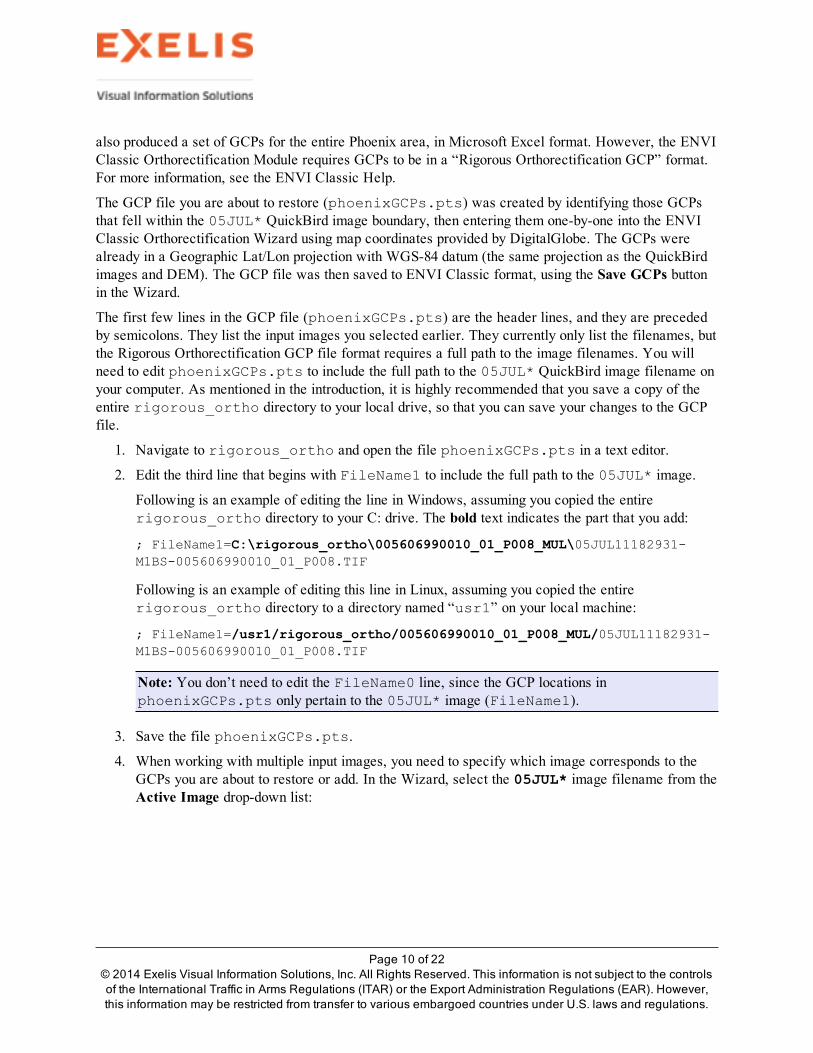
The first few lines in the GCP file (phoenixGCPs.pts) are the header lines, and they are precededby semicolons. They list the input images you selected earlier. They currently only list the filenames, butthe Rigorous Orthorectification GCP file format requires a full path to the image filenames. You willneed to edit phoenixGCPs.pts to include the full path to the 05JUL* QuickBird image filename onyour computer. As mentioned in the introduction, it is highly recommended that you save a copy of theentire rigorous_ortho directory to your local drive, so that you can save your changes to the GCPfile.
1. Navigate to rigorous_ortho and open the file phoenixGCPs.pts in a text editor.
2. Edit the third line that begins with FileName1 to include the full path to the 05JUL* image.
Following is an example of editing the line in Windows, assuming you copied the entirerigorous_ortho directory to your C: drive. The bold text indicates the part that you add:
; FileName1=C:\rigorous_ortho\005606990010_01_P008_MUL\05JUL11182931-M1BS-005606990010_01_P008.TIF
Following is an example of editing this line in Linux, assuming you copied the entirerigorous_ortho directory to a directory named “usr1” on your local machine:
; FileName1=/usr1/rigorous_ortho/005606990010_01_P008_MUL/05JUL11182931-M1BS-005606990010_01_P008.TIF
Note: You don’t need to edit the FileName0 line, since the GCP locations inphoenixGCPs.pts only pertain to the 05JUL* image (FileName1).
3. Save the file phoenixGCPs.pts.
4. When working with multiple input images, you need to specify which image corresponds to theGCPs you are about to restore or add. In the Wizard, select the 05JUL* image filename from theActive Image drop-down list:
Page 10 of 22© 2014 Exelis Visual Information Solutions, Inc. All Rights Reserved. This information is not subject to the controlsof the International Traffic in Arms Regulations (ITAR) or the Export Administration Regulations (EAR). However,this information may be restricted from transfer to various embargoed countries under U.S. laws and regulations.

The display group updates to show the 05JUL* image.
5. Click the Load GCPs button in the Wizard. The Select GCP File dialog appears.
6. Select the file phoenixGCPs.pts that you just edited and saved, and click Open. After a briefmoment, the GCPs are loaded in the GCP Selection panel of the Wizard and under the GCP tab ofthe Layout Manager. You may need to click the GCP and GCP Labels check boxes in theControls tab of the Layout Manager to view the locations of the GCPs within the Draw Area ofthe Layout Manager.
Adding New GCPsThe GCPs you just restored are all within the 05JUL* image, so now you should add some GCPs to the05OCT* image (the right-most image as shown in the Layout Manager). Unfortunately, there are onlytwo available GCPs for this area. But this is a realistic scenario in orthorectification: you may notalways have adequate GCP coverage throughout your area of interest, or the GCPs may be unevenlydistributed.
1. In the Wizard, select the 05OCT* image filename from the Active Image drop-down list:
2. Click the Projection toggle button .
3. Click Change Proj. The Projection Selection dialog appears.
4. Select Geographic Lat/Lon.
5. Ensure that the Datum is WGS-84.
6. Click OK in the Projection Selection dialog.
7. In the Wizard, click the Projection toggle button again.
8. Click DDEG. The Lat and Lon fields change so that you can enter map coordinates in decimaldegrees.
Page 11 of 22© 2014 Exelis Visual Information Solutions, Inc. All Rights Reserved. This information is not subject to the controlsof the International Traffic in Arms Regulations (ITAR) or the Export Administration Regulations (EAR). However,this information may be restricted from transfer to various embargoed countries under U.S. laws and regulations.
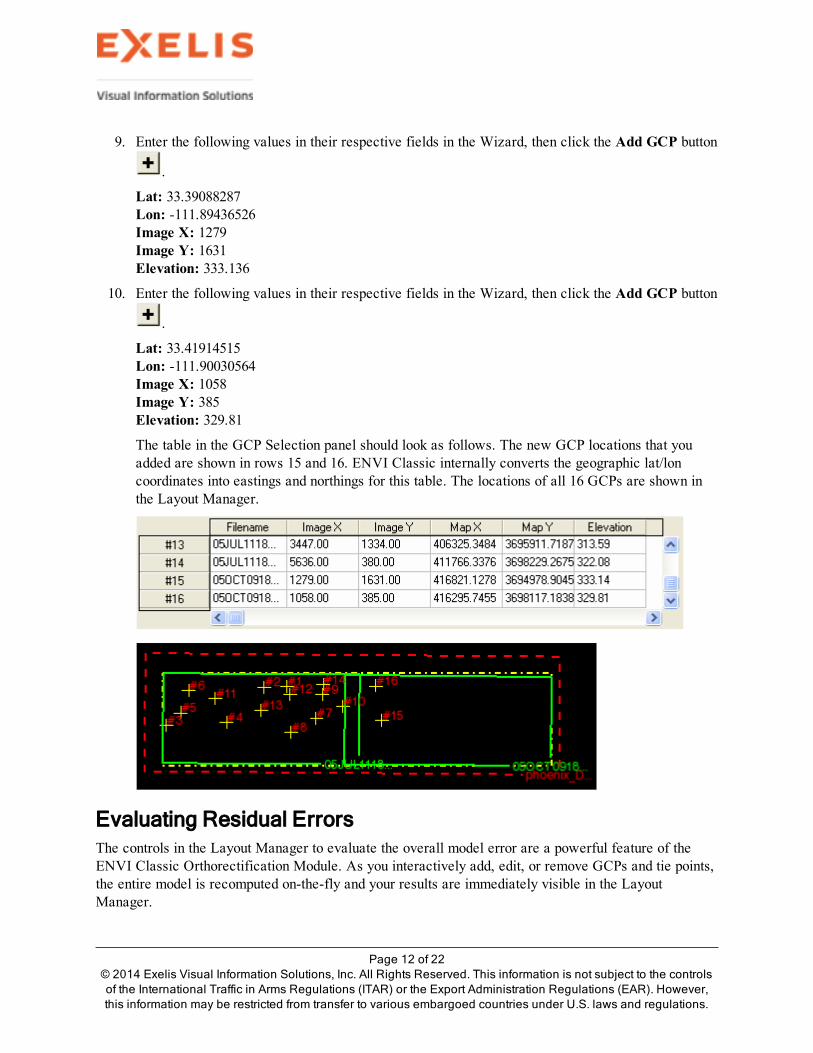
9. Enter the following values in their respective fields in the Wizard, then click the Add GCP button
.
Lat: 33.39088287Lon: -111.89436526Image X: 1279Image Y: 1631Elevation: 333.136
10. Enter the following values in their respective fields in the Wizard, then click the Add GCP button
.
Lat: 33.41914515Lon: -111.90030564Image X: 1058Image Y: 385Elevation: 329.81
The table in the GCP Selection panel should look as follows. The new GCP locations that youadded are shown in rows 15 and 16. ENVI Classic internally converts the geographic lat/loncoordinates into eastings and northings for this table. The locations of all 16 GCPs are shown inthe Layout Manager.
Evaluating Residual ErrorsThe controls in the Layout Manager to evaluate the overall model error are a powerful feature of theENVI Classic Orthorectification Module. As you interactively add, edit, or remove GCPs and tie points,the entire model is recomputed on-the-fly and your results are immediately visible in the LayoutManager.
Page 12 of 22© 2014 Exelis Visual Information Solutions, Inc. All Rights Reserved. This information is not subject to the controlsof the International Traffic in Arms Regulations (ITAR) or the Export Administration Regulations (EAR). However,this information may be restricted from transfer to various embargoed countries under U.S. laws and regulations.

1. In the Controls tab of the Layout Manager, the RMSE (root mean square error) field lists theoverall model error.
2. Enable the Residual Image option in the Layout Manager. A contour map is added to the DrawArea, showing the residual error throughout the area based on your GCP data. Purple-to-blueareas indicate the lowest residual errors, and red-to-white areas indicate the highest errors.
3. Right-click inside the Draw Area, and select Zoom In until you can see the contour labels moreclosely. Click-and-drag the left mouse button around the Draw Area to pan around. From lookingat this contour view, you can see that ID #3 (in the far lower-left corner of the contour map) has arelatively high residual error. IDs #1 and #14 have a relatively low error.
4. Select the GCP tab in the Layout Manager, and scroll to the right until you see the Mag field. Thecontour view of residual error is based on these relative magnitude values. You must have four ormore GCPs for this column to appear.
5. Select Row #2, which corresponds to GCP ID #3. A diamond marker appears over the GCP. Thisis the GCP associated with the large error you saw in Step 2. If you scroll to the Mag field forthis point, you will see a value of 206.2582. This value is very high, compared to the Mag valuesof other GCPs.
6. Select the Controls tab in the Layout Manager, then enable the Residual Vectors option. Use thearrow button (to the right of the slider) to increase the Residual Exaggeration value to 10. Cyan-colored arrows originate from each GCP location, showing their error magnitudes and directions.The left side of the scene has the highest errors and, as expected, the GCP corresponding to ID #3has the largest residual error vector.
In the next step, you will remove this GCP and see if the overall model improves.
7. In the Wizard, click Row #3.
Page 13 of 22© 2014 Exelis Visual Information Solutions, Inc. All Rights Reserved. This information is not subject to the controlsof the International Traffic in Arms Regulations (ITAR) or the Export Administration Regulations (EAR). However,this information may be restricted from transfer to various embargoed countries under U.S. laws and regulations.

8. Click the Remove GCP button . The entire model is recomputed, and the updated residual errorsare shown in the Layout Manager. What is the overall RMSE value now?
9. Click the GCP tab in the Layout Manager, and evaluate the updatedMag values for each GCP.Did the overall model improve after deleting that GCP?
10. You can experiment with removing GCPs or editing their values to improve the overall modelerror. For this tutorial, you can assume the results are reasonable and proceed to selecting tiepoints. Click Next in the Wizard to proceed to the Tie Point Selection panel.
Page 14 of 22© 2014 Exelis Visual Information Solutions, Inc. All Rights Reserved. This information is not subject to the controlsof the International Traffic in Arms Regulations (ITAR) or the Export Administration Regulations (EAR). However,this information may be restricted from transfer to various embargoed countries under U.S. laws and regulations.

Ordering Images and Defining CutlinesIn this optional step, you can define any areas between two or more overlapping images that you want toappear in the final output. With each input image, you perform two steps: (1) define the hierarchy of theimage relative to the others, and (2) define an optional cutline for the image.
Use the Image Order list to define how multiple images are ordered in the final output. This list ispopulated with the image filenames you added to the workflow earlier. The image at the top of the listwill be ordered first, followed by the second image, and so forth. Image ordering only pertains to areasof overlap between two or more images:
Cutlines are polygons that are used in combination with image ordering to define areas that you want tokeep in the final output. A cutline is essentially an inclusion polygon, similar to a cookie cutter applied toone or more images. The following example shows a cutline for a single image:
Following is an example of applying a cutline to the first-order (top-most) image when you have multipleimages.
Page 15 of 22© 2014 Exelis Visual Information Solutions, Inc. All Rights Reserved. This information is not subject to the controlsof the International Traffic in Arms Regulations (ITAR) or the Export Administration Regulations (EAR). However,this information may be restricted from transfer to various embargoed countries under U.S. laws and regulations.

For this tutorial, you will skip the process of ordering images and defining cutlines, by clicking Next.ENVI Classic will use the image frame as a cutline by default. The image frame is the area of usableimage data, excluding any background pixels.
Page 16 of 22© 2014 Exelis Visual Information Solutions, Inc. All Rights Reserved. This information is not subject to the controlsof the International Traffic in Arms Regulations (ITAR) or the Export Administration Regulations (EAR). However,this information may be restricted from transfer to various embargoed countries under U.S. laws and regulations.

Working with Tie PointsIn this step, you can select pixels from both images that represent the same location on the ground.These pixels are called tie points. Although computing tie points is an optional step, tie points are animportant component for computing the orthorectified model and account for most of the accuracy in theorthorectified product. In this exercise, you will add three tie points.
Two display groups appear, which currently show the same image (05OCT*), You need to change oneof them to show the 05JUL* image before adding tie points. You will do this in the first step.
1. In the Wizard, select the 05JUL* image from the Image 1 drop-down list. The 05OCT* imageis selected by default for Image 2, so you don’t need to select anything for Image 2. The dialogshould look similar to the following:
To save some time, the pixel coordinates for each tie point were already determined for you. Thisprocess involved identifying an object in the 05JUL* image (such as an intersection or buildingcorner), zooming in, and using ENVI Classic’s Cursor Location/Value tool to record thefractional image coordinates for that pixel. The same object was then identified in the 05OCT*image, and the fractional image coordinates for the corresponding pixel were recorded.
2. Enter the following pixel coordinates that represent the first tie point, then click the Add Tiepoint
button .
Image 1Image X: 6737, Image Y: 511.75
Image 2Image X: 363.75, Image Y: 480
3. Enter the following pixel coordinates that represent the second tie point, then click the AddTiepoint button.
Page 17 of 22© 2014 Exelis Visual Information Solutions, Inc. All Rights Reserved. This information is not subject to the controlsof the International Traffic in Arms Regulations (ITAR) or the Export Administration Regulations (EAR). However,this information may be restricted from transfer to various embargoed countries under U.S. laws and regulations.

Image 1Image X: 6860.25, Image Y: 1997.75
Image 2Image X: 489.75, Image Y: 1928
4. Enter the following pixel coordinates that represent the third (and final) tie point, then click theAdd Tiepoint button.
Image 1Image X: 6835.5, Image Y: 3174
Image 2Image X: 471.75, Image Y: 3073.5
The tie points are shown in the Layout Manager with magenta-colored “X” symbols, and theirvalues are added to the Wizard and the Tie Points tab in the Layout Manager. These dialogsshould look similar to the following.
Page 18 of 22© 2014 Exelis Visual Information Solutions, Inc. All Rights Reserved. This information is not subject to the controlsof the International Traffic in Arms Regulations (ITAR) or the Export Administration Regulations (EAR). However,this information may be restricted from transfer to various embargoed countries under U.S. laws and regulations.

5. Before proceeding to the next step in the workflow, you should save your project. From theWizard menu bar, select File > Save Project. The Select Project File dialog appears.
6. Enter a filename and location for the project state, and click Save. ENVI Classic saves theproject state in XML format. If you need to restore your project later, selectMap > RigorousOrthorectification from the ENVI Classic main menu bar, then select File > Restore Projectfrom the Wizard menu bar to select the XML file for your project. ENVI Classic automaticallyopens all input files, DEMs, GCPs, and tie points, so that you don’t need to open them prior torestoring the project.
7. Click Next in the Wizard to proceed to the Image Order & Cutline Selection panel.
Page 19 of 22© 2014 Exelis Visual Information Solutions, Inc. All Rights Reserved. This information is not subject to the controlsof the International Traffic in Arms Regulations (ITAR) or the Export Administration Regulations (EAR). However,this information may be restricted from transfer to various embargoed countries under U.S. laws and regulations.
Defining Output ParametersFollow these steps to select a projection, pixel size, and filename for the orthorectified product. Theseare required steps in the orthorectification workflow. ENVI Classic raster format is the only availableoutput format. ENVI Classic performs mosaicking and color balancing automatically, using the latestinnovative research methods.
1. In the Select Output Projection list, ensure that UTM is selected. Even though the QuickBirddata and original GCPs were Geographic Lat/Lon, the Wizard will not allow you to selectGeographic Lat/Lon in your output because it is considered a coordinate system, not a true mapprojection.
2. Ensure that the Datum is WGS-84, the Units are Meters, and the Zone is 12.
3. Leave the X/Y Pixel Size fields as-is. ENVI Classic will use the pixel sizes of the inputQuickBird images.
4. Select an output filename and location for the orthorectified product.
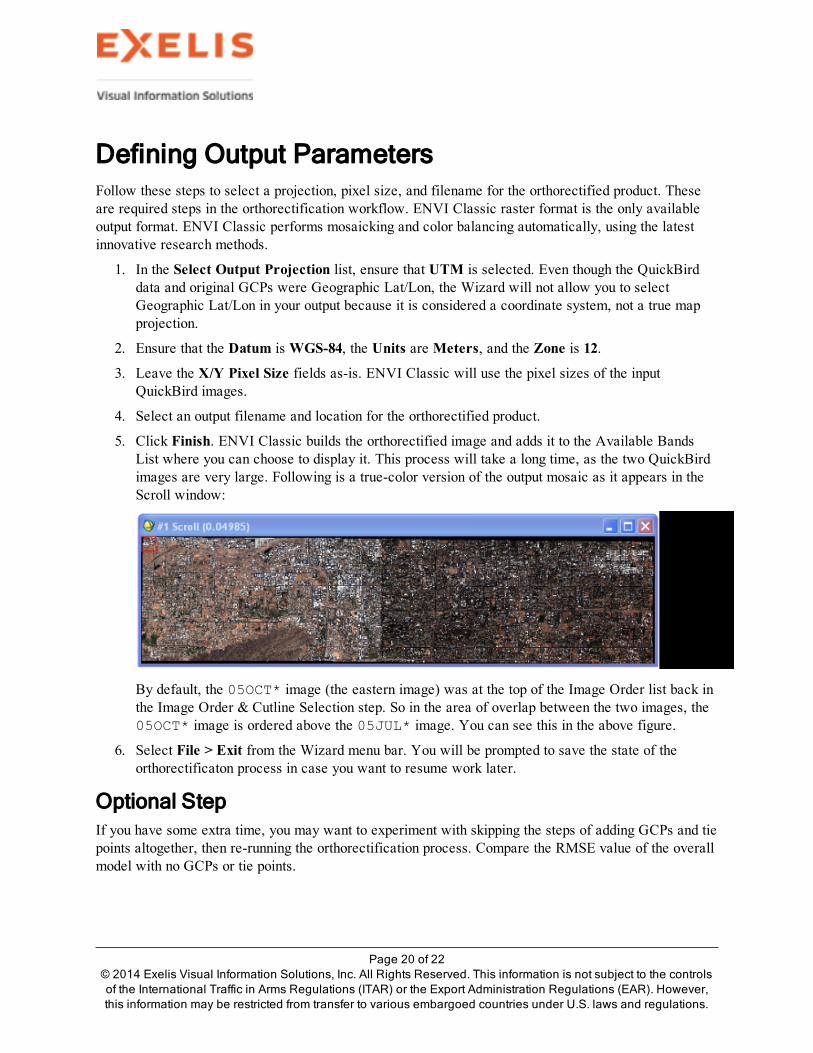
5. Click Finish. ENVI Classic builds the orthorectified image and adds it to the Available BandsList where you can choose to display it. This process will take a long time, as the two QuickBirdimages are very large. Following is a true-color version of the output mosaic as it appears in theScroll window:
By default, the 05OCT* image (the eastern image) was at the top of the Image Order list back inthe Image Order & Cutline Selection step. So in the area of overlap between the two images, the05OCT* image is ordered above the 05JUL* image. You can see this in the above figure.
6. Select File > Exit from the Wizard menu bar. You will be prompted to save the state of theorthorectificaton process in case you want to resume work later.
Optional StepIf you have some extra time, you may want to experiment with skipping the steps of adding GCPs and tiepoints altogether, then re-running the orthorectification process. Compare the RMSE value of the overallmodel with no GCPs or tie points.
Page 20 of 22© 2014 Exelis Visual Information Solutions, Inc. All Rights Reserved. This information is not subject to the controlsof the International Traffic in Arms Regulations (ITAR) or the Export Administration Regulations (EAR). However,this information may be restricted from transfer to various embargoed countries under U.S. laws and regulations.

GCPs and tie points should have a quality that is consistently better than the initial accuracy of thesensor model; this varies with data type and vendor. For example, mid-latitude QuickBird scenes of arelatively flat area may provide an accurate orthorectification without the use of GCPs or tie points.
Copyright Notice:
ENVI Classic is a registered trademark of Exelis Inc.
QUAC and FLAASH are registered trademarks of Spectral Sciences, Inc.
Page 21 of 22© 2014 Exelis Visual Information Solutions, Inc. All Rights Reserved. This information is not subject to the controlsof the International Traffic in Arms Regulations (ITAR) or the Export Administration Regulations (EAR). However,this information may be restricted from transfer to various embargoed countries under U.S. laws and regulations.
