emergency preparedness - scoutworksscoutworks.weebly.com/.../23781435/e_prep_pamphlet.pdf · joplin...
TRANSCRIPT
EmErGEncY PrEParEdnESS

How to Use This PamphletThe secret to successfully earning a merit badge is for you to use both the pamphlet and the suggestions of your counselor.
Your counselor can be as important to you as a coach is to an athlete. Use all of the resources your counselor can make available to you. This may be the best chance you will have to learn about this particular subject. Make it count.
If you or your counselor feels that any information in this pamphlet is incorrect, please let us know. Please state your source of information.
Merit badge pamphlets are reprinted annually and requirements updated regularly. Your suggestions for improvement are welcome.
Who Pays for This Pamphlet?This merit badge pamphlet is one in a series of more than 100 covering all kinds of hobby and career subjects. It is made available for you to buy as a service of the national and local councils, Boy Scouts of America. The costs of the development, writing, and editing of the merit badge pamphlets are paid for by the Boy Scouts of America in order to bring you the best book at a reasonable price.g y p
Send comments along with a brief statement about yourself to National Advancement Committee, S209 • Boy Scouts of America • 1325 West Walnut Hill Lane • P.O. Box 152079 • Irving, TX 75015-2079 • [email protected].
EmErgEncy PrEParEdnEss
BOy scOUTs OF amErIcamErIT BadgE sErIEs
The Boy Scouts of America is indebted to the American Red Cross for its subject matter expertise, review, and other assistance with this edition of the Emergency Preparedness merit badge pamphlet.
35888ISBN 978-0-8395-3368-9©2012 Boy Scouts of America2012 Printing
Note to the CounselorThe Boy Scouts of America believes that its youth members need adult contacts to help them develop character, citizenship, and fitness. As a merit badge counselor, you have subscribed to these aims of Scouting.
The Guide to Safe Scouting, No. 34416, is updated every year and is available from your local council Scout shop. It is also acces-sible online at the official BSA website: http://www.scouting.org/scoutsource/HealthandSafety.aspx. As an Emergency Preparedness merit badge counselor, this booklet may be particularly helpful to you.
Some BSA local councils have both risk management and health and safety committees; or these committees may be com-bined. In the BSA, risk management is an administrative function (prevention, funding); health and safety is a program function (assuring implementation of safe programs). These committees may be helpful as you plan Scouting activities in your area. The protection of our youth members is as vital as development of their career and hobby interests, which is the merit badge program’s basic function. Your active participation in and support of this goal is appreciated.
EmERgEnCy PREPAREdnESS 3
Requirements 1. Earn the First Aid merit badge.
2. Do the following:
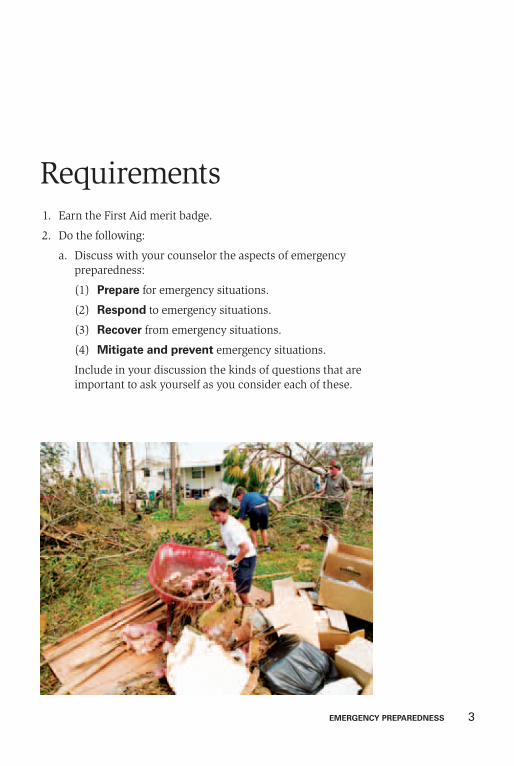
a. Discuss with your counselor the aspects of emergency preparedness:
(1) Prepare for emergency situations.
(2) Respond to emergency situations.
(3) Recover from emergency situations.
(4) mitigate and prevent emergency situations.
Include in your discussion the kinds of questions that are important to ask yourself as you consider each of these.
4 EmERgEnCy PREPAREdnESS
b. Make a chart that demonstrates your understanding of each of the aspects of emergency preparedness in requirement 2a (prepare, respond, recover, mitigate and prevent) with regard to 10 of the situations listed below. you must use situations 1, 2, 3, 4, and 5 below in boldface, but you may choose any other five listed here for a total of 10 situations. Discuss this chart with your counselor.
(1) Home kitchen fire
(2) Home basement/storage room/garage fire
(3) Explosion in the home
(4) Automobile crash
(5) Food-borne disease (food poisoning)
(6) Fire or explosion in a public place
(7) Vehicle stalled in the desert
(8) Vehicle trapped in a blizzard
(9) Flash flooding in town or in the country
(10) Mountain/backcountry accident
(11) Boating or water accident
(12) Gas leak in a home or a building
(13) Tornado or hurricane
(14) Major flood
(15) Nuclear power plant emergency
(16) Avalanche (snowslide or rockslide)
(17) Violence in a public place
EmERgEnCy PREPAREdnESS 5
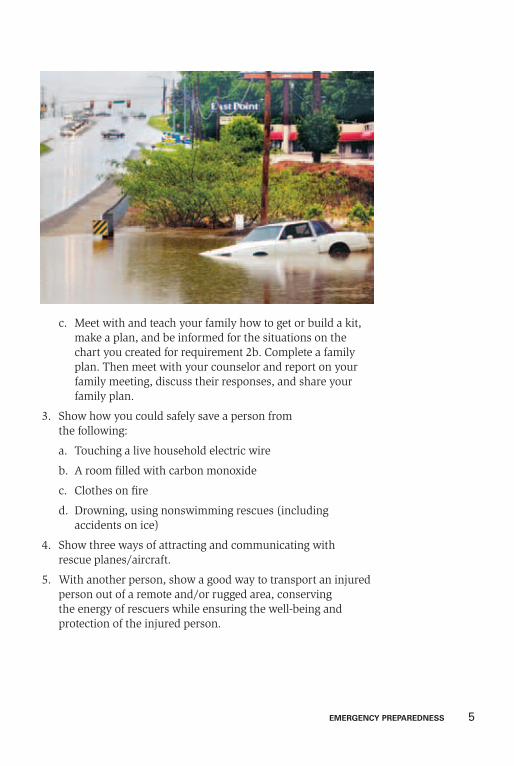
c. Meet with and teach your family how to get or build a kit, make a plan, and be informed for the situations on the chart you created for requirement 2b. Complete a family plan. Then meet with your counselor and report on your family meeting, discuss their responses, and share your family plan.
3. Show how you could safely save a person from the following:
a. Touching a live household electric wire
b. A room filled with carbon monoxide
c. Clothes on fire
d. Drowning, using nonswimming rescues (including accidents on ice)
4. Show three ways of attracting and communicating with rescue planes/aircraft.
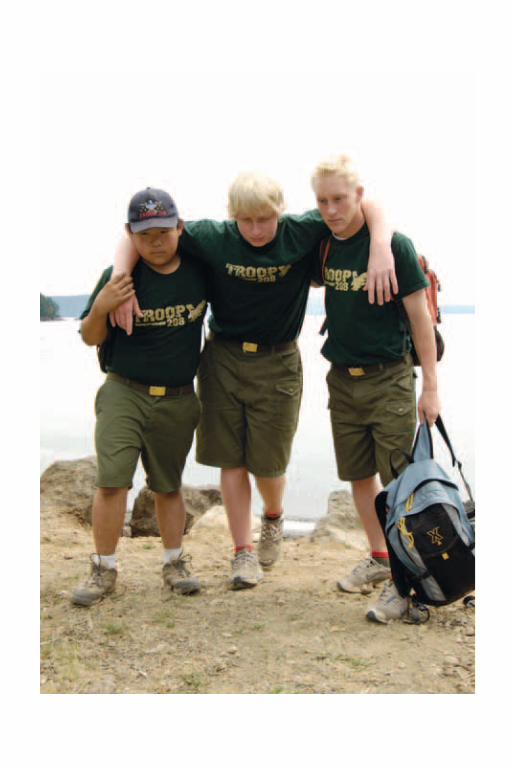
5. With another person, show a good way to transport an injured person out of a remote and/or rugged area, conserving the energy of rescuers while ensuring the well-being and protection of the injured person.
6 EmERgEnCy PREPAREdnESS
6. Do the following:
a. Tell the things a group of Scouts should be prepared to do, the training they need, and the safety precautions they should take for the following emergency services:
(1) Crowd and traffic control
(2) Messenger service and communication
(3) Collection and distribution services
(4) Group feeding, shelter, and sanitation
b. Identify the government or community agencies that nor-mally handle and prepare for the emergency services listed under 6a, and explain to your counselor how a group of Scouts could volunteer to help in the event of these types of emergencies.
c. Find out who is your community’s emergency manage- ment director and learn what this person does to prepare, respond to, recover from, and mitigate and prevent emergency situations in your community. Discuss this information with your counselor, and apply what you discover to the chart you created for requirement 2b.
7. Take part in an emergency service project, either a real one or a practice drill, with a Scouting unit or a community agency.
8. Do the following:
a. Prepare a written plan for mobilizing your troop when needed to do emergency service. If there is already a plan, explain it. Tell your part in making it work.
b. Take part in at least one troop mobilization. Before the exercise, describe your part to your counselor. Afterward, conduct an “after-action” lesson, discussing what you learned during the exercise that required changes or adjustments to the plan.
EmERgEnCy PREPAREdnESS 7
c. Prepare a personal emergency service pack for a mobili-zation call. Prepare a family emergency kit (suitcase or waterproof box) for use by your family in case an emergency evacuation is needed. Explain the needs and uses of the contents.
9. Do ONE of the following:
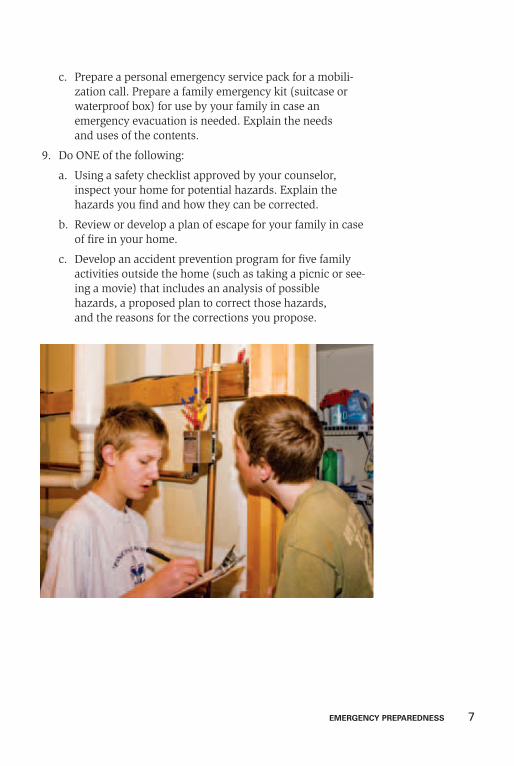
a. Using a safety checklist approved by your counselor, inspect your home for potential hazards. Explain the hazards you find and how they can be corrected.
b. Review or develop a plan of escape for your family in case of fire in your home.
c. Develop an accident prevention program for five family activities outside the home (such as taking a picnic or see-ing a movie) that includes an analysis of possible hazards, a proposed plan to correct those hazards, and the reasons for the corrections you propose.
EmERgEnCy PREPAREdnESS 9
Contents
Introduction . . . . . . . . . . . . . . . . . . . . . . . . . . . . . . . . . . . . . . . . . 11
Scouts Make a Difference . . . . . . . . . . . . . . . . . . . . . . . . . . . . 12
Emergency Preparedness . . . . . . . . . . . . . . . . . . . . . . . . . . . . 13
First Aid First . . . . . . . . . . . . . . . . . . . . . . . . . . . . . . . . . . . . . . . . 17
Prepare, Respond, Recover, Mitigate and Prevent . . . . . . . . . . . 21
The Four Aspects of Emergency Preparedness . . . . . . . . . . . 22
Questions for Emergency Preparedness . . . . . . . . . . . . . . . . 24
Emergency Packs and Kits . . . . . . . . . . . . . . . . . . . . . . . . . . . 26
Types of Emergencies . . . . . . . . . . . . . . . . . . . . . . . . . . . . . . . . . 31
Emergency in the Home . . . . . . . . . . . . . . . . . . . . . . . . . . . . . 31
Emergency in Your Car . . . . . . . . . . . . . . . . . . . . . . . . . . . . . . 38
Emergency in the Outdoors . . . . . . . . . . . . . . . . . . . . . . . . . . 44
Weather-Related Emergencies . . . . . . . . . . . . . . . . . . . . . . . . 59
Other Emergencies . . . . . . . . . . . . . . . . . . . . . . . . . . . . . . . . . 67
Saving Lives . . . . . . . . . . . . . . . . . . . . . . . . . . . . . . . . . . . . . . . 73
Community Emergency Service . . . . . . . . . . . . . . . . . . . . . . . . . 83
Lending a Helping Hand . . . . . . . . . . . . . . . . . . . . . . . . . . . . . 83
Emergency Mobilization Plans and Preparation . . . . . . . . . . 88
Getting Involved: Emergency Service Projects . . . . . . . . . . . . 89
Emergency Preparedness Resources . . . . . . . . . . . . . . . . . . . . . . 93
EmERgEnCy PREPAREdnESS 11
.Introduction
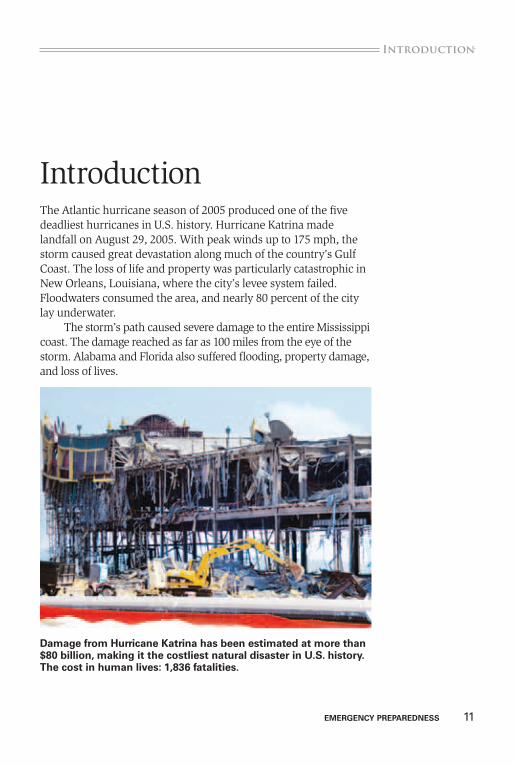
IntroductionThe Atlantic hurricane season of 2005 produced one of the five deadliest hurricanes in U.S. history. Hurricane Katrina made landfall on August 29, 2005. With peak winds up to 175 mph, the storm caused great devastation along much of the country’s Gulf Coast. The loss of life and property was particularly catastrophic in New Orleans, Louisiana, where the city’s levee system failed. Floodwaters consumed the area, and nearly 80 percent of the city lay underwater.
The storm’s path caused severe damage to the entire Mississippi coast. The damage reached as far as 100 miles from the eye of the storm. Alabama and Florida also suffered flooding, property damage, and loss of lives.
damage from Hurricane Katrina has been estimated at more than $80 billion, making it the costliest natural disaster in U.S. history. The cost in human lives: 1,836 fatalities.
12 EmERgEnCy PREPAREdnESS
Introduction.
Scouts make a differenceMore recently, the 2011 tornado season produced the second highest number of tornadoes recorded in a single year in U.S. history with 1,691 reported. One of those tornadoes—an EF-5, which causes the most intense damage—destroyed much of Joplin, Missouri, and became the deadliest tornado in the U.S. since 1950.
With winds reaching more than 200 mph and a track three-quarters of a mile wide and six miles long, the Joplin tornado damaged or destroyed thousands of structures, injured more than 1,000, and resulted in more than 150 deaths.
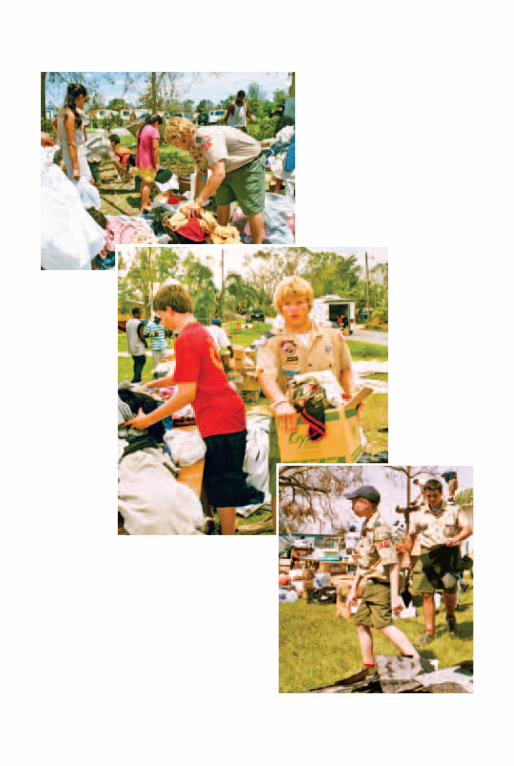
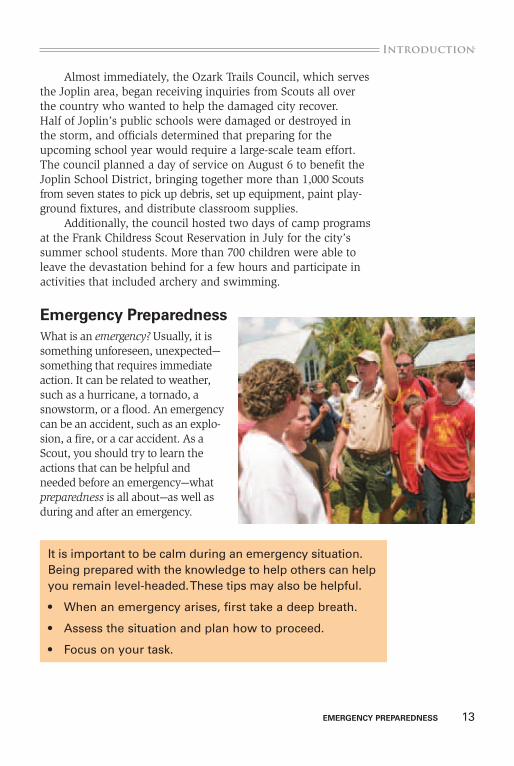
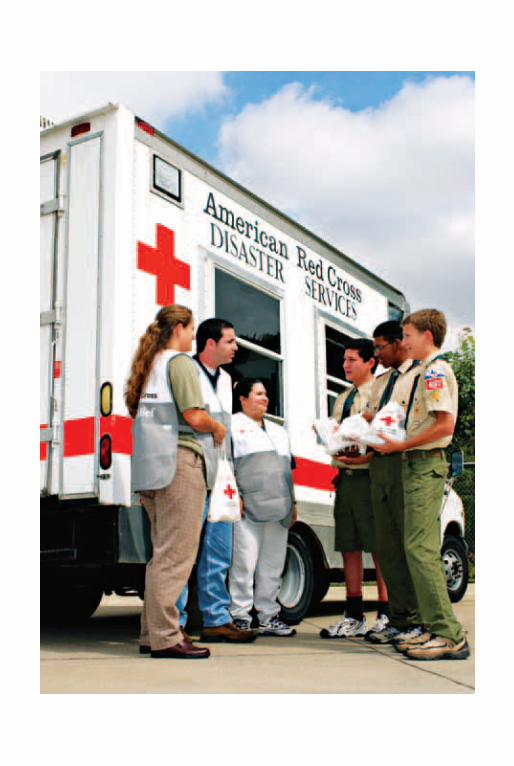
Troop 307 from deshler, nebraska, delivered bottled water, furniture, and other donated supplies after a tornado hit Joplin, missouri, in may 2011.
EmERgEnCy PREPAREdnESS 13
.Introduction
Almost immediately, the Ozark Trails Council, which serves the Joplin area, began receiving inquiries from Scouts all over the country who wanted to help the damaged city recover. Half of Joplin’s public schools were damaged or destroyed in the storm, and officials determined that preparing for the upcoming school year would require a large-scale team effort. The council planned a day of service on August 6 to benefit the Joplin School District, bringing together more than 1,000 Scouts from seven states to pick up debris, set up equipment, paint play-ground fixtures, and distribute classroom supplies.
Additionally, the council hosted two days of camp programs at the Frank Childress Scout Reservation in July for the city’s summer school students. More than 700 children were able to leave the devastation behind for a few hours and participate in activities that included archery and swimming.
Emergency PreparednessWhat is an emergency? Usually, it is something unforeseen, unexpected—something that requires immediate action. It can be related to weather, such as a hurricane, a tornado, a snowstorm, or a flood. An emergency can be an accident, such as an explo-sion, a fire, or a car accident. As a Scout, you should try to learn the actions that can be helpful and needed before an emergency—what preparedness is all about—as well as during and after an emergency.
It is important to be calm during an emergency situation. Being prepared with the knowledge to help others can help you remain level-headed. These tips may also be helpful.
• When an emergency arises, first take a deep breath.
• Assess the situation and plan how to proceed.
• Focus on your task.
14 EmERgEnCy PREPAREdnESS
Introduction.
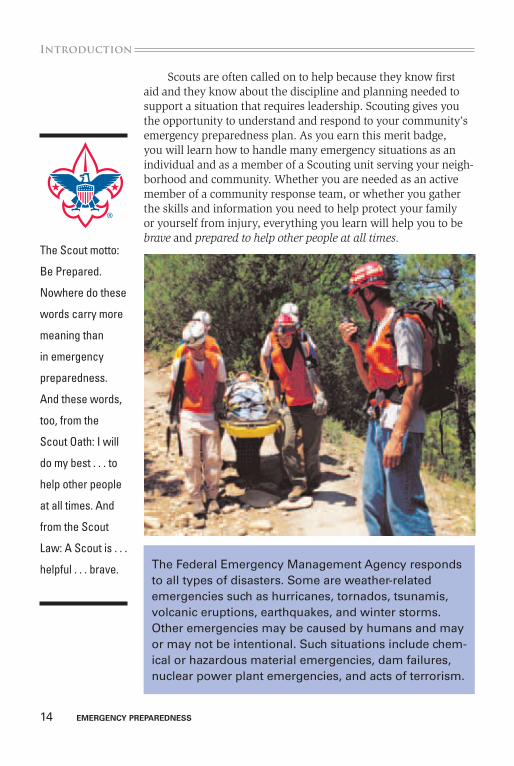
Scouts are often called on to help because they know first aid and they know about the discipline and planning needed to support a situation that requires leadership. Scouting gives you the opportunity to understand and respond to your community’s emergency preparedness plan. As you earn this merit badge, you will learn how to handle many emergency situations as an individual and as a member of a Scouting unit serving your neigh-borhood and community. Whether you are needed as an active member of a community response team, or whether you gather the skills and information you need to help protect your family or yourself from injury, everything you learn will help you to be brave and prepared to help other people at all times.
The Federal Emergency Management Agency responds to all types of disasters. Some are weather-related emergencies such as hurricanes, tornados, tsunamis, volcanic eruptions, earthquakes, and winter storms. Other emergencies may be caused by humans and may or may not be intentional. Such situations include chem-ical or hazardous material emergencies, dam failures, nuclear power plant emergencies, and acts of terrorism.
The Scout motto:
Be Prepared.
Nowhere do these
words carry more
meaning than
in emergency
preparedness.
And these words,
too, from the
Scout Oath: I will
do my best . . . to
help other people
at all times. And
from the Scout
Law: A Scout is . . .
helpful . . . brave.
EmERgEnCy PREPAREdnESS 15
.Introduction
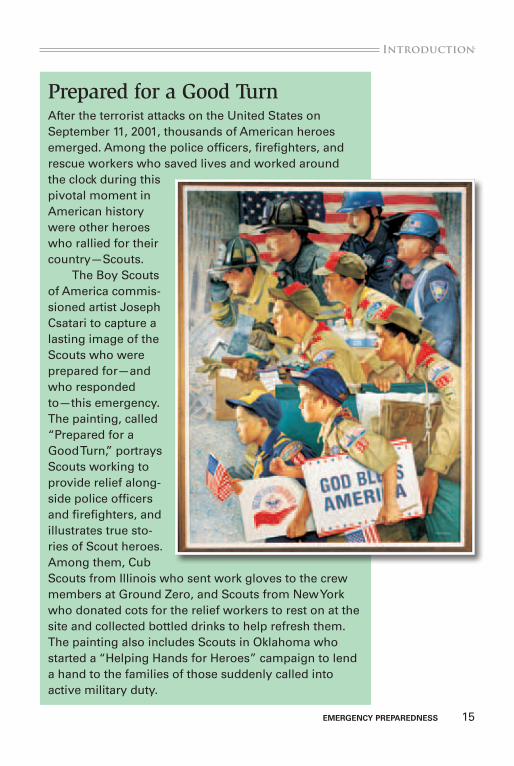
Prepared for a Good TurnAfter the terrorist attacks on the United States on September 11, 2001, thousands of American heroes emerged. Among the police officers, firefighters, and rescue workers who saved lives and worked around the clock during this pivotal moment in American history were other heroes who rallied for their country—Scouts.
The Boy Scouts of America commis-sioned artist Joseph Csatari to capture a lasting image of the Scouts who were prepared for—and who responded to—this emergency. The painting, called “Prepared for a Good Turn,” portrays Scouts working to provide relief along-side police officers and firefighters, and illustrates true sto-ries of Scout heroes. Among them, Cub Scouts from Illinois who sent work gloves to the crew members at Ground Zero, and Scouts from New York who donated cots for the relief workers to rest on at the site and collected bottled drinks to help refresh them. The painting also includes Scouts in Oklahoma who started a “Helping Hands for Heroes” campaign to lend a hand to the families of those suddenly called into active military duty.
EmERgEnCy PREPAREdnESS 17
.First aid First
First Aid FirstThe first requirement for this merit badge is to earn the First Aid merit badge, because first aid is emergency preparedness in action. You need to be able to recognize what is wrong with a person and then react to the emergency with the correct treatment until medical help arrives.
You should know first aid so well that you would be able to react to any situation immediately. What would you do in these situations?
• You are eating pizza with some friends. Suddenly, your friend’s little sister darts in and grabs some pizza. As she runs away giggling and eating, she trips and starts chok-ing. She turns blue and stops breathing.
• You are camping out with your patrol. During some free time, you offer to take a new patrol member on a hike around the lake. When you are halfway around the lake, he says his heel is so sore he can hardly walk. He takes off his shoe (he is wearing old running shoes rather than sturdy hiking boots) and finds a huge blister. You have two miles to walk in either direction to get back to camp and the first-aid kit.
• You are horsing around with friends indoors on a rainy day. One buddy pushes another and he falls into a glass-topped coffee table. The glass shatters and gashes his wrist. Blood starts spurting out.
• While skateboarding with a friend, his board hits a crack and he is thrown from it. He is not wearing a helmet. His head hits the cement bank, knocking him unconscious.
Now look at the situations again, and ask yourself how you might have helped to prevent them—another important part of emergency preparedness.
These emergencies call for immediate action. If you have already earned the First Aid merit badge, review those skills so you will be prepared to use them in an emergency.
18 EmERgEnCy PREPAREdnESS
First aid First.
The Latest First Aid for Wounds and CPRMost of us are concerned about the rapid spread of bloodborne pathogens—such as the hepatitis B virus (HBV) and human immunodeficiency virus (HIV), the AIDS virus—and try to avoid exposing ourselves to this hazard. Health professionals and first aiders like those of us in Scouting may find our-selves faced with special problems in this regard.
The First Aid merit badge pamphlet and other BSA handbooks used to advocate direct hand pressure to stop bleeding in injuries. However, this action could involve getting the victim’s blood on the res-cuer’s skin. If the victim has HIV or some other bloodborne disease, the rescuer could be infected with the virus. If the rescuer has open wounds on or near his or her hands, there is the risk of exposure to the victim.
In rescue breathing there is the risk of passing airborne infectious diseases such as influenza from victim to rescuer. But Scout leaders, parents, and youth members should know that there is no evidence that a rescuer can be infected by the hepatitis B virus or HIV either through contact with human saliva or by giving rescue breathing. Studies show that both hepatitis B and HIV are bloodborne illnesses.
The BSA has checked with experts in the federal government’s Centers for Disease Control and Prevention and with the American Red Cross. These authorities suggest that we should:
• Maintain the BSA’s tradition of rendering first aid to those in need.
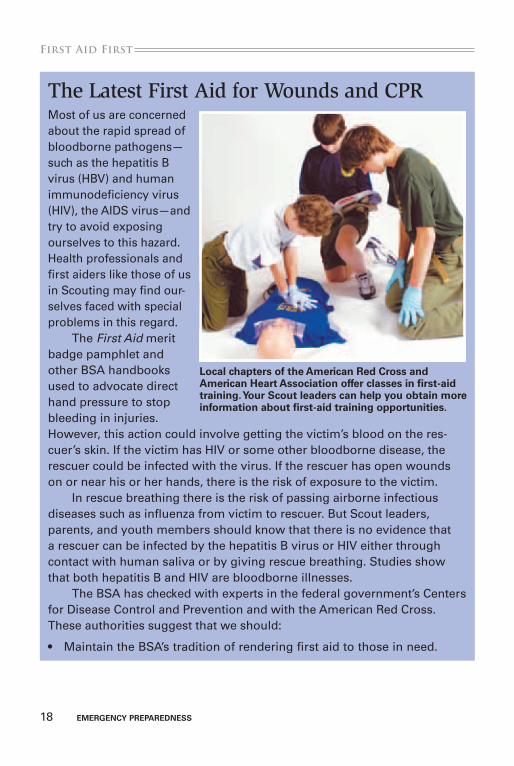
Local chapters of the American Red Cross and American Heart Association offer classes in first-aid training. your Scout leaders can help you obtain more information about first-aid training opportunities.
EmERgEnCy PREPAREdnESS 19
.First aid First
• Recognize that very often the victims we treat with first aid are friends and family members with whose health we are familiar. Therefore, in such cases, except when we know they have infectious diseases, we should not hesitate to render first aid.
The BSA Health and Safety Committee recommends the following.
Treat all blood and other bodily fluids as if they are contaminated with bloodborne viruses. Do not use bare hands to stop bleeding; always use a protective barrier; always wash exposed skin areas with water and soap immediately after treating the victim.
Have available and use personal protective equipment that helps prevent direct contact with infected materials. This equipment includes disposable, nonlatex gloves (nitrile or vinyl) and breathing barriers used when performing rescue breathing.
To help reduce the risk of getting or transmitting infectious disease, follow these guidelines for the use of protective equipment.
• Wear disposable, single-use gloves whenever giving care, particularly if there is risk of contact with blood or bodily fluids.
• Wear protective coverings such as a mask, eyewear, or a gown when you are likely to come in contact with blood or other bodily fluids that may splash.
• Cover any cuts, scrapes, or sores prior to putting on protective equipment.
• Use breathing barriers such as resuscitation masks or face shields when giving rescue breaths. A breathing barrier with a one-way HEPA valve offers the best protection.
• Remove disposable gloves without contacting the soiled part of the gloves, and dispose of them in a proper container.
• Change gloves before you care for a different victim.
• Remove jewelry such as rings, bracelets, and watches before putting on disposable gloves.
• Do not clean or reuse disposable gloves.
• Do not use disposable gloves that are discolored, torn, or punctured.
EmERgEnCy PREPAREdnESS 21
.Prepare, respond, recover, mitigate and Prevent
Prepare, Respond, Recover, Mitigate and PreventIn many ways, the world you live in today is much safer than the world in which your parents and grandparents grew up. For instance, medical advances today give us better protection from some diseases that were devastating in the past, such as smallpox. Weather forecasting technology allows for more accurate predic-tions and better planning for inclement weather.
Many institutions help us to be safer and deal with emergen-cies, too. The Occupational Safety and Health Administration helps ensure safe and healthful workplaces for employees in the United States. The Federal Emergency Management Agency has the mission of helping citizens plan for and respond to disasters and emergencies of all kinds. The American Red Cross works around the world to help people in need.
But it is not enough to rely on medicine, technology, institutions, or the actions of others to keep us prepared and safe. Look carefully at your home and your community, and educate yourself about potential dangers. As you work on requirements for the Emergency Preparedness merit badge, pay close attention to four things: preparedness, response, recovery, and mitigation and prevention.
Being prepared does not mean taking risk needlessly. In situations where a Scout lacks necessary skill or knowledge because he has not had the training or experience or when equipment is unavailable or is inadequate, the Scout has an obligation to advise his supervisor of the unsafe situation and to propose alternative solutions.
22 EmERgEnCy PREPAREdnESS
Prepare, respond, recover, mitigate and Prevent.
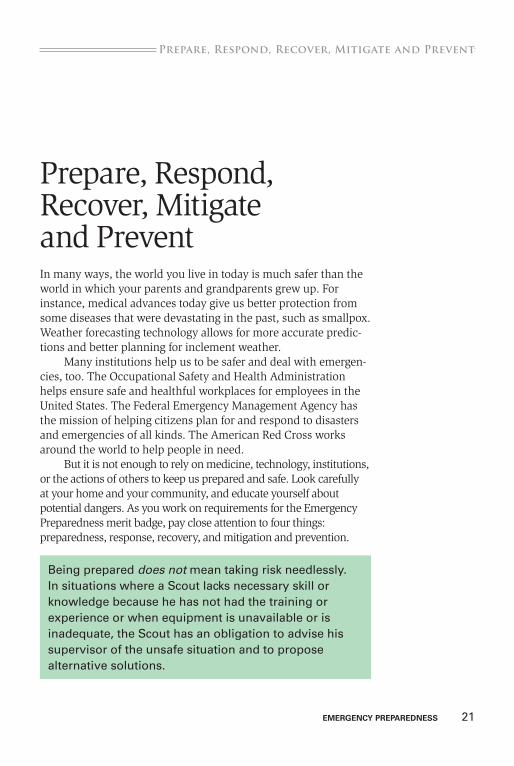
The Four Aspects of Emergency PreparednessEmergency personnel, such as Red Cross and FEMA workers, use many of the same terms when talking about emergency management. That is just one reason it is a good idea to become familiar with such terms: if you find yourself working with emergency personnel, you will understand what your actions are helping to accomplish.
1. Preparedness. When you take actions to prepare for emergencies, you recognize the possible threats from natural and other disasters. Making a plan and practicing it, assem-bling an emergency or disaster supplies kit, and installing warning devices are all actions you can take to prepare for an emergency.
2. Response. In this phase of emergency management, you may be called upon to help with shelter, first aid, and other activities. On a personal level, your response to an emergency can take many forms, such as evacuating an area. Your response can help reduce the occurrence of secondary damage.
3. Recovery. After a disaster or other emergency, the goal is to try to get things back to “normal.” In addition to rebuild-
ing and repairing property, there is also work to be done to try to bring physical and emotional
health back to a stable condition.
4. mitigation and Prevention. The word “mitigate” means “to lessen in force or intensity,” and “to make less severe.” Prevention goes hand-in-hand with mitigation, as do response and recovery. It also can make the difference between inconvenience and tragedy. Mitigation often involves managing risk—becoming aware of, and responding to, risks and hazards. Mitigation efforts can even help prevent an emergency from happening.
It is important to
be prepared to
offer assistance
in an emergency
situation.
However, be
aware that you
may never need
to use your
training and skills.
EmERgEnCy PREPAREdnESS 23
.Prepare, respond, recover, mitigate and Prevent
Let’s say you live in an area that has a high tornado risk. You can prepare by recognizing that a tornado emergency could happen to you and making a plan for your family in case of that emergency. You can respond by knowing what actions you will take ahead of time. You may have to recover from a tornado that damages your home. Services and resources can be obtained from the Red Cross or other providers. But all along the way, you can take actions that mitigate, or lessen, the impact on your family, and help prevent additional injuries and accidents. For instance, watching the news and being familiar with the tornado sirens that sound in your area could give you more time to respond. Taking shelter away from windows in a basement or interior room of the house could lessen your chances of being hit by flying objects. Even after a tornado, as you help with rebuilding efforts, wearing a sturdy pair of work gloves can help keep you from getting cuts and infections from handling debris.
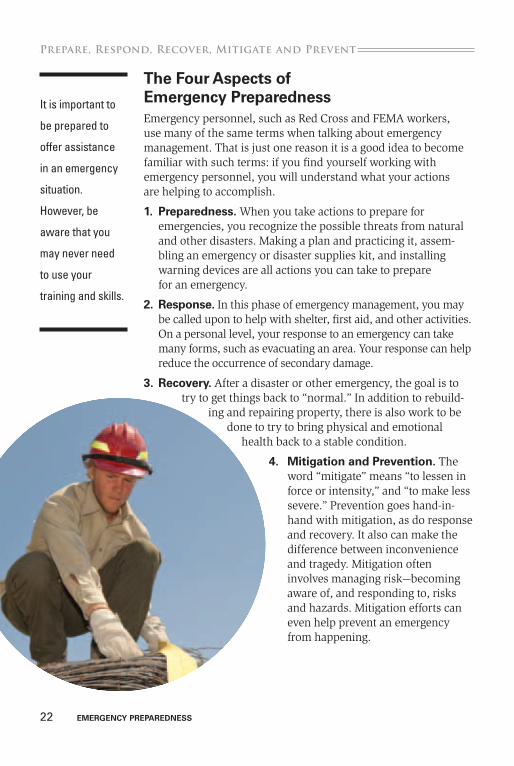
A careful driver who follows traffic laws and avoids distractions such as cell phone use or texting is less likely to have an accident. Such a driver is taking preventative actions. However, even the best driver may not be able to respond quickly enough to prevent a collision caused by another driver los-ing control of his car. In that case, prior decisions to wear safety belts and to use appropriate restraints for infants and small children will help mitigate the emergency; that is, they will reduce or lessen the chance of serious injury.
Likewise, household fires can be prevented by careful attention to potential sources: People can clear debris from around a furnace, not over-load electrical circuits, and be attentive when using candles or fireplaces. If a fire does break out, smoke alarms and a preplanned escape route will help mitigate the situation. In other words, the emergency is less severe if everyone gets out of the house alive. In public buildings such as schools, automatic sprinkler systems can mitigate a fire by keeping it from spread-ing throughout the building.
24 EmERgEnCy PREPAREdnESS
Prepare, respond, recover, mitigate and Prevent.
Questions for Emergency PreparednessHere are the kinds of questions you may ask yourself as you look around.1. Questions that will help you prepare for a risky situation or
possibility of an emergency or accident occurring. • Have I prepared a disaster supplies kit with supplies that
will last for at least three days? Is the kit packed and stored in an easy-to-access area?
• Have I made an emergency plan with family members in case of a disaster? Have I planned the quickest escape routes from my home and evacuation routes from my neighborhood? Does my family have a meeting place outside our home in case of a fire and another place outside the neighborhood in case we cannot return home? Do we have an out-of-town contact person to call with information about our safety and location in case local lines are jammed?
• Do I know the safe places to go within my home in case my family and I need shelter during extreme weather events such as a tornado? Have I posted emergency numbers near our home telephone where they can easily be found?
• Do I know how to be informed in case of an emergency? Do I know how local authorities might contact me in the event of a disaster, such as using warning sirens to sound an alert? Do I know which radio and television stations broadcast emergency warning information?
• Do I know which hazards are most likely to happen in my community? Do I live in an area that may experience dan-gerous weather (heat waves, hurricanes, tornadoes, blizzard conditions)? During what time of year?
2. Questions that will help you respond to an emergency situation in the best way you can.
• How can I plan before a crisis? Do I know what actions to take for a potential emergency? Have I gathered and positioned supplies and contact numbers that might be needed? Can I help educate and train people about safety and preparedness? Do I know which neighbors may need help?
An important
concern during
an emergency
situation such as
a natural disaster
is access to clean
water. See “Family
Emergency Kit”
later in this chapter
for information
about how much
clean water to
keep on hand
in case of
an emergency.
EmERgEnCy PREPAREdnESS 25
.Prepare, respond, recover, mitigate and Prevent
• How can I react after a crisis? Is there a family or community plan for reaction that I should know about? What resources might be mobilized and needed, and how can I help?
3. Questions that will help you and your family to recover from a dangerous situation or emergency.
• After a disaster, how can I help clean up the damage? Do I have the skills and tools to help repair and rebuild my home and my community?
• How can I help myself and my family recover emotionally from the disaster?
• Do I understand that physical recovery and emotional recovery take time?
4. Questions that will help you mitigate, or lessen, and prevent a dangerous situation or emergency when you can.
• What can I do to make my home safer from fire or explosion? How do I check for household hazards?
• How can I help minimize, or lessen, the damage that might be caused during an emergency (during violent weather, for instance)? Can I help make sure that no one would be injured?
• Can I help make sure that people are acting in a safe man-ner during an emergency or dangerous situation, such as when I am hiking with my troop in the wilderness?
Some emergency
responders
specialize in
emotional first aid
so they are able
to talk to and
treat a survivor
immediately
following a
traumatic event.
It’s normal for
a traumatic
experience to
cause a victim to
feel fear, sadness,
or even anger.
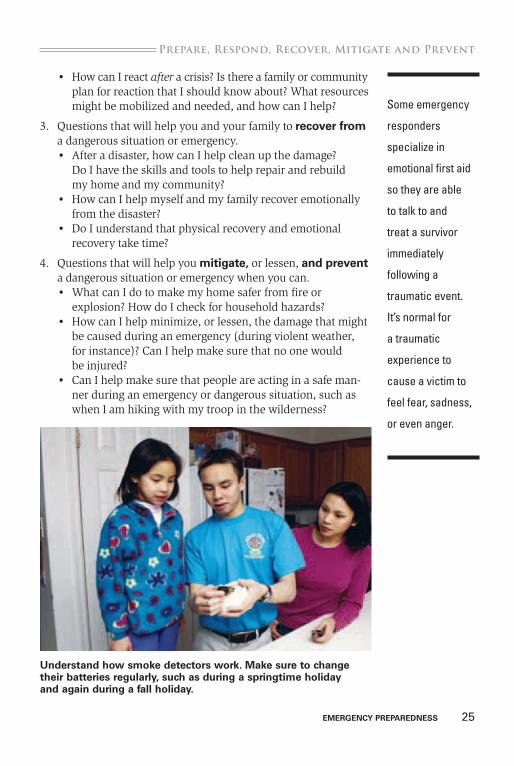
Understand how smoke detectors work. make sure to change their batteries regularly, such as during a springtime holiday and again during a fall holiday.
26 EmERgEnCy PREPAREdnESS
Prepare, respond, recover, mitigate and Prevent.
Emergency Packs and KitsThe following emergency kits will provide you with items that will make your life easier in the event of an emergency. Also, by assembling and maintaining such kits, you are thinking ahead about how to deal with possible emergencies before they develop.
Family Emergency KitIf you have received a warning that requires you and your family to evacuate your home, you may have little time to throw together a few items or dash to a well-stocked emergency shelter. It would be better to have a box or suitcase of emergency supplies and water on hand to meet your family’s needs for a few days or, better, for a week. These items come in handy in an emergency even if you do not have to evacuate. Some families keep their supplies in a basement shelter area or in a storm cellar, if they have one.
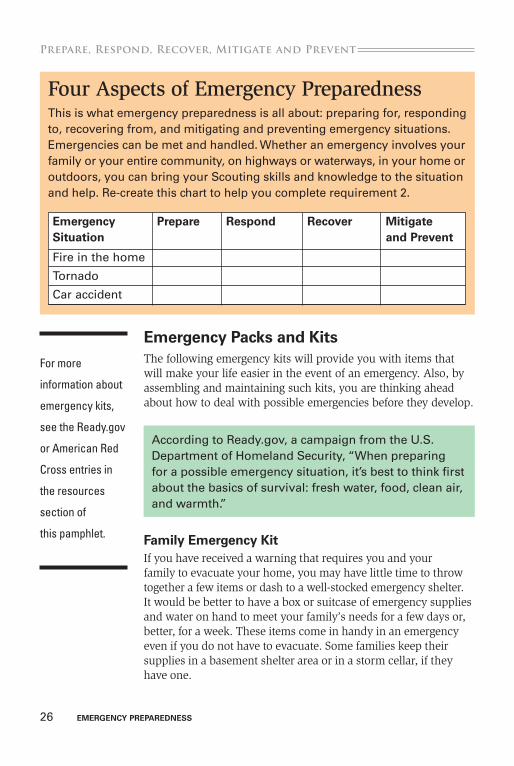
Four Aspects of Emergency PreparednessThis is what emergency preparedness is all about: preparing for, responding to, recovering from, and mitigating and preventing emergency situations. Emergencies can be met and handled. Whether an emergency involves your family or your entire community, on highways or waterways, in your home or outdoors, you can bring your Scouting skills and knowledge to the situation and help. Re-create this chart to help you complete requirement 2.
Emergency Prepare Respond Recover mitigate Situation and Prevent
Fire in the home
Tornado
Car accident
According to Ready.gov, a campaign from the U.S. Department of Homeland Security, “When preparing for a possible emergency situation, it’s best to think first about the basics of survival: fresh water, food, clean air, and warmth.”
For more
information about
emergency kits,
see the Ready.gov
or American Red
Cross entries in
the resources
section of
this pamphlet.
EmERgEnCy PREPAREdnESS 27
.Prepare, respond, recover, mitigate and Prevent
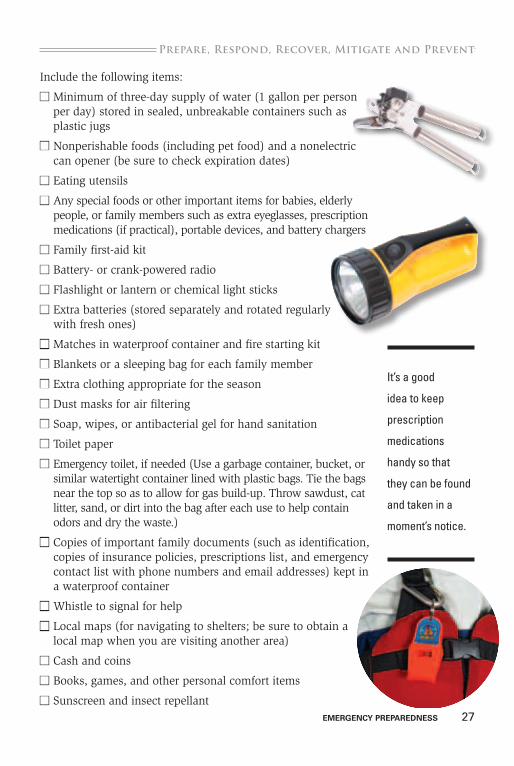
Include the following items:
P Minimum of three-day supply of water (1 gallon per person per day) stored in sealed, unbreakable containers such as plastic jugs
P Nonperishable foods (including pet food) and a nonelectric can opener (be sure to check expiration dates)
P Eating utensils
P Any special foods or other important items for babies, elderly people, or family members such as extra eyeglasses, prescription medications (if practical), portable devices, and battery chargers
P Family first-aid kit
P Battery- or crank-powered radio
P Flashlight or lantern or chemical light sticks
P Extra batteries (stored separately and rotated regularly with fresh ones)
P Matches in waterproof container and fire starting kit
P Blankets or a sleeping bag for each family member
P Extra clothing appropriate for the season
P Dust masks for air filtering
P Soap, wipes, or antibacterial gel for hand sanitation
P Toilet paper
P Emergency toilet, if needed (Use a garbage container, bucket, or similar watertight container lined with plastic bags. Tie the bags near the top so as to allow for gas build-up. Throw sawdust, cat litter, sand, or dirt into the bag after each use to help contain odors and dry the waste.)
P Copies of important family documents (such as identification, copies of insurance policies, prescriptions list, and emergency contact list with phone numbers and email addresses) kept in a waterproof container
P Whistle to signal for help
P Local maps (for navigating to shelters; be sure to obtain a local map when you are visiting another area)
P Cash and coins
P Books, games, and other personal comfort items
P Sunscreen and insect repellant
It’s a good
idea to keep
prescription
medications
handy so that
they can be found
and taken in a
moment’s notice.
28 EmERgEnCy PREPAREdnESS
Prepare, respond, recover, mitigate and Prevent.
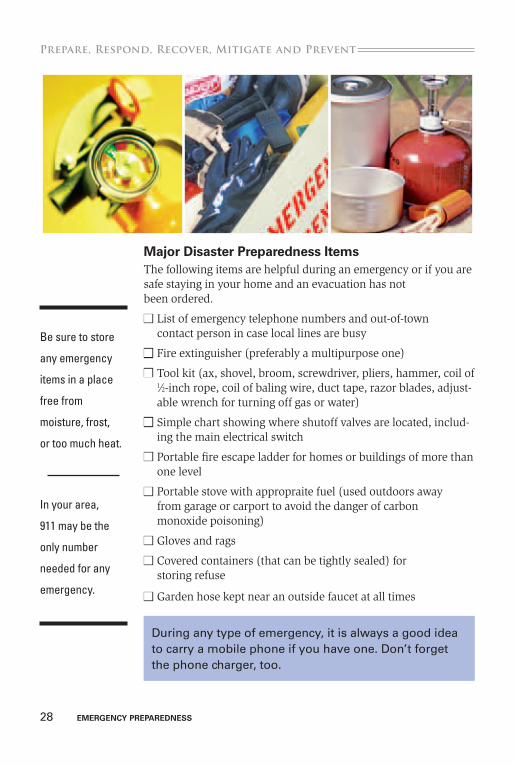
major disaster Preparedness ItemsThe following items are helpful during an emergency or if you are safe staying in your home and an evacuation has not been ordered.
P List of emergency telephone numbers and out-of-town contact person in case local lines are busy
P Fire extinguisher (preferably a multipurpose one)
P Tool kit (ax, shovel, broom, screwdriver, pliers, hammer, coil of 1⁄2-inch rope, coil of baling wire, duct tape, razor blades, adjust-able wrench for turning off gas or water)
P Simple chart showing where shutoff valves are located, includ-ing the main electrical switch
P Portable fire escape ladder for homes or buildings of more than one level
P Portable stove with appropraite fuel (used outdoors away from garage or carport to avoid the danger of carbon monoxide poisoning)
P Gloves and rags
P Covered containers (that can be tightly sealed) for storing refuse
P Garden hose kept near an outside faucet at all times
Be sure to store
any emergency
items in a place
free from
moisture, frost,
or too much heat.
In your area,
911 may be the
only number
needed for any
emergency.
During any type of emergency, it is always a good idea to carry a mobile phone if you have one. Don’t forget the phone charger, too.
EmERgEnCy PREPAREdnESS 29
.Prepare, respond, recover, mitigate and Prevent
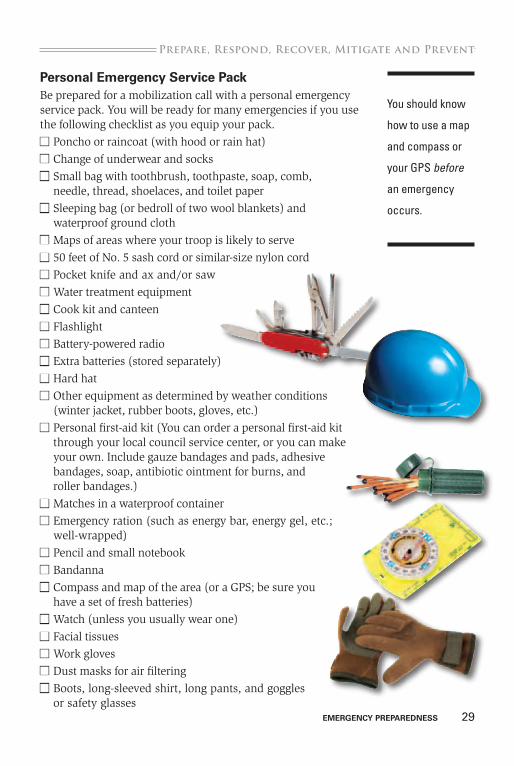
Personal Emergency Service PackBe prepared for a mobilization call with a personal emergency service pack. You will be ready for many emergencies if you use the following checklist as you equip your pack.
P Poncho or raincoat (with hood or rain hat)
P Change of underwear and socks
P Small bag with toothbrush, toothpaste, soap, comb, needle, thread, shoelaces, and toilet paper
P Sleeping bag (or bedroll of two wool blankets) and waterproof ground cloth
P Maps of areas where your troop is likely to serve
P 50 feet of No. 5 sash cord or similar-size nylon cord
P Pocket knife and ax and/or saw P Water treatment equipment
P Cook kit and canteen
P Flashlight
P Battery-powered radio
P Extra batteries (stored separately)
P Hard hat
P Other equipment as determined by weather conditions (winter jacket, rubber boots, gloves, etc.)
P Personal first-aid kit (You can order a personal first-aid kit through your local council service center, or you can make your own. Include gauze bandages and pads, adhesive bandages, soap, antibiotic ointment for burns, and roller bandages.)
P Matches in a waterproof container
P Emergency ration (such as energy bar, energy gel, etc.; well-wrapped)
P Pencil and small notebook
P Bandanna
P Compass and map of the area (or a GPS; be sure you have a set of fresh batteries)
P Watch (unless you usually wear one)
P Facial tissues
P Work gloves
P Dust masks for air filtering
P Boots, long-sleeved shirt, long pants, and goggles or safety glasses
You should know
how to use a map
and compass or
your GPS before
an emergency
occurs.
EmERgEnCy PREPAREdnESS 31
.Types of Emergencies
Types of EmergenciesThere are many types of emergencies and many ways they can occur. Becoming familiar with emergencies and their circum-stances can help you prepare, respond, recover, and mitigate and prevent. Knowledge of hazards and dangers can help prevent emergencies, too.
Emergency in the HomeMost people think of their homes as a safe haven. While our homes are safe places, accidents can happen in or near them. With good prevention techniques, many accidents can be avoided. Learn to recognize possible hazards in your environ-ment or unsafe behaviors. However, in the case of a true emergency, your response to the emergency situation can help to prevent injuries or even to save lives.
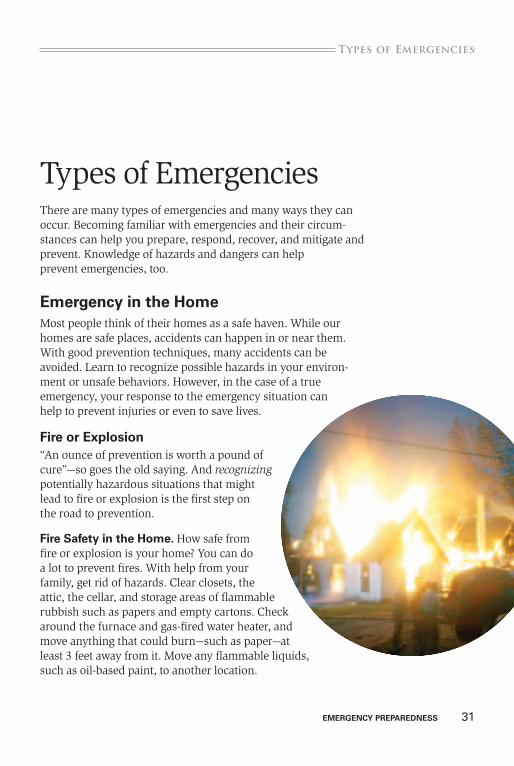
Fire or Explosion“An ounce of prevention is worth a pound of cure”—so goes the old saying. And recognizing potentially hazardous situations that might lead to fire or explosion is the first step on the road to prevention.
Fire Safety in the Home. How safe from fire or explosion is your home? You can do a lot to prevent fires. With help from your family, get rid of hazards. Clear closets, the attic, the cellar, and storage areas of flammable rubbish such as papers and empty cartons. Check around the furnace and gas-fired water heater, and move anything that could burn—such as paper—at least 3 feet away from it. Move any flammable liquids, such as oil-based paint, to another location.
32 EmERgEnCy PREPAREdnESS
Types of Emergencies.
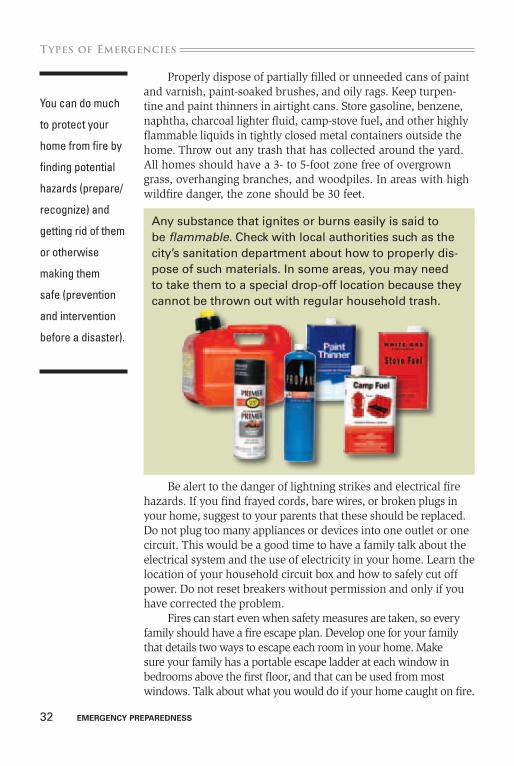
Properly dispose of partially filled or unneeded cans of paint and varnish, paint-soaked brushes, and oily rags. Keep turpen-tine and paint thinners in airtight cans. Store gasoline, benzene, naphtha, charcoal lighter fluid, camp-stove fuel, and other highly flammable liquids in tightly closed metal containers outside the home. Throw out any trash that has collected around the yard. All homes should have a 3- to 5-foot zone free of overgrown grass, overhanging branches, and woodpiles. In areas with high wildfire danger, the zone should be 30 feet.
Be alert to the danger of lightning strikes and electrical fire hazards. If you find frayed cords, bare wires, or broken plugs in your home, suggest to your parents that these should be replaced. Do not plug too many appliances or devices into one outlet or one circuit. This would be a good time to have a family talk about the electrical system and the use of electricity in your home. Learn the location of your household circuit box and how to safely cut off power. Do not reset breakers without permission and only if you have corrected the problem.
Fires can start even when safety measures are taken, so every family should have a fire escape plan. Develop one for your family that details two ways to escape each room in your home. Make sure your family has a portable escape ladder at each window in bedrooms above the first floor, and that can be used from most windows. Talk about what you would do if your home caught on fire.
You can do much
to protect your
home from fire by
finding potential
hazards (prepare/
recognize) and
getting rid of them
or otherwise
making them
safe (prevention
and intervention
before a disaster).
Any substance that ignites or burns easily is said to be flammable. Check with local authorities such as the city’s sanitation department about how to properly dis-pose of such materials. In some areas, you may need to take them to a special drop-off location because they cannot be thrown out with regular household trash.
EmERgEnCy PREPAREdnESS 33
.Types of Emergencies
For further reference and more fire preparedness ideas, see the “Fire Safety Checklist” in the Fire Safety merit badge pamphlet.
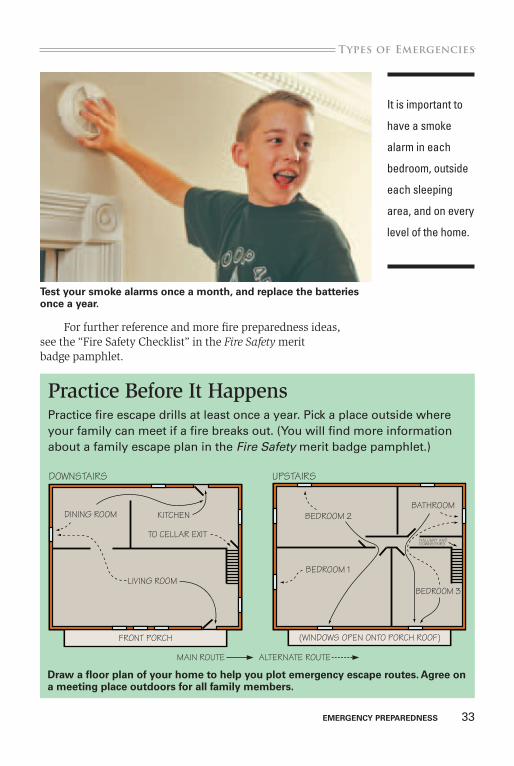
Test your smoke alarms once a month, and replace the batteries once a year.
Practice Before It HappensPractice fire escape drills at least once a year. Pick a place outside where your family can meet if a fire breaks out. (You will find more information about a family escape plan in the Fire Safety merit badge pamphlet.)
Main route alternate route
(WindoWs open onto porch roof)
BedrooM 1
BedrooM 3
hallWay and doWnstairs
BathrooMBedrooM 2
upstairsdoWnstairs
dining rooM Kitchen
to cellar exit
living rooM
front porch
draw a floor plan of your home to help you plot emergency escape routes. Agree on a meeting place outdoors for all family members.
It is important to
have a smoke
alarm in each
bedroom, outside
each sleeping
area, and on every
level of the home.
34 EmERgEnCy PREPAREdnESS
Types of Emergencies.
Lifesaving Fire Safety Tips. If you know how to react in the event of a fire in your home, you can prevent injuries and possibly save lives. Teach these tips to your family and discuss them.
1. If there is a fire, warn everyone possible—without endangering your own safety—before investigating the source of the alarm activation. Make sure everyone knows what the fire alarm sounds like.
2. Get out of the building if your escape routes are clear. Keep calm. Walk fast. Do not run.
3. Wait until you are in a safe area, but call 911 or the operator as soon as possible to report the fire. Say, “I want to report a fire,” and tell the operator your address. Do not hang up until the dispatcher says it is OK to do so. Know your present physical location, not just your home address.
4. If you are trapped in a multistory building, call 911 to report your location. If you cannot get to a phone, call for help from a window. Wave a towel to signal for attention.
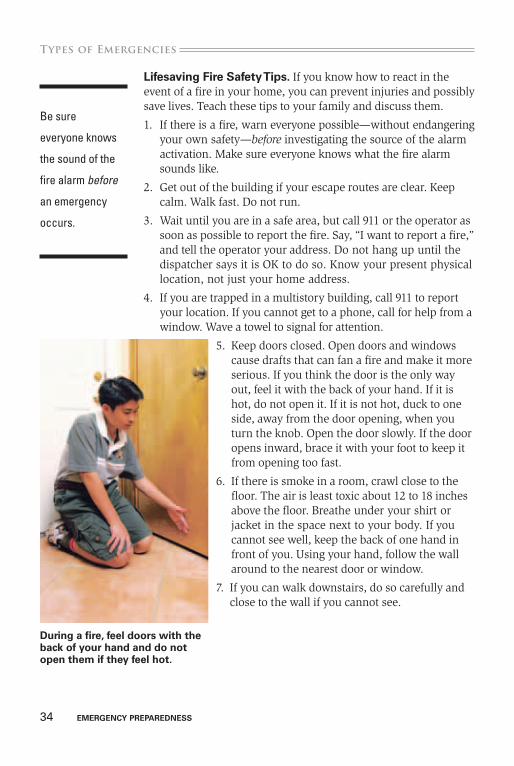
5. Keep doors closed. Open doors and windows cause drafts that can fan a fire and make it more serious. If you think the door is the only way out, feel it with the back of your hand. If it is hot, do not open it. If it is not hot, duck to one side, away from the door opening, when you turn the knob. Open the door slowly. If the door opens inward, brace it with your foot to keep it from opening too fast.
6. If there is smoke in a room, crawl close to the floor. The air is least toxic about 12 to 18 inches above the floor. Breathe under your shirt or jacket in the space next to your body. If you cannot see well, keep the back of one hand in front of you. Using your hand, follow the wall around to the nearest door or window.
7. If you can walk downstairs, do so carefully and close to the wall if you cannot see.
Be sure
everyone knows
the sound of the
fire alarm before
an emergency
occurs.
during a fire, feel doors with the back of your hand and do not open them if they feel hot.
EmERgEnCy PREPAREdnESS 35
.Types of Emergencies
8. Buildings that are two or three stories high should have an escape ladder. If you do not have one, get a sheet or other bright cloth and hang it outside a window to get the attention of people outside. Stay by the window and wait for the fire department to arrive and rescue you. Avoid the urge to jump out of the window—wait for help to arrive. Push towels or clothes (wet is better than dry) against the bottom of the door to keep smoke from entering the room.
9. Absolutely never use an elevator during a fire.
10. Remember that children may become very scared and hide under beds or in closets. You can make sure that they practice a fire escape plan so they know the right thing to do in case of a fire.
11. Help guide others along your escape route, but do not delay your escape by trying to rescue someone else. In an emergency, do not place yourself in additional danger! Get out of the burning building to save yourself and those with you. Meet the fire department when it arrives, and tell firefighters where you last saw other people.
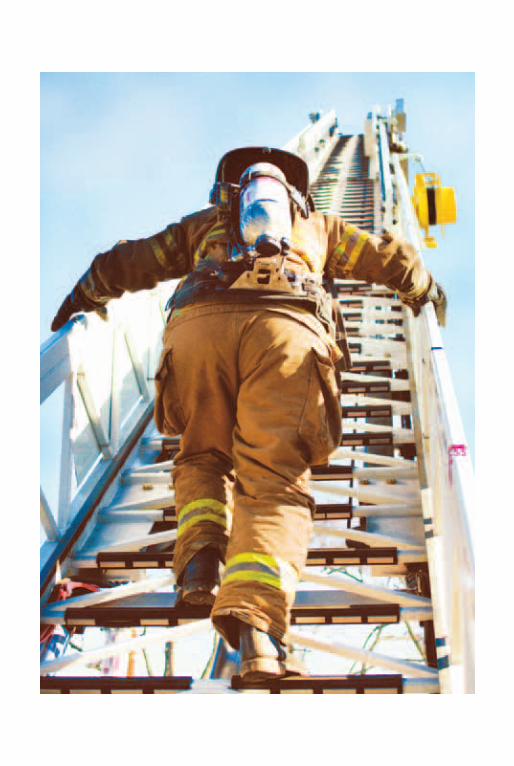
Firefighters have training, protective clothing, and breathing apparatus; let them do the rescuing. You will be most useful by telling them where others might need their help. You will be unable to direct firefighters to someone in trouble if you yourself become a victim of the fire.
Most of the points above are just as important to know for a fire emergency anywhere, such as in a public building. Look them over again and think about how they might apply. And here are three more important points.
• If you are in a hotel room or live in an apartment, be sure you take the key whenever you leave your room or apartment. Don’t get caught in the hallway without it.
• Never go inside a building that is on fire. Wait for the fire department to arrive with the right equipment and gear to rescue people and put the fire out.
• You probably have regular fire drills at school. This is emergency preparedness in action. If you are in school when a fire breaks out, follow your teacher’s instructions. Do not go out on your own.
Never re-enter a
burning building.
36 EmERgEnCy PREPAREdnESS
Types of Emergencies.
gas LeakGases can kill. The fumes from natural gas or propane leaks can cause explosions. Stoves that are left on but not lighted are especially hazardous. If anyone creates a spark in a fume-filled room, an explosion could happen.
Gases, and related fumes such as carbon monoxide, can cause a person to stop breathing, followed by unconsciousness and death. Sources of dangerous fumes include bad connections for furnaces, ovens, stoves, clothes dryers, water heaters, and other gas appliances. Garages, basements, and kitchens are a home’s danger spots.
Smart homeowners have gas fixtures and appliances inspected regularly and keep them in good repair. Have your par-ents check the gas pipes in your home, especially in damp areas such as the basement, to make sure that they are not rusting. Natural gas has a distinctive odor that you can smell.
Call 911 or your fire department or gas company if you think you have a gas leak. Looking for the source of a leak yourself could lead to an explosion, since many things can be an ignition source—even such things as flashlights, mobile phones, light switches, and garage door openers.
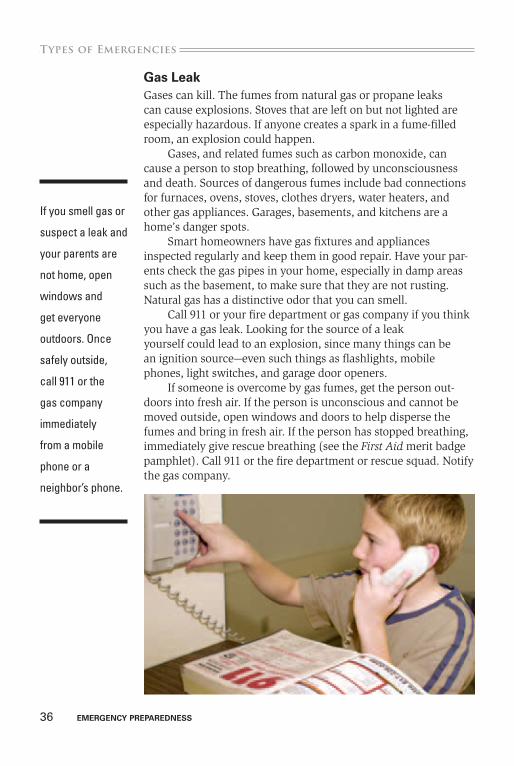
If someone is overcome by gas fumes, get the person out-doors into fresh air. If the person is unconscious and cannot be moved outside, open windows and doors to help disperse the fumes and bring in fresh air. If the person has stopped breathing, immediately give rescue breathing (see the First Aid merit badge pamphlet). Call 911 or the fire department or rescue squad. Notify the gas company.
If you smell gas or
suspect a leak and
your parents are
not home, open
windows and
get everyone
outdoors. Once
safely outside,
call 911 or the
gas company
immediately
from a mobile
phone or a
neighbor’s phone.
EmERgEnCy PREPAREdnESS 37
.Types of Emergencies
Carbon Monoxide PoisoningCarbon monoxide (CO) is an odorless and colorless gas—and it can kill. Every year in the United States, CO poisoning kills more than 200 people and sends thousands more to the hospital.
Carbon monoxide gas can come from a lot of places: gas-fired appliances, charcoal grills, wood-burning furnaces or fireplaces, power generators, chain saws and other gas-powered tools, and cars. Running a car or a generator in a closed garage or even under a carport, for instance, is a recipe for disaster.
Everyone is at risk for CO poisoning, but you can do some simple things to prevent a problem:
• Install a CO alarm in your home, and be sure everyone knows the sound of the alarm.
• Make sure your parents have any fuel-burning appliances, furnaces, and chimneys inspected by a professional at least once a year.
• Never use a charcoal grill in the garage or in your home—only outdoors!
Know the symptoms of carbon monoxide poisoning: headache, dizziness, faintness, and ringing in the ears. A person might yawn a lot or feel like vomiting. If you or someone else feels like this, get outside or open windows right away for fresh air.
If someone is overcome by carbon monoxide poisoning, call 911 for medical help. The person may not be able to breathe. Give rescue breath-ing as you learned to do for the First Aid merit badge. Make sure that all appliances and sources of combustion are turned off. A professional should investigate the source of the CO buildup and repair it.
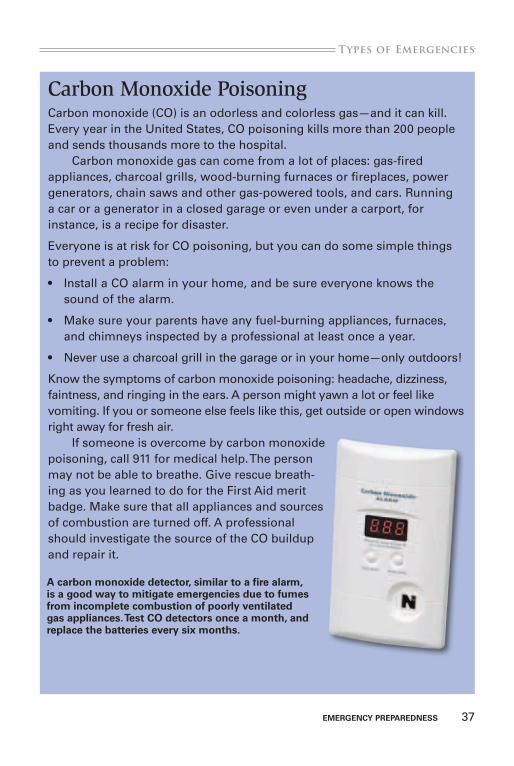
A carbon monoxide detector, similar to a fire alarm, is a good way to mitigate emergencies due to fumes from incomplete combustion of poorly ventilated gas appliances. Test CO detectors once a month, and replace the batteries every six months.
38 EmERgEnCy PREPAREdnESS
Types of Emergencies.
If you get trapped
somewhere while
traveling, remem-
ber that your car
horn can alert
rescuers as far as
a mile downwind.
However, the horn
will not work if the
battery is dead.
In an Emergency, Use the PhoneIn many emergency situations, the first and smartest thing you can do is call for help. In your home, post emergency numbers (such as the fire department, police, and doctor) by all phones. Calling 911 will summon fire, police, and ambulance services. Tell the 911 operator your name and address and what the emergency is; then stay on the line until you are
sure help is on the way. In the case of fire or gas leak, leave immediately and call from a neighbor’s house or use a cell
phone once outside. In the event of a power outage, a corded phone may still work: Phone lines are powered separately. If the phone lines are down, try a mobile phone, which should work as long as the nearby cell tower still has power. If 911 service is not available in
your area, dial “0” and tell the operator your address and your emergency.
Emergency in your CarRoad trips with your family or with your troop can be great fun. But these trips need to be safe, too. Especially because you might be far from home or from immediate help as you travel, preparation is very important.• Consider the weather you might encounter. Prepare for the
worst. Check weather reports and plan travel routes accordingly. If severe weather is threatening, consider delaying your trip.
• Keep at least half a tank of gasoline in the car.• Before you leave, let others know your route and when you
expect to arrive. Advise them of any route or time change.• Pack food, water, medications, and extra clothing (appropriate
for the season and weather conditions).• Carry a wool blanket for warmth, for patient transport, or to
suffocate a fire.• Keep a first-aid kit, signal whistle, flares, and booster cables in
your car. Also carry reflective devices that are not sources of ignition so you can use them safely around spilled flammables or where there is wildfire danger.
• Always buckle up—every time, every seat, every person.
You can check out the Traffic Safety merit badge pamphlet for more information about recognizing and preventing emergency situations in vehicles.
EmERgEnCy PREPAREdnESS 39
.Types of Emergencies
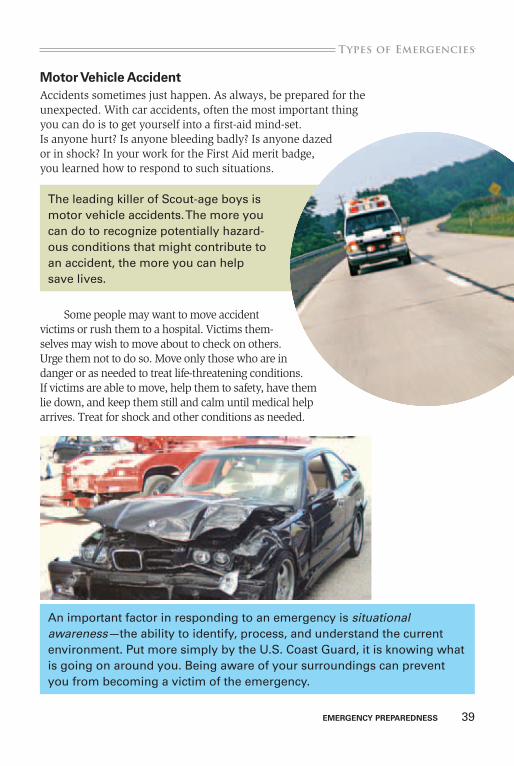
motor Vehicle AccidentAccidents sometimes just happen. As always, be prepared for the unexpected. With car accidents, often the most important thing you can do is to get yourself into a first-aid mind-set. Is anyone hurt? Is anyone bleeding badly? Is anyone dazed or in shock? In your work for the First Aid merit badge, you learned how to respond to such situations.
Some people may want to move accident victims or rush them to a hospital. Victims them-selves may wish to move about to check on others. Urge them not to do so. Move only those who are in danger or as needed to treat life-threatening conditions. If victims are able to move, help them to safety, have them lie down, and keep them still and calm until medical help arrives. Treat for shock and other conditions as needed.
The leading killer of Scout-age boys is motor vehicle accidents. The more you can do to recognize potentially hazard-ous conditions that might contribute to an accident, the more you can help save lives.
An important factor in responding to an emergency is situational awareness—the ability to identify, process, and understand the current environment. Put more simply by the U.S. Coast Guard, it is knowing what is going on around you. Being aware of your surroundings can prevent you from becoming a victim of the emergency.
40 EmERgEnCy PREPAREdnESS
Types of Emergencies.
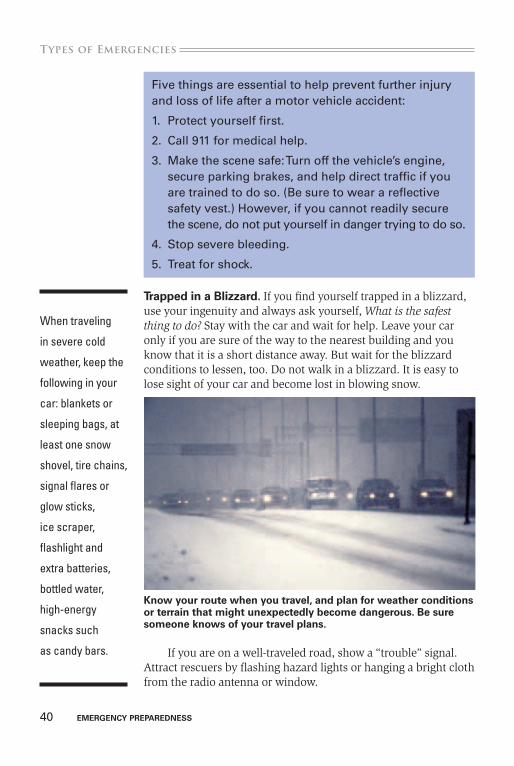
Trapped in a Blizzard. If you find yourself trapped in a blizzard, use your ingenuity and always ask yourself, What is the safest thing to do? Stay with the car and wait for help. Leave your car only if you are sure of the way to the nearest building and you know that it is a short distance away. But wait for the blizzard conditions to lessen, too. Do not walk in a blizzard. It is easy to lose sight of your car and become lost in blowing snow.
If you are on a well-traveled road, show a “trouble” signal. Attract rescuers by flashing hazard lights or hanging a bright cloth from the radio antenna or window.
Five things are essential to help prevent further injury and loss of life after a motor vehicle accident:
1. Protect yourself first.
2. Call 911 for medical help.
3. Make the scene safe: Turn off the vehicle’s engine, secure parking brakes, and help direct traffic if you are trained to do so. (Be sure to wear a reflective safety vest.) However, if you cannot readily secure the scene, do not put yourself in danger trying to do so.
4. Stop severe bleeding.
5. Treat for shock.
Know your route when you travel, and plan for weather conditions or terrain that might unexpectedly become dangerous. Be sure someone knows of your travel plans.
When traveling
in severe cold
weather, keep the
following in your
car: blankets or
sleeping bags, at
least one snow
shovel, tire chains,
signal flares or
glow sticks,
ice scraper,
flashlight and
extra batteries,
bottled water,
high-energy
snacks such
as candy bars.
EmERgEnCy PREPAREdnESS 41
.Types of Emergencies
If possible, run the engine and heater just long enough to remove the chill from the air—about 10 minutes each hour. Conserve gasoline. But be careful when running the engine, too: Do not let the exhaust pipe get clogged with snow. Blockage can cause deadly carbon monoxide to leak into the passenger compartment. You can also use a small, votive-type candle in a fire-safe, stable container to raise the temperature inside a car. In either case, open a window slightly on the side away from the wind to provide ventilation. Occasionally, breathe deeply, and rapidly move your arms and legs to increase blood circulation.
The inside of a car can protect you for a time. At night, keep the inside dome light on to make it easier for rescuers to see the car in the dark. The dome light uses only a small amount of current from the battery; however, extended use could drain the battery entirely. If you are stuck for more than six hours and the cold in the car becomes unbearable, consider moving into a snow hole or snow shelter. The temperature inside a snow hole can be 15 to 20 degrees warmer than the air outside the hole. For more about cold-weather shelters, see the Wilderness Survival merit badge pamphlet.
Scouts are known for their resourcefulness. Look around and make do with what you have. You could use the flat, round top of the air filter in your car for digging in the snow. Use a cushion from the car as a seat in your snow hole, or cut branches from a tree to sit on. (You will need a seat so that you are not sitting in melted snow; stay as dry as possible.) As soon as you can, build a fire outside (not in the shelter). Use the car’s hubcaps as a fireplace, or place logs on top of the snow. You might be able to start a fire with the car’s lighter. For tinder, tear up road maps or other paper you might have in the car, or strip fabric from the car seats. If you do not have fuel for a fire, look through the car again. Wooden handles of tools will burn, for example.
Try to avoid
burning synthetic
materials such as
plastic and nylon.
Doing so can emit
toxic fumes.
You may have heard that the universal distress signal “SOS” stands for “Save Our Ship” or “Save Our Souls,” but it turns out that this is just a myth. The Berlin Radiotelegraphic Conference of 1906 adopted SOS as a danger signal merely because the Morse code for SOS—three dots, three dashes, and three dots—was felt to be unmistakable when relayed by telegraph. These days, “three” can mean “distress” in other contexts, too, such as lighting three fires to indicate distress or arranging three piles of debris that searchers might see.
42 EmERgEnCy PREPAREdnESS
Types of Emergencies.
Make three small fires arranged in a triangle as a distress signal. If you cannot build a fire, stamp out a big “SOS” in the snow near your car. Make the letters deep so that shadows are cast into them or fill the letters with contrasting material, such as greenery, dead branches, or dirt, to make them easier for rescuers to see.
If you are stuck with your car for more than a day, finding food and water could become a problem. You can get water by melting clean snow. If you do not have any food, work slowly and rest often. In extremely cold weather, if you do not rest you will tire quickly and become exhausted.
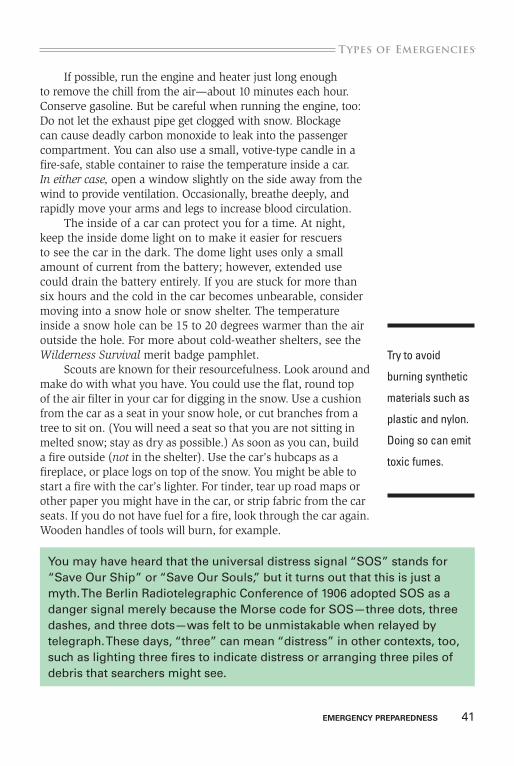
Stalled in the desertAll deserts are dry, but deserts are not always hot. For example, salt flats in Utah that reach temperatures well over 100 degrees Fahrenheit during the day in summer will fall below freezing at night during the winter. Although the most common concern is dealing with excess heat, those stranded in deserts may also have to deal with low temperatures at night.
If your car stalls in a hot desert, stay with the car but not in it. If you are on a regularly traveled road, someone will come by soon to help. Raise the hood and trunk (but disconnect the indicator lights during the day to avoid draining the battery) to indicate you need help. At night, attract attention any way you can: Set out an emergency light, turn on the car flashers or turn signals, leave the inside dome light on, or if possible build a fire outside.
EmERgEnCy PREPAREdnESS 43
.Types of Emergencies
If you are stalled in a remote desert area, stay with the car. Sit in its shade on something, such as a car seat, that keeps you a foot or so off the ground. (The temperature of the ground can be 30 degrees higher than the air a foot off the ground.) Stay calm and think; do not act hastily. You will need water and you will need to protect yourself from the heat. Stay covered; do not throw away clothing, no matter how hot it gets. Clothing will guard against the sun, blowing sand, and insects.
Water is the most important thing. Know these potential sources of water:
• dew. If the night is cold, in the morning you can use a sponge or small cloth to collect the dew that forms on cars, rocks, and plants.
• Water holes. In the evening and early morning, listen for birds and watch for circling flocks and freshly made animal tracks. Follow the birds or tracks—they could lead to water. Caution: Salty or soapy-tasting water may be poisonous.
If you must walk in search of things, leave a note at the car telling anyone who arrives the direction you went. Normally, you should not leave a car unless you know for certain that help is close by in a given direction. Walk only after sundown or in the early dawn if you need light to see. Rest during the day in any shade that you can find or make.
Use signal fires to attract the attention of planes or other desert travelers. A burning car tire, deflated to prevent explosion, should be visible during the day due to the smoke. Use the car mirror as a signaling device as described in the “Plane Signals” section later in this pamphlet. Spell out “SOS” on the ground in letters at least 10 feet wide with rocks, rags, or strips of car seat covering—anything you can find that contrasts in color with the ground.
If you find water, drink it. Do not ration it. Trying to make water last longer does more harm than good. Do not eat food unless you drink at least a pint of water a day or unless the food is water-laden, such as fruit and some vegetables.
Especially when
you are traveling
in or through
remote areas,
always be sure
someone knows
your travel plans.
44 EmERgEnCy PREPAREdnESS
Types of Emergencies.
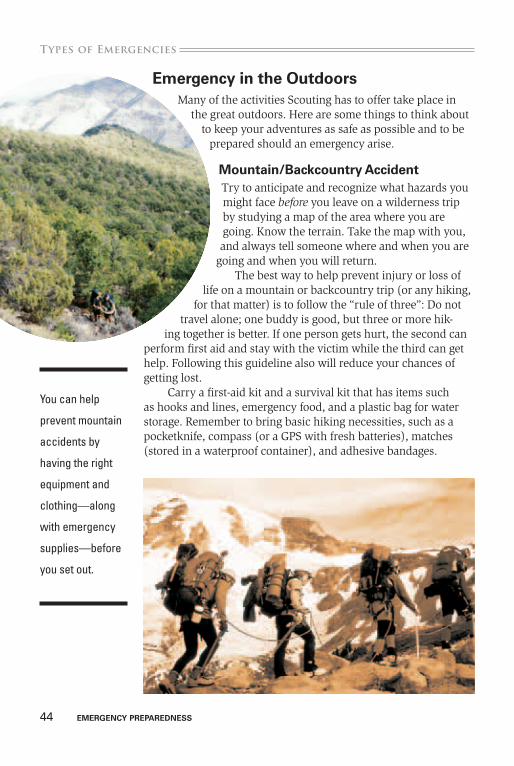
Emergency in the OutdoorsMany of the activities Scouting has to offer take place in
the great outdoors. Here are some things to think about to keep your adventures as safe as possible and to be
prepared should an emergency arise.
mountain/Backcountry AccidentTry to anticipate and recognize what hazards you might face before you leave on a wilderness trip by studying a map of the area where you are going. Know the terrain. Take the map with you, and always tell someone where and when you are
going and when you will return.The best way to help prevent injury or loss of
life on a mountain or backcountry trip (or any hiking, for that matter) is to follow the “rule of three”: Do not
travel alone; one buddy is good, but three or more hik-ing together is better. If one person gets hurt, the second can
perform first aid and stay with the victim while the third can get help. Following this guideline also will reduce your chances of getting lost.
Carry a first-aid kit and a survival kit that has items such as hooks and lines, emergency food, and a plastic bag for water storage. Remember to bring basic hiking necessities, such as a pocketknife, compass (or a GPS with fresh batteries), matches (stored in a waterproof container), and adhesive bandages.
You can help
prevent mountain
accidents by
having the right
equipment and
clothing—along
with emergency
supplies—before
you set out.

EmERgEnCy PREPAREdnESS 45
.Types of Emergencies
Stay on your Feet. In the mountains or backcountry, the most common accident is a fall. Try to prevent falls. When going down a hill or a steep bank, control your center of gravity; that is, lean back slightly. If you fall, you will fall backward, and then you will be in a sliding, rather than a tumbling, position. Leaning forward and grabbing branches or other objects for support is not always a good idea. The support might give way, roll, break, or slide— and then you will tumble forward.
In rough-going areas, try to anticipate where you might fall. That way, if you do fall, you will at least fall in the safest place and manner.
Stay off fallen timber, which can be wet and mossy, making for a slippery surface. Likewise, wet rocks can be slick and dan-gerous. Even if you do not fall over, you can twist an ankle.
If you must wade across a stream, study it carefully first, finding the safest place to cross. Carry a staff (hiker’s pole), which you can use for support if the current is swift. Test the bottom of the stream with the pole as you cross. Loosen pack straps before you cross so that you can get the pack off easily if trouble develops.
Watch Where You StepDo not travel after dark, and stay on trails. A hiker in Washington left a marked trail on Mount Si to follow a mountain goat. But mountain goats are better at off-trail hiking than people are. This hiker jumped to a ledge he could not escape and had to spend the night there—along with a lot of hungry mosquitoes.
Bradford Angier, author of How to Stay Alive in the Woods, says, “Never step on anything you can step over, and never step over anything you can step around”—simple advice that may prevent an emergency situation.
46 EmERgEnCy PREPAREdnESS
Types of Emergencies.
Be Weather Alert. Watch for lightning and thunderstorms. Take shelter in a low area under a thick growth of small trees, ideally away from the direction of the approaching storm. Do not stand under a tall, isolated tree in an open space. Avoid bodies of water and metal fences, hiking poles, climbing hardware, and tent poles, and anything else that might conduct electricity.
If you are in a meadow, head for the lowest spot of the nearest forest cover. If you get caught in a storm where you cannot quickly get to a low, safe spot, be a short target: Until the storm passes, crouch low with only the soles of your shoes (tiptoe if possible) touching the ground. Place your hands over your ears. Do not lie flat on the ground—which will make you a larger target—and do not wear a baseball cap (the button on top probably is made of metal). Spread your group out 100 feet from each other if possible.
Do not camp in a gully or dry streambed. A thunderstorm or flash flood miles away could send a rushing torrent of water through your campsite.
Lost or maroonedIf you become lost or marooned with a group, such as your patrol, be a leader. Stay calm and help others stay calm. Tell everyone to sit and think. Clear an area on the ground and “build” a map to help you estimate where you are. Mark landmarks that you can see. Try to reconstruct your trail on the map. How long have you been gone? Can anyone remember when and where he last saw something familiar—a scarred tree? a creek or pond? a fence? Put it on your map. Discuss every detail about your hike that anyone can remember.
Rest and consider your options. Usually, it is best to stay put. People searching can find you easier than you can find them.
If you must travel and everyone agrees to it, walk in a straight line. Use the sighting system: If you can get to a high point safely, go up and look over the land below, find a familiar landmark, and head toward it. Leave a note or otherwise indicate your direction of travel for searchers.
If there is any possibility that you will have to stay out over-night, find a good campsite before dusk. Do not travel at night, except in the desert with good visibility.
Note to the
Counselor
One useful tool for
BSA adult leaders
is Hazardous
Weather training,
an online module
at www.
myscouting.org.
The training
presents safety
precautions for
eight different
types of weather
and focuses
on planning,
preparation,
and traditional
weather signs.
EmERgEnCy PREPAREdnESS 47
.Types of Emergencies
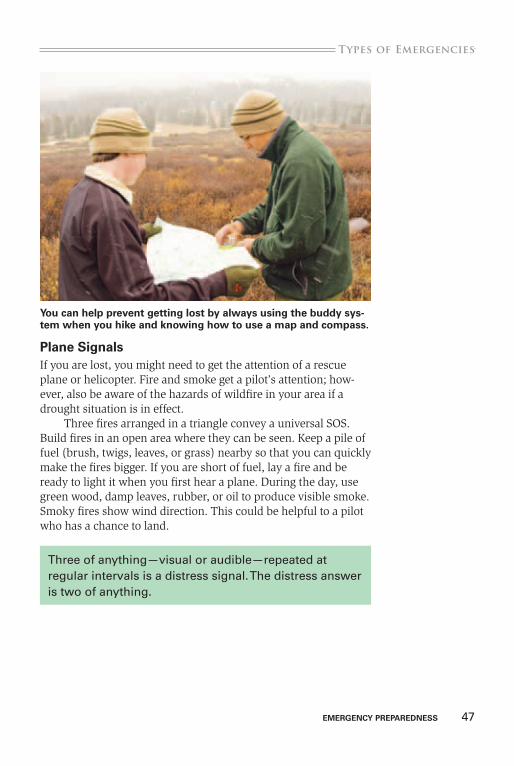
Plane SignalsIf you are lost, you might need to get the attention of a rescue plane or helicopter. Fire and smoke get a pilot’s attention; how-ever, also be aware of the hazards of wildfire in your area if a drought situation is in effect.
Three fires arranged in a triangle convey a universal SOS. Build fires in an open area where they can be seen. Keep a pile of fuel (brush, twigs, leaves, or grass) nearby so that you can quickly make the fires bigger. If you are short of fuel, lay a fire and be ready to light it when you first hear a plane. During the day, use green wood, damp leaves, rubber, or oil to produce visible smoke. Smoky fires show wind direction. This could be helpful to a pilot who has a chance to land.
you can help prevent getting lost by always using the buddy sys-tem when you hike and knowing how to use a map and compass.
Three of anything—visual or audible—repeated at regular intervals is a distress signal. The distress answer is two of anything.

48 EmERgEnCy PREPAREdnESS
Types of Emergencies.
With a smoky fire, you can send smoke signals. Cut off the smoke with a wet blanket (or something similar). Release it, but quickly cut off the smoke again. Do this so that you send three short puffs in a row. Pause and repeat.
In the daytime, a ground-level “sign language” of symbols can attract an aircraft and communicate with the pilot. Because geometric figures are not found in nature, symbols such as squares and triangles will attract attention. For instance, an arrow is the ground-to-air visual code meaning “proceeding in this direction.”
Make the symbols with strips of cloth, rocks, or branches. Use any available material that will contrast with the background that it is placed on. Make the symbols big—10 feet wide or wider—in an open area where they can be seen. You can also stamp the symbols in sand or snow. If possible, line the bottom of such tracks with something dark, such as leafy green branches (or powdered or rehydrated fruit drink in snowy conditions). Pile sand or snow on one side so that the sun will throw a shadow onto the symbols. When in doubt, use the international distress symbol, SOS.
One way to get the attention of a rescue aircraft is to use a mirror to aim a beam of reflected sunlight at the plane or helicopter (see the sidebar on signaling with a mirror). If you do not see or hear an aircraft, sweep the horizon with your reflected sunbeam anyway. This tiny flash of light can be seen for 50 or more miles.
You can make a signaling mirror using an empty can. Cut out the lid or bottom of the can, and you are ready to signal. You can also use the blade of your knife. If you are lost and have none of this equipment, you could use a smooth, wet piece of wood, a flat rock, or anything that will reflect some sunlight.
“Three” means “distress.” A pilot might spot three piles of debris when looking for a lost person. Three piles of cut branches or rocks might work. Flashing SOS using Morse code—three short flashes, three long flashes (twice as long as the short ones), three short flashes—is another way to attract help, night or day.
EmERgEnCy PREPAREdnESS 49
.Types of Emergencies
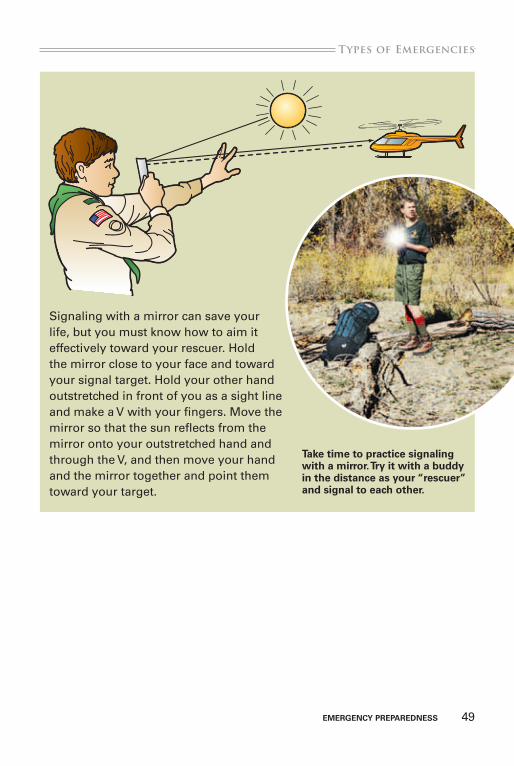
Take time to practice signaling with a mirror. Try it with a buddy in the distance as your “rescuer” and signal to each other.
Signaling with a mirror can save your life, but you must know how to aim it effectively toward your rescuer. Hold the mirror close to your face and toward your signal target. Hold your other hand outstretched in front of you as a sight line and make a V with your fingers. Move the mirror so that the sun reflects from the mirror onto your outstretched hand and through the V, and then move your hand and the mirror together and point them toward your target.
50 EmERgEnCy PREPAREdnESS
Types of Emergencies.
When you hear a helicopter or low-flying search plane, move to a safe place in an open area and lie on the ground on your back with your arms and legs spread. This will provide an excellent opportunity for detection by the air crew.
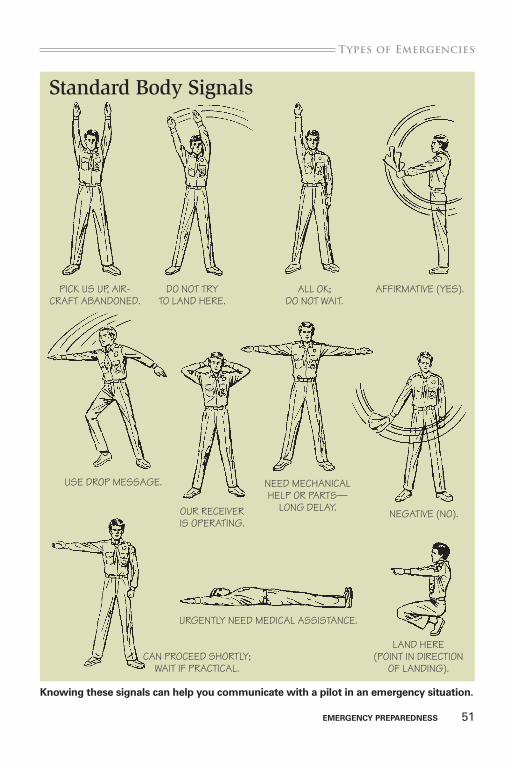
You can also “talk” to a pilot with body signals. Most pilots know this universal language. Learn the 11 standard body signals illustrated in this chapter.
Know how to “read” a pilot, too. A pilot says “yes” by dipping the nose of the plane up and down. Zigzagging—or fishtailing—the plane means “no.” If your message has been understood, the pilot will rock the plane from side to side or flash green lights with a signal lamp. If your message has not been understood, the pilot will make a complete right-hand circle or flash red lights.
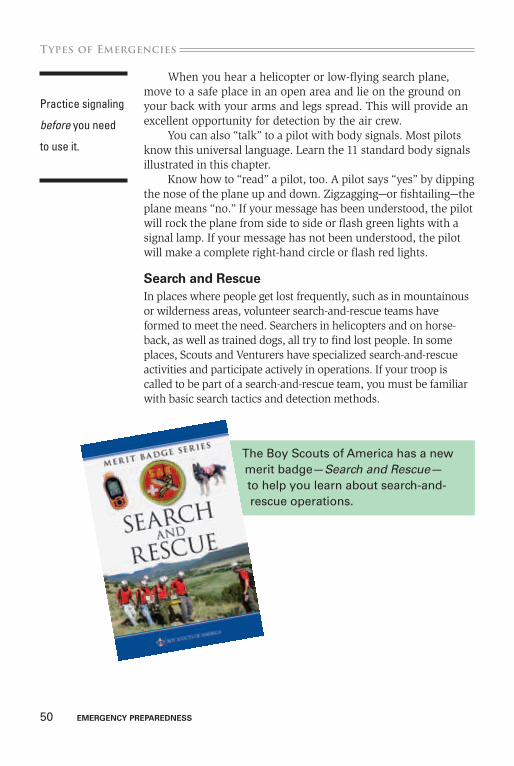
Search and RescueIn places where people get lost frequently, such as in mountainous or wilderness areas, volunteer search-and-rescue teams have formed to meet the need. Searchers in helicopters and on horse-back, as well as trained dogs, all try to find lost people. In some places, Scouts and Venturers have specialized search-and-rescue activities and participate actively in operations. If your troop is called to be part of a search-and-rescue team, you must be familiar with basic search tactics and detection methods.
Practice signaling
before you need
to use it.
The Boy Scouts of America has a new merit badge—Search and Rescue— to help you learn about search-and-rescue operations.
EmERgEnCy PREPAREdnESS 51
.Types of Emergencies
picK us up, air-craft aBandoned.
do not try to land here.
all oK; do not Wait.
affirMative (yes).
can proceed shortly; Wait if practical.
urgently need Medical assistance.
land here (point in direction
of landing).
use drop Message.
our receiver is operating.
need Mechanical help or parts—
long delay. negative (no).
Standard Body Signals
Knowing these signals can help you communicate with a pilot in an emergency situation.
52 EmERgEnCy PREPAREdnESS
Types of Emergencies.
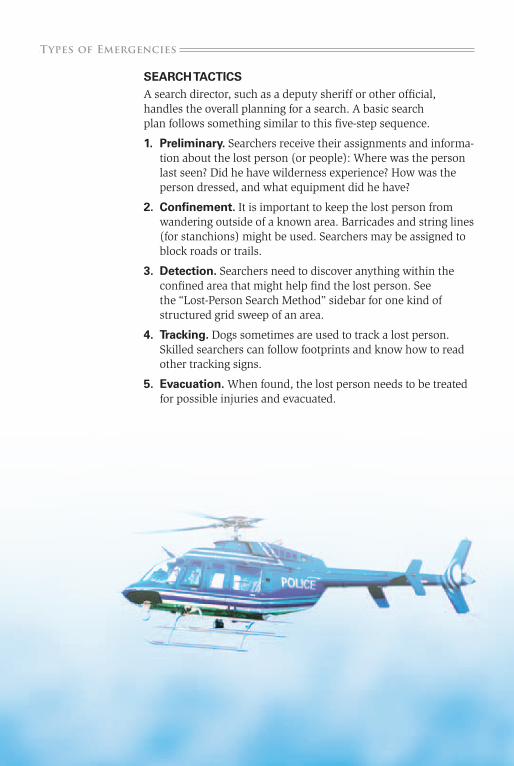
SEARCH TACTICSA search director, such as a deputy sheriff or other official, handles the overall planning for a search. A basic search plan follows something similar to this five-step sequence.
1. Preliminary. Searchers receive their assignments and informa-tion about the lost person (or people): Where was the person last seen? Did he have wilderness experience? How was the person dressed, and what equipment did he have?
2. Confinement. It is important to keep the lost person from wandering outside of a known area. Barricades and string lines (for stanchions) might be used. Searchers may be assigned to block roads or trails.
3. detection. Searchers need to discover anything within the confined area that might help find the lost person. See the “Lost-Person Search Method” sidebar for one kind of structured grid sweep of an area.
4. Tracking. Dogs sometimes are used to track a lost person. Skilled searchers can follow footprints and know how to read other tracking signs.
5. Evacuation. When found, the lost person needs to be treated for possible injuries and evacuated.
EmERgEnCy PREPAREdnESS 53
.Types of Emergencies
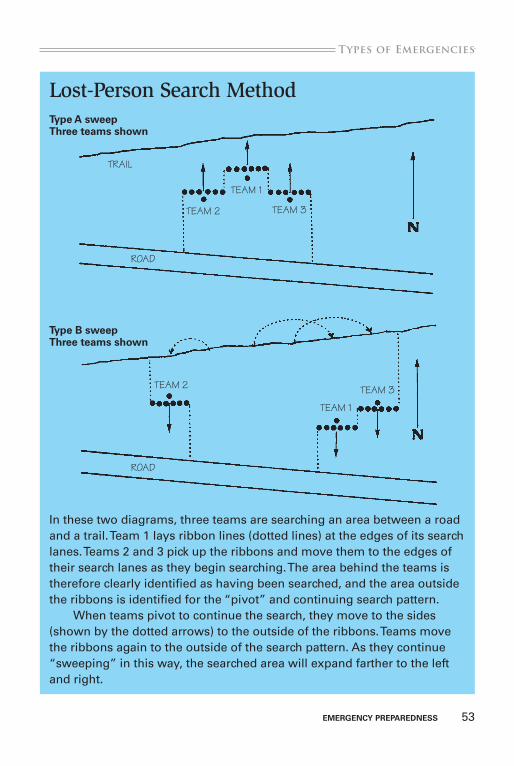
Lost-Person Search MethodType A sweepThree teams shown
In these two diagrams, three teams are searching an area between a road and a trail. Team 1 lays ribbon lines (dotted lines) at the edges of its search lanes. Teams 2 and 3 pick up the ribbons and move them to the edges of their search lanes as they begin searching. The area behind the teams is therefore clearly identified as having been searched, and the area outside the ribbons is identified for the “pivot” and continuing search pattern.
When teams pivot to continue the search, they move to the sides (shown by the dotted arrows) to the outside of the ribbons. Teams move the ribbons again to the outside of the search pattern. As they continue “sweeping” in this way, the searched area will expand farther to the left and right.
road
trail
teaM 1
teaM 2 teaM 3
road
teaM 1
teaM 2 teaM 3
Type B sweepThree teams shown
54 EmERgEnCy PREPAREdnESS
Types of Emergencies.
Along with the search method shown on the previous page, a simple search might involve a large number of small teams check-ing natural and artificial features in an area. This could include trail checks (hiking a trail to see whether the lost person is walking it), ridge-running (taking a quick route along high ground to search valleys from above), and checking buildings, drainage areas, caves, or other potential hazards. The emphasis is on making a quick check of the most obvious places a person may get lost.
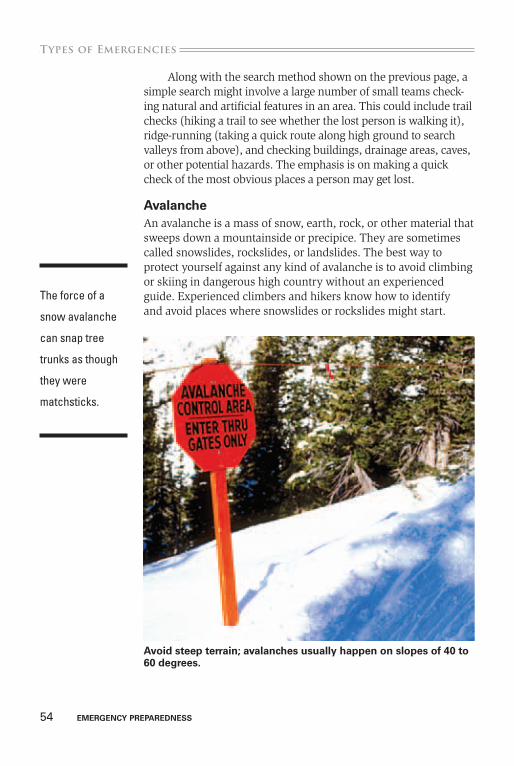
AvalancheAn avalanche is a mass of snow, earth, rock, or other material that sweeps down a mountainside or precipice. They are sometimes called snowslides, rockslides, or landslides. The best way to protect yourself against any kind of avalanche is to avoid climbing or skiing in dangerous high country without an experienced guide. Experienced climbers and hikers know how to identify and avoid places where snowslides or rockslides might start.
Avoid steep terrain; avalanches usually happen on slopes of 40 to 60 degrees.
The force of a
snow avalanche
can snap tree
trunks as though
they were
matchsticks.
EmERgEnCy PREPAREdnESS 55
.Types of Emergencies
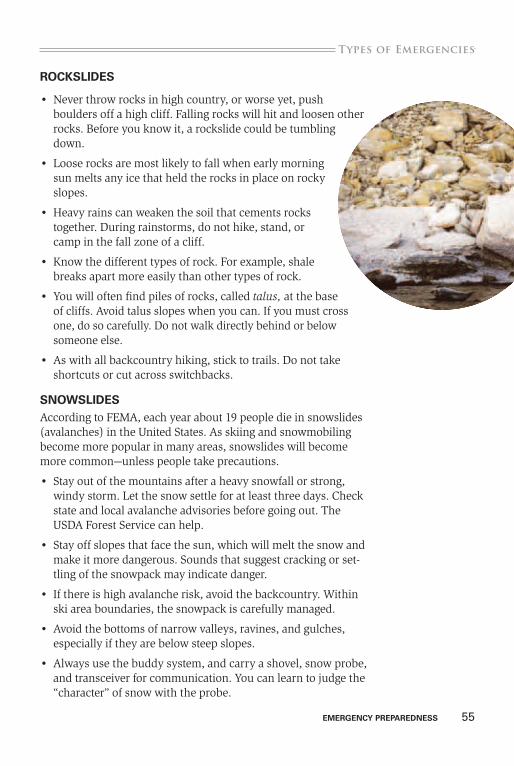
ROCKSLIdES
• Never throw rocks in high country, or worse yet, push boulders off a high cliff. Falling rocks will hit and loosen other rocks. Before you know it, a rockslide could be tumbling down.
• Loose rocks are most likely to fall when early morning sun melts any ice that held the rocks in place on rocky slopes.
• Heavy rains can weaken the soil that cements rocks together. During rainstorms, do not hike, stand, or camp in the fall zone of a cliff.
• Know the different types of rock. For example, shale breaks apart more easily than other types of rock.
• You will often find piles of rocks, called talus, at the base of cliffs. Avoid talus slopes when you can. If you must cross one, do so carefully. Do not walk directly behind or below someone else.
• As with all backcountry hiking, stick to trails. Do not take shortcuts or cut across switchbacks.
SnOWSLIdESAccording to FEMA, each year about 19 people die in snowslides (avalanches) in the United States. As skiing and snowmobiling become more popular in many areas, snowslides will become more common—unless people take precautions.
• Stay out of the mountains after a heavy snowfall or strong, windy storm. Let the snow settle for at least three days. Check state and local avalanche advisories before going out. The USDA Forest Service can help.
• Stay off slopes that face the sun, which will melt the snow and make it more dangerous. Sounds that suggest cracking or set-tling of the snowpack may indicate danger.
• If there is high avalanche risk, avoid the backcountry. Within ski area boundaries, the snowpack is carefully managed.
• Avoid the bottoms of narrow valleys, ravines, and gulches, especially if they are below steep slopes.
• Always use the buddy system, and carry a shovel, snow probe, and transceiver for communication. You can learn to judge the “character” of snow with the probe.
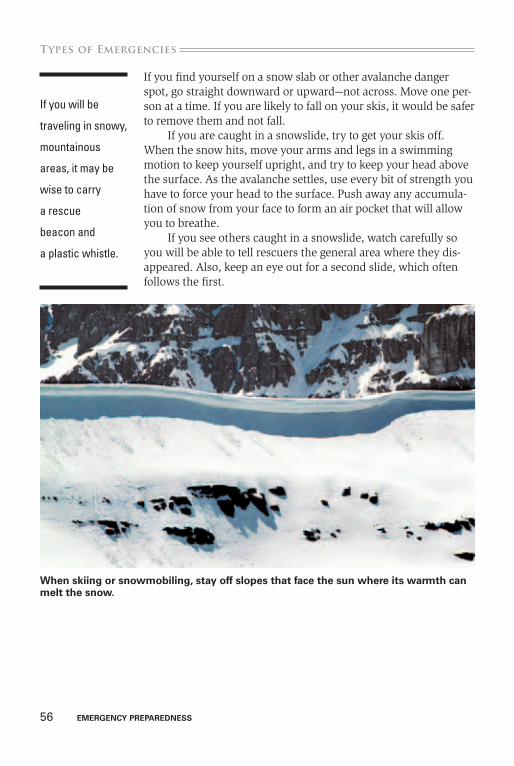
56 EmERgEnCy PREPAREdnESS
Types of Emergencies.
If you find yourself on a snow slab or other avalanche danger spot, go straight downward or upward—not across. Move one per-son at a time. If you are likely to fall on your skis, it would be safer to remove them and not fall.
If you are caught in a snowslide, try to get your skis off. When the snow hits, move your arms and legs in a swimming motion to keep yourself upright, and try to keep your head above the surface. As the avalanche settles, use every bit of strength you have to force your head to the surface. Push away any accumula-tion of snow from your face to form an air pocket that will allow you to breathe.
If you see others caught in a snowslide, watch carefully so you will be able to tell rescuers the general area where they dis-appeared. Also, keep an eye out for a second slide, which often follows the first.
When skiing or snowmobiling, stay off slopes that face the sun where its warmth can melt the snow.
If you will be
traveling in snowy,
mountainous
areas, it may be
wise to carry
a rescue
beacon and
a plastic whistle.
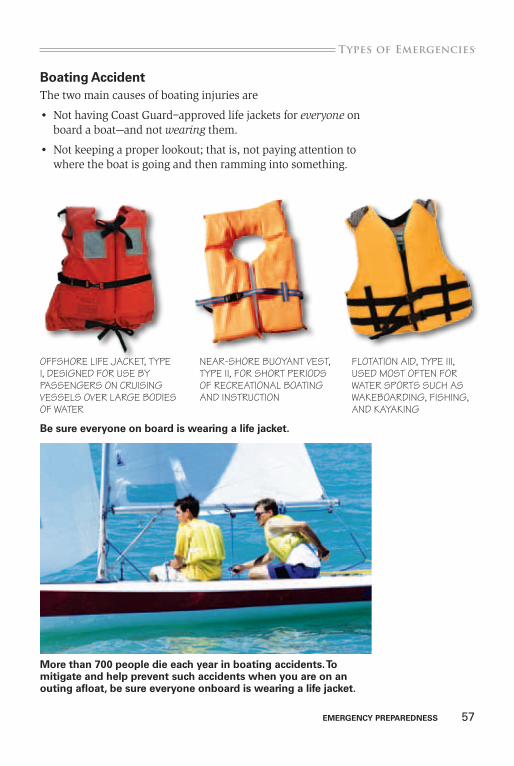
EmERgEnCy PREPAREdnESS 57
.Types of Emergencies
Boating AccidentThe two main causes of boating injuries are
• Not having Coast Guard–approved life jackets for everyone on board a boat—and not wearing them.
• Not keeping a proper lookout; that is, not paying attention to where the boat is going and then ramming into something.
offshore life jacKet, type i, designed for use By passengers on cruising vessels over large Bodies of Water
near-shore Buoyant vest, type ii, for short periods of recreational Boating and instruction
flotation aid, type iii, used Most often for Water sports such as WaKeBoarding, fishing, and KayaKing
Be sure everyone on board is wearing a life jacket.
more than 700 people die each year in boating accidents. To mitigate and help prevent such accidents when you are on an outing afloat, be sure everyone onboard is wearing a life jacket.

58 EmERgEnCy PREPAREdnESS
Types of Emergencies.
If your family has a boat, check the equipment and make sure it and the boat are in good repair and working order. Be sure to carry a waterproof emergency locator beacon or a cell phone secured in a waterproof bag. If you have a powerboat, carry fire extinguishers, proper lights, an emergency paddle, and an anchor. Chain outboard motors to the boat. Know the boat’s capacity—the number of people it can carry safely—which is shown on a metal plate on the boat. Do not take more people aboard than the stated capacity.
If you must move around in a boat, stay low and in the center and hold on to the sides. If your boat capsizes, hang on to it unless it is on fire. Wait for help. Do not try to swim for land. It is easier for rescuers to see a capsized boat than a lone swimmer. In cold water, huddle together in or on the capsized boat to delay hypothermia.
Observe the rules for water travel (see the Motorboating merit badge pamphlet). Do not run a motorboat through or close to a swimming area. When you approach a landing place, slow to a speed less than 5 mph.
Keep an eye on the weather. Head for home—or the nearest place where you can tie up—before a storm reaches you.Know standard distress codes, calls, and signals so that you can give the proper call in case of an accident. If you have a radiotelephone, you can send official distress calls, such as the standard “Mayday.” Repeat the call three times, followed by the boat’s call letters, name, and position, and describe the trouble. You can also:
• Rapidly and repeatedly sound your horn, bell, or whistle.
• Fly your flag upside down.
• Blink your white range light or a spotlight using the standard SOS signal (three short blinks, three longer blinks, three short blinks).
• Fly an orange emergency signal flag (it shows an emblem of a black circle and square on it) or send up a flare.
The standard
international
radiotelephone
distress call,
“Mayday,” comes
from the French
m’aidez, which
means “help me.”
Always wear a life jacket. Comfortable styles are available that allow you to participate actively while protecting against drowning. This is simple, effective emergency prevention and preparedness.
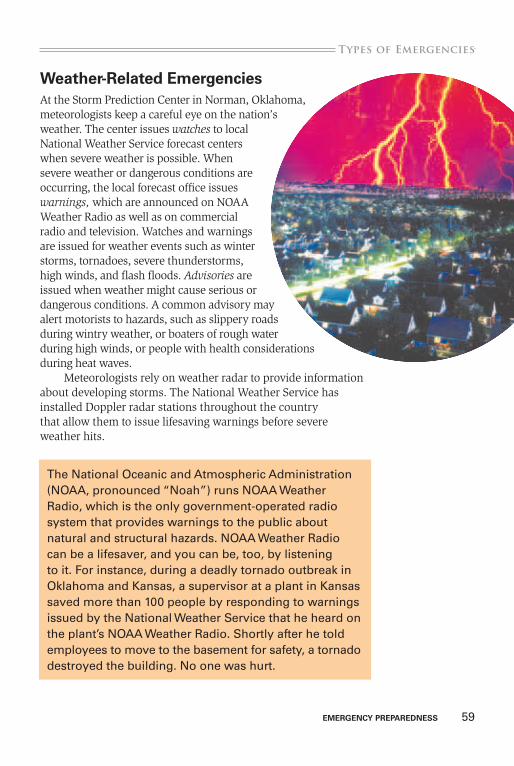
EmERgEnCy PREPAREdnESS 59
.Types of Emergencies
Weather-Related EmergenciesAt the Storm Prediction Center in Norman, Oklahoma, meteorologists keep a careful eye on the nation’s weather. The center issues watches to local National Weather Service forecast centers when severe weather is possible. When severe weather or dangerous conditions are occurring, the local forecast office issues warnings, which are announced on NOAA Weather Radio as well as on commercial radio and television. Watches and warnings are issued for weather events such as winter storms, tornadoes, severe thunderstorms, high winds, and flash floods. Advisories are issued when weather might cause serious or dangerous conditions. A common advisory may alert motorists to hazards, such as slippery roads during wintry weather, or boaters of rough water during high winds, or people with health considerations during heat waves.
Meteorologists rely on weather radar to provide information about developing storms. The National Weather Service has installed Doppler radar stations throughout the country that allow them to issue lifesaving warnings before severe weather hits.
The National Oceanic and Atmospheric Administration (NOAA, pronounced “Noah”) runs NOAA Weather Radio, which is the only government-operated radio system that provides warnings to the public about natural and structural hazards. NOAA Weather Radio can be a lifesaver, and you can be, too, by listening to it. For instance, during a deadly tornado outbreak in Oklahoma and Kansas, a supervisor at a plant in Kansas saved more than 100 people by responding to warnings issued by the National Weather Service that he heard on the plant’s NOAA Weather Radio. Shortly after he told employees to move to the basement for safety, a tornado destroyed the building. No one was hurt.
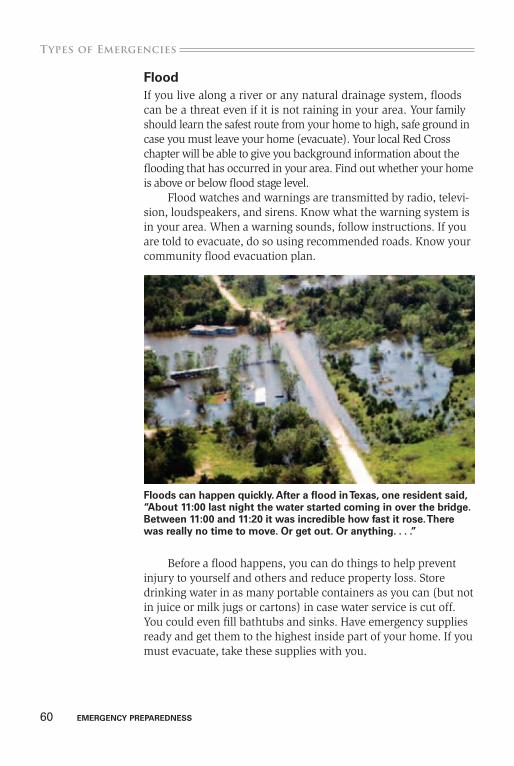
60 EmERgEnCy PREPAREdnESS
Types of Emergencies.
FloodIf you live along a river or any natural drainage system, floods can be a threat even if it is not raining in your area. Your family should learn the safest route from your home to high, safe ground in case you must leave your home (evacuate). Your local Red Cross chapter will be able to give you background information about the flooding that has occurred in your area. Find out whether your home is above or below flood stage level.
Flood watches and warnings are transmitted by radio, televi-sion, loudspeakers, and sirens. Know what the warning system is in your area. When a warning sounds, follow instructions. If you are told to evacuate, do so using recommended roads. Know your community flood evacuation plan.
Before a flood happens, you can do things to help prevent injury to yourself and others and reduce property loss. Store drinking water in as many portable containers as you can (but not in juice or milk jugs or cartons) in case water service is cut off. You could even fill bathtubs and sinks. Have emergency supplies ready and get them to the highest inside part of your home. If you must evacuate, take these supplies with you.
Floods can happen quickly. After a flood in Texas, one resident said, “About 11:00 last night the water started coming in over the bridge. Between 11:00 and 11:20 it was incredible how fast it rose. There was really no time to move. Or get out. Or anything. . . .”
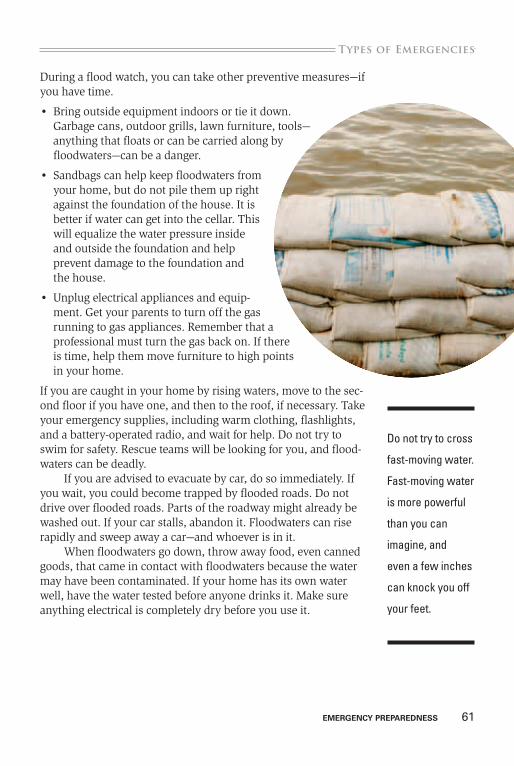
EmERgEnCy PREPAREdnESS 61
.Types of Emergencies
During a flood watch, you can take other preventive measures—if you have time.
• Bring outside equipment indoors or tie it down. Garbage cans, outdoor grills, lawn furniture, tools—anything that floats or can be carried along by floodwaters—can be a danger.
• Sandbags can help keep floodwaters from your home, but do not pile them up right against the foundation of the house. It is better if water can get into the cellar. This will equalize the water pressure inside and outside the foundation and help prevent damage to the foundation and the house.
• Unplug electrical appliances and equip-ment. Get your parents to turn off the gas running to gas appliances. Remember that a professional must turn the gas back on. If there is time, help them move furniture to high points in your home.
If you are caught in your home by rising waters, move to the sec-ond floor if you have one, and then to the roof, if necessary. Take your emergency supplies, including warm clothing, flashlights, and a battery-operated radio, and wait for help. Do not try to swim for safety. Rescue teams will be looking for you, and flood-waters can be deadly.
If you are advised to evacuate by car, do so immediately. If you wait, you could become trapped by flooded roads. Do not drive over flooded roads. Parts of the roadway might already be washed out. If your car stalls, abandon it. Floodwaters can rise rapidly and sweep away a car—and whoever is in it.
When floodwaters go down, throw away food, even canned goods, that came in contact with floodwaters because the water may have been contaminated. If your home has its own water well, have the water tested before anyone drinks it. Make sure anything electrical is completely dry before you use it.
Do not try to cross
fast-moving water.
Fast-moving water
is more powerful
than you can
imagine, and
even a few inches
can knock you off
your feet.
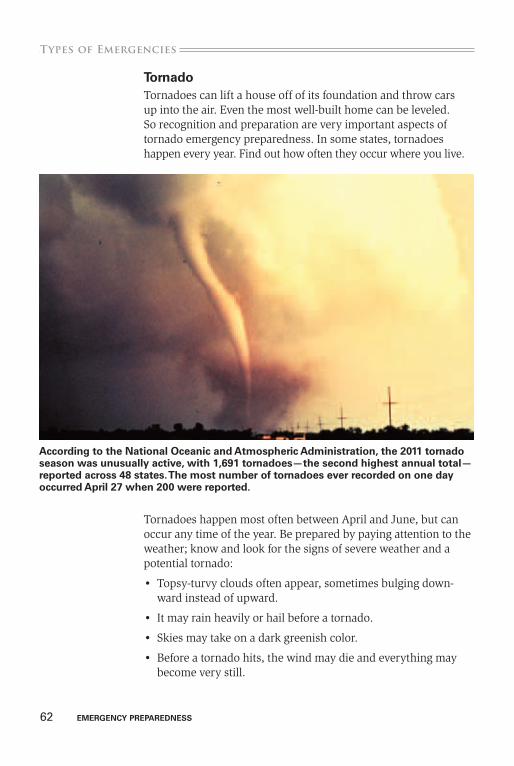
62 EmERgEnCy PREPAREdnESS
Types of Emergencies.
TornadoTornadoes can lift a house off of its foundation and throw cars up into the air. Even the most well-built home can be leveled. So recognition and preparation are very important aspects of tornado emergency preparedness. In some states, tornadoes happen every year. Find out how often they occur where you live.
Tornadoes happen most often between April and June, but can occur any time of the year. Be prepared by paying attention to the weather; know and look for the signs of severe weather and a potential tornado:
• Topsy-turvy clouds often appear, sometimes bulging down-ward instead of upward.
• It may rain heavily or hail before a tornado.
• Skies may take on a dark greenish color.
• Before a tornado hits, the wind may die and everything may become very still.
According to the national Oceanic and Atmospheric Administration, the 2011 tornado season was unusually active, with 1,691 tornadoes—the second highest annual total—reported across 48 states. The most number of tornadoes ever recorded on one day occurred April 27 when 200 were reported.

EmERgEnCy PREPAREdnESS 63
.Types of Emergencies
Everyone in your family should know the difference between a tornado watch and a tornado warning. A watch means that tornadoes are possible and conditions are favorable for them to develop. A warning means that one has been sighted.
During a tornado warning, you and your family should move to your preplanned place of safety. At home, this should be in a basement or storm cellar, or a windowless, interior room (even a closet) on the lowest floor of your home. Stay away from windows; windblown objects may break the glass. Take cover under a piece of heavy furniture and hold on to it. Cover yourself with blankets or pillows if you can.
If you live in a mobile or manufactured home, do not stay there. Get out and find shelter.
If you live in an area that has a lot of tornadoes, your school will have plans for what to do during a tornado warning. The safest place is in an interior hallway on the lowest floor. Auditoriums, cafeterias, or gyms that have big, poorly supported roofs are not safe. This is good advice for any public place, too: Go to an interior hallway or restroom. Stay away from glass.
If you are in a car during a tornado warning, get out of the car and find shelter in a building. If there is no building or no time to get to one, lie flat in a nearby ditch, gully, or depression away from the car. Shield your head with your hands and arms. Never try to drive away from a tornado. They can do zigzags, figure eights, and U-turns—you might suddenly find yourself driving straight into one.
After a tornado, be prepared with your first-aid skills and your duty to help other people.
Where Is Tornado Alley?The central part of our country—from northern Minnesota and North Dakota to southern Texas and Louisiana—is sometimes called “Tornado Alley.” Generally, this is the area where dangerous tornadoes are most likely to happen, although tornadoes have been reported in all 50 states. According to a map from FEMA, the number of tornadoes recorded per 1,000 square miles is highest in north Texas and central Oklahoma, with other danger spots in southern Missouri, Arkansas, Mississippi, and Alabama.
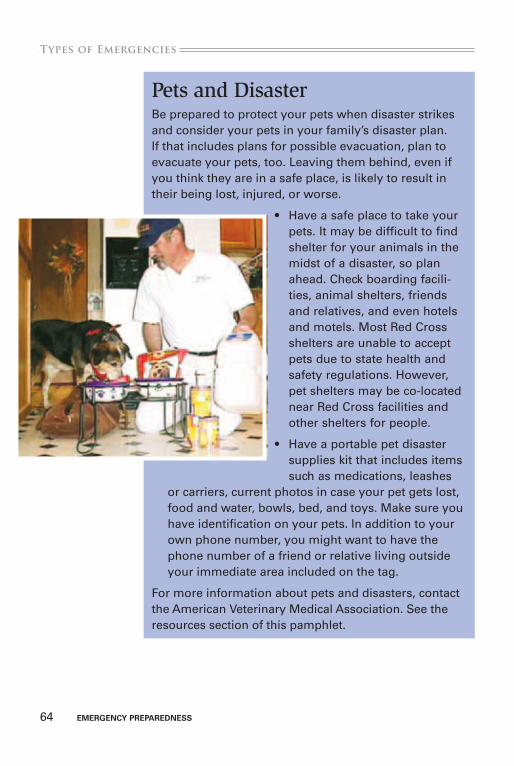
64 EmERgEnCy PREPAREdnESS
Types of Emergencies.
Pets and DisasterBe prepared to protect your pets when disaster strikes and consider your pets in your family’s disaster plan. If that includes plans for possible evacuation, plan to evacuate your pets, too. Leaving them behind, even if you think they are in a safe place, is likely to result in their being lost, injured, or worse.
• Have a safe place to take your pets. It may be difficult to find shelter for your animals in the midst of a disaster, so plan ahead. Check boarding facili-ties, animal shelters, friends and relatives, and even hotels and motels. Most Red Cross shelters are unable to accept pets due to state health and safety regulations. However, pet shelters may be co-located near Red Cross facilities and other shelters for people.
• Have a portable pet disaster supplies kit that includes items such as medications, leashes
or carriers, current photos in case your pet gets lost, food and water, bowls, bed, and toys. Make sure you have identification on your pets. In addition to your own phone number, you might want to have the phone number of a friend or relative living outside your immediate area included on the tag.
For more information about pets and disasters, contact the American Veterinary Medical Association. See the resources section of this pamphlet.
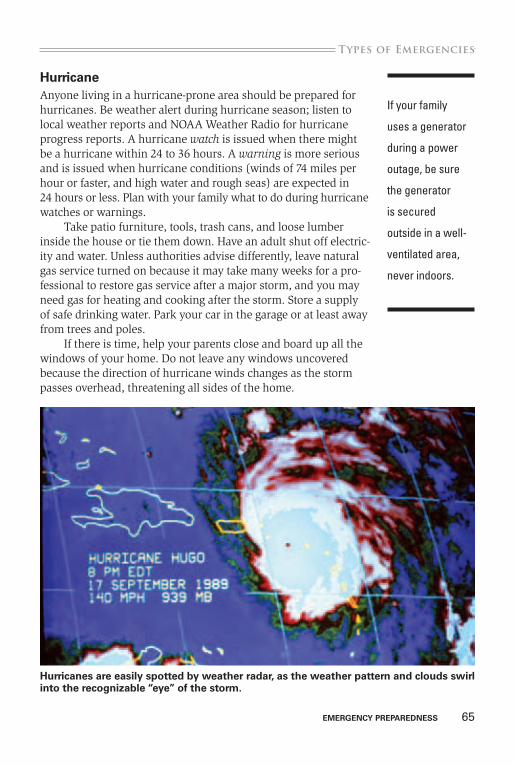
EmERgEnCy PREPAREdnESS 65
.Types of Emergencies
HurricaneAnyone living in a hurricane-prone area should be prepared for hurricanes. Be weather alert during hurricane season; listen to local weather reports and NOAA Weather Radio for hurricane progress reports. A hurricane watch is issued when there might be a hurricane within 24 to 36 hours. A warning is more serious and is issued when hurricane conditions (winds of 74 miles per hour or faster, and high water and rough seas) are expected in 24 hours or less. Plan with your family what to do during hurricane watches or warnings.
Take patio furniture, tools, trash cans, and loose lumber inside the house or tie them down. Have an adult shut off electric-ity and water. Unless authorities advise differently, leave natural gas service turned on because it may take many weeks for a pro-fessional to restore gas service after a major storm, and you may need gas for heating and cooking after the storm. Store a supply of safe drinking water. Park your car in the garage or at least away from trees and poles.
If there is time, help your parents close and board up all the windows of your home. Do not leave any windows uncovered because the direction of hurricane winds changes as the storm passes overhead, threatening all sides of the home.
If your family
uses a generator
during a power
outage, be sure
the generator
is secured
outside in a well-
ventilated area,
never indoors.
Hurricanes are easily spotted by weather radar, as the weather pattern and clouds swirl into the recognizable “eye” of the storm.
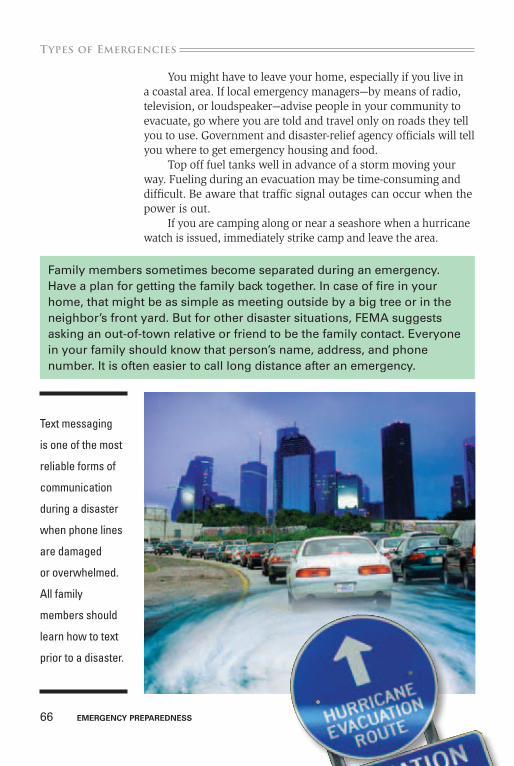
66 EmERgEnCy PREPAREdnESS
Types of Emergencies.
You might have to leave your home, especially if you live in a coastal area. If local emergency managers—by means of radio, television, or loudspeaker—advise people in your community to evacuate, go where you are told and travel only on roads they tell you to use. Government and disaster-relief agency officials will tell you where to get emergency housing and food.
Top off fuel tanks well in advance of a storm moving your way. Fueling during an evacuation may be time-consuming and difficult. Be aware that traffic signal outages can occur when the power is out.
If you are camping along or near a seashore when a hurricane watch is issued, immediately strike camp and leave the area.
Family members sometimes become separated during an emergency. Have a plan for getting the family back together. In case of fire in your home, that might be as simple as meeting outside by a big tree or in the neighbor’s front yard. But for other disaster situations, FEMA suggests asking an out-of-town relative or friend to be the family contact. Everyone in your family should know that person’s name, address, and phone number. It is often easier to call long distance after an emergency.
Text messaging
is one of the most
reliable forms of
communication
during a disaster
when phone lines
are damaged
or overwhelmed.
All family
members should
learn how to text
prior to a disaster.
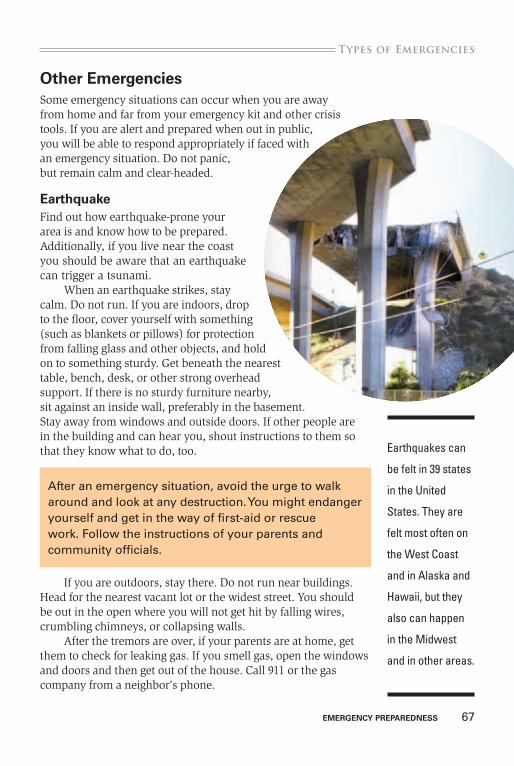
EmERgEnCy PREPAREdnESS 67
.Types of Emergencies
Other EmergenciesSome emergency situations can occur when you are away from home and far from your emergency kit and other crisis tools. If you are alert and prepared when out in public, you will be able to respond appropriately if faced with an emergency situation. Do not panic, but remain calm and clear-headed.
EarthquakeFind out how earthquake-prone your area is and know how to be prepared. Additionally, if you live near the coast you should be aware that an earthquake can trigger a tsunami.
When an earthquake strikes, stay calm. Do not run. If you are indoors, drop to the floor, cover yourself with something (such as blankets or pillows) for protection from falling glass and other objects, and hold on to something sturdy. Get beneath the nearest table, bench, desk, or other strong overhead support. If there is no sturdy furniture nearby, sit against an inside wall, preferably in the basement. Stay away from windows and outside doors. If other people are in the building and can hear you, shout instructions to them so that they know what to do, too.
If you are outdoors, stay there. Do not run near buildings. Head for the nearest vacant lot or the widest street. You should be out in the open where you will not get hit by falling wires, crumbling chimneys, or collapsing walls.
After the tremors are over, if your parents are at home, get them to check for leaking gas. If you smell gas, open the windows and doors and then get out of the house. Call 911 or the gas company from a neighbor’s phone.
Earthquakes can
be felt in 39 states
in the United
States. They are
felt most often on
the West Coast
and in Alaska and
Hawaii, but they
also can happen
in the Midwest
and in other areas.
After an emergency situation, avoid the urge to walk around and look at any destruction. You might endanger yourself and get in the way of first-aid or rescue work. Follow the instructions of your parents and community officials.
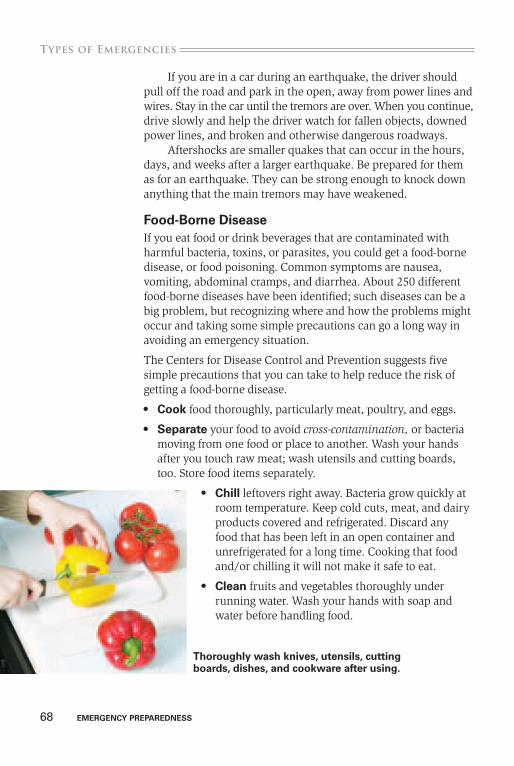
68 EmERgEnCy PREPAREdnESS
Types of Emergencies.
If you are in a car during an earthquake, the driver should pull off the road and park in the open, away from power lines and wires. Stay in the car until the tremors are over. When you continue, drive slowly and help the driver watch for fallen objects, downed power lines, and broken and otherwise dangerous roadways.
Aftershocks are smaller quakes that can occur in the hours, days, and weeks after a larger earthquake. Be prepared for them as for an earthquake. They can be strong enough to knock down anything that the main tremors may have weakened.
Food-Borne diseaseIf you eat food or drink beverages that are contaminated with harmful bacteria, toxins, or parasites, you could get a food-borne disease, or food poisoning. Common symptoms are nausea, vomiting, abdominal cramps, and diarrhea. About 250 different food-borne diseases have been identified; such diseases can be a big problem, but recognizing where and how the problems might occur and taking some simple precautions can go a long way in avoiding an emergency situation.
The Centers for Disease Control and Prevention suggests five simple precautions that you can take to help reduce the risk of getting a food-borne disease.
•Cook food thoroughly, particularly meat, poultry, and eggs.
•Separate your food to avoid cross-contamination, or bacteria moving from one food or place to another. Wash your hands after you touch raw meat; wash utensils and cutting boards, too. Store food items separately.
•Chill leftovers right away. Bacteria grow quickly at room temperature. Keep cold cuts, meat, and dairy products covered and refrigerated. Discard any food that has been left in an open container and unrefrigerated for a long time. Cooking that food and/or chilling it will not make it safe to eat.
•Clean fruits and vegetables thoroughly under running water. Wash your hands with soap and water before handling food.
Thoroughly wash knives, utensils, cutting boards, dishes, and cookware after using.
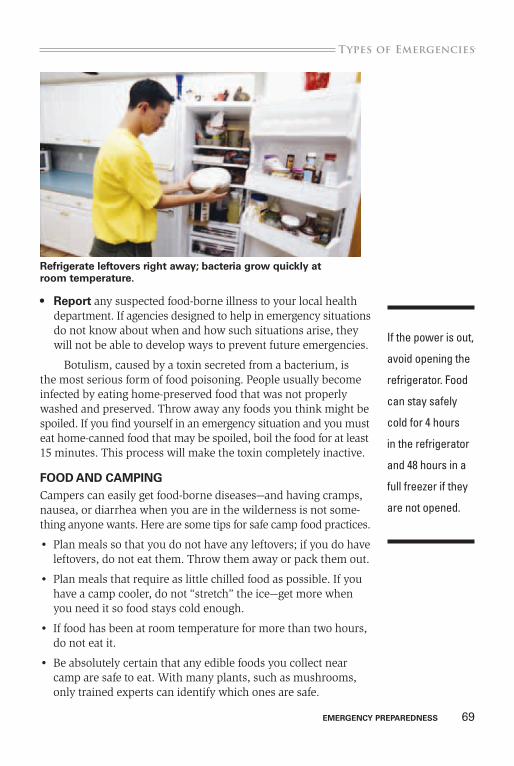
EmERgEnCy PREPAREdnESS 69
.Types of Emergencies
•Report any suspected food-borne illness to your local health department. If agencies designed to help in emergency situations do not know about when and how such situations arise, they will not be able to develop ways to prevent future emergencies.
Botulism, caused by a toxin secreted from a bacterium, is the most serious form of food poisoning. People usually become infected by eating home-preserved food that was not properly washed and preserved. Throw away any foods you think might be spoiled. If you find yourself in an emergency situation and you must eat home-canned food that may be spoiled, boil the food for at least 15 minutes. This process will make the toxin completely inactive.
FOOd And CAmPIngCampers can easily get food-borne diseases—and having cramps, nausea, or diarrhea when you are in the wilderness is not some-thing anyone wants. Here are some tips for safe camp food practices.
• Plan meals so that you do not have any leftovers; if you do have leftovers, do not eat them. Throw them away or pack them out.
• Plan meals that require as little chilled food as possible. If you have a camp cooler, do not “stretch” the ice—get more when you need it so food stays cold enough.
• If food has been at room temperature for more than two hours, do not eat it.
• Be absolutely certain that any edible foods you collect near camp are safe to eat. With many plants, such as mushrooms, only trained experts can identify which ones are safe.
Refrigerate leftovers right away; bacteria grow quickly at room temperature.
If the power is out,
avoid opening the
refrigerator. Food
can stay safely
cold for 4 hours
in the refrigerator
and 48 hours in a
full freezer if they
are not opened.
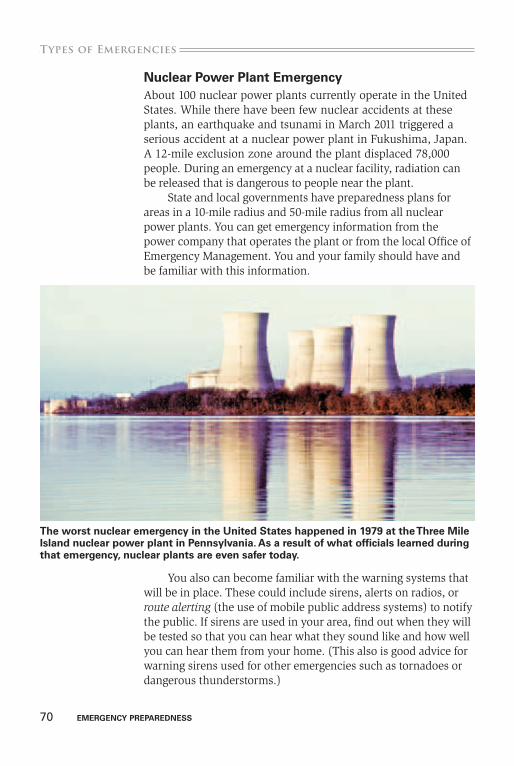
70 EmERgEnCy PREPAREdnESS
Types of Emergencies.
nuclear Power Plant EmergencyAbout 100 nuclear power plants currently operate in the United States. While there have been few nuclear accidents at these plants, an earthquake and tsunami in March 2011 triggered a serious accident at a nuclear power plant in Fukushima, Japan. A 12-mile exclusion zone around the plant displaced 78,000 people. During an emergency at a nuclear facility, radiation can be released that is dangerous to people near the plant.
State and local governments have preparedness plans for areas in a 10-mile radius and 50-mile radius from all nuclear power plants. You can get emergency information from the power company that operates the plant or from the local Office of Emergency Management. You and your family should have and be familiar with this information.
You also can become familiar with the warning systems that will be in place. These could include sirens, alerts on radios, or route alerting (the use of mobile public address systems) to notify the public. If sirens are used in your area, find out when they will be tested so that you can hear what they sound like and how well you can hear them from your home. (This also is good advice for warning sirens used for other emergencies such as tornadoes or dangerous thunderstorms.)
The worst nuclear emergency in the United States happened in 1979 at the Three mile Island nuclear power plant in Pennsylvania. As a result of what officials learned during that emergency, nuclear plants are even safer today.
EmERgEnCy PREPAREdnESS 71
.Types of Emergencies
Learn about the emergency plans at places where your fam-ily members might be, such as schools, child care centers, and nursing homes. Learn where people are supposed to go if there is an evacuation. Be prepared to evacuate with emergency supplies, as you might be for another emergency.
There are four levels of emergency at nuclear power plants:
• A notification of an unusual event is the least serious. Something unusual or unexpected has happened at the plant, but the public does not have to do anything special. Emergency officials are notified.
• An alert means that something has happened to reduce plant safety, but all the backup systems are still working and no one is in danger.
• A site area emergency is more serious. Small amounts of radiation might be released into the air or water, but these levels are still expected to be safe outside the boundaries of the plant.
• A general emergency is the most serious problem. Radiation could leak outside the plant and off the plant site. Sirens will be sounded or other alert systems used. You should listen to the radio and watch television. Local authorities will provide infor-mation and instructions. Follow their instructions promptly—you may be advised to evacuate or take shelter.
If you are told to stay indoors, close doors, windows, and chimney dampers. You want to keep outside air from getting in. Turn off forced-air heating or air-conditioning. Put food in covered contain-ers or in the refrigerator. If you can, go to the basement or another underground area. Stay there until you are told it is safe to leave. Do not use the telephone unless absolutely necessary; all lines will be needed for emergency calls.
If you are told to evacuate, stay calm. You will have plenty of time to leave. When outdoors, cover your nose and mouth with a handkerchief. When you go back indoors, change your clothes and shower. Put the clothes you were wearing in a plastic bag and seal it. When you leave your home, lock the doors and win-dows. Keep car windows and vents closed. Listen to the radio for updates, evacuation routes, and other instructions. Review the emergency information you got from the power company, which will include a map of evacuation routes and where you can find relocation centers.
Authorities will monitor radiation release and will let the public know when any danger has passed.
72 EmERgEnCy PREPAREdnESS
Types of Emergencies.
Emergency in a Public PlaceIt seems that we hear about emergencies in public places more and more—in schools, office buildings, shopping malls, and restaurants, and even in places of worship. As in your home, recognizing potential emergency situations is the first step in preparedness. In your school, for instance, do you see any fire hazards in the building? Are conditions and practices in shops, labs, and the gym safe? Are the waste collection, storage, and disposal practices safe? If you see any unsafe conditions in your school, tell a teacher, the principal, or another adult who will listen.
One important thing you can always do when facing any emergency is to stay calm and as clear-headed as you can. In a public place, this can be especially important because there may be other people around you who are afraid and not acting in a safe manner. You may have heard the story of someone yelling “Fire!” in a crowded theater. The audience members all react at once, rushing for a door as they try to escape. Such sudden, unthinking reactions can cause more serious accidents, and even death, so learn how to control your own fear. Try not to give in to it, as it can cloud your judgment. If you are calm, you may be able to help other people stay calm. Set an example.
Always remember that you must never endanger yourself when you are facing an emergency. If you can safely do so, call 911 for help. Otherwise, sometimes the wisest thing you can do is to protect yourself and wait for help to come to you.
As much as possible, be prepared before trouble strikes in public. For instance, get into the habit of looking for exits in any public building you enter. Be aware that in some situations, the best thing to do is to keep yourself safe and possibly leave the scene if you can.
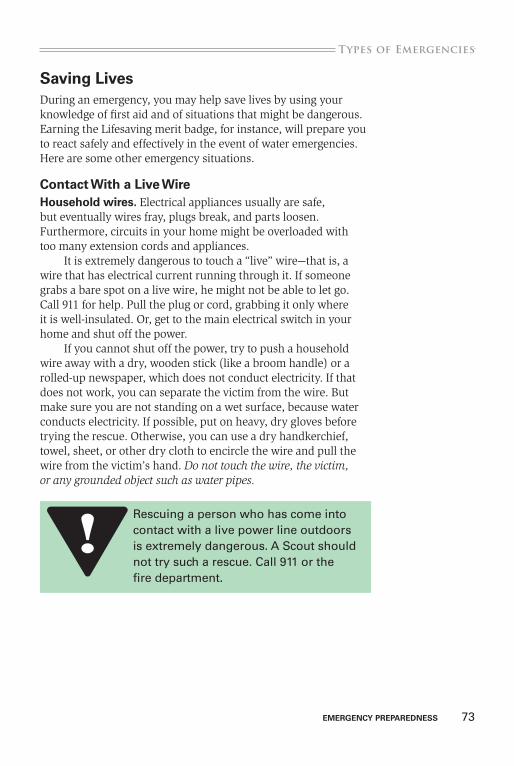
EmERgEnCy PREPAREdnESS 73
.Types of Emergencies
Saving LivesDuring an emergency, you may help save lives by using your knowledge of first aid and of situations that might be dangerous. Earning the Lifesaving merit badge, for instance, will prepare you to react safely and effectively in the event of water emergencies. Here are some other emergency situations.
Contact With a Live WireHousehold wires. Electrical appliances usually are safe, but eventually wires fray, plugs break, and parts loosen. Furthermore, circuits in your home might be overloaded with too many extension cords and appliances.
It is extremely dangerous to touch a “live” wire—that is, a wire that has electrical current running through it. If someone grabs a bare spot on a live wire, he might not be able to let go. Call 911 for help. Pull the plug or cord, grabbing it only where it is well-insulated. Or, get to the main electrical switch in your home and shut off the power.
If you cannot shut off the power, try to push a household wire away with a dry, wooden stick (like a broom handle) or a rolled-up newspaper, which does not conduct electricity. If that does not work, you can separate the victim from the wire. But make sure you are not standing on a wet surface, because water conducts electricity. If possible, put on heavy, dry gloves before trying the rescue. Otherwise, you can use a dry handkerchief, towel, sheet, or other dry cloth to encircle the wire and pull the wire from the victim’s hand. Do not touch the wire, the victim, or any grounded object such as water pipes.
Rescuing a person who has come into contact with a live power line outdoors is extremely dangerous. A Scout should not try such a rescue. Call 911 or the fire department.
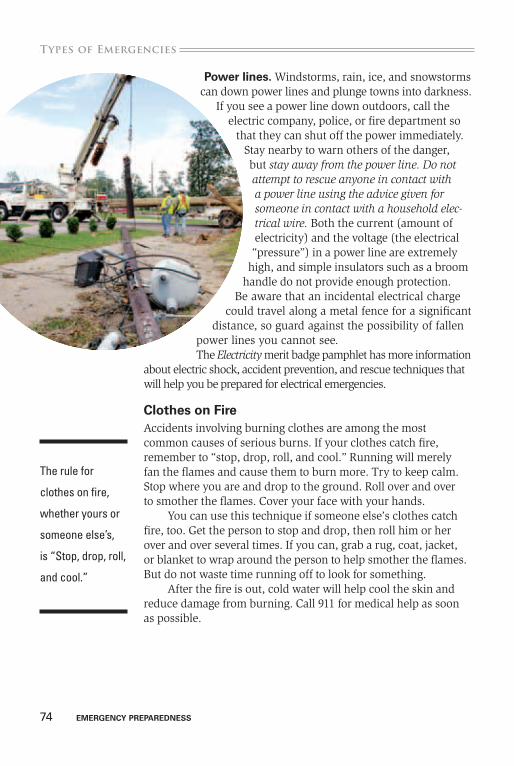
74 EmERgEnCy PREPAREdnESS
Types of Emergencies.
The rule for
clothes on fire,
whether yours or
someone else’s,
is “Stop, drop, roll,
and cool.”
Power lines. Windstorms, rain, ice, and snowstorms can down power lines and plunge towns into darkness.
If you see a power line down outdoors, call the electric company, police, or fire department so
that they can shut off the power immediately. Stay nearby to warn others of the danger, but stay away from the power line. Do not attempt to rescue anyone in contact with a power line using the advice given for someone in contact with a household elec-trical wire. Both the current (amount of electricity) and the voltage (the electrical “pressure”) in a power line are extremely
high, and simple insulators such as a broom handle do not provide enough protection.
Be aware that an incidental electrical charge could travel along a metal fence for a significant
distance, so guard against the possibility of fallen power lines you cannot see.The Electricity merit badge pamphlet has more information
about electric shock, accident prevention, and rescue techniques that will help you be prepared for electrical emergencies.
Clothes on FireAccidents involving burning clothes are among the most common causes of serious burns. If your clothes catch fire, remember to “stop, drop, roll, and cool.” Running will merely fan the flames and cause them to burn more. Try to keep calm. Stop where you are and drop to the ground. Roll over and over to smother the flames. Cover your face with your hands.
You can use this technique if someone else’s clothes catch fire, too. Get the person to stop and drop, then roll him or her over and over several times. If you can, grab a rug, coat, jacket, or blanket to wrap around the person to help smother the flames. But do not waste time running off to look for something.
After the fire is out, cold water will help cool the skin and reduce damage from burning. Call 911 for medical help as soon as possible.
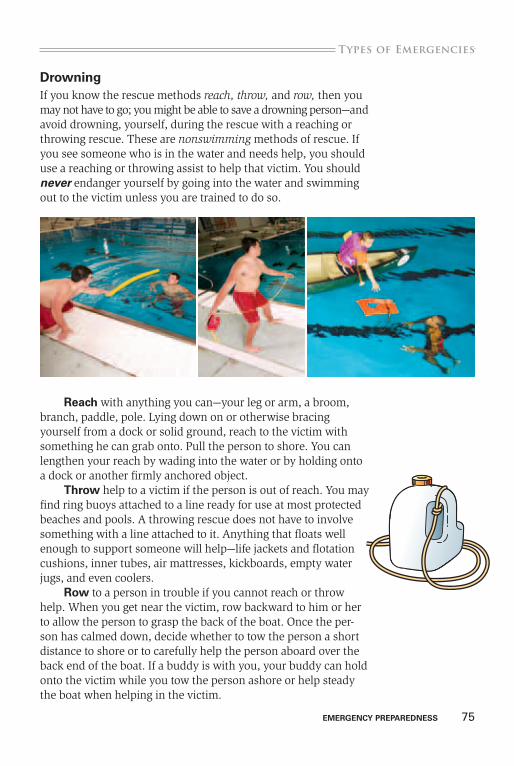
EmERgEnCy PREPAREdnESS 75
.Types of Emergencies
drowningIf you know the rescue methods reach, throw, and row, then you may not have to go; you might be able to save a drowning person—and avoid drowning, yourself, during the rescue with a reaching or throwing rescue. These are nonswimming methods of rescue. If you see someone who is in the water and needs help, you should use a reaching or throwing assist to help that victim. You should never endanger yourself by going into the water and swimming out to the victim unless you are trained to do so.
Reach with anything you can—your leg or arm, a broom, branch, paddle, pole. Lying down on or otherwise bracing yourself from a dock or solid ground, reach to the victim with something he can grab onto. Pull the person to shore. You can lengthen your reach by wading into the water or by holding onto a dock or another firmly anchored object.
Throw help to a victim if the person is out of reach. You may find ring buoys attached to a line ready for use at most protected beaches and pools. A throwing rescue does not have to involve something with a line attached to it. Anything that floats well enough to support someone will help—life jackets and flotation cushions, inner tubes, air mattresses, kickboards, empty water jugs, and even coolers.
Row to a person in trouble if you cannot reach or throw help. When you get near the victim, row backward to him or her to allow the person to grasp the back of the boat. Once the per-son has calmed down, decide whether to tow the person a short distance to shore or to carefully help the person aboard over the back end of the boat. If a buddy is with you, your buddy can hold onto the victim while you tow the person ashore or help steady the boat when helping in the victim.
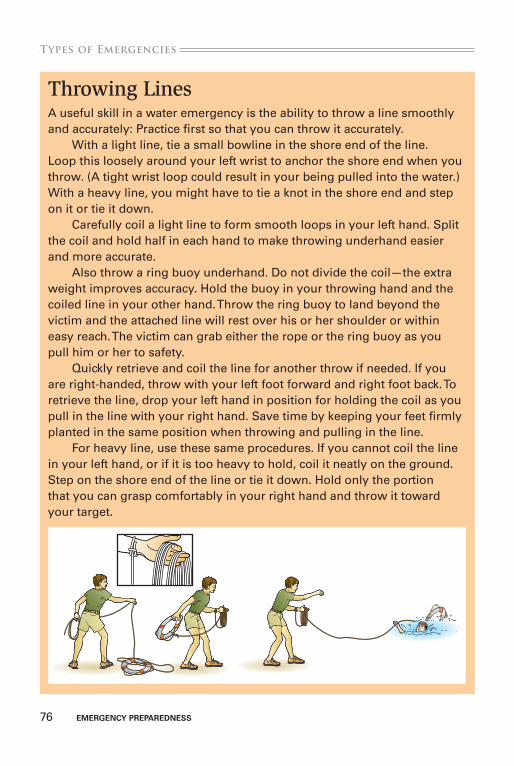
76 EmERgEnCy PREPAREdnESS
Types of Emergencies.
Throwing LinesA useful skill in a water emergency is the ability to throw a line smoothly and accurately: Practice first so that you can throw it accurately.
With a light line, tie a small bowline in the shore end of the line. Loop this loosely around your left wrist to anchor the shore end when you throw. (A tight wrist loop could result in your being pulled into the water.) With a heavy line, you might have to tie a knot in the shore end and step on it or tie it down.
Carefully coil a light line to form smooth loops in your left hand. Split the coil and hold half in each hand to make throwing underhand easier and more accurate.
Also throw a ring buoy underhand. Do not divide the coil—the extra weight improves accuracy. Hold the buoy in your throwing hand and the coiled line in your other hand. Throw the ring buoy to land beyond the victim and the attached line will rest over his or her shoulder or within easy reach. The victim can grab either the rope or the ring buoy as you pull him or her to safety.
Quickly retrieve and coil the line for another throw if needed. If you are right-handed, throw with your left foot forward and right foot back. To retrieve the line, drop your left hand in position for holding the coil as you pull in the line with your right hand. Save time by keeping your feet firmly planted in the same position when throwing and pulling in the line.
For heavy line, use these same procedures. If you cannot coil the line in your left hand, or if it is too heavy to hold, coil it neatly on the ground. Step on the shore end of the line or tie it down. Hold only the portion that you can grasp comfortably in your right hand and throw it toward your target.
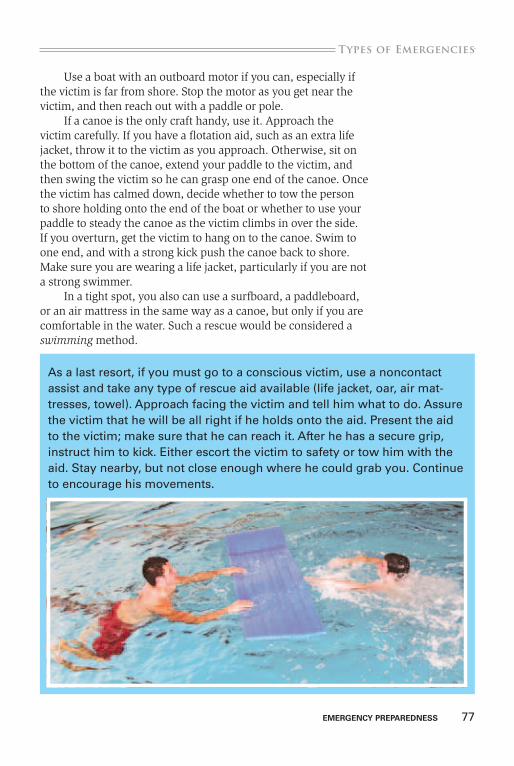
EmERgEnCy PREPAREdnESS 77
.Types of Emergencies
Use a boat with an outboard motor if you can, especially if the victim is far from shore. Stop the motor as you get near the victim, and then reach out with a paddle or pole.
If a canoe is the only craft handy, use it. Approach the victim carefully. If you have a flotation aid, such as an extra life jacket, throw it to the victim as you approach. Otherwise, sit on the bottom of the canoe, extend your paddle to the victim, and then swing the victim so he can grasp one end of the canoe. Once the victim has calmed down, decide whether to tow the person to shore holding onto the end of the boat or whether to use your paddle to steady the canoe as the victim climbs in over the side. If you overturn, get the victim to hang on to the canoe. Swim to one end, and with a strong kick push the canoe back to shore. Make sure you are wearing a life jacket, particularly if you are not a strong swimmer.
In a tight spot, you also can use a surfboard, a paddleboard, or an air mattress in the same way as a canoe, but only if you are comfortable in the water. Such a rescue would be considered a swimming method.
As a last resort, if you must go to a conscious victim, use a noncontact assist and take any type of rescue aid available (life jacket, oar, air mat-tresses, towel). Approach facing the victim and tell him what to do. Assure the victim that he will be all right if he holds onto the aid. Present the aid to the victim; make sure that he can reach it. After he has a secure grip, instruct him to kick. Either escort the victim to safety or tow him with the aid. Stay nearby, but not close enough where he could grab you. Continue to encourage his movements.
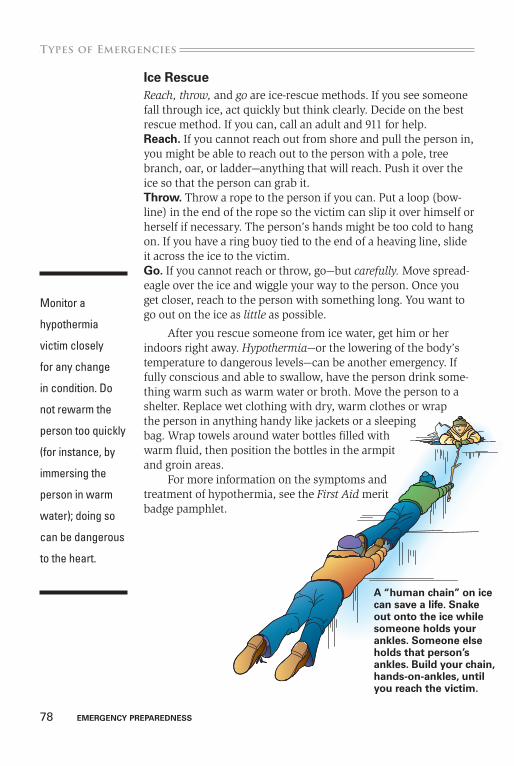
78 EmERgEnCy PREPAREdnESS
Types of Emergencies.
Ice Rescue Reach, throw, and go are ice-rescue methods. If you see someone fall through ice, act quickly but think clearly. Decide on the best rescue method. If you can, call an adult and 911 for help.Reach. If you cannot reach out from shore and pull the person in, you might be able to reach out to the person with a pole, tree branch, oar, or ladder—anything that will reach. Push it over the ice so that the person can grab it.Throw. Throw a rope to the person if you can. Put a loop (bow-line) in the end of the rope so the victim can slip it over himself or herself if necessary. The person’s hands might be too cold to hang on. If you have a ring buoy tied to the end of a heaving line, slide it across the ice to the victim.go. If you cannot reach or throw, go—but carefully. Move spread-eagle over the ice and wiggle your way to the person. Once you get closer, reach to the person with something long. You want to go out on the ice as little as possible.
After you rescue someone from ice water, get him or her indoors right away. Hypothermia—or the lowering of the body’s temperature to dangerous levels—can be another emergency. If fully conscious and able to swallow, have the person drink some-thing warm such as warm water or broth. Move the person to a shelter. Replace wet clothing with dry, warm clothes or wrap the person in anything handy like jackets or a sleeping bag. Wrap towels around water bottles filled with warm fluid, then position the bottles in the armpit and groin areas.
For more information on the symptoms and treatment of hypothermia, see the First Aid merit badge pamphlet.
Monitor a
hypothermia
victim closely
for any change
in condition. Do
not rewarm the
person too quickly
(for instance, by
immersing the
person in warm
water); doing so
can be dangerous
to the heart.
A “human chain” on ice can save a life. Snake out onto the ice while someone holds your ankles. Someone else holds that person’s ankles. Build your chain, hands-on-ankles, until you reach the victim.
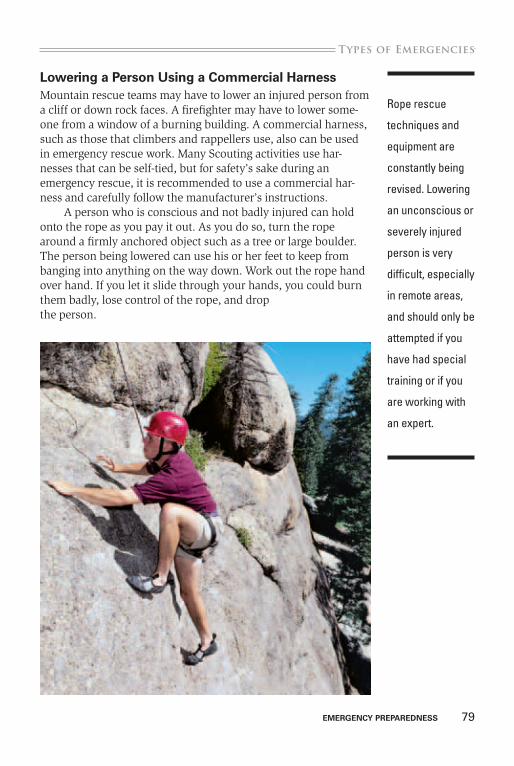
EmERgEnCy PREPAREdnESS 79
.Types of Emergencies
Lowering a Person Using a Commercial HarnessMountain rescue teams may have to lower an injured person from a cliff or down rock faces. A firefighter may have to lower some-one from a window of a burning building. A commercial harness, such as those that climbers and rappellers use, also can be used in emergency rescue work. Many Scouting activities use har-nesses that can be self-tied, but for safety’s sake during an emergency rescue, it is recommended to use a commercial har-ness and carefully follow the manufacturer’s instructions.
A person who is conscious and not badly injured can hold onto the rope as you pay it out. As you do so, turn the rope around a firmly anchored object such as a tree or large boulder. The person being lowered can use his or her feet to keep from banging into anything on the way down. Work out the rope hand over hand. If you let it slide through your hands, you could burn them badly, lose control of the rope, and drop the person.
Rope rescue
techniques and
equipment are
constantly being
revised. Lowering
an unconscious or
severely injured
person is very
difficult, especially
in remote areas,
and should only be
attempted if you
have had special
training or if you
are working with
an expert.
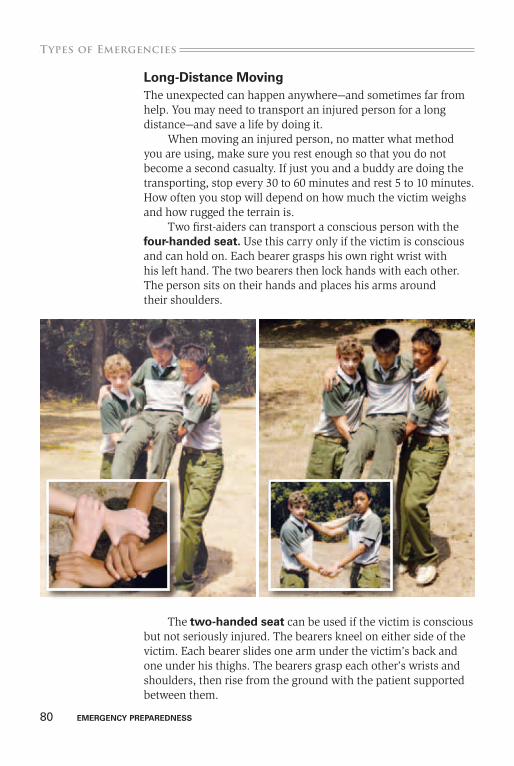
80 EmERgEnCy PREPAREdnESS
Types of Emergencies.
Long-distance movingThe unexpected can happen anywhere—and sometimes far from help. You may need to transport an injured person for a long distance—and save a life by doing it.
When moving an injured person, no matter what method you are using, make sure you rest enough so that you do not become a second casualty. If just you and a buddy are doing the transporting, stop every 30 to 60 minutes and rest 5 to 10 minutes. How often you stop will depend on how much the victim weighs and how rugged the terrain is.
Two first-aiders can transport a conscious person with the four-handed seat. Use this carry only if the victim is conscious and can hold on. Each bearer grasps his own right wrist with his left hand. The two bearers then lock hands with each other. The person sits on their hands and places his arms around their shoulders.
The two-handed seat can be used if the victim is conscious but not seriously injured. The bearers kneel on either side of the victim. Each bearer slides one arm under the victim’s back and one under his thighs. The bearers grasp each other’s wrists and shoulders, then rise from the ground with the patient supported between them.
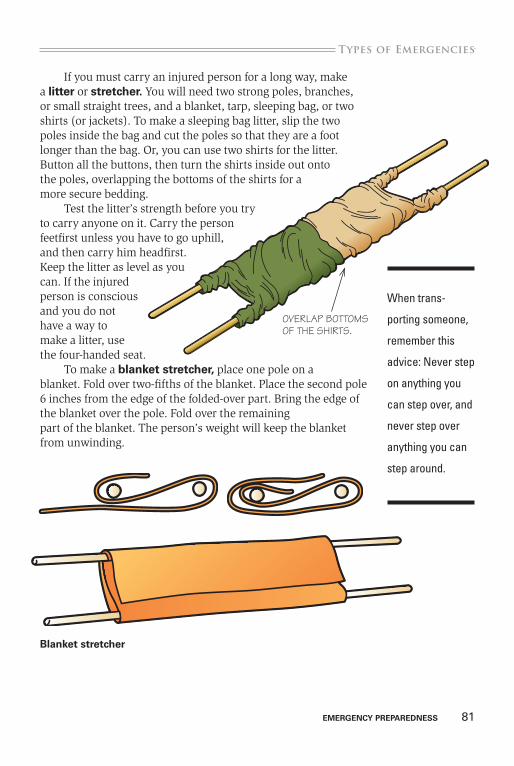
EmERgEnCy PREPAREdnESS 81
.Types of Emergencies
If you must carry an injured person for a long way, make a litter or stretcher. You will need two strong poles, branches, or small straight trees, and a blanket, tarp, sleeping bag, or two shirts (or jackets). To make a sleeping bag litter, slip the two poles inside the bag and cut the poles so that they are a foot longer than the bag. Or, you can use two shirts for the litter. Button all the buttons, then turn the shirts inside out onto the poles, overlapping the bottoms of the shirts for a more secure bedding.
Test the litter’s strength before you try to carry anyone on it. Carry the person feetfirst unless you have to go uphill, and then carry him headfirst. Keep the litter as level as you can. If the injured person is conscious and you do not have a way to make a litter, use the four-handed seat.
To make a blanket stretcher, place one pole on a blanket. Fold over two-fifths of the blanket. Place the second pole 6 inches from the edge of the folded-over part. Bring the edge of the blanket over the pole. Fold over the remaining part of the blanket. The person’s weight will keep the blanket from unwinding.
When trans-
porting someone,
remember this
advice: Never step
on anything you
can step over, and
never step over
anything you can
step around.
overlap BottoMs of the shirts.
Blanket stretcher
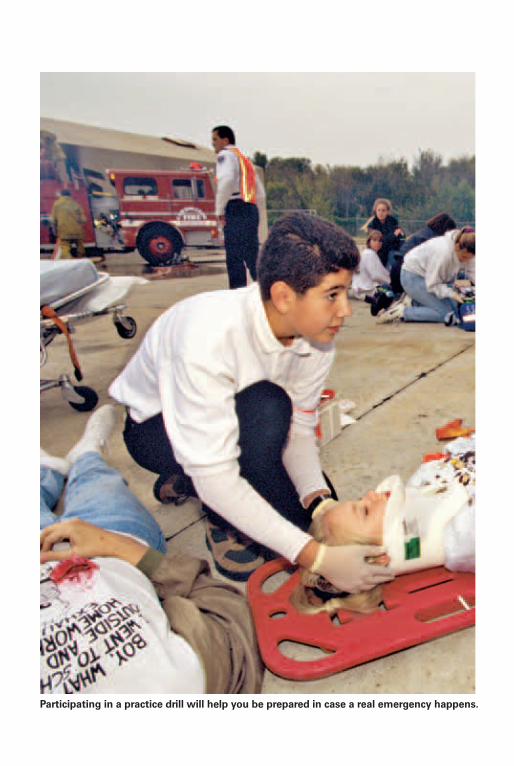
Participating in a practice drill will help you be prepared in case a real emergency happens.
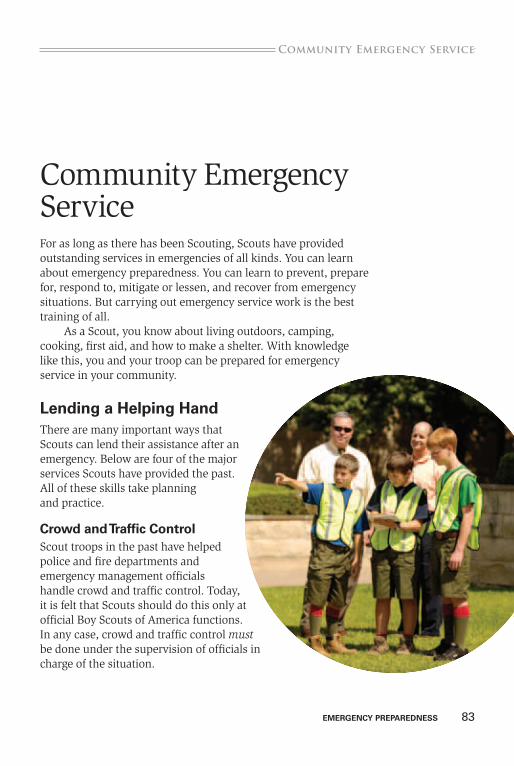
EmERgEnCy PREPAREdnESS 83
.community Emergency service
Community Emergency ServiceFor as long as there has been Scouting, Scouts have provided outstanding services in emergencies of all kinds. You can learn about emergency preparedness. You can learn to prevent, prepare for, respond to, mitigate or lessen, and recover from emergency situations. But carrying out emergency service work is the best training of all.
As a Scout, you know about living outdoors, camping, cooking, first aid, and how to make a shelter. With knowledge like this, you and your troop can be prepared for emergency service in your community.
Lending a Helping HandThere are many important ways that Scouts can lend their assistance after an emergency. Below are four of the major services Scouts have provided the past. All of these skills take planning and practice.
Crowd and Traffic ControlScout troops in the past have helped police and fire departments and emergency management officials handle crowd and traffic control. Today, it is felt that Scouts should do this only at official Boy Scouts of America functions. In any case, crowd and traffic control must be done under the supervision of officials in charge of the situation.
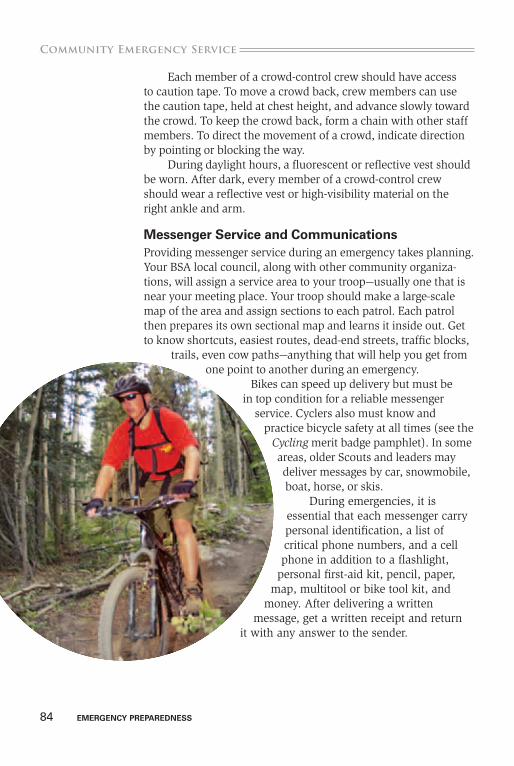
84 EmERgEnCy PREPAREdnESS
community Emergency service.
Each member of a crowd-control crew should have access to caution tape. To move a crowd back, crew members can use the caution tape, held at chest height, and advance slowly toward the crowd. To keep the crowd back, form a chain with other staff members. To direct the movement of a crowd, indicate direction by pointing or blocking the way.
During daylight hours, a fluorescent or reflective vest should be worn. After dark, every member of a crowd-control crew should wear a reflective vest or high-visibility material on the right ankle and arm.
messenger Service and CommunicationsProviding messenger service during an emergency takes planning. Your BSA local council, along with other community organiza-tions, will assign a service area to your troop—usually one that is near your meeting place. Your troop should make a large-scale map of the area and assign sections to each patrol. Each patrol then prepares its own sectional map and learns it inside out. Get to know shortcuts, easiest routes, dead-end streets, traffic blocks,
trails, even cow paths—anything that will help you get from one point to another during an emergency.
Bikes can speed up delivery but must be in top condition for a reliable messenger
service. Cyclers also must know and practice bicycle safety at all times (see the
Cycling merit badge pamphlet). In some areas, older Scouts and leaders may deliver messages by car, snowmobile, boat, horse, or skis.
During emergencies, it is essential that each messenger carry personal identification, a list of critical phone numbers, and a cell phone in addition to a flashlight,
personal first-aid kit, pencil, paper, map, multitool or bike tool kit, and
money. After delivering a written message, get a written receipt and return
it with any answer to the sender.
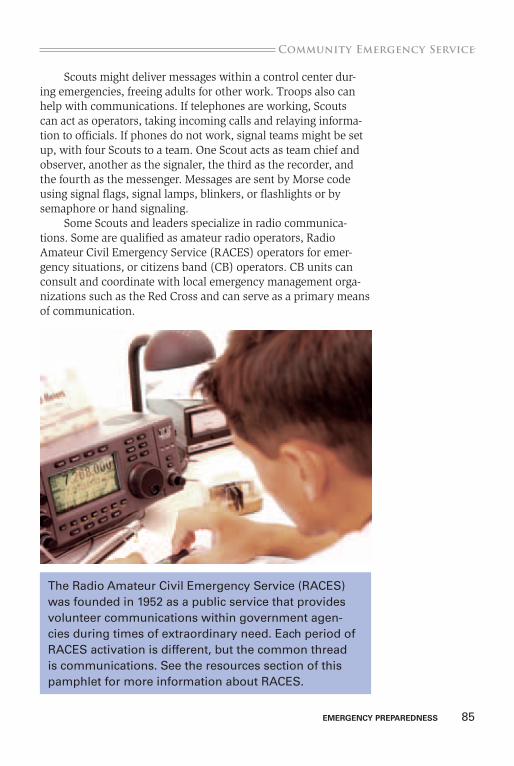
EmERgEnCy PREPAREdnESS 85
.community Emergency service
Scouts might deliver messages within a control center dur-ing emergencies, freeing adults for other work. Troops also can help with communications. If telephones are working, Scouts can act as operators, taking incoming calls and relaying informa-tion to officials. If phones do not work, signal teams might be set up, with four Scouts to a team. One Scout acts as team chief and observer, another as the signaler, the third as the recorder, and the fourth as the messenger. Messages are sent by Morse code using signal flags, signal lamps, blinkers, or flashlights or by semaphore or hand signaling.
Some Scouts and leaders specialize in radio communica-tions. Some are qualified as amateur radio operators, Radio Amateur Civil Emergency Service (RACES) operators for emer-gency situations, or citizens band (CB) operators. CB units can consult and coordinate with local emergency management orga-nizations such as the Red Cross and can serve as a primary means of communication.
The Radio Amateur Civil Emergency Service (RACES) was founded in 1952 as a public service that provides volunteer communications within government agen-cies during times of extraordinary need. Each period of RACES activation is different, but the common thread is communications. See the resources section of this pamphlet for more information about RACES.
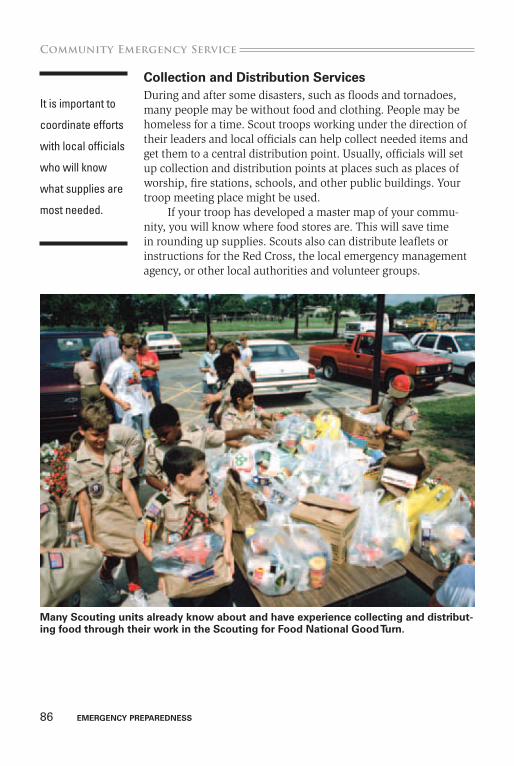
86 EmERgEnCy PREPAREdnESS
community Emergency service.
Collection and distribution ServicesDuring and after some disasters, such as floods and tornadoes, many people may be without food and clothing. People may be homeless for a time. Scout troops working under the direction of their leaders and local officials can help collect needed items and get them to a central distribution point. Usually, officials will set up collection and distribution points at places such as places of worship, fire stations, schools, and other public buildings. Your troop meeting place might be used.
If your troop has developed a master map of your commu-nity, you will know where food stores are. This will save time in rounding up supplies. Scouts also can distribute leaflets or instructions for the Red Cross, the local emergency management agency, or other local authorities and volunteer groups.
many Scouting units already know about and have experience collecting and distribut-ing food through their work in the Scouting for Food national good Turn.
It is important to
coordinate efforts
with local officials
who will know
what supplies are
most needed.
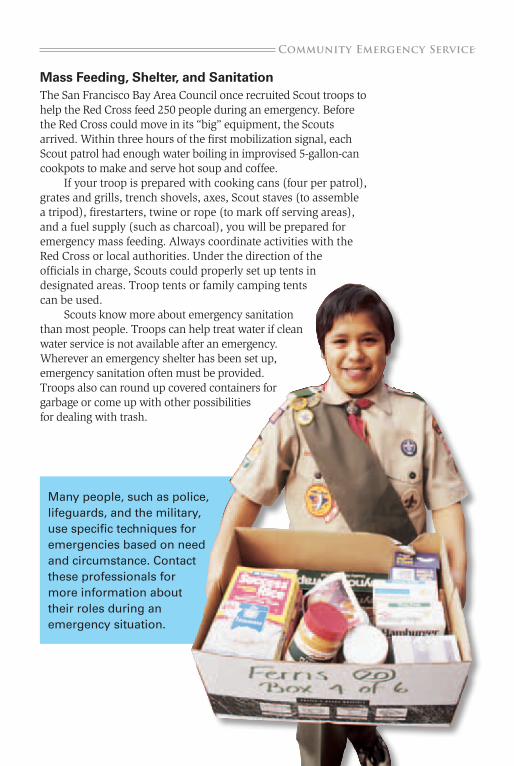
.community Emergency service
mass Feeding, Shelter, and SanitationThe San Francisco Bay Area Council once recruited Scout troops to help the Red Cross feed 250 people during an emergency. Before the Red Cross could move in its “big” equipment, the Scouts arrived. Within three hours of the first mobilization signal, each Scout patrol had enough water boiling in improvised 5-gallon-can cookpots to make and serve hot soup and coffee.
If your troop is prepared with cooking cans (four per patrol), grates and grills, trench shovels, axes, Scout staves (to assemble a tripod), firestarters, twine or rope (to mark off serving areas), and a fuel supply (such as charcoal), you will be prepared for emergency mass feeding. Always coordinate activities with the Red Cross or local authorities. Under the direction of the officials in charge, Scouts could properly set up tents in designated areas. Troop tents or family camping tents can be used.
Scouts know more about emergency sanitation than most people. Troops can help treat water if clean water service is not available after an emergency. Wherever an emergency shelter has been set up, emergency sanitation often must be provided. Troops also can round up covered containers for garbage or come up with other possibilities for dealing with trash.
Many people, such as police, lifeguards, and the military, use specific techniques for emergencies based on need and circumstance. Contact these professionals for more information about their roles during an emergency situation.
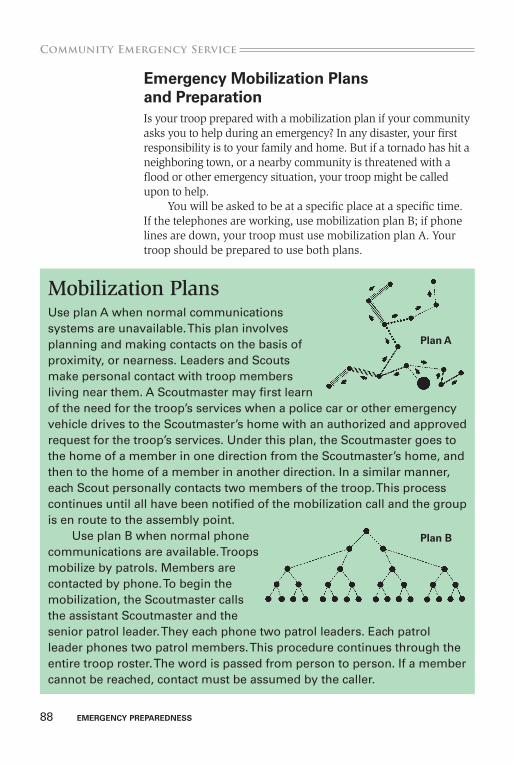
88 EmERgEnCy PREPAREdnESS
community Emergency service.
Emergency mobilization Plans and PreparationIs your troop prepared with a mobilization plan if your community asks you to help during an emergency? In any disaster, your first responsibility is to your family and home. But if a tornado has hit a neighboring town, or a nearby community is threatened with a flood or other emergency situation, your troop might be called upon to help.
You will be asked to be at a specific place at a specific time. If the telephones are working, use mobilization plan B; if phone lines are down, your troop must use mobilization plan A. Your troop should be prepared to use both plans.
Mobilization PlansUse plan A when normal communications systems are unavailable. This plan involves planning and making contacts on the basis of proximity, or nearness. Leaders and Scouts make personal contact with troop members living near them. A Scoutmaster may first learn of the need for the troop’s services when a police car or other emergency vehicle drives to the Scoutmaster’s home with an authorized and approved request for the troop’s services. Under this plan, the Scoutmaster goes to the home of a member in one direction from the Scoutmaster’s home, and then to the home of a member in another direction. In a similar manner, each Scout personally contacts two members of the troop. This process continues until all have been notified of the mobilization call and the group is en route to the assembly point.
Use plan B when normal phone communications are available. Troops mobilize by patrols. Members are contacted by phone. To begin the mobilization, the Scoutmaster calls the assistant Scoutmaster and the senior patrol leader. They each phone two patrol leaders. Each patrol leader phones two patrol members. This procedure continues through the entire troop roster. The word is passed from person to person. If a member cannot be reached, contact must be assumed by the caller.
Plan A
Plan B
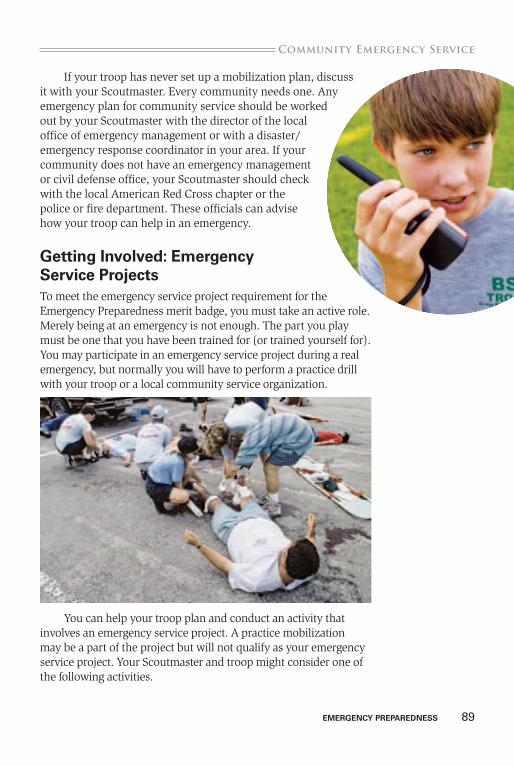
EmERgEnCy PREPAREdnESS 89
.community Emergency service
If your troop has never set up a mobilization plan, discuss it with your Scoutmaster. Every community needs one. Any emergency plan for community service should be worked out by your Scoutmaster with the director of the local office of emergency management or with a disaster/emergency response coordinator in your area. If your community does not have an emergency management or civil defense office, your Scoutmaster should check with the local American Red Cross chapter or the police or fire department. These officials can advise how your troop can help in an emergency.
getting Involved: Emergency Service ProjectsTo meet the emergency service project requirement for the Emergency Preparedness merit badge, you must take an active role. Merely being at an emergency is not enough. The part you play must be one that you have been trained for (or trained yourself for). You may participate in an emergency service project during a real emergency, but normally you will have to perform a practice drill with your troop or a local community service organization.
You can help your troop plan and conduct an activity that involves an emergency service project. A practice mobilization may be a part of the project but will not qualify as your emergency service project. Your Scoutmaster and troop might consider one of the following activities.
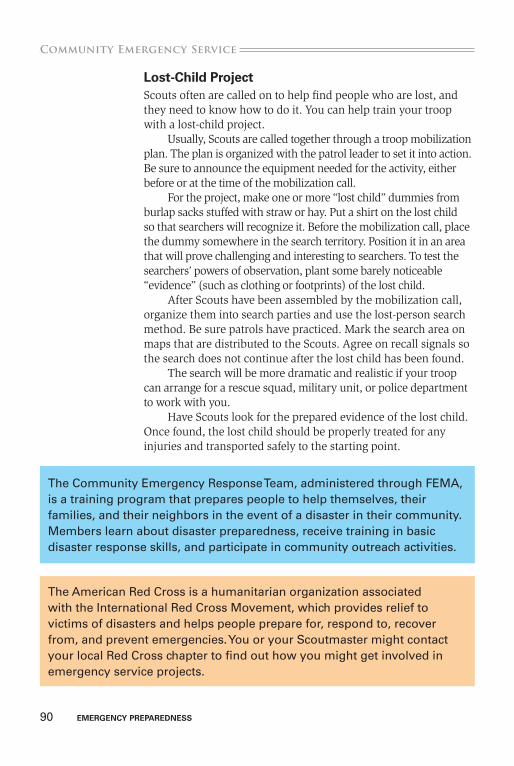
90 EmERgEnCy PREPAREdnESS
community Emergency service.
Lost-Child ProjectScouts often are called on to help find people who are lost, and they need to know how to do it. You can help train your troop with a lost-child project.
Usually, Scouts are called together through a troop mobilization plan. The plan is organized with the patrol leader to set it into action. Be sure to announce the equipment needed for the activity, either before or at the time of the mobilization call.
For the project, make one or more “lost child” dummies from burlap sacks stuffed with straw or hay. Put a shirt on the lost child so that searchers will recognize it. Before the mobilization call, place the dummy somewhere in the search territory. Position it in an area that will prove challenging and interesting to searchers. To test the searchers’ powers of observation, plant some barely noticeable “evidence” (such as clothing or footprints) of the lost child.
After Scouts have been assembled by the mobilization call, organize them into search parties and use the lost-person search method. Be sure patrols have practiced. Mark the search area on maps that are distributed to the Scouts. Agree on recall signals so the search does not continue after the lost child has been found.
The search will be more dramatic and realistic if your troop can arrange for a rescue squad, military unit, or police department to work with you.
Have Scouts look for the prepared evidence of the lost child. Once found, the lost child should be properly treated for any injuries and transported safely to the starting point.
The American Red Cross is a humanitarian organization associated with the International Red Cross Movement, which provides relief to victims of disasters and helps people prepare for, respond to, recover from, and prevent emergencies. You or your Scoutmaster might contact your local Red Cross chapter to find out how you might get involved in emergency service projects.
The Community Emergency Response Team, administered through FEMA, is a training program that prepares people to help themselves, their families, and their neighbors in the event of a disaster in their community. Members learn about disaster preparedness, receive training in basic disaster response skills, and participate in community outreach activities.
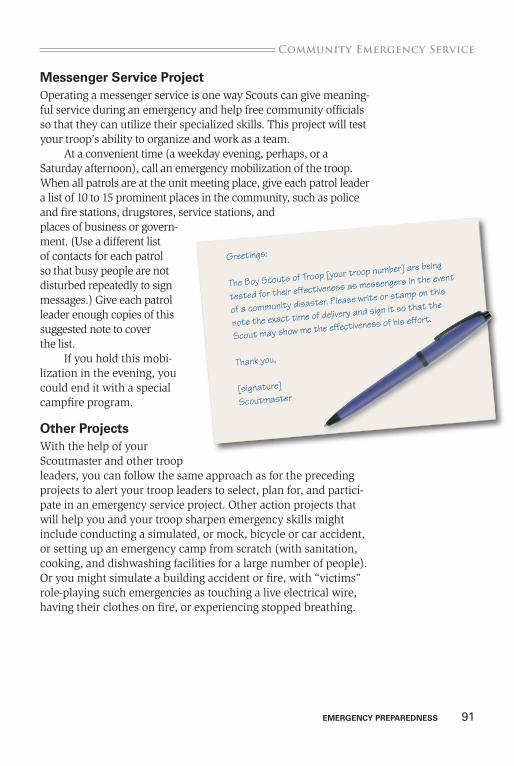
EmERgEnCy PREPAREdnESS 91
.community Emergency service
messenger Service ProjectOperating a messenger service is one way Scouts can give meaning-ful service during an emergency and help free community officials so that they can utilize their specialized skills. This project will test your troop’s ability to organize and work as a team.
At a convenient time (a weekday evening, perhaps, or a Saturday afternoon), call an emergency mobilization of the troop. When all patrols are at the unit meeting place, give each patrol leader a list of 10 to 15 prominent places in the community, such as police and fire stations, drugstores, service stations, and places of business or govern-ment. (Use a different list of contacts for each patrol so that busy people are not disturbed repeatedly to sign messages.) Give each patrol leader enough copies of this suggested note to cover the list.
If you hold this mobi-lization in the evening, you could end it with a special campfire program.
Other ProjectsWith the help of your Scoutmaster and other troop leaders, you can follow the same approach as for the preceding projects to alert your troop leaders to select, plan for, and partici-pate in an emergency service project. Other action projects that will help you and your troop sharpen emergency skills might include conducting a simulated, or mock, bicycle or car accident, or setting up an emergency camp from scratch (with sanitation, cooking, and dishwashing facilities for a large number of people). Or you might simulate a building accident or fire, with “victims” role-playing such emergencies as touching a live electrical wire, having their clothes on fire, or experiencing stopped breathing.
greetings:
the Boy scouts of troop [your troop number] are being
tested for their effectiveness as messengers in the event
of a community disaster. please write or stamp on this
note the exact time of delivery and sign it so that the
scout may show me the effectiveness of his effort.
thank you,
[signature]
scoutmaster
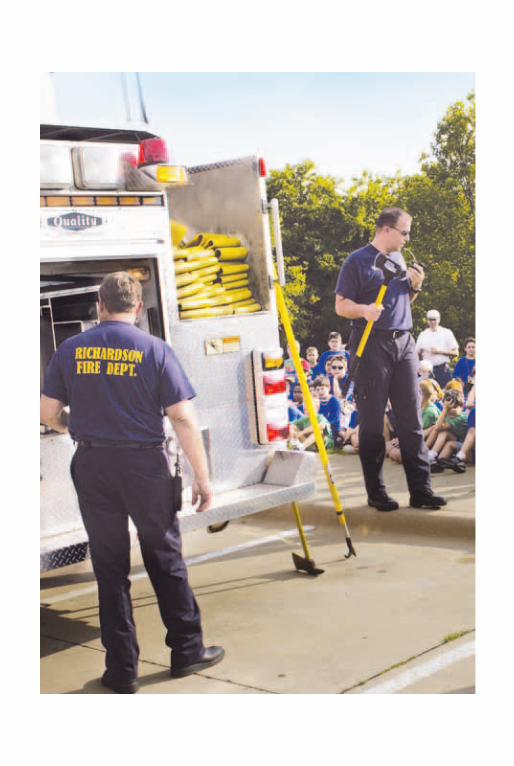
EmERgEnCy PREPAREdnESS 93
.Emergency Preparedness resources
Scouting LiteratureBoy Scout Journal; Backpacking, Camping, Canoeing, Cooking, Cycling, Electricity, Fire Safety, First Aid, Hiking, Home Repairs, Lifesaving, Motorboating, Nature, Orienteering, Pioneering, Public Health, Radio, Rowing, Safety, Search and Rescue, Small-Boat Sailing, Snow Sports, Swimming, Traffic Safety, Weather, and Wilderness Survival merit badge pamphlets
Books
American Red Cross. American Red Cross Water Safety Handbook. StayWell, 2004.
———. First Aid/CPR/AED for Schools and Communities (participant’s manual). Staywell, 2006.
———. Responding to Emergencies (participant’s manual). Staywell, 2007.
Forgey, William W. Basic Essentials: Wilderness First Aid, 3rd ed. Falcon Guides, 2007.
Kelly, Kate. Living Safe in an Unsafe World: The Complete Guide to Family Preparedness. New American Library Trade, 2000.
Meyer-Crissey, Pamela, and Brian L. Crissey, Ph.D. Common Sense in Uncommon Times. Granite Publishing, 2002.
U.S. Department of Transportation, National Highway Traffic Safety Administration. First There First Care: Bystander Care for the Injured. DOT HS 809 853, 2005.
Emergency Preparedness Resources
For more information about Scouting-related resources, visit the BSA’s official online retail cata-log (with your parent’s permission) at http://www.scoutstuff.org.
94 EmERgEnCy PREPAREdnESS
Emergency Preparedness resources.
The following emergency preparedness resources from the American Red Cross may be of particular interest to Scouts, Scout leaders, and merit badge counselors.
masters of disaster™ Educator’s Kit, No. A1140EDU.
masters of disaster™ Family Kit, No. A1140FAM.
Organizations and WebsitesAmerican Red CrossToll-free telephone: 800-733-2767Website: http://www.redcross.org
American Veterinary medical AssociationWebsite: http://avma.org
Citizen Corps/Community Emergency Response TeamsWebsite: http://www.citizencorps.gov/cert
Environmental Protection AgencyTelephone: 202-272-0167Toll-free telephone for literature requests only: 800-490-9198Website: http://www.epa.gov
Federal Emergency management AgencyTelephone: 800-621-3362Toll-free telephone for literature requests only: 800-480-2520Website: http://www.fema.gov
national Oceanic and Atmospheric AdministrationTelephone: 202-482-6090Website: http://www.noaa.gov
Radio Amateur Civil Emergency ServiceWebsite: http://www.usraces.org
Ready.govTelephone: 202-282-8000 or 202-447-3543 TTYWebsite: http://www.ready.gov
U.S. department of Homeland SecurityTelephone: 202-282-8000Website: www.dhs.gov
U.S. department of TransportationNHTSA Office of Emergency Medical ServicesTelephone: 202-366-5440Website: www.dot.gov
U.S. geological SurveyToll-free telephone: 888-275-8747Website: http://www.usgs.gov
EmErgEncy PrEParEdnEss 95
.Emergency Preparedness Resources
acknowledgmentsThe Boy Scouts of America gives special thanks to members of the BSA Health and Safety Committee, in particular David Bell, Ph.D.; Rick Mason; Arthur Mittelstaedt Jr., Ed.D.; and Sven Rundman, for their assistance. We also thank the following subject mat-ter experts from the Office of Health Affairs, U.S. Department of Homeland Security, for their contributions to this pamphlet: Scouter Darrell Donahue, Ph.D., American Association for the Advancement of Science Fellow; Assistant Secretary and Chief Medical Officer Jeffrey Runge, M.D.; Donald Noah, DVM, MPH, special advisor; and Tom McGinn, DVM, chief veterinarian.
The Boy Scouts of America thanks the following individuals for their assistance with the 2012 revision of this merit badge pamphlet: Ken Brinson, Bob Cameron, Wayne Fortin, Laura Itogawa, Ken Matsumoto, Pat Murphy, Peggy Orr, Steve Scarano, and Stephen Steinberger.
The Boy Scouts of America is grate-ful to the American Red Cross for providing hands-on assistance from beginning to end with this edition of the Emergency Preparedness merit badge pamphlet. In particu-lar, the BSA would like to thank the following individuals from the American Red Cross National Headquarters, Preparedness and Health and Safety Services: John E. Hendrickson (who is also a member of the BSA Health and Safety Committee); Jean Ertdmann; Victoria Melvin; Laurie Willshire, MPH, BSN; and Joscelyn Silsby, MPH, CHES.
Thanks also to Scott Meyer, Disaster Services, Mass Care.
96 EmERgEnCy PREPAREdnESS
Emergency Preparedness resources.
Photo and Illustration Credits
American National Red Cross, courtesy—page 94 (both)
David Bell, courtesy—page 57 (top left)
FEMA, courtesy—page 67
FEMA/George Armstrong, courtesy— page 11
FEMA/Patricia Armstrong, courtesy—page 60
FEMA/Andrea Booher, courtesy— page 24
FEMA/Mike Howard, courtesy—page 64
FEMA/Michael Raphael, courtesy— page 63
FEMA/Mark Wolfe, courtesy—page 74
HAAP Media Ltd., courtesy—cover (telephone, radio, background) and page 39 (bottom)
Byron Haverstick/Ozark Trails Council, courtesy—page 12 (both)
Ingram Publishing, ©1994–2001— page 91 (pen)
©Jupiterimages.com—cover (life jacket, evacuation route sign); pages 8, 27 (top, center), 29 (knife, gloves), 30, 39 (top), 52, 55, 61, and 66 (all)
NOAA/National Hurricane Center, courtesy—page 65
NOAA Photo Library, NOAA Central Library; OAR/ERL/National Severe Storms Laboratory (NSSL), courtesy—page 62
©Photos.com—pages 28 (left, center), 31, 38 (both), 40, 42, 54, 56, and 59
Three Mile Island, courtesy—page 70
U.S. Navy/Photographer’s Airman Nicholas A. Garratt, courtesy— page 10
Wikipedia.org, courtesy—cover (emergency horns)
All other photos and illustrations not mentioned above are the property of or are protected by the Boy Scouts of America.
Jack Brown—cover (telephone book) and page 36
Dan Bryant—page 28 (right)
Joseph Csatari—page 15
Daniel Giles—pages 5 and 85
Francis Giles—pages 3, 10 (all), and 13
John McDearmon—all illustrations on pages 33–34, 46, 49, 51, 75–76, 78, and 81
Frank McMahon—page 87
Brian Payne—pages 7, 44 (top), 49 (right), 57 (top center, top right), 84, and 89 (bottom)
Randy Piland—pages 33 (top), 57 (bottom), and 89 (top)
Scott Stenjem—page 33 (bottom)
Merit badge libraryThough intended as an aid to Boy Scouts, Varsity Scouts, and qualified Venturers and Sea Scouts in meeting merit badge requirements, these pamphlets are of general interest and are made available by many schools and public libraries. The latest revision date of each pamphlet might not correspond with the copyright date shown below, because this list is corrected only once a year, in January. Any number of merit badge pamphlets may be revised throughout the year; others are simply reprinted until a revision becomes necessary.
If a Scout has already started working on a merit badge when a new edition for that pamphlet is introduced, he may continue to use the same merit badge pamphlet to earn the badge and fulfill the requirements therein. In other words, the Scout need not start over again with the new pamphlet and possibly revised requirements.
Merit badge Pamphlet yearAmerican Business 2002American Cultures 2005American Heritage 2005American Labor 2006Animal Science 2006Archaeology 2006Archery 2004Architecture and
Landscape Architecture 2010Art 2006Astronomy 2010Athletics 2006Automotive Maintenance 2008Aviation 2006Backpacking 2007Basketry 2003Bird Study 2005Bugling (see Music)Camping 2005Canoeing 2004Chemistry 2004Chess 2011Cinematography 2008Citizenship in the
Community 2005Citizenship in the Nation 2005Citizenship in the World 2005Climbing 2011Coin Collecting 2008Collections 2008Communication 2009Composite Materials 2006Computers 2009Cooking 2007Crime Prevention 2005Cycling 2003Dentistry 2006Disabilities Awareness 2005Dog Care 2003Drafting 2008Electricity 2004Electronics 2004Emergency Preparedness 2008Energy 2005Engineering 2008
Merit badge Pamphlet yearEntrepreneurship 2006Environmental Science 2006Family Life 2005Farm Mechanics 2008Fingerprinting 2003Fire Safety 2004First Aid 2007Fish and Wildlife
Management 2004Fishing 2009Fly-Fishing 2009Forestry 2005Gardening 2002Genealogy 2005Geocaching 2010Geology 2005Golf 2002Graphic Arts 2006Hiking 2007Home Repairs 2009Horsemanship 2010Indian Lore 2008Insect Study 2008Inventing 2010Journalism 2006Landscape Architecture
(see Architecture)Law 2003Leatherwork 2002Lifesaving 2008Mammal Study 2003Medicine 2009Metalwork 2007Model Design and Building 2010Motorboating 2008Music and Bugling 2003Nature 2003Nuclear Science 2010Oceanography 2009Orienteering 2003Painting 2008Personal Fitness 2006Personal Management 2003Pets 2003Photography 2005
Merit badge Pamphlet yearPioneering 2006Plant Science 2005Plumbing 2004Pottery 2008Public Health 2005Public Speaking 2002Pulp and Paper 2006Radio 2008Railroading 2003Reading 2003Reptile and
Amphibian Study 2005Rifle Shooting 2001Robotics 2011Rowing 2006Safety 2006Salesmanship 2003Scholarship 2004Scouting Heritage 2010Scuba Diving 2009Sculpture 2007Shotgun Shooting 2005Skating 2005Small-Boat Sailing 2004Snow Sports 2007Soil and Water
Conservation 2004Space Exploration 2004Sports 2006Stamp Collecting 2007Surveying 2004Swimming 2008Textile 2003Theater 2005Traffic Safety 2006Truck Transportation 2005Veterinary Medicine 2005Water Sports 2007Weather 2006Welding 2012Whitewater 2005Wilderness Survival 2007Wood Carving 2006Woodwork 2011
BOY SCOUTS OF AMERICA • SUPPLY GROUP
NatiONal diStribUtiON CeNter direCt Mail CeNter 2109 Westinghouse Boulevard P.O. Box 909 P.O. Box 7143 Pineville, NC 28134-0909 Charlotte, NC 28241-7143 For fast credit card orders— VISA, MasterCard, American Express— www.scoutstuff.org call BSA operators toll-free 1-800-323-0732

The Supply Group is
ready to be a partner
on your trail to
Eagle through high
adventure. The
adventure is yours,
and we are ready
with the gear you
will need. You can
depend on the latest
in lightweight,
durable, quality
gear that will
meet and surpass
your toughest
requirements.
www.scoutstuff.org
eagle scout
northern tier
florida sea base
philmont scout ranch
7 30176 35705 8
SKU 615832
35888 2012 Printing
On
th
e r
oad
to
hig
h a
dv
entu
re