emergency eyewashes & showers - promedicahealthstream.promedica.org/corp/od/emergency eye...
TRANSCRIPT

Emergency
Eyewashes &
Showers
How to Perform the Weekly
Required Inspections and Tests
and
How to Use

Weekly Inspections of
Eyewashes and Showers
Recommended to be performed by Individual
Departments, not by Maintenance

Weekly Inspections & Tests
PURPOSE: Flush water lines to ensure the water is clean. Ensure that water flow is good and even; Ensure that all parts are work properly; Ensure the areas around all units are clear and
unobstructed; Ensure caps/covers are in place to protect
nozzles from dirt/debris and come off with water flow
Make sure that deficiencies are reported to maintenance and corrected immediately.

“Tepid” Water
Tepid – Moderately warm or lukewarm; 60 - 100˚F
Water too cool found to be the #1 reason why injured worker does not remain in water flow for recommended length of time!!!
Emergency Eyewashes
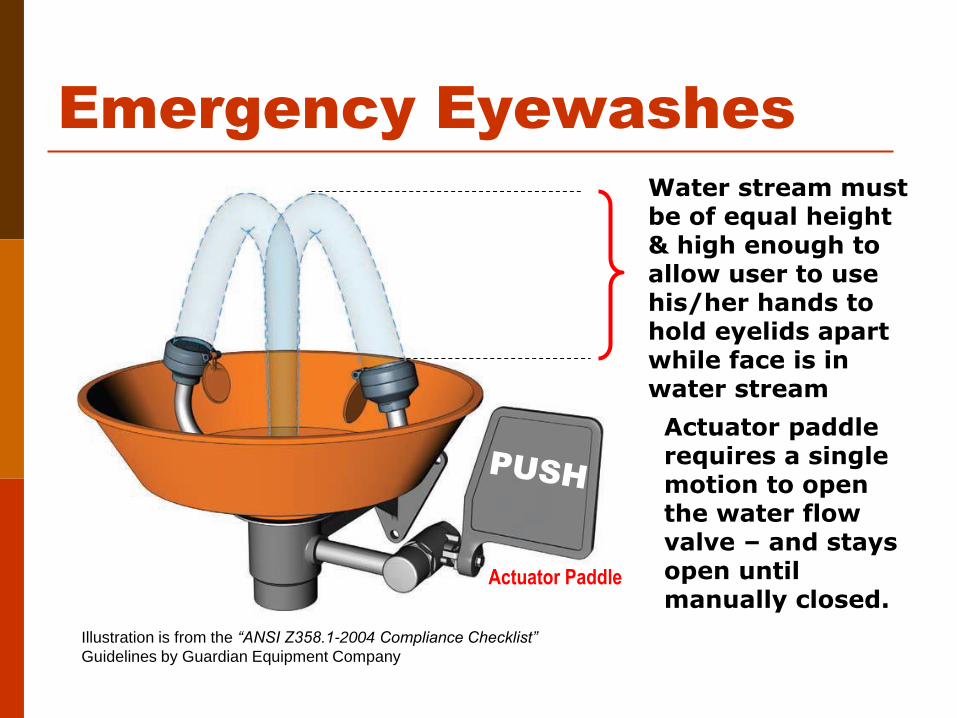
Water stream must be of equal height & high enough to allow user to use his/her hands to hold eyelids apart while face is in water stream
Actuator paddle requires a single motion to open the water flow valve – and stays open until manually closed.
Illustration is from the “ANSI Z358.1-2004 Compliance Checklist”
Guidelines by Guardian Equipment Company
Actuator Paddle

Eyewashes –
Activating the Water Flow
These styles of emergency eyewash units are activated by either pulling down on the arm or swinging the unit into place over a sink.

Faucet / Eyewash
Combination Unit
This is the ONLY faucet spigot / eyewash combination unit that is approved for use.
To activate the flow, pull on the handle labeled “PULL”.
Mfr: Speakman Company

Drench Hose
These types of drench hoses do NOT qualify as an emergency eyewash or facewash, but they are very useful to supplement an eyewash.
They also must be inspected and water flowed to clear the plumbing lines.

Signage
Signage should be provided to indicate location of eyewash.

Problem Conditions
A
B
C
D
Extremely low water flow
Uneven water flow /
blocked access
Blocked travel swing
Dirty nozzle & bowl

Eyewashes:
Inspection Process
Begin with a visual
Look for:
leaks or pipe damage,
loose fittings,
protective covers / caps
unit is free of any obstructions
a clear travel path to the unit
Eyewashes:
Inspection Process
Activate the unit – (If there is no drain,
place a bucket under the open drain)
Ensure that the water flow is abundant and continuous
Run the water for 2 to 3 minutes to ensure the lines are flushed
This flushing of the pipes ensures removal of rust deposits and bacterial contamination that can occur in stagnant water.

Eyewashes:
Inspection Process
Evaluate whether the unit can maintain a water flow for 15 minutes and is not injurious to the user's eye or face.
Valve actuator must stay on unless manually turned off and must activate water flow in one second or less.
Flow of water must be provided to both eyes simultaneously.
Water pressure should be sufficient for water stream to be high enough to allow user to hold eyelids open with hands.
Water pressure should not cause damage to the eyes.

Eyewashes:
Inspection Process
Report deficiencies to the maintenance department for repair.
Clean the unit nozzles and bowl (if present) of any grime or debris.
Document test results with dates and initials through an approved method of recording results, such as a tag or on a form.
Record conditions found during inspection & testing and corrective actions taken.
EX
AM
PL
E
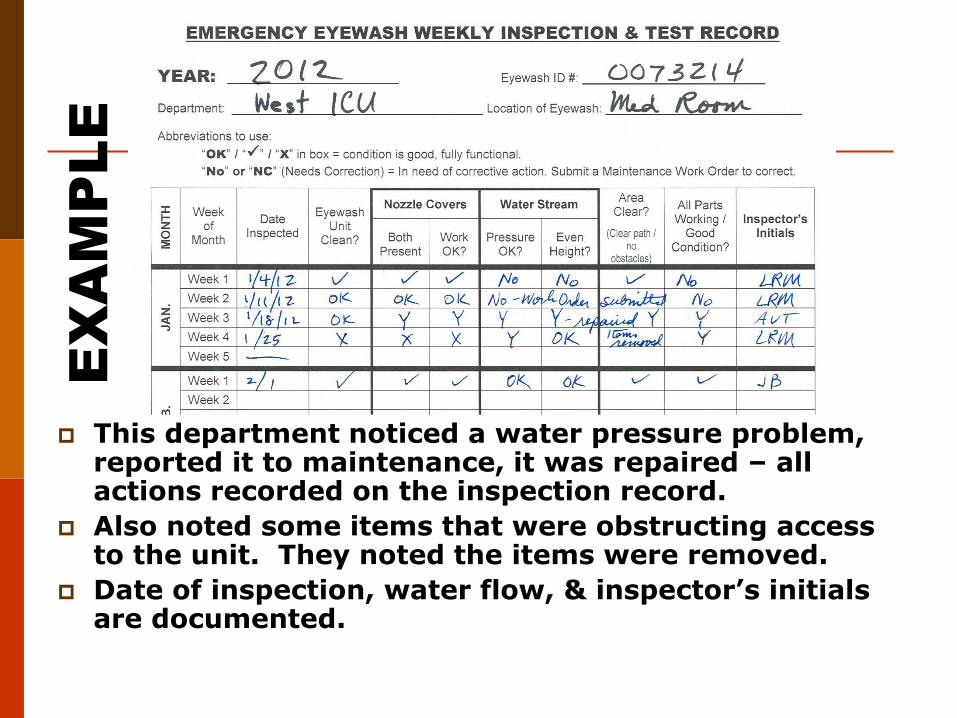
This department noticed a water pressure problem, reported it to maintenance, it was repaired – all actions recorded on the inspection record.
Also noted some items that were obstructing access to the unit. They noted the items were removed.
Date of inspection, water flow, & inspector’s initials are documented.

Emergency Showers: Weekly
Flush Test
A test shower enclosure and bucket “kit”, such as shown, is required to test the shower and contain the water.
Visual inspection of the unit. Look for leaks, pipe damage, loose fittings, damage to actuators.
Activate unit. Ensure that the water flow is continuous, evaluate that the unit can maintain flow for 15 minutes. Valve actuator must stay on unless manually
turned off and must activate water flow in one second or less.
The shower unit must be capable of delivering not less than 20 gallons per minute of flushing fluid.
Document test results and corrective actions with dates and initials on unit tag or other approved recording method.

Reporting Defects or
Deficiencies
If the emergency unit is not operating to specifications, employees in the area must initiate appropriate corrective action.
Notify your supervisor to implement appropriate tagging of unit as “DO NOT USE”, if applicable.
The supervisor must notify Maintenance / Facility Services Department for repair or replacement.
Follow up, as needed, to ensure the unit is repaired.

How to Use an
Eyewash
Important Steps for Saving Your Vision

Step 1
Move to the eyewash as soon as a chemical enters the eyes.
Call out to coworkers for help.
Get to the eyewash within 10 seconds if at all possible.

Step 2
Push actuator or lever to start water flow
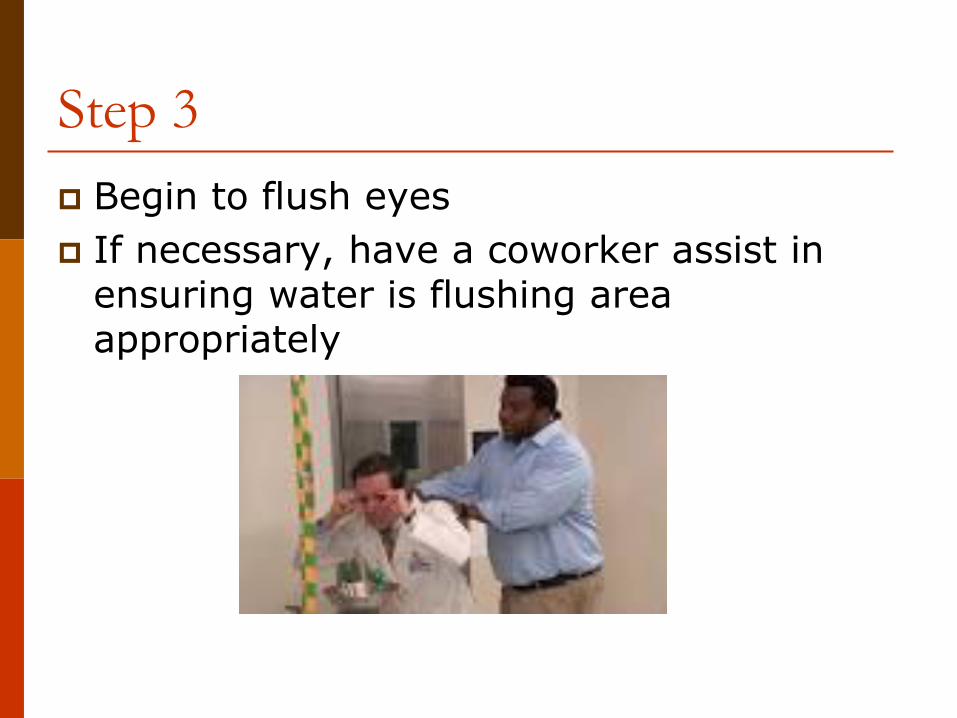
Step 3
Begin to flush eyes
If necessary, have a coworker assist in ensuring water is flushing area appropriately

Step 4
Hold the eyes open
Natural instinct is to squint, but for flushing to work, the eyelids must be held open

Step 5
Rotate eyeballs in all directions to remove contamination from around the eyes and under the eyelids

Step 6
Flushing should continue for 15 minutes
A coworker can watch the time and encourage the injured worker to stay in the flow of water for the full 15 minutes
During this time, someone should locate the SDS for the chemical

Step 7
Remove contacts
Contacts have the potential to absorb a chemical and hold it against the eyeball
Discard the contacts

Step 8
Seek medical attention
Employee should be seen by OccuHealth or ED, as appropriate
Bring or fax SDS so that Health Care Provider has information on chemical employee was exposed to

Step 9
Report the injury or exposure
Notify your supervisor immediately
Call the OUCHLine
Complete an RL-6
Make sure you tell OccuHealth/ED that it is a work-related exposure so that an FROI can be completed

How to Use an
Emergency Shower
Removing the chemical quickly and completely to minimize
damage to the skin and body

Step 1
Move to the shower as quickly as possible
Call out to coworkers for help

Step 2
Pull handle or lever
Move into water, focusing on area that is most contaminated

Step 3
Remove clothing and any other contaminated items such as glasses or jewelry
Contaminated articles can hold the chemical against the skin, prolonging exposure time

Step 4
Remain in the shower for 15 minutes
A coworker can assist in marking the time, encouraging the employee to remain in the shower and holding open the eyelids, if necessary
During this time, someone should locate the SDS for the chemical

Step 5
Seek medical attention
Employee should be seen by OccuHealth or ED, as appropriate
Bring or fax SDS so that Health Care Provider has information on chemical employee was exposed to

Step 6
Report the injury or exposure
Notify your supervisor immediately
Call the OUCHLine
Complete an RL-6
Make sure you tell OccuHealth/ED that it is a work-related exposure so that an FROI can be completed