embossed monogram - sew vac outlet (humble … an embossed monogram on your towels. the embroidery...
TRANSCRIPT
CREATING AN EMBOSSED MONOGRAM WITH FLORIANI TC/U SOFTWARE
© Designs by Marje 1
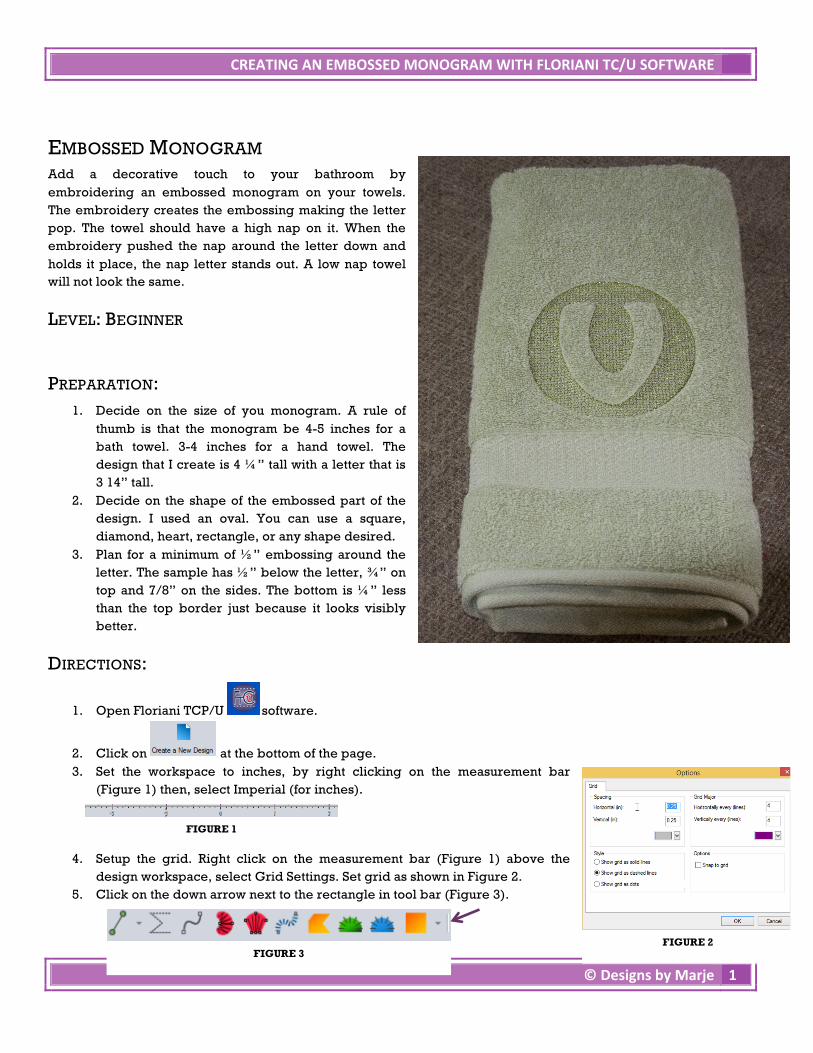
EMBOSSED MONOGRAM Add a decorative touch to your bathroom by embroidering an embossed monogram on your towels. The embroidery creates the embossing making the letter pop. The towel should have a high nap on it. When the embroidery pushed the nap around the letter down and holds it place, the nap letter stands out. A low nap towel will not look the same.
LEVEL: BEGINNER
PREPARATION: 1. Decide on the size of you monogram. A rule of
thumb is that the monogram be 4-5 inches for a bath towel. 3-4 inches for a hand towel. The design that I create is 4 ¼” tall with a letter that is 3 14” tall.
2. Decide on the shape of the embossed part of the design. I used an oval. You can use a square, diamond, heart, rectangle, or any shape desired.
3. Plan for a minimum of ½” embossing around the letter. The sample has ½” below the letter, ¾” on top and 7/8” on the sides. The bottom is ¼” less than the top border just because it looks visibly better.
DIRECTIONS:
1. Open Floriani TCP/U software.
2. Click on at the bottom of the page. 3. Set the workspace to inches, by right clicking on the measurement bar
(Figure 1) then, select Imperial (for inches).
4. Setup the grid. Right click on the measurement bar (Figure 1) above the design workspace, select Grid Settings. Set grid as shown in Figure 2.
5. Click on the down arrow next to the rectangle in tool bar (Figure 3).
FIGURE 3 FIGURE 2
FIGURE 1
CREATING AN EMBOSSED MONOGRAM WITH FLORIANI TC/U SOFTWARE
2 © Designs by Marje
6. Select the Ellipse from the shapes. 7. Click and drag drawing the shape on the workspace. Do not worry about size, just shape. Size will be set in
Step 9. 8. Select the ellipse by clicking on it or selecting it in the sequence view,
then click on center on the top toolbar. The ellipse is now centered in the middle of the workspace.
9. With the ellipse selected, click on Properties, then Transform. Set the desired size for the design. Uncheck Maintain aspect ratio. Then enter 4.0 is the width and 4.5 in the height. Click on apply. This is the base of your design. See Figure 4.
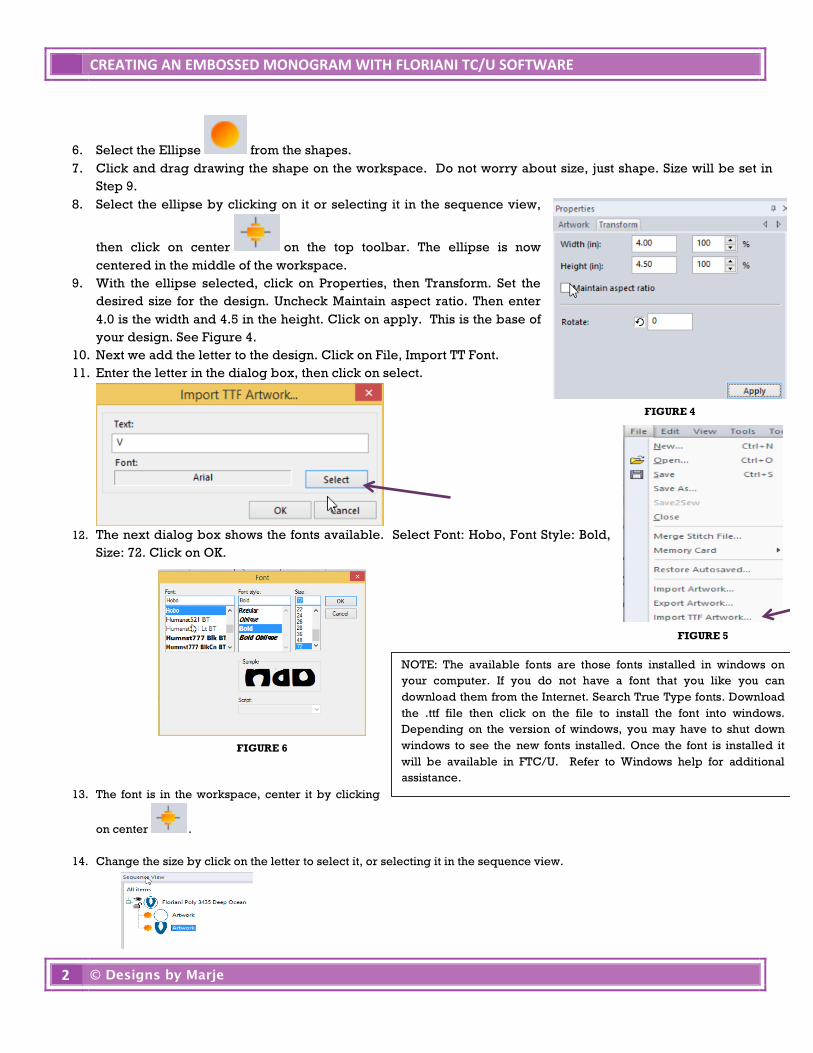
10. Next we add the letter to the design. Click on File, Import TT Font. 11. Enter the letter in the dialog box, then click on select.
12. The next dialog box shows the fonts available. Select Font: Hobo, Font Style: Bold, Size: 72. Click on OK.
13. The font is in the workspace, center it by clicking
on center .
14. Change the size by click on the letter to select it, or selecting it in the sequence view.
FIGURE 4
FIGURE 6
FIGURE 5
NOTE: The available fonts are those fonts installed in windows on your computer. If you do not have a font that you like you can download them from the Internet. Search True Type fonts. Download the .ttf file then click on the file to install the font into windows. Depending on the version of windows, you may have to shut down windows to see the new fonts installed. Once the font is installed it will be available in FTC/U. Refer to Windows help for additional assistance.

CREATING AN EMBOSSED MONOGRAM WITH FLORIANI TC/U SOFTWARE
© Designs by Marje 3
15. Click on Properties, then Transform. Enter 2.54 in width and 3.35 in height. Uncheck Maintain Aspect Ratio. Click Apply.
16. Now the design has the shape and the letter. The letter needs to be “cut out” of the shape to create the “embossing”. To
cut the letter out of the shape, we need 1 shape and 1 letter. We also need one shape and one letter for the outline bean stitch, which finishes the edges of the motif stitch.
a. Select all items in the sequence view.
b. Press CTRL + C or Right click, copy
c. Press CTRL + V or Right Click. paste. d. Now there are 4 items in the sequence view.
CREATING AN EMBOSSED MONOGRAM WITH FLORIANI TC/U SOFTWARE
4 © Designs by Marje
17. Change the color of the 2nd shape and the 2nd letter. Click on the 2nd shape, press CTRL and click on the 2nd letter. Click on any color in the palette.
18. Cut the letter out of the shape to create the “embossing”. In the sequence view, click on the 1st shape, press the CTRL key and click on the1st letter. Right click, select combine. The sequence view as 3 items.
19. At the bottom of the screen is the Stitches Toolbar. Click on the desired stitch to assign it to an item in the sequence view to
change the artwork to stitches. Click on the 1st item in the sequence view to select it.
20. Click on the Motif Fill stitch on the Stitches Toolbar. Click on Properties then, select Motif 211 from the list. Click on Apply.
21. With the properties still displayed, click on the commands
tab. Set Start Command to normal, End to Trim (cuts jump stitch), and tie in and out to basic. Click on Apply.
22. In the sequence view, click on the last 2 items. Click on Run in the Stitches Toolbar. 23. In the Properties, Set Stitch Type: Bean, Repeats: 3, Stitch Length 3.5. Click Apply. 24. With the properties still displayed, click on the commands tab. Set Start Command to normal, End to Trim (cuts jump
stitch), and tie in and out to basic. Click on Apply.
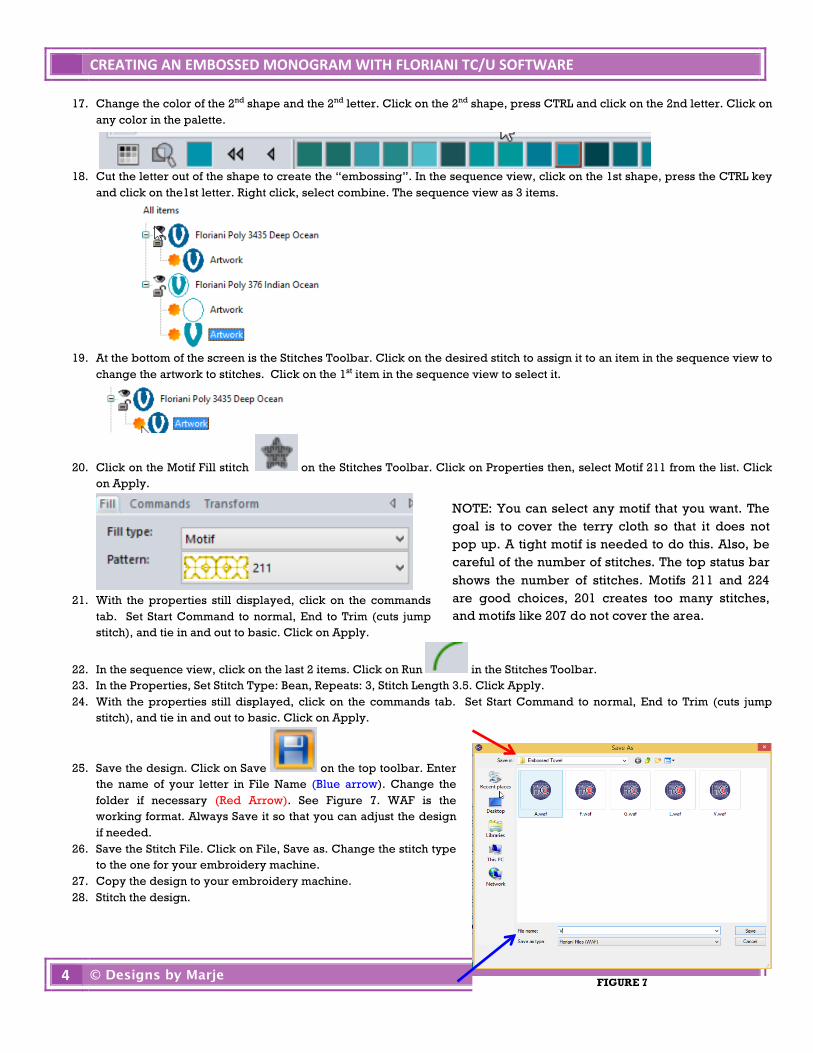
25. Save the design. Click on Save on the top toolbar. Enter the name of your letter in File Name (Blue arrow). Change the folder if necessary (Red Arrow). See Figure 7. WAF is the working format. Always Save it so that you can adjust the design if needed.
26. Save the Stitch File. Click on File, Save as. Change the stitch type to the one for your embroidery machine.
27. Copy the design to your embroidery machine. 28. Stitch the design.
NOTE: You can select any motif that you want. The goal is to cover the terry cloth so that it does not pop up. A tight motif is needed to do this. Also, be careful of the number of stitches. The top status bar shows the number of stitches. Motifs 211 and 224 are good choices, 201 creates too many stitches, and motifs like 207 do not cover the area.
FIGURE 7