ec44: outlook web app calendar - abdn.ac.uk
TRANSCRIPT
University of Aberdeen :: IT Services Reviewed: 22/11/2021 The University of Aberdeen is a charity registered in Scotland, No SC013683
Ou t lo o k Web A pp : C a len da r qu ick gu ide
This quick guide introduces you to the Outlook Web App (OWA) interface and shows you how to manage messages, folders, and contacts. For more information about University email you can check out Toolkit’s Staff & PGR Email resource.
Sign into your University email account in OWA 1. In a web browser (e.g. Chrome), go to the StaffNet homepage,
scroll down to Quick Links and select Staff Email
2. In the Sign in dialog, enter in your email address in the [email protected], e.g. [email protected]
3. Click Next
4. Enter in your password and click Next
5. If you have no other Office 365 apps open or have switched accounts, you will be prompted toauthenticate. See What is Multi-factor Authentication? for more information.
You may want to add the OWA login page – i.e. https://outlook.com/abdn.ac.uk – to your web browser as a Bookmark or Favourite for quick access to OWA.
OWA interface
To display your calendar, click the Calendar icon at the left of the Email pane beneath the Apps launcher.
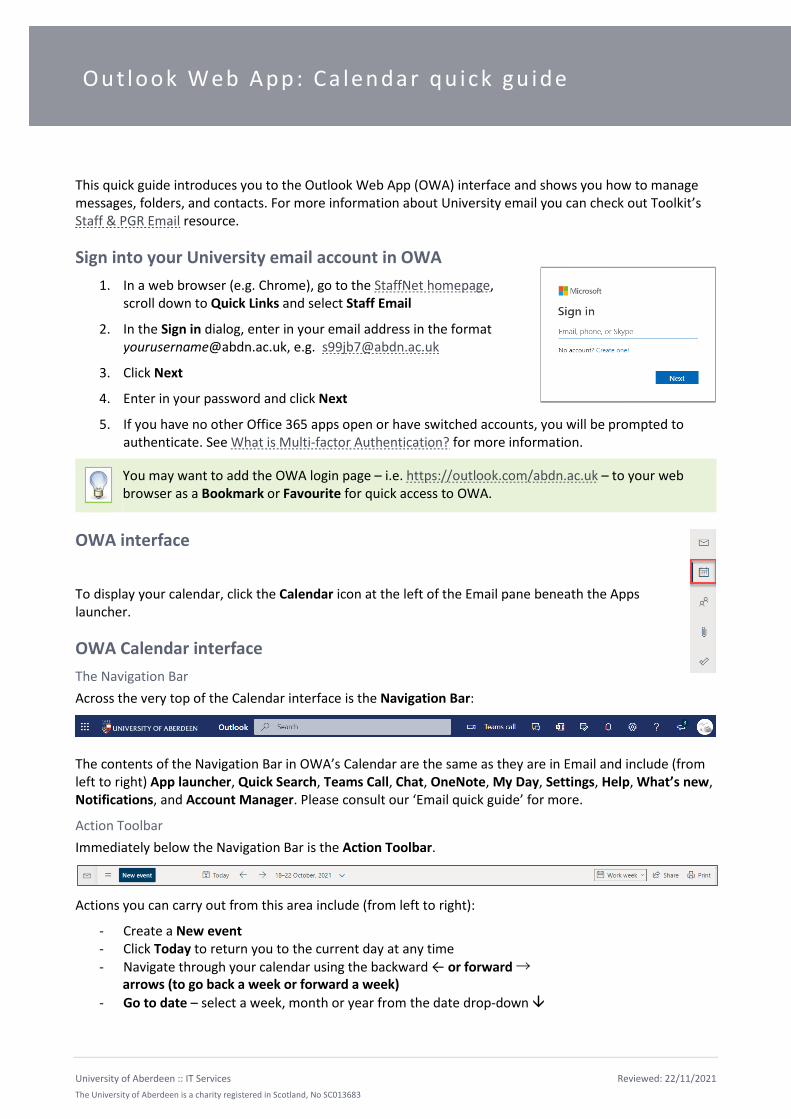
OWA Calendar interface The Navigation Bar Across the very top of the Calendar interface is the Navigation Bar:
The contents of the Navigation Bar in OWA’s Calendar are the same as they are in Email and include (from left to right) App launcher, Quick Search, Teams Call, Chat, OneNote, My Day, Settings, Help, What’s new, Notifications, and Account Manager. Please consult our ‘Email quick guide’ for more.
Action Toolbar Immediately below the Navigation Bar is the Action Toolbar.
Actions you can carry out from this area include (from left to right):
- Create a New event- Click Today to return you to the current day at any time- Navigate through your calendar using the backward ← or forward →
arrows (to go back a week or forward a week)- Go to date – select a week, month or year from the date drop-down

2
- Select a Calendar view (Day, Work week, Week, Month, Board0F
1, Split view – if you want to view more than one calendar)
- Share your calendar- Print your calendar
Main Calendar window The main window is divided into two panes.
Calendar
From left to right, these are:
Browser pane
- The Apps bar: Email, Calendar, People, Files (associated with what you have sent or received in your email), Tasks and Online Office Apps (Word, Excel, PowerPoint, OneNote and Yammer)
- Browse days, months, and years via the Calendar at the top of the pane- Add a Calendar (you must have permission to add a shared calendar)- Browse additional Calendars you have access to, e.g. a Team Calendar- View any Group Calendars you may have access to
Calendar pane
- View your Calendar events (meetings and appointments) and add an event- Both the current day and time are highlighted by thick bold lines in the Calendar pane
Create a new Event An Event can be a meeting, or a private appointment. When you create a New event you can set your status to Free, Working elsewhere, Busy, Tentative or Away. This lets colleagues see your availability when they are scheduling meetings.
The default status is Busy. If you are adding a private event – for example, a dentist appointment – you can mark your event as Private. This means others will see you status as Busy, but won’t see the event detail.
1. Click New event on the Action Bar, or double-click on a date and time in your calendar, in any of thecalendar views, e.g. Week, Day, Work week or Month
1 Manage your most important tasks and events with Board view

3
Single-click on a date and time in your calendar to give you a small pop-up window that allows you to create an event quickly. Click the double-headed arrow in the pop-up to expand the window.
2. In the new event window:
- Add a title and Add a description for the event
- To invite others to a meeting, click Invite attendees. Start entering a participant’s surname, and select them from the pop-up list of Suggested contacts. If they are not listed, click Search Directory.Alternatively, type in their Firstname Lastname, e.g. Joe Bloggs, and select the correct person from the list of pop-up results.
- Continue to add other participants as required
3. Click on the Calendar icon to select a different date if required4. Click to select a Start time and End time
If it is an all-day event, click on the All day slider. This will block off the entire day in your calendar and is especially useful for annual leave.
5. Outlook will look at each participant’s calendar and display theday and time slots where all participants are free
6. In the pane on the right of the new event window, Outlook shows you suggestedfree times for all participants in white
- Red indicates that not all participants are free at the time you have proposed.
- Green indicates that all participants are free at the time you have proposed.
- You can click and drag the event to move to a time that is convenient for allparticipants.
- You can also click on the backward and forward arrows at the top of the paneto select a different day or on the downward arrow to choose another week.
7. If you are not comfortable using the pane on the right of the new event window,click on the Scheduling Assistant (at the top of the new event window) instead.
− Click and drag the event ‘bar’ to a time/date when all participants are free. Use the grey scroll bar at the foot of the Scheduling Assistant to move to different days, if required.

4
- When the ‘bar’ changes to Green, it indicates all participants are available for that time slot.
- Click on Done to save your changes, or Discard
8. If the event is a recurring meeting, click on the Repeat: Never downward arrow to selectrecurrence as appropriate. Choose from Every day, Every week, Every month, Every yearor Custom (e.g. every 2nd Tuesday).
9. If you want the meeting to be a virtual meeting via MS Teams, click the Team meeting
slider.
10. Set notifications by clicking on Remind me. Choose from Never, 5 minutes and to up to 1 week beforeor add email reminder.
11. Add a description of the meeting, e.g. an agenda, attach supporting documentationfor the meeting if required.
12. At the top of the new event window, click Response options to select or de-selectAllow forwarding and/or Hide attendee list.
13. Before you send your invite, check that you have included all the details you need, e.g. title,participants, times, date, description, status, and attachments if applicable
14. Click Send to send your meeting or Discard if you have changed your mind
Modify an Event
1. Locate the event and:
- Double-click on the event to open it, and click Edit, or
- Right-click on the event and select Edit > This event from the pop-up then the double-headedarrow to expand the event window, or
- Single-click on the event and click Edit from the callout to expand the event window
- If it is a meeting: click Send to save your changes and send the update to all participants, orDiscard if you have changed your mind
- If it is a private appointment (i.e. you are the only participant): click Save
We do not recommend switching off Request responses as you will not be able to see if participants have accepted, declined or responded as tentative.
In order to edit an event, you must be the event organiser – i.e. person that set it up.
2. Edit the event details as required
5
Cancel an Event 1. Locate the event and:
- Double-click on the event to open it, and click Cancel, or
- Right-click on the event and select Cancel from the pop-up menu, or
- Single-click on the event and click Cancel from the callout
2. Enter some text explaining why you are cancelling – it’s good meeting etiquette
3. Click Send to notify your participants, or Discard if you have changed your mind
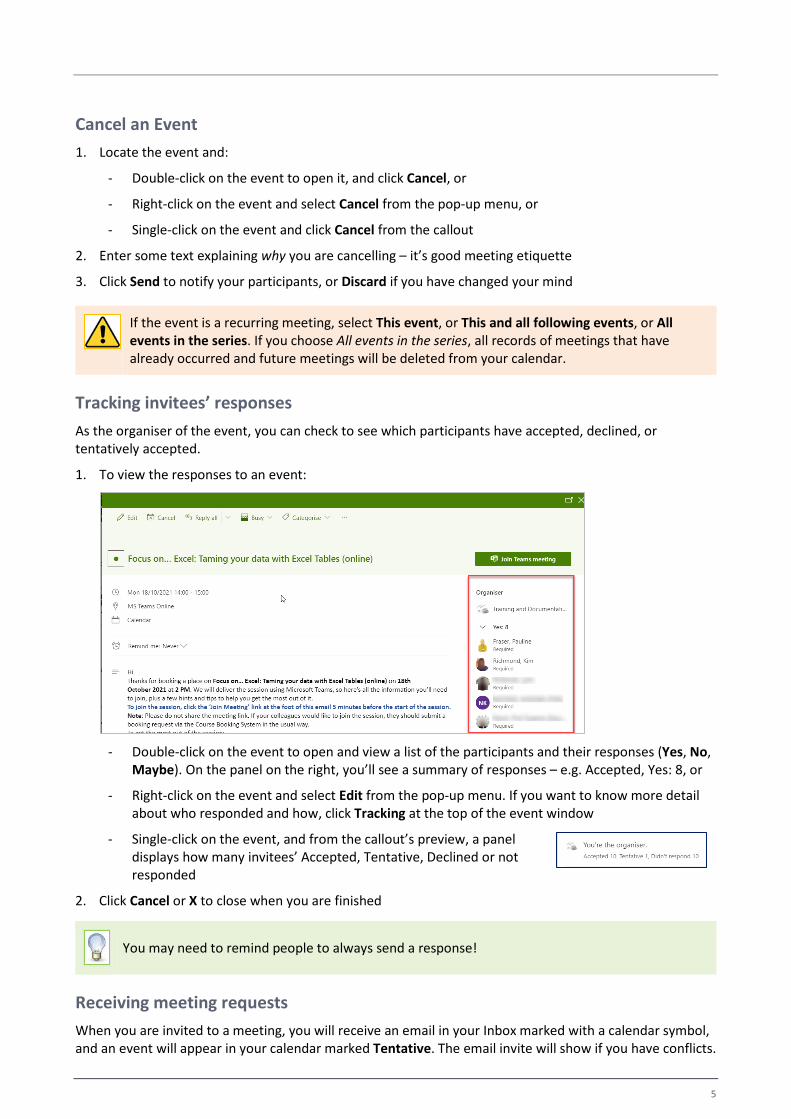
Tracking invitees’ responsesAs the organiser of the event, you can check to see which participants have accepted, declined, or tentatively accepted.
1. To view the responses to an event:
- Double-click on the event to open and view a list of the participants and their responses (Yes, No,Maybe). On the panel on the right, you’ll see a summary of responses – e.g. Accepted, Yes: 8, or
- Right-click on the event and select Edit from the pop-up menu. If you want to know more detailabout who responded and how, click Tracking at the top of the event window
- Single-click on the event, and from the callout’s preview, a paneldisplays how many invitees’ Accepted, Tentative, Declined or notresponded
2. Click Cancel or X to close when you are finished
Receiving meeting requests When you are invited to a meeting, you will receive an email in your Inbox marked with a calendar symbol, and an event will appear in your calendar marked Tentative. The email invite will show if you have conflicts.
If the event is a recurring meeting, select This event, or This and all following events, or All events in the series. If you choose All events in the series, all records of meetings that have already occurred and future meetings will be deleted from your calendar.
You may need to remind people to always send a response!

6
Responding to meeting requests from your Inbox 1. To respond to a meeting invite:
- Single-click the RSVP button displayedin your Inbox to view a callout windowshowing a summary of the meeting.
Select your response by clicking Yes(Accept), Maybe (Tentative) or No(Decline), or
- Double-click to open the meeting in anew window, or click to preview emailmessage in Reading Pane, to viewinformation about the meeting.
Select your response by clicking Yes (Accept), Maybe(Tentative), No (Decline). Note that in this view, you canalso Propose new time
2. Click Send to send your response to the meeting organiser
Responding to meeting requests from your Calendar 1. To respond to a meeting invite from your Calendar:
- Single-click on the event to display a callout window summarising the meeting
And select your response by clicking Yes (Accept), Maybe (Tentative) or No (Decline), or
- Double-click to open the event and show all the meeting information
And select your response by clicking Yes (Accept), Maybe (Tentative), No (Decline) or Proposenew time, or
- Right-click on the event and select Yes I’ll attend (Accept), I might attend (Tentative), No, I won’tattend (Decline), or Propose new time from the pop-up
2. Click Send to send a response to the meeting organiser.
Recovering a declined meeting If you decline a meeting it will disappear completely from your calendar. If you change your mind about your response, you retrieve it from your Deleted Items folder and update your response, provided you do so within 30 days of declining the meeting.
1. Go to your Email and select the Deleted Items folder from the Folder List.
2. Find and select the meeting request email, and select Restore from the Action toolbar to restore toyour Inbox.
3. Select the meeting request in your Inbox and in the Preview pane, select your new response: Yes(Accept), Maybe (Tentative)
Once you have responded with Yes or Maybe the email invite will be deleted from your Inbox, but the meeting will be in your Calendar. If you decline a meeting it will disappear completely from your Inbox and your Calendar. Remember: if you don’t send a response, the meeting organiser will have no way of knowing whether you plan to attend or not.

7
Share your Calendar 1. To share your Calendar, either
- Click Share on the Action toolbar and choose Calendar, or
- Click Settings (cog icon) on the Navigation bar, type share in the search box and select Share a calendar
- Then in the Settings > Shared calendars dialog, under Shared calendars, click Select a calendar and choose Calendar
2. In the Sharing and permissions dialog that opens, Enter a name or email address of the individual you want to share your Calendar with
3. Select the correct person from the suggested results if required, or click Search People to search for more from the Global Address List (GAL) or your own personal contact lists
4. Once you have selected the person, choose the level of permission you want to grant them:
- Can view when I’m busy (only see free/busy information)- Can view titles and locations (can see the description of meetings, free/busy and location
information)- Can view all details (can see full details apart from any meetings that have been marked as
Private)- Can edit (can edit your calendar as well as view all details of calendar items)- Delegate (can edit your calendar, view full details and send and respond to meeting requests on
your behalf)
5. Click Share. The person you shared your Calendar with will receive an email notification
Edit your sharing permissions 1. Click Share on the Action toolbar and choose Calendar
2. Locate the person whose permissions you want to change, click on thedrop-down list to the right of their name and select the appropriatepermission option
3. To remove sharing, click on the Waste Bin icon alongside their name
4. Click X to close
View a Calendar someone has shared with you 1. When someone shares their calendar with
you, you will receive an email invitation.
2. The permissions given are displayed in themessage
3. To accept and open the shared calendar,click on Add this calendar
4. The shared calendar will now be visible inyour Calendar’s Browser pane, beneaththe heading People’s calendars

8
5. To view the owner of a calendar, click on their name. Their Calendar will overlay yours by default. Clickon Calendar view drop-down and select Split view to see calendars side by side from the Action Toolbar
6. To close a shared calendar, click on the calendar owner’s name
Setting up your working days and hours for your calendar We all work different days and working hours. It is good practice to set these in your calendar as people will know you are out of the office and won’t be available for meetings.
1. Click Settings (cog icon) on the Navigation bar, type calendar in the search box and select Calendarappearance
2. Then in the Settings > View dialog, under Calendar appearances
- Show the first day of the week as: By default the start of the week is set for Monday, but if youstart on a different day, click on the drop-down arrow to select it
- Show work week as: Click the checkboxes for the days you work. This will block your calendar forthe days you do not work and will show you are not available
3. Click to select Start time and End time
4. Click X to close the Settings dialog and save your settings.
When multiple calendars are opened at the same time, the calendars are overlaid in the same view. To help differentiate the calendars, you can change the colour of each. Click More options (...) to the right of each name on the People’s calendars list, click Colour and choose a colour.
You can also use automatic replies to inform people you won’t be responding right away to their email messages or give them an alternative contact and when you will be back in the office.
See our ‘Email quick guide’ for help setting up automatic replies.
Make sure you are in the correct time zone. This should be:
(UTC+00:00) Dublin, Edinburgh, Lisbon, London
If the time zone is incorrect, go to Settings > General > Language and time > Current time zone to change it.

9
Give yourself time between meetings Give yourself enough time to get to meetings and appointments by adding in some breathing space to get a comfort break or a cuppa.
1. Click Settings (cog icon) on the Navigation bar, type leave in the search box and select Events youcreate
2. Then in the Settings > Events and invitations dialog, under Events you create
- Tick the Shorten duration for all events checkbox
- Select either End events early or Start events late
- Click Less that one hour: drop down and choose how many minutes early a meeting lasting lessthan one hour should end
- Do the same for meetings of One hour or longer
3. Click Save
Further information and help More information about working in Outlook Web App, visit Microsoft’s support page.
You can also use MyIT to log calls with the University’s IT Service Desk
You can also customise new meetings you create to add in the Join Teams Meeting link automatically. To enable tick the Add online meeting to all meetings checkbox from Events and invitations > Events you create