easy face painting how an amateur face painter can … one face painting ... thank you for your...
TRANSCRIPT

Easy Face Painting
How An Amateur Face Painter Can Get Professional Results …
Even If You've Never Picked Up A Paintbrush
by: JoAnne D. Westcott

2
This book and all other material associated with it was created to provide specific information regarding the subject matter covered. Every attempt has been made to
verify the information provided in this material however, neither the author, nor publisher is responsible for any errors, omissions or incorrect interpretations of the
subject matter.
Information contained within this material may be subject to local, state, federal and international laws. The reader is advised to consult with a licensed professional for
legal, financial and other services.
The reader of this material assumes responsibility for the use of this information. The author and publisher assume no responsibility or liability whatsoever for the use
or misuse of the information contained within these materials.
Easy Face Painting is Copyright 2005 by JoAnne D. Westcott Reproduction, resale or redistribution without permission is prohibited.
3
INDEX
Introduction Why I Wrote This Book ……………………… 5 Chapter One Face Painting - Why Kids Love It ………….. 6 Chapter Two Basic Supplies ……………………………….. 8 Chapter Three Setting Up Your Workspace ………………... 15 Chapter Four Painting Technique ………………………….. 16 Chapter Five Working With Your Subject…A Little Face … 18 Chapter Six Practice, Practice, Practice …………………. 21 Chapter Seven Face Painting Designs..Where Do You
Find Them? …………………………………... 22 Chapter Eight Troubleshooting ……………………………... 25 Chapter Nine "Can This Be A Business?" ………………… 27 Chapter Ten Designs ………………………………………. 29 Chapter Eleven Step-By-Step Photos ……………………….. 37

4
Dear Reader … Thank you for your purchase of Easy Face Painting: How An Amateur Face Painter Can Get Professional Results … Even If You've Never Picked Up A Paintbrush. My hope, as you read this book, is that you discover valuable, new ideas that you can actually put to use in your life. That's why you bought this book, right? I do not take it lightly that you are spending your money and time for this course. If you've never face painted before, the most difficult part of this for you will be to paint your first face or practice sheet. As soon as you possibly can, I encourage picking up a brush and putting you first stroke on paper. Just do it! You'll be surprised at the relief you'll feel when you see paint on paper. Just one stroke will give you the encouragement to keep painting. You don't need to know everything there is to know about face painting to get started. Take a few pieces of information, choose a few designs and go! The rest will come in time with continued practice. If your first designs aren't perfect, don't worry. Look at the face of the child you just painted as they see their face in the mirror. The smile on their face will say it all. Enjoy the book and please, send me your feedback and photos of your creations. My email address is [email protected] Enjoy!
5
Why I Wrote This Book As the mom of a three and a five year old, I've been to many school events, community festivals and charity functions where the face painting booth, no matter what else was going on, was the star attraction. I thought to myself, face painting would be an awesome way to entertain my kids on a rainy day. I had so many questions about it but not a clue where to start. I searched face painting on the internet and although I found some beautiful photos of full face creations, they didn't really help me much as a beginner. I simply wanted to learn how to paint a flower design on my daughter's cheek. I knew, however, that I could learn a lot from the artists who create those kinds of masterpieces. So as I began writing this book, I created a web page asking people just like you what they wanted to know about face painting. Low and behold, they wanted to know many of the same things I did. So I went to the experts, people who face paint for a living. And let me tell you, these people are true artists. Their work is spectacularly inspiring - a little intimidating perhaps, but inspiring. You'll see some of their work here. I've learned so much and I hope as you move through each chapter that you gain the confidence to paint a face …one face, ten faces, one hundred faces, it doesn't matter….just paint!

6
Chapter One
Face Painting - Why Kids Love It Why is it that face painting booths are so popular? There are a number of reasons: Attention - All children crave attention. Come to think of it, most adults do too. When a child is sitting in the chair, the face painter is completely focused on that child. You can just see how special that child feels at that moment. Creativity - Any kind of painting is an expression of creativity. When kids choose the design they wish to have painted on their face, they take command of their own creativity and self-expression. Individuality - The right toys, the right clothes. Generation after generation, youngsters are encouraged to conform to be socially accepted. Face Painting is one way to express individuality. Fun - Let's face it. Having your face painted is just plain fun. And is there any sweeter look than the quick glances that kids take of themselves in the mirror after a face painting session? That little smirk on their face is priceless! Some or all of these reasons probably made up your "Why" for purchasing this book.

7
Let's take a minute and explore the places and events where Face Painting can be done: • Fundraising events • Community festivals • State fairs • School parties • Sporting events • Birthday parties • Playdates • Scout meetings • Halloween parties • Halloween Trick or Treating • Holiday parties • Bookstores • Toy stores • Children's Boutiques • Circuses • Carnivals • Family Reunions • Picnics • Rainy Days • Campouts • "Just Because" Days The list is endless and I'm sure you can think of a dozen more. Jot them down and remember, Face Painting isn't just for birthday parties anymore!

8
Chapter Two Basic Supplies
This section will explain the basic supplies need to get started in face painting. With more face painting activity, you may want to add additional equipment and supplies, particularly if you choose to face paint as a business. Paints It is recommended that you purchase water-based face paints. You can purchase individual pots of color or you can purchase a palette which contains many colors of paint in one container. A palette will give you, say six or twelve basic colors in one container. That palette will be enough to complete 50-70 face designs, more or less. When you are starting out, a palette is more economical than purchasing colors individually because each section of color in a palette contains a lesser amount of paint. Palettes are perfect for beginners because of the cost and because all paints are in one convenient container. Palettes are also a great way to test different brands of paint to find the brand that is best suited for you. You can find a six-color palette of face paint for as little as $3.95 (US), however you get what you pay for. There is a difference among face paints. If you stick with the professional companies that specialize in face paint and theatrical makeup, you will be much better off than purchasing a paint brand based on price alone.

9
Water-Based Paint: The Preferred Choice Water-based face paints are easy to use and easy to remove. Be sure to check the labels of any paint that you are considering. Look for those that comply with the non-toxic standards of the FDA. These products are the paints that you can feel most comfortable using, particularly on children and particularly on their faces and around their eyes. Water based paint is the better choice for beginning face painters because: - if can be washed off with soap and water, - it can be mixed or blended with other colors to produce a desired effect - it dries quickly DO NOT use acrylic paints, latex paints or any other form of paint not specifically developed for use on the skin. I would also not recommend theatrical grease paint for face painting. It has an oil base, doesn't dry thoroughly and is more difficult to use than water-based products. Some manufacturers who specialize in face paint and theatrical cosmetics include: - Mehron - Paradise dries quickly - Snazaroo - Dries quickly - Ben Nye - Kryolan - Graftobian
10
Making Your Own Face Paint For a fun, science-like project at home or on a rainy day, consider making your own face paint. There are several recipes outlined below. You may not achieve the same professional-looking results that you might from using commercial face paints. However, the process of creating their own concoction will be highly entertaining for the children. Experiment with the recipes in this book and with commercial face paint and decide for yourself which product you are more comfortable and happier using. These easy face paint recipes show how to make homemade face paint using common household ingredients. Mix and store in baby food jars or discarded film canisters. Be ready for your next kids party or dress-up event. Facepaint Recipe #1 1 tsp. Cornstarch 1⁄2 tsp. Cold cream 1⁄2 tsp. Water food coloring (variety of colors) Mix together cornstarch and cold cream until well blended. Add water and stir. Add food coloring one drop at a time until you get the desired color.

11
Facepaint Recipe #2 3 TB. Cornstarch 1 TB. Flour 3/4 cup Karo Light Corn Syrup 1/4 cup Water 1⁄2 tsp. Liquid food coloring Mix cornstarch and flour together in a bowl. Gradually stir in Karo syrup and water until smooth. Divide mixture into individual containers as needed and tint each one with the food coloring of your choice. Leave one batch untinted. ------------------------------------------------------------------------ Clown Make-up Blend on a paper plate: 2 TB. shortening 5 tsp. cornstarch 1 tsp. flour Dab of Vaseline Add food coloring for various colors. ------------------------------------------------------------------------ Fake Blood for Halloween Party make-up Karo brand corn syrup Red and blue food coloring Milk Add some red food coloring to the corn syrup, then just a drop or two of blue to get a more realistic dark color. Milk will make the blood appear more opaque and more realistic. Note: This mixture is sticky and can stain clothes.

12
Glitter Nothing turns a face painting design from average to spectacular faster than the use of glitter. Use glitter powder or glitter gel that is specifically made for the skin. Do not use the large, loose glitter made for crafts. It is not made specifically for our purposes and can be an irritant should it get into their eyes. I have seen face painters use the fine powder glitter that is available in the stamping section of craft stores. It is fine-milled and polyester- based. Experiment with different types to find out what you are most comfortable using. Again, the safest bet is to only use glitters that are specifically made for skin. Glitter gel comes in a rainbow of colors and can even be purchased as a glow-in-the-dark product. A good, standard glitter color for beginners is prism silver (reflects many different colors). Sponges The white, triangular-shaped makeup sponges that you can purchase at the drug store work wonderfully for blending colors, base coating and thinning out gloppy strokes. Wash the sponges thoroughly after each use. Paint For Small Details You can achieve a precise, professional look by purchasing a face painting product called Detailz. It is manufactured by Mehron and is part of their Paradise Face Paint line. Detailz looks much like a nail polish
13
bottle, contains a small brush in the cap and can be used to make small dots, outlines, etc. It comes in white, black, red, blue, silver, gold, yellow, purple and green. White is perfect for creating eyes or accent dots (see the octopus photos in the photo section of this book.) Blush To brighten up a princess, kitty cat, bunny or clown, you could use red face paint but you may not get the subtle glow that you need. A bright, red powder blush makes getting that glow easy and inexpensive. For an example of blush in use, see the kitty cat photo in the photo section of this book. You can purchase powder blushes from the suppliers listed earlier, but you can also purchase a bright red or pink powder blush from any cosmetic line.
14
Brushes Synthetic artist brushes are a great choice for face painting. Natural bristle brushes are too soft for the average project. It is not necessary to purchase the highest quality art brushes. But save yourself time, money and frustration. Don't try to use the paintbrush that came with your child's "paint by number" coloring book. Spend at least US$3.00 on each paintbrush. For beginners, a collection of four or five good-quality brushes will serve you well: one small, very thin brush for details and outlining, two or so medium-sized brushes and one large brush for filling in large areas. Additional Supplies • Paper towels and facial tissues • Box of alcohol-free baby wipes • Two bowls or jars filled with clean water (to alternate so you always
appear to have clear water when painting your next customer) • Towel, smock or apron to protect the clothing of the person being
painted • Hair clips or bobby pins • Hand-held or stand-alone mirror • Table cloth to cover your work area • Display board or design catalog of face painting designs • Digital camera to take photos of your finished faces

15
Chapter Three Setting Up Your Workspace
You will be a lot more efficient and your customers will be happier if you are prepared and have all of your tools within arm's reach. To set up your face painting "station", first cover the area with a plastic or vinyl tablecloth, one that can be easily cleaned after a spill or paint spatter. Use a solid color tablecloth simply because your designs and your paints are the stars of the show. A print or patterned tablecloth is distracting and too busy for this purpose. Place your brushes bristle up in an attractive cup or mug. Have two cups or smaller bowls of water on your table. One bowl will be used to dip your brushes in as you mix your paint and the second bowl will be to rinse/clean your brushes when switching between colors. Of course, if you have one brush for each color category, this will save you time and keep your rinse water from turning muddy. Try as much as you can to keep the water bowls as clear as possible. If you have a helper, ask them to change the water frequently. There is nothing worse than seeing a parent's face when they see a bowls of dirty water. They're thinking "You're going to paint my kid's face using that water?" As a general suggestion, just think what you would want to see if your child was in the face painting chair. Place a mirror on the table so your customer can marvel at their newly painted creation. A box of tissues and alcohol-free baby wipes can wipe off smudges or mistakes.

16
Chapter Four
Painting Technique 1. Adding paint to your brush is called "loading." When loading your
paintbrush, dip the brush in water first, then drag your brush back and forth across the paint, adding water as you go (if necessary) to reach the desired consistency. Do not pounce your paintbrush up and down. You could damage the bristles and you may not achieve the precision necessary for a great design.
2. Add enough water so that your paintbrush flows easily across your
painting surface. If the paint runs, it's too thin. If it drags, skips or gets stuck as you paint, there is not enough paint on your brush. If it's gloppy, chances are the paint is too thick.
3. Use only one color on a brush at a time. Try to use the same brush for
various color categories, i.e. dark blue/black/brown, red/orange, purple/blue.
4. As a general rule, paint the lighter colors first and if possible, give each
color of paint a few seconds to dry before adding another one. 5. There are two schools of thought when it comes to full face painting.
For some, creating a basic outline of the design on the face helps to keep it balanced and even. Others prefer to paint the fill-in color in a rough design on each side of the face without outlining. In this method, it is easy to expand or 'erase' paint to get an even and balanced look. Try both methods to see what works best for you. And take a look at the full-face butterfly photo in the photo section of this book to see the fill-in method in action.
6. When painting symmetrical shapes, like butterfly wings, paint both
sides of the face with one color first. Then proceed to the next color. In other words, don't paint one whole half of the butterfly, then follow

17
up to paint the other half. To have even-sized wings, paint both sides simultaneously. Your chances of having a beautifully-centered and even butterfly will increase greatly with this method.
7. Here is a great tip from Irina, a professional face painter from New
Orleans. She suggests, that to prevent colors from running together, try her "rainbow method" -- only paint colors together which appear next to each other in the rainbow. (RED< ORANGE<YELLOW<GREEN<BLUE<INDIGO<VIOLET) You can read more from Irina in her Bonus letter to her Face Painting Friends at the end of this book.
8. When painting two strong colors together that aren't natural in the
rainbow progression, put another strip of color in between to separate the two, i.e. silver, gold, white.
9. There is one last and most important tip that I can share with you about
painting technique. Do not overcomplicate your designs. You will see in the photos section that simple is truly better. A simple yellow butterfly with two wings, a body and some glitter makes a child smile just as much as a science book version of a monarch butterfly with lots of shading, veins and extra detail. This kind of simplicity will help you get started quicker and it will also allow you to complete a fully painted design in a matter of minutes.

18
Chapter Five Working With Your Subject: A Little Face
Always check for open cuts, abrasions, cold sores, rashes, etc. Do Not paint the face of someone who has any kind of skin issue. If you have a customer with a cut, etc, offer to paint their hand or arm instead. Ask about any skin allergies. Make available the ingredient list of all paints and glitters you are using so the child and parent can make knowledgeable decisions. Once again, only use face paint that is especially designed for skin and in compliance with governmental regulations. You will find this information on the packaging. As a general rule, do not use red paint around the eyes. Protect the child's clothing by covering them with a smock or towel. If necessary for the design, tie or clip their hair away from their face. Make sure that you are comfortable sitting in the chair or stool. Experiment to see if you prefer your subject to be higher than you, lower than you or at eye level with you. Adjust the customer's chair accordingly for your comfort. If you are right handed, position your chair so you are on the right side of the person being painted. If you are left handed, position your chair so you are on the left side. By sitting in this fashion, you will not have to move you arm across your body to load your brush or rinse it out.

19
Keeping Your "Canvas" Still For smaller children, gently steady their head of chin with your hand to help keep them still. One thing that most professional face painters seem to agree upon is that face painting is extremely therapeutic for both the painter and the child. With calmness and compassion, you have the ability to keep any child still. Consider the following methods for "fidget proofing" your subject. Tell A Story Create a story around each of your designs, No more than a minute or two, these stories can captivate a child as you focus on "painting a story." Stories don't have to be complicated. In fact, simple is best. Children will follow along more closely if your words are easily understood. "And Then What Happened?" Playing a game with the child will help the child for focus as he/she explores his/her imaginative powers. Begin by telling the child the beginning of the story relating to the design you are painting. Near the conclusion of the one-two minute story, ask the child to tell you "what happens next?" You may build a trust relationship with the child and relieve any nerves that may be present. One example would be to tell the story of The Three Little Pigs. Nearly everyone knows the classic story. Ask the child to tell you a new ending about what happens to the wolf. You will literally be able to see the child's mind processing a new ending to the story. (Imagine! Instead of the wolf falling into the pot of boiling water, he apologizes to the three pigs and invites them to have lunch at the mall! Great Expectations Children are creatures of routine, particularly very young children. They thrive better when they know what is coming next. By telling the child what to expect during the painting session, tension and fear can be

20
alleviated. Ask the child "have you never had your face painted before?" If they say "yes," then respond with, "Well then, you know what its like. My paintbrushes will tickle your cheek, right?" If the child says "no", explain the process and what it may feel like. Be sure to speak in terms they'll understand how long the process will take (i.e. "can you count to thirty four times?") Silence is Golden There will be times, too, that the simple silence between the artist and the child will calm the entire process. Children require attention and respond to the power of touch. The sad reality is, though, that not all children receive that kind of focus from their parents or caregivers. For two or three minutes, the 100% attention you give to that child, even in complete silence, can communicate to that child that he/she is an important part of our universe.

21
Chapter Six Practice, Practice, Practice
If you have a willing subject in your household who would be happy acting as your guinea pig, you are fortunate. Break out the paints and start practicing. If not, or if you are trying to perfect 100 designs in a weekend, you can practice on paper. The texture of the paper won't be the same as skin, but you will be able to finesse the design. Then when you move to skin, your biggest challenge will be to learn how the texture of the skin affects stroking your design. Clear acetate that can be found in office supply stores is a great, reusable tool for paint practice. Lay a sheet of acetate over a design from this book or others. Paint the design right on the acetate as you follow along the design underneath. If it's not to your satisfaction, simply wipe the paint off of the acetate with a damp paper towel and start over. Acetate practice sheets are wonderful for those who feel like painting freehand (at least at the beginning) is an impossibility.

22
Chapter Seven Face Painting Designs - Where Do You Find Them?
The answer is "Everywhere." Once you train your mind to begin seeing the possibilities, you will find designs everywhere. Remember, simple is better. Look for basic outlines of shapes with very little intricate detail. A great place to start is preschool coloring books. You will find very basic coloring pages with large outlines. Put your "kid at heart" hat on, color the designs with crayon, then duplicate the design in paint. When surfing the internet, search online for "preschool printables," "preschool coloring pages," or "free coloring pages." You will receive a huge list of free designs that can be used at no charge for personal use. In addition, an internet search for "preschool worksheets" will turn up hundreds of teacher-oriented worksheets. You will find basic shape designs, alphabet and block number patterns. Check the local library for craft books that contain very simple patterns. Browse children's boutiques. Many designs that you will find on children's bedding and accessories are created for little eyes, very simple and very basic.

23
Manage Your "Inventory" It is always better to perfect twenty really great designs that take three or four minutes to paint than it is to have 100 mediocre designs that take ten minutes. Choose a few designs, practice until you can paint them in your sleep, then move on to additional designs. Following is a list of tried-and-true face painting cheek art favorites: • sports motifs (hockey stick,
football, soccer ball, etc.) • rainbow • flowers • butterfly • frog • sun • pumpkin • ghost • bird • fish • palm tree • sunset • dog • bunny • hearts • cupid • ladybug • candy cane • string of holiday lights • reindeer • holly/ivy • snowman
• flags • treble clef • music notes • peace sign • shamrock • Easter eggs • star • moon • snake • flamingo • shark • confetti • cupcake • balloons • clouds • cherries
24
Facepainting Stencils If you believe you are "freehand painting challenged," consider making your own stencils. Using the same clear acetates that you use for practicing, you can create stencils from very simple designs. Lay the acetate over the design in the exact size you would like to paint. Outline the design with a pen or permanent marker. With the acetate on top of a craft mat (or several layers of cardboard) cut around the outline of the design with a sharp craft knife. When face painting with a stencil, you will hold the stencil on the child's cheek with one hand, while painting with the other. Once the basic design is transferred to the skin, use additional colors and/or glitter gel to embellish. My personal opinion is that stencils are more difficult to use than learning to paint very simple designs free hand. Again, do your own experimentation to find out what works best for you.

25
Chapter Eight Face Painting Trouble Shooting
First and foremost, you don't have to be perfect. And painting, regardless of the form, is not a perfect process. The second thing to remember is that the majority of your customers and their parents will consider you to be a true artist. They are generally so enamored with the whole of their new creation that they will not notice a small flaw. Having said that, there are things you can do to prevent smudging, cracking and other 'mistakes.' 1. Paint the lighter colors first, then follow with darker colors. 2. As mentioned earlier, consider colors that will appear next to each
other in terms of the colors of the rainbow (red, orange, yellow, green, blue, indigo, violet)
3. When layering color, give the first layer a little while to dry. 4. When sponging a base coat, sponge on two thinner layers of color
rather than one thick layer. Wait until each thin layer dries. This will keep peeling and cracking to a minimum. Using water-based paints will also minimize peeling and cracking.
5. Take great care when painting around the eyes. Just like in applying
eyeliner or mascara, when painting underneath the eye, instruct your subject to look up. When painting the eyelid, instruct the subject to look down.
6. A great way to get professional and clean look is to outline the design
in black or a dark color with a very thin paintbrush or face paint crayon.

26
7. If you make a mistake, simply erase the mistake with a baby wipe or wet paper towel. Start again.

27
Chapter Nine
"Can This Be A Business?"
Once the neighbors and school friends discover that you are a new face painter, you may quickly become their new best friend for volunteer fundraisers, school festivals and class parties. If you think that you may enjoy earning a part-time income as a face painter, volunteering your services at small functions is a perfect way to promote your new business. How to Create Your Design "Catalog" As you begin to perfect and expand your face painting expertise, consider painting each design on a square of paper. Mount each square onto a large piece of cardboard or foamcore. Add a simple easel-back and you will have a design catalog available for your customers as they select the design they want painted on their face. Alternatively, you can take photos of your customers, insert the photos into page protectors and create a binder of design options. (Note: make sure to check the legal requirements in your area for using the photos of your customers.)

28
Legal Even very small businesses have legal responsibilities. And there are tax advantages can be fantastically beneficial to your household. Consult an attorney and/or accountant to set up your business properly s you can benefit from all available tax advantages. Consider Consider too, some level of liability insurance. Your attorney can guide you in the right direction.

29
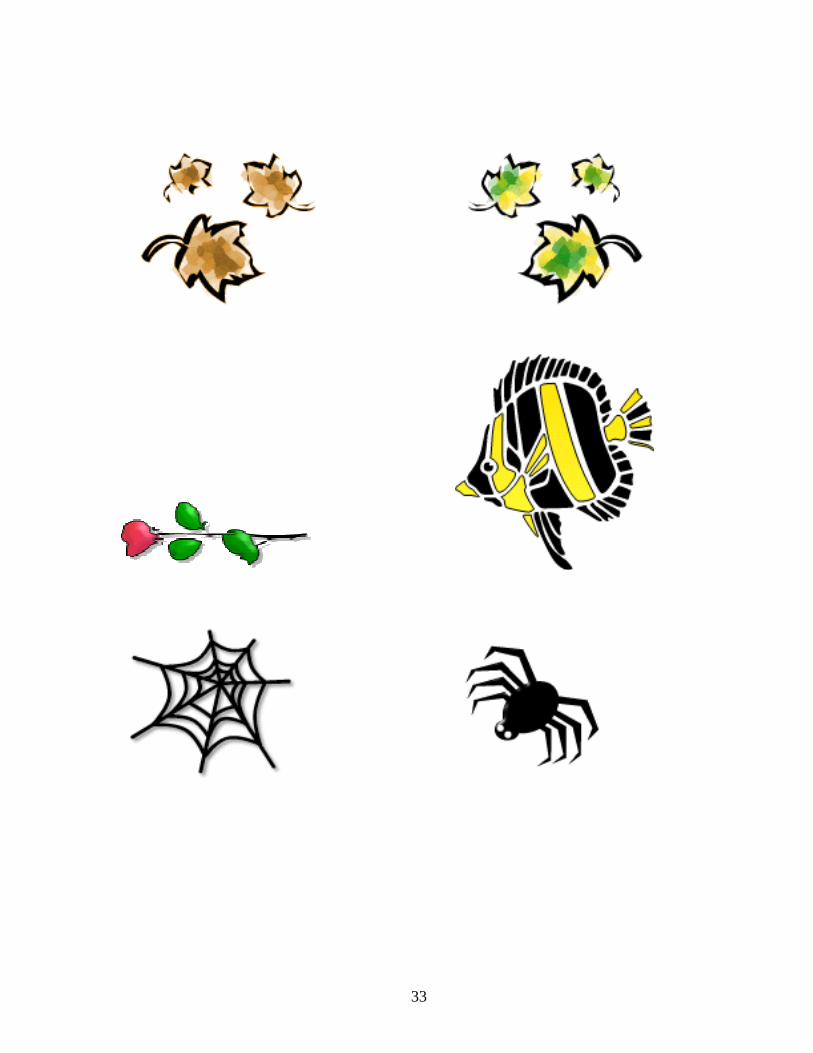
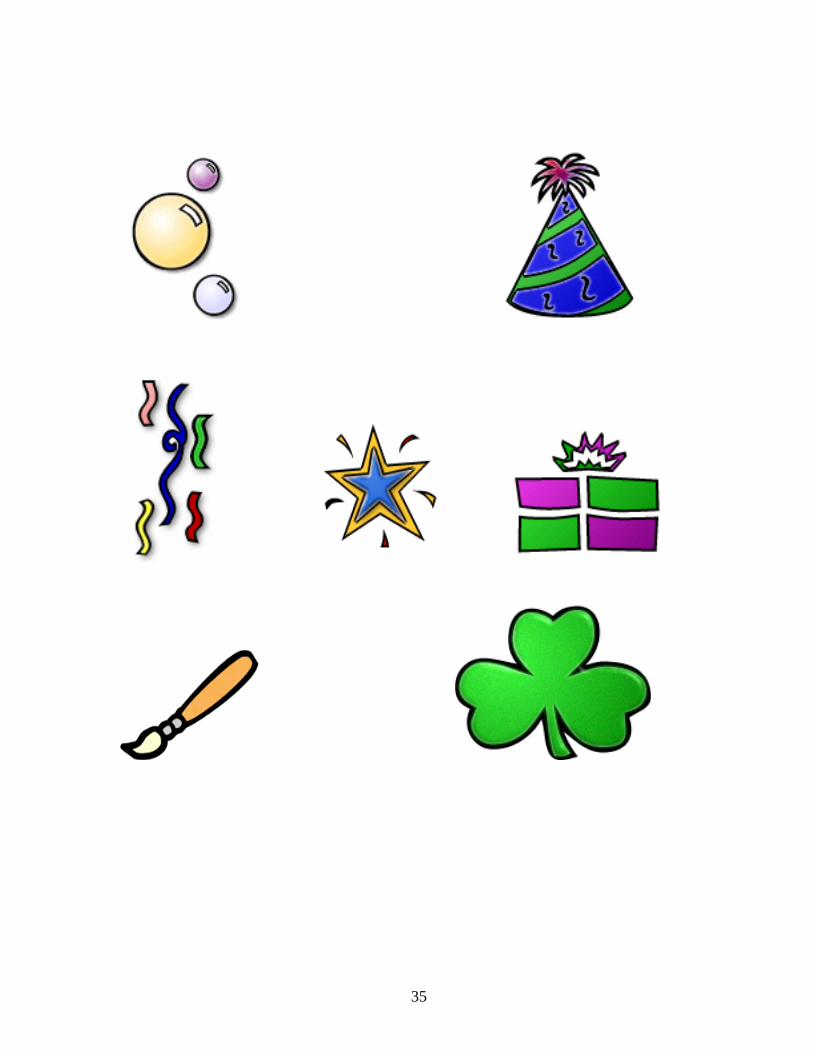
Chapter Ten Designs
In this chapter, you will find various illustrations that you can use as inspiration face painting designs. Don't worry about blending colors together and don't worry if you don't have the colors that are shown in this artwork. Use the basic outline for your designs and fill in with the colors that you have on hand. Take these designs and practice painting them in their oversimplified form.

30

31

32
33

34
35

36

37
Chapter Eleven Step By Step Photos
Ladybug
Paint a simple oval
Add the half moon in black
Add Antennae, Dots and Stripe
Finish off with glitter
38
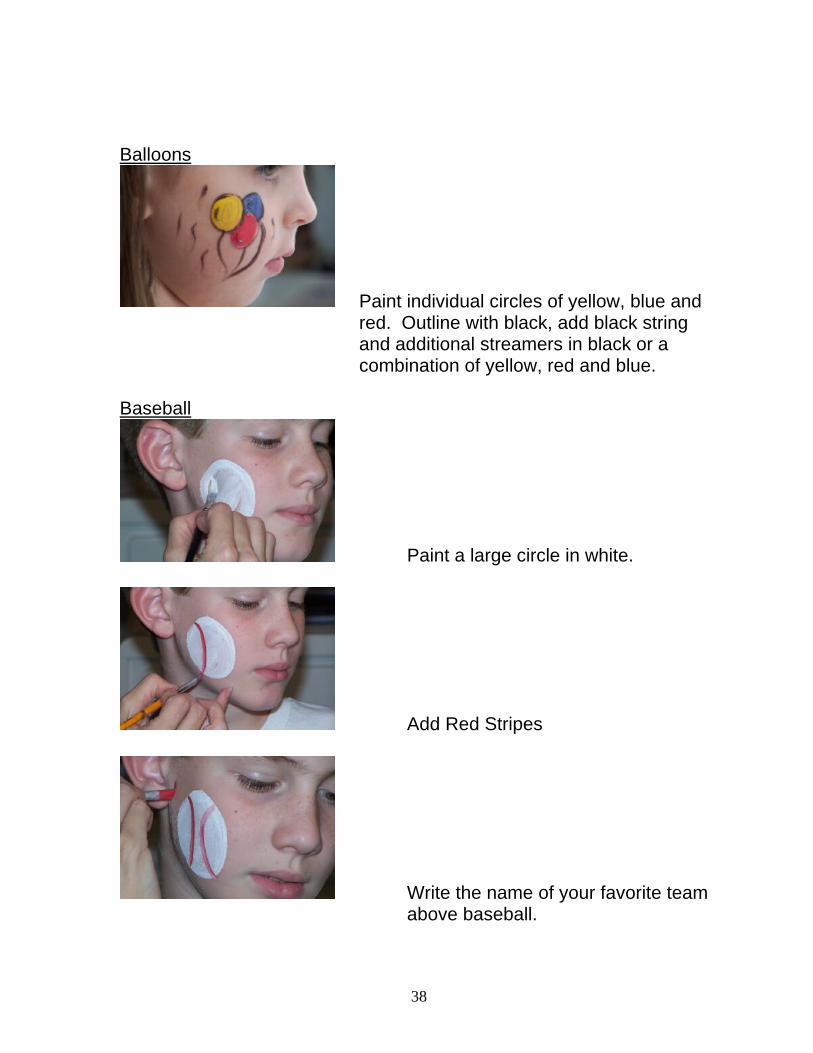
Balloons
Paint individual circles of yellow, blue and red. Outline with black, add black string and additional streamers in black or a combination of yellow, red and blue.
Baseball
Paint a large circle in white.
Add Red Stripes
Write the name of your favorite team above baseball.

39
Butterfly
Begin with outline of one wing.
Fill in wings. Notice four basic circles make up the wings.
Finish with body, antenna and glitter.

40
Cherries
Begin with two red circles
Attach stems in brown
Attach green leaf
Finish with white line to highlight

41
Palm Tree
Paint in brown c-shapes for tree trunk
Add palm branches
Pounce on a lighter green/brown sand
Add glitter for effect
42
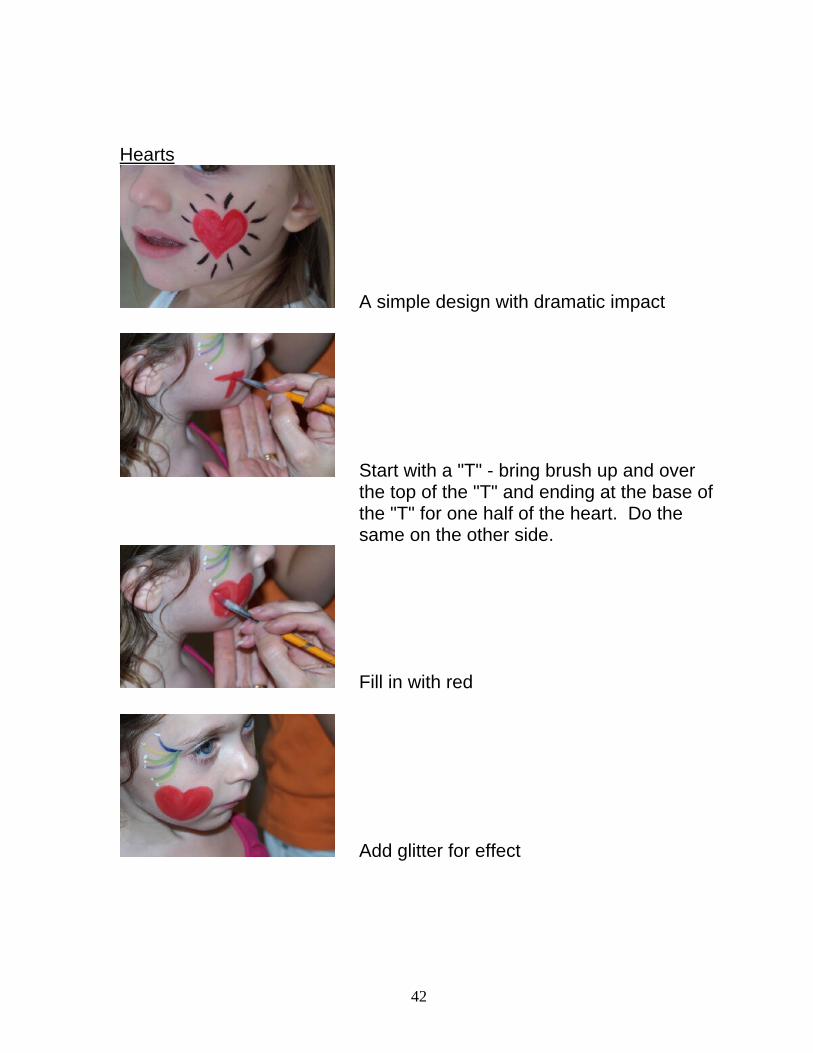
Hearts
A simple design with dramatic impact
Start with a "T" - bring brush up and over the top of the "T" and ending at the base of the "T" for one half of the heart. Do the same on the other side.
Fill in with red
Add glitter for effect

43
Simple
Simple design of beginning with flower petals; dot yellow inside flower. Attach stem and leaf. Paint yellow "leaf" shape for bumblebee. Add two teardrops for wings. Thin black lines and dot for eye. Finish with sparkly glitter.
Simple but dramatic "feather-like" swirls in the color combination of your choice can celebrate Mardi gras, Christmas, school spirit, July 4, etc.
Another version of simple swirls with dramatic effects.
44
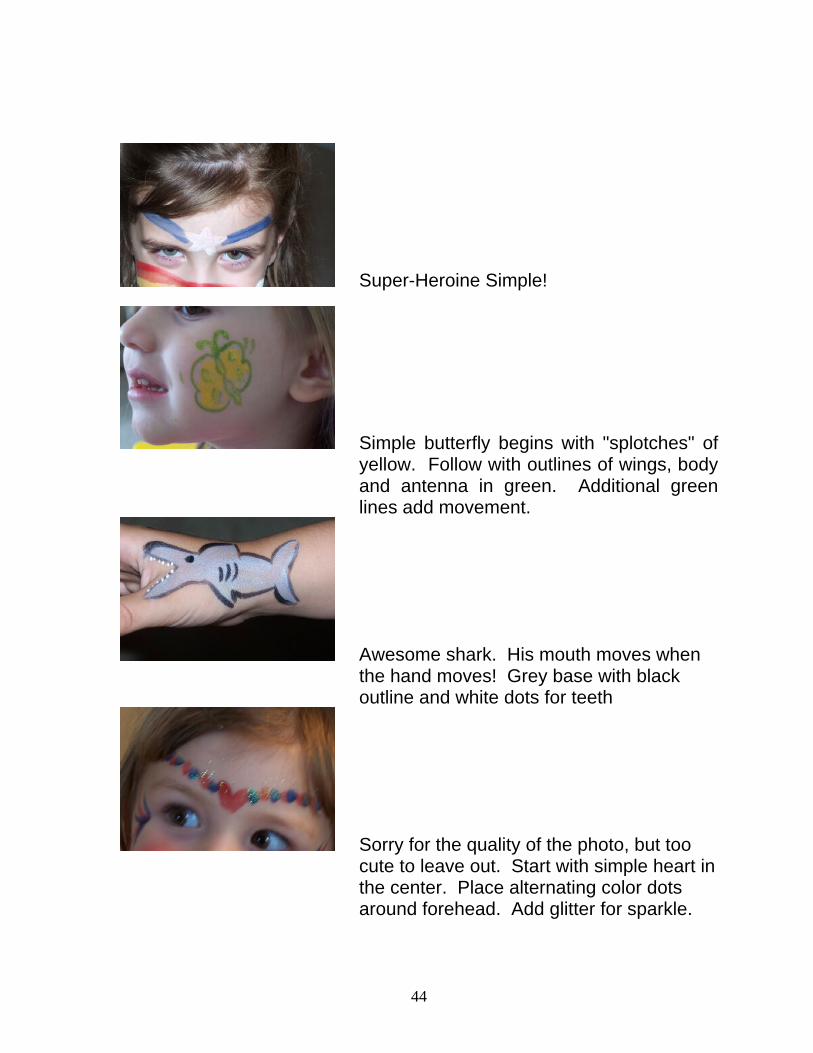
Super-Heroine Simple!
Simple butterfly begins with "splotches" of yellow. Follow with outlines of wings, body and antenna in green. Additional green lines add movement.
Awesome shark. His mouth moves when the hand moves! Grey base with black outline and white dots for teeth
Sorry for the quality of the photo, but too cute to leave out. Start with simple heart in the center. Place alternating color dots around forehead. Add glitter for sparkle.
45
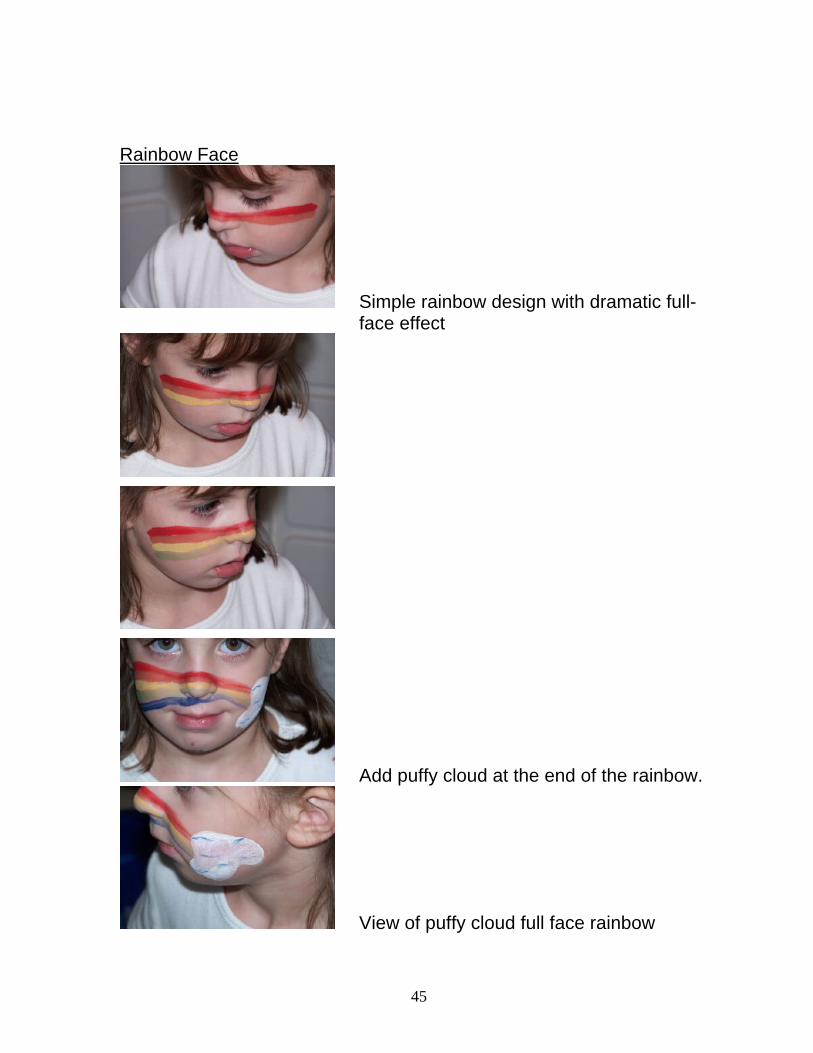
Rainbow Face
Simple rainbow design with dramatic full-face effect
Add puffy cloud at the end of the rainbow.
View of puffy cloud full face rainbow

46
Rainbow Bracelet

47
Octopus
Begin with large blue circle
Add eight legs
Add black highlights alongside each leg
Add eyes and mouth
Add depth and drama with white dots on the legs and inside black eyes.
48
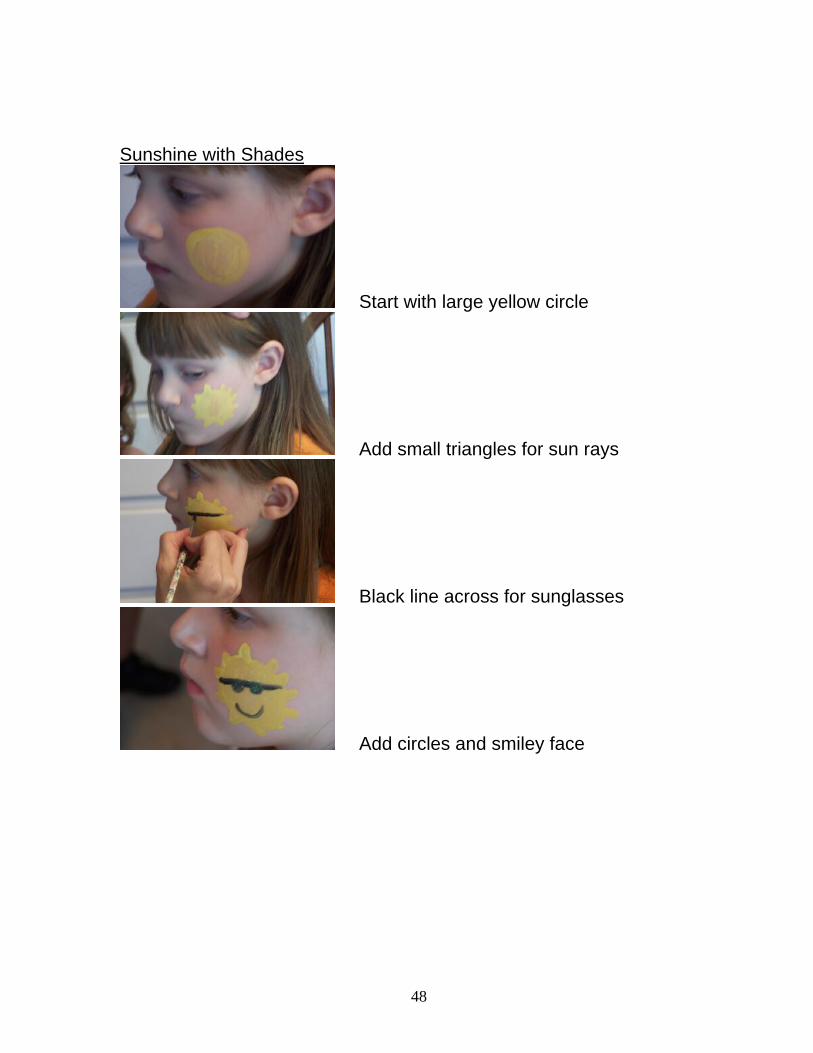
Sunshine with Shades
Start with large yellow circle
Add small triangles for sun rays
Black line across for sunglasses
Add circles and smiley face
49
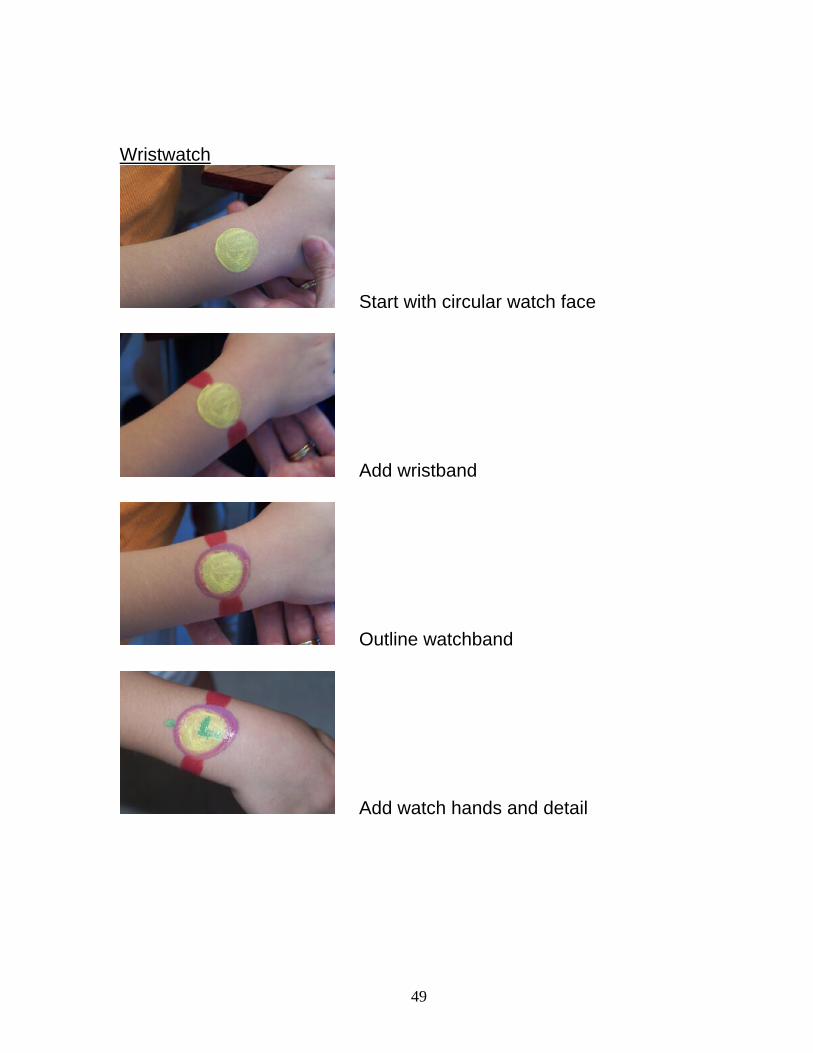
Wristwatch
Start with circular watch face
Add wristband
Outline watchband
Add watch hands and detail
50
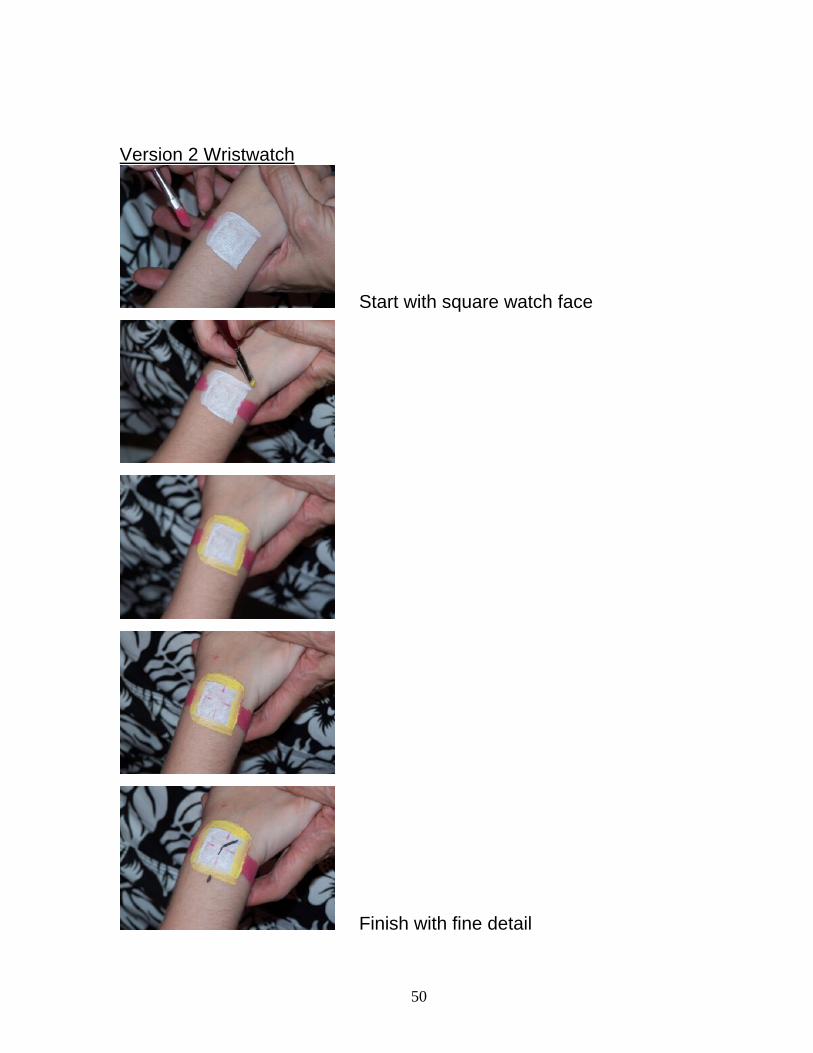
Version 2 Wristwatch
Start with square watch face
Finish with fine detail

51
Spider
Begin with two black circles
Fill in with black leaving two small circles
Add legs
Fill in holes with red and add glitter
52
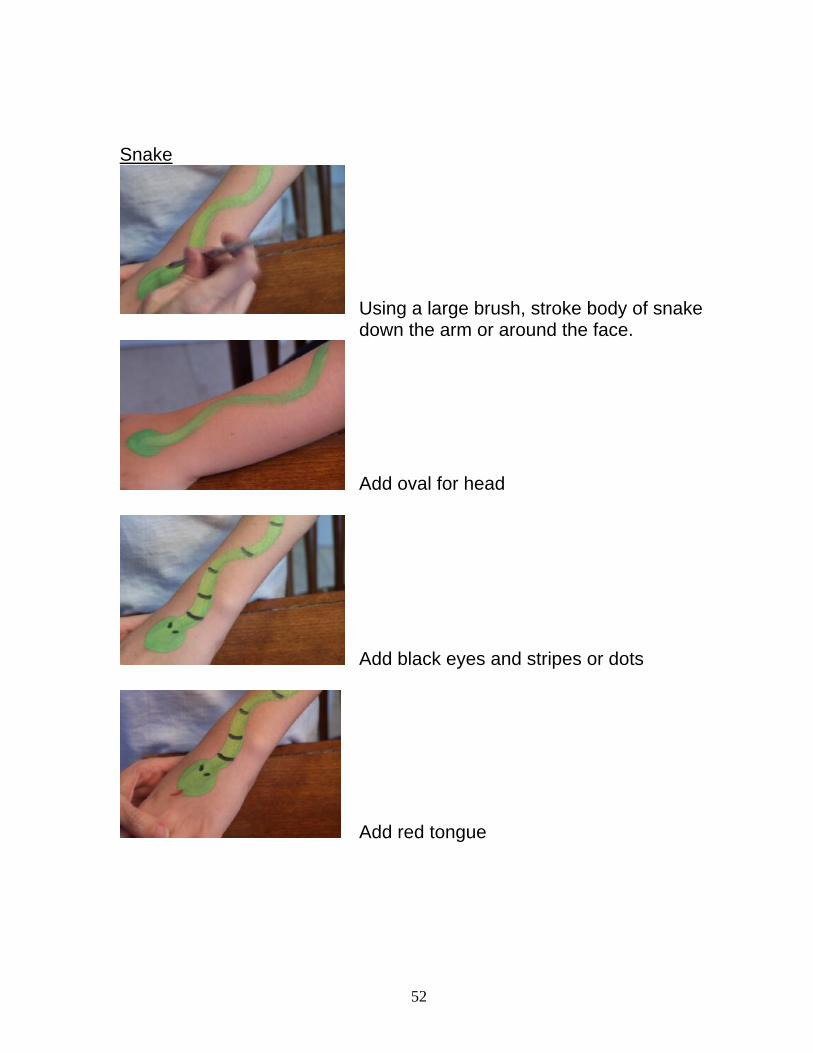
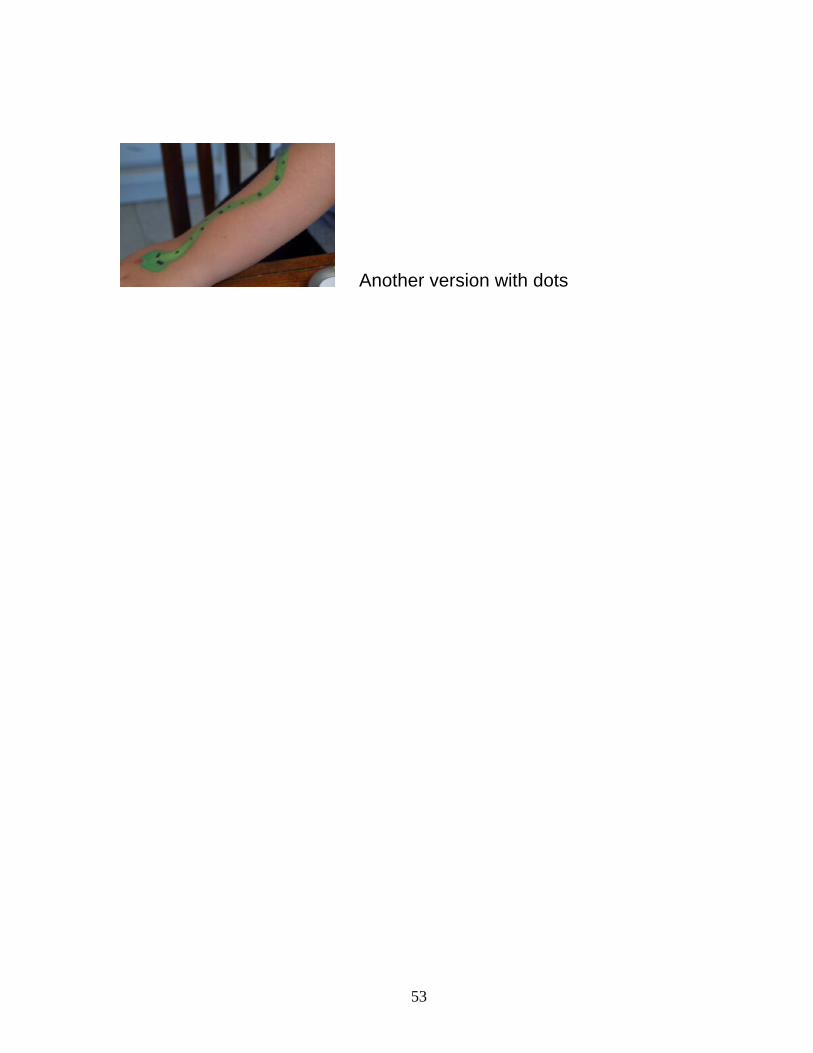
Snake
Using a large brush, stroke body of snake down the arm or around the face.
Add oval for head
Add black eyes and stripes or dots
Add red tongue
53
Another version with dots
54
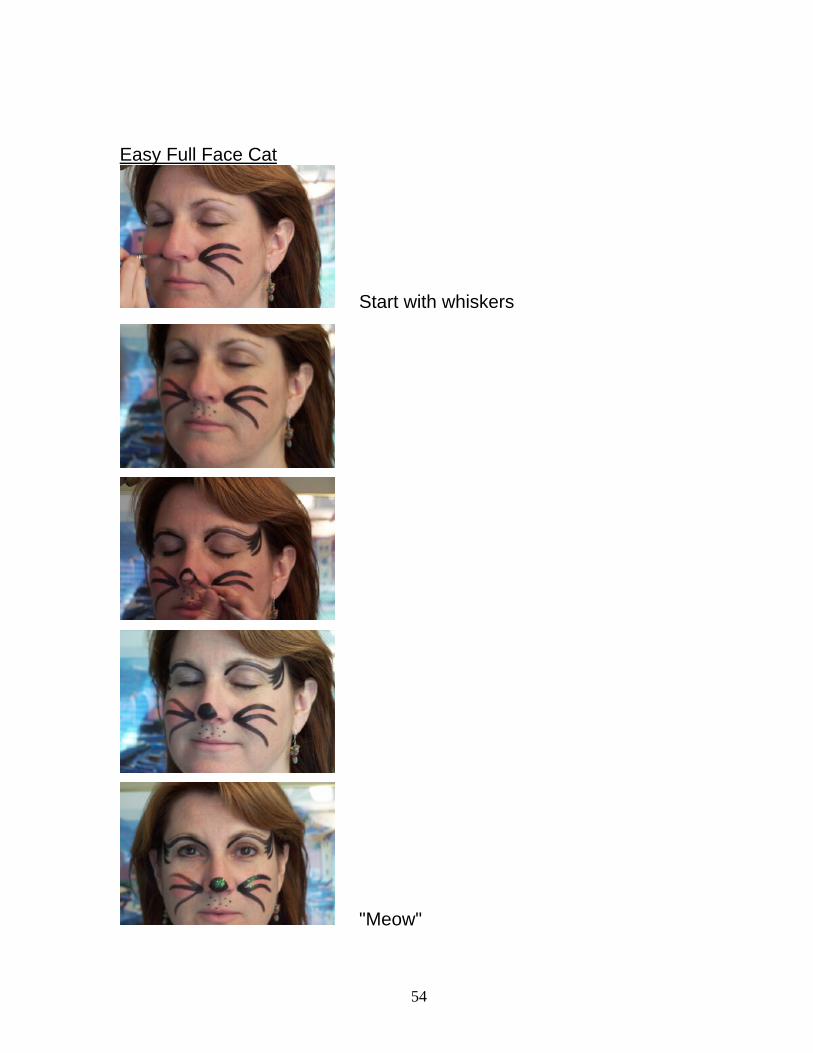
Easy Full Face Cat
Start with whiskers
"Meow"

55
Easy Full Face Butterfly

56

57
Go to
Easy Face Painting - Part II