easy 2 4 bench & side table - jays custom...
TRANSCRIPT

Easy 2x4 BEnch & sidE TaBlECopyright © 2014 JaysCustomCreations.com
Shopping List Per Bench Shopping List Per Table
Item Quantity
2x4x8’ 8
2-1/2” pocket hole screws 22
2-1/2” decking screws 24
Wood glue
Item Quantity
2x4x8’ 2
2x2x8’ (optional) 1
2-1/2” pocket hole screws 24
Wood glue

Page | 2 2x4 Bench And Side Table
Arrows indicate pocket holes. All angles are 15 degrees.
Bench pocket hole locations.

Page | 3 2x4 Bench And Side Table
Build the left and right leg assemblies. Use glue and two decking screws along the long diagonal of each intersection. The lower horizontal piece is spaced
3-1/2” away so you can use a scrap piece of 2x4 for spacing. Pocket holes should
face up.
Attach the back support with glue and screws along the long diagonal again. The back support lines up with the top back corner of the leg assembly and is
flush with the bottom.
Connect the left and right leg assemblies with the leg stretcher. Make sure the
pocket holes are facing the back of the bench.

Page | 4 2x4 Bench And Side Table
Attach the seat slats from the back forward. The back seat slat rests
against the back support and the rest are spaced 1/4” apart. A standard
wood pencil is about 1/4”. Secure them from below with glue and pocket hole
screws.
Attach the back slats the same way. I space the lowest slat by 1/2” and the
rest by 1/4”.
Sand and apply a protective finish if you want.
Page | 5 2x4 Bench And Side Table
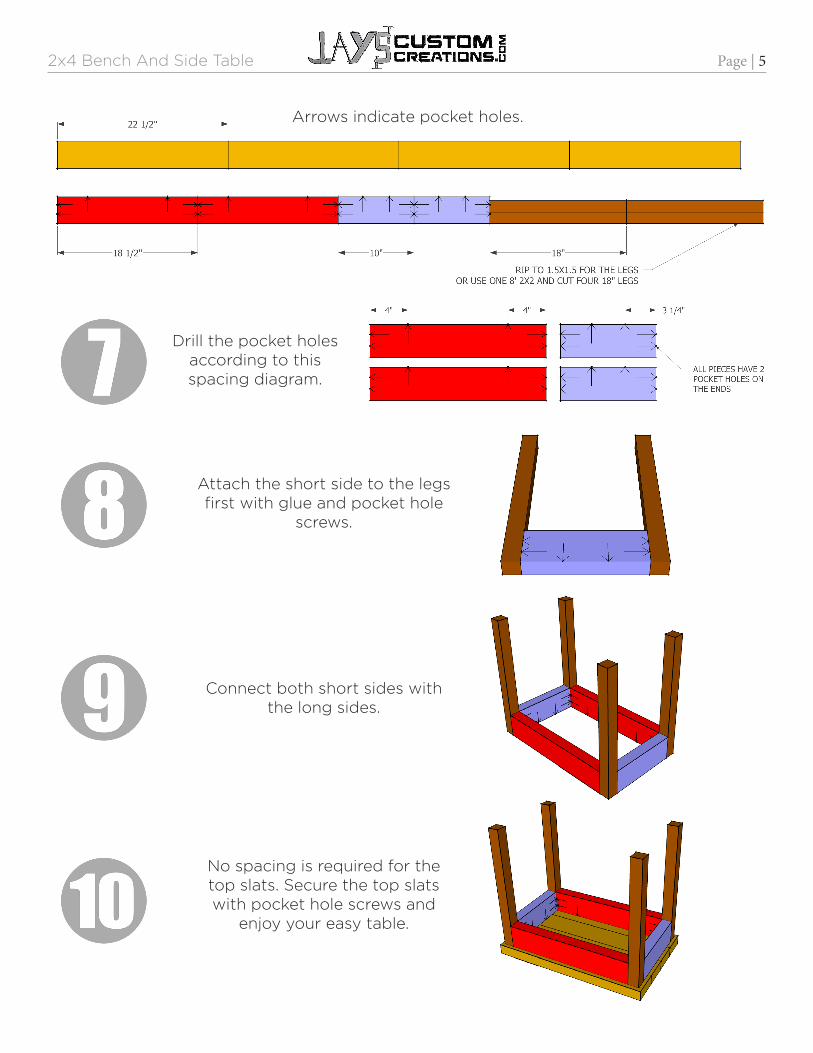
Arrows indicate pocket holes.
Drill the pocket holes according to this spacing diagram.
Attach the short side to the legs first with glue and pocket hole
screws.
Connect both short sides with the long sides.
No spacing is required for the top slats. Secure the top slats with pocket hole screws and
enjoy your easy table.